|
Re: Safety Glass LOGO
|
||||
|---|---|---|---|---|
|
Home away from home

|
LOF see Libbey-Owens-Ford Company. I wonder how hard it would be to etch glass with that logo.
Posted on: 2014/6/17 18:34
|
|||
|
||||
|
Re: Safety Glass LOGO
|
||||
|---|---|---|---|---|
|
Home away from home
|
I have 5 pieces of glass for the '32 901 I'm restoring; 1) the windshield (less a small lower corner), 2) rear, 3) both rear passenger, and 4) rear door. The only one that I find that has any markings is the rear window with; Line 1 "Test ????", Line 2 "Safety Sheet" and Line 3 "as????? CNX". I could not read the last portion of line 1 - hence ????.
All of the glass is laminated and starting to separate. I would guess all of the original glass was unmarked and the the rear was replaced.
Posted on: 2014/6/15 13:49
|
|||
|
||||
|
Window glass for a '32 901
|
||||
|---|---|---|---|---|
|
Home away from home
|
I would like to get some input as I'm gearing up to work on the doors on my '32 901 Of course part of that involves glass. I have unbroken pieces for about half of the car. They are laminated, but have a slight greenish tint.
In order to have the glass all appear to be the same, my thought is replace all 8 pieces of glass. I can get it without any markings and it is sold for "off road use only" or with a large unsightly etched marking. The glass with the markings would pass any safety inspections the car may end up going through while unmarked it would not if the inspector knew or thought it was replacement glass. Are there any point deductions for the glass with markings and what are others thoughts on my problem. I've visited the topic at "Window Glass", but wanted to get thoughts on the matter that are more current before opening the wallet.
Posted on: 2014/6/15 6:08
|
|||
|
||||
|
Re: Our 1932 901
|
||||
|---|---|---|---|---|
|
Home away from home
|
Recent activity included working on the hood and mounting the headlight braces.
The shoulder rivets mentioned earlier were used to install the doors on the lower hood panels. They worked out very well and their heads were painted in place with a small artist paint brush. Newly chrome plated knobs and painted springs were installed (see photo) All in all the assembly went very well. The headlight braces were a different matter. I looked through all the boxes of parts that came with the car and none of the parts looked correct for installing them. Having no idea of how the braces were attached to the headlight bar or to the side of the radiator shell allowed me an unfretted approach as I surmised both areas would be out of sight (unless of course the diehard Packard aficionado wants to lay on his back and look up underneath the headlight bar or get their trusty little flash light and mirror out to peering into the gap between the radiator and shell - LOL). Some of you may consider this a sexist attitude because of the use of the word "his", But I'm certain that no Packard loving woman would stoop so low. Enough ranting - I found a piece of scrape steel bar that was 11/16' in diameter that would easily slipped into the empty space in the headlight bar. It was cut to a length of 2 ?" and two holes were drilled into the bar 1.5" apart. The holes were threaded for a 3/8" bolt. For attaching the brace to the shell, a piece of 16 gauge sheet metal was cut into a triangle shape and 7/16" holes were drilled so as to align with the three holes in in the brace. Nuts (3/8" NF) were welded on the sheet metal. The fabricated bars and sheet metal parts were painted flat back. To prevent the brace from scratching the chrome in the radiator shell, a thin piece of clear polyethylene was attached to the brace with double-faced tape. Everything went together with a little pushing and shoving. The horns were then installed on the headlight brace. As a temporary solution standard bolts were used on the brace. I have bolts on order from Bruce Blevins to finish off task. Attach file:  (118.76 KB) (118.76 KB)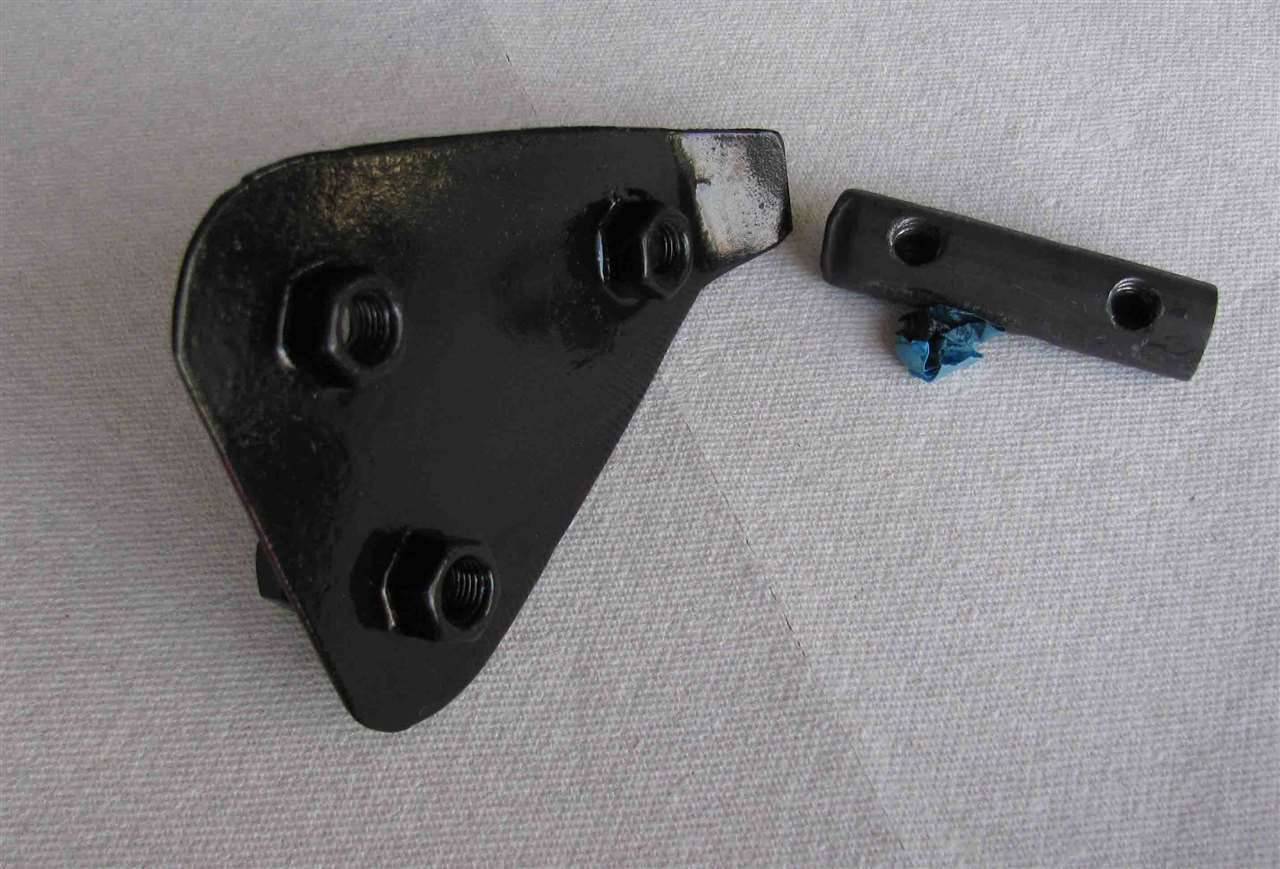 (110.59 KB) (110.59 KB)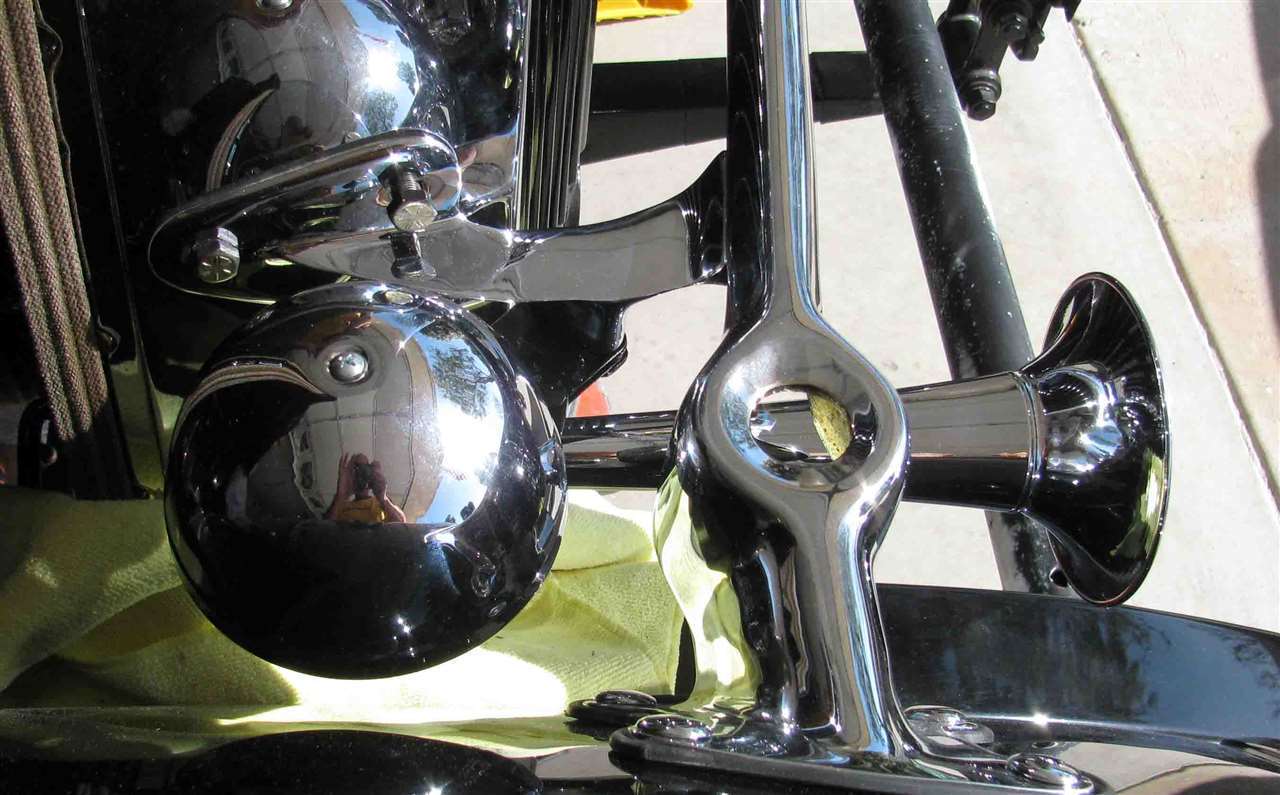 (139.87 KB) (139.87 KB)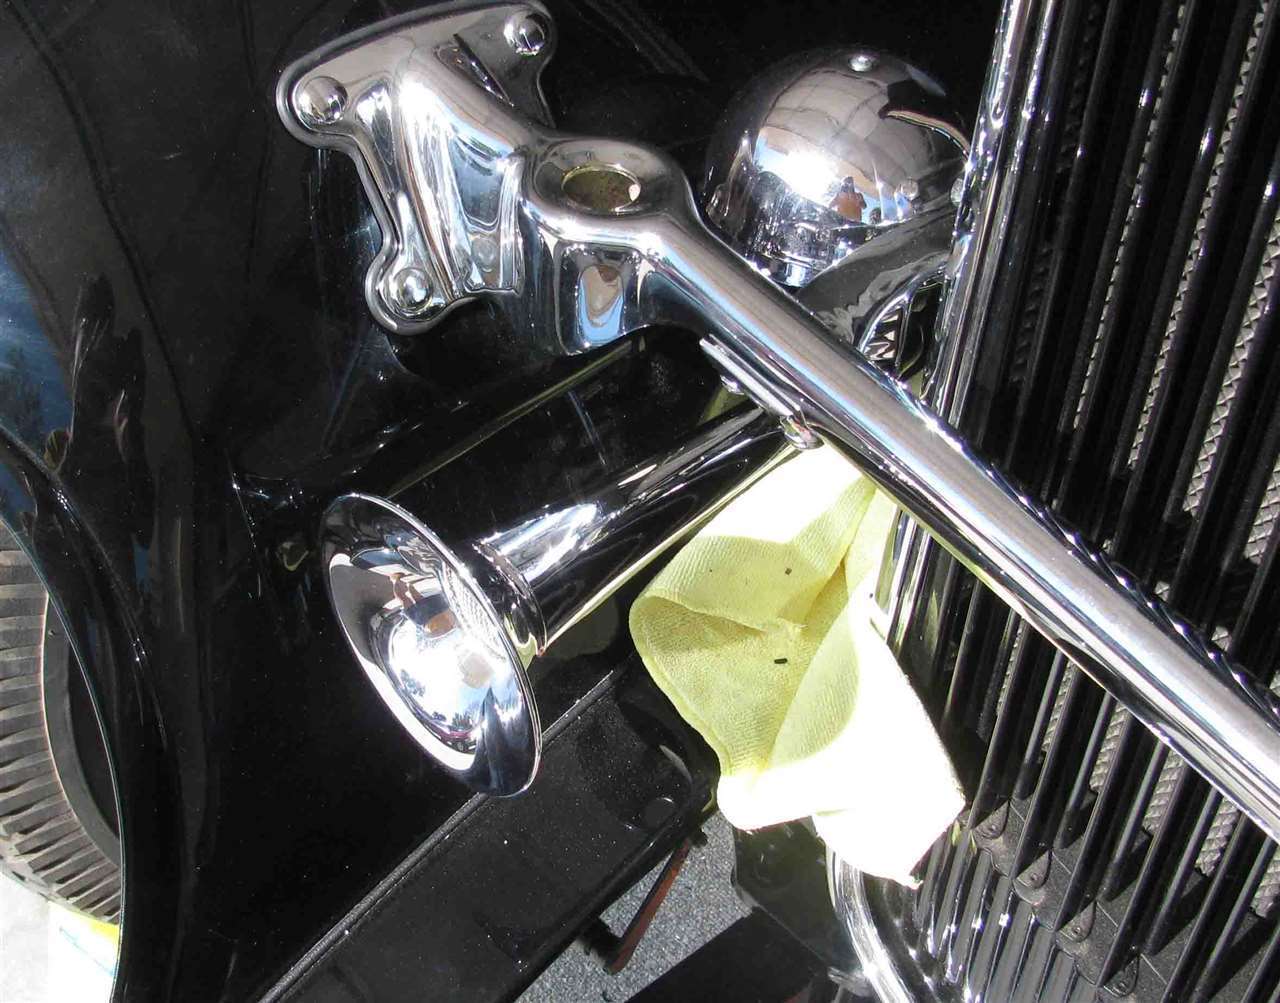
Posted on: 2014/6/1 18:30
|
|||
|
||||
|
Re: An Air Cleaner from a '33 - To Clean or Disassemble
|
||||
|---|---|---|---|---|
|
Home away from home
|
O-d-D,
Thanks for your input and thoughts on the matter. I'll proceed with a good cleaning followed by a painting the exterior with primer and black paint.
Posted on: 2014/6/1 7:37
|
|||
|
||||
|
An Air Cleaner from a '33 - To Clean or Disassemble
|
||||
|---|---|---|---|---|
|
Home away from home
|
My '32 was converted to a downdraft carburetor system in it's very distant past. Now I'm getting ready to paint the air cleaner, which is from a '33. While it appears that no rodents have used it for a home, I'm sure that it's insides are full of oil and dirt.
Is it out of the question to try and open it up for cleaning or should I just flush the insides and prep the outside for paint? Any and all opinions would be greatly appreciated.
Posted on: 2014/5/31 21:57
|
|||
|
||||
|
Re: Ouch & Request for Help with 1932 901
|
||||
|---|---|---|---|---|
|
Home away from home
|
O-D,
Thanks for the info. I'll look into the vendors you suggested and others.
Posted on: 2014/5/31 17:56
|
|||
|
||||
|
Ouch & Request for Help with 1932 901
|
||||
|---|---|---|---|---|
|
Home away from home
|
The left tail light that came with my 901 had been broken and I cannot find the piece. I was hoping to use Muggy Weld' solder to join the two back together, but that appears to be impossible now.
I've looked at the major piece and it looks like it is only missing several inches at the top of the light that holds the license plate. I'm thinking that if I had a better idea of what it looked like it might be possible to make the missing part out of brass and attach it. I've attached a picture of what I have. Can someone out there could take several pictures of theirs or if you have one for sale, it would really be appreciated. Attach file: (84.65 KB)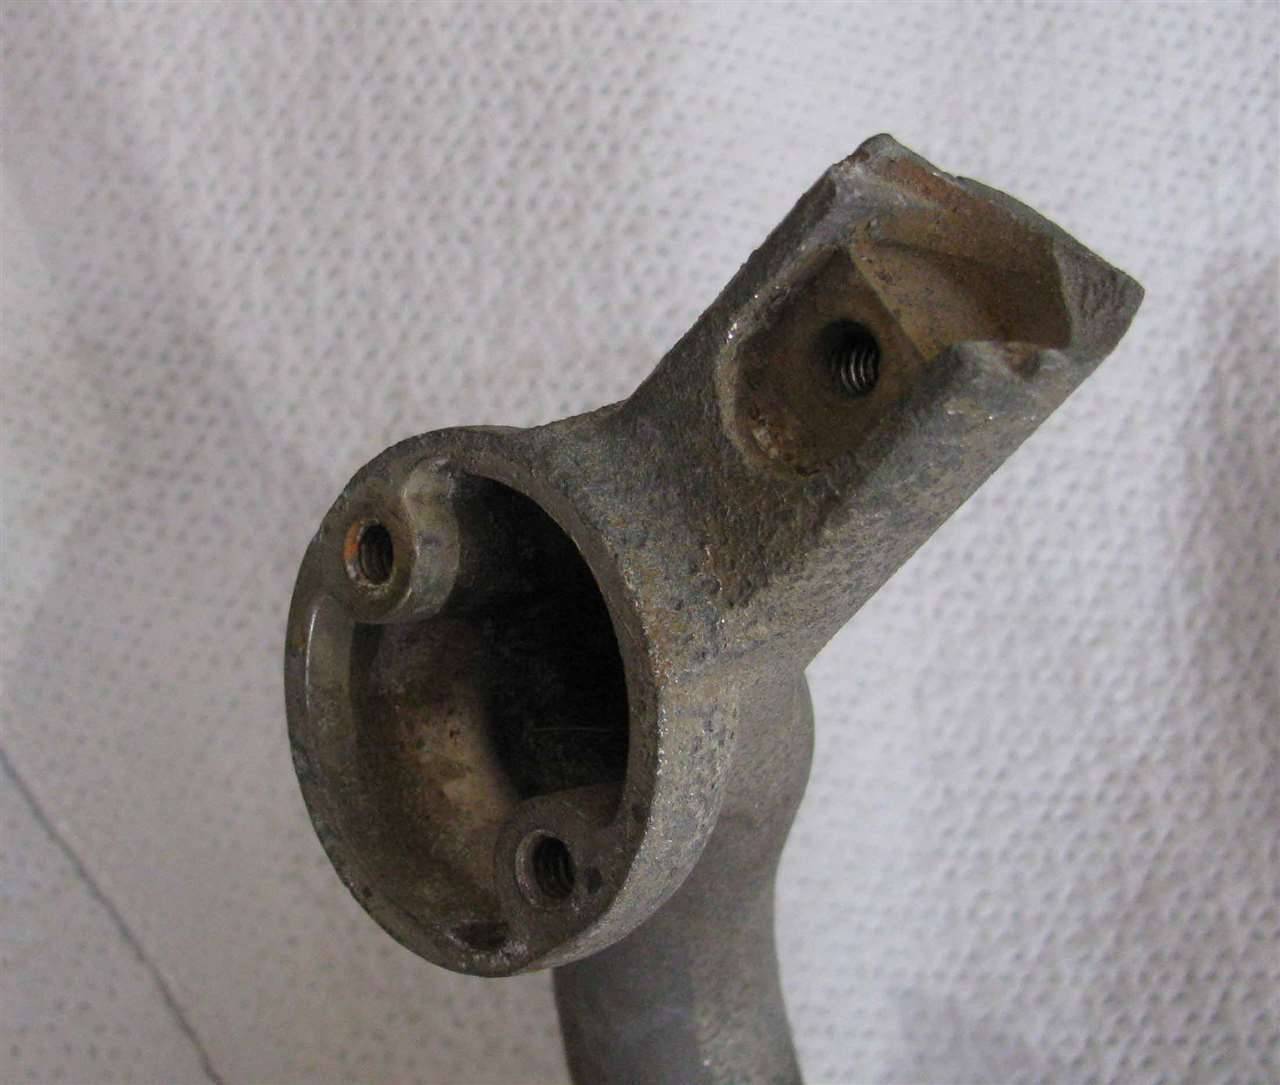
Posted on: 2014/5/30 18:40
|
|||
|
||||
|
Re: 1954 Packard Clipper Super Radiator hoses
|
||||
|---|---|---|---|---|
|
Home away from home
|
Ross,
Thanks for the NAPA hose info. I just finished rebuilding the generator and replacing the regulator on my '51 200 Deluxe. While I was at I replaced the fan belt and noticed that the hose between the pump and the auto cooler was questionable. Thanks to you, all it took was a quick call to Napa to check that they had the hoses in stock, which they did. It made for a easy job and all is up and running. I want to also thank Jason at AER for the parts and his assistance on the generator and regulator.
Posted on: 2014/5/24 17:43
|
|||
|
||||
|
Re: Our 1932 901
|
||||
|---|---|---|---|---|
|
Home away from home
|
Last weekend I finished realigning the doors after moving the body forward and can now proceed. Raising the radiator helped on the gap at the front on the top two pieces, but hurt elsewhere. Also, it appears that the radiator shell is back as far as possible so there's nothing to be gained there. Therefore, I set about working on other things while I investigate the hood gap problem some more.
In need of shoulder rivets for the 8 hood side doors (8 with a long shoulder and 8 with a short shoulder) I searched and found a source for them at $12.50 each. With an extra one of each size for insurance, this would have been a $225.00 hit for several ounces of brass. Therefore, I thought maybe a shoulder screw would work and found some in stainless for $1.00 each, but didn't like the look. So I set about making shoulder rivets myself on a lathe. I bought a short piece of 5/16" brass rod. Turned a prototype of each and then adjusted my measurements estimates. The first 2 or so took about 15 to 20 minutes each while the final ones were clocking in at less than 10. I made the 8 brackets that hold the locking mechanism on the side doors from 16 gauge steel as the ones I had were fairly well rusted and I only had enough for one side.. To form the "U" bend in the bracket I made a die from a piece of 5/8" thick aluminum flat bar by drilling a 3/8' hole right next to the side of the bar. The hole was opened up so it was "U" shaped (see photo). The holes on both sides of the "U" are guides for drilling the holes in the bracket. One of the photos shows the bend being formed using the die and pressing a 1/4" rod into the slot with a vice. Attach file: (108.27 KB)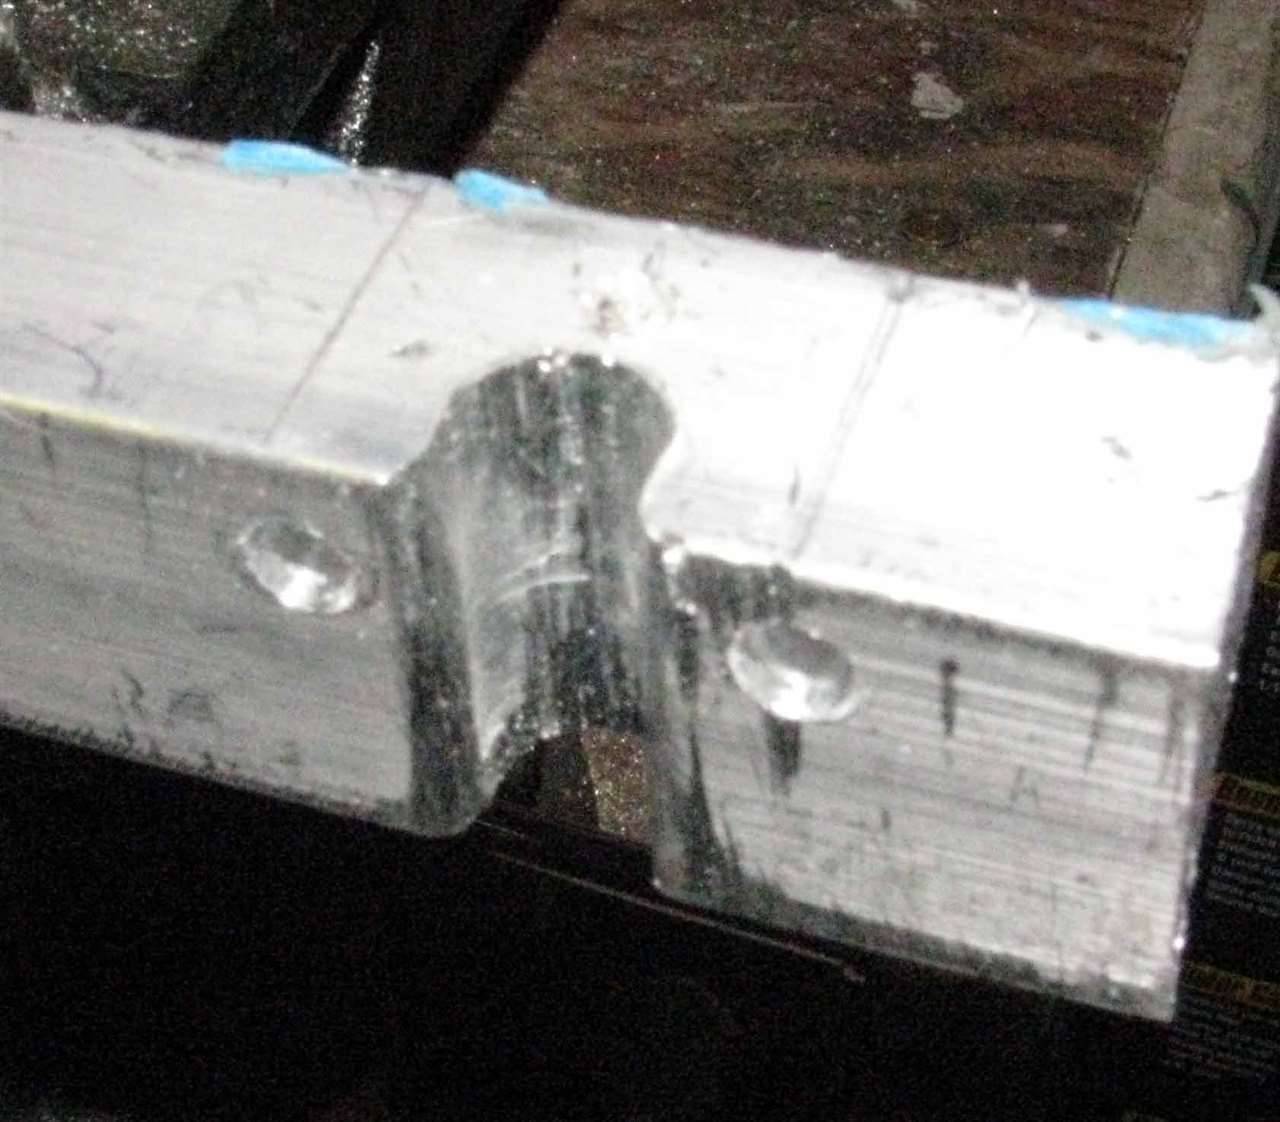 (108.70 KB) (108.70 KB)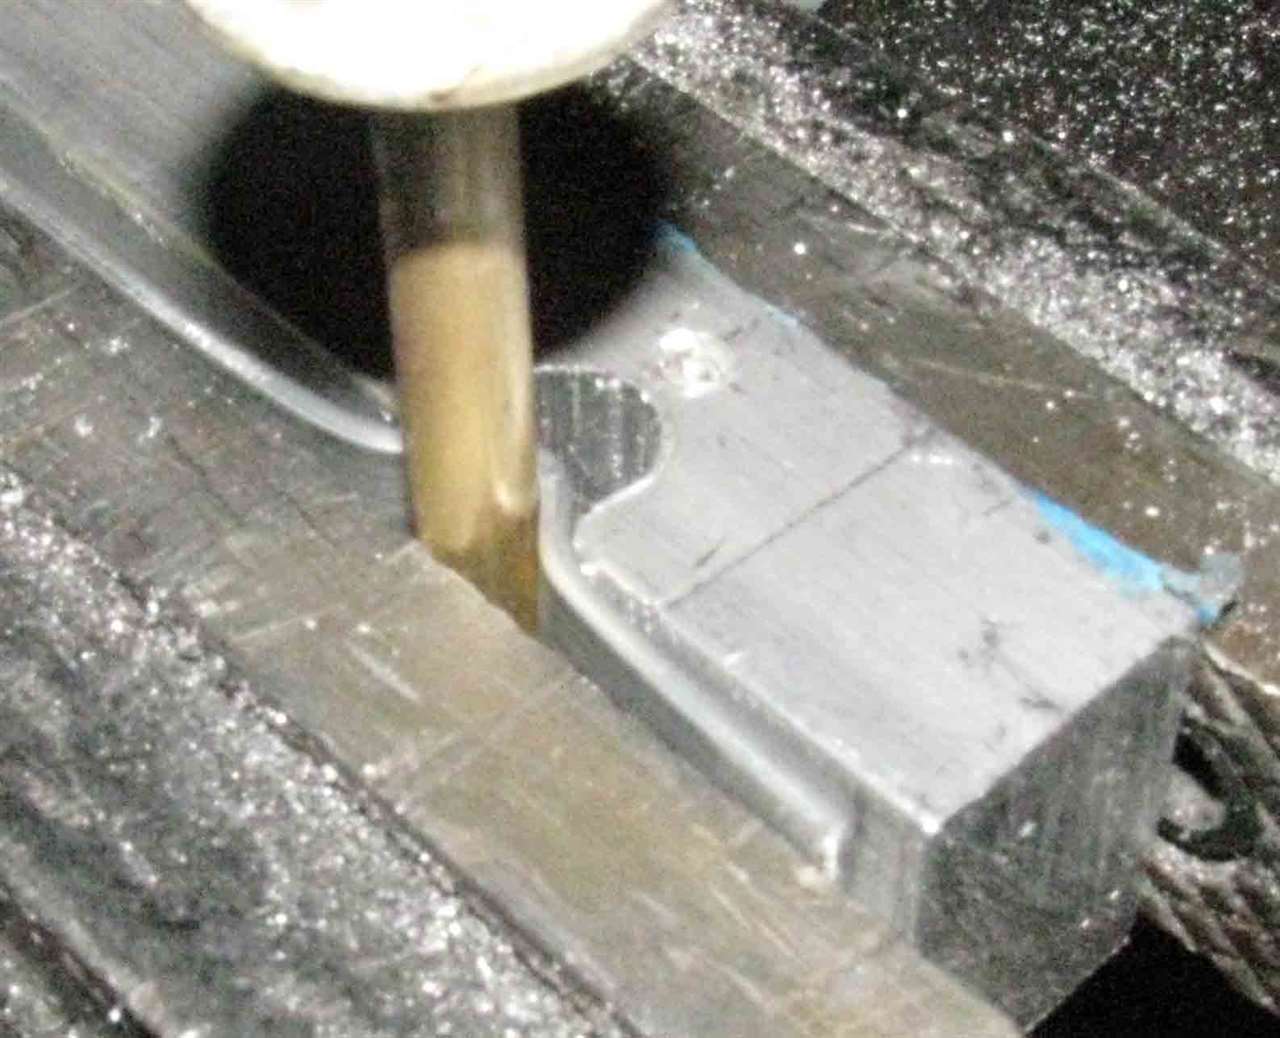 (148.51 KB) (148.51 KB)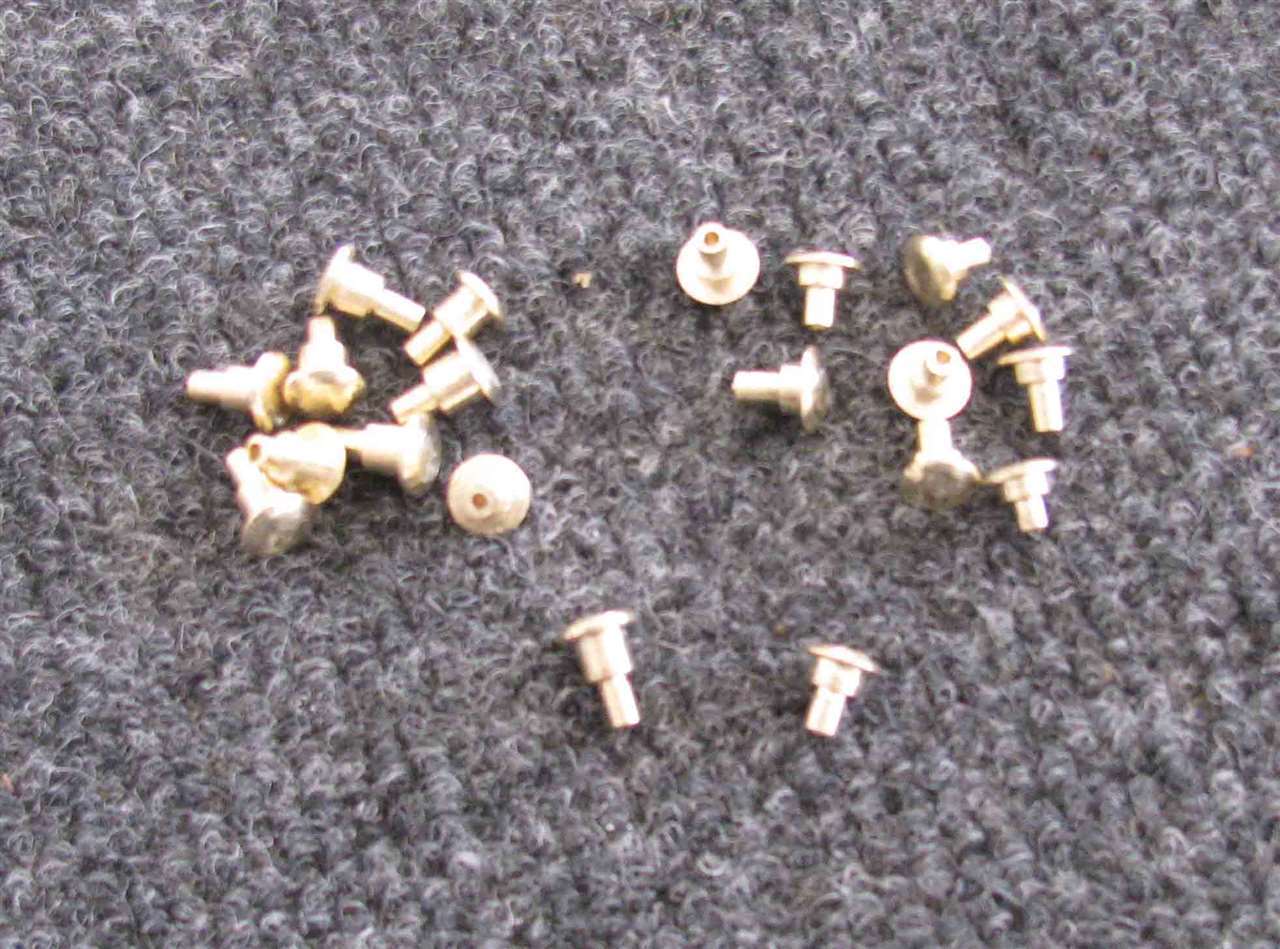
Posted on: 2014/5/12 18:18
|
|||
|
||||


.jpg")


