|
Re: 4th of July
|
||||
|---|---|---|---|---|
|
Home away from home

|
Happy 4th everyone!
Attach file:  4th of July.jpg (131.90 KB) 4th of July.jpg (131.90 KB)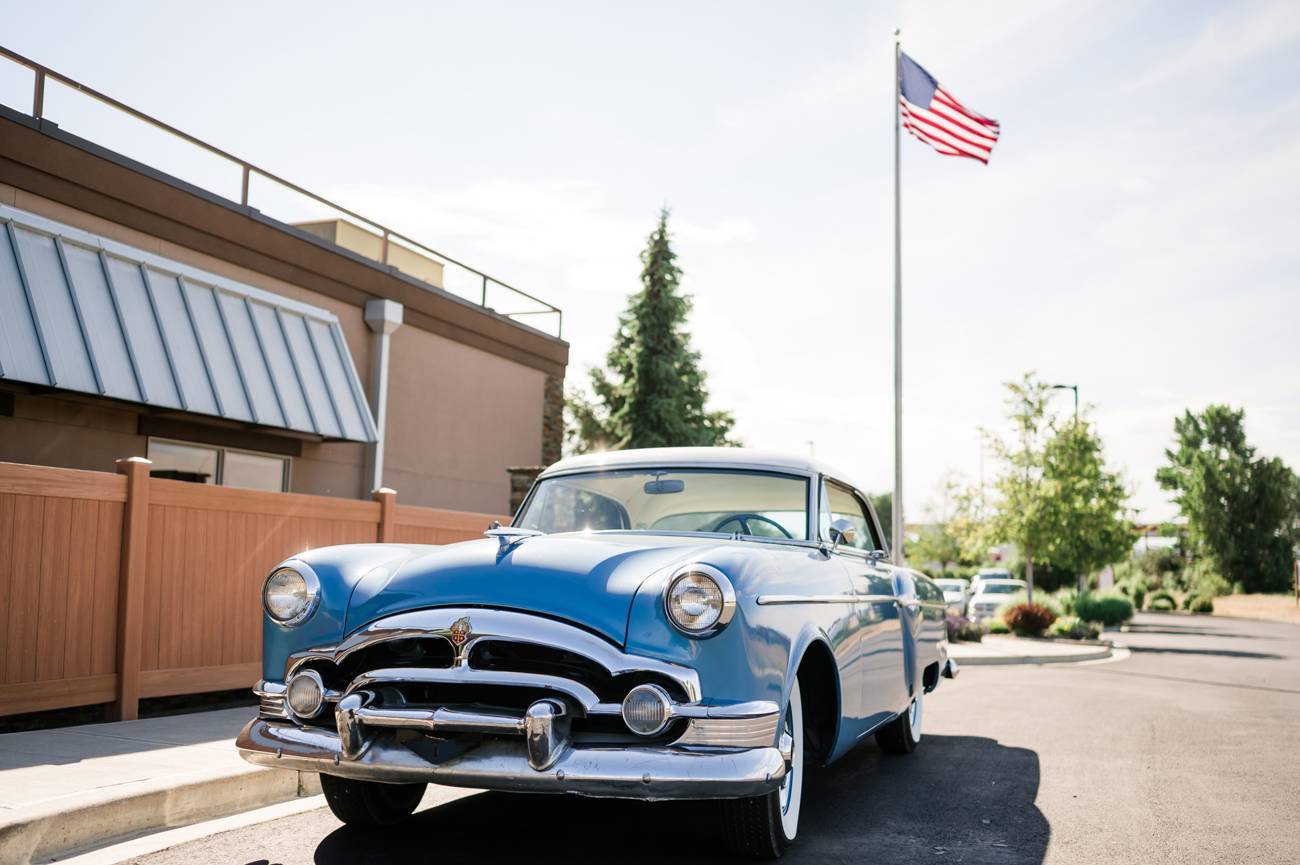
Posted on: 2021/7/4 13:02
|
|||
|
||||
|
Re: KPack's 1954 Panama
|
||||
|---|---|---|---|---|
|
Home away from home
|
Haven't had lots of time to work on the car, so instead I'm ordering parts for the several projects I have on my list.
Ordered a new exhaust system, front to back, from Kanter today. It'll take at least 6 weeks to get it. I figured I might as well just do it all new instead of leaving the old muffler and patching in a pipe after it. I have no idea what condition the interior of the original muffler is.....if it's anything like the inside of the car then it was probably clogged with mice junk and dirt. I've been worried about restriction somewhere in the exhaust system. My understanding is that it can lead to overheating, and I feel like I have more stuff coming out of the road draft tube than I should. -Kevin
Posted on: 2021/7/2 22:49
|
|||
|
||||
|
Re: Vacation Car - 56 Patrician
|
||||
|---|---|---|---|---|
|
Home away from home
|
Wow, that looks beautiful. Can't wait to see it in the car! I've always loved the '55-56 dash trim.
-Kevin
Posted on: 2021/7/2 22:45
|
|||
|
||||
|
Re: BigKev
|
||||
|---|---|---|---|---|
|
Home away from home
|
Still looks as good as ever!
-Kevin
Posted on: 2021/6/28 10:28
|
|||
|
||||
|
Re: 52 mascot wings
|
||||
|---|---|---|---|---|
|
Home away from home
|
Protect that windshield! They are impossible to find. I should know.
-Kevin
Posted on: 2021/6/27 22:01
|
|||
|
||||
|
Re: KPack
|
||||
|---|---|---|---|---|
|
Home away from home
|
Yesterday was picture day at the office, and the staff wanted me to bring the Packard for pictures. They got a kick out of it, and the photographer stayed and got a bunch of pictures of the car afterwards. It looks way better in pictures than it does in real life.
Enjoy! -Kevin Attach file: Staff picture.jpg (149.84 KB) Doctor photo.jpg (161.49 KB) Doctor photo.jpg (161.49 KB)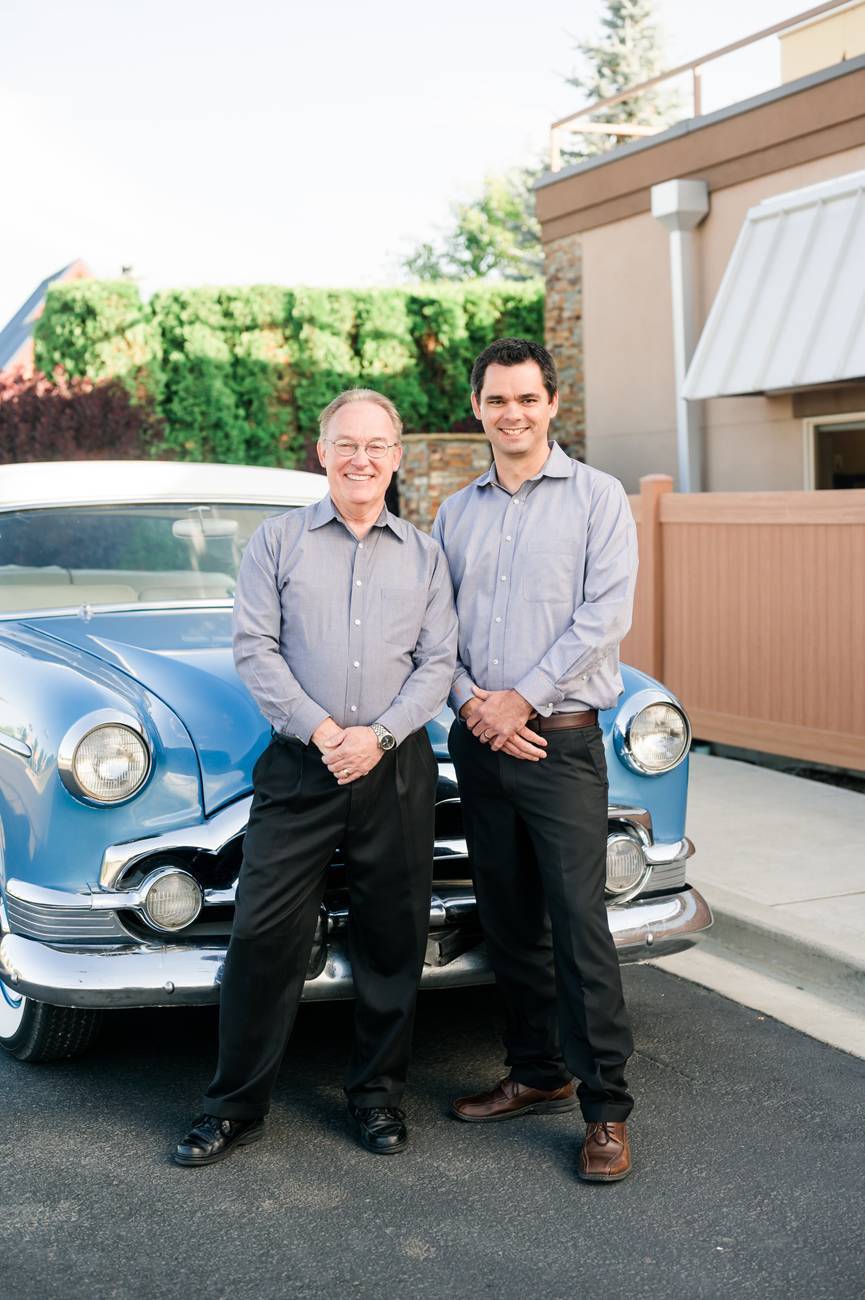 Side view.jpg (103.94 KB) Side view.jpg (103.94 KB)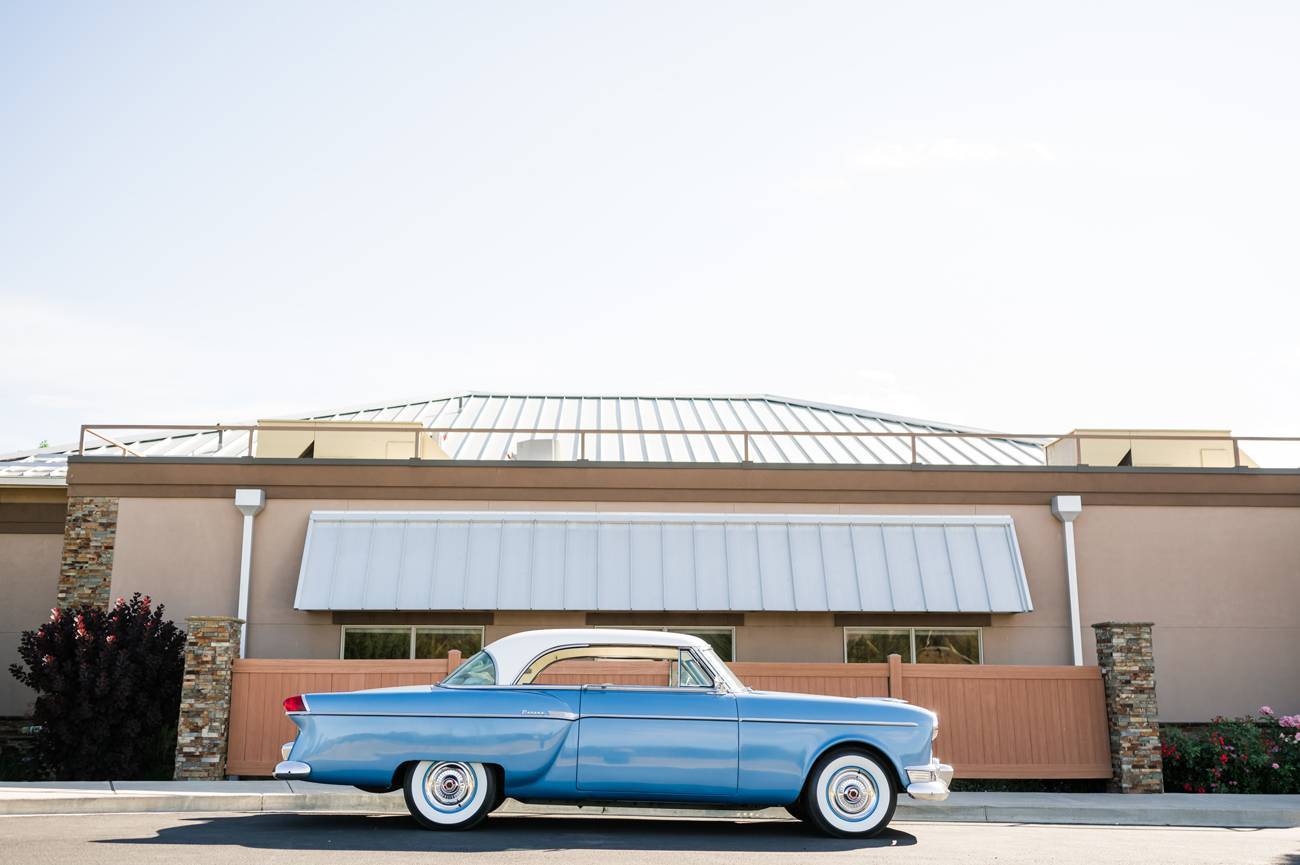 Rear three quarter.jpg (151.72 KB) Rear three quarter.jpg (151.72 KB) Rear sharp angle.jpg (100.34 KB) Rear sharp angle.jpg (100.34 KB)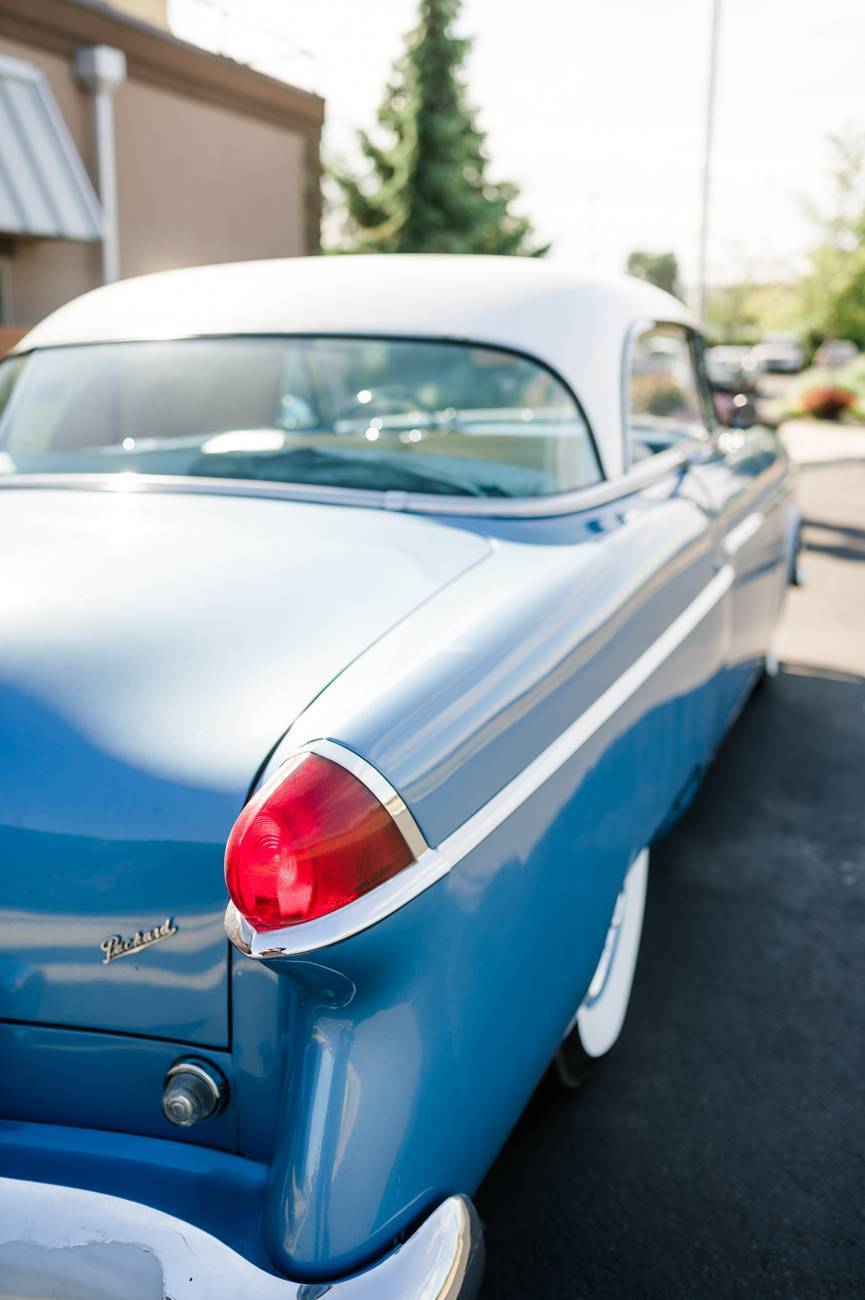 Packard script.jpg (84.72 KB) Packard script.jpg (84.72 KB)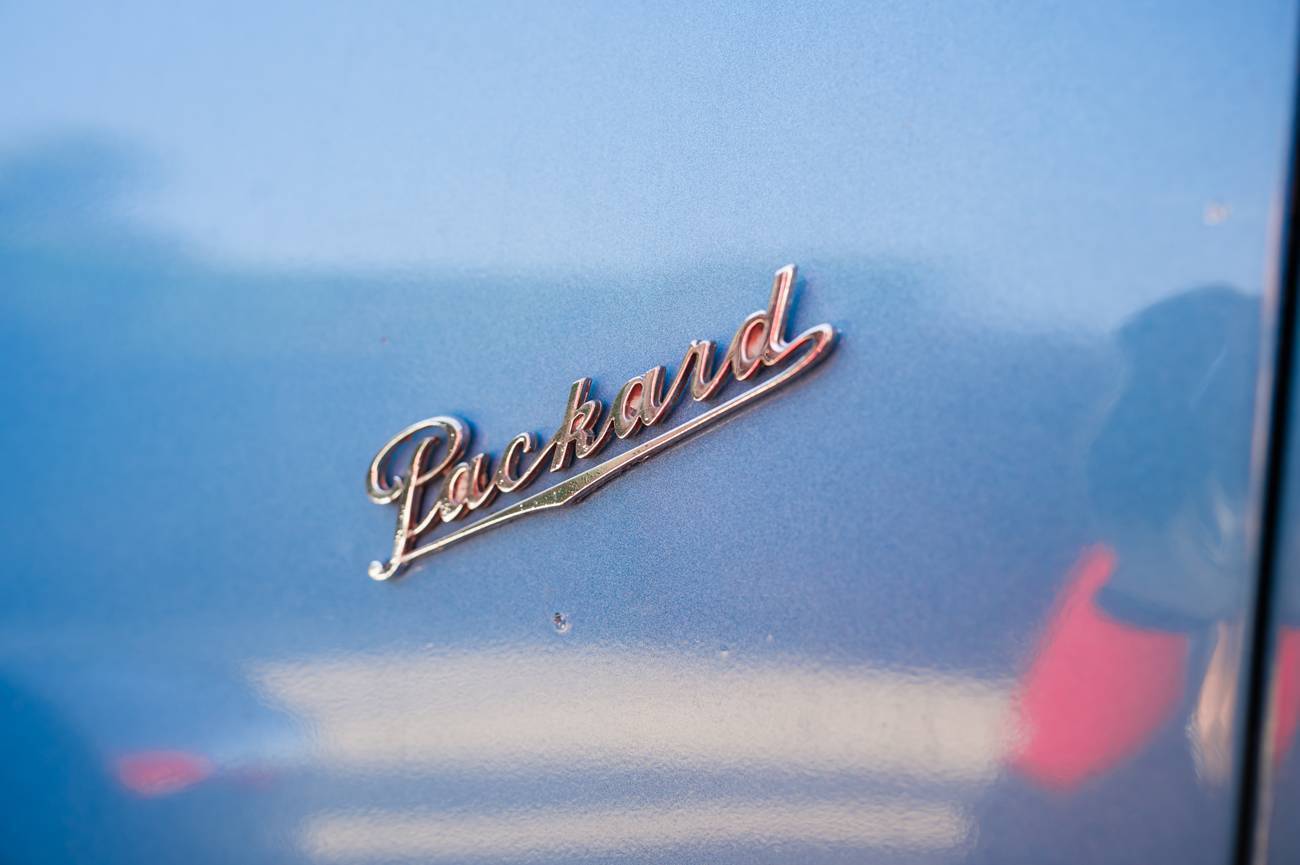 Trunk emblem.jpg (96.79 KB) Trunk emblem.jpg (96.79 KB)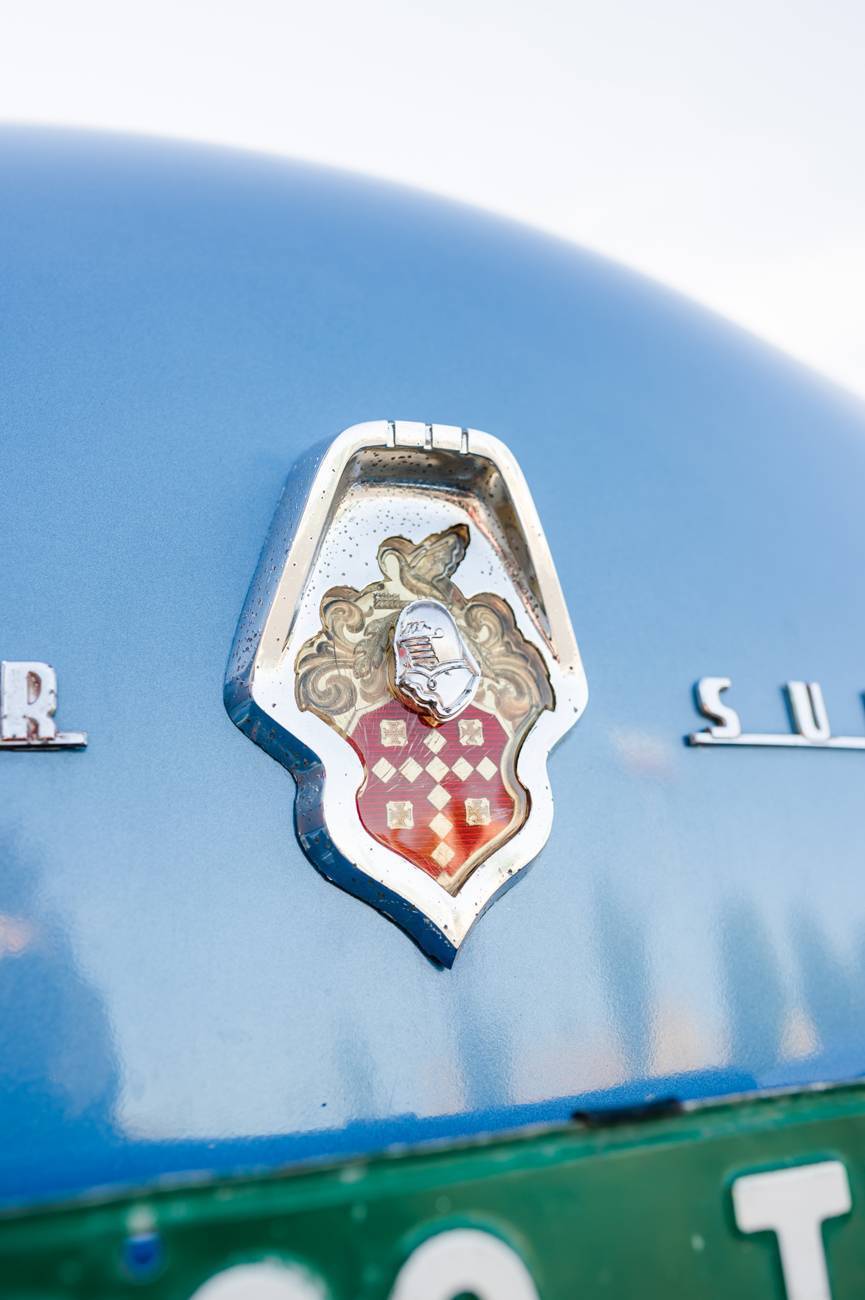 Dash.jpg (149.13 KB) Dash.jpg (149.13 KB)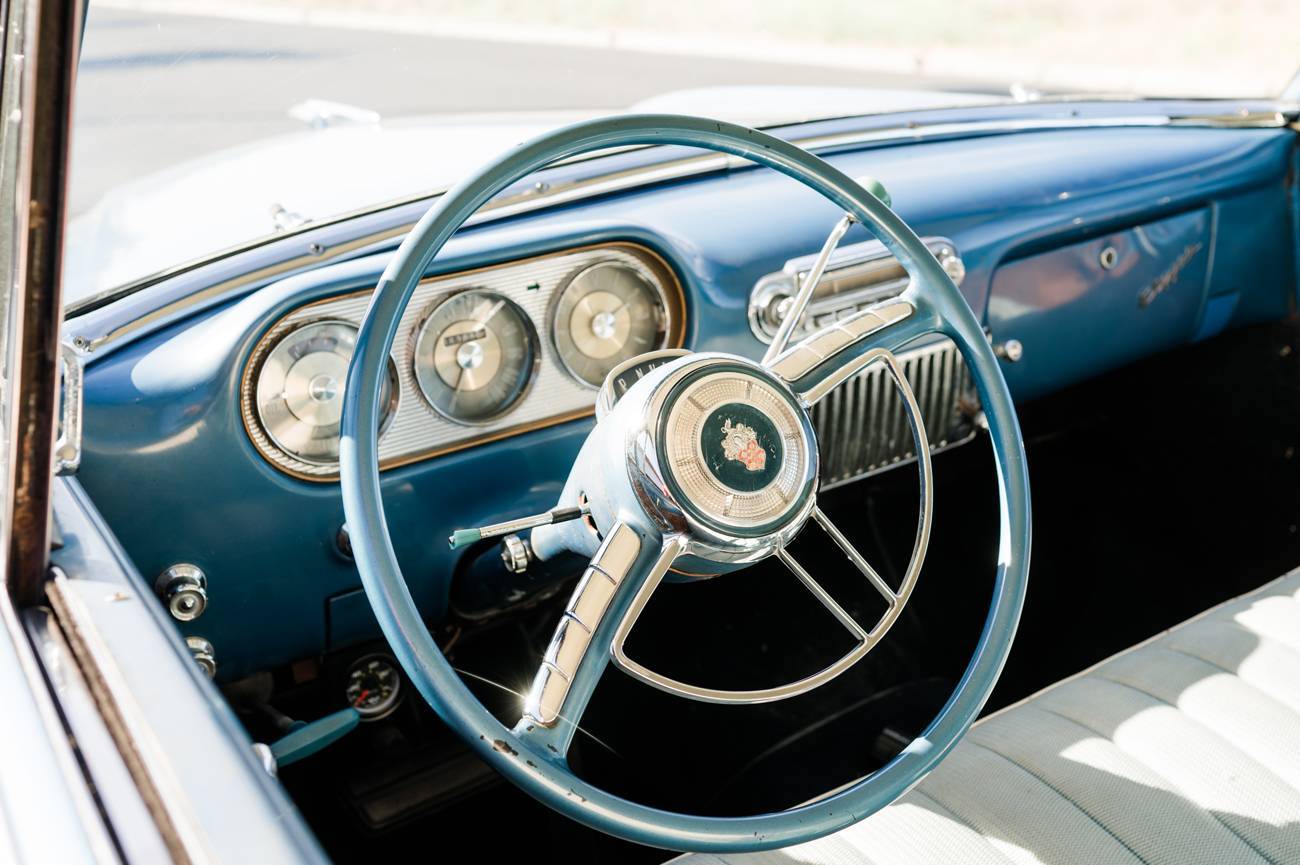 Hood ornament.jpg (77.18 KB) Hood ornament.jpg (77.18 KB)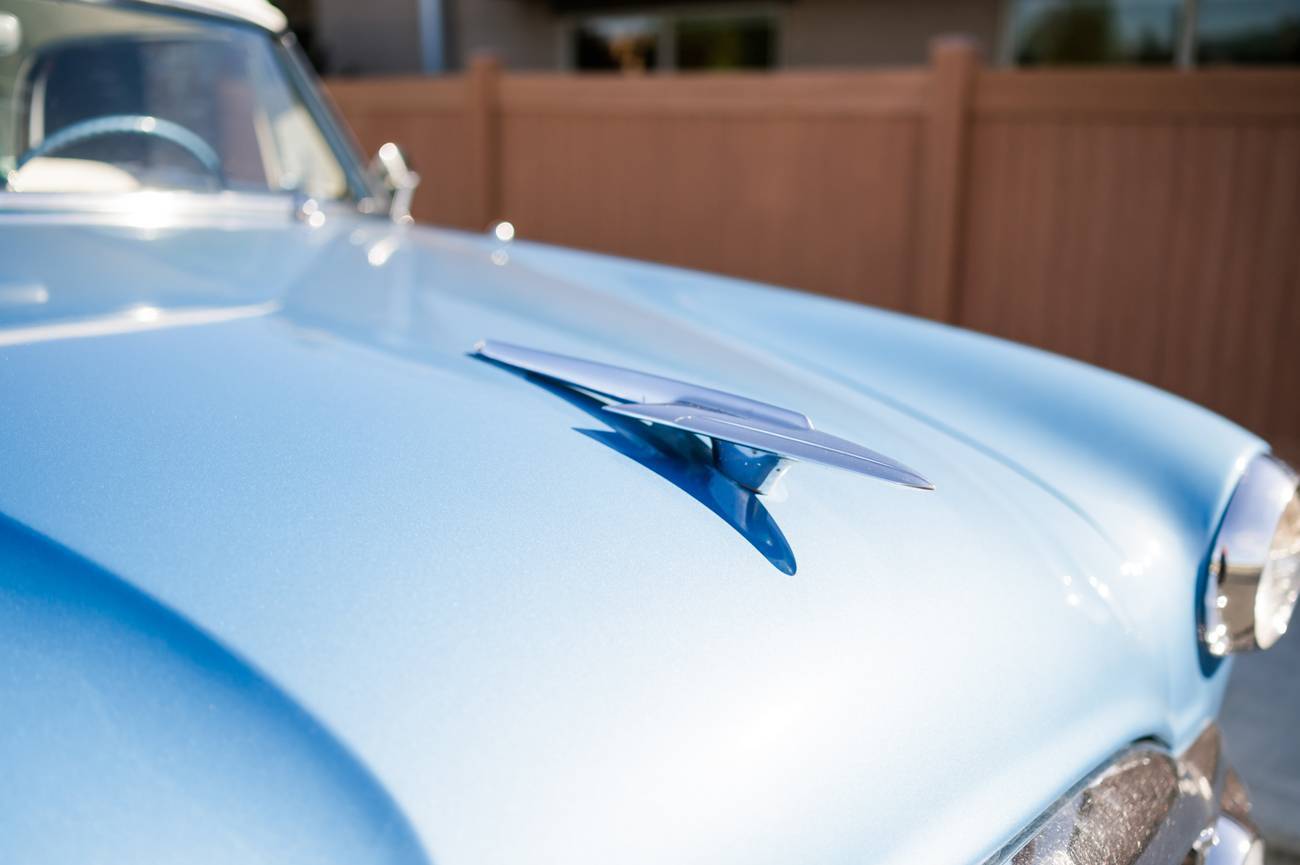 Rear quarter.jpg (136.31 KB) Rear quarter.jpg (136.31 KB) Rear quarter low.jpg (92.73 KB) Rear quarter low.jpg (92.73 KB)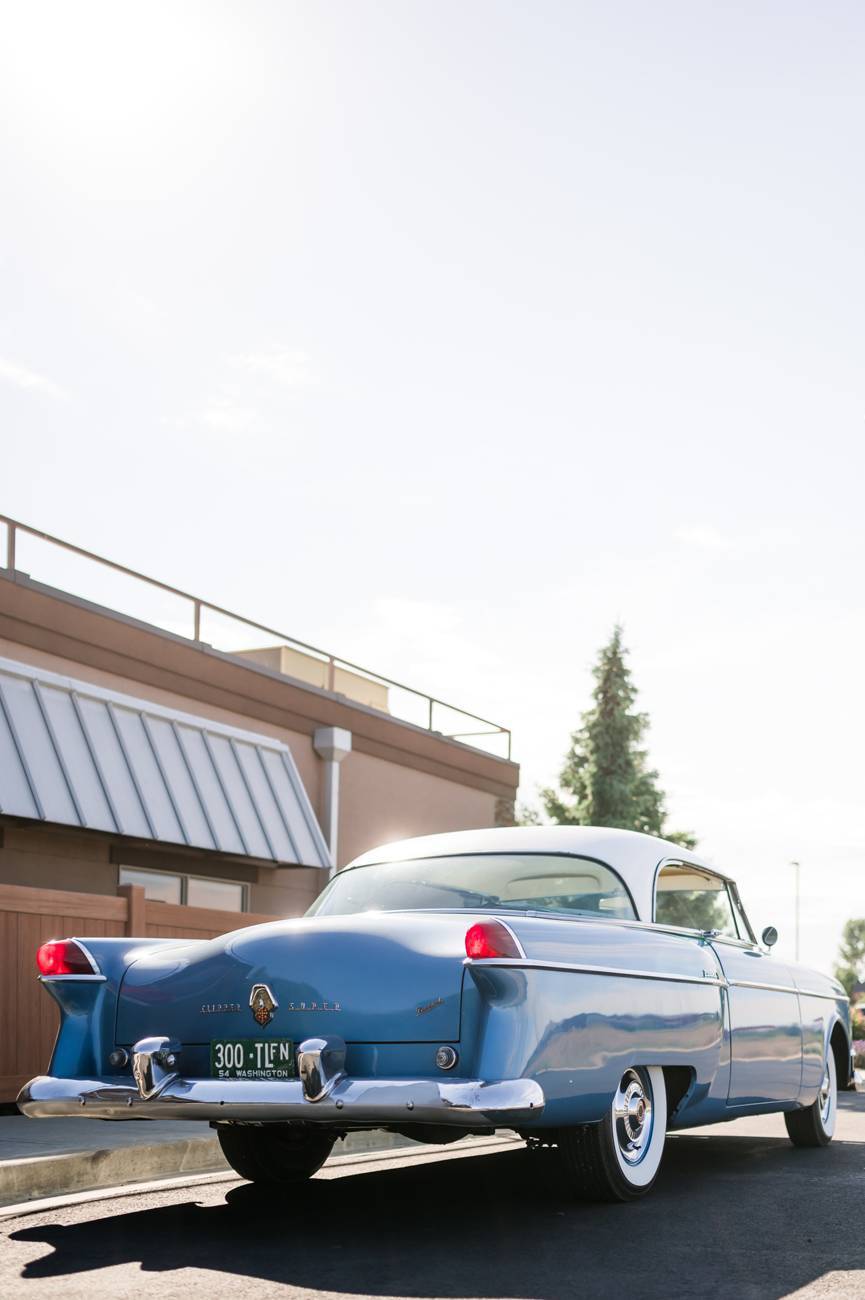 Front driver quarter.jpg (159.00 KB) Front driver quarter.jpg (159.00 KB)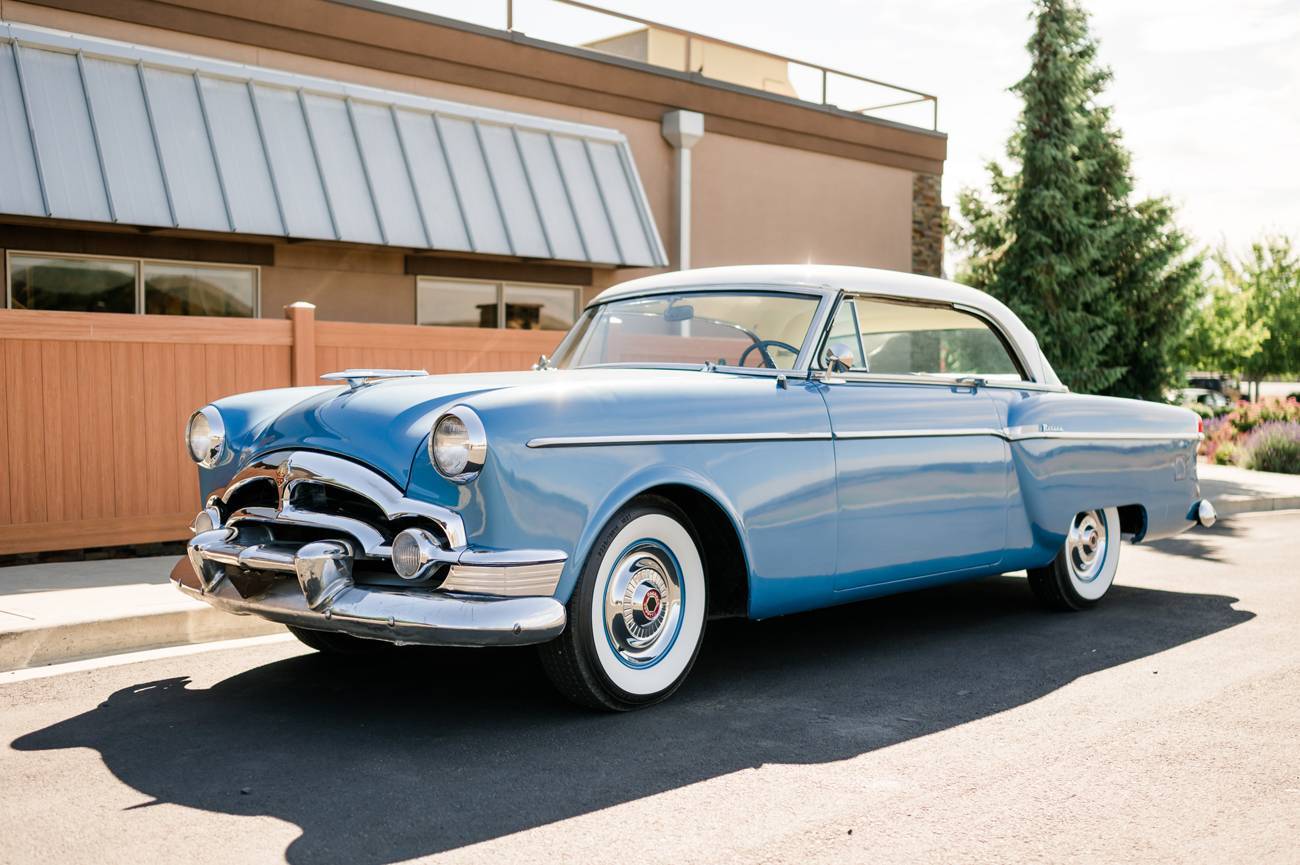 Front passenger quarter.jpg (131.65 KB) Front passenger quarter.jpg (131.65 KB)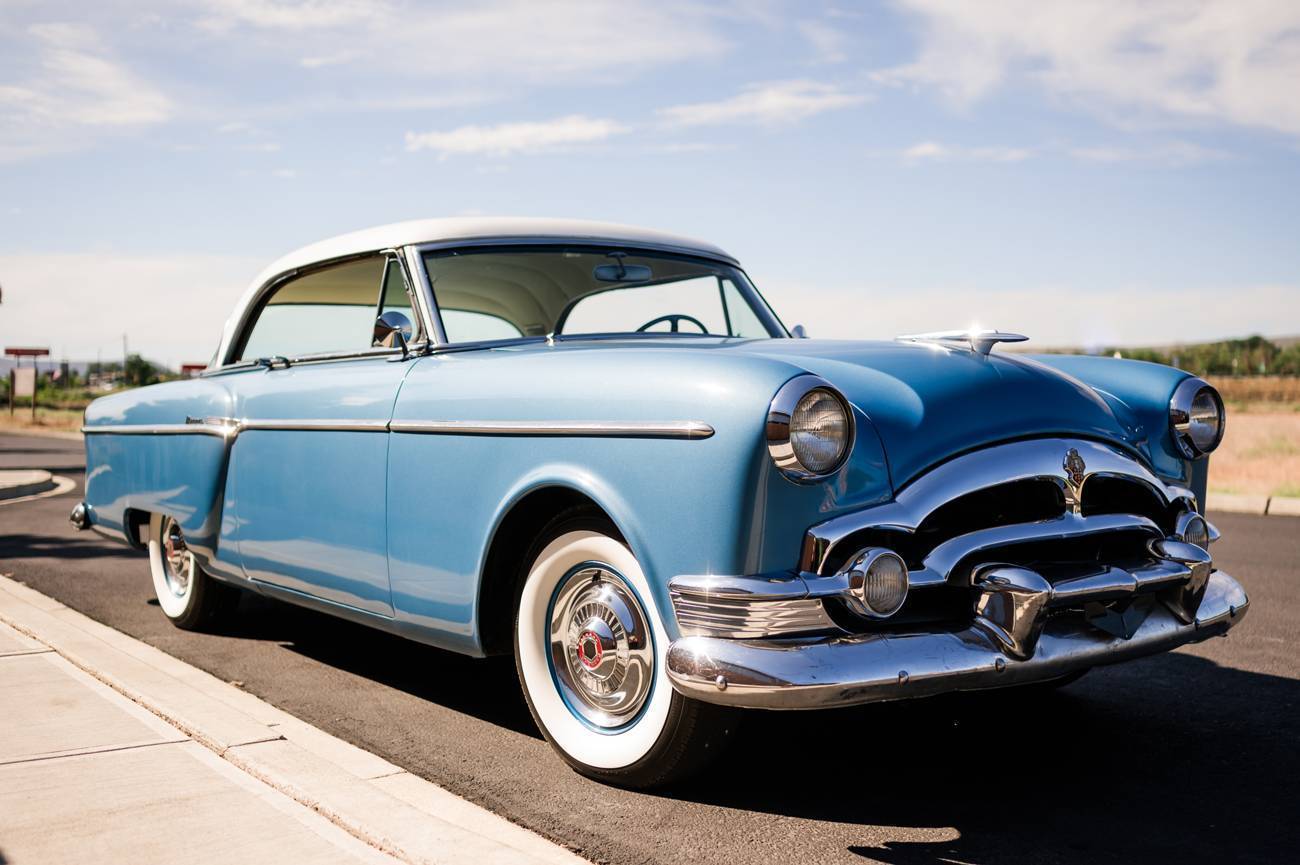 Back in the 50's.jpg (173.76 KB) Back in the 50's.jpg (173.76 KB) America.jpg (167.46 KB) America.jpg (167.46 KB)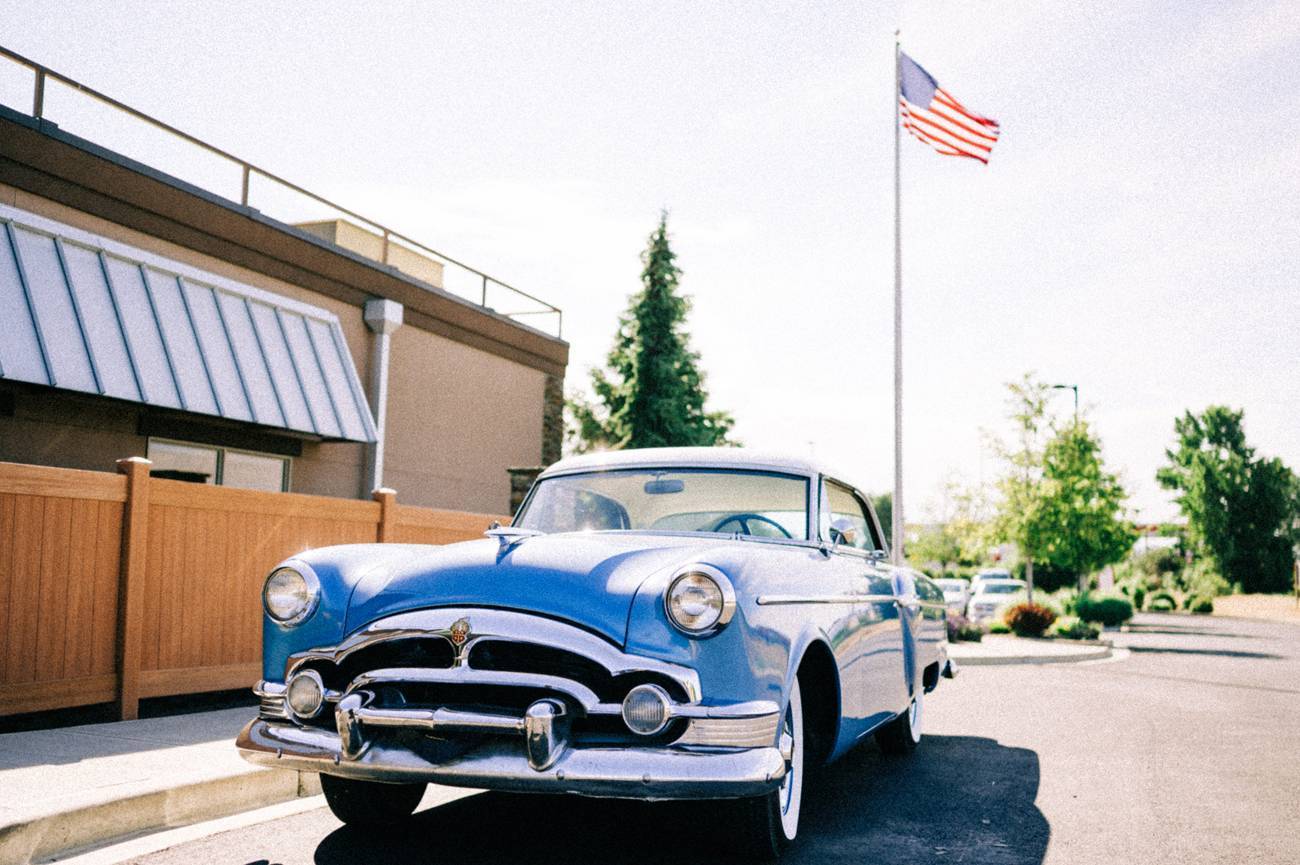 Front close.jpg (138.55 KB) Front close.jpg (138.55 KB)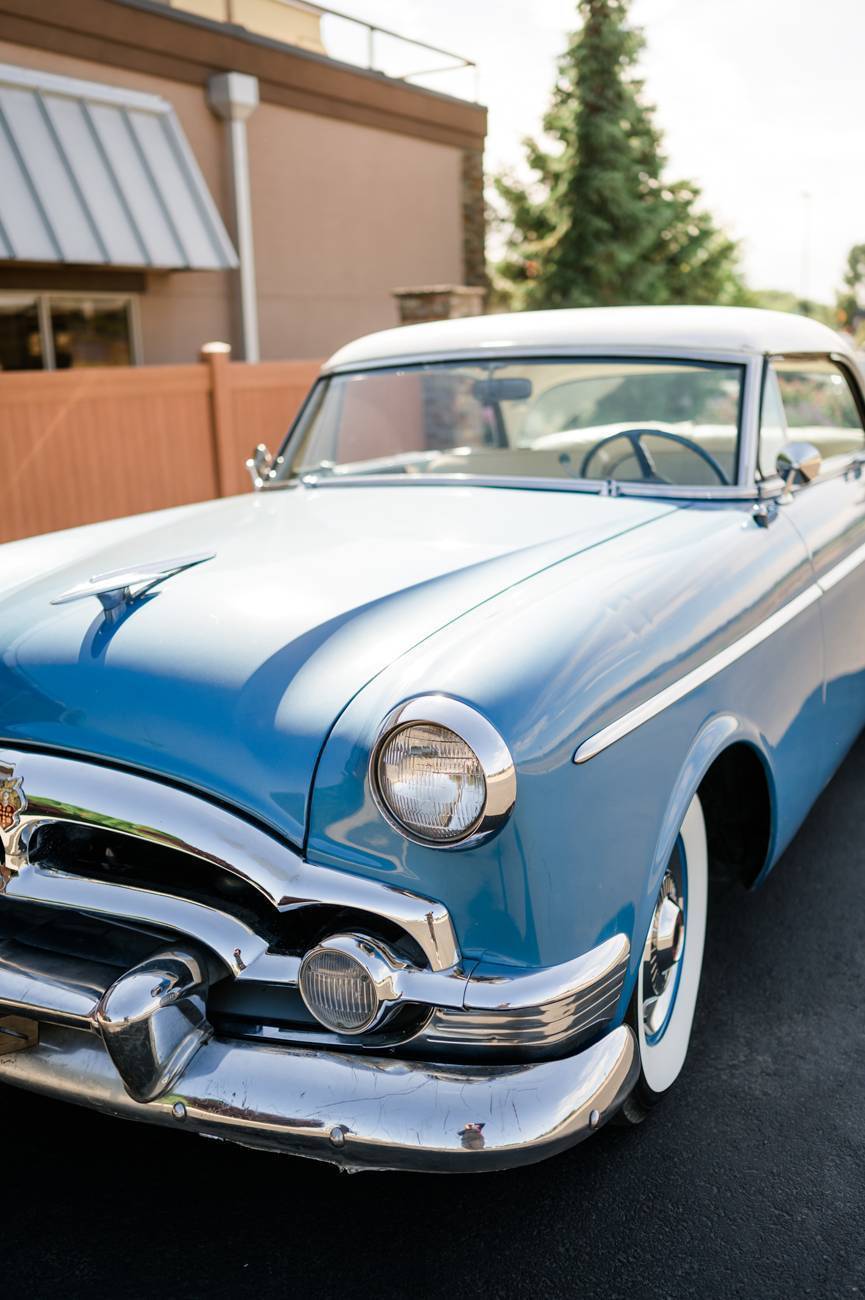 Panama.jpg (70.07 KB) Panama.jpg (70.07 KB)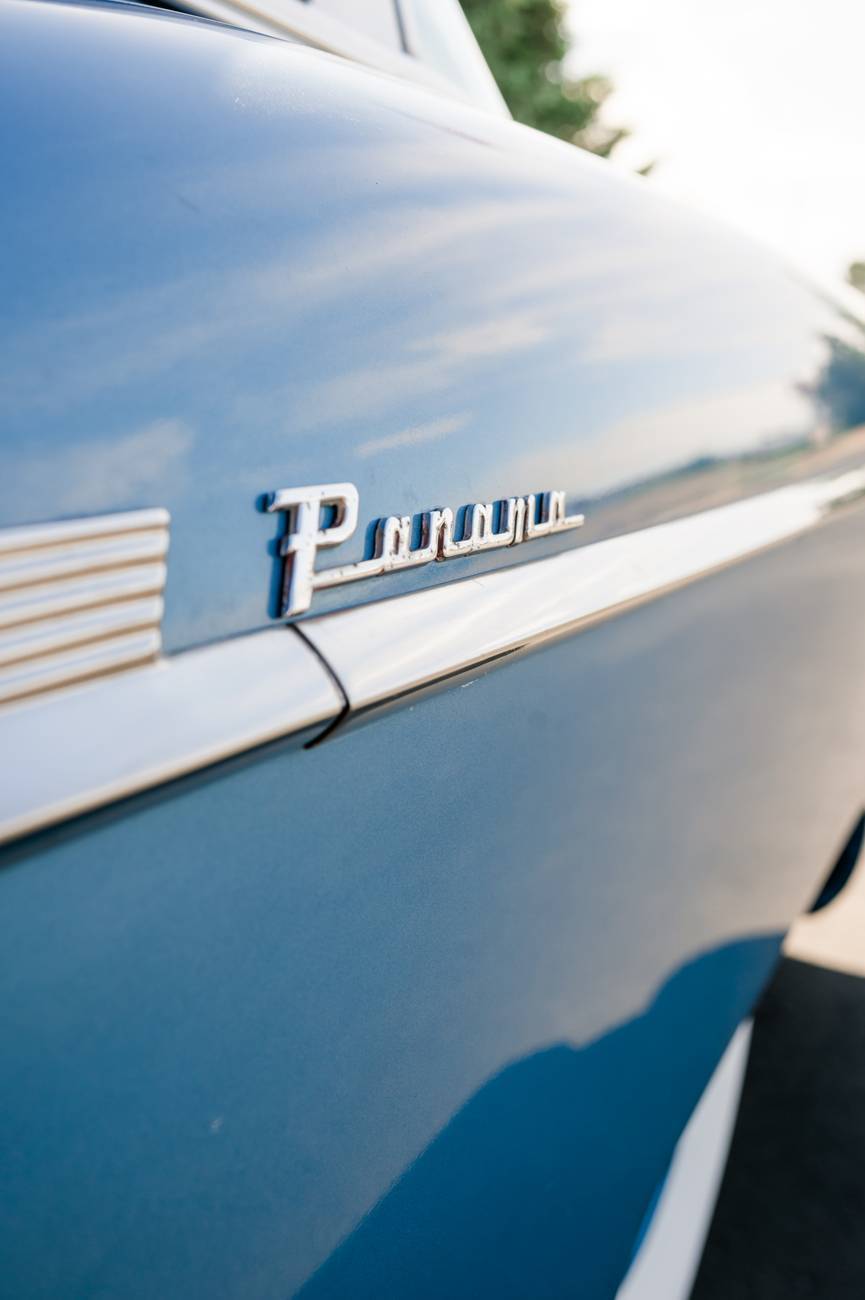 Crest.jpg (106.52 KB) Crest.jpg (106.52 KB)
Posted on: 2021/6/24 12:10
|
|||
|
||||
|
Re: Stewart's 1955 Packard 400
|
||||
|---|---|---|---|---|
|
Home away from home
|
That looks great! What did you use? Single-stage urethane?
Posted on: 2021/6/23 18:35
|
|||
|
||||
|
Re: KPack's 1954 Panama
|
||||
|---|---|---|---|---|
|
Home away from home
|
Don - thanks, let me know if you find something that will work.
Paul - The vinyl is attached to a cardboard type material (I probably shouldn't have said "hardboard"). That assembly is then wrapped over the original metal and wood parts, and sewn up. It is not sewn through the wood....the whole thing is tight enough to keep it from moving around. That's how the original ones were made: no attachment between the wood and the cardboard/vinyl. Anthony - Thanks! It looks like I was looking at the wrong part (must have been the loop that goes around the tailpipe). The number you have is correct. And I didn't even think to check Max Merritt, so that's good to know. I'll get it touch to see if they have one in stock. -Kevin
Posted on: 2021/6/23 10:25
|
|||
|
||||
|
Re: KPack's 1954 Panama
|
||||
|---|---|---|---|---|
|
Home away from home
|
Thanks Anthony. It's coming along slowly but surely.
One of the next things I need to do is the exhaust. The car didn't come with the back half of the exhaust, and the tailpipe hangar is gone as well. Anyone have an extra one I could buy? I *think* it's part #446868. -Kevin
Posted on: 2021/6/22 18:49
|
|||
|
||||
|
Re: KPack
|
||||
|---|---|---|---|---|
|
Home away from home
|
Finally got around to having the sunshades recovered. The old ones were really bad, almost brown. SMS sent me extra vinyl to use on the sunshades when I ordered the headliner.
I was hoping to do them myself, but after watching videos and doing some reading I learned that it requires an industrial sewing machine, which I don't have. So I took the old sunshades and new vinyl to an upholstery shop and had them do it. Originally the sunshades had light blue border (appears to be made of a plastic type material) and three shops I checked at couldn't replicate it. So I had them redo the sunshades the way that most of them are done. They removed the old vinyl and fiberboard from the old ones, and used them as a pattern for the new hardboard. Then that was used to cut the new vinyl. They cut about 1.5" larger on the vinyl to allow it to be stretched. Spray adhesive (the real stuff) held the vinyl to the hardboard, then it was stretched over, making sure there was enough to allow the whole thing to fold in half. Once everything was glued, the excess vinyl was trimmed and the original hardware (chrome, stainless, and wood) was placed between the two halves. The new cover was folded over, held in place with clamps, then sewn up. I cleaned up the old chrome and stainless (it was really bad), and used new mounting screws. The old ones were completely rusted out. I marked the mounting holes on the headliner, punched through and mounted the shades back up. Though they aren't 100% original (no blue banding) they really help to make the headliner look finished. It's a nice touch. -Kevin Attach file: Original sunshade and headliner.jpg (58.32 KB)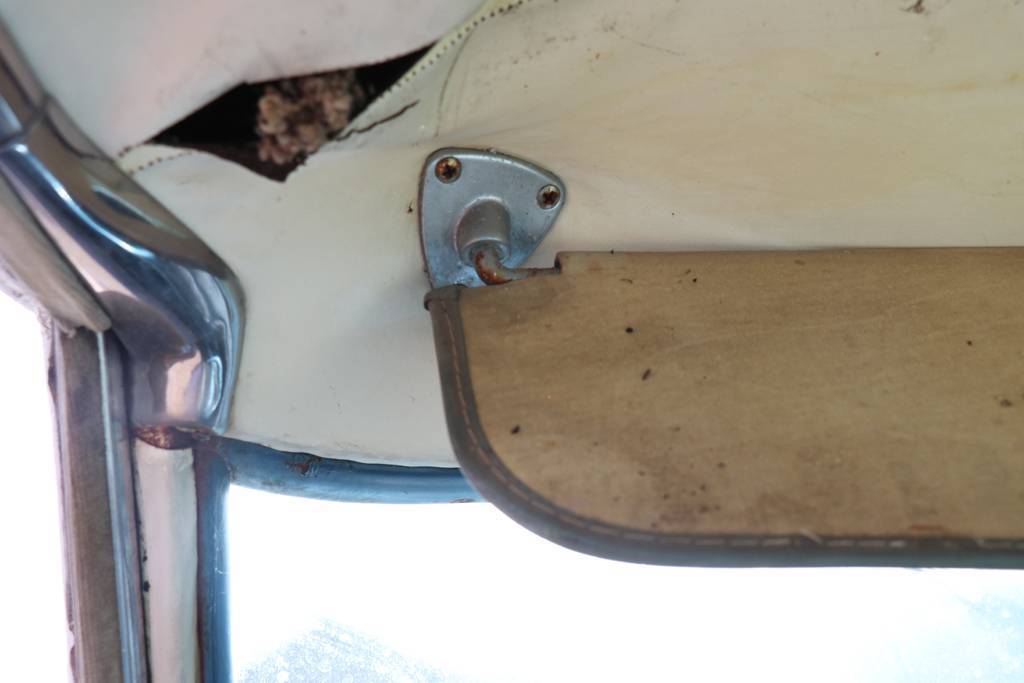 Original sunshades and headliner.jpg (75.47 KB) Original sunshades and headliner.jpg (75.47 KB) Sunshade pattern.jpg (113.23 KB) Sunshade pattern.jpg (113.23 KB)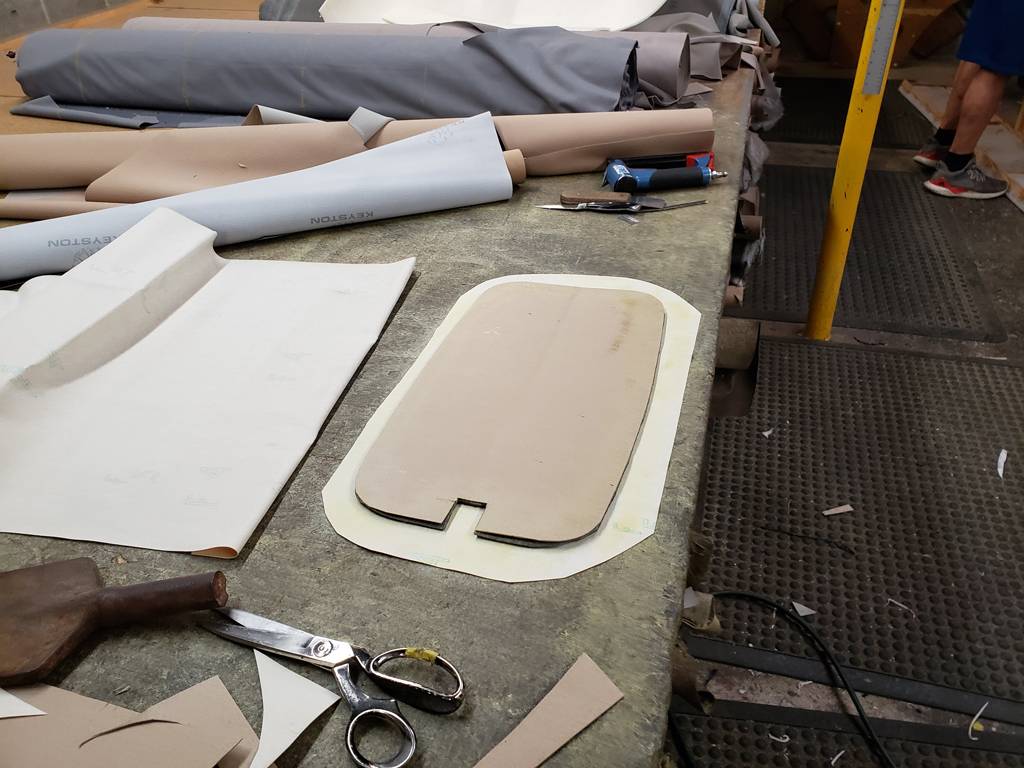 Sunshade gluing vinyl to backing.jpg (119.75 KB) Sunshade gluing vinyl to backing.jpg (119.75 KB)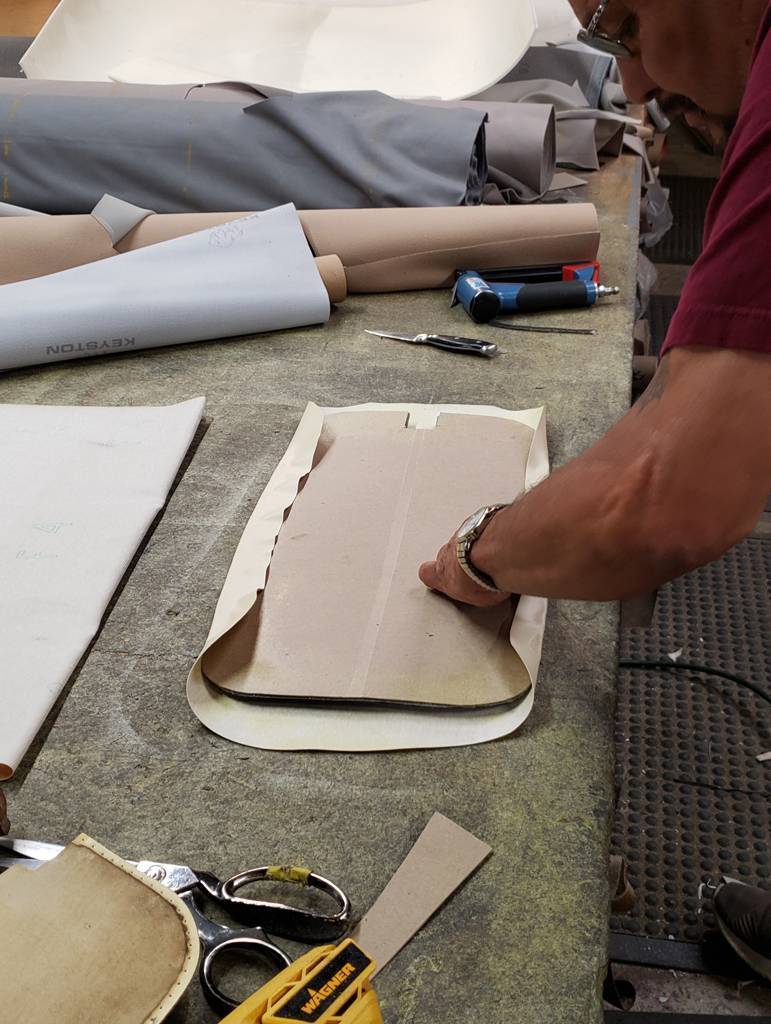 Sunshade new vinyl and hardboard, with original wood.jpg (122.17 KB) Sunshade new vinyl and hardboard, with original wood.jpg (122.17 KB)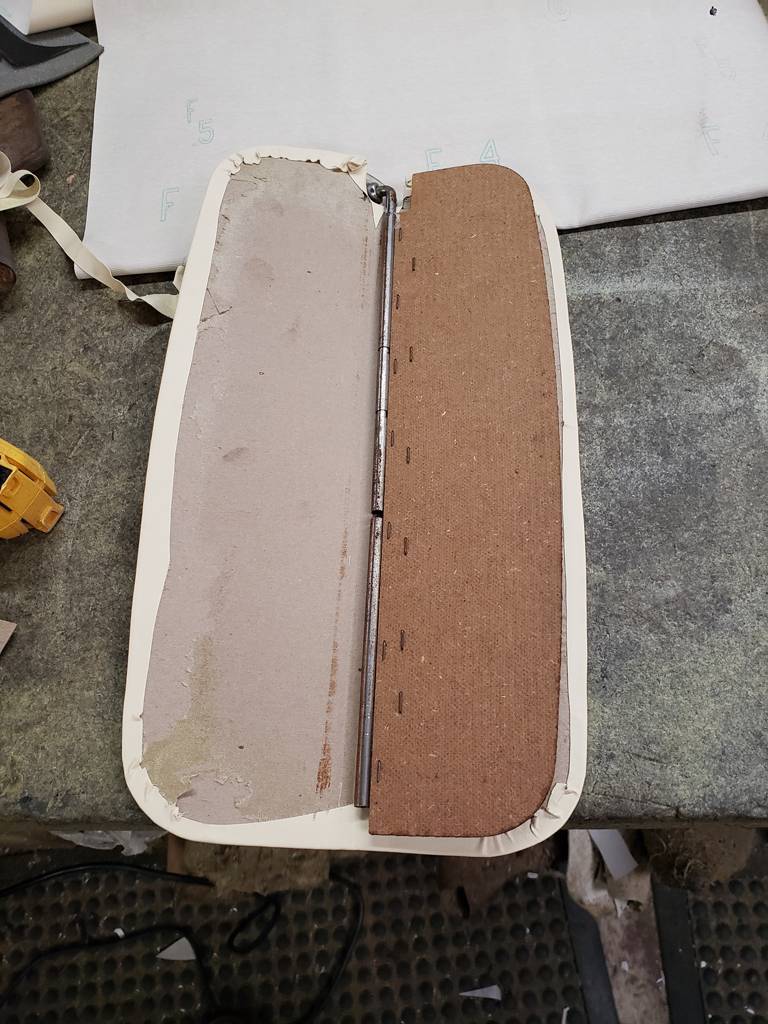 Sewing new sunshades.jpg (114.45 KB) Sewing new sunshades.jpg (114.45 KB)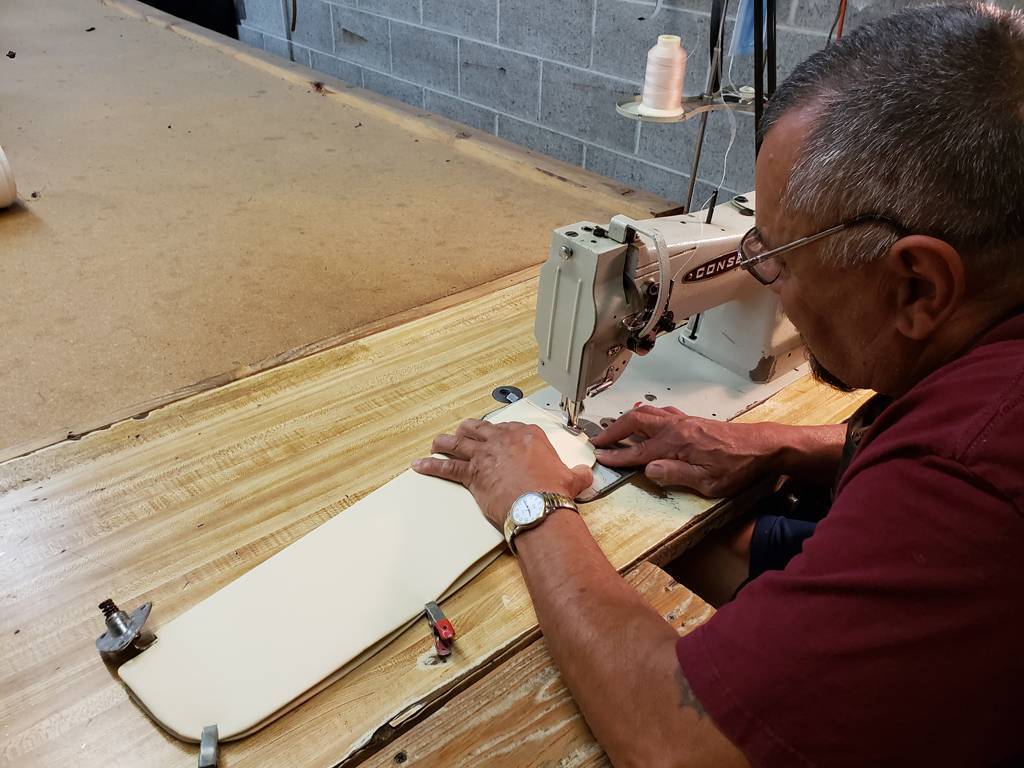 New sunshades installed.jpg (87.59 KB) New sunshades installed.jpg (87.59 KB)
Posted on: 2021/6/22 13:58
|
|||
|
||||


