|
Re: Odd metal piece on headlamp switch? 22&23
|
||||
|---|---|---|---|---|
|
Home away from home

|
Wow, that was quick!
I had a feeling that it might be a fix to prevent people from accidentally turning off the lights. It does make operation of the switch a bit clunky. I think I'll remove it, since for now I'll be installing a 23rd Series switch panel that has the illuminated switch labels, which brings up another question. Should there be a black light filter for the bulb that illuminates the switch labels? I would think so, because they are printed in the same luminescent paint as the gauges. Jeff
Posted on: 2013/8/3 17:02
|
|||
|
||||
|
Odd metal piece on headlamp switch? 22&23
|
||||
|---|---|---|---|---|
|
Home away from home
|
Does anyone know the purpose behind the spring steel piece on the headlamp switch that makes it difficult to operate the switch? The original switch from the '48 had it and the switch panel that I have off of a 23rd series has it too. The 22nd series owner's manual doesn't mention any special procedure for using the switch other than pushing it in like all the other switches.
Thanks, Jeff Attach file:  (72.11 KB) (72.11 KB)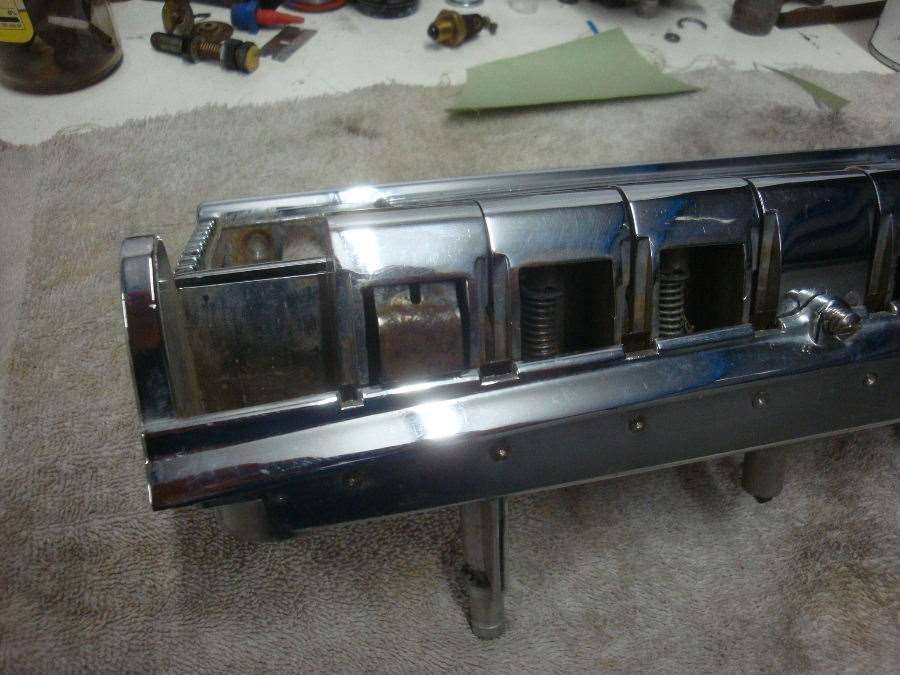
Posted on: 2013/8/3 16:37
|
|||
|
||||
|
Re: Stewart's 1955 Packard 400
|
||||
|---|---|---|---|---|
|
Home away from home
|
That's a really nice shop that you built. I wish I had gone with the barn red and white when I built mine years ago, but I opted for a more discrete tan and green. I look forward to following along on your Packard project.
Jeff
Posted on: 2013/7/8 23:32
|
|||
|
||||
|
Re: 356 valve cover
|
||||
|---|---|---|---|---|
|
Home away from home
|
That's great. Much easier than finding a replacement. Cheaper too.
Jeff
Posted on: 2013/7/7 23:48
|
|||
|
||||
|
Re: Jeff's 48 Custom 8 Victoria Project
|
||||
|---|---|---|---|---|
|
Home away from home
|
That's a neat looking engine stand. I bet that sucker is heavy, as it appears to be all cast iron. That's the way most of the currently available heavy truck engine stands are set up. They attach to the side of the engine to spread the load evenly. That vintage stand would make a nice display piece in an automotive memorabilia collection. There's probably a few of them still around.
Jeff
Posted on: 2013/7/6 1:24
|
|||
|
||||
|
Re: 356 valve cover
|
||||
|---|---|---|---|---|
|
Home away from home
|
Maybe you could put one end of the cover in a vice, then twist the other end with a pair of very large water pump pliers? That cover seems to be a fairly sturdy piece. Someone must have abused it in the past to twist the entire cover.
Jeff
Posted on: 2013/7/6 1:06
|
|||
|
||||
|
Re: Jeff's 48 Custom 8 Victoria Project
|
||||
|---|---|---|---|---|
|
Home away from home
|
This chapter is long on words and light on Packard progress, but it fills in a big gap in the timeline and some may find the shop upgrades helpful.
With the engine bay all painted it was time to prepare to work on all the bits and pieces that I had removed from the Packard. Considering that almost every part that came off of the car was rusted or corroded, media blasting equipment would be a must. I had one blast cabinet that I built back in the early 1980's when I was still a kid. It was poorly designed, so it would need to be upgraded or replaced. My shop air supply wasn't up to the task of providing the dry air needed for blasting either. All I had was a hose connected directly to the compressor. After much consideration, I planned out a system consisting of 70 feet of ?" steel pipe that will cool down the air before it arrives at the water separator. The separator is about twenty feet from the compressor, but the air travels through 60 feet of pipe on the way. The extra ten foot section goes to the hose reel that I use for my air tools. I installed a ball valve drain on the bottom of each pipe section, along with a regulator/separator and a Motor Guard filter. The system works excellent, especially considering how much water and oil my cheesy compressor pumps through the lines. Next on the to-do list, I decided to improve my old blast cabinet instead of spending $1000 on a new one. I had originally built it with a vertical front panel, not taking into account the shape of the human body. When you put your arms into the glove holes, your face was smashed against the viewing window. There's a good reason that all blast cabinets have the front panel angled back, away from your head. To use it for any length of time, I had to put wood blocks under the front to tilt the entire cabinet back. I stripped off the top section of the cabinet and made all new pieces. I bought all new accessories from TP Tools, such as gloves, glove holders, window and frame, pickup tube and gun, along with a media reclaimer. I decided to purchase a second blast cabinet for glass bead. I have a more aggressive media my original cabinet, which does a much better job cutting through rust than the glass bead does. Unfortunately, the new cabinet turned out to be one of the biggest pieces of junk that I've ever bought. It's a blow molded plastic cabinet made by ALC. Take my advice and never even consider buying one of these. I thought that it would be a quality piece since it was made in the USA, but it's really poorly designed. The sad part is that it wasn't cheap either. I found out later that I could have had a nice TP Tools metal cabinet that was on sale for only $50 more. One week into November, news came that the Packard engine was finally ready to be picked up. The final list of repairs included cleaning and sonic checking the engine block and cylinder head, resurfacing of the block deck and head, replacement of the exhaust guides and one valve seat, a complete valve job, setting the valve stem heights, replacement of the cam bearings, cylinder bores were ball-honed, along with magnafluxing and polishing the crankshaft. When I got the engine back to the shop I used a heavy duty wire wheel in an angle grinder to clean the rust off of the exterior of the block and head. A few weeks earlier I had spent way too many hours trying to find a suitable engine stand to hold the long and heavy Packard straight eight. I had found a real nice stand on a manufacturer's website, but it turned out to be discontinued, and I couldn't find anyone who still had one in stock. I settled on a Torin 1500 lb capacity stand that Northern Equipment sells. So far it seems to be handling the engine well, though it became tough to steer the stand once the engine was fully assembled. These modern engine stands aren't designed to bolt to the older engines with small bellhousing bolt circles, so I had to rig it up a bit. Later on I found that I had to space the engine out another inch to make room for the crankshaft flange. The 1985 Mustang GT that can be seen sitting outside the shop was going to push the Packard aside for the entire winter and into spring. The Mustang had been here for a year and a half and the owner was starting to miss it. It was here for an engine rebuild, an engine bay detail and preparation for a color change, along with an upgrade from a 7.5 to 8.8 rear axle. I'm really pleased with how it came out, so I had to throw in a few before and after pics. The Packard should look as good when it's done. The only other Packard-related progress for this time period was the rebuilding of the starter and generator by a local electrical shop. I've known the guys who run the shop since high school and they only charged me $160 to do both items. A real bargain. October 2012 to May 2013. Shop is upgraded. Mustang gets my attention while Packard waits it's turn. Attach file: (33.86 KB) (75.51 KB) (75.51 KB)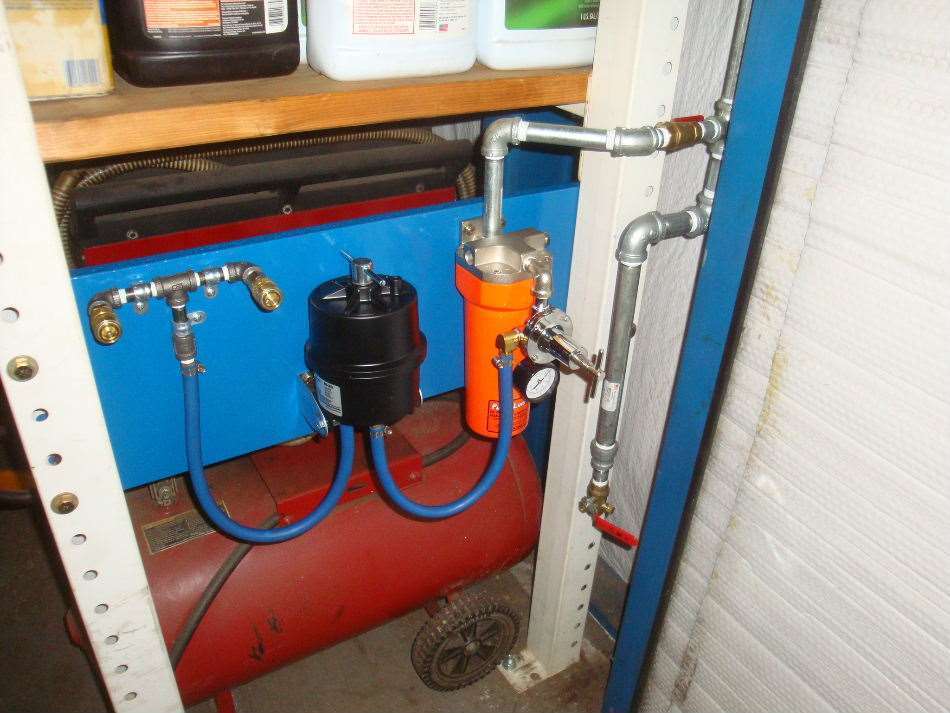 (60.91 KB) (60.91 KB)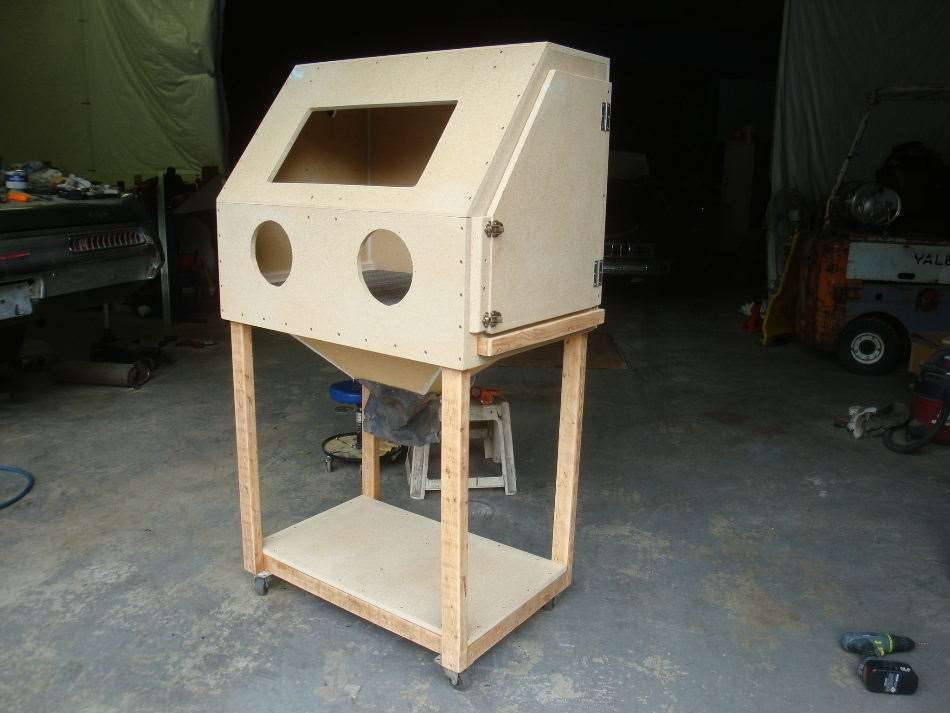 (71.97 KB) (71.97 KB)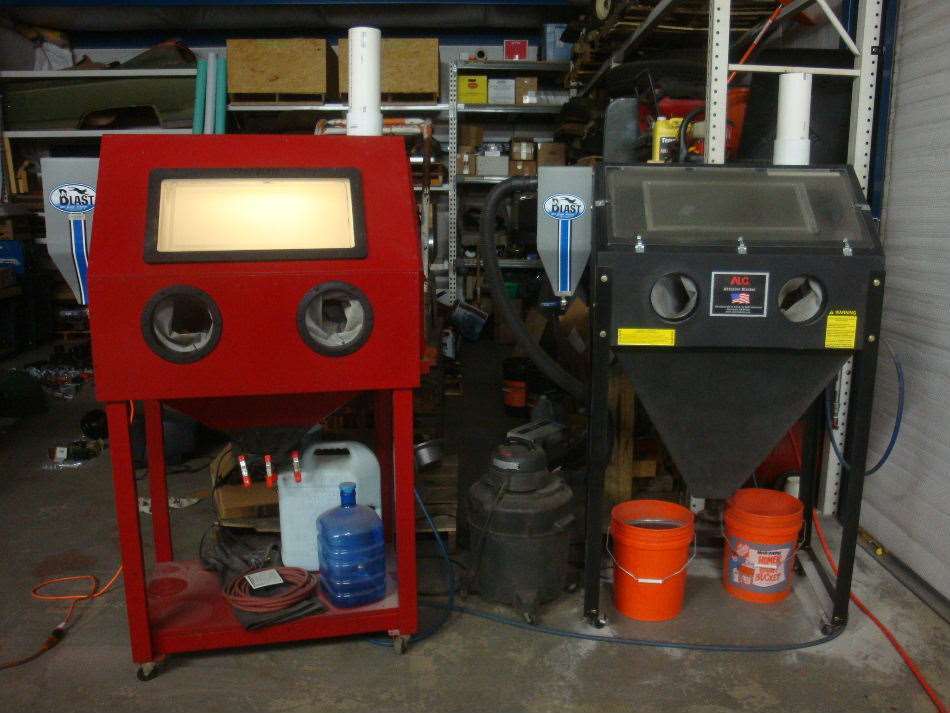 (79.03 KB) (79.03 KB)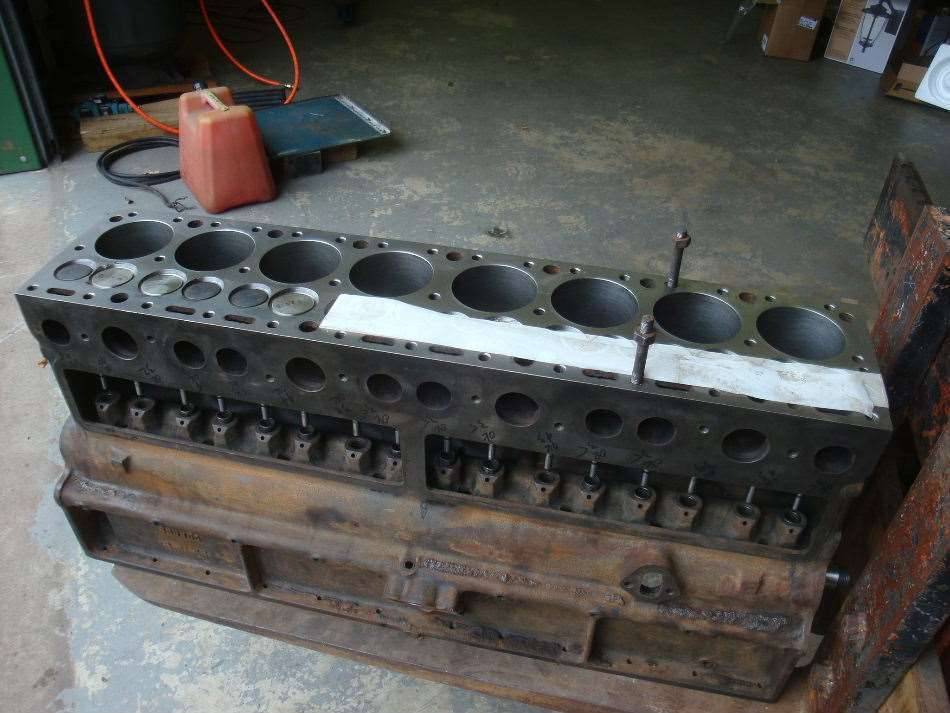 (148.64 KB) (148.64 KB)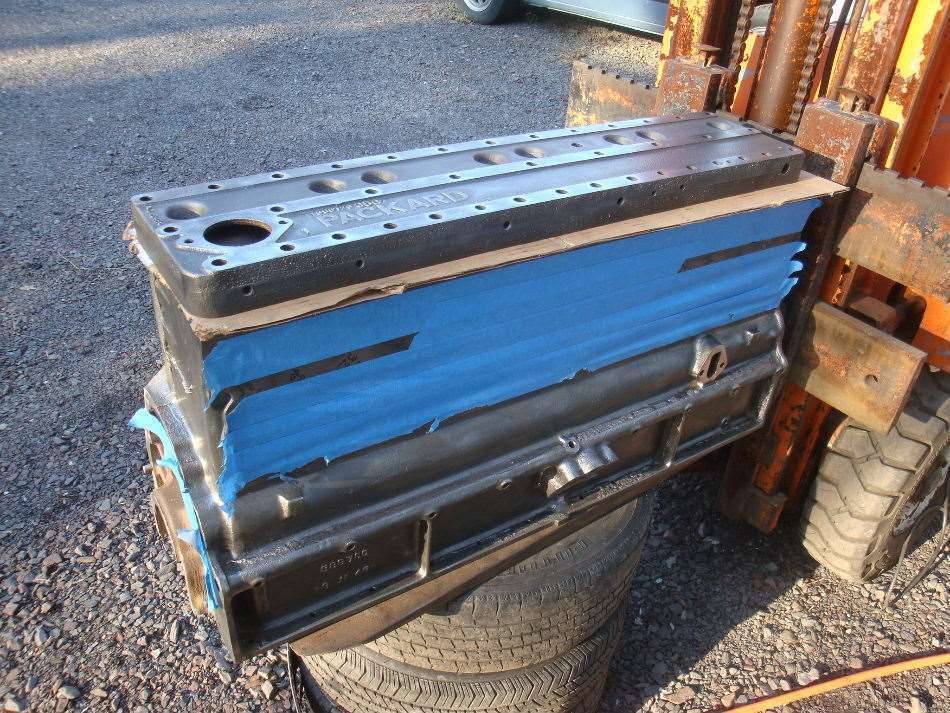 (79.50 KB) (79.50 KB)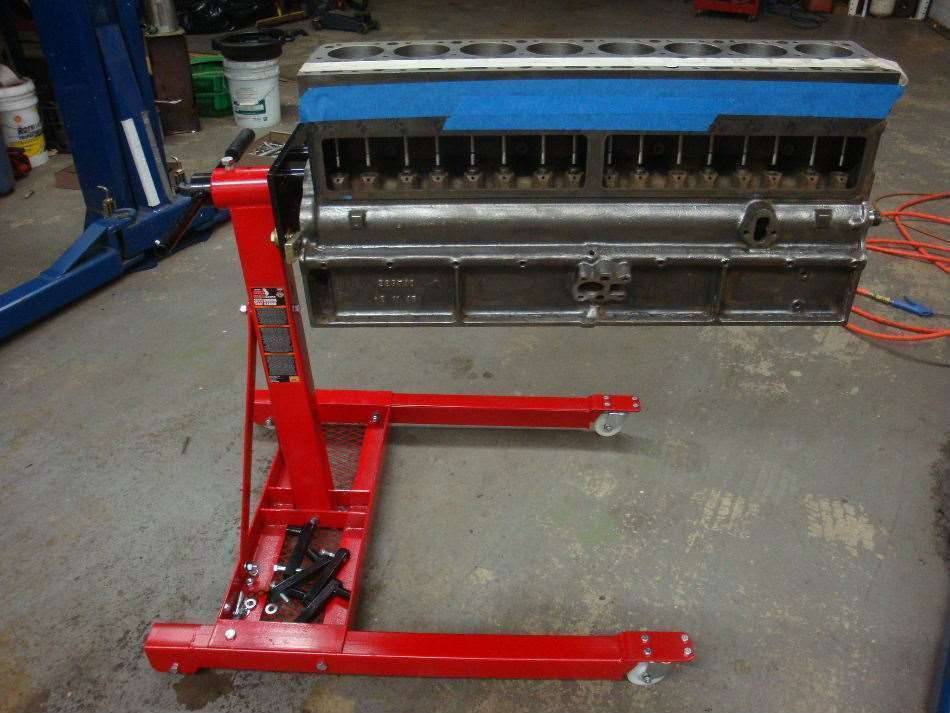 (86.98 KB) (86.98 KB)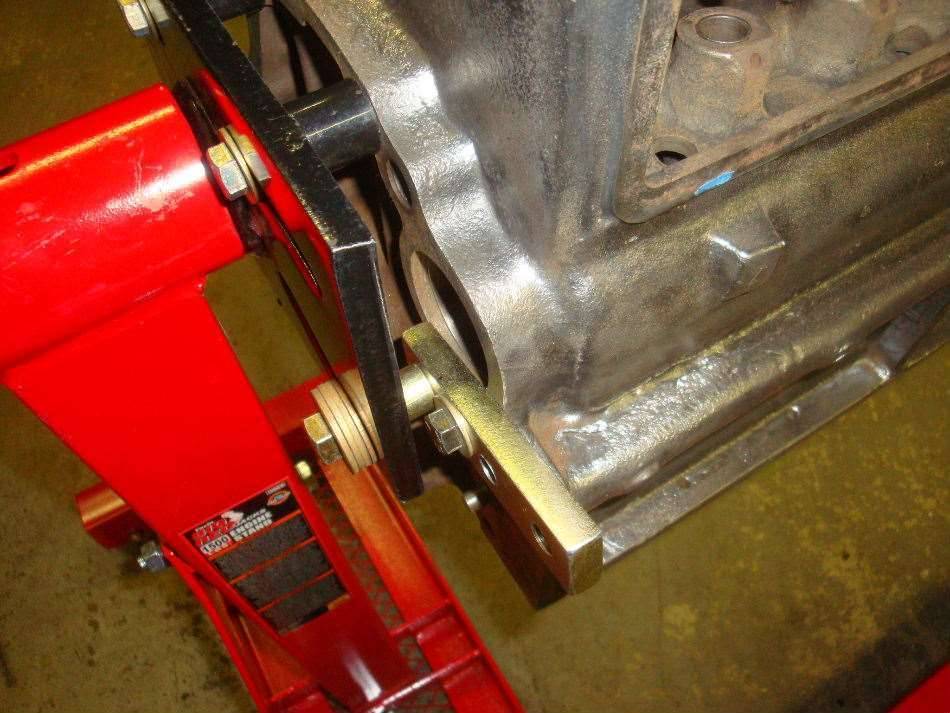 (84.57 KB) (84.57 KB)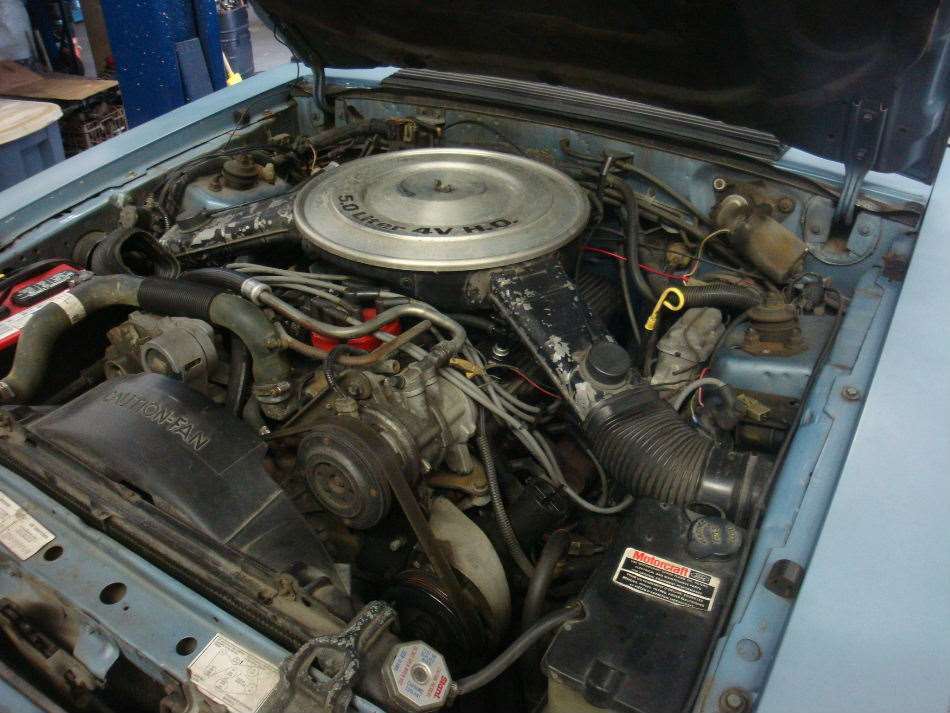 (116.66 KB) (116.66 KB)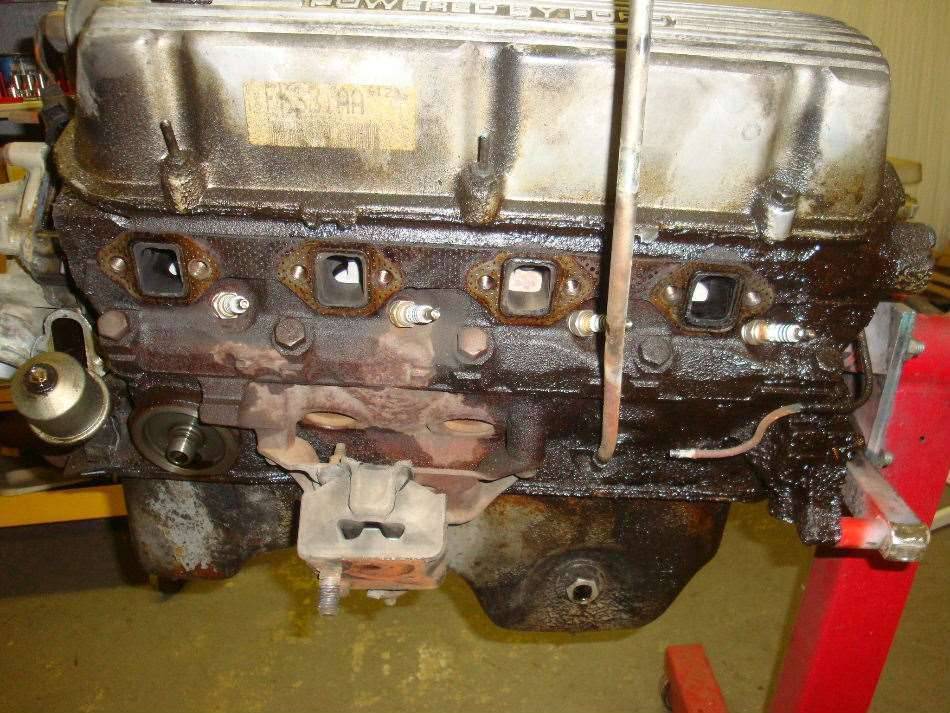 (100.37 KB) (100.37 KB)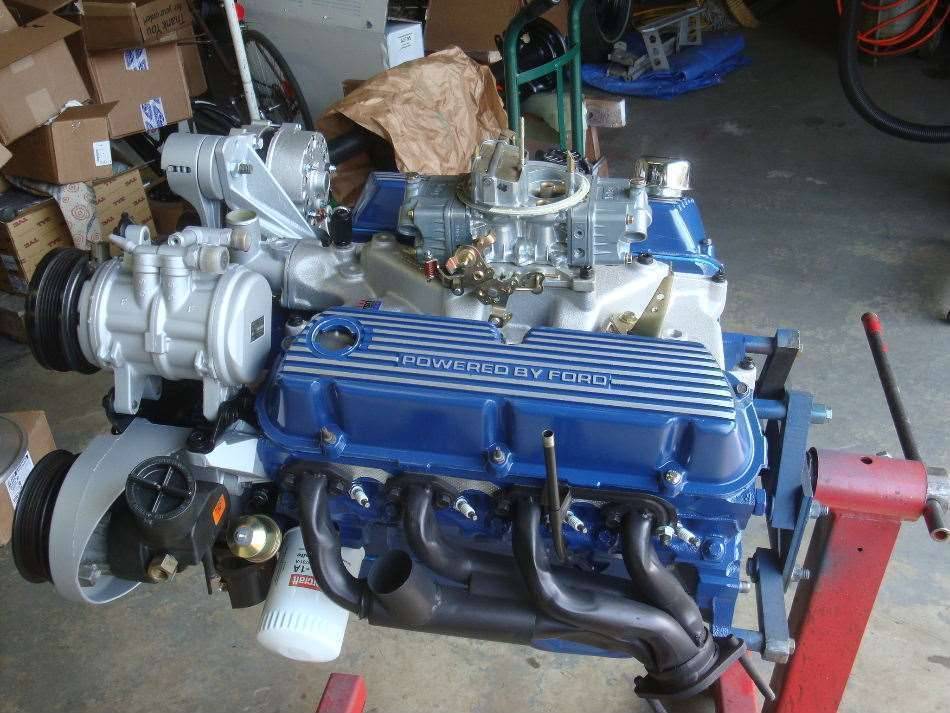 (92.25 KB) (92.25 KB)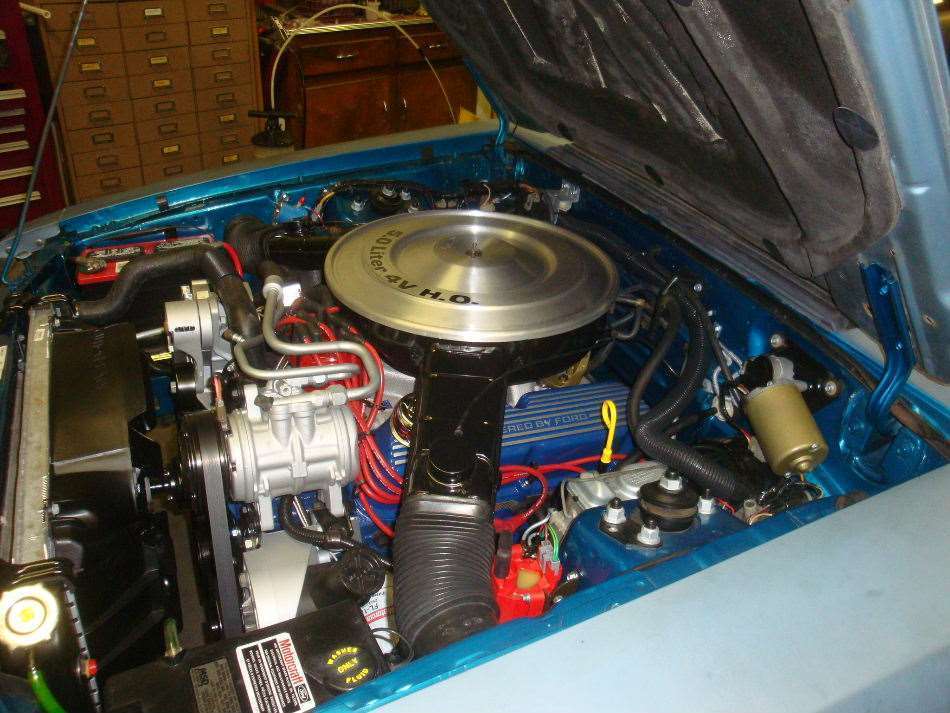 (65.20 KB) (65.20 KB)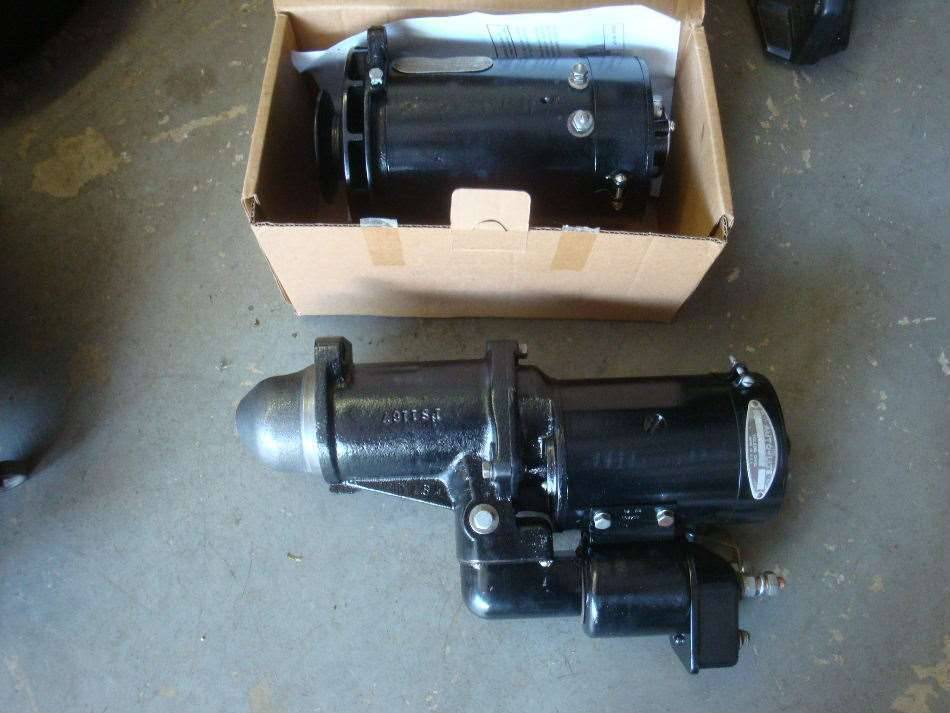
Posted on: 2013/7/5 0:51
|
|||
|
||||
|
Re: Jeff's 48 Custom 8 Victoria Project
|
||||
|---|---|---|---|---|
|
Home away from home
|
Thanks Kevin and Joe.
Sadly, all the hardware had to be mixed together when it was cleaned and de-rusted, but the pictures I have of the cart will make great references to figure out what goes where. The originals are 3 megapixles, so they blow up huge for lots of detail. I didn't like the looks of some of the hardware, so I decided to replace it with new stuff. Many of the bolts had a porous appearance, with lots of tiny holes in the heads. I will save all the original pieces in case someone wants to do a concourse resto in the future. There's what appears to be an identical '48 Custom Eight convertible in the Registry that's fully restored, and it's a real looker. Jeff
Posted on: 2013/7/2 0:00
|
|||
|
||||
|
Re: Jeff's 48 Custom 8 Victoria Project
|
||||
|---|---|---|---|---|
|
Home away from home
|
The Packard would wait a over a month as I worked on more daily drivers, took care of some tasks that needed my attention, and made my yearly pilgrimage to Chryslers at Carlisle.
Now it was time to get the engine compartment cleaned up and painted. Nothing groundbreaking here, lots of scraping, a thorough power washing, and some paint. It's amazing how rock-hard 60 year old dried up grease that's mixed with sand can get. It was almost like trying to scrape off cured concrete. I removed what I could by hand, and the hot water pressure washer was able to melt off the remains. I used Eastwood's single stage urethane for the color coat. Even though the paint sprayed and covered well, I wouldn't recommend the black for an exterior paint job on a car. It's not a pure black and has the same grayish-brown hue under direct sunlight that you get with black Rustoleum or Krylon spray cans. It would be ok to use their colors for a budget-minded paint job, but just not the black. Also, don't trust the paint chip chart that they supply. For a different project, I ordered what I thought would be a medium metallic red and ended up with a metallic pink car. July to September 2012. Engine bay cleanup and painting Attach file: (76.09 KB)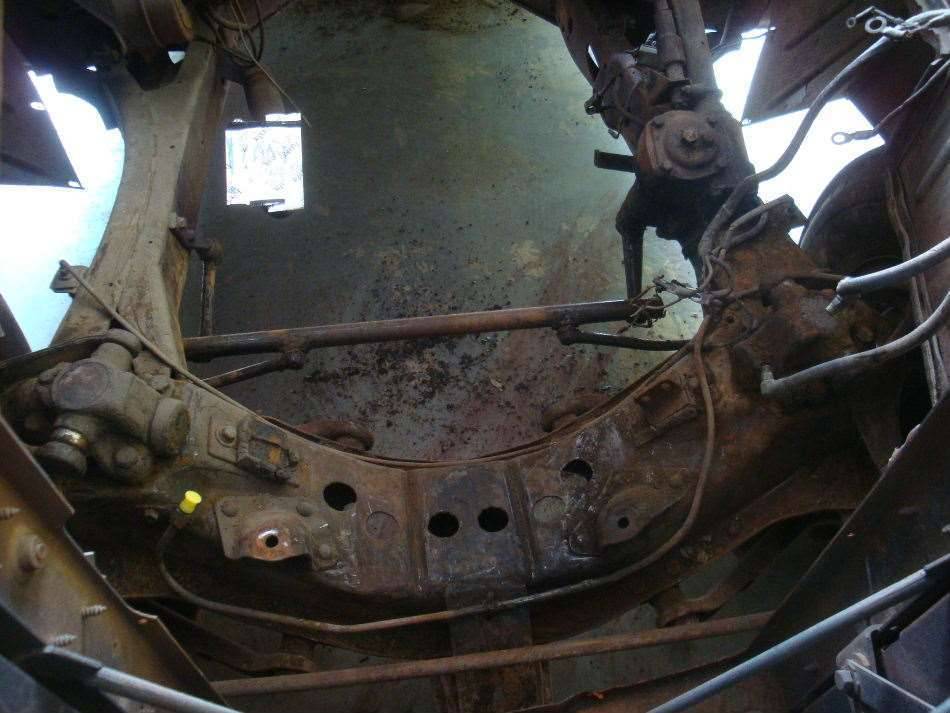 (95.81 KB) (95.81 KB) (137.89 KB) (137.89 KB)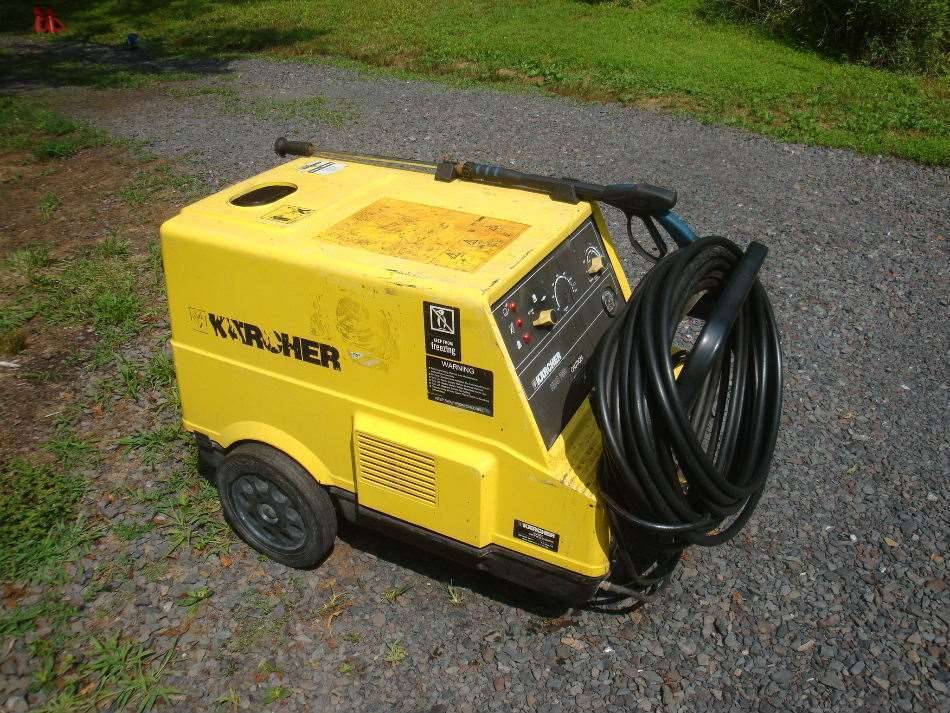 (150.69 KB) (150.69 KB)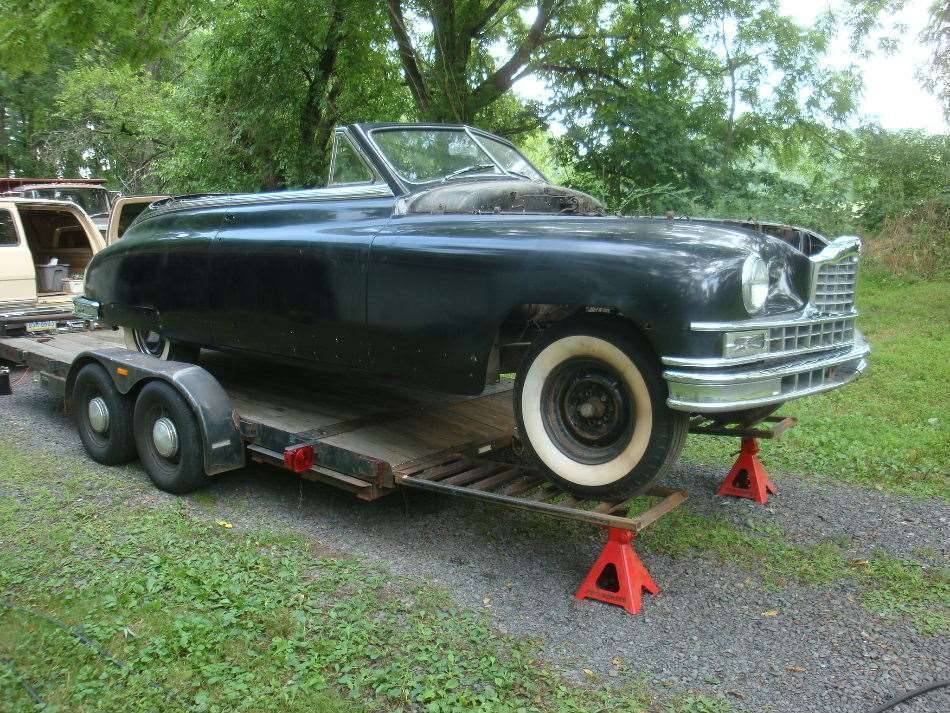 (182.64 KB) (182.64 KB)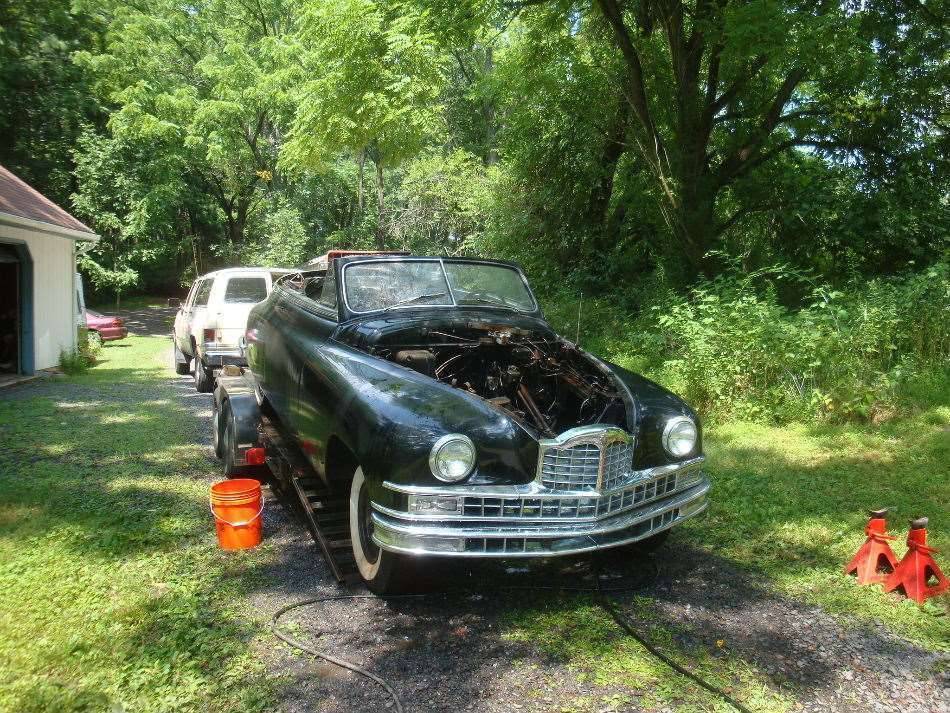 (119.06 KB) (119.06 KB)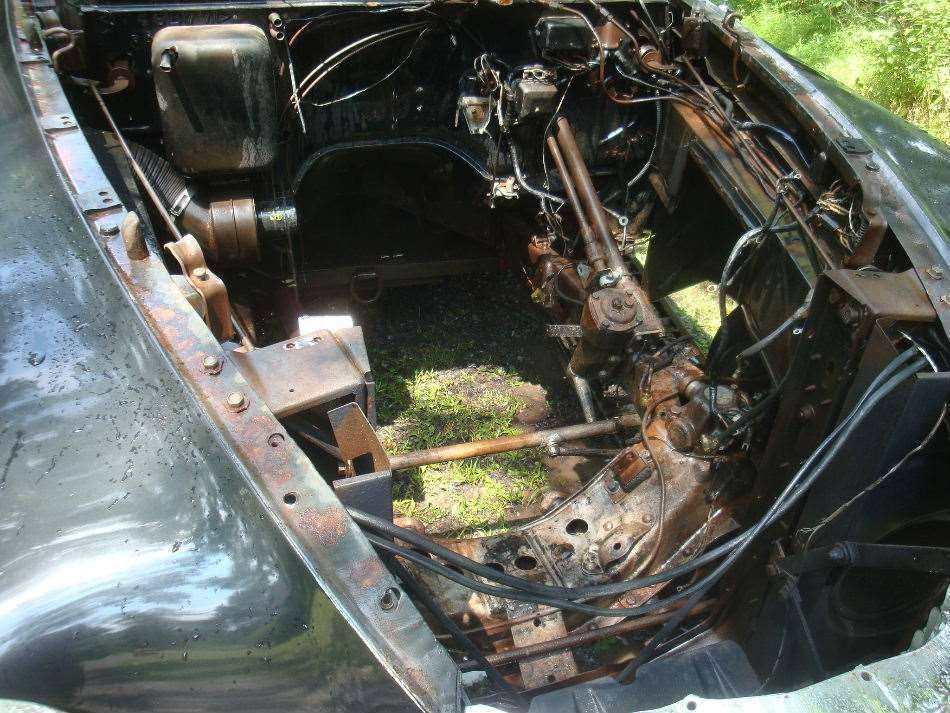 (79.82 KB) (79.82 KB)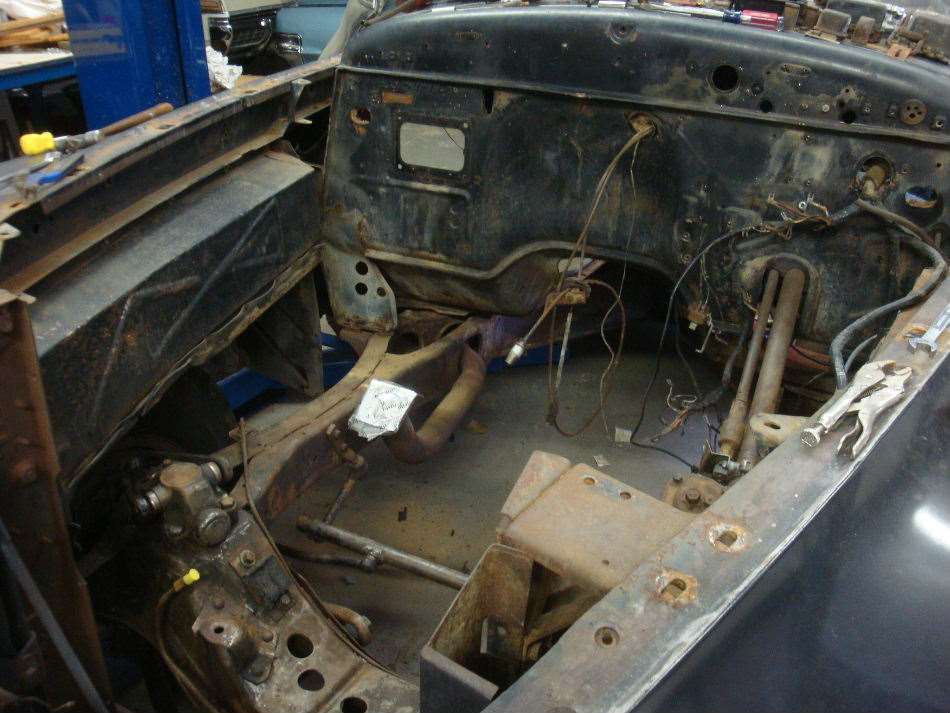 (79.20 KB) (79.20 KB)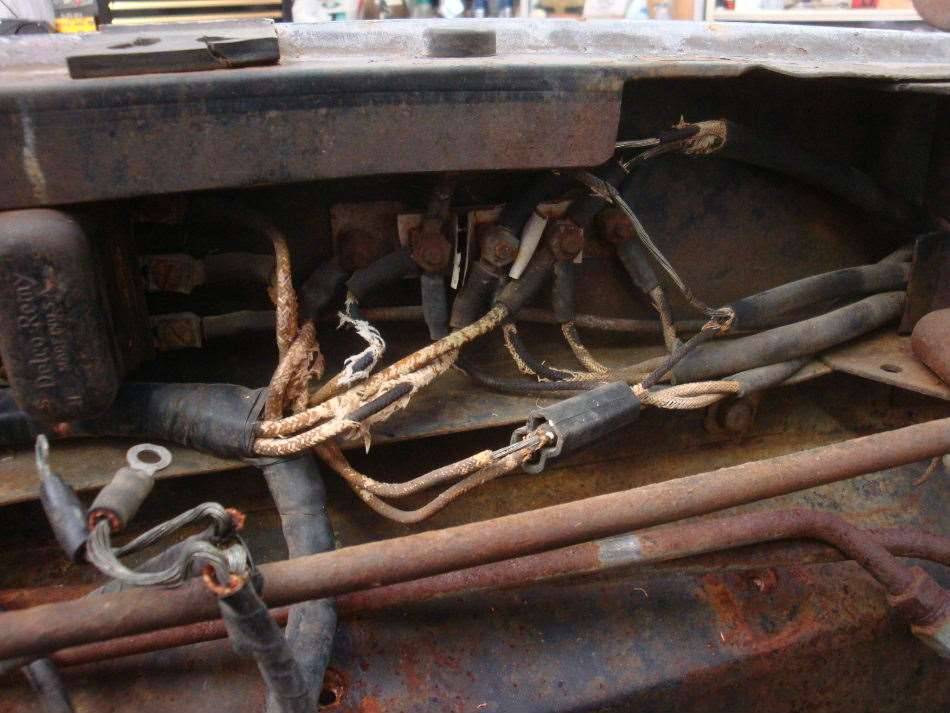 (89.04 KB) (89.04 KB) (87.36 KB) (87.36 KB)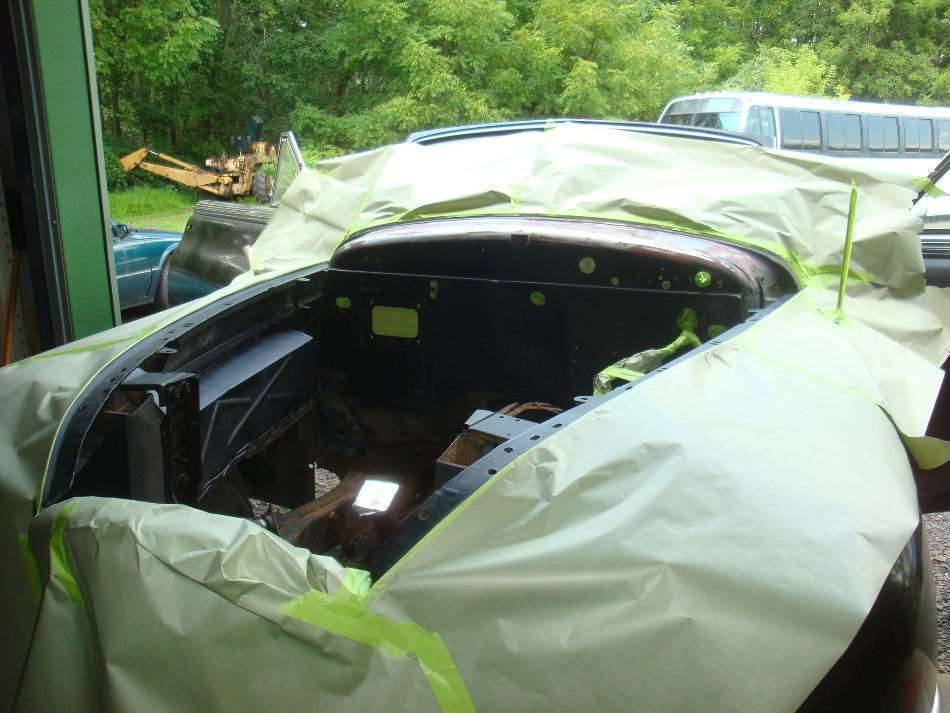 (65.04 KB) (65.04 KB)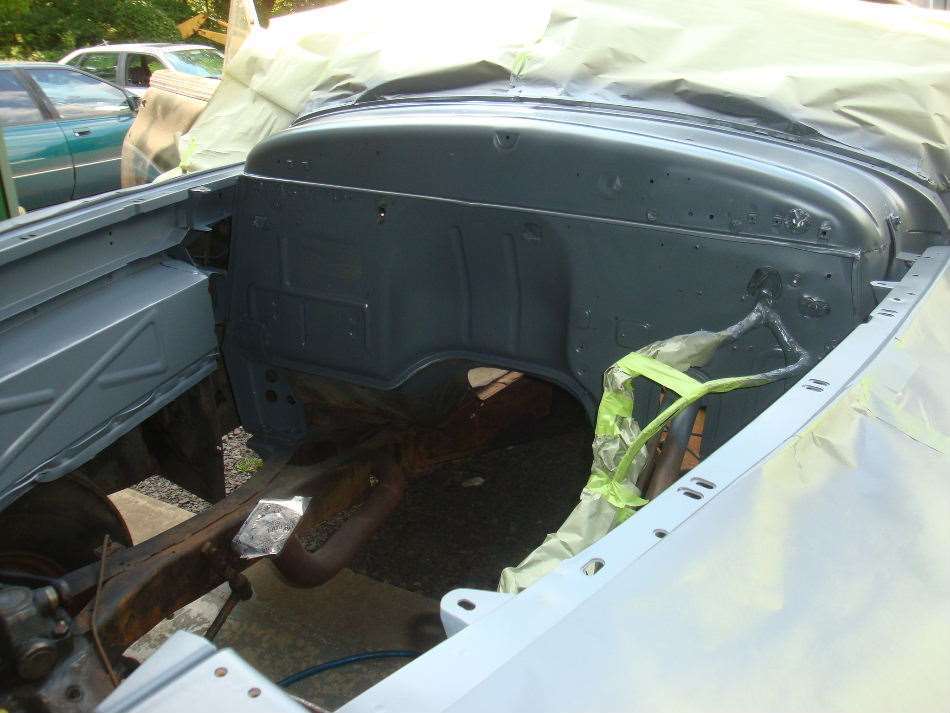 (66.52 KB) (66.52 KB)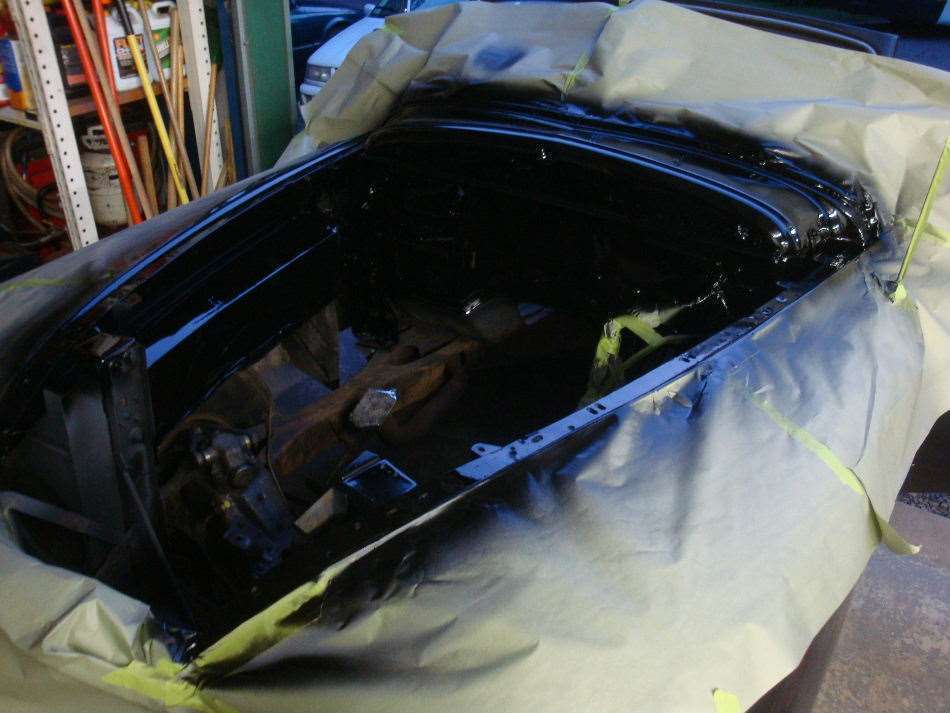 (77.18 KB) (77.18 KB)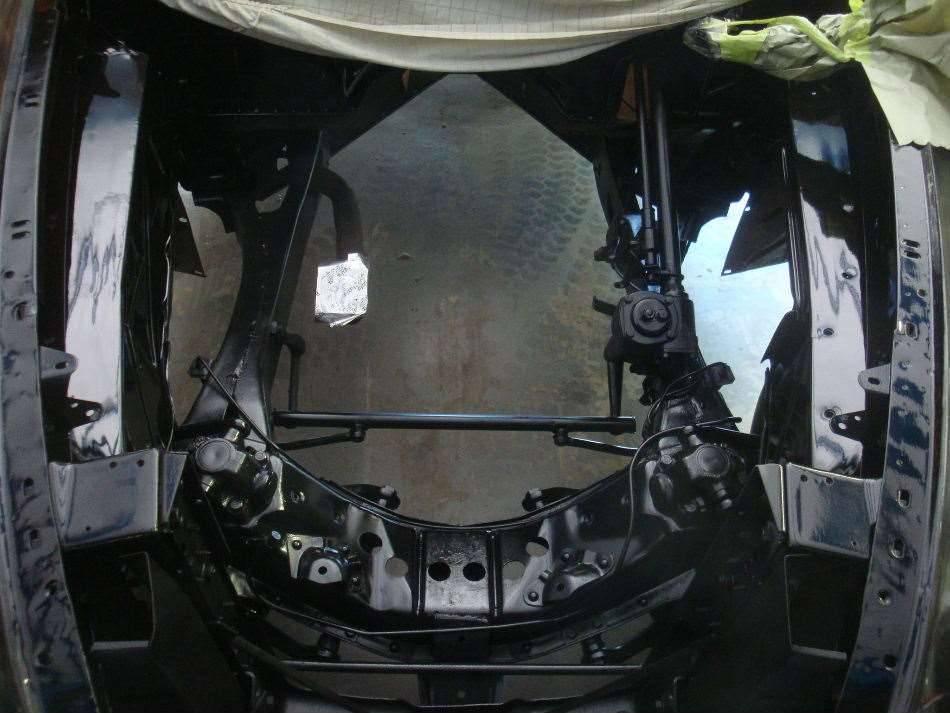 (87.95 KB) (87.95 KB)
Posted on: 2013/7/1 23:37
|
|||
|
||||
|
Re: Jeff's 48 Custom 8 Victoria Project
|
||||
|---|---|---|---|---|
|
Home away from home
|
Thanks Craig,
I started working in the used car business back in 2005 and I was using a floor jack and jackstands for all the work I did on the cars. That got old real quick. I think I bought the lift after about four months of struggling with the stands. Electric lifts are fairly cheap these days, but as you said, the main problem is that they take up a lot of space and you need at least twelve feet of ceiling height for it to fit. Jeff
Posted on: 2013/7/1 22:28
|
|||
|
||||


