|
Re: Pre-war Bolt pattern + Rim size
|
||||
|---|---|---|---|---|
|
Home away from home

|
Quote:
Thread is 9/16-18, overall length 1-1/2" with a tapered shoulder.
Posted on: 2009/12/17 23:20
|
|||
|
||||
|
Re: Pre-war Bolt pattern + Rim size
|
||||
|---|---|---|---|---|
|
Home away from home
|
Pattern is 5 bolt on a 5 inch circle with an extra 5 smaller holes to match a locating pin on the brake drums.
Posted on: 2009/12/17 22:01
|
|||
|
||||
|
Re: your experience with 6 cyl Packard engines: 110/Six/Clipper Six
|
||||
|---|---|---|---|---|
|
Home away from home
|
I can speak from experience with both a 1937 115C and a 1947 Clipper 6.
The 115C is a nice car to drive with adequate power and easy steering. Top speed is a bit limited by the numerically high rear axle ratio so anything over 50 mph starts sounding a bit busy. The 1939 to 1941 cars with overdrive would be better for highway driving. The Clipper body style is considerably heavier so tend to be underpowered with the 6. Overdrive also makes these models better on the highway. As far as service and durability is concerned the 6 is pretty much the same as the 8 used for the 120 models.
Posted on: 2009/12/11 19:16
|
|||
|
||||
|
Re: Garage comfort vs work accomplished
|
||||
|---|---|---|---|---|
|
Home away from home
|
Weather is never a factor as I have insulation and natural gas heat for winter that makes it easy to maintain an inside temperature of 15 C (60 F). The heat gets turned on low from about the end of November to sometime in March to keep a bit above freezing and turned up as needed for working.
No need for A/C since it rarely gets much above 30 C (85 F) in summer and the climate is dry.
Posted on: 2009/12/10 20:48
|
|||
|
||||
|
Re: distributor gasket
|
||||
|---|---|---|---|---|
|
Home away from home
|
Is this what you found?
I've had this for a long time and don't remember where I got it but it is very handy for cutting gaskets. Attach file:  (42.11 KB) (42.11 KB) (48.11 KB) (48.11 KB)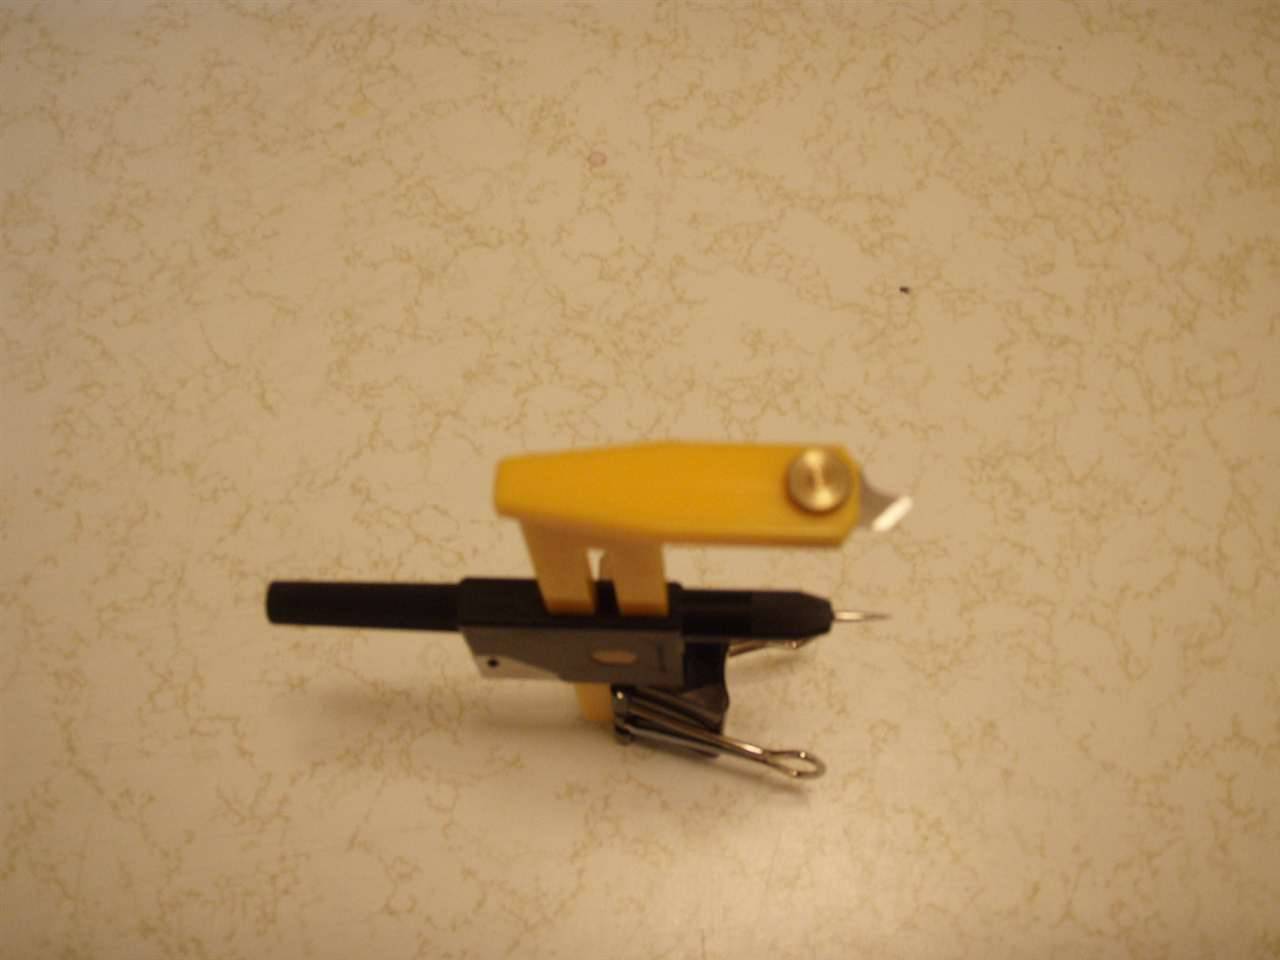
Posted on: 2009/12/10 20:27
|
|||
|
||||
|
Re: Rear Gravel to Bumper rubber strip 22nd Series
|
||||
|---|---|---|---|---|
|
Home away from home
|
Quote:
The original material used for a seal on the fender skirts was called hood lace. It was riveted on and is a woven material, 3/4" wide by 1/8" thick. Available from Restoration Specialties. Attach file: (71.44 KB)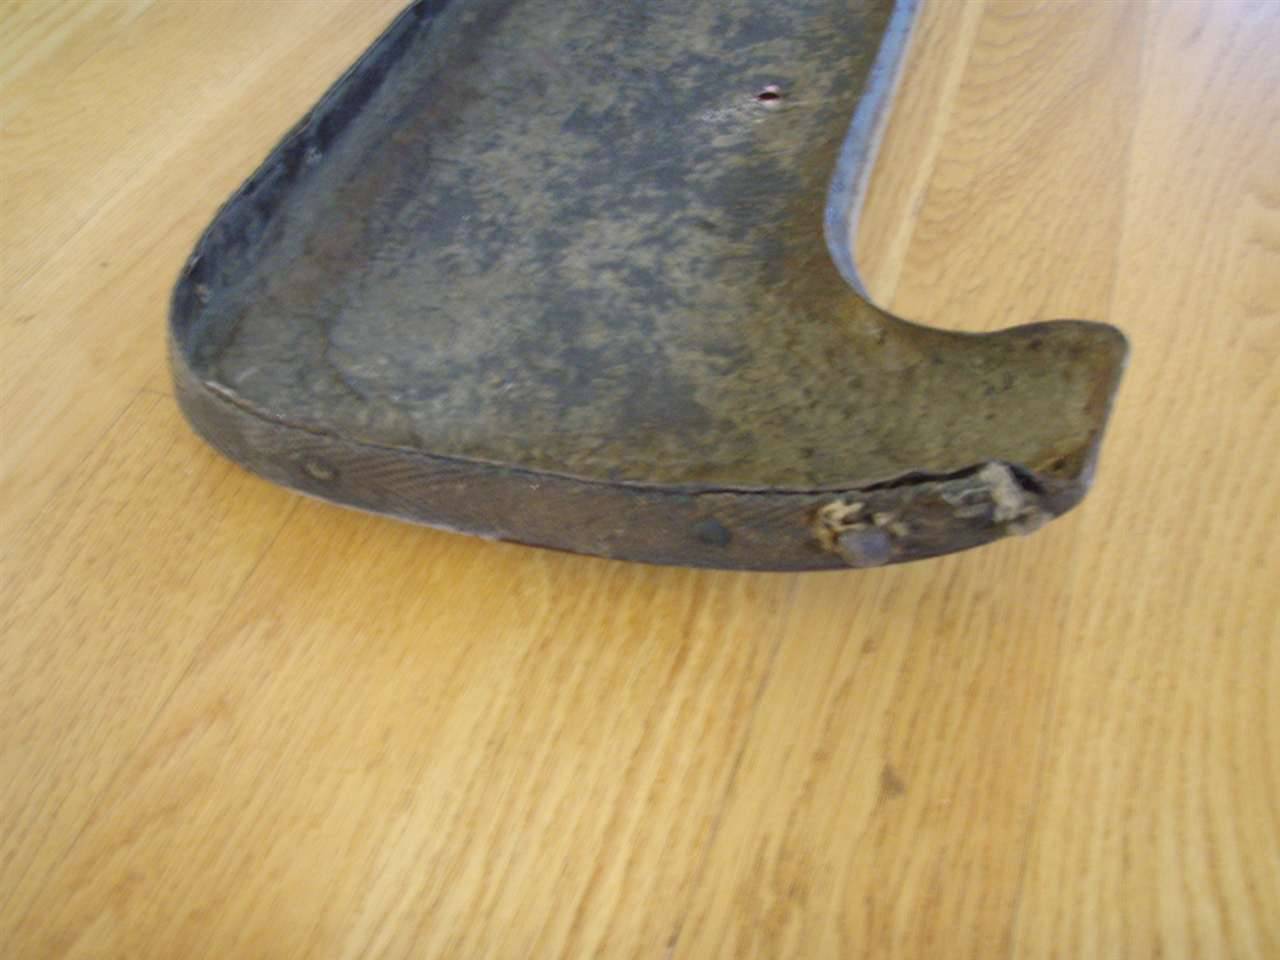 (69.68 KB) (69.68 KB)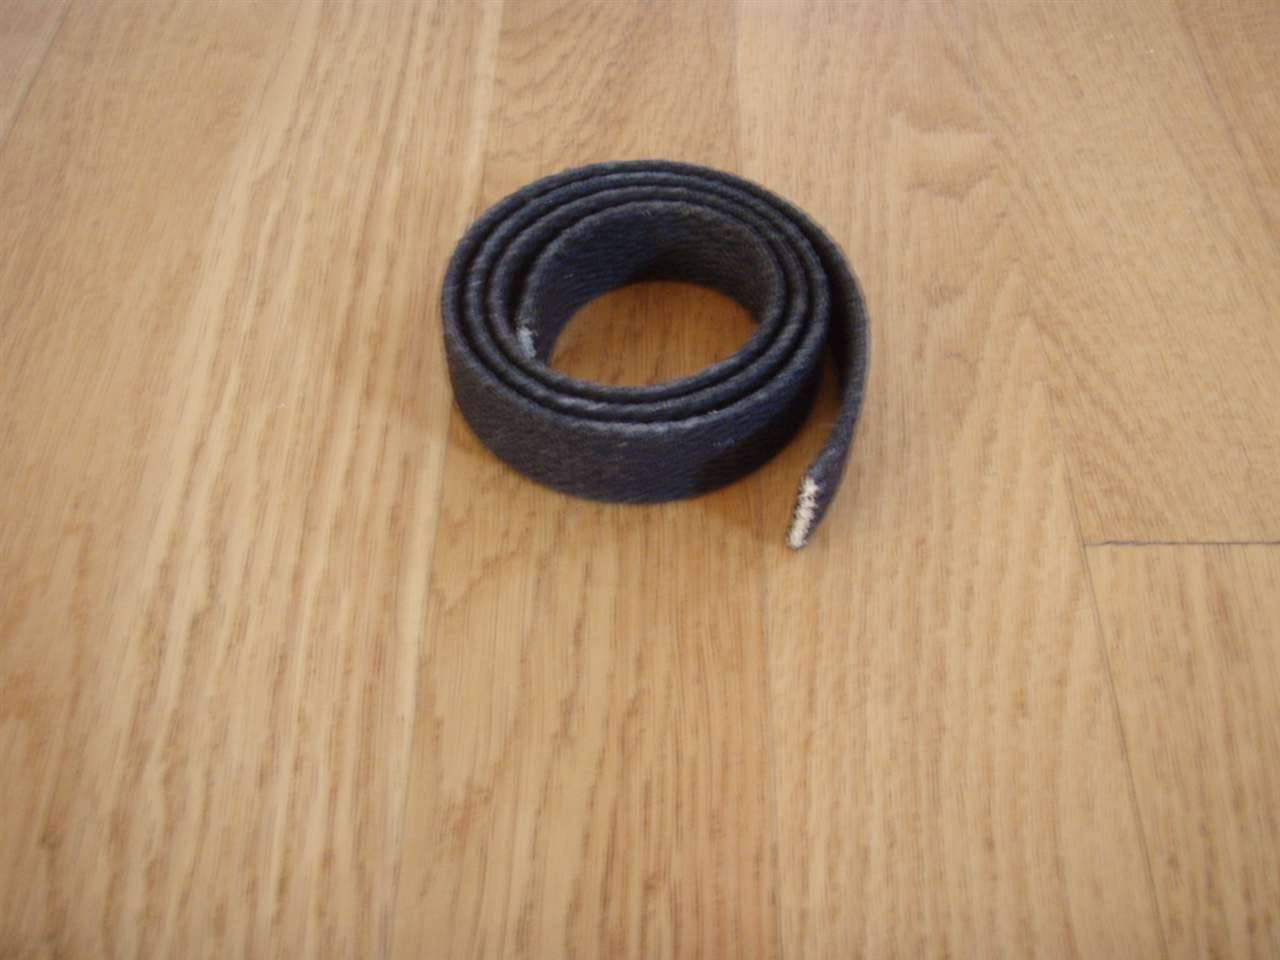
Posted on: 2009/12/8 17:08
|
|||
|
||||
|
Re: 1936 Junior 120B
|
||||
|---|---|---|---|---|
|
Home away from home
|
Quote:
I agree that using the transmission as a slide hammer seems a bit brutal but it sounds like the bearing is stuck pretty firmly on the input shaft. I was thinking that this might be a way to break it loose. A gentler method would be to get 4 lengths of 1/2" threaded rod, coarse thread and about a foot long and thread them into the bolt holes in the bell housing with 2 nuts on each rod between the bell housing and transmission. One of the nuts would be used next to the bell housing to lock the rod in place and the other used next to the transmission to apply tension. Gradually tightening each of the 4 in sequence might provide enough force to pull the input shaft free from the bearing.
Posted on: 2009/12/8 1:58
|
|||
|
||||
|
Re: 1936 Junior 120B
|
||||
|---|---|---|---|---|
|
Home away from home
|
Suggest that you soak the t/o bearing, spline shaft and pilot bearing with PB Blaster or other and try moving the transmission back and forth to free up the t/o bearing sleeve and the clutch disc splines, then using the entire transmission as a slide hammer to get the pilot bearing off the end of the input shaft.
Posted on: 2009/12/7 21:39
|
|||
|
||||
|
Re: Hood to Cowl seal 22nd Series
|
||||
|---|---|---|---|---|
|
Home away from home
|
I believe that the seal for 22nd and 23rd series cars is attached to the cowl with weatherstrip cement.
Better than drilling holes.
Posted on: 2009/12/7 16:37
|
|||
|
||||
|
Re: 1936 Junior 120B
|
||||
|---|---|---|---|---|
|
Home away from home
|
Is the throwout bearing what you are talking about? It slides on the housing at the front of the transmission and has a small spring that pulls it back when the clutch is released. The pictures show it in two different positions.
If not this one, then it is the pilot bearing that Eric mentioned. Attach file: (70.10 KB)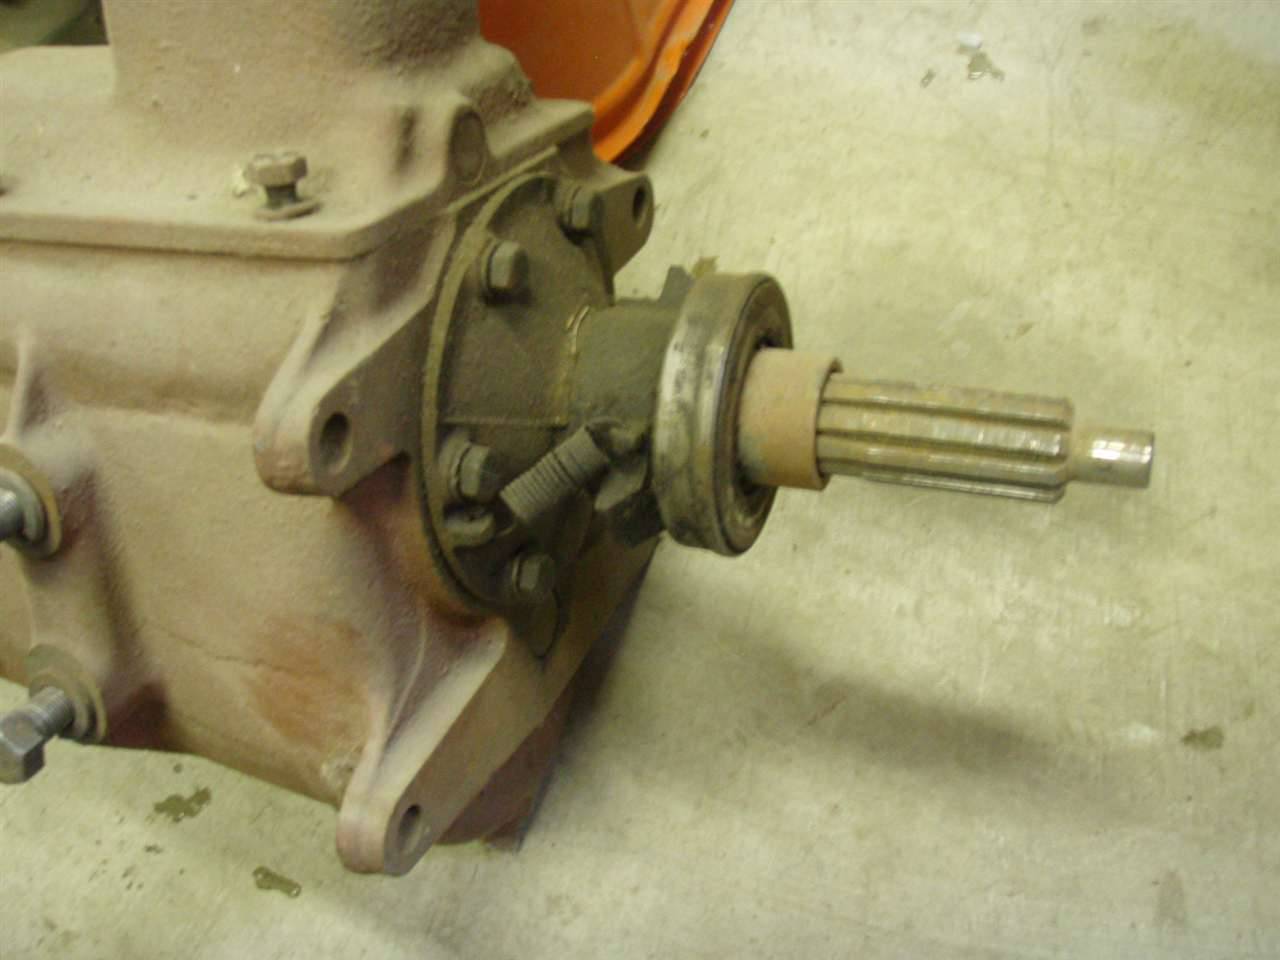 (67.22 KB) (67.22 KB)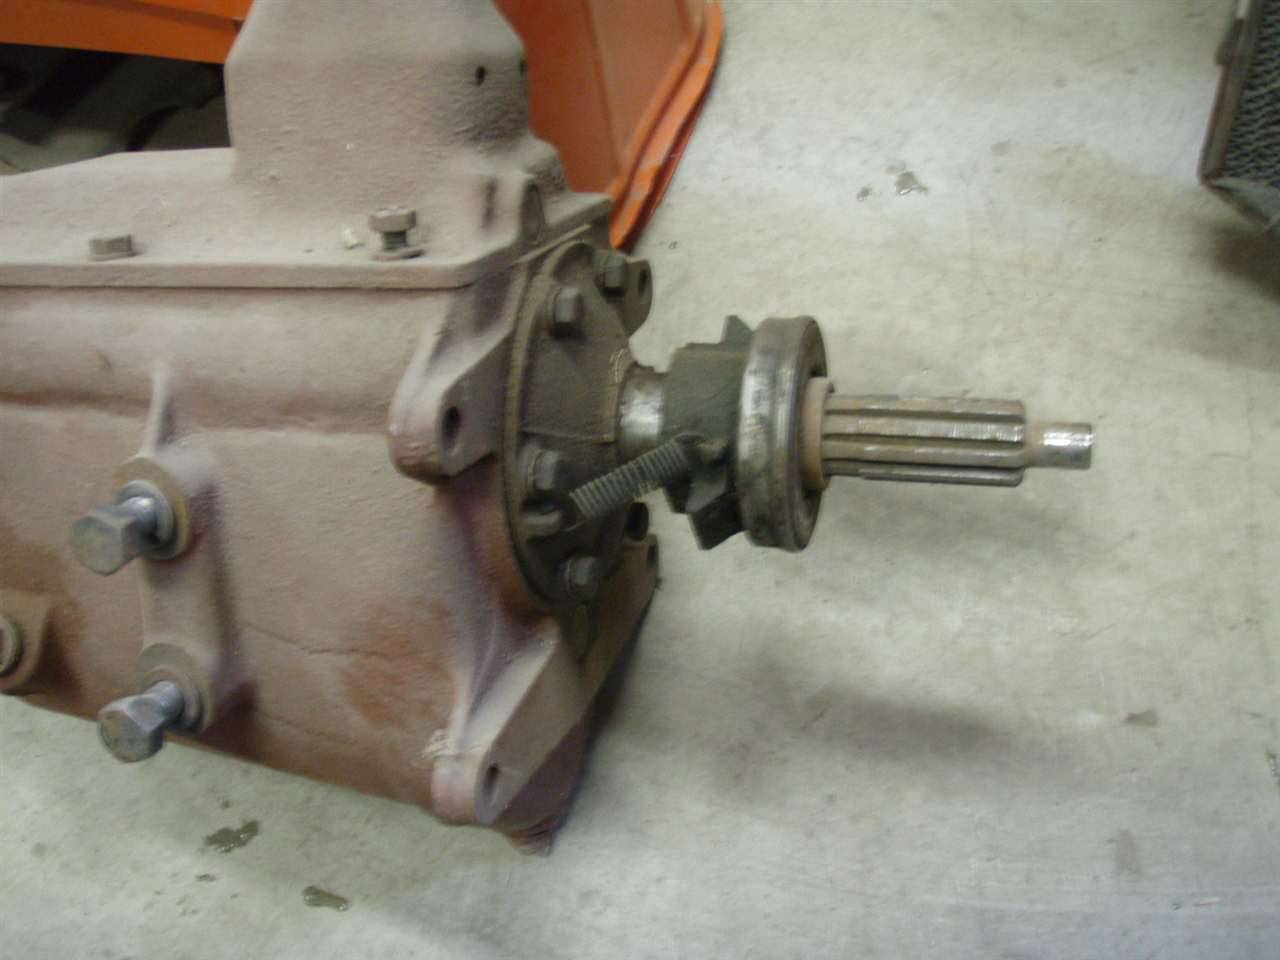
Posted on: 2009/12/7 16:34
|
|||
|
||||


.jpg")


