|
Re: Vent Window Nylon Repro Project
|
||||
|---|---|---|---|---|
|
Not too shy to talk

|
Great timing! I've been fretting for the last year just how to solve this very problem. Thank you for this project. I just ordered 2 pairs.
Posted on: 2022/11/18 12:22
|
|||
|
||||
|
Re: Modification to OEM fender
|
||||
|---|---|---|---|---|
|
Not too shy to talk
|
Thanks for the response, I can now remove the "struts" with a bit less trepidation. The collective knowledge of this community never ceases to amaze.
Posted on: 2022/3/4 20:23
|
|||
|
||||
|
Modification to OEM fender
|
||||
|---|---|---|---|---|
|
Not too shy to talk
|
A number of years back I was able to secure a pair of New Old Stock fenders which have since been cleaned up and installed onto my "in work" 55 400. I happened to notice (after the car was painted) that there is some sheet metal remaining in the opening for the turnsignal lamp assembly.
Before I get the grinder out to cut out the metal strip, I wished to solicit opinion on my course of action. I see no way to install the lamp assembly with the metal strip in place. The fender does appear to be for a different model. I' showing in yellow the approximate needed cut line. Thoughts? Attach file:  IMG_2574a.jpg (14.07 KB) IMG_2574a.jpg (14.07 KB)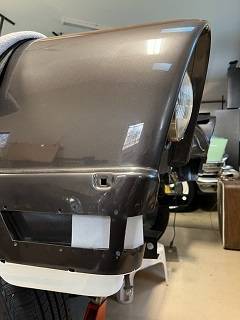 MarkUp26feb22a.jpg (13.51 KB) MarkUp26feb22a.jpg (13.51 KB)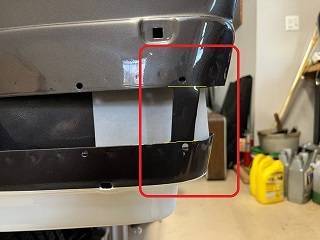
Posted on: 2022/2/26 21:59
|
|||
|
||||
|
Re: Unknown Transmission bracket
|
||||
|---|---|---|---|---|
|
Not too shy to talk
|
Thank you Sir: That was it.
The smaller holes align exactly with a muffler clamp, and comparing with the other car, aligns with a joint in the exhaust pipe. I was unable to observe that at first because the darn exhaust pipe was in the way. 
Posted on: 2021/9/30 12:34
|
|||
|
||||
|
Unknown Transmission bracket
|
||||
|---|---|---|---|---|
|
Not too shy to talk
|
I’m attempting to reinstall my engine/transmission assembly back into the car (55 400) and I’ve been gathering up the parts removed some 7 years ago. Not everything was well documented. I successfully located the gear selector bracket that attaches to the transmission and the two associated ½ x 20 x ½ inch bolts. But in the bag with the two bolts was another mystery bracket shown below.
No part number markings but with mountings holes that appear to the match up with the gear selector bracket. Question: Any one recognize this bracket and what is its function. The two mounting bolts are short, but I can barely mount the two brackets together onto the transmission. Is this correct? Once again for any assistance. Attach file: bracket.jpg (12.37 KB)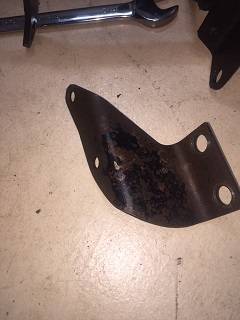 twoBrackets.jpg (12.88 KB) twoBrackets.jpg (12.88 KB)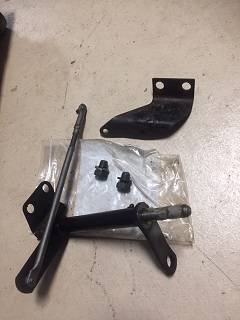 installedAssembly.jpg (13.52 KB) installedAssembly.jpg (13.52 KB)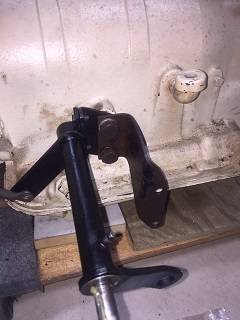
Posted on: 2021/9/30 10:26
|
|||
|
||||
|
Re: 1955-56 Factory Air Conditioning
|
||||
|---|---|---|---|---|
|
Not too shy to talk
|
Howard:
I have another question for you. I purchase the condenser called out in your article, 16x22 from Nostalgic Air. My 16x22 seems to be a bit bigger than the one have pictured. It appears the 16x20 may fit better. If I was correct in my attempt in reverse Engineering your design (which I should complement you on, a nice implementation of new technology into the classic form); it appears you kicked the positioning of the condenser over about 2 inches and slightly up, to allow access for the Freon connections which can interfere with the horn locations. The unit I have is just about the same width (approx. 23") as the original condenser and does not permit the convenience of a shift. I'm looking to exchange for a 16x20 (part no. 54-1620) unit to give me some working space. Can I ask you what considerations you made in positioning the condenser both to the right and slightly up? Everything appears to fit nicely. Fortunately I have access to another 55, with air, where I have been able to make measurement. I'll attempt to attach a picture showing my 16x22 next to the original condenser. Once again thanks for your help. Dave Attach file: (206.03 KB)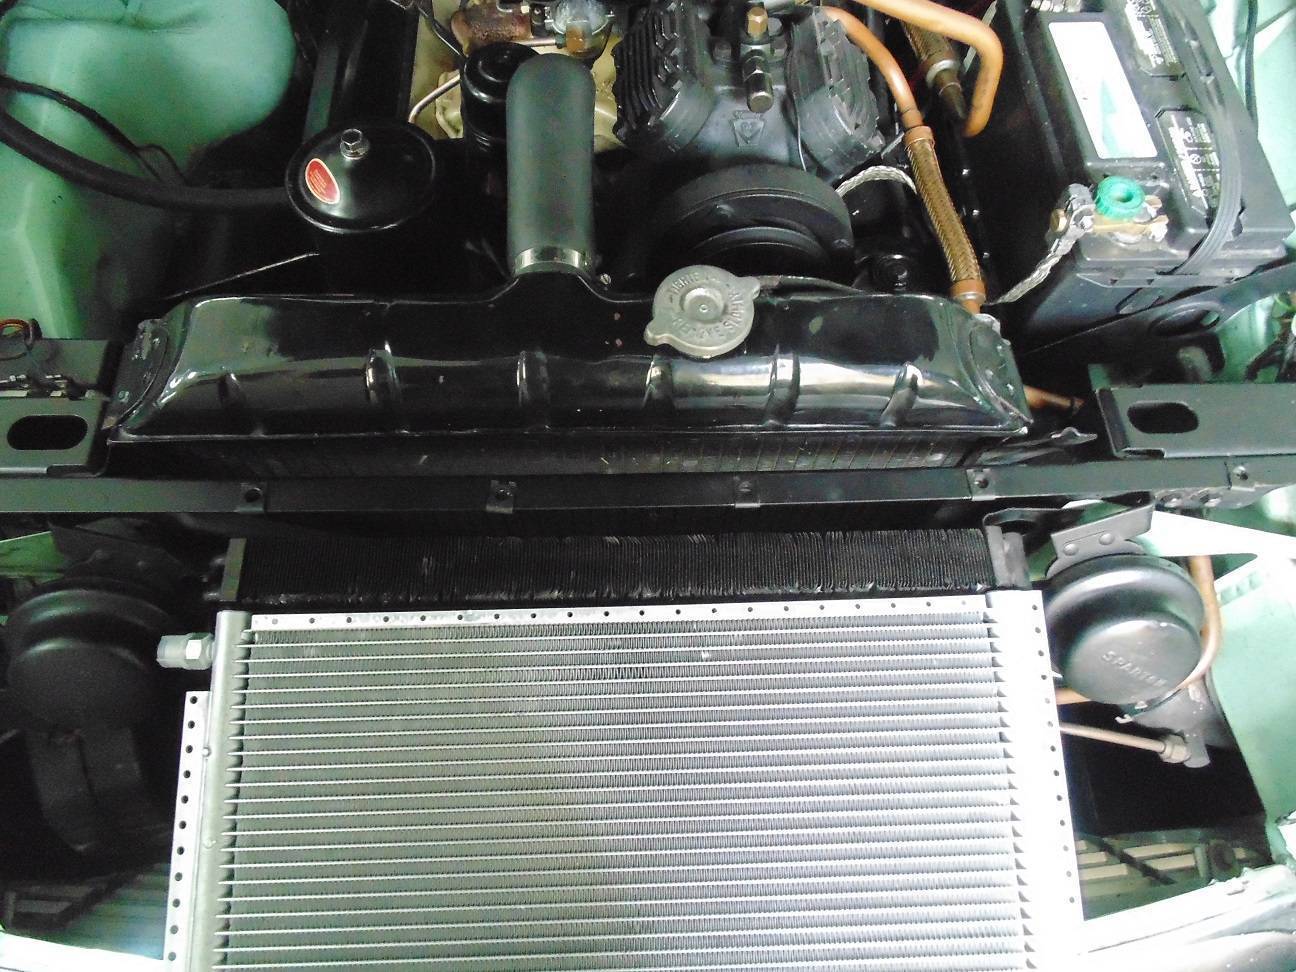
Posted on: 2019/9/8 21:00
|
|||
|
||||
|
Re: 1955-56 Factory Air Conditioning
|
||||
|---|---|---|---|---|
|
Not too shy to talk
|
Thanks for the prompt reply - right on the money. I appreciate the extra photos which are very helpful. I mounted the compressor on the right side of the engine. I assume that I can just turn the condenser 180 degrees on the vertical axis to have the plumbing come out on the passenger (right) side of the car (but reversing the airflow through the condenser).
I'll be installing an underdash unit, hopefully simplifying my update. Thanks for the help.
Posted on: 2019/7/26 15:48
|
|||
|
||||
|
Re: 1955-56 Factory Air Conditioning
|
||||
|---|---|---|---|---|
|
Not too shy to talk
|
Howard:
Noting that this thread started some years ago, under the heading of "had I known then what I know now"; do you still recommend the 16x22 condenser from Nostalgic Air that you so nicely modified to fit in message #16. I am looking to replicate your solution. If the dimensions of the mounting bracket still exist I would be very interested. You do nice work. Thanks Dave 1955 400
Posted on: 2019/7/25 21:34
|
|||
|
||||
|
Re: Torque Converter Installatiomn
|
||||
|---|---|---|---|---|
|
Not too shy to talk
|
Mr. Gearhead:
I ran into the same issue and just was not able to get everything aligned at the right moment. What finally worked for me was literally standing the transmission on its tail (hopefully all fluids have been drained) and slowly dropping the torque converter onto the transmission into position. By positioning gravity forces along the axis of the transmission it allowed the gears to align themselves. But if you know what you are doing, performing such contortions are probably not necessary. Good Luck.
Posted on: 2018/10/28 11:14
|
|||
|
||||
|
Re: Front Fender/Door Weather-stripping
|
||||
|---|---|---|---|---|
|
Not too shy to talk
|
Thank You Gentlemen; Great information. It is not only helpful to know what, but also to know why.
dcc
Posted on: 2018/6/30 6:15
|
|||
|
||||


