|
Re: 55 400 instrument performance
|
||||
|---|---|---|---|---|
|
Home away from home

|
BTW- we still have a 4gc, a roll of green embossed vinyl, stainless door edge guards, and some other trim and clips and the oil bath. If anyone needs will let go for reasonable offer or:as I have seen here- will ship all except carb and vinyl to anyone who pays shipping and makes a donation to the web page operator. I have considerable $ in the carb and vinyl so would not be giving these away.
Posted on: 2022/6/4 13:45
|
|||
|
||||
|
Re: 55 400 instrument performance
|
||||
|---|---|---|---|---|
|
Home away from home
|
I used a solid state regulator for a 55 clipper custom. It worked quite well. It involved using one made for reverse polarity and was mounted on a heat sink . For a senior you may need two due to 3 gauges, heat etc. it never failed when we owned it however it will be another thing to blow when an unaware reverses polarity on a jump start or charge. Look up # for 12- 5 v regulator and rev polarity one. Different part #.
Posted on: 2022/6/4 13:38
|
|||
|
||||
|
Re: 55 400 lower windshield trim
|
||||
|---|---|---|---|---|
|
Home away from home
|
This seems to be a recurring topic. I will post what worked for us again as it has seen years since last time. Our windshield though installed with new gasket with the trim in the trunk and was sagging and was way low in the opening. I realize the clips in the bulletin attempt to pull the lower portion of the glass in but this was not all that was needed. Rubber “blocks” were cut as spacers to rest in the weather strip channel from 1/4 inch thick rubber sheet so they were 1/4x1/4x an inch and a half and were used to raise the glass in the opening. All this was done with the glass installed! With suction cups and hand pressure slowly easing the glass up until a spacer could be inserted here and there in several places along the bottom edge. This then made the whole glass fit the opening better and it seemed to sit rearward more on the bottom edge. Then viola- the curves and contours of the mouldings esp in the lower corners fit better and were able to be inserted in the rubber slot in the weatherstrip. If you have a gap between the stainless trim and the roof this would indicate that the glass is very low and your last pic would seem to show yours is by the amount of pinchweld visible above the weatherstrip rubber along the roof line. The trim was “roped in” with fine gauge electric insulated wire and was still a bear but was doable. The process took WEEKS to accomplish. I hope your adhesive does not create a mess in the summer sun. This is just what worked here. May not be everyone’s problem. Good luck.
Posted on: 2022/1/28 14:44
|
|||
|
||||
|
Re: Running rough at cold start
|
||||
|---|---|---|---|---|
|
Home away from home
|
Yes. All above are correct. But.... If wild choke settings for lean and rich don’t help And all secondary spark possibilities are eliminated - this sounds to me (vibration meaning one or two holes) like one or two cyls have very different requirements for cold start mixture from all others. This would indicate lean (vacuum leak) at manifold near the dead holes cold or very different compression on one or two compared to the rest. Good luck. Keep us posted on the root cause. Hope she was not sold for this issue. Someone else chased and could not rectify this?
Posted on: 2021/11/9 14:33
|
|||
|
||||
|
Re: Stewart
|
||||
|---|---|---|---|---|
|
Home away from home
|
Looking good. On the cluster-have you had one of the speedo rebuilt or tested? Have you plans to replace the gauge voltage regulator with a new original style or a solid state? These are very hard to access after all is installed and the car is back on the road. If your orig speedo ad the needle broken it may have had the dreaded needle bounce these are prone to. Test your replacement with a cordless drill and a full length speedo cable to check for bounce. Pay careful attention to dust,rust, dried lube on the odometer gears. Clean all with wd40 and tooth brush carefully without staining odometer barrels.
Posted on: 2021/8/2 11:21
|
|||
|
||||
|
Re: Rubber valve stems
|
||||
|---|---|---|---|---|
|
Home away from home
|
I was sent these by the tire supplier for the radials going on a 55 at the time. They were wrong for those rims. Did Packard have two sizes in 55? A running change ? They have an Argo # on bottom and a tr#. someone in an above post mentioned 5/8 or .625 size hole. What are the exact hole sizes because these measured with a dial caliper seem to be .590 at the sealing surface and would be loose in that hole. Is I understand it- tubeless stems need to be lubed up and pulled in the hole with a snug fit to create the seal. These are about 1 inch sealing surface to tip. I would donate to anyone who would pay shipping here in the US. I am not able to ship outside the continuous 48. Pics won’t seem to upload
Attach file:  FED25EC6-B810-430C-BB07-70324587C3D5.jpeg (175.43 KB) FED25EC6-B810-430C-BB07-70324587C3D5.jpeg (175.43 KB)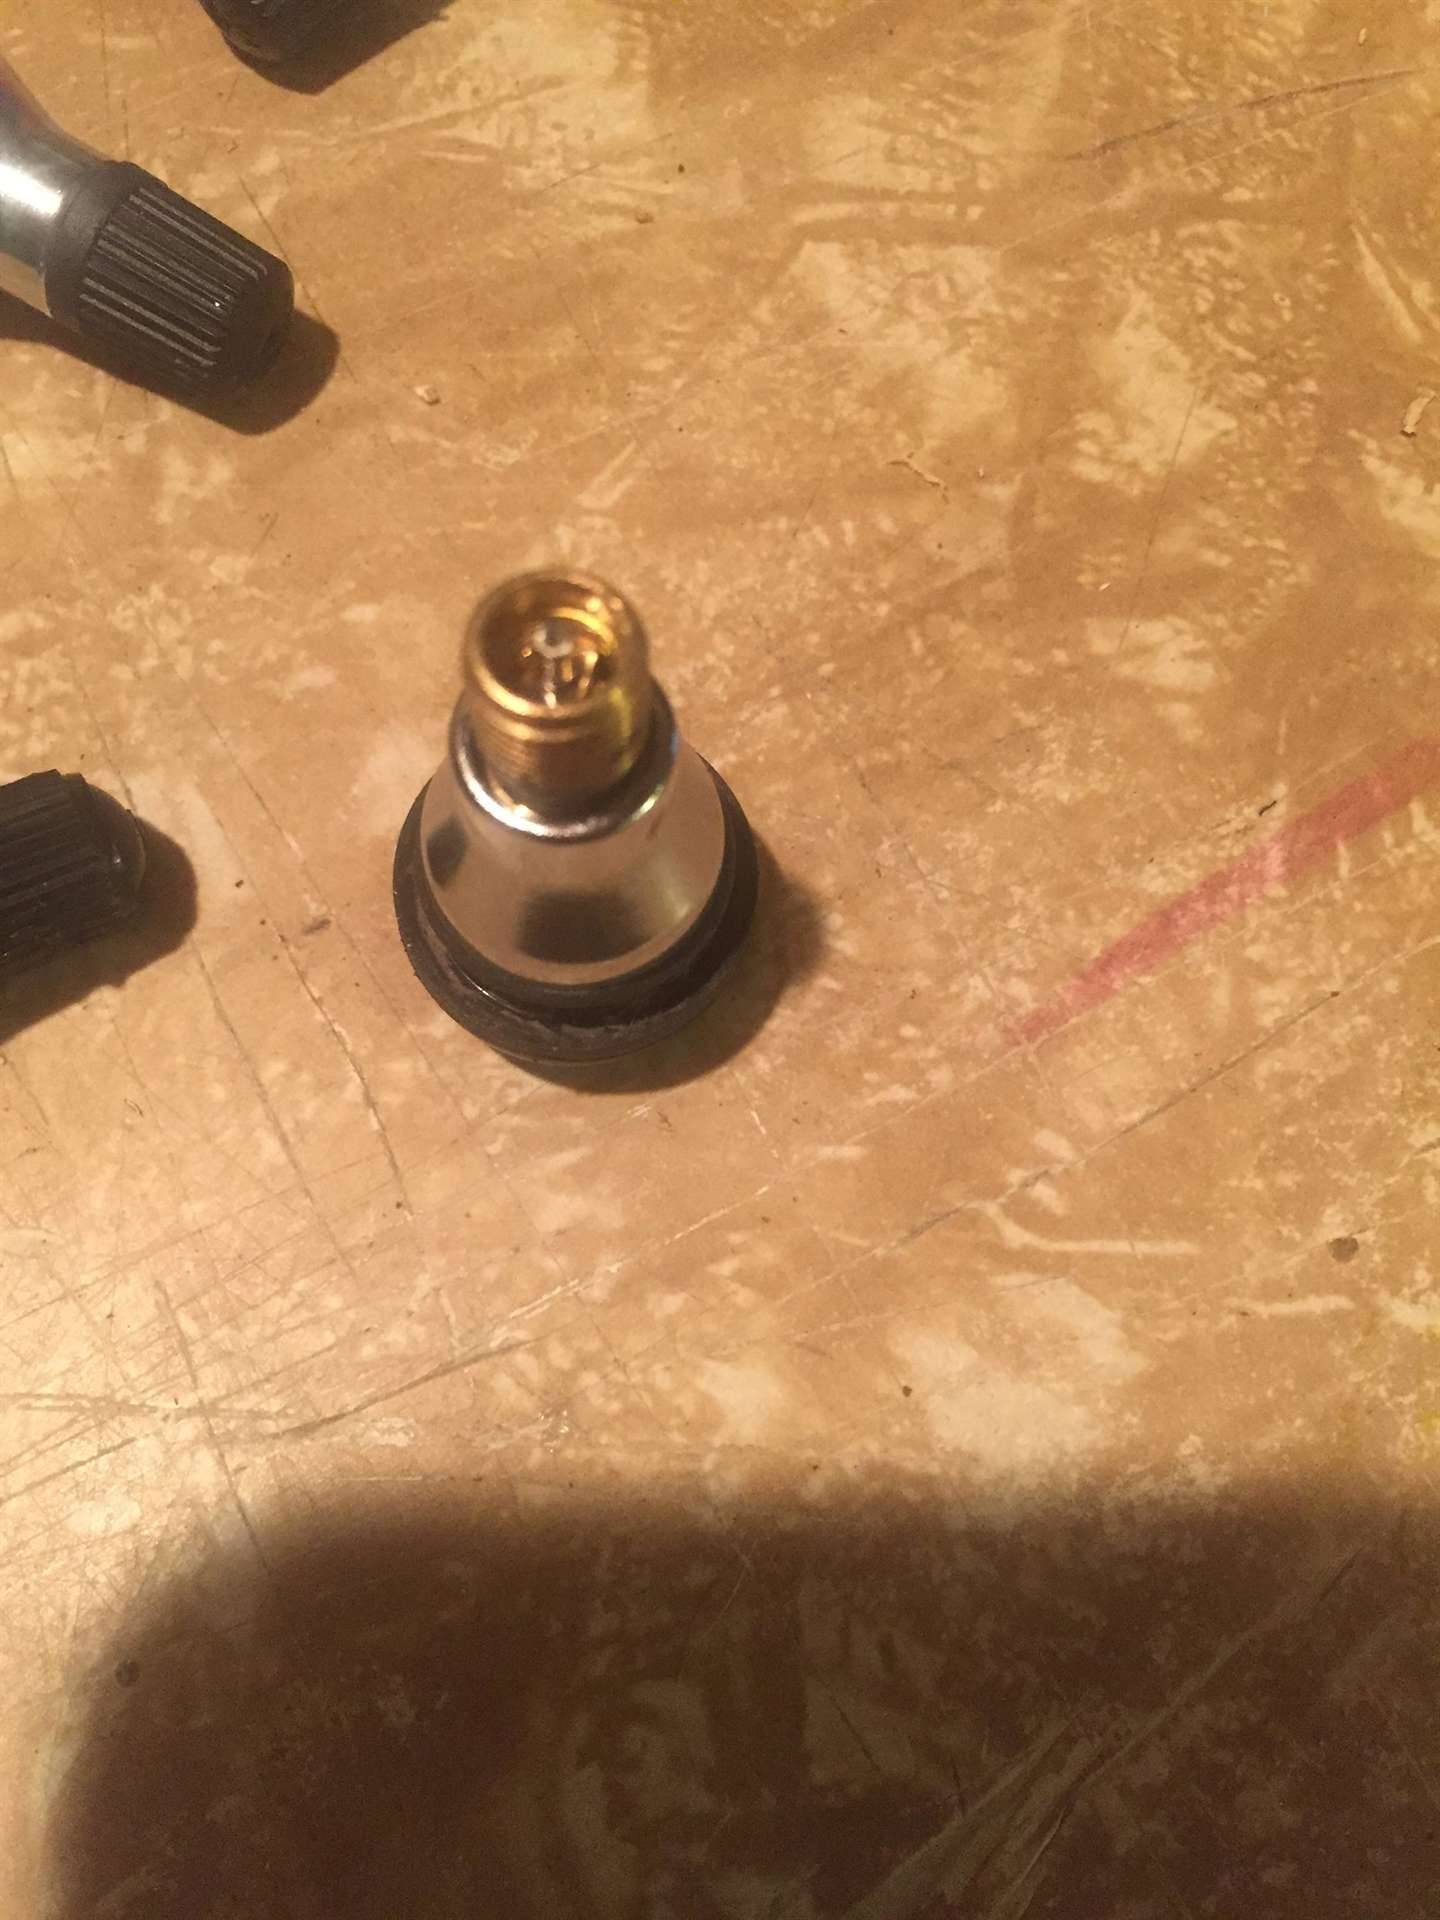
Posted on: 2021/7/17 10:12
|
|||
|
||||
|
Re: Non Packard transmission replacements
|
||||
|---|---|---|---|---|
|
Home away from home
|
BTW. The crank adapter on that kit looks like it is an inch and a half or two inches deep. As I recall the V8 engine has a deep flange cast into it as part of the bell housing and this spacer depth required due to this spacing of a GM (or any) trans further away from rear of crank. As such-any rust,nicks,debris,bending,or out of true of the Packard crank flange will be multiplied by the length of this spacer. Another wobble, vibration threat.
Posted on: 2021/7/4 18:30
|
|||
|
||||
|
Re: Stewart's 1955 Packard 400
|
||||
|---|---|---|---|---|
|
Home away from home
|
Mmm. Sounds fishy. Water should flow through the core just by gravity(pouring). Either it’s clogged or has been plugged intentionally. This is not the way to test for leak. If water has been verified to flow pouring through, the unit would have a plug on one end and the other a hose adapter(s) attached where pressurized air from your compressor (low press) about 10-12 lb applied and the unit submerged in a lg plastic storage bin filled with water. This is in fact the way radiator shops tested whole rads for leaks-in their lg tank. Good luck.
Posted on: 2021/7/4 18:17
|
|||
|
||||
|
Re: Non Packard transmission replacements
|
||||
|---|---|---|---|---|
|
Home away from home
|
Just a few words on transmission to centerline of crankshaft alignment and vibration/pump, bushing failure as I see it was mentioned a few times in multiple posts above. This info may be known by many car enthusiasts or may be new info to some but is important to understand.
The centerline of the trans input/converter/crank is all indexed off the Dowel Pins on GM products (others as well) not the bolts or bolt holes. There is also a “pilot” surface machined into the back of the crank concentric with its rotation although it is seldom referenced and not called a pilot bushing or bearing like a manual trans. This is a one to two thou slip fit for the large center nub on the front of the converter, and the dowel pins are a snug interference fit to the trans case. The center of the crank and trans are indexed in space vertically and horizontally within a thou or two so as to not have misalignment vibrations from the factory and to allow service replacement trans to be installed without these issues. During service-engaging all three steps of the converter and pushing it back an additional quarter inch or 3/8s allows the trans to center on the dowels, and with the rear of the converter centered on the shaft/pump/seal, be pushed forward to fit the front nub nested in the crank. This is what aligns the converter to run true to crank and trans! Not the converter bolts. I would be suspect of any “kit” that does not have snug fit dowel pins on the adaptor plate and is not CNc or quality controlled to centerline from them on each kit .Looking at the pic of the GM kit on the second link- it seems to have an alignment cup machined in the crank adapter but relying on the bolts to center it concentric seems to be playing Russian roulette also. I would be checking it for spec on the converter snout before installing, then performing a runout check to its alignment bore inner surface with a dial indicator with that crank adapter installed while spinning the crank by hand, and checking all centerline to dowel alignment on these parts. There are other things that affect crank centerline such as remachining crank bore for spun bearing (is raises the centerline) and others I will not get into here. Do a search for “offset dowel pins” and measuring manual trans input shaft to crank runout and you will get more info! Good luck.
Posted on: 2021/7/2 12:17
|
|||
|
||||
|
Re: Brake Conversion
|
||||
|---|---|---|---|---|
|
Home away from home
|
What master cyl are you using? What pedal ratio and or power assist?
Posted on: 2021/6/29 16:26
|
|||
|
||||


