|
Re: Front Seat Floor Panel Wings
|
||||
|---|---|---|---|---|
|
Not too shy to talk
|
Thanks for the info. That makes sense - I thought it looked like air vents. I wasn't aware there was an under seat blower.
JB
Posted on: 2021/1/18 21:44
|
|||
|
||||
|
Front Seat Floor Panel Wings
|
||||
|---|---|---|---|---|
|
Not too shy to talk
|
Quick update on my '52 300 before the questions. The front and rear suspension has been stripped and rebuilt. As has the whole brake system. The engine has been given an initial once over and is up and running relatively smoothly (although two of the freeze plugs rusted through, so they all got replaced). It still has some lifter noise, but I'm hoping MMO will take care of that - the engine has been run for less than an hour at this point after sitting idle for a long time. The car now stops and drives - and can drive out of the garage under its own power.
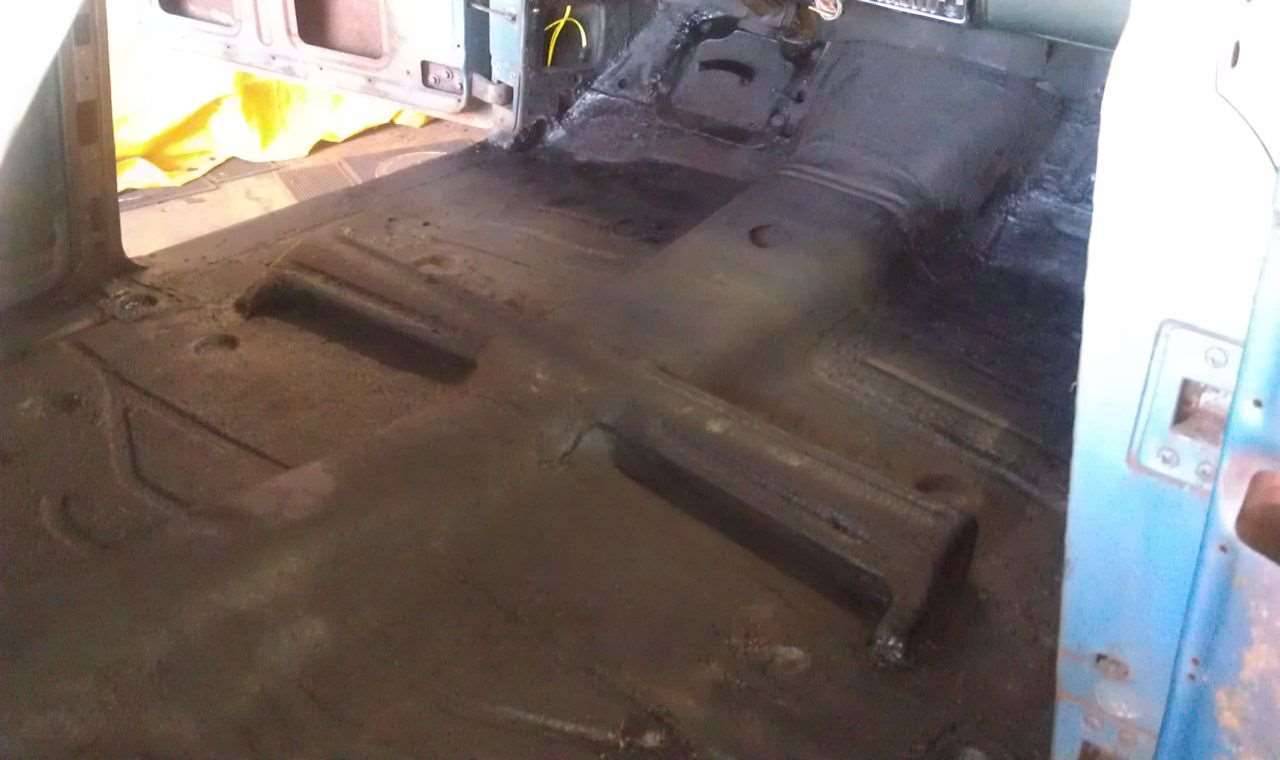
I'm just about to start fixing the rusted out floor pans. I've removed the front seats, which I've concluded aren't original to this car, as the bolt pattern doesn't match the original holes. Under the front seat were the remnants of what appear to be two metal wings, coming off of the transfer tunnel. You can see them here in BigKev's picture. In my car they appear to have been cut off about 6" from the tunnel. Seat Wings Image I'm not sure what these are for. Are they structural to the real front seat? Looking at the limited replacement floor panels that are available, they don't appear to include this part. Not knowing what it actually is and does, I'm not sure if I need to fabricate it or not. Any help here would be greatly appreciated. JB
Posted on: 2021/1/17 18:17
|
|||
|
||||
|
Re: Easamatic Rebuild Question
|
||||
|---|---|---|---|---|
|
Not too shy to talk
|
Thanks for the advice. Mine was definitely not returning in a couple of seconds. I took it back apart - it wasn't the leather sealed vacuum piston, but the small hydraulic piston. It was very hard to move back and forth.
Looks like I didn't lubricate it enough with brake fluid during the reassembly. After a liberal application of brake fluid to the cup seal, it started to move freely. Once re-assembled, I can push it in and get a strong puff of air of the outlet and then it returns back within two seconds with an audible in-rush of air as well. JB
Posted on: 2020/11/23 18:45
|
|||
|
||||
|
Re: Easamatic Rebuild Question
|
||||
|---|---|---|---|---|
|
Not too shy to talk
|
I don't think the pedal arm is binding. I get about the same response when I push it in by hand.
I could press the diaphragm in by hand when the unit was partially disassembled. But it didn't pop back up easily then. I did lubricate the inside of the piston housing, but perhaps I didn't do it enough? I get about the same experience as in this rebuild video (around the 28m 15s mark: https://www.youtube.com/watch?v=LKbnYmPj9a8&t=1695s JB
Posted on: 2020/11/22 19:44
|
|||
|
||||
|
Easamatic Rebuild Question
|
||||
|---|---|---|---|---|
|
Not too shy to talk
|
I have disassembled and rebuilt the Easamatic unit on my '52 300, thanks to the useful guides on this site, and I'm getting ready to re-install it. The service manual says after pressing the pedal to the floor, it should return to its start position.
How fast should it return? Mine does return but takes 30-seconds or so. There's no brake lines connected yet or vacuum lines - not sure if this will make things quicker. I'm debating stripping it down again to see if I can speed up the return - but before I do, I thought I'd check if slow return is expected. Thanks in advance. JB
Posted on: 2020/11/22 18:47
|
|||
|
||||
|
Re: Captive Wing Nuts
|
||||
|---|---|---|---|---|
|
Not too shy to talk
|
Thanks to all the good advice, I have managed to get all the broken bolts out. The last couple were so stuck I had to drill them out - but even upside down I managed to drill them cleanly and run a tap through to tidy up the threads.
JB
Posted on: 2020/11/22 18:42
|
|||
|
||||
|
Re: Captive Wing Nuts
|
||||
|---|---|---|---|---|
|
Not too shy to talk
|
Thanks for all the good advice. I have had some luck with these options so far. One bolt I had previously tried drilling out and left for a few weeks after initially giving up. I was able to twist it out with some small needle nose pliers - it had been previously stuck fast when I gave up on drilling it out. Perhaps sitting for a few weeks with penetrating oil on it finally broke it loose?
I was also able to get one of the lower front ones out by welding a nut to the top of what was left. The heat from the welding helped break it free. I tried the same trick on the passenger side upper bolt, but there wasn't enough left sticking out to weld too. I've got an easy-out drilled in to it - but still stuck fast right now. I'm soaking it regularly in PB Blaster in the hope it will eventually break free. The two back lower bolts are going to be tough as I can't get to the top side. I'll try drilling them and use the easy-out - but if that fails, I'm thinking heli-coils might be the way to go. They don't seem to need a hole much bigger than the current bolt size. JB
Posted on: 2020/11/15 17:36
|
|||
|
||||
|
Captive Wing Nuts
|
||||
|---|---|---|---|---|
|
Not too shy to talk
|
As part of the restoration process for my '52 300, we have had to remove both front wings. Unfortunately nearly all of the bolts holding them on were rusted solid and broke off during disassembly.
I'm not sure drilling them out in situ is an option for me. I'm thinking of cutting off the various mounts and welding on a new captive nut and reattaching the mounts. I've also been considering rivnuts as a potential option, if I can find them in the right size. Does anyone else have other options to consider? Thanks, James
Posted on: 2020/11/8 18:33
|
|||
|
||||
|
Re: King Pin Rebuild
|
||||
|---|---|---|---|---|
|
Not too shy to talk
|
Thanks for the quick responses guys.
I found a 0.868" reamer on eBay - it's on its way. James
Posted on: 2020/9/20 17:40
|
|||
|
||||
|
King Pin Rebuild
|
||||
|---|---|---|---|---|
|
Not too shy to talk
|
I'm in the midst of rebuilding the King Pin's for a '52 300. I have the king pin kit from Kanter, but before I commit and potentially mess things up, I thought I'd ask a couple of questions.
I've pushed out the old needle bearing and bronze bushing and installed the new ones. The new king pin does not feel like it will go through the bronze pushing without some force. The king pin measures 0.865" and the bushing is around 0.859". This seems like it will require more than the light tapping the service manual suggests. Does the bronze bushing require reaming? The king pin covers also don't seem like they'll be an easy fit. There is pronounced lip on the on top of the area where they seat. The covers are 1.31", but the lip has reduced the opening to 1.23". Watching a couple of YouTube videos on similar king pin work, they just tap them in with a hammer. I'm not sure if that will work here. What's the best way to get them in? Thanks James
Posted on: 2020/9/20 16:38
|
|||
|
||||


.jpg")


