|
Re: Edmunds head
|
||||
|---|---|---|---|---|
|
Not too shy to talk

|
Quote:
Standard rule for octane to static comp rat is that 87 is good to 9.1 and the 93 is good to almost 10.0 but octane is really more dependent on the timing, cam, the temp. coefficient of the head(s)and valves and so on. An aluminum head will always let you run lower octane for the same static comp rat. On higher mileage engines the main problem for detonation is rough edges that eventually end up as hot spots. There are many other things that come into play as well. An interesting example of extra considerations is my Triumph 750cc bike with 11.1:1 comp rat, proper external oil cooler, aluminum head and pistons: I can run 87 octane until it gets hot out (over 95F) where I then need to run 89 or better. The only thing is that the bottom end of the powerband is weaker than normal.
Posted on: 2011/3/21 11:10
|
|||
|
||||
|
Re: BigKev's 1954 Packard Clipper Deluxe Sedan
|
||||
|---|---|---|---|---|
|
Not too shy to talk
|
A clear over the clean steel would be an interesting thing to do. If you wanted to get fancy with it, you could always put a grain into the steel with scotchbrite pads.
The "clean skin" idea is a bit different than what Kev's talking about in that all military and some high-end civilian aircraft skinned in aluminum were/are made of exterior sheet metal that is coated or "clad" in a very thin layer of pure aluminum (usually hidden under zinc-chromate paint) on both sides as an extra line of defense against corrosion. But that's not to say they weren't polished just as often as the general's caddy. I worked on my fair share over the years and I can tell you that it's not the easiest thing to keep spotless.
Posted on: 2011/3/18 4:15
|
|||
|
||||
|
Re: SpencerB's '54 Clipper Deluxe Sportster
|
||||
|---|---|---|---|---|
|
Not too shy to talk
|
Rear end update: I decided to keep the '89 10 bolt and just use some early '00's Ford Ranger wheels. The sidewall isn't too close to the fender well or fender skirts but the original Packard hubcaps I'm using might make it just a hair too close of a fit to jack up before you take the skirts off.
Since I'm keeping the 10 bolt I changed out the fluid and seals and got the rear rotors settled on the new bolt pattern. A couple of side questions for you guys: Have any of you found the body cushion 437004 between the overlap of the upper part of the front fenders and the body? Is this a spot where it would be a good idea to place one? I keep hearing about people doing a sbc swap like mine but I have only found pictures of one pre-war example. Does anyone have photos of a post-war example? Or know someone that has one?
Posted on: 2011/2/23 12:33
|
|||
|
||||
|
Re: SpencerB's '54 Clipper Deluxe Sportster
|
||||
|---|---|---|---|---|
|
Not too shy to talk
|
I've been delayed on the Packard for a while trying to get a friend's heli back to airworthy condition and moving my automotive shop as well. As a result, the engine build was postponed and I put the body on the frame for ease of transport.
I'm going to go with a different rear end than the camaro ten bolt I have because the tires would end up a little too far out for my liking. I may go with a first gen. camaro rear because it's 1.5"-2" narrower, but everything else in the drivetrain will still be third generation camaro down to the hyd. clutch. By the way, if any of you guys are interested in my left over bits (toe board, btv, brake lines, fuel system, front brake assy's, rear axle, original wheels and so on) let me know. I'll help arrange shipping worldwide. It's looking like a real car again! {sorta) Attach file:  (29.15 KB) (29.15 KB)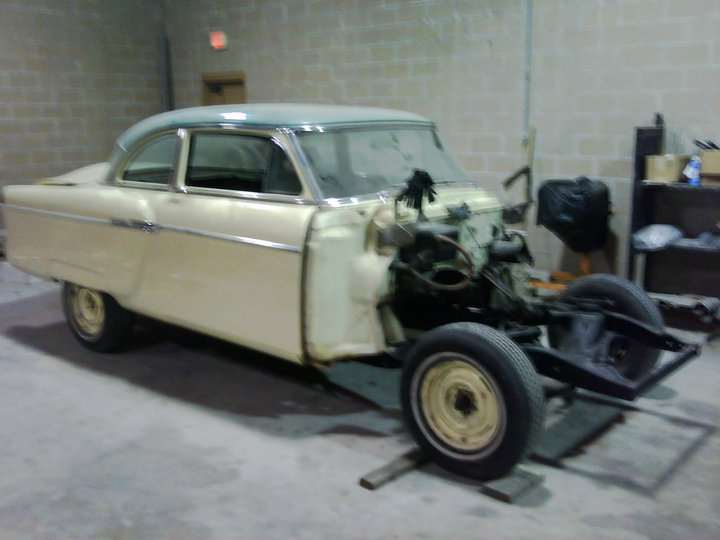
Posted on: 2011/1/3 11:40
|
|||
|
||||
|
Re: SpencerB's '54 Clipper Deluxe Sportster
|
||||
|---|---|---|---|---|
|
Not too shy to talk
|
So, today's update:
The frame has been stripped down, straightened, finish welded and repainted. The rear end was mounted and the lug pattern changed to fit the stock wheels. Next up is bolting in the front suspension and braking so I can put her down on all four tires again. Because of the weight difference from the engine/trans combo I'll be riding too high up front, almost at the upper control arm stop at full load. (load cells are super handy for this kind of thing). My solution is to cut out a smidge of the lower end of the coil and rebend the end to meet in it's socket so it'll be straight when replaced. I still need to change the pinion seal, fluid, crush sleeve and rear cover seal on the rearend. Before I prep the body for mating, I also need to rig up the parking brake system and open up the lug holes on the rear rotors to fit the new pattern and make the transmission mount. I think I'm going to finish building and painting the engine after I get this customer bike out of the shop tomorrow morning. 
Posted on: 2010/10/12 19:08
|
|||
|
||||
|
Re: SpencerB's '54 Clipper Deluxe Sportster
|
||||
|---|---|---|---|---|
|
Not too shy to talk
|
And thanks HH56, the book i was using didn't list that number at all.
By the way, I'm starting to put photos on Photo Bucket Here.
Posted on: 2010/10/3 16:08
|
|||
|
||||
|
Re: SpencerB's '54 Clipper Deluxe Sportster
|
||||
|---|---|---|---|---|
|
Not too shy to talk
|
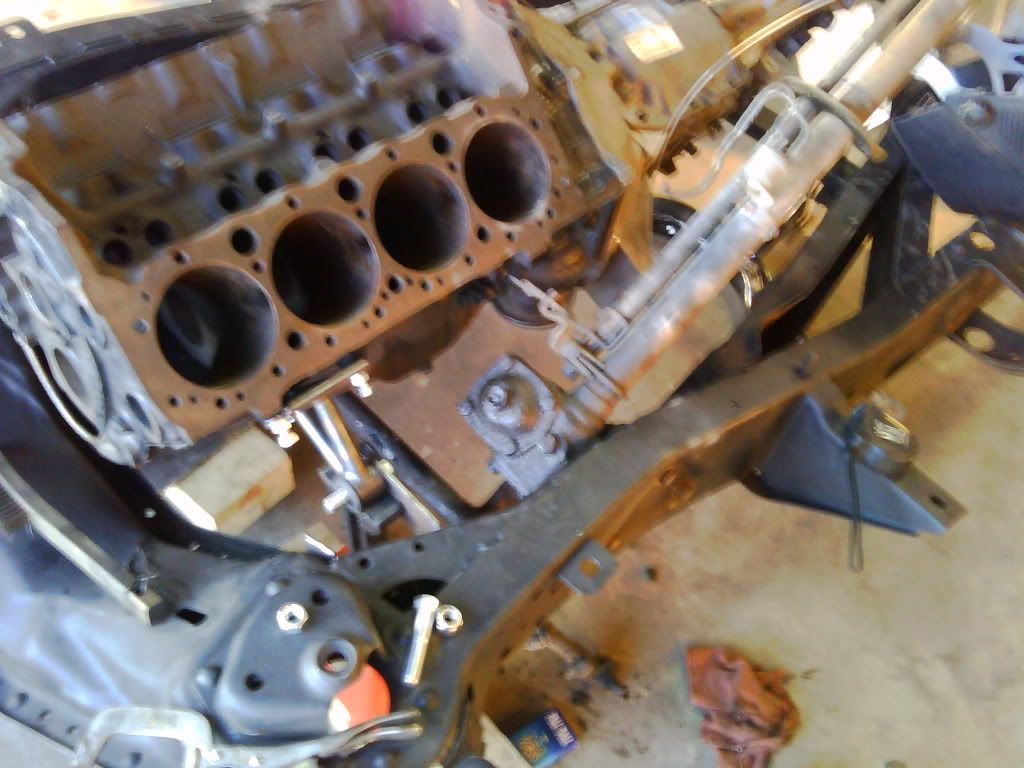
I started on the engine compartment with the help of my friend Curt yesterday. Mocked up the new motor mounts, fixed the hole torched into the x-member for fuel pump clearance from the last bozo that was in here. (pic included) I used the Welder's Series part #WS2149 for motor mounts. So I ripped out the frame to engine insulator bracket to make room for the new frame brackets and tacked them in place after a thousand checks and rechecks. We didn't get finished with the gussets but i'll take some pictures when i get done. As far as fitting goes: The passenger side is cake; nothing in the way. But, the diver's side header needs to get notched slightly to keep far enough from the steering box. And if you go with an automatic, the column shifter linkage will be very close to the block.
 Attach file: (177.28 KB)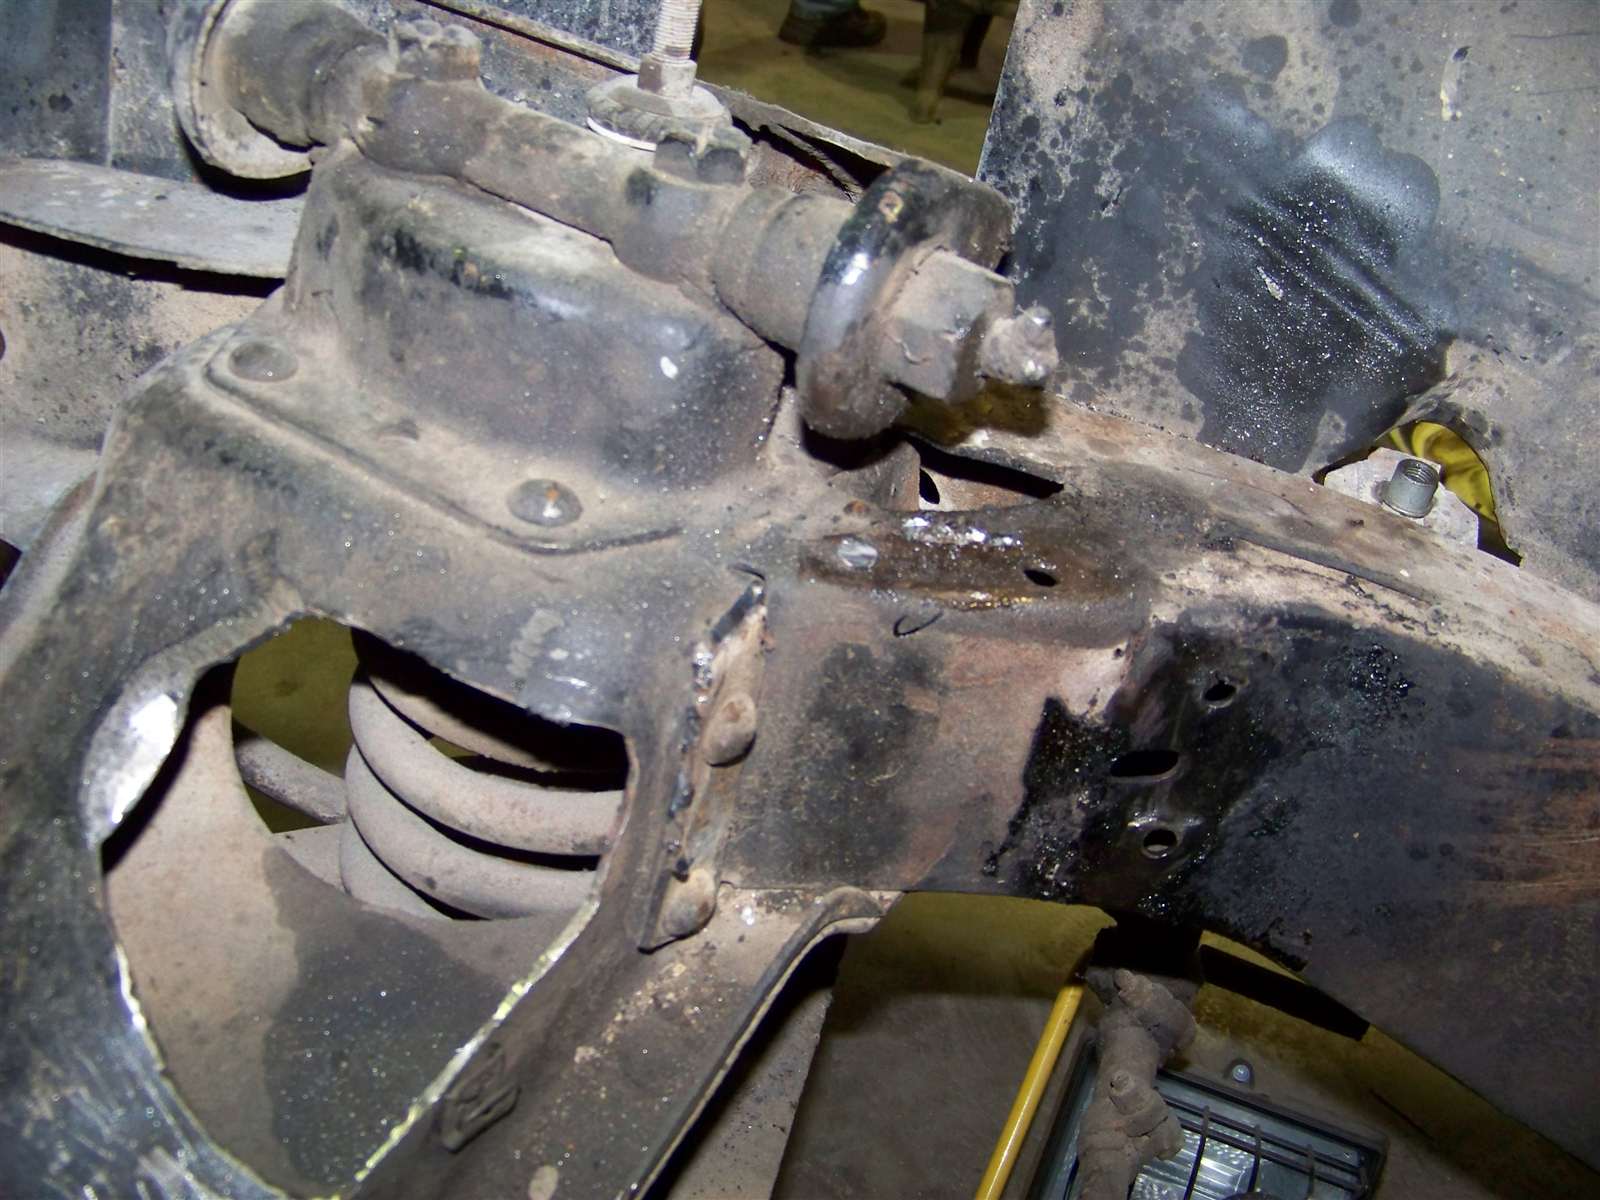
Posted on: 2010/10/3 16:04
|
|||
|
||||
|
Re: SpencerB's '54 Clipper Deluxe Sportster
|
||||
|---|---|---|---|---|
|
Not too shy to talk
|
I was told that the 5x5 pattern was used in order to make replacement parts more readily available.
The hardware box was labeled "Packard '55 special" which made me a bit nervous until I put a caliper bracket up to the spindle i have at home. Couldn't be a nicer fit. Does anyone know if the (5/16") body bushings 30.1004 are the same for the radiator support? I can't seem to find any info on those guys.
Posted on: 2010/9/29 21:00
|
|||
|
||||
|
Re: SpencerB's '54 Clipper Deluxe Sportster
|
||||
|---|---|---|---|---|
|
Not too shy to talk
|
I decided that I was going to try ABS's front disc set up because I didn't really care to figure out the bearing/rotor combo, bearing adapters or design a caliper bracket and so on. Most of the disc kits you find for pre 60's still require machining of the spindle and new steering arms but ABS's comes with a collar-type adapter for pinto/mustang ii bearings & retains the stock spindle nut setup and steering arms. The calipers are the 70's GM big single piston that we all know and love. The caliper bracket is evidently the same as a '47-'59 chevy and also, unrelatedly, plasma cut for nice edges. The rotors are 5"x5 so your wheels won't bolt up but I knew this going in. I always hated how far in the front wheels set in so I am going to use adapters to use the stock wheels and also push the track a smidge further apart.
I attached a picture of all the parts that ABS sends with the kit (minus one rotor). Attach file: (208.47 KB)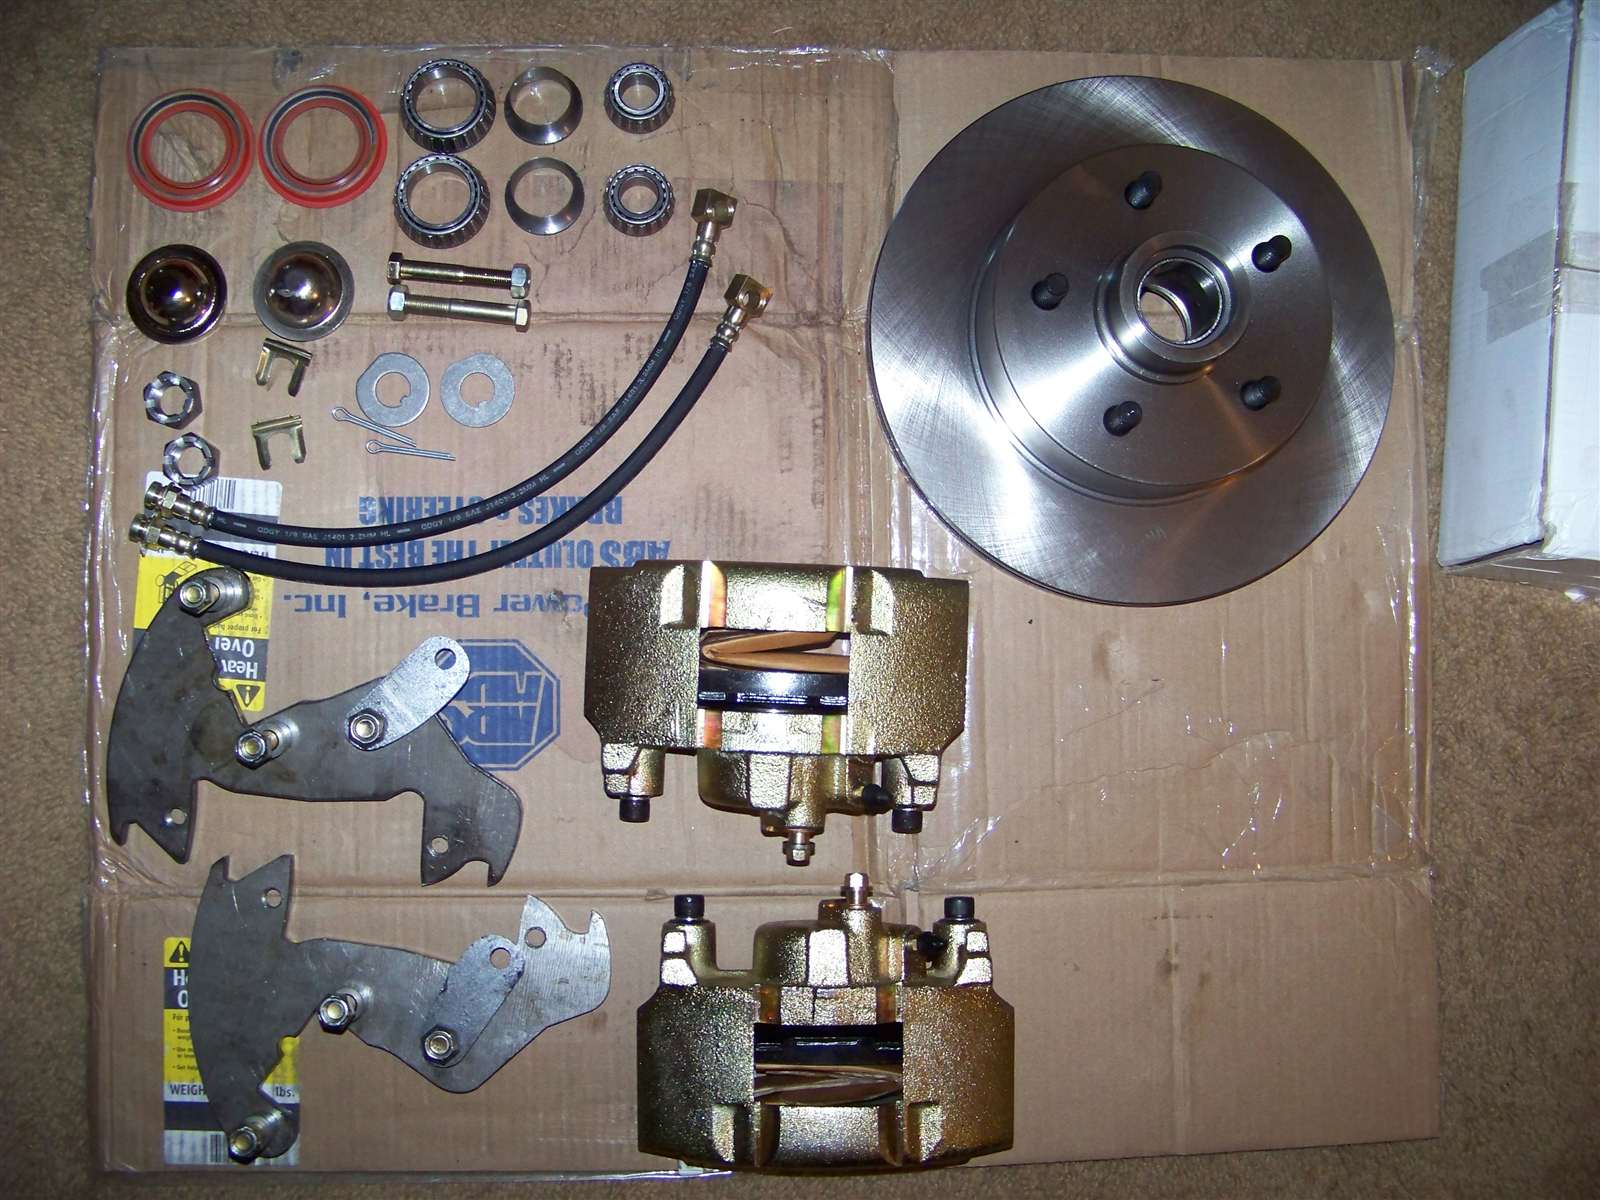
Posted on: 2010/9/29 19:47
|
|||
|
||||
|
SpencerB's '54 Clipper Deluxe Sportster
|
||||
|---|---|---|---|---|
|
Not too shy to talk
|
So I bought this car from a dealer I knew in San Antonio that was looking to scrap the car in 2003. I know many people here are sticklers for the restoration of Packards to be completely stock; I am not one of these people, at least not for this car. This car is being built to be my main driver; drive every day, cross country, in rush hour traffic, the lot. So my main concerns are safety and reliability but at the same time I want the car not to look "Kustom" or too far from original from the outside.
I got the car in need of everything redone except for the painting. The 12 volt "conversion" burned the wire up, blew all the gauges and the clock. I bought the car to store and then start restoring later. There was already a really poorly constructed SBC/TH350 conversion stuck in there so I decided to keep the 350cid but sold the TH350 because it has no overdrive. I didn't go with an O/D automatic because I haven't had much luck with chevy's o/d autos & I had a fresh WC T-5 & bellhousing for a '92 Camaro from a trade but I think mainly because I like running through the gears. I figured that in order to make this as simple as possible I should use just one donor car model. Seeing as I had the camaro trans, it was already settled with a 1992 Camaro. I finally got funds to start taking up some of my shop space with the Packard so I started by removing the body, rear end, engine & trans to clean up the years of grease, rust and Oklahoma dirt from the frame in the winter of 2009. After grinding down the frame to bare metal and repainting, I started the reassembly. Going with reliability, safety and availability of parts, I wanted 4 wheel discs so I found a complete Camaro posi disc rear end that's set up for a three link & coil springs at a swap meet in Austin. I could have fabbed up the 3 link to fit but the amount of work involved didn't seem worth it unless I went with a four link but either way, it's overkill for a daily driver. So I stayed with the leaf style. I took the old leaf springs to a shop to have them gone over. Then all the tabs and mounts where removed off the new axle housing and the leaf sprig brackets welded in place. I needed a dual master cyl. and wanted power brakes too. Conveniently, the camaro power brake and hyd. clutch pedals are on the same firewall bracket, along with the neutral safety & brake light switches. So I could use the camaro's brake master cyl. & booster. I haven't had the time to work on the car in while but more parts are coming soon so the piles of boxed parts at the shop will probably kick my ass in gear to get the rear axles machined, the front disc set up sorted and the body & frame reunited. Attach file: (198.50 KB)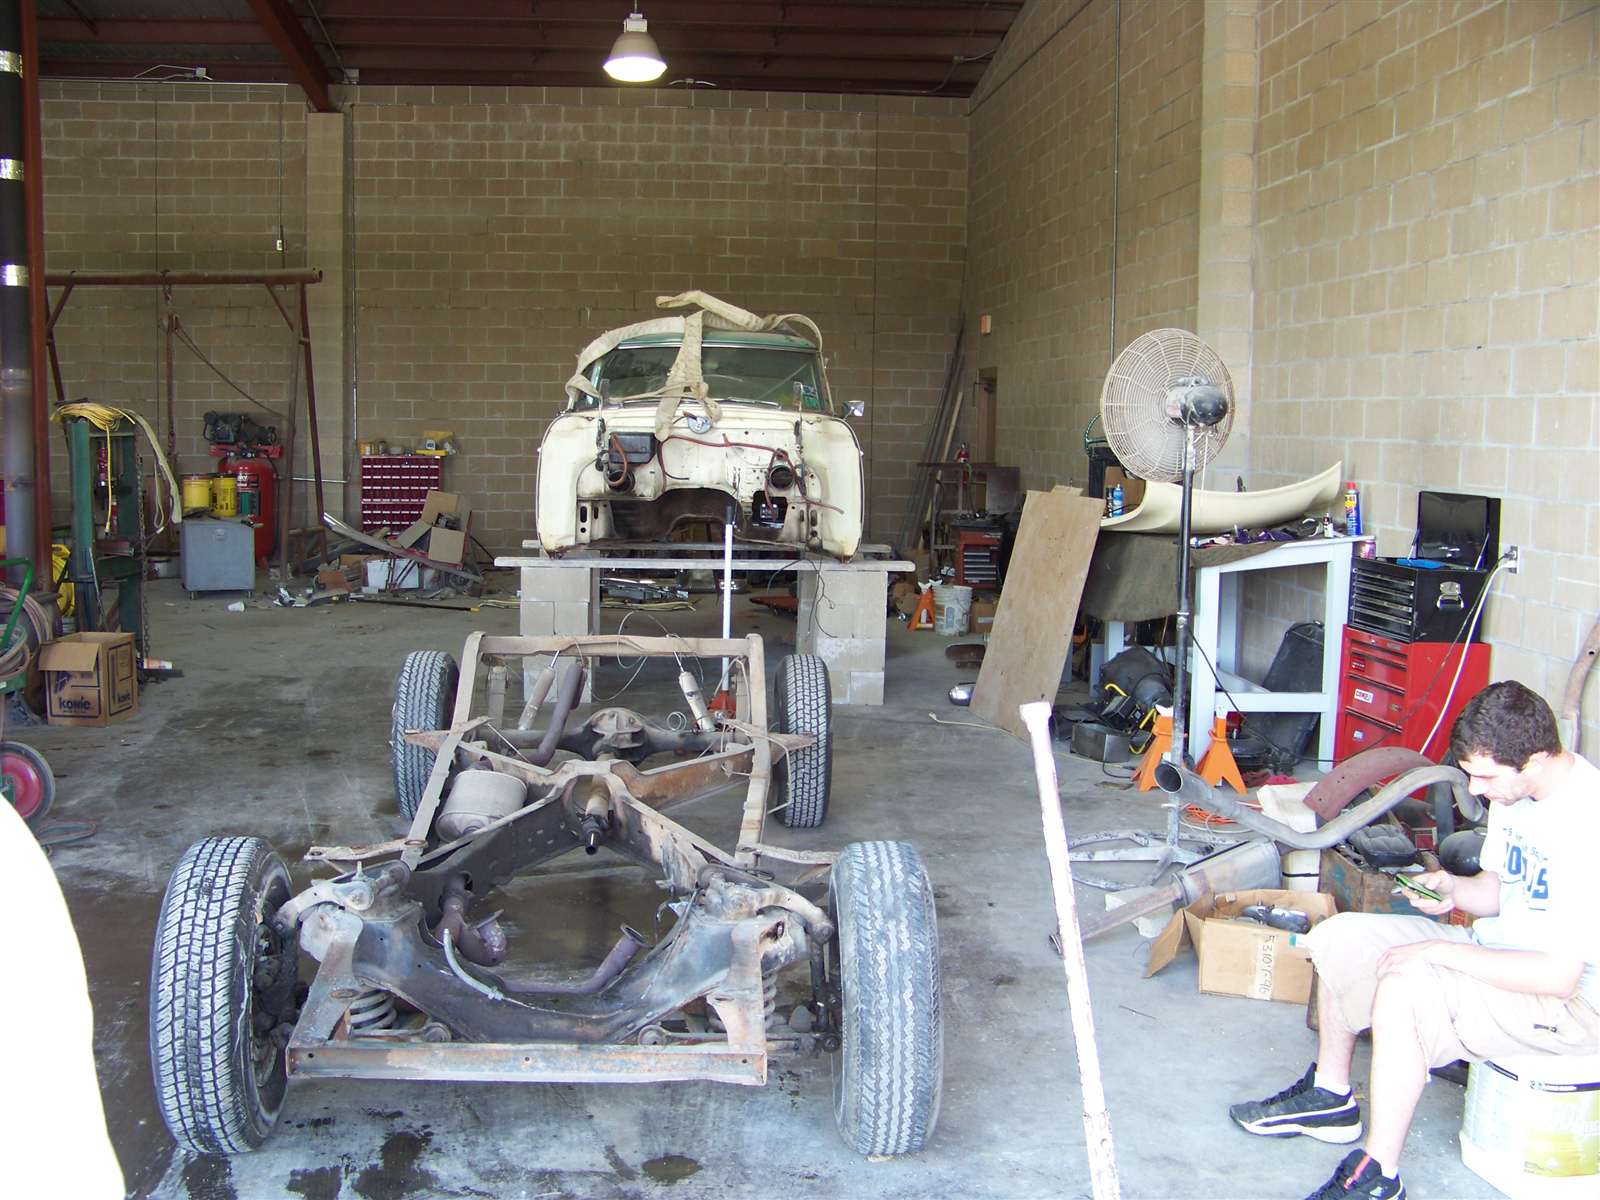 (32.79 KB) (32.79 KB)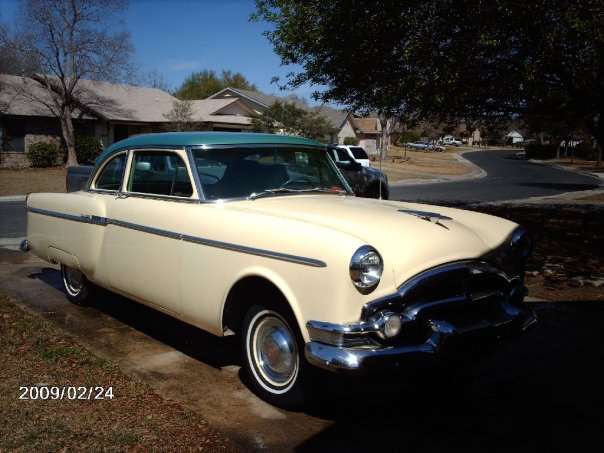 (157.56 KB) (157.56 KB)
Posted on: 2010/9/28 22:03
|
|||
|
||||


