|
Re: Larry's 1951 Club Sedan Project
|
||||
|---|---|---|---|---|
|
Home away from home
|
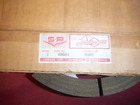
Taking note of BigKev's suggestion regarding the Harbor Freight Stud Welder - I want one!
http://www.harborfreight.com/cpi/ctaf/Displayitem.taf?itemnumber=3223 So after investigating for a few days to find whether any similar welder is available here in Oz - there is NO similar product (!amazing!).If you want to buy one in Australia it will be from the USA, off eBay. I checked with my brother (who has been in the electronics game for years) and he happens to have a very large toroidal isolation transformer of 30KVA capacity. AOK to step down 240V to 110V and provide 30amps for the welder. Next - emailed Harbor Freight for a quote on freight to Australia . . . . sadly the quote was around $150 US. I reckon that is too expensive for me at present, considering I don't need the welder at this time. It has got me beat how you have to pay around the same amount (FedEx) for a 20lb package as for a 150lb package!! Ridiculous! So buying my nice cheap stud welder will be put on hold . . . Sadly it seems freight charges are a considerable barrier to importing the great stuff you want from the States. Anyone coming over with a bit of spare room in their suitcase - let me know! (lol)
Posted on: 2010/4/18 5:18
|
|||
|
1951 Packard Club Sedan | [url=ht
|
||||
|
||||
|
Re: Larry's 1951 Club Sedan Project
|
||||
|---|---|---|---|---|
|
Home away from home

|
Rear Axle and Brake Recon
The new wheel cylinders were sourced from Kanter, you can see just how bad the old cylinders are in the following photos.   Note the yellowish gunk coming out of the brake wheel cylinder. This used to be brake fluid!  Thrown in is a pic of the diff, with new seals fitted and a couple of coats of POR15 added.  Showing the refurbished rear brake components ready to be fitted, and after completion. The backing plates (and drums - not shown here)were painted with heat resistant paint.   Here is a pic showing the offset of the brake anchor pin. Offset allows proper positioning of the brake shoes when a full brake adjustment is carried out, as outlined in section IV of the Packard Service Manual, under Major Brake Adjustment..  There was only minimal wear on the linings, so they just got a clean-up and a dose of heat-proof paint.  Back together . . .    
Posted on: 2010/4/18 6:26
|
|||
|
1951 Packard Club Sedan | [url=ht
|
||||
|
||||
|
Re: Larry's 1951 Club Sedan Project
|
||||
|---|---|---|---|---|
|
Forum Ambassador
|
Quote:
Rusty O\'Toole wrote:......In case they go by a different name in Australia a roofing nail is a galvanized nail with a large head used to fasten asphalt shingles to a roof...... May have a problem finding roofing nails in Australia for the application you describe as I have never seen asphalt shingles here. Roofing materials are variously cement or terracotta tiles, corrugated iron sheeting, colorbond sheeting and slate tiles, or before the dangers were known, corrugated asbestos sheeting. Although you never know, Lee(Larry51) is a very resourceful guy.
Posted on: 2010/4/18 8:04
|
|||
|
Mal
/o[]o\ ====  Bowral, Southern Highlands of NSW, Australia "Out of chaos comes order" - Nietzsche. 1938 Eight Touring Sedan - SOLD 1941 One-Twenty Club Coupe - SOLD 1948 Super Eight Limo, chassis RHD - SOLD 1950 Eight Touring Sedan - SOLD What's this?  Put your Packard in the Packard Vehicle Registry! Here's how! Any questions - PM or email me at ozstatman@gmail.com |
||||
|
||||
|
Re: Larry's 1951 Club Sedan Project
|
||||
|---|---|---|---|---|
|
Forum Ambassador
|
Quote:
Rusty O\'Toole wrote:......In case they go by a different name in Australia a roofing nail is a galvanized nail with a large head used to fasten asphalt shingles to a roof...... May have a problem finding roofing nails in Australia for the application you describe as I have never seen asphalt shingles here. Roofing materials are variously cement or terracotta tiles, corrugated iron sheeting, colorbond sheeting and slate tiles, or before the dangers were known, corrugated asbestos sheeting. Although you never know, Lee(Larry51) is a very resourceful guy.
Posted on: 2010/4/18 8:05
|
|||
|
Mal
/o[]o\ ====  Bowral, Southern Highlands of NSW, Australia "Out of chaos comes order" - Nietzsche. 1938 Eight Touring Sedan - SOLD 1941 One-Twenty Club Coupe - SOLD 1948 Super Eight Limo, chassis RHD - SOLD 1950 Eight Touring Sedan - SOLD What's this?  Put your Packard in the Packard Vehicle Registry! Here's how! Any questions - PM or email me at ozstatman@gmail.com |
||||
|
||||
|
Re: Larry's 1951 Club Sedan Project
|
||||
|---|---|---|---|---|
|
Home away from home

|
Thanks Rusty for another method to try! I'll keep that one in mind.
I have a few soldering irons including the old triangular Plumber's irons that you hung on the kerosene blowlamp (which really held the heat well), and the kero blowlamp to go with them. Lamp still works fine - it must be 80 years old or more. Nails - not a problem, have some 'clout head' ones with a large flat top on them that will do the trick I think. Will give it a try on dents I have in a '51 air cleaner. It's light-gauge metal so should work OK. EDIT: (Very kind of you Mal!)
Posted on: 2010/4/18 8:06
|
|||
|
1951 Packard Club Sedan | [url=ht
|
||||
|
||||
|
Re: Larry's 1951 Club Sedan Project
|
||||
|---|---|---|---|---|
|
Webmaster
|
Before I was introduced to the wonder that is the stud welder, I had a buddy that showed me how to pulled out dents by brazing nail heads to the dent and then pulling the dent out with a slide hammer. Then you just reheat the metal to release the brazing solder.
But of course this introduces much more heat into the affected area.
Posted on: 2010/4/18 11:37
|
|||
|
-BigKev
1954 Packard Clipper Deluxe Touring Sedan -> Registry | Project Blog 1937 Packard 115-C Convertible Coupe -> Registry | Project Blog |
||||
|
||||
|
Re: Larry's 1951 Club Sedan Project
|
||||
|---|---|---|---|---|
|
Home away from home

|
Zinc Plating
Have been doing my own Zinc plating, and the pics below show a few of the results achieved so far.   Also have the chemicals for bright Copper and Nickel plating, but I haven't had a need to use those yet . . . the time will come. Have Zinc plated a few dozen small parts (nuts, bolts, washers, body hold-down bolts and tubes etc) so far, with mainly very satisfactory results. On the few pieces where the result has been a bit 'cloudy' the problem has been either insufficient cleaning and buffing of the part before plating, or using too much current from the power supply for the area to be plated. Settings and layout need a bit of experimentation to get it right. It is fiddly and time-consuming work, I really can't recommend doing it yourself unless (like me) you have a lot of time to spare. One advantage is that you don't have the problem of sending a bucket of parts off to the plater and getting a bucket full of someone else's parts back! Most people know what I mean. Darned hard to get Packard small bits without having someone lose them for you. Plus there is quite a lot of satisfaction when you take a shiny 'new-looking' part out of the tank when what you put in a while ago was a very ordinary-looking bit of metal. And the benefit is that the zinc will protect the part for a much longer time than if not plated. It is also probably about cost-neutral once you have bought the (expensive) chemicals and power supply, as rather than buying new nuts / bolts etc you are using the originals, and getting a more authentic resto job to boot. In Oz you cannot buy a Chrome plating kit, it's against the law due to the very poisonous nature of Chrome. I think Chroming kits are still available in the US -? Anyone wanting more information - PM me.
Posted on: 2010/4/28 4:25
|
|||
|
1951 Packard Club Sedan | [url=ht
|
||||
|
||||
|
Re: Larry's 1951 Club Sedan Project
|
||||
|---|---|---|---|---|
|
Home away from home

|
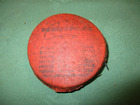
Casting a Pair of Sway Bar Rubber Bushings
After trying to find replacement sway bar rubbers I found there was nothing available so decided to do the same as several people have done and cast my own.   The results were pleasing, and although the product (FLEXANE) is ain't cheap here in Oz I've managed to make the bushings for less than half the cost, and have enough Flexane left to make quite a few more rubbery bits and pieces when needed.   Made the moulds out of PVC sheet and flat, and used WD-40 as a release agent. The WD-40 was a 'reasonable' release agent due to it costing so little. (The recommended agent was - would you believe - a massive $30Aus for a spraycan!). Admittedly I had to destroy the moulds to get the stuff out of them, but that was not a problem and far less expensive than buying the 'million dollar' release agent. Moulds were glued together using Araldite 2-pak and this was a reasonably easy process. Thanks to the several members (like Keegan, HH56 and PackardV8) who posted valuable and really helpful info which inspired me to give it a go! Just one of several really helpful threads is at Keegan's Rhino Bushings Recommend that you give it a go if you can't find the right parts at the right price
Posted on: 2010/4/28 5:57
|
|||
|
1951 Packard Club Sedan | [url=ht
|
||||
|
||||
|
Re: Larry's 1951 Club Sedan Project
|
||||
|---|---|---|---|---|
|
Home away from home

|
Larry,
Nice work. Looks like I just may have to give that a try for the front and rear axle rebound pads for my car. They are available for my car but I like to be adventurous and try things myself just like the rest of you do. Thanks all for sharing this with us all.
Posted on: 2010/4/28 6:58
|
|||
|
||||


