|
Re: Wade's Workshop
|
||||
|---|---|---|---|---|
|
Forum Ambassador

|
Tuesday 13th October 2009
Enough of Maxwells and back to Packards. Yesterday received a Boot(Trunk) light for the '41 in the mail I'd bought off eBay earlier this month. Funny thing was I didn't immediately realise on seeing it that I wanted one although the cover for my Boot light is missing. But once the brain cells clicked into gear, a day or so later, had the requisite eureka moment. Will clean, paint and mount the light cover in the near future. Today was pick up and start on John's '39 110 engine swap day. But, before getting to that, first caught up with Wade about what's been happening. More work on Big Red with the seats taken home to resew the popped buttons onto them. The wheels and new WWW's have gone round to Wheel and Tyre Co to be mounted. Wiring continues with the dash again looking like a can of worms as Wade fixes more wiring issues and has replaced the broken off armoured coil wire. When the new pistons and pins arrive, expected any time now, then the machining processes required for Big Red's engine can start. And so on to John's '39 110. Wade took along the Optima battery out of Big Red as well as a booster pack from the workshop because the battery in the '39 was flat. The '39 isn't run very often and apparently only cranked over about twice before expiring on the weekend. Wade put the Optima in the '39 and she started fairly easily but another problem manifested. It was stuck in gear so some judicious fiddling with the linkages was required before she could be moved. Very rattly engine noise so the sooner the transplant is performed the better she'll be for it. Back at the workshop she was backed into the space cleared late last week by Wade and dis-assembly undertaken. Bonnet(Hood) off, then front clip removed. I hadn't been directly involved in doing this with Old Blue as it happened during my absence although I did see it off at the time. But I must say it is a really nifty way of working on a car engine and front end because it makes things so much more accessible. With the engine out there are a number of other matters which will also be addressed including the gearchange and throttle linkages(both very sloppy), the carburettor(has a Tillotson on it at present), jumping out of 2nd gear(could be solved by the linkage fix), radiator check, flush, fix, etc, new thermostat for the radiator shutters and reconnecting and making the shutters operative, various wiring fixes, and more. With the front clip off it also looks like the right front shock is leaking and probably inoperative so that's an extra thats already reared it's ugly head and no doubt there'll be more to come! I removed the fan(modern flexfan fitted), head, generator, starter, distributor, coil, horns, carburettor and almost the fuel pump before leaving for the day. And I say almost the fuel pump because after getting the bolts undone it couldn't be manouvered past the combination of oil pump, shock and RHD steering box, so it's currently "hanging" waiting further appraisal of options. With the wiring all over the place Wade had to tag and cut most wires before the front clip could be removed. While doing all this Harvey arrived with two things, a 1949 AWA(Aussie manufacturer) radio and a shopping list of parts for Wade to order for him for the rebuild of the '39 120 he's doing at the moment. Wade's going to check and fix the radio itself, wearing his other hat of radio restorer, while Harvey brings the timber cabinet back to it's former glory. The shopping list? Harvey doesn't have internet access so Wade's going to order the parts in for him. Attach file:  (23.36 KB) (23.36 KB)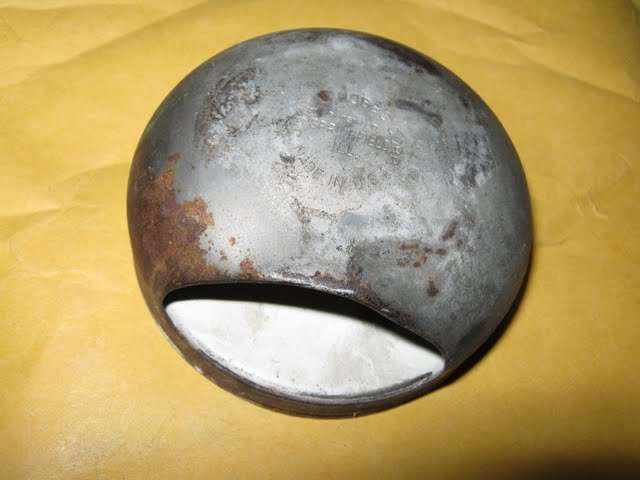 (27.55 KB) (27.55 KB)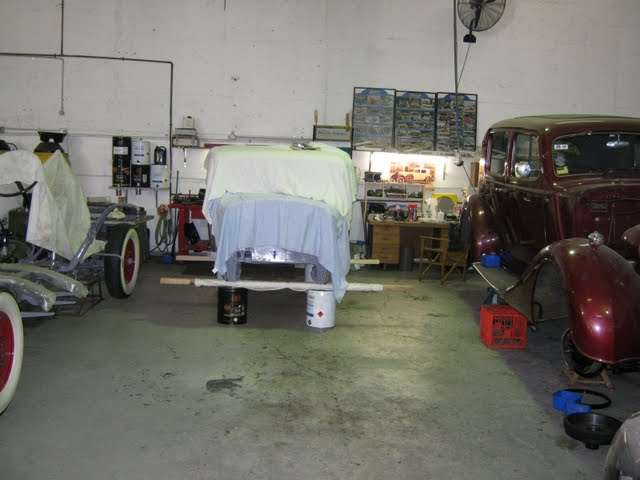 (37.89 KB) (37.89 KB)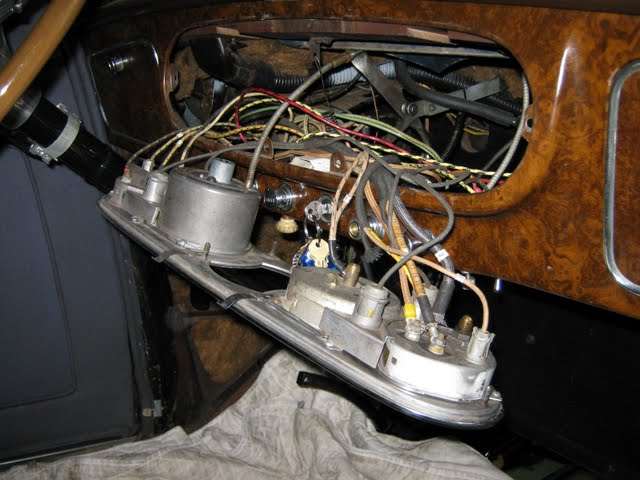 (20.95 KB) (20.95 KB)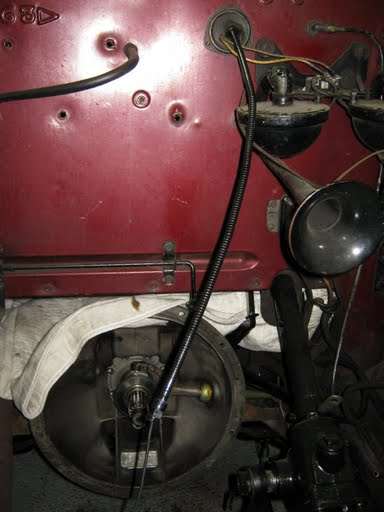 (25.75 KB) (25.75 KB) (32.37 KB) (32.37 KB) (28.31 KB) (28.31 KB) (28.58 KB) (28.58 KB) (32.77 KB) (32.77 KB) (24.95 KB) (24.95 KB)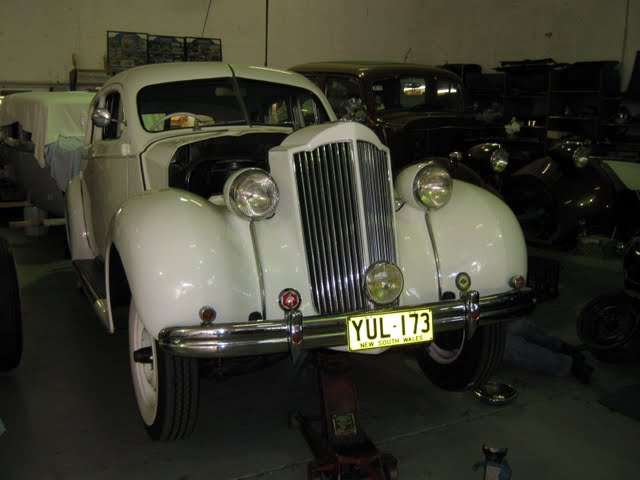 (23.06 KB) (23.06 KB)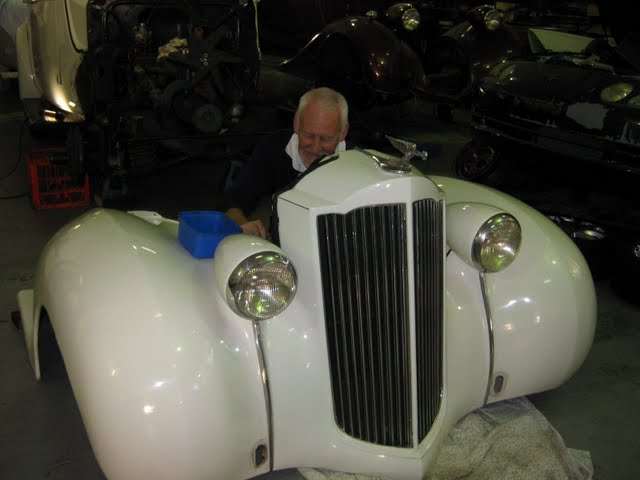 (37.50 KB) (37.50 KB) (30.71 KB) (30.71 KB)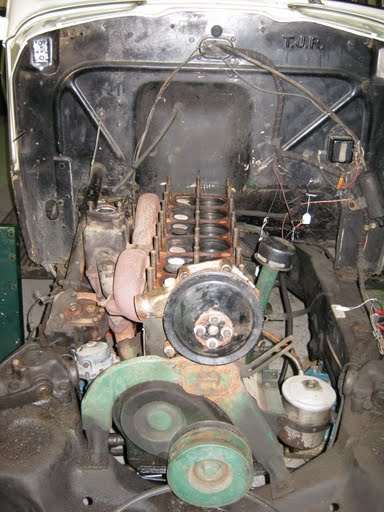 (28.47 KB) (28.47 KB) (37.71 KB) (37.71 KB)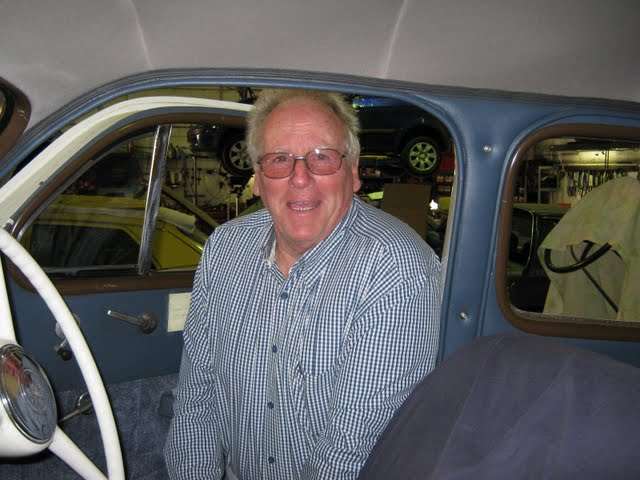 (35.09 KB) (35.09 KB) (20.63 KB) (20.63 KB)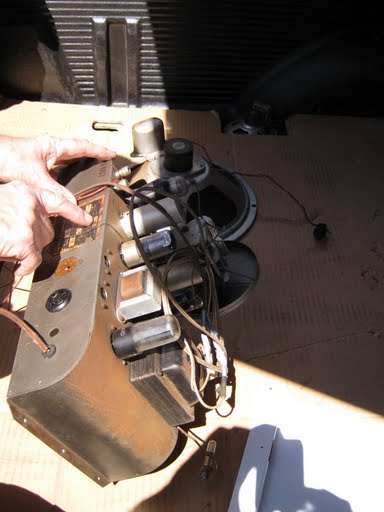
Posted on: 2009/10/14 0:14
|
|||
|
Mal
/o[]o\ ====  Bowral, Southern Highlands of NSW, Australia "Out of chaos comes order" - Nietzsche. 1938 Eight Touring Sedan - SOLD 1941 One-Twenty Club Coupe - SOLD 1948 Super Eight Limo, chassis RHD - SOLD 1950 Eight Touring Sedan - SOLD What's this?  Put your Packard in the Packard Vehicle Registry! Here's how! Any questions - PM or email me at ozstatman@gmail.com |
||||
|
||||
|
Re: Wade's Workshop
|
||||
|---|---|---|---|---|
|
Home away from home

|
Hey Mate,
You playing Fred Flintstone in that 11th picture  Or is that some new engine design you have come up with.
Posted on: 2009/10/14 6:01
|
|||
|
||||
|
Re: Wade's Workshop
|
||||
|---|---|---|---|---|
|
Webmaster

|
The firewall stamping is interesting. No Theft Proof number, no triangles at the end.So did they know this car was destined for Oz at the time of the cowl stamping?
I wonder if there is anything in the Briggs archives that is part of the Chrysler Archives that could shed some light on this.
Posted on: 2009/10/14 12:01
|
|||
|
-BigKev
1954 Packard Clipper Deluxe Touring Sedan -> Registry | Project Blog 1937 Packard 115-C Convertible Coupe -> Registry | Project Blog |
||||
|
||||
|
Re: Wade's Workshop
|
||||
|---|---|---|---|---|
|
Forum Ambassador
|
Quote:
Tom (Packin31) wrote: Hey Mate, You playing Fred Flintstone in that 11th picture Tom, That's Wade undoing the bolts holding the radiator in it's cradle. Quote: BigKev wrote: The firewall stamping is interesting. No Theft Proof number, no triangles at the end.So did they know this car was destined for Oz at the time of the cowl stamping?...... Kev, Body didn't originate in North America but was built in South Australia by a company called TJ Richards. From what I've heard it's almost identical to the Studebaker bodies TJR's also built at that time. It's different from Packard bodies with a different belt line, door handle placement and windscreen slope amongst other things. A company called Holdens also built bodies but mainly for GM cars of that era and later became General Motors Holden, the Aussie arm of GM after WW2.
Posted on: 2009/10/14 17:04
|
|||
|
Mal
/o[]o\ ==== Bowral, Southern Highlands of NSW, Australia "Out of chaos comes order" - Nietzsche. 1938 Eight Touring Sedan - SOLD 1941 One-Twenty Club Coupe - SOLD 1948 Super Eight Limo, chassis RHD - SOLD 1950 Eight Touring Sedan - SOLD What's this? Put your Packard in the Packard Vehicle Registry! Here's how! Any questions - PM or email me at ozstatman@gmail.com |
||||
|
||||
|
Re: Wade's Workshop
|
||||
|---|---|---|---|---|
|
Webmaster
|
Gotcha. Now that makes more sense.
Posted on: 2009/10/14 21:49
|
|||
|
-BigKev
1954 Packard Clipper Deluxe Touring Sedan -> Registry | Project Blog 1937 Packard 115-C Convertible Coupe -> Registry | Project Blog |
||||
|
||||
|
Re: Wade's Workshop
|
||||
|---|---|---|---|---|
|
Forum Ambassador
|
Thursday 15th October 2009
Yesterday Wade had pulled the engine and trans from the '39. The partly removed fuel pump was fully removed once the engine was raised enough to clear any obstructions. He then removed the trans, intake/exhaust manifolds, water pump and sundry other parts most of which will be cleaned and/or painted for re-use on the replacement engine. The original engine will be kept as a core should a PACA member require it for rebuild. Today I cleaned some of the various parts that came off yesterday while Wade attended to a number of matters on both the original and replacement engines. The clutch, pressure plate and flywheel were removed from both because Wade had rebuilt John's last year and since then it had done less than 500 miles. The original engine was parked in the back corner of the workshop while the replacement engine was lifted onto the bench for attention. I then scraped off the green paint, it's definitely NOT Packard green but it's staying as is because this is NOT a 100 point showca,) from the gasket surfaces on the block for the water pump and inlet/exhaust manifolds. Attach file: (38.60 KB)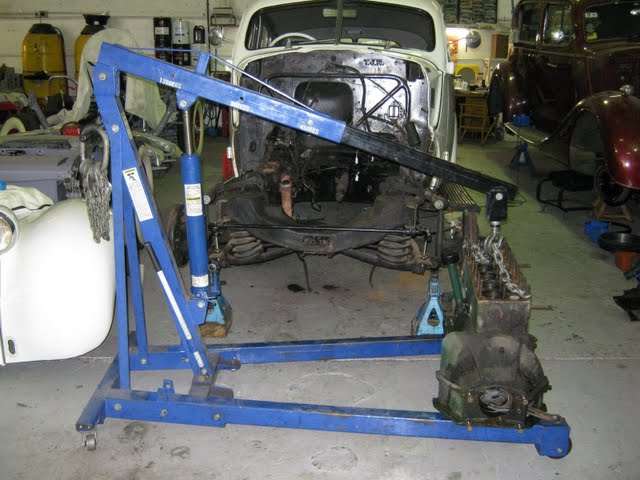 (34.70 KB) (34.70 KB)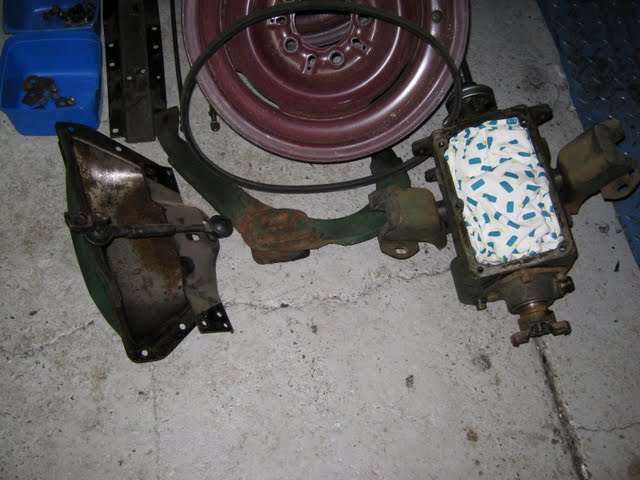 (36.79 KB) (36.79 KB)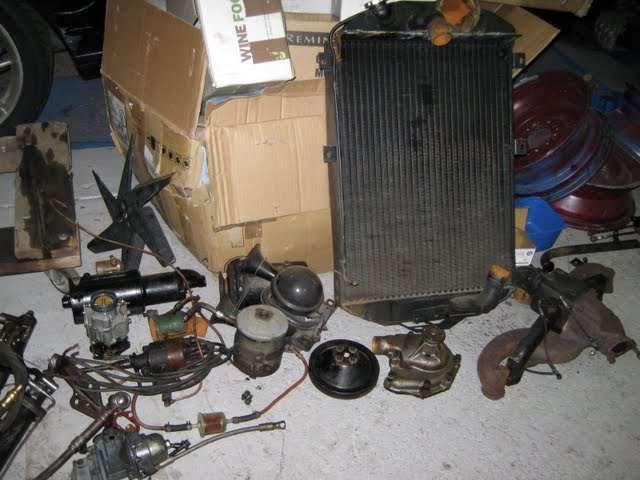 (40.51 KB) (40.51 KB)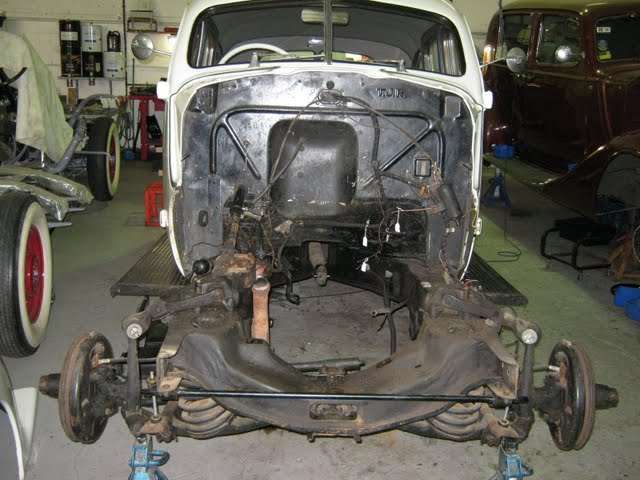 (31.63 KB) (31.63 KB)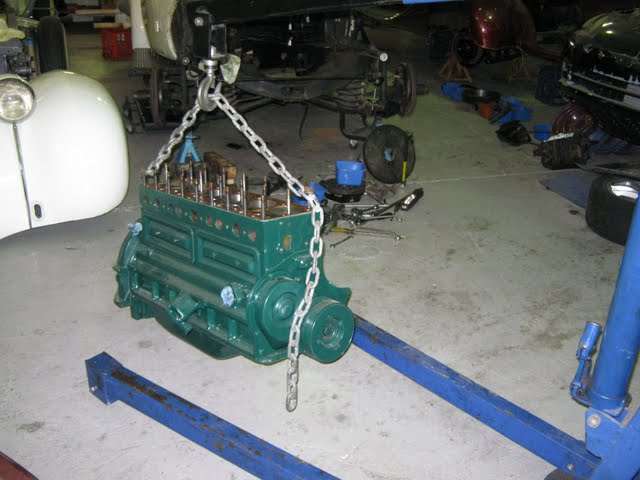 (38.88 KB) (38.88 KB)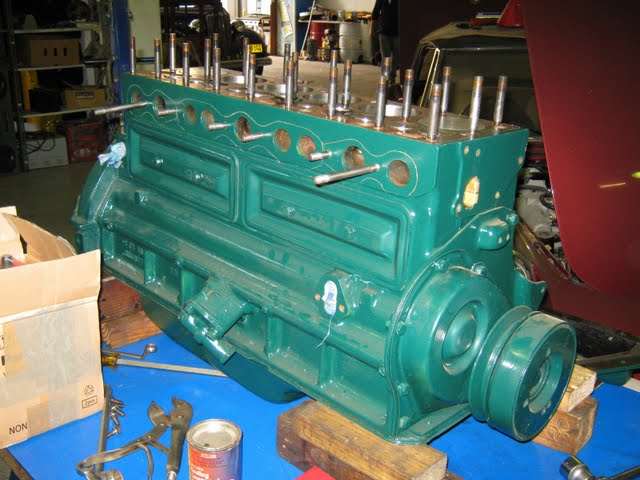 (37.23 KB) (37.23 KB)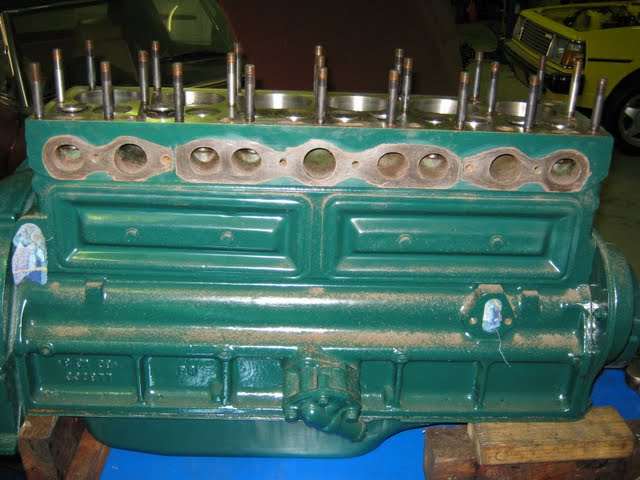 (36.92 KB) (36.92 KB)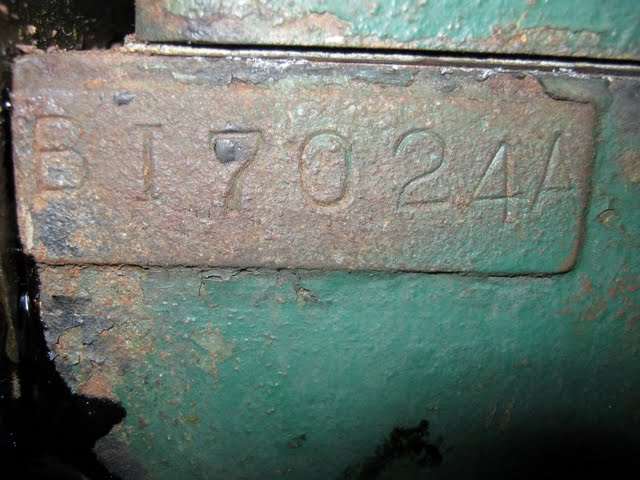 (18.68 KB) (18.68 KB)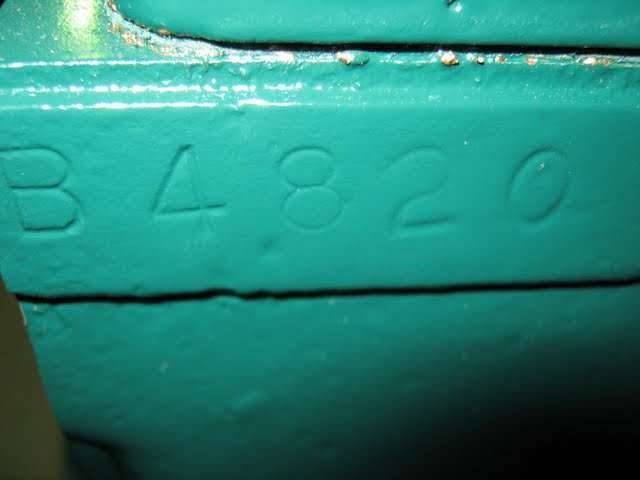 (51.78 KB) (51.78 KB)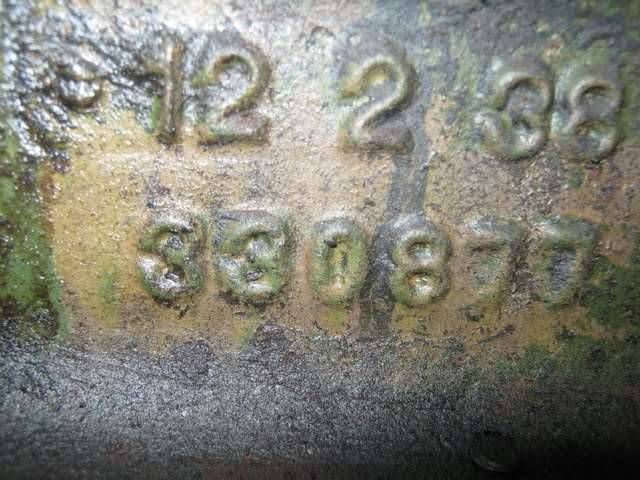 (28.33 KB) (28.33 KB)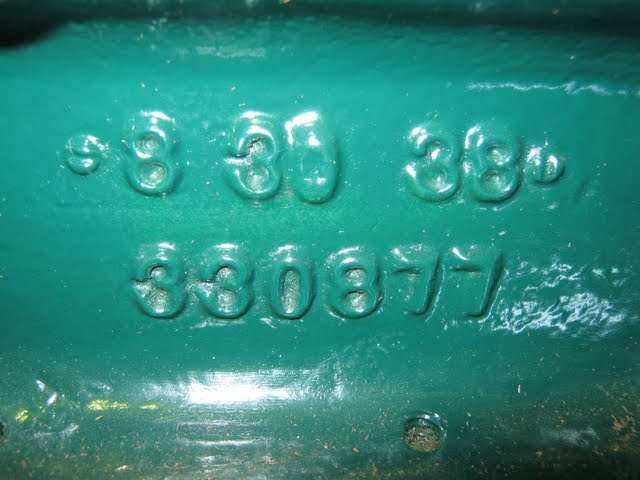
Posted on: 2009/10/15 5:50
|
|||
|
Mal
/o[]o\ ==== Bowral, Southern Highlands of NSW, Australia "Out of chaos comes order" - Nietzsche. 1938 Eight Touring Sedan - SOLD 1941 One-Twenty Club Coupe - SOLD 1948 Super Eight Limo, chassis RHD - SOLD 1950 Eight Touring Sedan - SOLD What's this? Put your Packard in the Packard Vehicle Registry! Here's how! Any questions - PM or email me at ozstatman@gmail.com |
||||
|
||||
|
Re: Wade's Workshop
|
||||
|---|---|---|---|---|
|
Forum Ambassador
|
Monday 19th October 2009
Last Friday Wade picked up Big Red's wheels from Wheel & Tyre Co now fitted with the new WWW's. While over the weekend he displayed another talent in replacing the buttons that had popped off the back section of Big Red's rear seat. The rest of the seats need this treatment too, but more materials are required to finish them off. Then while Wade bolted the seat back back in Big Red I started on John's '39. The right front shock is shot while the left front appears to have been leaking so both needed to be removed for rebuilding. But how to remove them with the front up on jack stands and without releasing the tension stored in the front coils? Why use something to take the place of the shock when it's removed and keep the lower arms in tension. Wade had given this some thought and had come up with a solution - use an old broken leaf spring sitting next to his spare '34 chassis. How? The spring-eye centre to centre measurement was almost exactly the same as the lower front sway bar mounts! So stepping through the procedure, it's: 1) Remove lower mounting nuts for the front sway bar 2) Swing sway bar out of way 3) Place leaf spring across front of chassis 4) Measure and cut threaded rod to length 5) Tighten 2 nuts together so they lock at the bottom of each rod 6) Push rod through sway bar mount up through spring eye and screw a nut on each rod 7) Tighten each of the top nuts so that the bump stop for each shock is clear 8) Undo the upper outer pins/bolts 9) Slide out the pins/bolts 10) Support the upper bushing by wiring it to the chassis 11) Undo and remove the four bolts holding each shock to the chassis 12) Remove the shocks noting the number and position of the shims under the inside bolts There you have it! Next, while Wade was working on removing the gear change linkages and other things, I cleaned up the intake and exhaust manifolds which had been split apart because there was an exhaust leak at the hot box join between the two. Also cleaned up the shocks to remove the years of crud accumulated. Then we bolted the cleaned manifold sections together and remounted the assembly on the block. This, to check for fit only. Looks like the manifold assembly will be sent out for a light skim to ensure the block mounting faces are level. The other thing that Wade did was remove the ring-gear off the flywheel being used because the teeth were chewed up. Then he heated up the new ring gear, and after a couple of attempts(not hot enough, so it didn't yet fit!) dropped it onto the flange around the outside of the flywheel helped along with some light taps to ensure it was properly on. After the assembly had cooled and ensuring the engine was at TDC for #1 the flywheel was re-united with the crankshaft which also had a new pilot bearing installed. Wade had also had Ivan turn up a new pin for the clutch pivot on the bellhousing because the original one was quite worn and this too was installed. Attach file: (21.48 KB)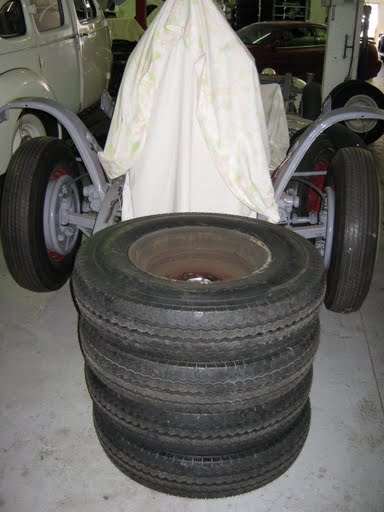 (20.63 KB) (20.63 KB)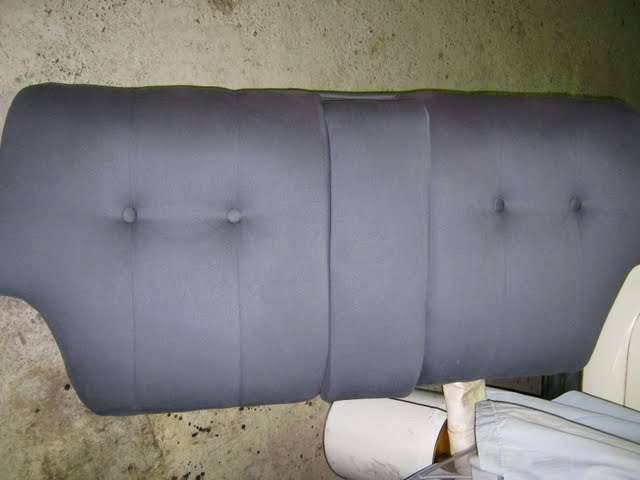 (26.46 KB) (26.46 KB)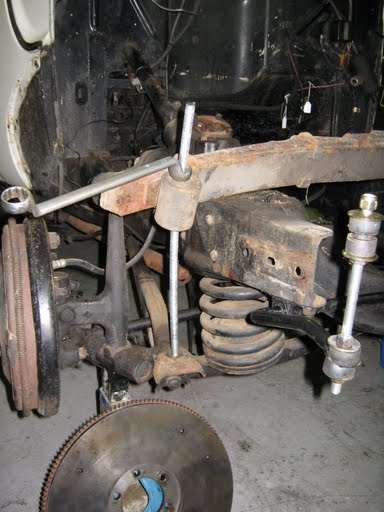 (38.17 KB) (38.17 KB) (37.23 KB) (37.23 KB) (37.74 KB) (37.74 KB)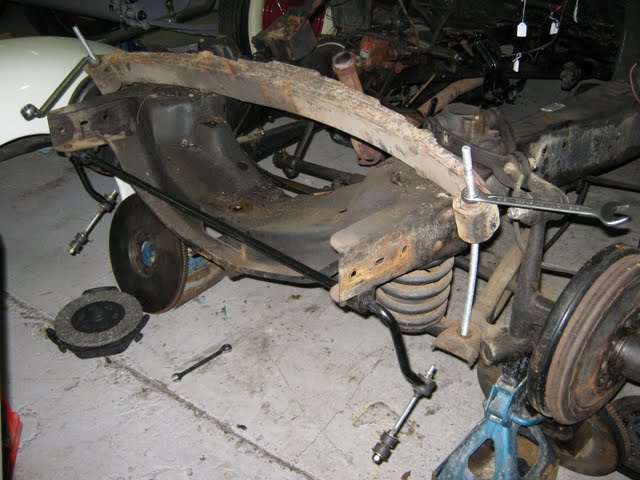 (37.12 KB) (37.12 KB)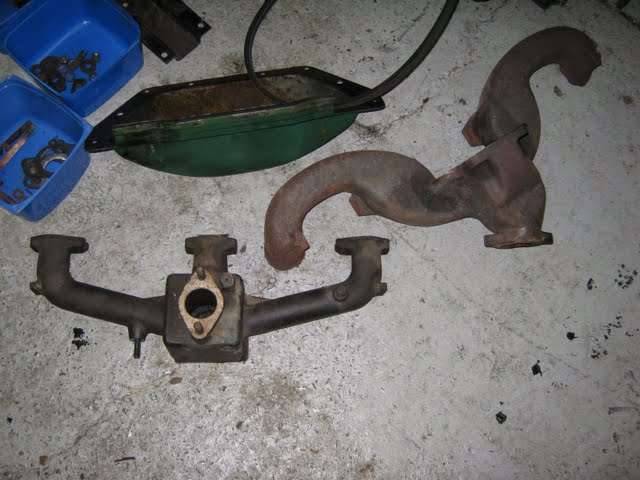 (38.30 KB) (38.30 KB)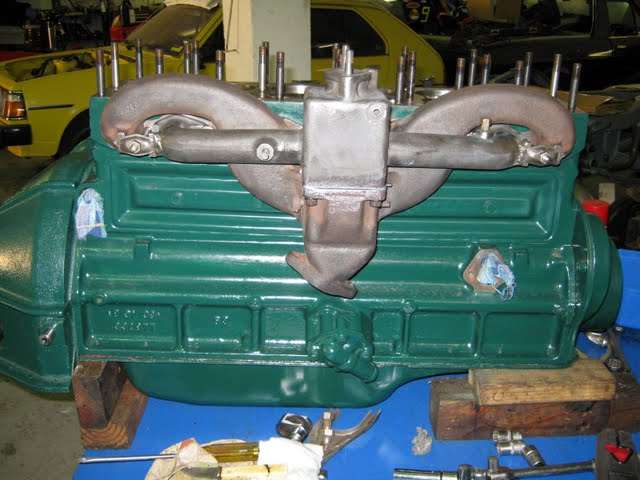 (29.29 KB) (29.29 KB) (21.94 KB) (21.94 KB)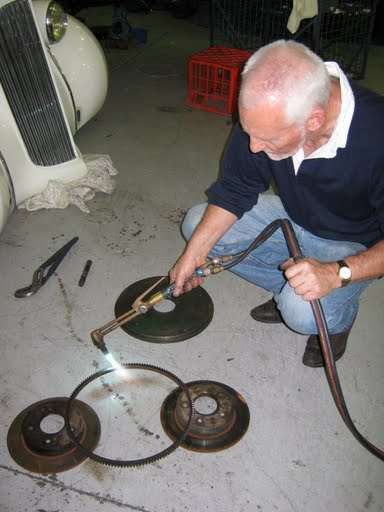 (25.83 KB) (25.83 KB)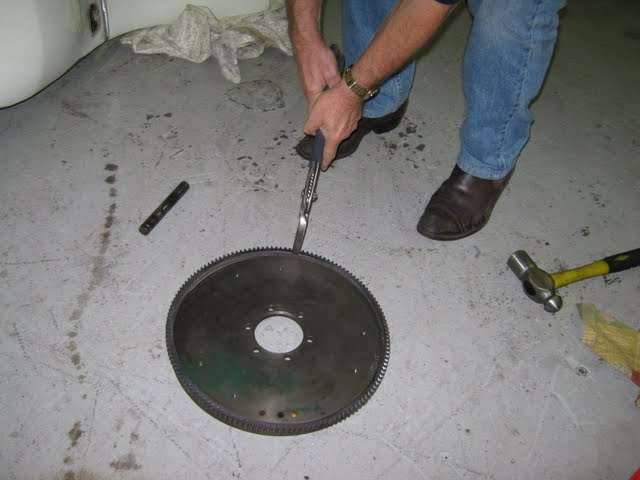 (24.25 KB) (24.25 KB)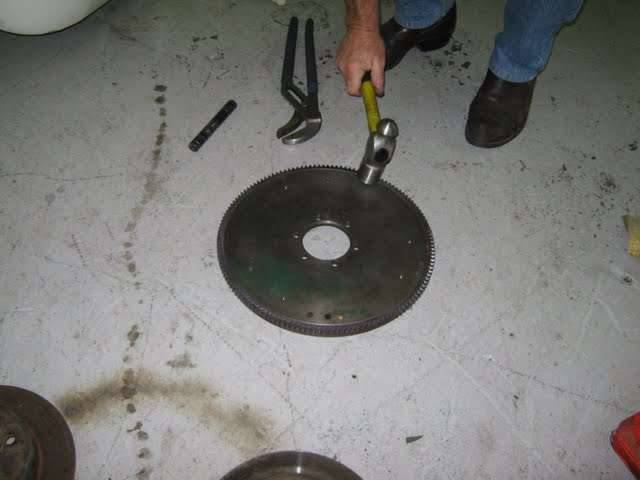 (33.45 KB) (33.45 KB)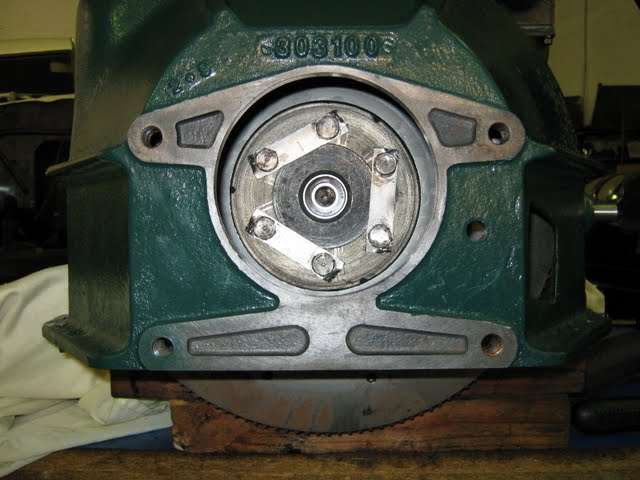 (21.80 KB) (21.80 KB)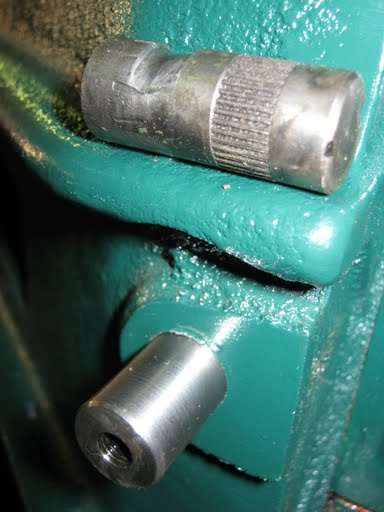
Posted on: 2009/10/19 4:11
|
|||
|
Mal
/o[]o\ ==== Bowral, Southern Highlands of NSW, Australia "Out of chaos comes order" - Nietzsche. 1938 Eight Touring Sedan - SOLD 1941 One-Twenty Club Coupe - SOLD 1948 Super Eight Limo, chassis RHD - SOLD 1950 Eight Touring Sedan - SOLD What's this? Put your Packard in the Packard Vehicle Registry! Here's how! Any questions - PM or email me at ozstatman@gmail.com |
||||
|
||||
|
Re: Wade's Workshop
|
||||
|---|---|---|---|---|
|
Forum Ambassador
|
Tuesday 20th October 2009
Couple of hours at the workshop this morning. Continued on from yesterday at the back of John's engine by installing the clutch fork arm, the pressure and clutch plates, the clutch throw-out bearing, the transmission, reconnecting the spring to the throw-out bearing, the bottom bell-housing cover and topped off with a new boot for the clutch fork. Then turned to the front of the engine and "added" a timing mark pointer for the front pulley/balancer. The '39 110 doesn't come equipped with this feature instead relying on the mechanic to view the timing marks on the front of the flywheel through the hole below the starter motor! Must have been some kind of masochist who designed that feature and some sort of contortionist to use it! Wade used one off a 120 which fitted perfectly and then using the timing marks on the flywheel, marks were inscribed on the pulley for #1 TDC and 7 degrees before and after #1 TDC. Wade's final touch was to paint the marks and also the pointer tip white for ease in using a timing light later. And for a bloke, whose hands at times shake like he's got some sort of palsy, he had a deft touch with the paintbrush for the markings required! Lastly the intake/exhaust manifold assembly was removed from the engine. Yesterday a new hot box gasket was installed between the intake and exhaust manifolds, tightened up and left overnight. There was another check tightening on the three bolts holding it together this morning followed by a discussion with John(the mechanic in the workshop, not the car owner) about whether to have the engine manifold surfaces skimmed. Although it looks pretty good, and checking with a straight edge shows it to be about dead level, Wade after his experiences recently with Old Blue didn't want to take the risk. So we walked the manifold to the machine shop up the road and Perry said it should be ready this afternoon. The only other thing is that I remembered to ask Wade about removing the '34's radiator. This question came from Terry(PackardInfo member, Traumjaegercat) in the Chatroom last night. Terry, you can remove the grill shell, shutters and radiator as a unit from the chassis or you can remove the grill shell then the shutters(6 bolts hold the assembly on as well as removing the rods for the shutterstat), then 2 bolts hold the bottom of the radiator frame to the front cross-member. There are some pic's here from today which may help. Attach file: (30.96 KB) (32.66 KB) (32.66 KB) (34.64 KB) (34.64 KB) (34.91 KB) (34.91 KB)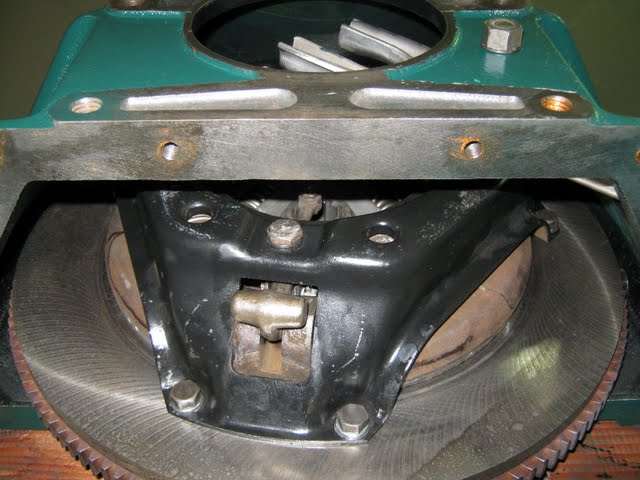 (35.20 KB) (35.20 KB) (28.87 KB) (28.87 KB) (31.52 KB) (31.52 KB)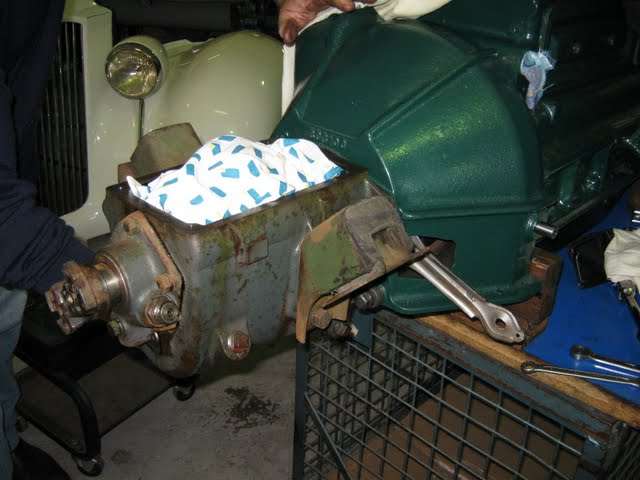 (36.04 KB) (36.04 KB)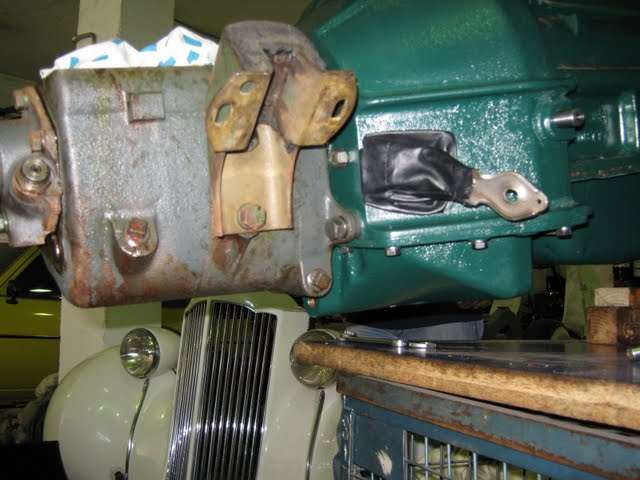 (29.84 KB) (29.84 KB) (23.48 KB) (23.48 KB) (28.00 KB) (28.00 KB)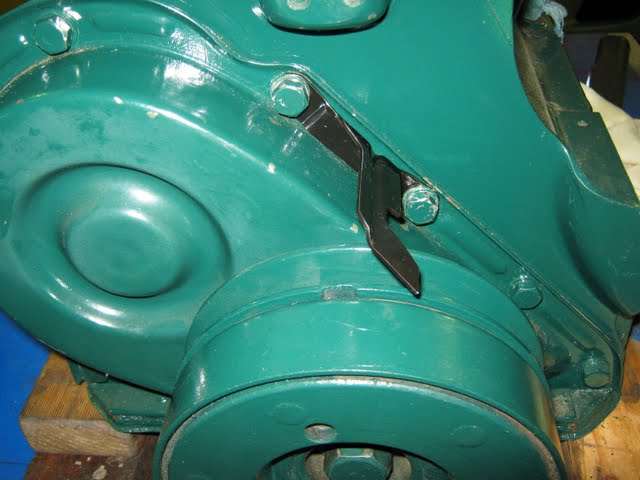 (38.51 KB) (38.51 KB)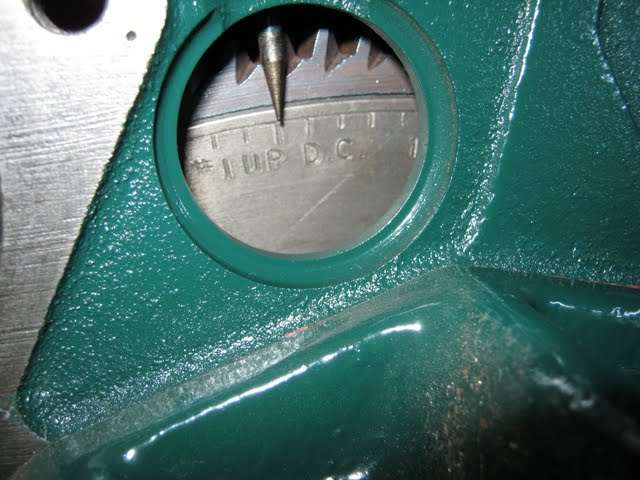 (20.18 KB) (20.18 KB)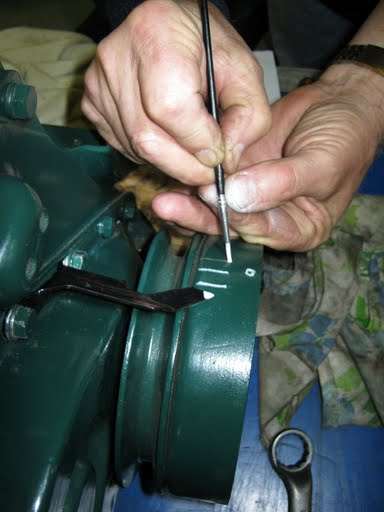 (30.06 KB) (30.06 KB)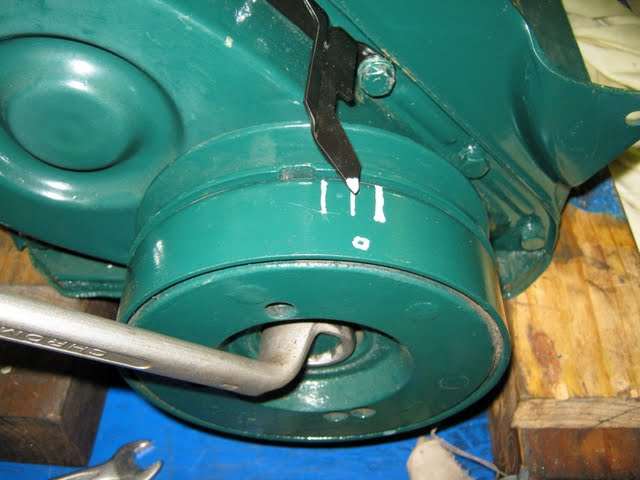 (24.95 KB) (24.95 KB)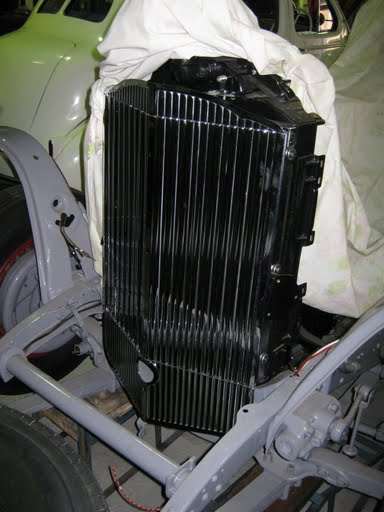 (17.24 KB) (17.24 KB)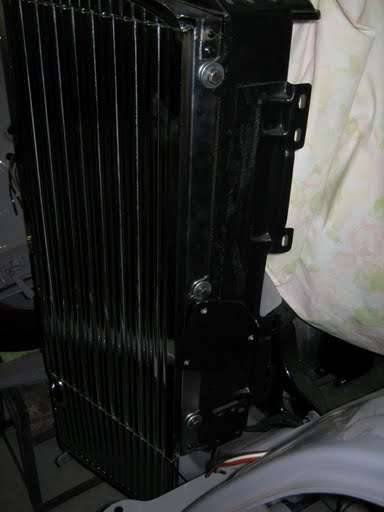 (22.77 KB) (22.77 KB)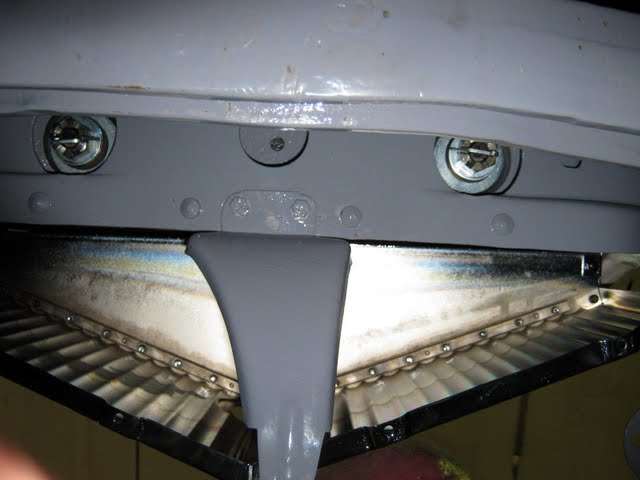 (16.15 KB) (16.15 KB)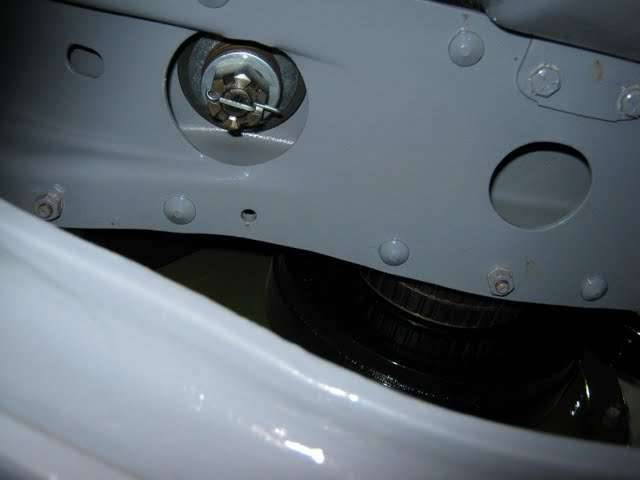
Posted on: 2009/10/19 23:36
|
|||
|
Mal
/o[]o\ ==== Bowral, Southern Highlands of NSW, Australia "Out of chaos comes order" - Nietzsche. 1938 Eight Touring Sedan - SOLD 1941 One-Twenty Club Coupe - SOLD 1948 Super Eight Limo, chassis RHD - SOLD 1950 Eight Touring Sedan - SOLD What's this? Put your Packard in the Packard Vehicle Registry! Here's how! Any questions - PM or email me at ozstatman@gmail.com |
||||
|
||||
|
Re: Wade's Workshop
|
||||
|---|---|---|---|---|
|
Home away from home
|
Hi Mal and Wade, I would urge that you etch or carefully strike the marks onto the harmonic balancer as the paint has a habit of removing itself after a while. best regards and keep up the good work. Peter T
Posted on: 2009/10/20 0:10
|
|||
|
I like people, Packards and old motorbikes
|
||||
|
||||
Register To PostTopic is Locked


