


|
Follow-on chassis sub-projects
|
||||
|---|---|---|---|---|
|
Home away from home
|
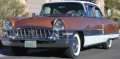
Cleaning...painting the chassis is pretty mundane, but it was only the first stage of a series of sub-projects on it. Following will be:
1) removal of the torsion bars and torque arms. The torsion bars need to be cleaned better and painted. The torque arm pivots need to be disassembled, cleaned and re-lubed. 2) The new fuel system will be plumbed. This will include a sumped fuel tank, an electric pusher pump at the back into 3/8IN feed line up to the front, a fuel pressure regulator next to the new high performance mechanical fuel pump and a 1/2IN return line back to the tank. This may seem like overkill, but it is not given the higher horsepower of the engine and the 115F temperature it may have to operate in during the Summer in Pahrump/Las Vegas. 3) New brake lines will be plumbed. Panther has 4-wheel disc brakes, so new flex brake lines were needed in any case. I will replace all the steel brake lines too. More to come... Craig
Posted on: 2015/4/5 10:54
|
|||
|
Nuke them from orbit, it's the only way to be sure! Ellen Ripley "Aliens"
Time flies like an arrow. Frui |
||||
|
||||
|
Re: Follow-on chassis sub-projects
|
||||
|---|---|---|---|---|
|
Home away from home

|
I'm happy the Panther is moving forward for you. Looking towards seeing it in person when I drop by again.
Posted on: 2015/4/5 18:27
|
|||
|
||||
|
Continuing with chassis sub-projects: left T-L bars removal
|
||||
|---|---|---|---|---|
|
Home away from home
|
Continuing with the chassis sub-projects: removing the left side torsion bars.
The first thing to do was free the loads on the left front and rear torque arms. To free the left front, we removed the left upper and lower control arms. This also allowed us to remove the torque arm to lower control arm adjustable strut. Unloading the upper control arm:  Disconnecting the upper control arm inner pivot bar from the frame:  Front suspension lower control arm disconnected, arms now free and torque arm is unloaded:  Following a similar procedure on the rear torque arm:  Both torque arms are load-free.
Posted on: 2015/4/11 15:09
|
|||
|
Nuke them from orbit, it's the only way to be sure! Ellen Ripley "Aliens"
Time flies like an arrow. Frui |
||||
|
||||
|
Left T-L bars removal continued
|
||||
|---|---|---|---|---|
|
Home away from home
|
Supposedly, one can now use a drift and sledge hammer on the end of the left front torsion bar where it is accessible through the broach hole in the front of the front torque arm. This is supposed to drive the rear hex end out of the rear of the broach hole in the rear torque arm and through a hole in the outrigger bracket. My friend Paul in Las Vegas has done this many times.
NO JOY! The rear of the main bar refused to move no matter how much we pounded on the front or the rear or used PB Blaster on it! What to do? When in doubt, RTFM. From the 1955-56 Packard Service Manual, Suspension and Steering section, page 13, figures 36 and 37:   IMO, there is NO WAY that puny J-6046 tool and hammer is going to knock the rear hex end of the left bar loose! So, I had my local machine shop make up a very much more robust version and I will use a large sledge hammer on it. The custom tool:  
Posted on: 2015/4/11 15:16
|
|||
|
Nuke them from orbit, it's the only way to be sure! Ellen Ripley "Aliens"
Time flies like an arrow. Frui |
||||
|
||||
|
Re: Left T-L bars removal continued 2
|
||||
|---|---|---|---|---|
|
Home away from home
|
Here's my custom J-6046 (split-block clamp tool) in action:
 I also heated the cast steel outside of the rear torque arm with my O-A torch for about 1 minute. After a few good wacks, the left main bar is now free from the hex broach!  You can see that the rear hex end is pretty rusty looking which explains why it was stuck so firmly. A similar procedure to force the front hex through the rear hex broach hole except this time the tool is attached to the front of the main bar but on the rear side of the outrigger bracket:  Left main bar and rear torque arm removed:  Comments and/or questions welcome. Craig
Posted on: 2015/4/11 15:37
|
|||
|
Nuke them from orbit, it's the only way to be sure! Ellen Ripley "Aliens"
Time flies like an arrow. Frui |
||||
|
||||


