|
Re: KPack's 1954 Panama
|
||||
|---|---|---|---|---|
|
Forum Ambassador

|
Yes, undercutting the mica after turning the commutator is a proper and necessary part of generator service, and using a section of hacksaw blade was a very common way of accomplishing that.
Posted on: 2022/4/7 14:42
|
|||
|
||||
|
Re: KPack's 1954 Panama
|
||||
|---|---|---|---|---|
|
Home away from home

|
Thank you, Dave, for the confirmation of the process! Since I am entirely self-taught and have been working on Packards since I was 16 in the ‘60s, I’m not sure where I ever came across that tidbit.
Posted on: 2022/4/7 15:28
|
|||
|
||||
|
Re: KPack's 1954 Panama
|
||||
|---|---|---|---|---|
|
Home away from home

|
I did check the mica as part of the service. The Motors manual I worked out of mentioned it, and I think it said something like 1/32" was an appropriate undercut.
I checked mine and the mica still looks plenty undercut relative to the commutator, so I didn't do anything additional. I just used very fine sandpaper to polish the commutator until I removed all the scratches. Attach file:  mica.jpg (296.93 KB) mica.jpg (296.93 KB)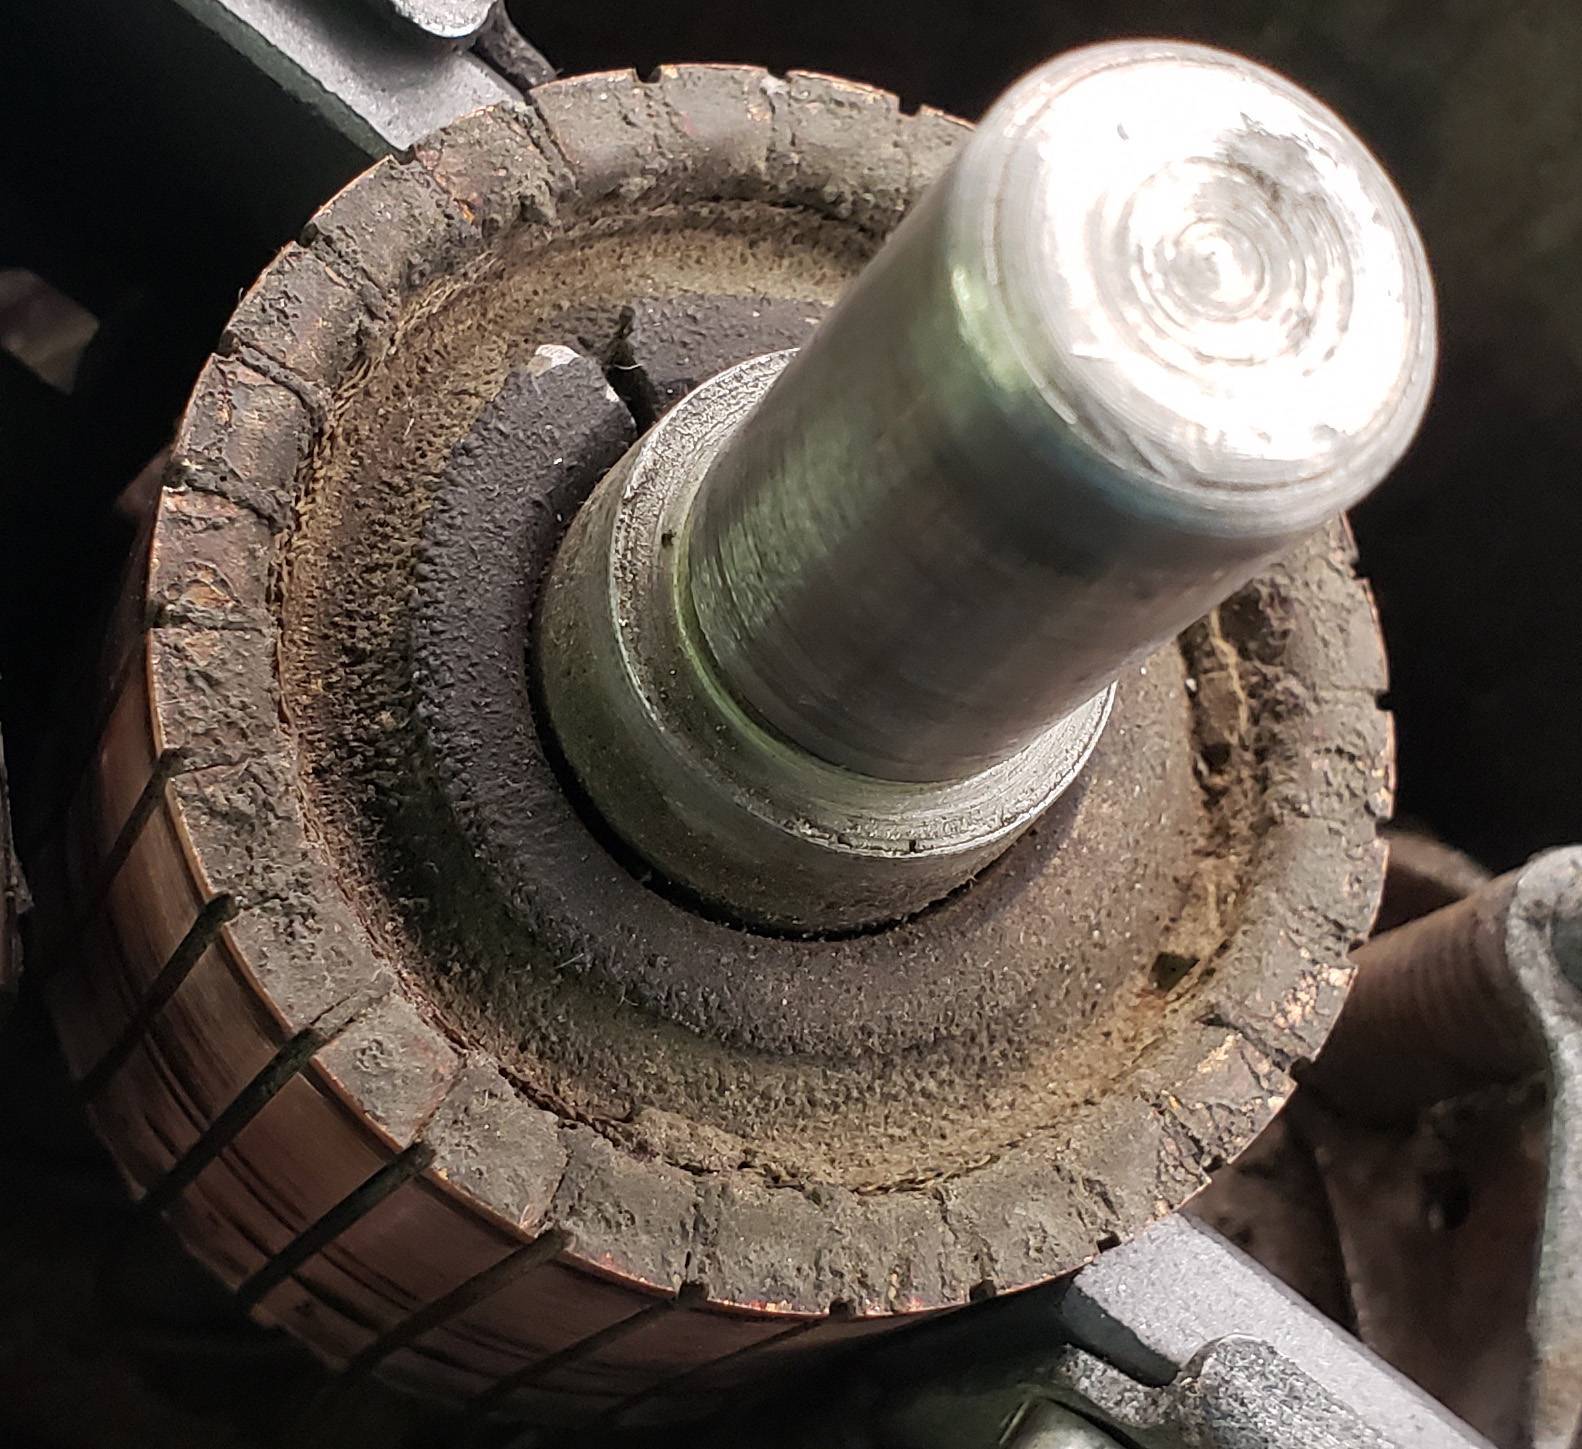
Posted on: 2022/4/7 16:07
|
|||
|
||||
|
Re: KPack's 1954 Panama
|
||||
|---|---|---|---|---|
|
Home away from home
|
I noticed that yours looked good and should have said that the comment was for reference an case anyone else was doing a similar repair. Also, now that I think of it, I’ve also used the sharp corner of a cut feeler gauge to do the job.
Posted on: 2022/4/7 18:33
|
|||
|
||||
|
Re: KPack
|
||||
|---|---|---|---|---|
|
Home away from home
|
I had some time yesterday so I hooked up the generator to the battery and let it run for a while. Thanks Ross for the tip. From what I can tell it seemed to run fine, and I assume the brushes are settled into place. Once I get the car started again I will test to make sure that it is all functioning properly.
I installed the generator back on the car, leaving the condenser off for now. The radio currently does not work in the car, so the condenser is not needed. I reinstalled the fan as well. Next up is the radiator. Lastly, I stripped the radiator panel from whatever was on it previously. I think it was POR 15 or something similar. It was thick, was peeling in a few places, had ugly running drips, and generally was a poor look. So I cleaned it down to bare metal and will repaint. I was hoping to get the car started and test it out, but we woke up to 3-4" of snow on the ground. There's supposed to be a cruise-in with the local car club this weekend...I wonder if that will still happen. -Kevin Attach file: Generator testing.jpg (121.38 KB)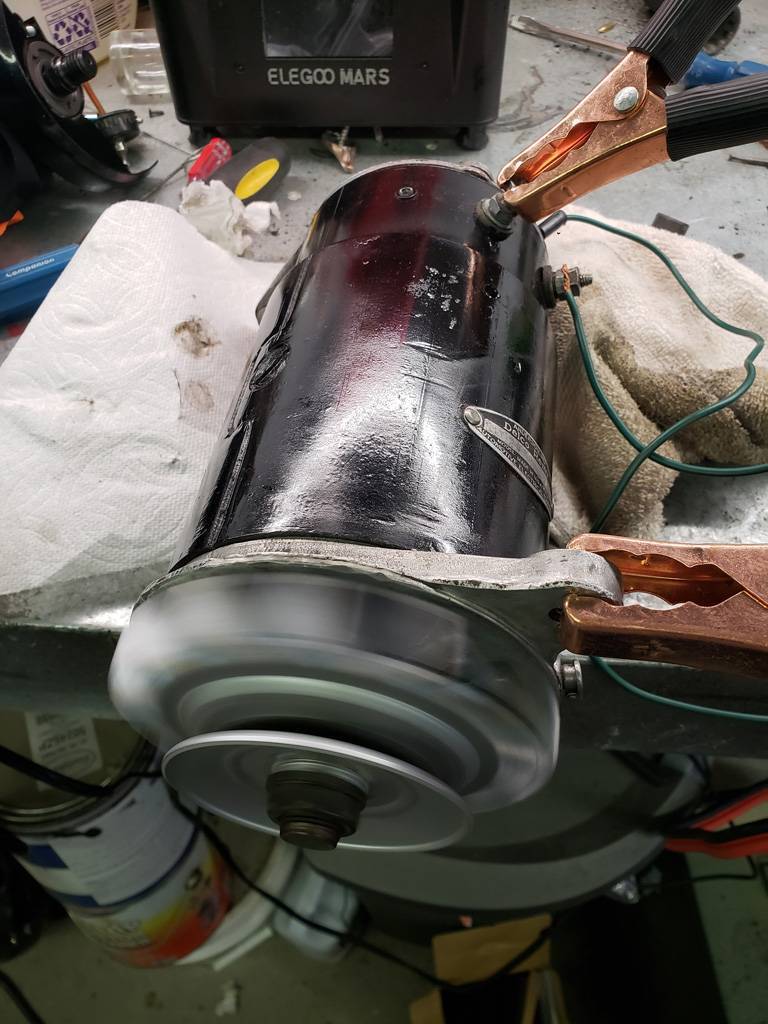 Generator reinstalled.jpg (122.53 KB) Generator reinstalled.jpg (122.53 KB)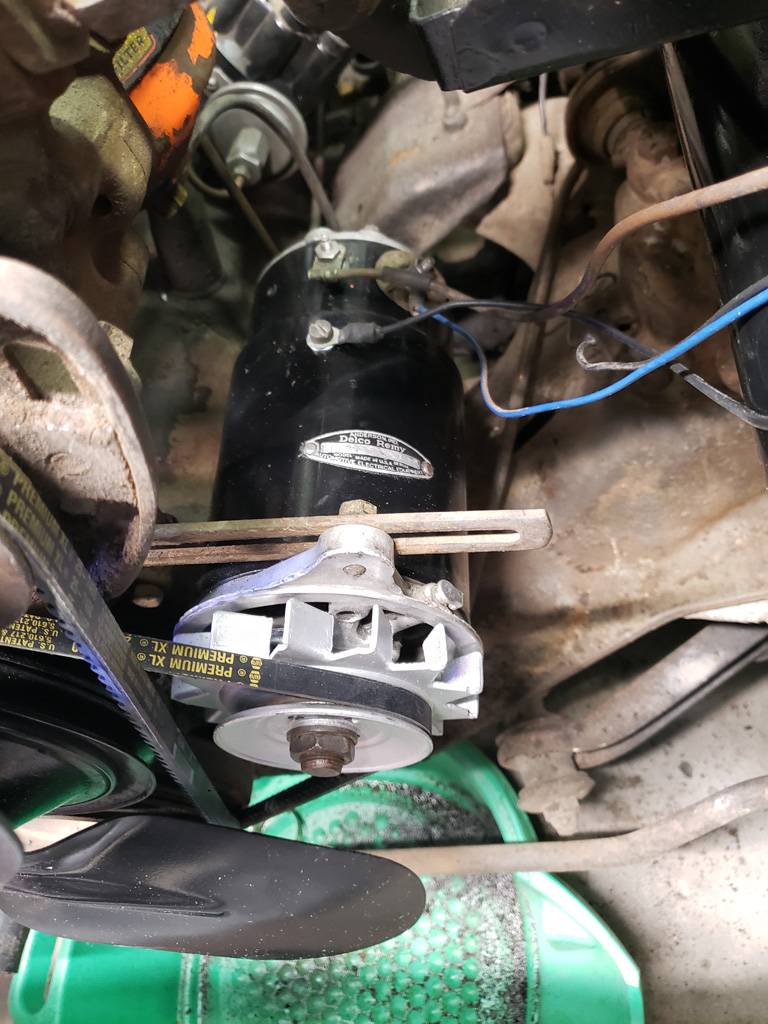 Slowly coming back together.jpg (151.73 KB) Slowly coming back together.jpg (151.73 KB)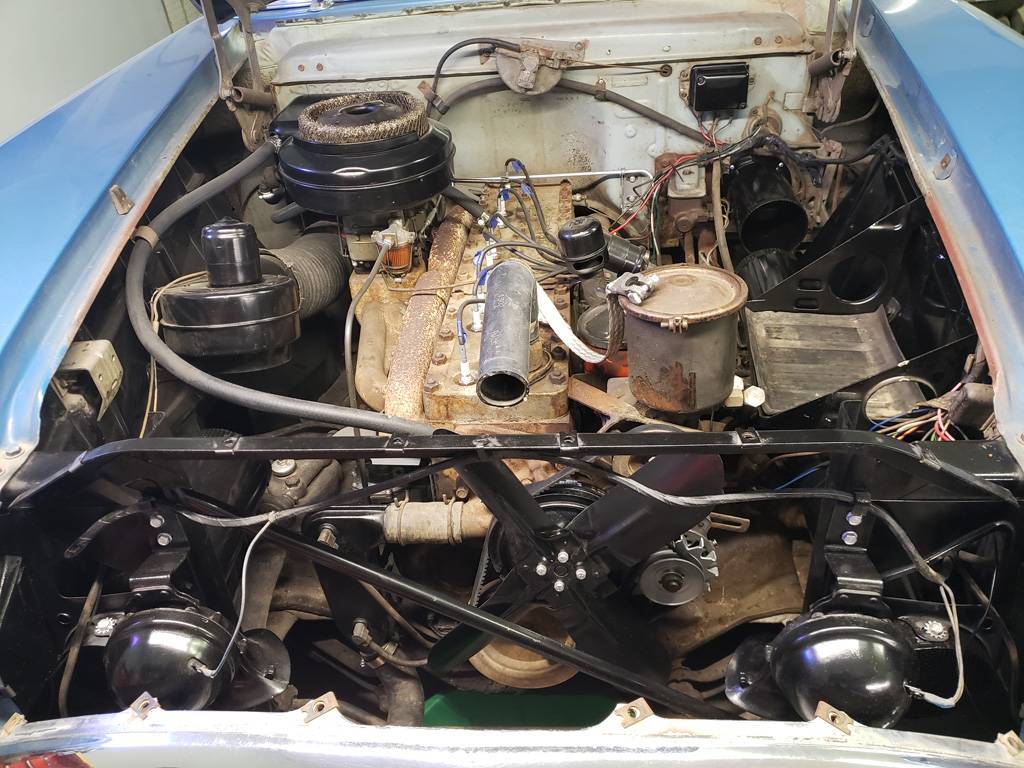 Radiator panel.jpg (92.07 KB) Radiator panel.jpg (92.07 KB)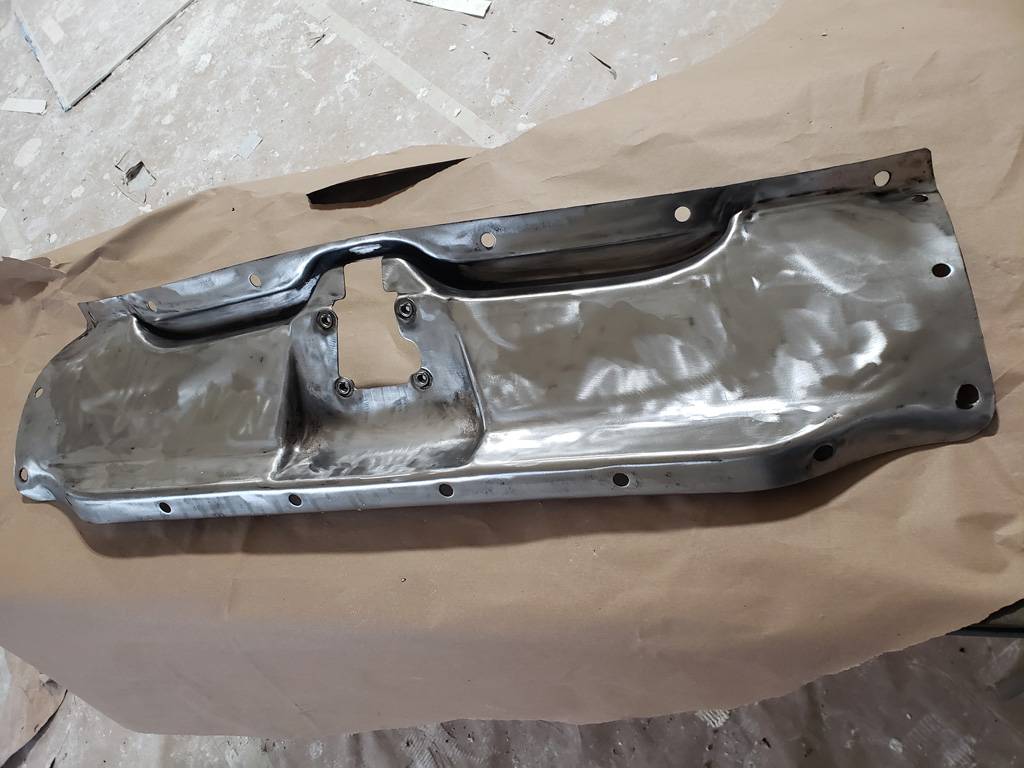 Late spring snow.jpg (73.01 KB) Late spring snow.jpg (73.01 KB)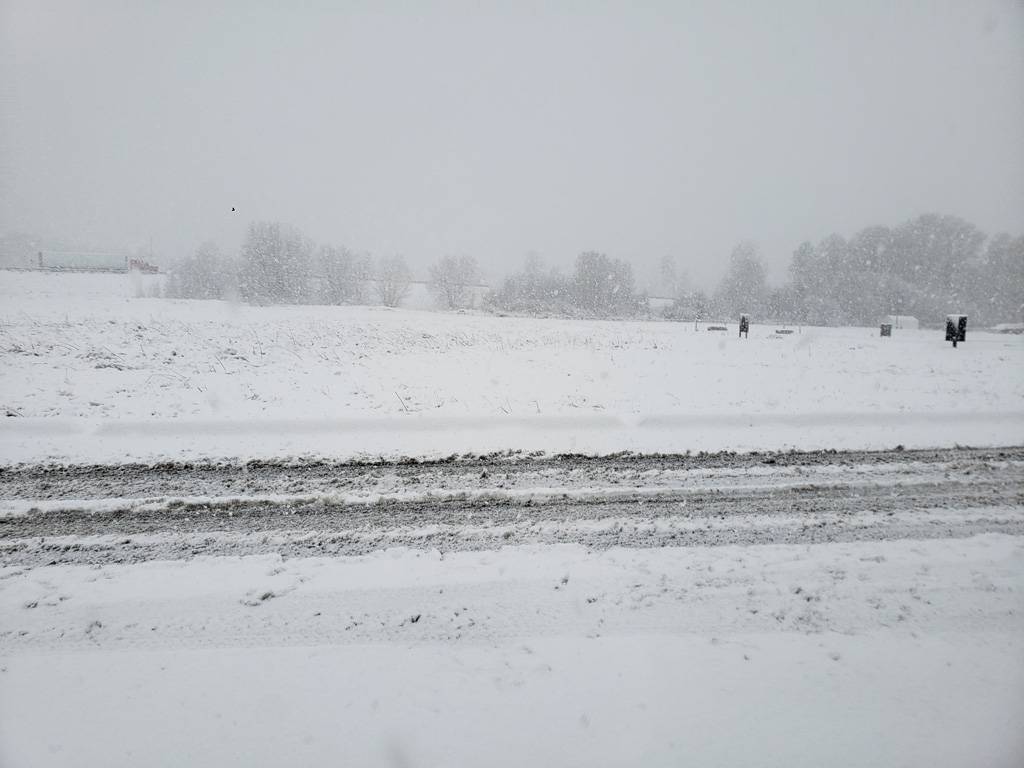
Posted on: 2022/4/12 11:20
|
|||
|
||||
|
Re: KPack
|
||||
|---|---|---|---|---|
|
Home away from home
|
Kevin, good to see about the generator, and I'll have to remember that tip. I just replaced the bearing and brushes in mine, but the commutator looked good, so I didn't do more work, and it's charging fine.
Sorry to hear about the snow. My parents are near you, in N. Idaho, and had the same issue. Hope it melts off soon!
Posted on: 2022/4/13 20:31
|
|||
|
1937 120 1092 - Original survivor for driving and continued preservation.
https://packardinfo.com/xoops/html/modules/newbb/viewtopic.php?topic_id=16514&forum=10 1937 115 1082 - Total basket case, partial restoration, sold Hershey 2015 https://packardinfo.com/xoops/html/modules/newbb/viewtopic.php?start=0&topic_id=6550&order=ASC&status=&mode=0 |
||||
|
||||
|
Re: KPack
|
||||
|---|---|---|---|---|
|
Home away from home
|
Not much time to work on the Panama, but I did get the radiator reinstalled. I used some fiber-reinforced rubber washers I found for toilet tank installation. They are different from the ones that others have posted about here before, but I couldn't find anything like those. My radiator did not have the center bolts on either side, just the ones with the rubber washers. How important is it to have the center bolts? I can get some if needed, just not sure how much they help since I believe they are not mounted with rubber.
I also got new flexible duct hose from Dwight. The old ones were rock hard, ugly, and didn't stay in place, leading to lots of air leaks. Dwight warned me that the cut wires were extremely sharp, and he's right. Rather than having to be overly cautious when installing the ducts, I took a minute or two and used a Dremel to quickly round them off so they were safe. Installing the ducts was a struggle, mainly because of the awkward positioning of the air ducts. But I got them all on eventually. Hopefully they stay on while driving. I have a comparison shot between old material vs new. I'm not sure if my old ducts are original to the car or not. But the fabric seems to be very similar. My old ones were very stretched out, whereas I have a lot more to spare with the new. Overall I'm very happy with the replacements and I hope to have a little less fumes entering the cabin. Lastly, we are finally having some decent weather again without snow or rain. I'm hoping to get the car started up again this weekend. The puddle under the car from the transmission is growing in size even though I haven't moved the car at all in weeks. I haven't had time to get underneath and see where it is coming from. I also plan to change the engine oil and filter after getting it running for a while. Any thoughts on dumping some Seafoam or MMO into the crankcase before I change the oil? -Kevin Attach file: Sharp edges.jpg (75.13 KB)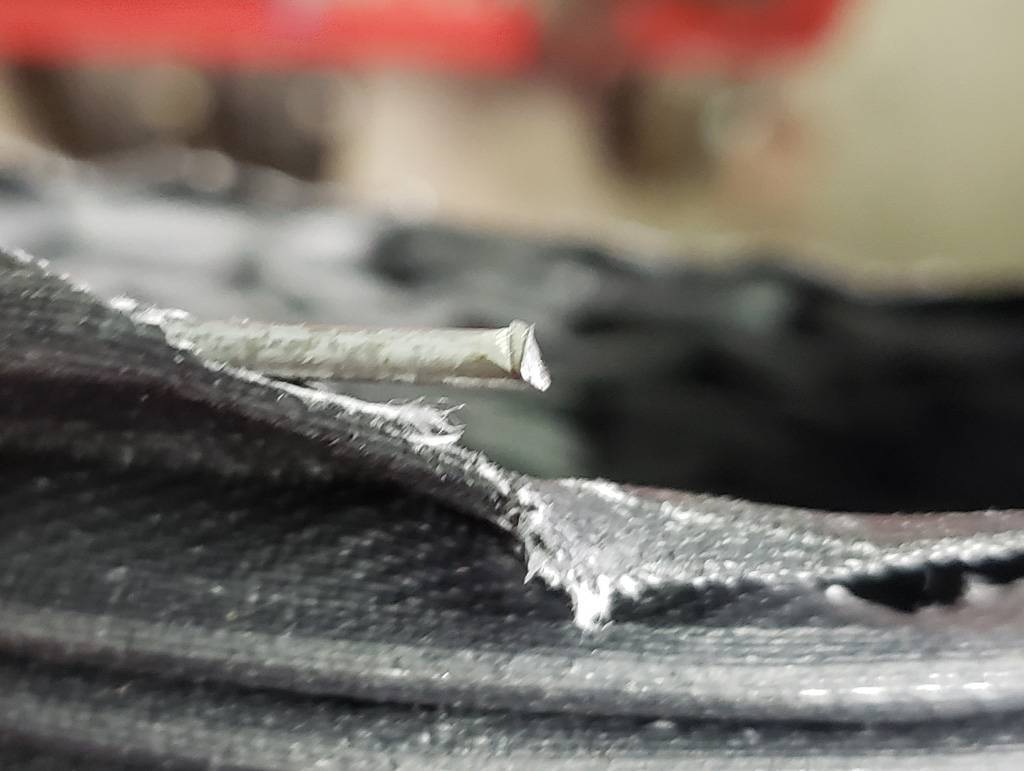 Smooth edges.jpg (88.88 KB) Smooth edges.jpg (88.88 KB)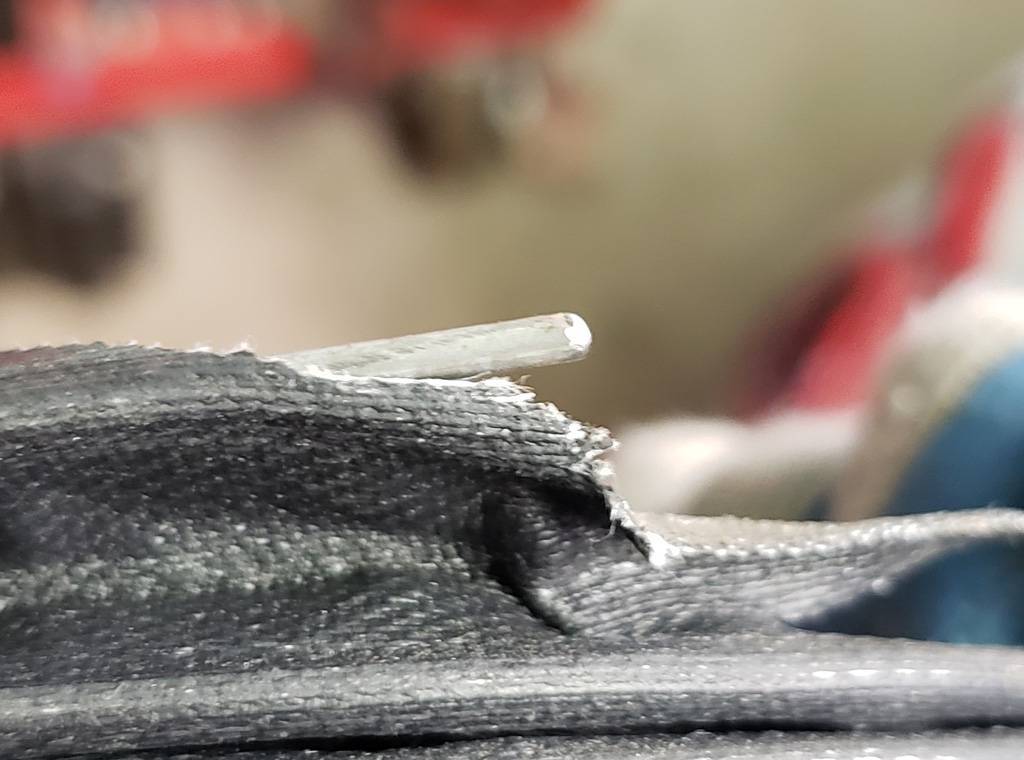 New ducting installed.jpg (155.40 KB) New ducting installed.jpg (155.40 KB) New vs old ducting.jpg (239.08 KB) New vs old ducting.jpg (239.08 KB)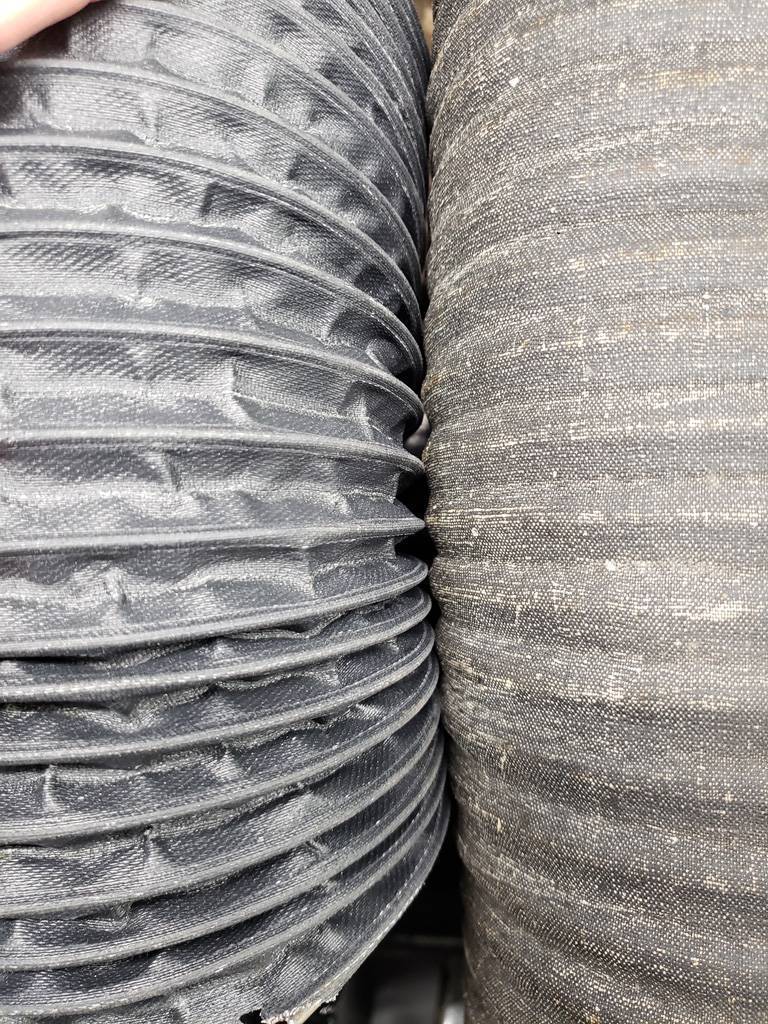
Posted on: 2022/4/22 10:34
|
|||
|
||||
|
Re: KPack
|
||||
|---|---|---|---|---|
|
Forum Ambassador

|
Quote:
Installing the ducts was a struggle, mainly because of the awkward positioning of the air ducts. But I got them all on eventually. Hopefully they stay on while driving. I will presume your car has the same ducts as the 55-6 and if so, if you look or feel carefully there are 3 or 4 tiny bumps spread around the duct about an inch or so in from the ends. It kind of looks like they might have used a tool from the inside to push out and almost puncture the sheet metal. The result is a raised area the cloth duct and wire is supposed to slide over (which is a pain) but the idea is the wire will catch on the bumps so the fabric will not slide back.
Posted on: 2022/4/22 10:53
|
|||
|
Howard
|
||||
|
||||
|
Re: KPack's 1954 Panama
|
||||
|---|---|---|---|---|
|
Home away from home
|
Howard, you beat me to it as I was just about to point those out! I’ve replaced the tubes in several Packards through the years (years ago) but don’t recall difficulties although I probably partially took things apart too.
On the radiator mounting, I believe it is the center bolts that support much of the weight with the others adding a little more, especially if used in conjunction with the steel tube that goes inside the rubber bushings. I’ll be at my Oregon shop in a few weeks and, as you’re in about the same climate in Washington as I am in Oregon, I hope the weather does co-operate! Not that it matters much as I work indoors but I prefer staying dry in the block or so distance to the shop from the house. Lately, though, I’ve been using my late father’s covered golf (mobility) cart with headlights for the trips which has made it easier and allows me to work later rather than walking back on the gravel road when it is so dark that I can’t see my hand in front of my face.
Posted on: 2022/4/22 13:13
|
|||
|
||||


.jpg")


