
|
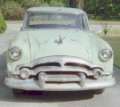
Re: Ken's 1953 Packard Clipper Deluxe Touring Sedan
|
||||
|---|---|---|---|---|
|
Home away from home
|
11/4/09 to 11/22/09
While still working on replacing all bulbs in the instrument cluster, the gas tank started leaking again, around the seam in the middle of the tank. This was the second leak for the gas tank since first having the gas tank cleaned and repaired on 2/29/2008 by Sims Radiator Service in Lawrenceville, Georgia. The original job had a 90 day warranty. Since the gas tank was not installed within the 90 day warranty period, and started leaking shortly after installed, Sims Radiator Service made an exception in my case and re-treated the gas tank without additional charge, which I appreciated. The re-treated gas tank lasted more than 90 days, so I really don't have a beef with Sims Radiator Service. Sims has done good work for me on radiators on my daily drivers and on this Packard. Sims has done good work on gas tanks for others in Peachstate Packards on their Packards. I really do not know why my gas tank was such a problem. I do know that I do not like installing and reinstalling gas tanks on my Packard on a regular basis and wanted more than a 90 day warranty. So I ordered a gas tank from Max Merritt, which has a limited lifetime warranty, limited to the buyer's lifetime during his ownership of the vehicle. Max Merritt gets its gas tanks from Gas Tank Renu-USA, which has a headquarters in Detroit, Michigan, with numerous dealers in the U.S.A. and Canada. The Gas Tank Renu-USA gas tank has a black rubber-like coating. Only two small problems with installation of the new gas tank. Had to ream out the 1/8 in. gas line opening, perhaps because some of the coating had gotten into the opening. Also had to remove some drips of the rubberized material on the gas tank fill tube, as the drips made installation of the rubber hose part of the fill tube difficult. The old gas tank taken off had a 1/4 in. gas line opening, so to use the existing gas line with the new gas tank with the 1/8 in. gas line opening, had to buy a 1/8 in. to 1/4 in. brass adapter. (Otherwise, I would have had to cut off the 1/4 in. fitting on the gas line and reinstall a 1/8 in. fitting on the gas line.) So far performance of the new gas tank has been good. Parts required: Gas Tank Renu-USA gas tank--Max Merritt 1/8 in. to 1/4 in. brass adapter--Hill's Ace Hardware, Loganville, GA. NAPA Permatex High Performance Automotive Grade Thread Sealant Here is a picture of the gas tank also showing the brass adapter: Attach file:  (49.58 KB) (49.58 KB)
Posted on: 2010/1/5 18:52
|
|||
|
||||
|
Re: Ken's 1953 Packard Clipper Deluxe Touring Sedan
|
||||
|---|---|---|---|---|
|
Forum Ambassador

|
Max lists these as restored tanks but you're saying the gas outlet is not as original. Does the tank look to be a repro or different than the one you took out other than the coating. If "restored" why would the original size outlet be different?
Posted on: 2010/1/5 19:35
|
|||
|
||||
|
Re: Ken's 1953 Packard Clipper Deluxe Touring Sedan
|
||||
|---|---|---|---|---|
|
Webmaster

|
I think the fuel line on my Clipper is 3/8" line. But I will have to double check that.
Posted on: 2010/1/5 19:41
|
|||
|
-BigKev
1954 Packard Clipper Deluxe Touring Sedan -> Registry | Project Blog 1937 Packard 115-C Convertible Coupe -> Registry | Project Blog |
||||
|
||||
|
Re: Ken's 1953 Packard Clipper Deluxe Touring Sedan
|
||||
|---|---|---|---|---|
|
Home away from home

|
Most US cars had 5/16 gas lines. The only exception I know of was Chrysler built Hemi cars 1966-72 had 3/8. This was a hemi only feature, even the 440 models used the standard 5/16.
Posted on: 2010/1/5 19:52
|
|||
|
||||
|
Re: Ken's 1953 Packard Clipper Deluxe Touring Sedan
|
||||
|---|---|---|---|---|
|
Webmaster
|
Yes I think 5/16 not 3/8. You are correct.
Posted on: 2010/1/5 20:10
|
|||
|
-BigKev
1954 Packard Clipper Deluxe Touring Sedan -> Registry | Project Blog 1937 Packard 115-C Convertible Coupe -> Registry | Project Blog |
||||
|
||||
|
Re: Ken's 1953 Packard Clipper Deluxe Touring Sedan
|
||||
|---|---|---|---|---|
|
Home away from home
|
Big Kev, Rusty, HH56,
I believe the gas tank I got from Max Merritt was original as it looked original. I had assumed that the gas tank on it originally was original but I do not know for sure. As for the gas tank on it originally, I suppose it is possible that the original threads were stripped on it and it was rethreaded to a larger size. I suppose that could also have been true for the Max Merritt tank. They do not claim that it is new, only reconditioned. All I know was that I inserted screws into the holes and used the sizes that appeared to fit. With cars this old, not everything is always as it was originally. Ken
Posted on: 2010/1/6 9:01
|
|||
|
||||
|
Re: Ken's 1953 Packard Clipper Deluxe Touring Sedan
|
||||
|---|---|---|---|---|
|
Home away from home
|
11/15/09-12/27/09
The gas gauge in the Packard was working but was underreporting the actual amount of gas in the gas tank. The temperature gauge on the Packard was not working at all. The 1951-1954 Service Manual (available on Packard Info) in Chapter 13 on Instruments, page 2, indicated that underreporting fuel could be due to the Instrument Voltage Regulator being defective. The 1951-1954 Service Manual in Chapter 13 on Instruments pages 2 and 3 gives a way to test temperature gauges with a fuel tank sending unit and two leads with clip terminals on each end. When I took the old fuel tank off the Packard to replace it with the new fuel tank, I took the fuel tank sending unit (which I had fairly recently installed) out, used it, two wires and four clothes pins (not having 2 leads with clip terminals) and did the test described in the Service Manual. The result was that the temperature gauge did work, the wiring to the temperature gauge was good, but the Temperature Sending Unit was not good. With this knowledge in hand, I ordered an Instrument Voltage Regulator and a Temperature Sending Unit from Max Merritt. The Instrument Voltage Regulator is attached to the back of the instrument cluster. Since the instrument cluster remained loose from my replacing the bulbs (knowing I would probably go back in for the gauges), I removed the instrument cluster, unscrewed the old Instrument Voltage Regulator and screwed in the new Instrument Voltage Regulator. The Temperature Sending Unit is screwed into the driver's side of the engine and has a wire attached to it. Obviously, you should detach the wire and then unscrew the old Temperature Sending Unit. Was surprised to find a 16 mm. metric wrench fit the old (and new) Temperature Sending Unit nearly perfectly. Did not know anything was metric about a Packard. Was also surprised when I got it unscrewed that I had a small coolant leak from the engine where the old Temperature Sending Unit had been. So it would help to have a small container underneath it to catch leaking antifreeze unless you are very fast to put in the new Temperature Sending Unit. With both the new Instrument Voltage Regulator and the new Temperature Sending Unit installed, the temperature gauge appears to be working properly and the fuel gauge appears to be giving a truer reading of the fuel level in the gas tank. Parts required: Instrument Voltage Regulator-Max Merritt Temperature Sending Unit--Max Merritt Attached is a photo showing the new Temperature Sending Unit installed. It is the brass protrusion from the driver's side of the engine above the solenoid and the starter. Attach file: (62.93 KB)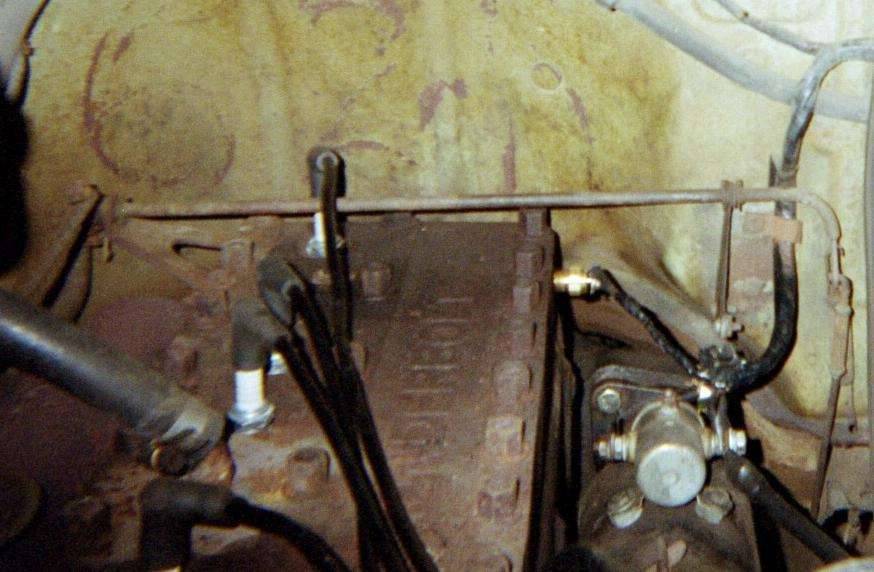
Posted on: 2010/1/6 9:09
|
|||
|
||||
|
Re: Ken's 1953 Packard Clipper Deluxe Touring Sedan
|
||||
|---|---|---|---|---|
|
Home away from home
|
Here are the three dog dish hubcaps that came with my car. You've heard of The Good, the Bad, and the Ugly? This is the Bad, the Worse, and the Ugly. All three are seriously lacking in chrome plating. Few respectable hubcap thiefs would be caught dead with them, which may be why they were still on the car. The best one is down to its brass plating. The other two are down to steel that is rusting. All three were painted with silver paint.
Short term I am thinking about rust remover for the two rusty ones, apply Rustoleum rusty metal primer to the formerly rusty spots, and go to work with some more Rustoleum silver paint. (And black and red paint.) Long term I am thinking about either rechroming them or replacing them with better condition dog dishes found on eBay or wherever I can find them cheap. If I stick with the dog dishes I will need to buy some wheel trim rings since this model came with them. Dog dishes are a sentimental favorite with me since my parent's car and my first car came with them but I understand they are harder to find in good condition and more expensive. But I could buy some good used full sized hubcaps on eBay or whereever I can find some cheap. They were optional equipment on the car. I think they look better than the dog dishes. I think they are easier to find in good condition and a bit less expensive. I could always use the old ones as garage d?cor. Any thoughts about this? Ken Attach file: (103.89 KB)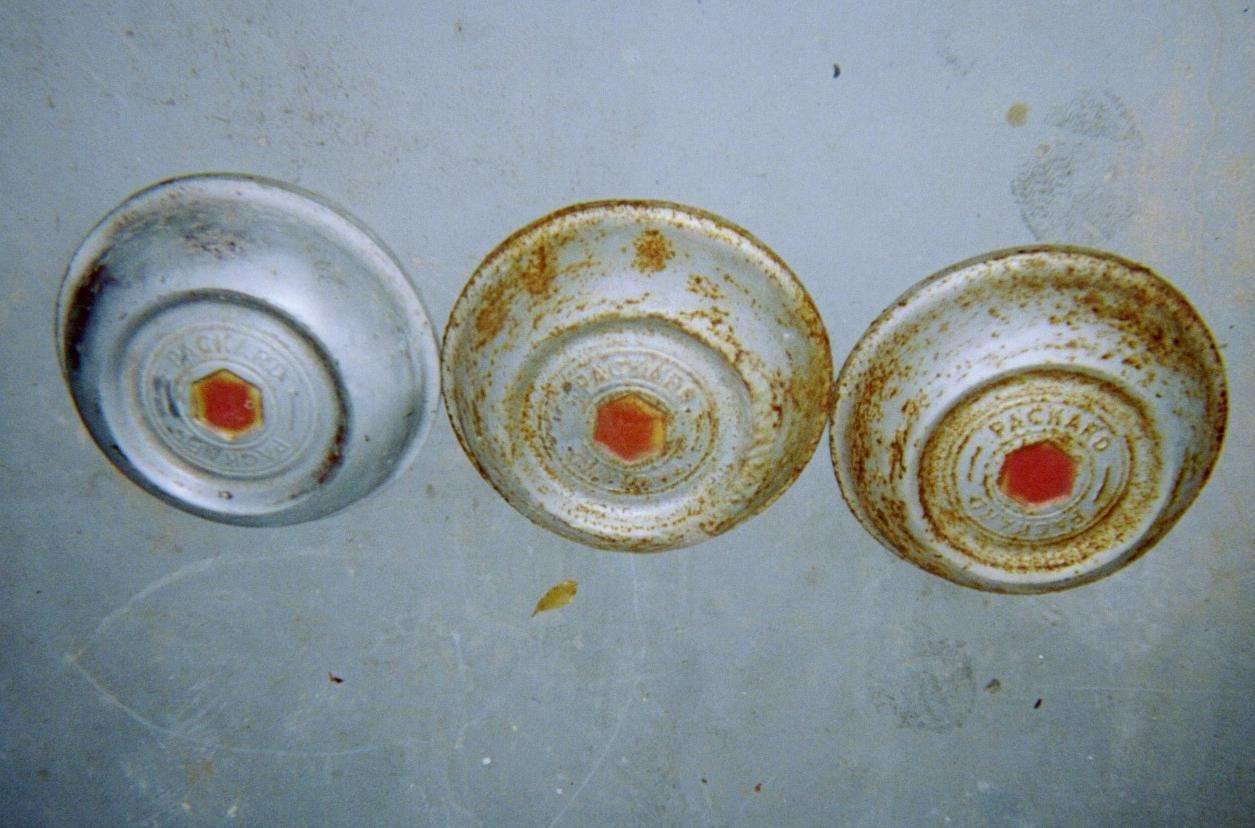
Posted on: 2010/1/9 11:36
|
|||
|
||||
|
Re: Ken's 1953 Packard Clipper Deluxe Touring Sedan
|
||||
|---|---|---|---|---|
|
Home away from home
|
I say seek out the dog dishes/trim rings!
Posted on: 2010/1/9 14:58
|
|||
|
||||


.jpg")


