|
Re: T-L Front upper control arm bushings R&R
|
||||
|---|---|---|---|---|
|
Home away from home

|
Slick set up. Very slick. Looks to be 3/4" steel???? I would think 1/2" would be more than enuf. Tempted to try 3/8" myself. My reasoning is that if the 3/8 u-bolt is strong enuf then 3/8 bar stock should be strong enuf.
Suppose a wide margin (like a couple of wing tabs) was left on the tool-bar so that they extend past the sides of the TL arm. Then drill and tap the tabs for 3/8 bolts and delete the u-bolt. OR maybe weld to each side of the tool bar 3/8 coupler nuts. Not sure why a 50 ton test should be needed. The car only weighs at the max 2.5 tons divided by 4 wheels. I's think a 3 ton test would be more more than ever needed. One ton test at least adequate. Either way, u have a great idea there. I like it better than the Packard approved tool because it allows the load arm to be drawn up into position rahter than requireing the load arm to be positioned initially before installing oem tool.
Posted on: 2013/3/3 20:50
|
|||
|
VAPOR LOCK demystified: See paragraph SEVEN of PMCC documentaion as listed in post #11 of the following thread:f
https://packardinfo.com/xoops/html/modules/newbb/viewtopic.php?topic_id=7245 |
||||
|
||||
|
Re: T-L Front upper control arm bushings R&R
|
||||
|---|---|---|---|---|
|
Home away from home
|
Magnetizing a good idea. The only problem is that standard cold roll steel does not hold magnetism, or not for very long. Usualy permanant magnets are rather hard steel. At least as hard as a good quality screw driver shaft.
Posted on: 2013/3/5 8:35
|
|||
|
VAPOR LOCK demystified: See paragraph SEVEN of PMCC documentaion as listed in post #11 of the following thread:f
https://packardinfo.com/xoops/html/modules/newbb/viewtopic.php?topic_id=7245 |
||||
|
||||
|
Re: T-L Front upper control arm bushings R&R
|
||||
|---|---|---|---|---|
|
Home away from home
|
V8.......nuts...
Plan b...just use magnets..they make super strong ones just to hold u bolt.
Posted on: 2013/3/5 9:53
|
|||
|
Riki
|
||||
|
||||
|
Re: T-L Front upper control arm bushings R&R
|
||||
|---|---|---|---|---|
|
Home away from home
|
If you need a really strong magnet, get one from a magnetron in a discarded microwave. They are strong.
Posted on: 2013/3/5 10:31
|
|||
|
||||
|
Re: T-L Front upper control arm bushings R&R
|
||||
|---|---|---|---|---|
|
Home away from home
|
there was a micro wave on the street, was tempted but I hear they are stronger with current, possible model train motor upgrade.
bought a rare earth magnet, 10 bucks! they are strong,, so will see how that works. edit.. here is ft tool,,complete,,, tomorrow I will test it,, edit,, think I might add a top, milled piece,, edit,,3-10-2013, here is ft tool strut out, the magnet was a pitb, so didn't use it, I need to mill the down cradle wider, shorten legs, and 3/8s would work down there. making the cradle longer, to replace spacers would make it easier. I tighten it up , since my bsr has a curve could not make it flush with bar, unless I loosen the down u bolt. so Packard owners who have their engine out, can replace upper bushings, and this can be modified further,,but this works,,and its cheap to make, Attach file:  (123.56 KB) (123.56 KB)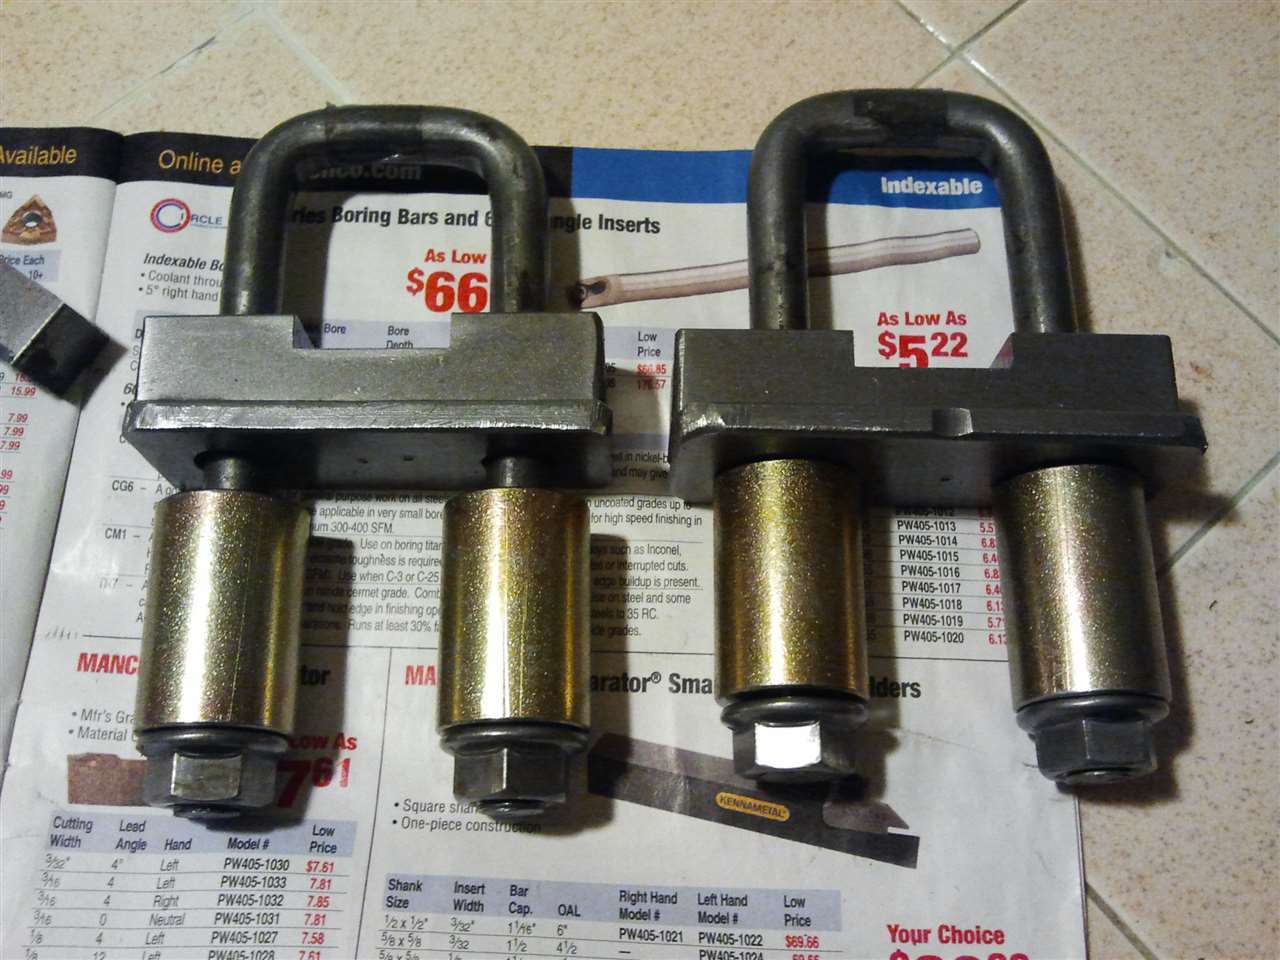 (89.57 KB) (89.57 KB)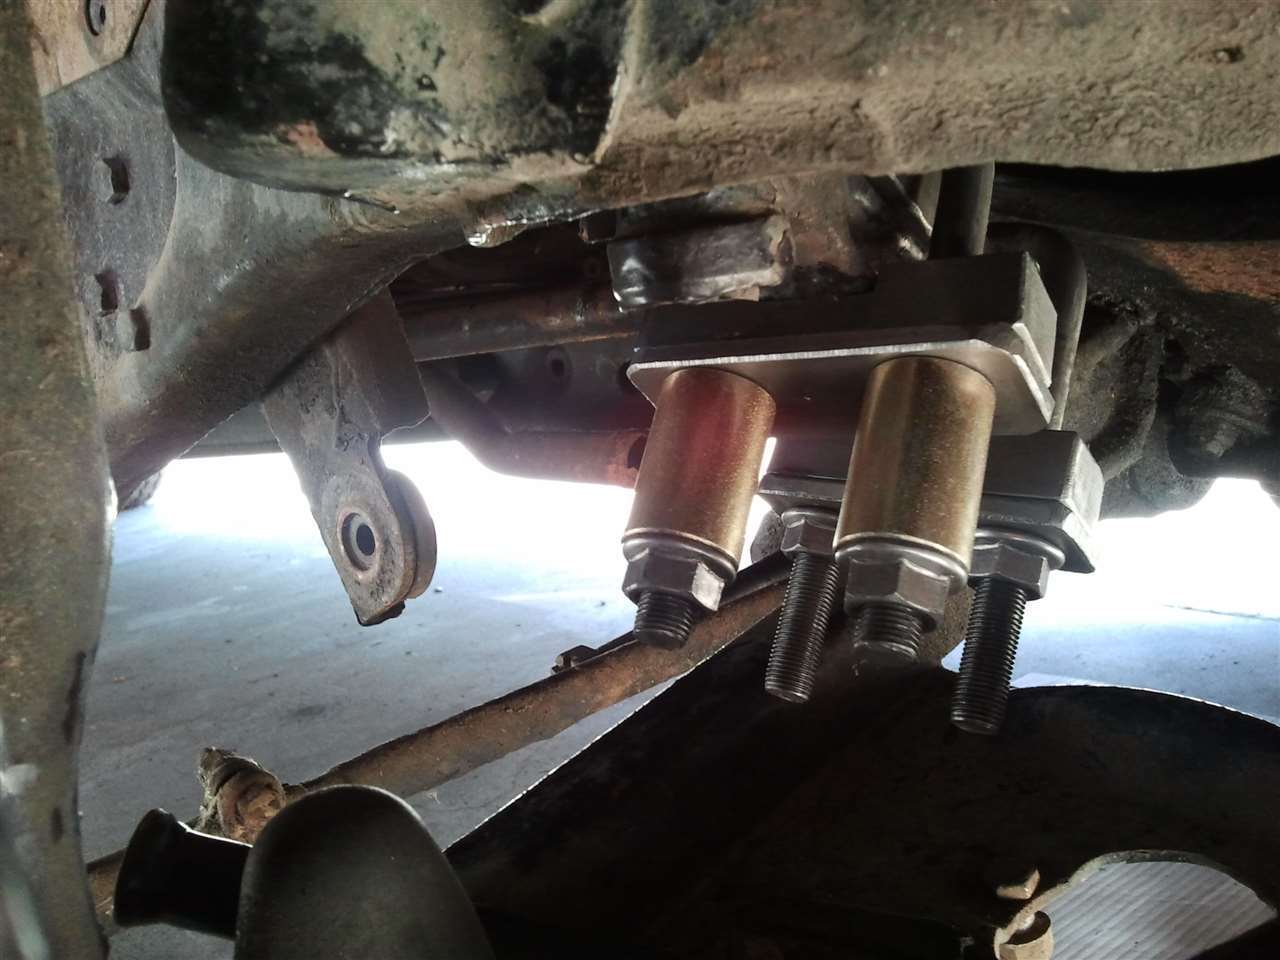 (104.46 KB) (104.46 KB)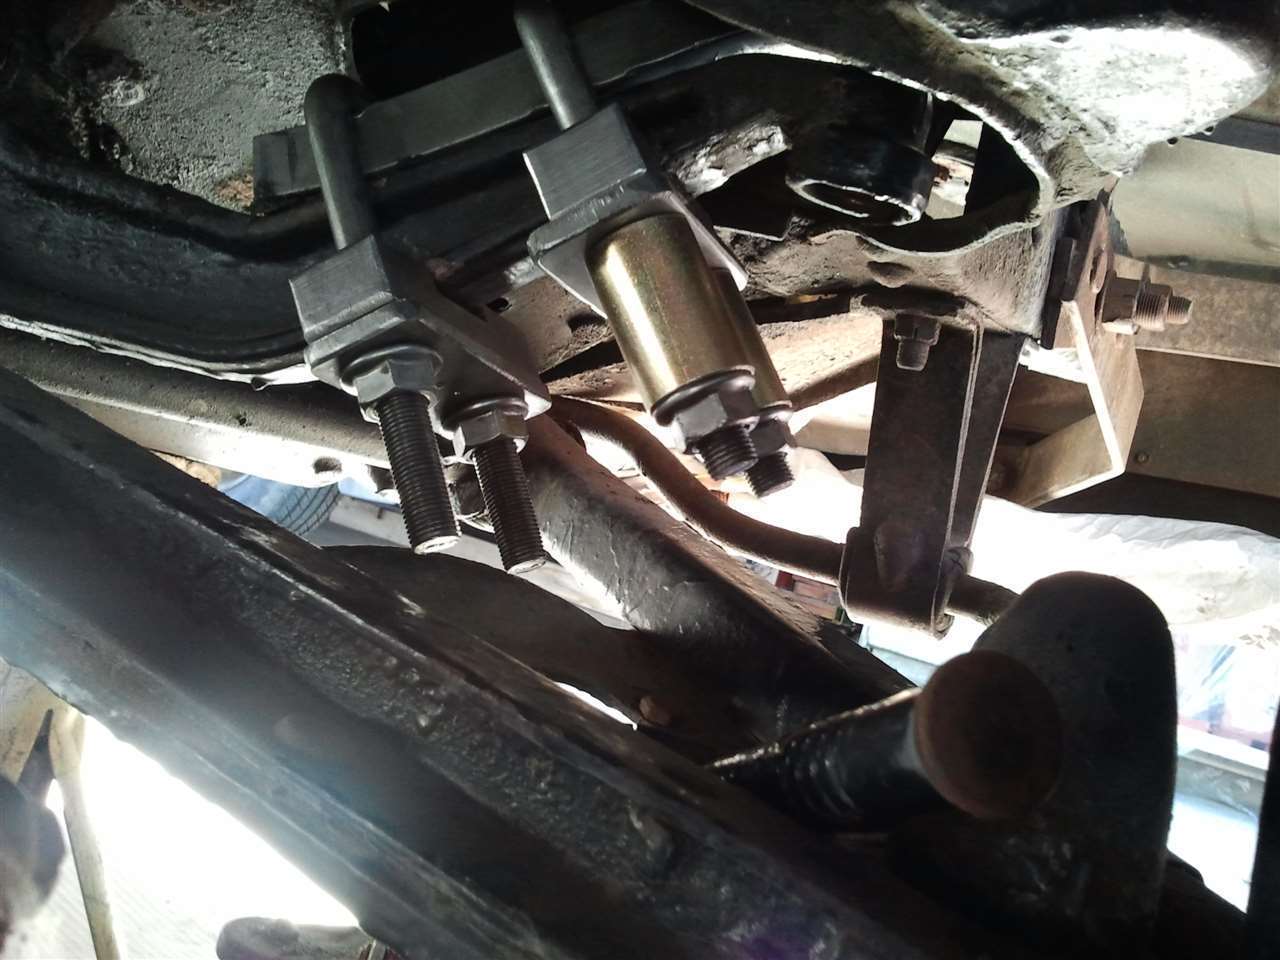 (102.42 KB) (102.42 KB)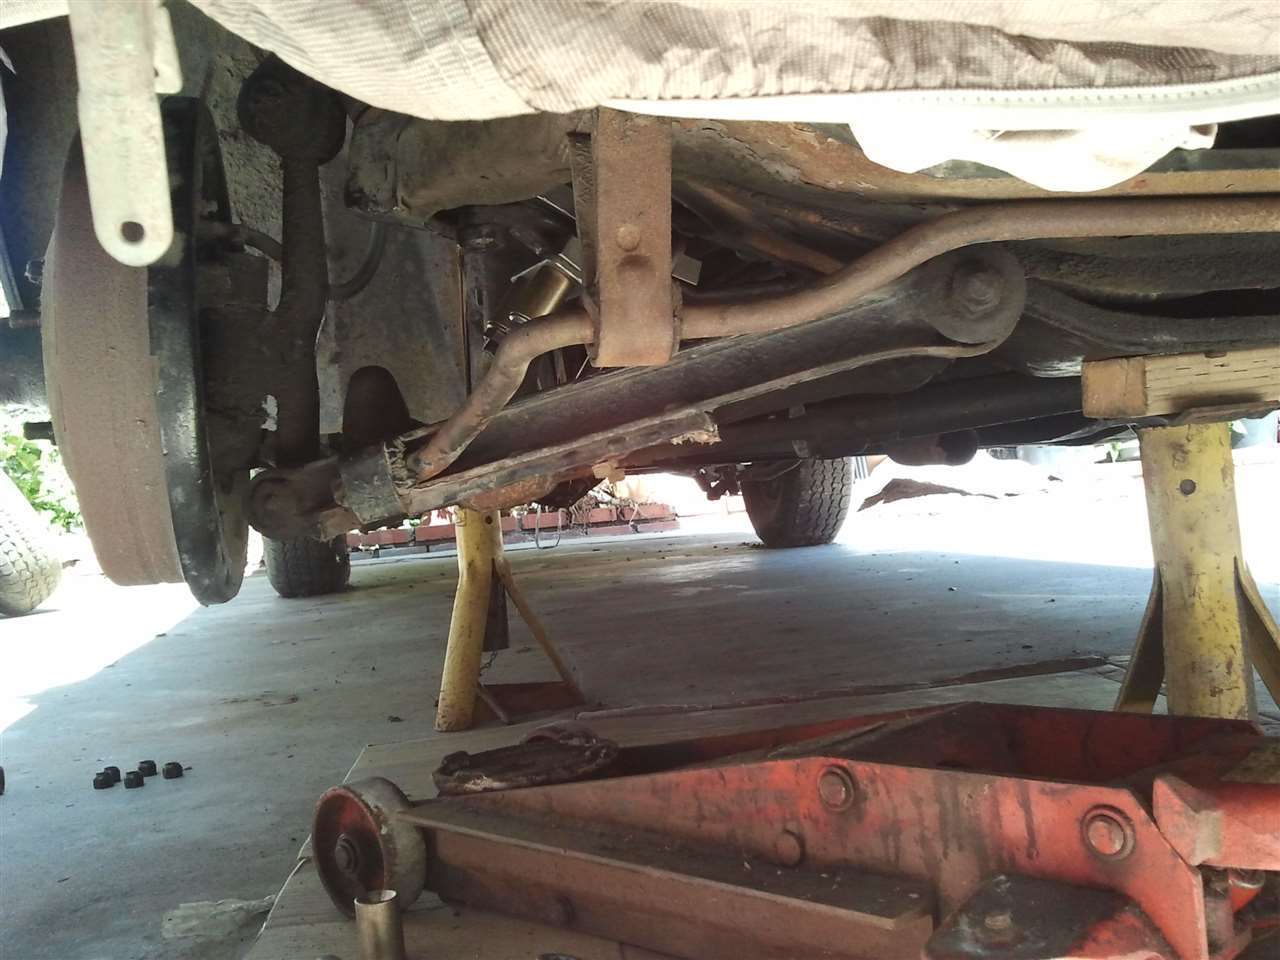
Posted on: 2013/3/8 19:39
|
|||
|
Riki
|
||||
|
||||
|
Re: T-L Front upper control arm bushings R&R
|
||||
|---|---|---|---|---|
|
Home away from home
|
It mite be possible to magnetize the current tool u have.
If u can get some feeler gauge stock (it's hard) that will flex to the matching the arc of the tool and as wide and long as the bottom side of the tool. TIGHTLY wrap some #10 or #8 gauge INSULATED electrical wire around the feeler stock. Allow for about 2 feet of free length of wire at each end. Touch each end of the wire to the battery posts of a car battery. Mite have to do it 2 or 3 times. Only make conexion for 1 or 3 seconds each time. Then unwrap the wire from the feeler stock. The feeler stock will be well magnetized. Place on op of load arm then place tool ontop of the feeler stock. I've never done it with this type of application where very thin steel is needed. If u want to make a quick test run then wrap a GOOD QUALITY screw driver shank with wire and touch it to battery posts. Only touch for maybe 1 to 2 seconds at the longest. 2 or 3 tries. It will magnetize the screw driver shank and it will hold the magnetism well for 10 to 20 years.
Posted on: 2013/3/8 23:50
|
|||
|
VAPOR LOCK demystified: See paragraph SEVEN of PMCC documentaion as listed in post #11 of the following thread:f
https://packardinfo.com/xoops/html/modules/newbb/viewtopic.php?topic_id=7245 |
||||
|
||||
|
Re: T-L Front upper control arm bushings R&R
|
||||
|---|---|---|---|---|
|
Home away from home
|
v8 thanks,
the magnet I bought, I have on the tool its on my vise, and it is stuck to vise, not much but it does stick, when I but u bolt next to it , it goes up, to top of magnet, but you can pull it down, I guess I should put magnet on load arm, you know I always thought of using opposing magnet s as shock absorbers .. or on bumpers to repel butt riders....tailgaters.. I have magnet wire,, use it for my trains, I will see how things go, then give that a try.. thanks v8
Posted on: 2013/3/9 0:16
|
|||
|
Riki
|
||||
|
||||
|
Re: T-L Front upper control arm bushings R&R
|
||||
|---|---|---|---|---|
|
Home away from home
|
hopefully my edits are updated
Posted on: 2013/3/10 19:04
|
|||
|
Riki
|
||||
|
||||
|
Re: T-L Front upper control arm bushings R&R
|
||||
|---|---|---|---|---|
|
Home away from home
|
today took off control arm,
put the bushings on, large gap,, turned the nuts down, not tight, to bring down gap, arm ,,,71/2 inches, Packard 81/2 inches,, these ford cont. bushings are too short, if I make spacers will that be ok???,,,,
Posted on: 2013/4/19 23:30
|
|||
|
Riki
|
||||
|
||||


