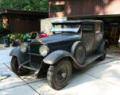
|
Re: Grandpa's '28 526 - The good, The bad, and the Ugly
|
||||
|---|---|---|---|---|
|
Home away from home
|
Well, I have been wrong before. I'll shut my trap now.
Posted on: 2011/11/29 11:31
|
|||
|
||||
|
Re: Grandpa's '28 526 - The good, The bad, and the Ugly
|
||||
|---|---|---|---|---|
|
Home away from home
|
How to duplicate the cowl support / upper dash has caused much deliberation, and a few sleepless nights. This piece is vital for rigidity of the body, and the first piece that ties the two sides together. From my reverse engineering of what little remains of the original wood, I know how Packard did it. My problem was that the way it was originally built, it would be a once and done proposition. As this is a restoration and not factory build, I will have it apart 50-950 times to get the fit right. So, the way that they built this piece simply would not work for me.
I'm not proud of the fact that I struggled with the solution for so long, but hey, I did. My solution is to make the piece using 5 pieces of wood. Two in back are full width. Center piece in front, and two on each side which will have the dados to go into the A-pillars. The gap in between the center and the two outer pieces, allow for fitting. Once locked in, undercowl painted, etc..,etc, I will simply fill the gap with a filler piece, and then all 5 will become one. And yes, the dash piece is WAY too wide at this point, but it is easier to make it smaller than bigger. Attach file:  (90.28 KB) (90.28 KB) (91.36 KB) (91.36 KB)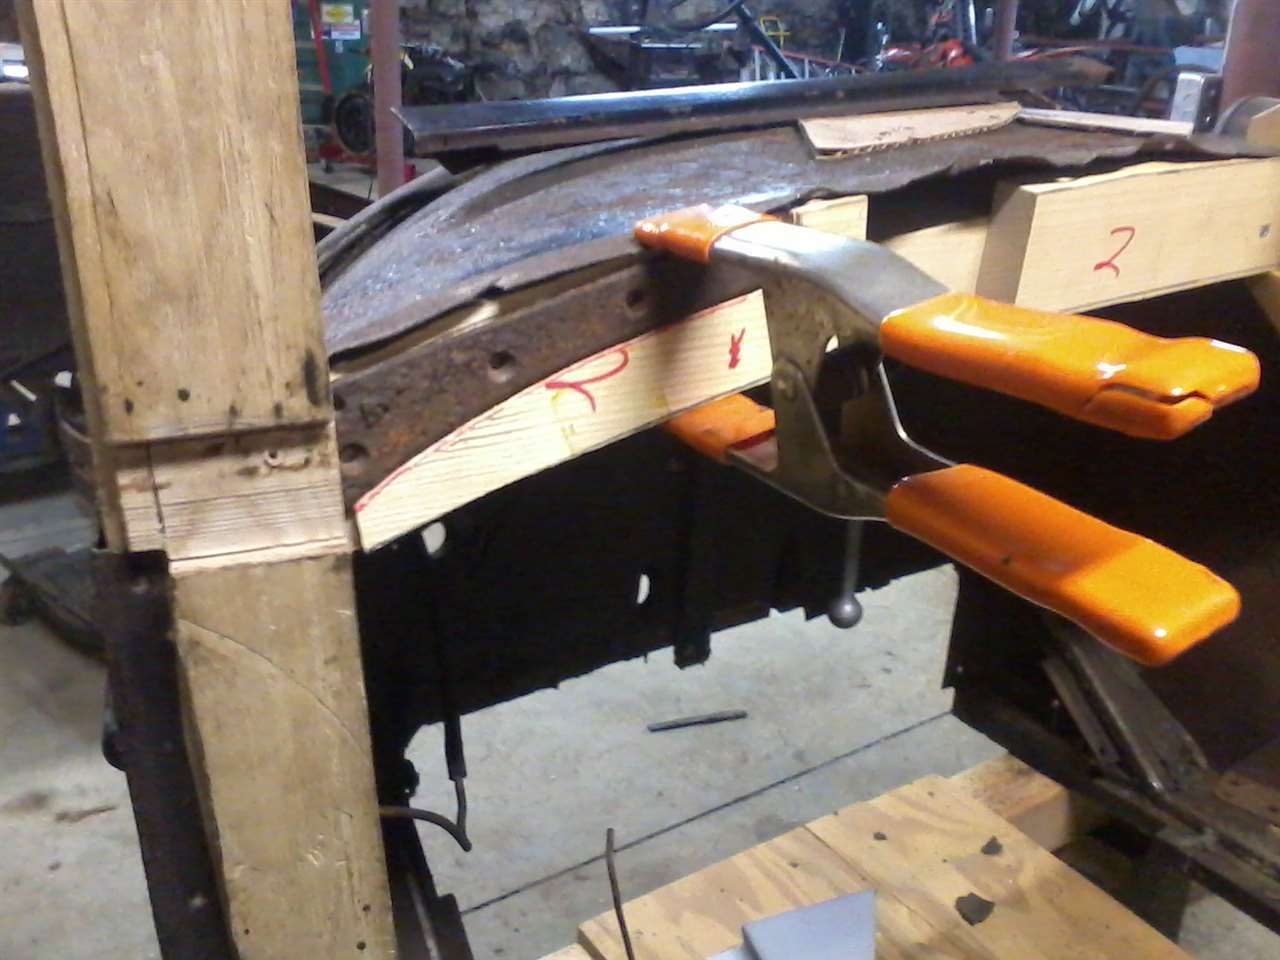
Posted on: 2011/12/31 13:06
|
|||
|
||||
|
Re: Grandpa's '28 526 - The good, The bad, and the Ugly
|
||||
|---|---|---|---|---|
|
Home away from home
|
And, don't be alarmed by the courseness of the joinery / fit. I am treating all pieces as protypes anyway, if they happen to make the final cut, all the better.
Posted on: 2011/12/31 13:30
|
|||
|
||||
|
Re: Grandpa's '28 526 - The good, The bad, and the Ugly
|
||||
|---|---|---|---|---|
|
Home away from home
|
So, I knew that it had to happen. I was just in denial while building the pillars. Daydreamed about rebuilding the wood with the cowl intact.
Denial no more, I took the cowl off, and then apart. The car now doesn't look like much of anything, which is disheartening, but necessary I realize. The front pillars/ windshield/ cowl support/ front top will now be built on the bench instead of on the "car" which will make the result that much better both structurally and cosmetically. Still tough to look at right now. Attach file: (57.20 KB)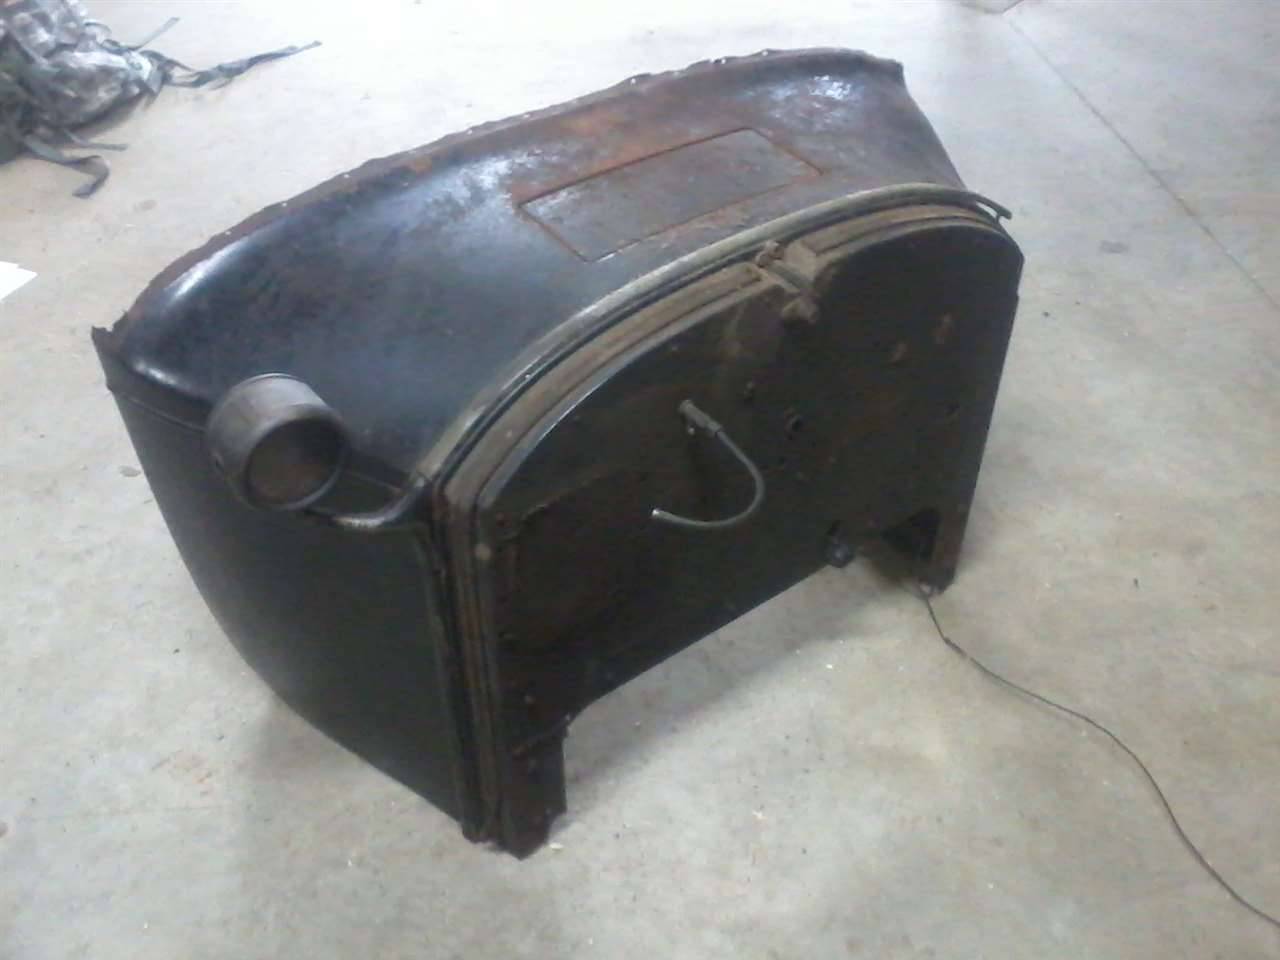 (82.74 KB) (82.74 KB)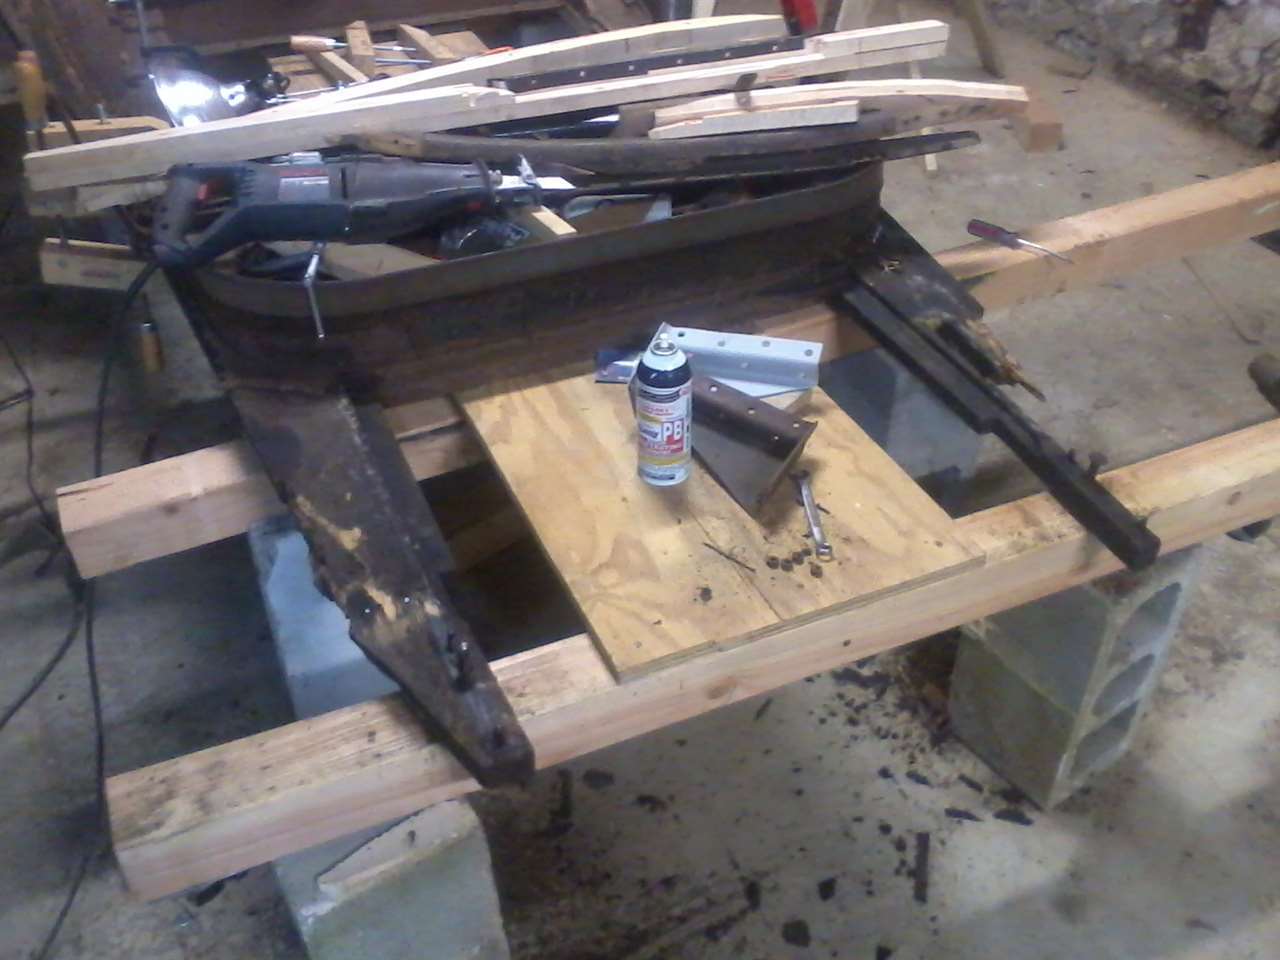
Posted on: 2012/1/13 14:53
|
|||
|
||||
|
Re: Grandpa's '28 526 - The good, The bad, and the Ugly
|
||||
|---|---|---|---|---|
|
Home away from home
|
prototype A-pillars. Pine was definitely the way to go, I still went through about 5 2x6s to get two 50" pieces, but they fit beautifully.
Attach file: (85.55 KB)
Posted on: 2012/1/22 15:06
|
|||
|
||||
|
Re: Grandpa's '28 526 - The good, The bad, and the Ugly
|
||||
|---|---|---|---|---|
|
Home away from home
|
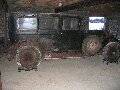
Wow, no updates since January, I am horrible. Now granted there has not been a lot of work to update on, but SOME progress was recently made:
Cowl back on, VERY rough fitment of the doors, so that I can figure out the top pieces. Drivers side top piece fabricated, (out of poplar for ease of work) Passenger side wood removed, once I got over the thought that I could save any of it. Time to start work on the PAX side rear wood. --Just when I thought that I had made some good joinery, I take out some original and find multiple direction sliding dovetails! Come on Packard, no way I can duplicate that! GOTTA LOVE THE DATE: 5/26!! Attach file: (61.99 KB)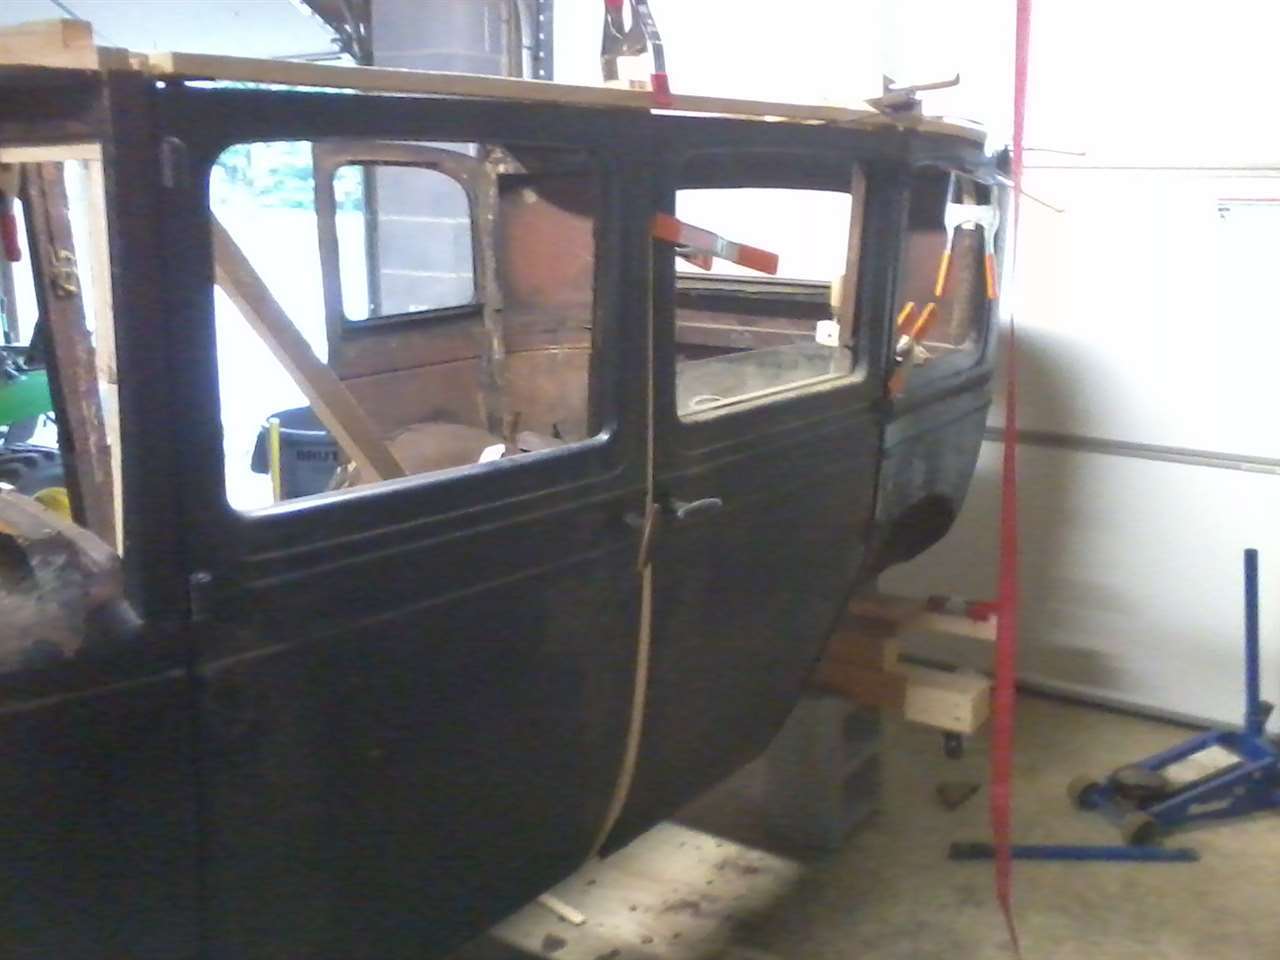 (90.87 KB) (90.87 KB)
Posted on: 2012/5/26 17:37
|
|||
|
||||
|
Re: Grandpa's '28 526 - The good, The bad, and the Ugly
|
||||
|---|---|---|---|---|
|
Home away from home
|
for the 3 of you that read this blog, no updates until at least April as I am deployed again.
I have come to the revelation that I need to get the chassis at least to a roller before I go any further with the wood. I need things to be in a little more of a permanent position before true fitment begins. The funny thing about rebuilding all of the wood is that I can put things wherever I want. I want to put them back exactly as Packard intented, to do that, I need more points of reference.
Posted on: 2012/12/8 18:23
|
|||
|
||||
|
Re: Grandpa's '28 526 - The good, The bad, and the Ugly
|
||||
|---|---|---|---|---|
|
Just can't stay away
|
I feel your pain!When I was doing my coupe body body,it was definitely helpful to have the body on the frame.Keep up the good work!
Posted on: 2012/12/17 6:40
|
|||
|
dan
|
||||
|
||||
|
Re: Grandpa's '28 526 - The good, The bad, and the Ugly
|
||||
|---|---|---|---|---|
|
Home away from home
|
works in progress!
Frame cleaned up and with a couple coats of primer. No finish coats until the wood/ body are done, and ready for permanent attachment. Flintstone car complete, with any luck the body goes back on tomorrow!! I just had to throw in a "before" frame pic as well. Attach file: (82.90 KB)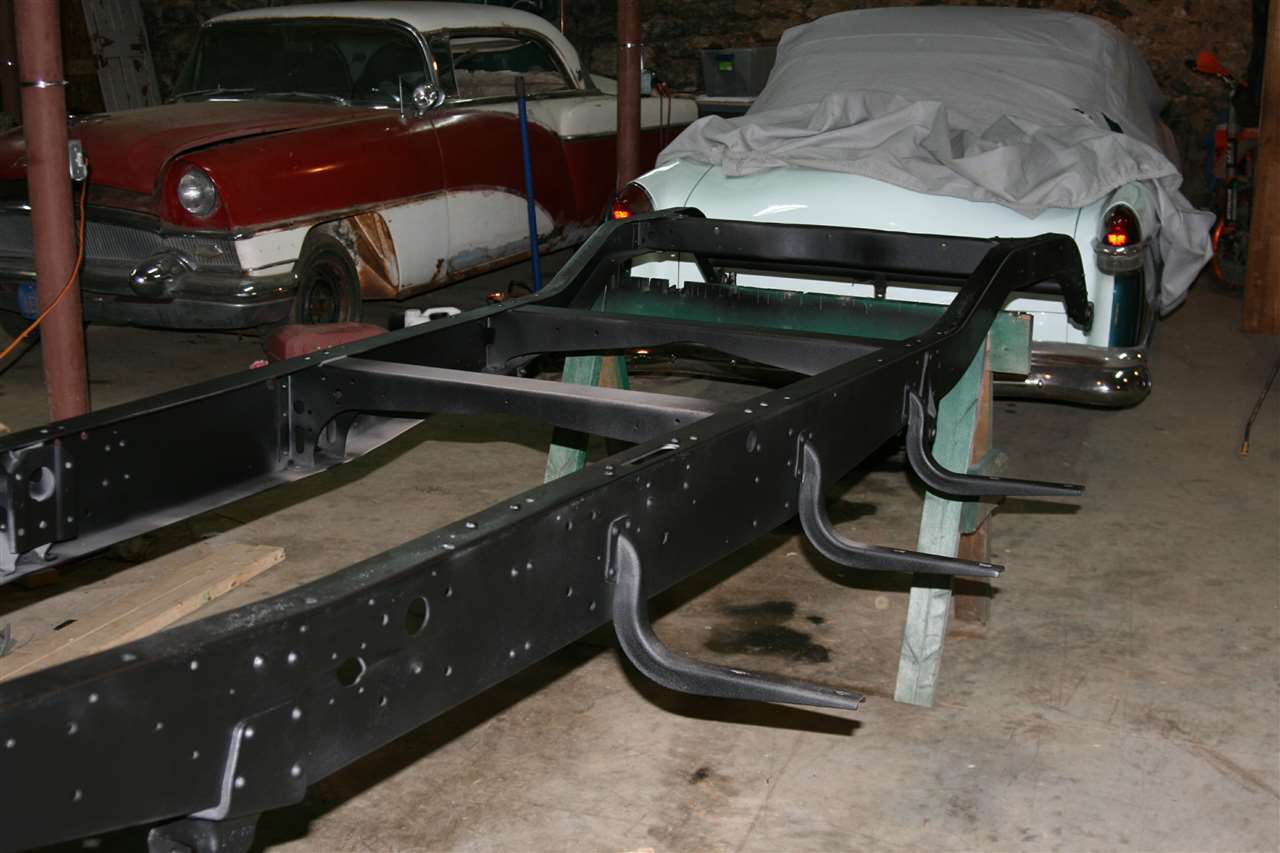 (62.95 KB) (62.95 KB)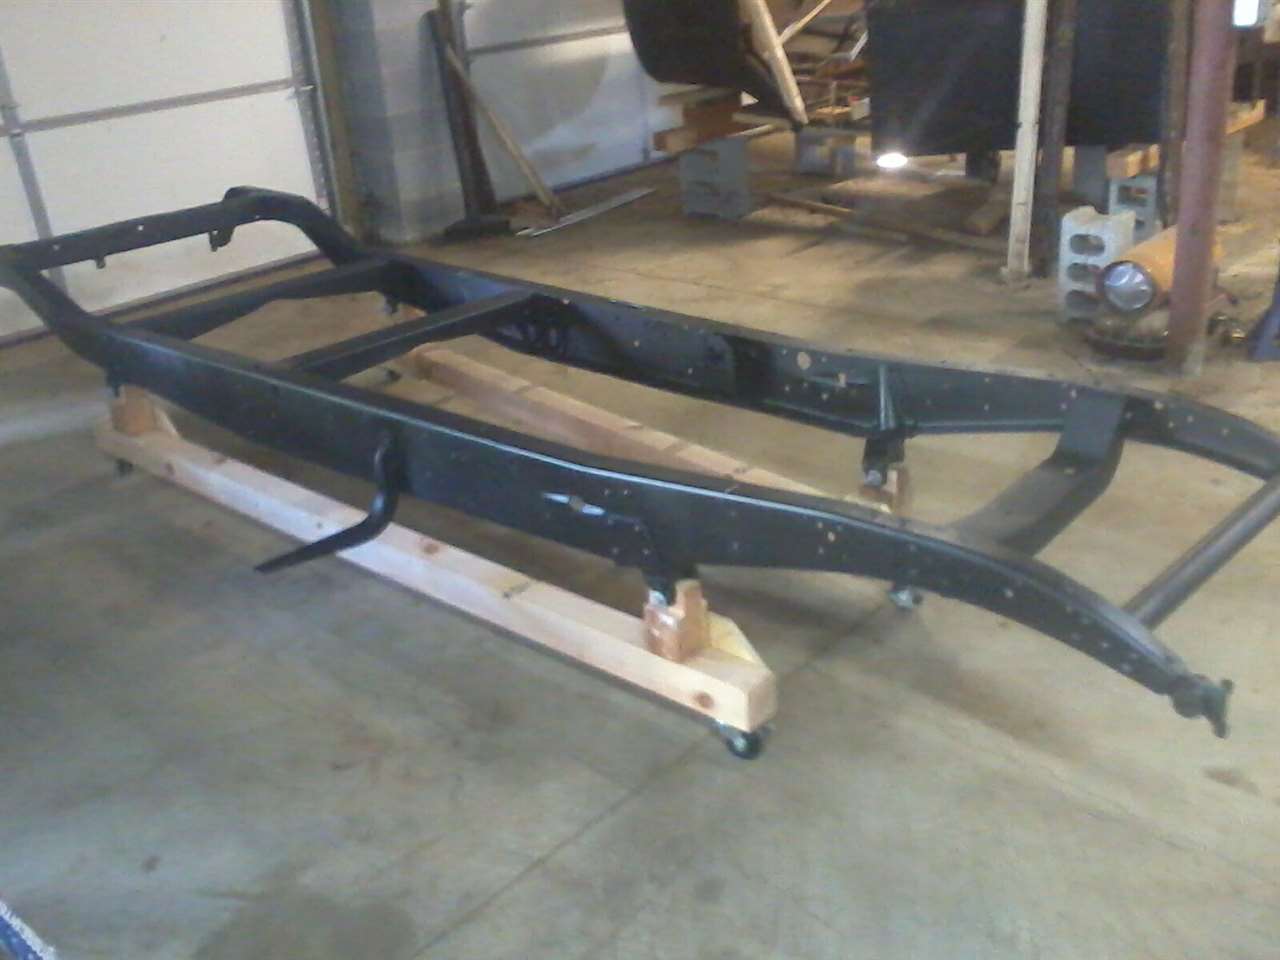 (127.32 KB) (127.32 KB)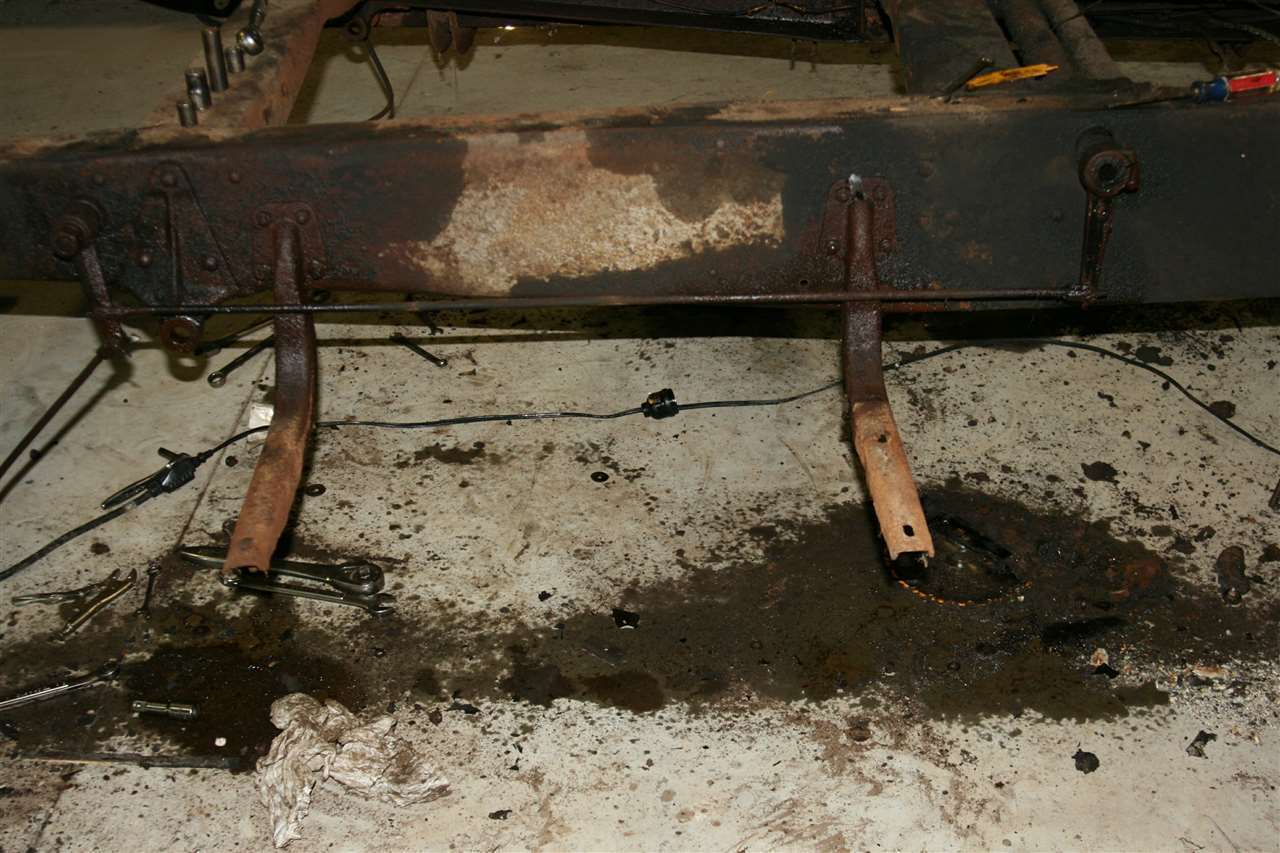
Posted on: 2013/9/27 16:23
|
|||
|
||||


