|
Re: The Duchess Project: 1940 Super 8 Convertible Sedan
|
||||
|---|---|---|---|---|
|
Home away from home

|
Much progress over the weekend.
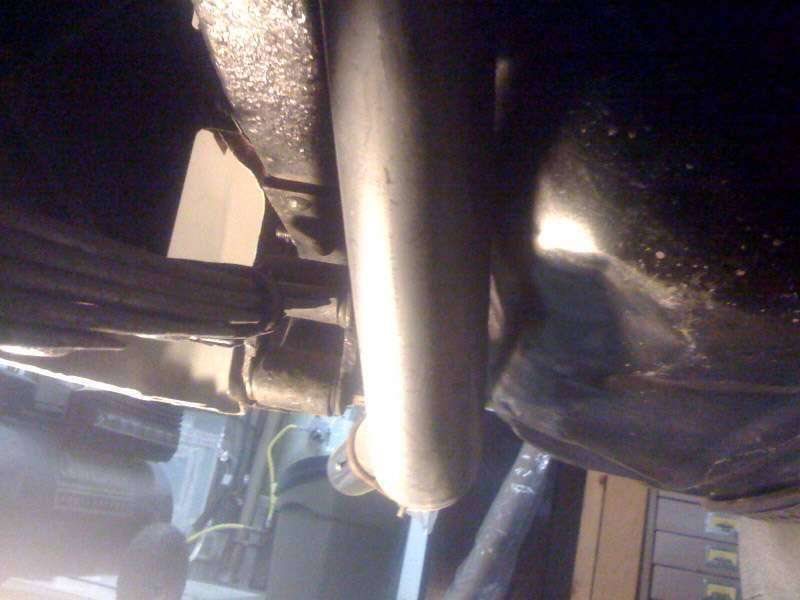
EXHAUST PIPE I pulled out the tail pipe and took it to Midas Muffler. Back in the day, like 1975, I bought a muffler there with a golden lifetime guarantee. The muffler is still good. They were terrific. I had marked the pipe along the bottom and indicated roughly where it needed to be bent to clear the gas tank and come out straight the back end. They bent it for me no charge. Lonnie, who started at Midas about the time I bought my muffler, was great. Very nice people. It's perfect now. BRAKES I'd had a leaky cylinder and so dismantled and honed the rear cylinders. My son John drove up from Salem and gave me his Sunday. We bled the brakes, twice. Pedal is right up there now. ENGINE We tried to start the engine but it wasn't responding. I'd poured a half ounce or so of oil into each of the cylinders and let it soak a couple days before turning the engine over with no ignition. We disconnected a plug and checked it for spark and it had plenty, sprayed some starter fluid in the carb and off she went. One backfire, poom, puuf, choo, hum. Problem is we had an oil leak from the new (redone) plumbing of the filter. I tried to find the correct multiport fitting, but Fluid Connections told me to bring in what I had and they'd find or 'gin up something that will work. After the billows of smoke cleared it was so nice hearing that big 8 ba ba bumming out the tail. Idles down to nothing and stays lit. In my campaign to find all parts I pieced together the fromt bumper and fog lights. The Duchess started to look like a real car. And I received the Save the Date card for the wedding July 1 in St. Helena that I'm trying to make the Duchess' debut along with Joey, my middle son, and Jordan's 5th anniversary bash in Santa Cruz. Getting very close to taking her in for paint. I ordered some screw-together top rivets from Ron Carpenter and from John Ulrich a set of gas straps (the ones I bought from someone else were simply big strips of plumbers tape), the metal heater return hose, and fuel pump shield. I repainted my heater housing, too, along with license brackets. You know I can smell The Road. Attach file:  (42.31 KB) (42.31 KB)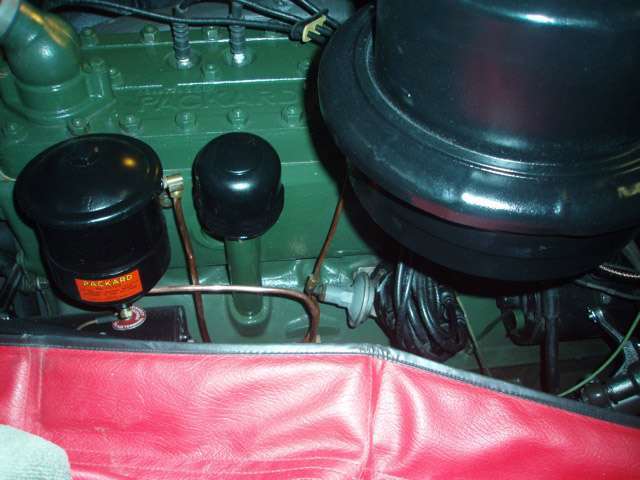 (47.05 KB) (47.05 KB)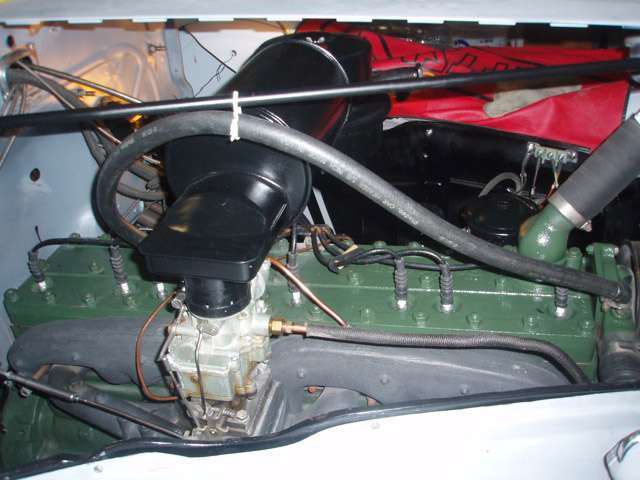 (46.84 KB) (46.84 KB)
Posted on: 2011/1/11 1:47
|
|||
|
||||
|
Re: The Duchess Project: 1940 Super 8 Convertible Sedan
|
||||
|---|---|---|---|---|
|
Home away from home
|
Busy at work and busy in the garage evenings.
3 FEMALES AND 1 MALE, NOT AS MUCH FUN AS I EXPECTED... MY EXPERIENCE WITH OIL LINES: If anyone tells you that your oil line setup is not that sexy, go eat some chocolate. If however, your oil lines were set up incorrectly as mine were, then you're stuck with a job that could require the patience of Job. Problem one was finding a 3-female/1-male fitting. After hitting several large auto supply places on the weekend, without success, I had to call the professional places only open during the week, like Fluid Connector Products, who said "com'on in", then couldn't find anything that would work, but called Oil Filter Service for me and asked them to fax a picture of the fittings they had. So drove over there, my lunch "hour" extending into the afternoon. They set me up with a Cross fitting, which with some add-ons, did the job, that is, made it possible to do the job. Making the new lines and flaring them was easy, after a few pathetic tries. I'm an expert now. If your trumpet needs a flare, I'm your guy. It was the short pipe that created all the problems. It took me 3 tries to get the length exactly right and the bend perfected (meaning 'to fit'). With a line 5 inches long, two bends and a twist, there's no forgiveness. And, you have to make the flares before bending and rough fitting the tube for length because you can't flare a tube that curved so close to the ends with the fittings on it. It was a bear making that one little pipe. I made three of them. I got them in the holes and tightened. But as soon as the pressure rose, they leaked. But finally got it. Attach file: (33.37 KB)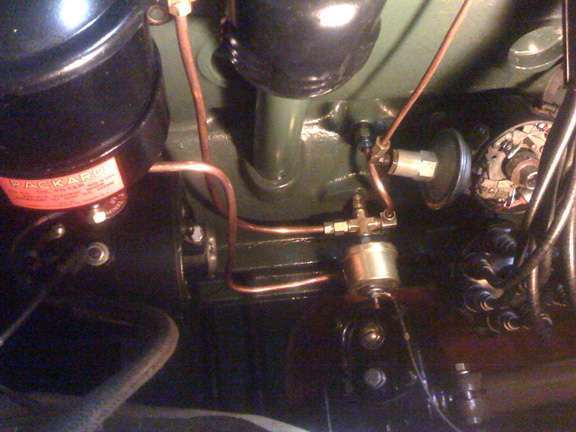
Posted on: 2011/1/20 10:25
|
|||
|
||||
|
Re: The Duchess Project: 1940 Super 8 Convertible Sedan
|
||||
|---|---|---|---|---|
|
Home away from home
|
An hour's writing, just bit the dust. Restored. It's what we do, no?
BABY IT'S COLD OUTSIDE and A GAY MOMENT ...MY EXPERIENCE WITH A PACKARD DELUXE HEATER/DEFROSTER AND DELUXE RADIO ... The heater and the radio were rebuilt 25 years ago, one sent off to a radiator shop downtown and the other to the Midwest for re-tubing. Both have been sitting on one shelf or another waiting for me to get it together, it being The Duchess. So at last I ordered the firewall insulator from Quiet Ride and decided I should make sure we didn't seal up the wrong holes in the firewall when we welded up all the superfluous ones. I could install and test out both accessories. The paint on the heater housing needed to be refreshed from being buffeted from residence to residence. The switch needed cleaning, so took it apart and did that. The heater, speaker and radio all mounted easily with the help of a couple of pillows to prop them in place. I wired them up, the heater to the ignition switch and the radio to the ammeter. The heater motor works like a dream, smooth and quiet. The heater return tube I ordered from John Ulrich is on its way, so I can test the radiator component, too. It looks brand new. I don't think we put water in it after it came back from the shop. I connected the flex hoses to the outlets and the window defroster attachments. It blew me away. Wow, a mighty wind on the window (when there's a window there). It took me back. On semester break from USF in the winter of '62, I drove to Southern California with Mike K, now of Seattle, and we hit a long stretch of highway near Bakersfield about 2 in the morning. It was freezing cold. The Duchess had a little Brand X heater and no defroster. The fog was dense. You couldn't see truck tail lights until you were practically on top of them. We took turns driving and holding a match to the driver's window. We met up with a friend of Mike's in LA with an '48 MG TC and had short bursts of racing on the freeway to meet some girls in Bellflower. It was the first time I'd seen REAL CHP's in action. Radar at the overpass. Three patrolmen with shoulder harnesses in one juiced up Chrysler chasing down speeders, dropping off a CHP for each violator, the last one ticketing our friend in the TC. Efficiency. The Duchess wasn't targeted. Gee, they were serious down here. Bottom line, the fan is powerful. I was surprised. So now looking forward to freezing fog conditions. THE VIBRATOR STILL WORKS, THANK GOODNESS. I turned on the radio. There was a faint buzz, but not from the speaker, from the receiver. Volume up all the way. Nothing from the speaker. I'd replaced the waterlogged 8" dynamic speaker with a modern one designed for patio use, also 8", but with like a plastic frame. The exterior looks the same. I dismounted the speaker and opened it up. Everything inside looked new and solid, so I brought it in the house and touched the speaker wires from the stereo to 2 of the 4 posts. Nada. When I touched the 2 posts closest together, it played music to my ears. So remounted it. I'd purchased a Packard Custom Deluxe installation manual from Yesterday's Radio, but up to this point, only looked at the drawings, like I do sometimes with an issue of the New Yorker. Now I read about how to correctly attached the controls. And the antenna. Aha. Antenna, Santana! I stuck a wire in the hole. (I bought a muddy, crusty under-the-runningboard antenna for $20 at a swap meet, but don't have the proper antenna plug-in.) Nothing. I decided to start working on the old antenna, but forgot to switch off the radio, which works without the ignition on. About 10 minutes later I heard something burning. I didn't smell anything, just heard this crackling sound. It was coming from the speaker! I turned the dial knob to tune in the frequency of a station. I thought I heard a change, but still mostly that static scratching noise. I decided to pull open the face of the receiver. It worked off slowly. I got an alligator test lead and clipped it to the antenna jack on the inside. I was shocked! The thing just blasted Mexican music as loud and joyous as you can imagine. I turned it down, then hell, turned it back up again. I was thrilled. I started dancing around the garage to the music. Hacha! Hoi-Hoi! It was too much. It was a gay moment, but as in the song South of the Border..."It was fiesta, and we were so gay. South of the border, down Mexico way!" Well, when I calmed down, I tried tuning the dial to another station, but even as I turned the knob and could feel it turning the tuner, nothing changed. Will I be forced to listen to Mexican music forever? I read more of the manual. You have to push the center button through the set frequencies until you come to the Dial. Then the dial works. Which it does. Holy cow, this was the most fun I'd had in a very long time. Especially after coming off that god-forsaken oil line. The restoration of the antenna is well underway. I picked up an antenna extension cord with the proper plug. Feeling pretty good now. The engine is another matter. I've been following the starting and running diagnostics Herehttps://packardinfo.com/xoops/html/modules/newbb/viewtopic.php?topic_id=6350&viewmode=flat&order=ASC&type=&mode=0&start=30 More later. The fuel pump comes off tonight. Attach file: (58.53 KB)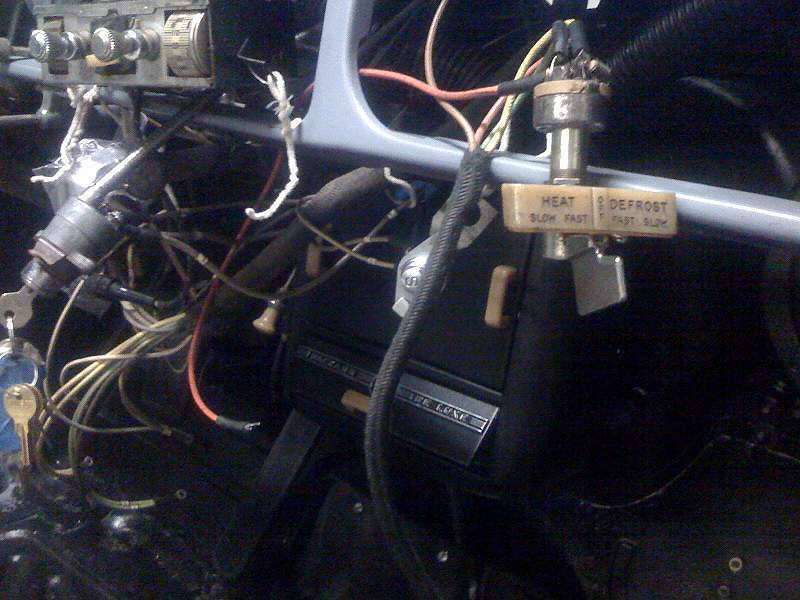 (71.31 KB) (71.31 KB)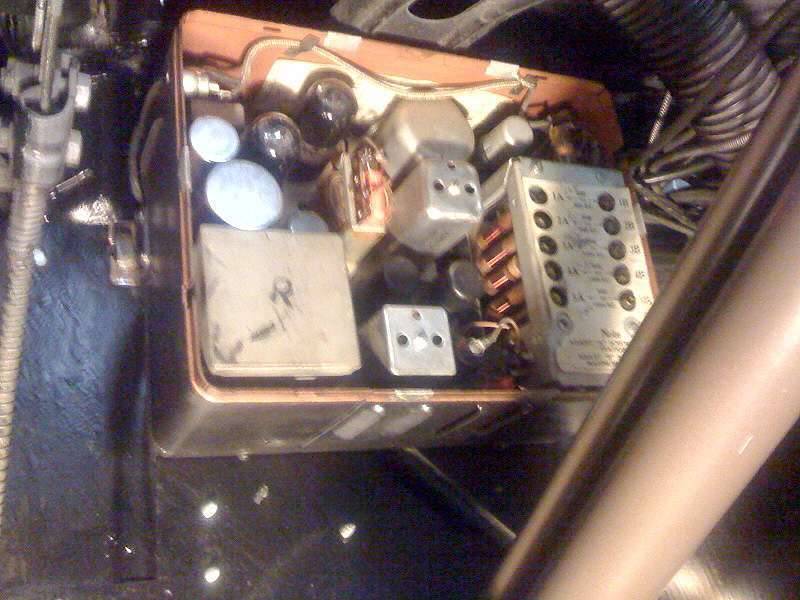 (61.03 KB) (61.03 KB) (46.79 KB) (46.79 KB)
Posted on: 2011/1/20 11:15
|
|||
|
||||
|
Re: The Duchess Project: 1940 Super 8 Convertible Sedan
|
||||
|---|---|---|---|---|
|
Forum Ambassador

|
A lot of nice progress.
Those timeouts can be a P.I.A. and don't know what the actual limit is. I've learned the hard way also. Now just figure if I haven't clicked or done anything or if reply takes longer than 5 minutes to write, then best to select all and copy before hitting the submit button. Has saved frustration more than once.
Posted on: 2011/1/20 11:26
|
|||
|
Howard
|
||||
|
||||
|
Re: The Duchess Project: 1940 Super 8 Convertible Sedan
|
||||
|---|---|---|---|---|
|
Webmaster

|
The timeout is 15 mins. After 15 mins on inactivity the website with automatically 'recycle' your session token to free up resources for others. This is also for security in the event you walked away from your computer, or were using a computer in a public space.
You can also click the preview button at times in the middle of your long posting, this lets the website know you are still there.
Posted on: 2011/1/20 12:03
|
|||
|
-BigKev
1954 Packard Clipper Deluxe Touring Sedan -> Registry | Project Blog 1937 Packard 115-C Convertible Coupe -> Registry | Project Blog |
||||
|
||||
|
Re: The Duchess Project: 1940 Super 8 Convertible Sedan
|
||||
|---|---|---|---|---|
|
Home away from home
|
...or if you step away to take a picture of your heater...
But I understand, and now we know the rules about this and the workarounds. Thanks, Kev. Joe
Posted on: 2011/1/20 12:20
|
|||
|
||||
|
Re: The Duchess Project: 1940 Super 8 Convertible Sedan
|
||||
|---|---|---|---|---|
|
Home away from home
|
Your heater control switch/paddle is very valuable. Be careful with it.
Speaking of which, I have one just like it, but my insulators are very delicate and turn to powder when you touch them. Any advice on how to replace them???
Posted on: 2011/1/21 11:10
|
|||
|
West Peterson
1930 Packard Speedster Eight Runabout (boattail) 1940 Packard 1808 w/Factory Air 1947 Chrysler Town and Country sedan 1970 Camaro RS https://packardinfo.com/xoops/html/modules/newbb/viewtopic.php?topic_id=4307&forum=10 http://aaca.org/ |
||||
|
||||
|
Re: The Duchess Project: 1940 Super 8 Convertible Sedan
|
||||
|---|---|---|---|---|
|
Home away from home
|
I don't have an answer for that. I think you could find a modern equivalent and wire the slow speed circuit to it. It wouldn't show, the switch would work the same way and it might work better.
Posted on: 2011/2/14 13:32
|
|||
|
||||
|
Re: The Duchess Project: 1940 Super 8 Convertible Sedan
|
||||
|---|---|---|---|---|
|
Home away from home
|
A WEEK OF PROGRESS
TAUPE PARTS Final throes of painting these parts for the top and steering. Everything left is primed and sanded, so just waiting for some parts for my Sharpe spray gun which broke a plastic pipe when I dropped it. I also had some paint loaded into spray cans. Had to get a quart's worth, so I have 6 cans coming. It's enamel for the main front wood bow and the rear wood bow. HEATER HOSE I connected the heater hoses after installing the firewall insulation from Quiet Ride. FIREWALL INSULATION This looks great. I had to remove the steering column support bracket to get it in, but once in position, it fit well. The instructions are to mark the places for additional holes as needed for the radio speaker and heater pipes and support bolts. The radio box holes were already in place. Then remove the firewall, pull back the insulation, which wraps around your drill bit if you don't, and drill addition holes. I didn't trust myself, plus removing the wall once in place is a hassle. I positioned the firewall, push nails through the existing fasteners holes that match up to the holes in the cowl, then I used a small drill bit from the engine compartment through the center of each larger hole I needed to mount the accessories. This gave me a small starter hole on the inside of the car to drill the larger holes from. The grain and the finishing skirt along the bottom look nice. Attach file: (41.87 KB)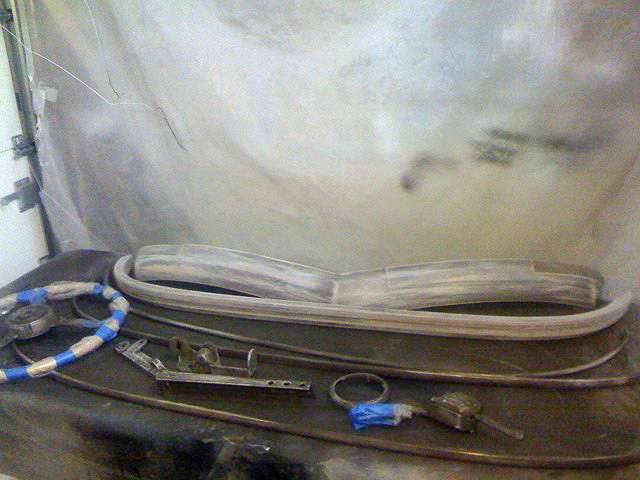 (36.07 KB) (36.07 KB)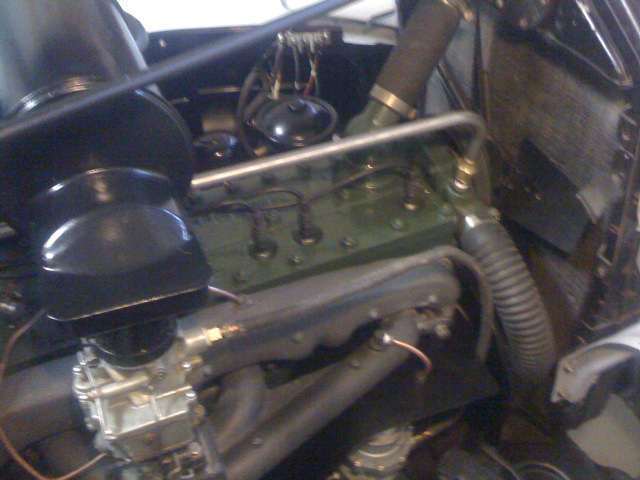 (33.66 KB) (33.66 KB)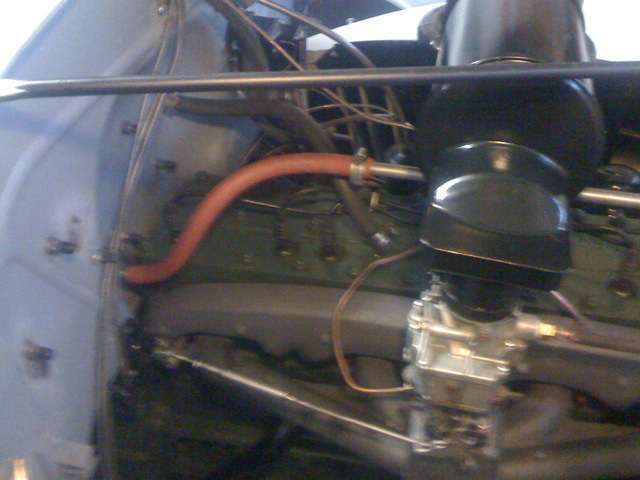 (34.39 KB) (34.39 KB) (38.27 KB) (38.27 KB)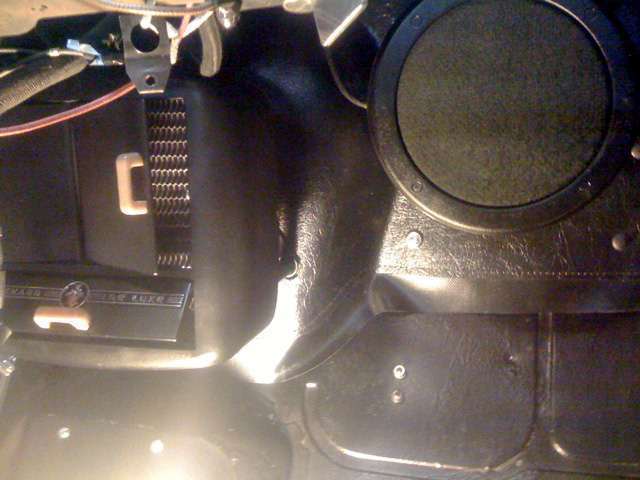
Posted on: 2011/2/14 13:54
|
|||
|
||||


.jpg")


