
|
Re: KPack's 1954 Panama
|
||||
|---|---|---|---|---|
|
Home away from home

|
Thanks for the input guys. Mine are at 34 PSI and they feel and look okay. I certainly wouldn't go higher on these....it would be far too stiff if I did. Currently handling is good, tracking is perfect, and bumps are decent. Lower pressure would absorb the smaller bumps better.
-Kevin
Posted on: 2021/5/15 23:34
|
|||
|
||||
|
Re: KPack
|
||||
|---|---|---|---|---|
|
Home away from home
|
Some progress to report. The car had been getting too warm for my taste...the needle was up to the "P" and would keep climbing. So today I tackled the cooling system. Not a complete job, but at least a start.
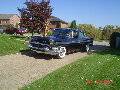
Replaced the cap with 7lbs cap. It's obvious the old cap wasn't sealing. I did a quick test run with just the new cap and when the car cooled the upper hose collapsed, which never happened with the old cap. I drained the radiator and entire cooling system. I disconnected the upper and lower hoses from the radiator, but left them connected to the engine. I then backflushed the block until everything came out clear. I then flushed the radiator from the top down. Also performed a quick flow test by plugging the lower outlet, then filling the radiator, then releasing to see how fast the water came out. It looked pretty good from my perspective. Replaced the hoses with those listed on the parts reference. The upper one requires trimming. I removed the old thermostat (180 degree) and replaced with a 160 degree. I also plugged the two hoses going to the heater core. Filled it all back up with water, burped it and tested. A small leak at the water neck gasket (the one from NAPA is way thinner than what I pulled off), but it's hardly a drip. I'll address it later. Road test showed the temp much lower (between E and M), with a bit of climbing occasionally. Never got as warm as before and the day was hotter. So that's good. Scrambled and got the car ready for her debut at our local car club's cruise night. Finally got the crest put on the front of the car. Washed and cleaned, then off to the cruise night. The cruise night is just a bunch of cars driving up and down main street, parking and gathering in a few parking lots, then cruising some more. All told there were probably about 30-40 cars ranging from restored Model T's, various rods, a few restored 50's cars, and some muscle cars. A few friends rolled in while we parked, and my daughters were excited to polish the dust off the car while we parked. We drove around a bit and then the car shut off. Turns out I ran out of gas....my gauge still does not work and I haven't gathered the motivation to drop the tank again and fix the ground. Now I have the motivation. A couple other old car guys saw my plight and brought a gas can. Back on the road I drove to another parking lot to check out some other cars. Then we it came time to go the car would not turn over. Battery dead. So we all got a good laugh at my misfortune. Eventually we found someone with cables and were able to jump the car. I didn't want to test my luck again, so I took it home for the night. So on my list this coming week is to drop the tank and fix the ground to the sending unit. Also need to figure out if my generator is even charging the battery. I have no idea where to begin on that. Lastly, I need to clean up the rear bumper and get it back on the car. -Kevin Attach file:  New 7 lbs cap compared to old.jpg (54.62 KB) New 7 lbs cap compared to old.jpg (54.62 KB) Old vs new hoses.jpg (185.17 KB) Old vs new hoses.jpg (185.17 KB)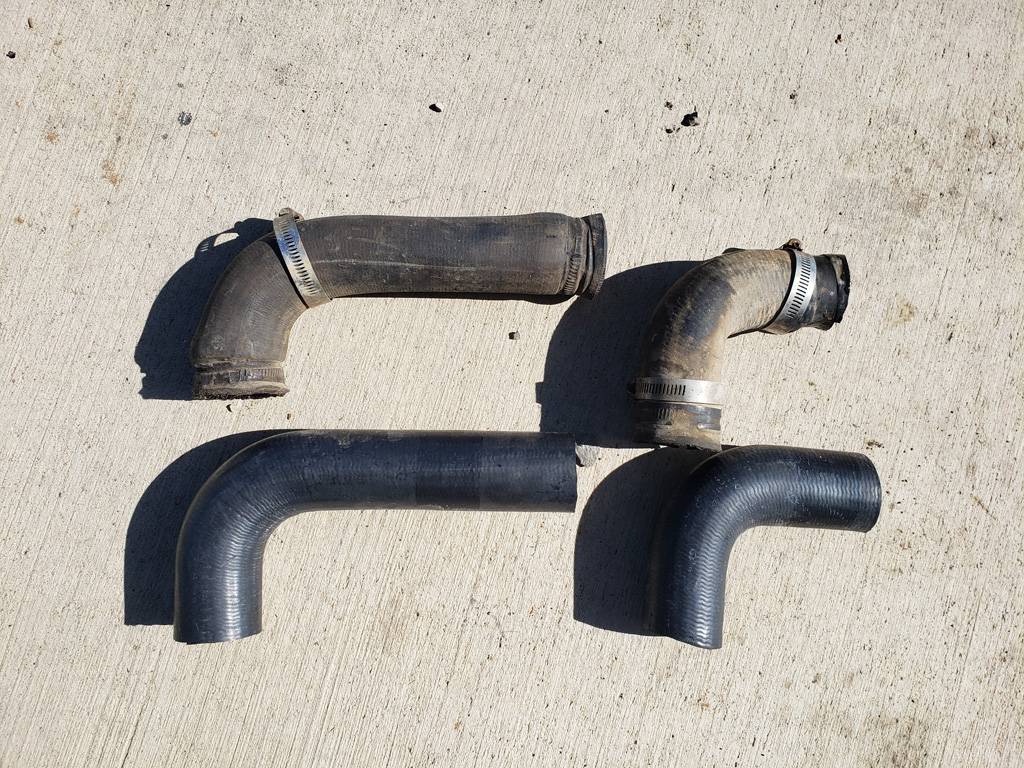 Crest installed.jpg (87.28 KB) Crest installed.jpg (87.28 KB)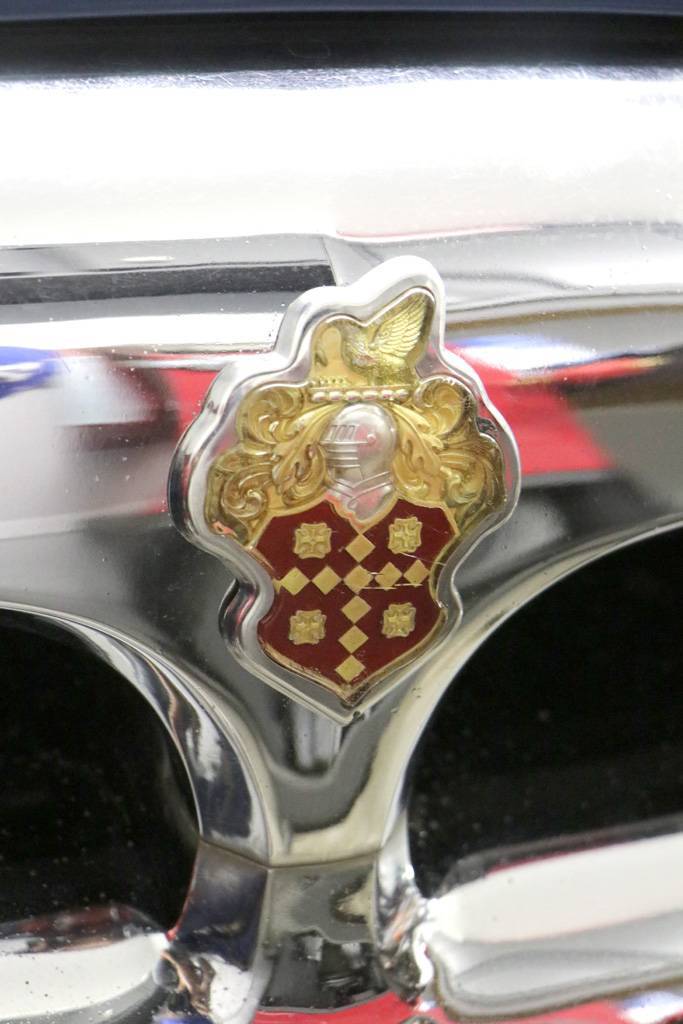 Starting to line up.jpg (126.22 KB) Starting to line up.jpg (126.22 KB)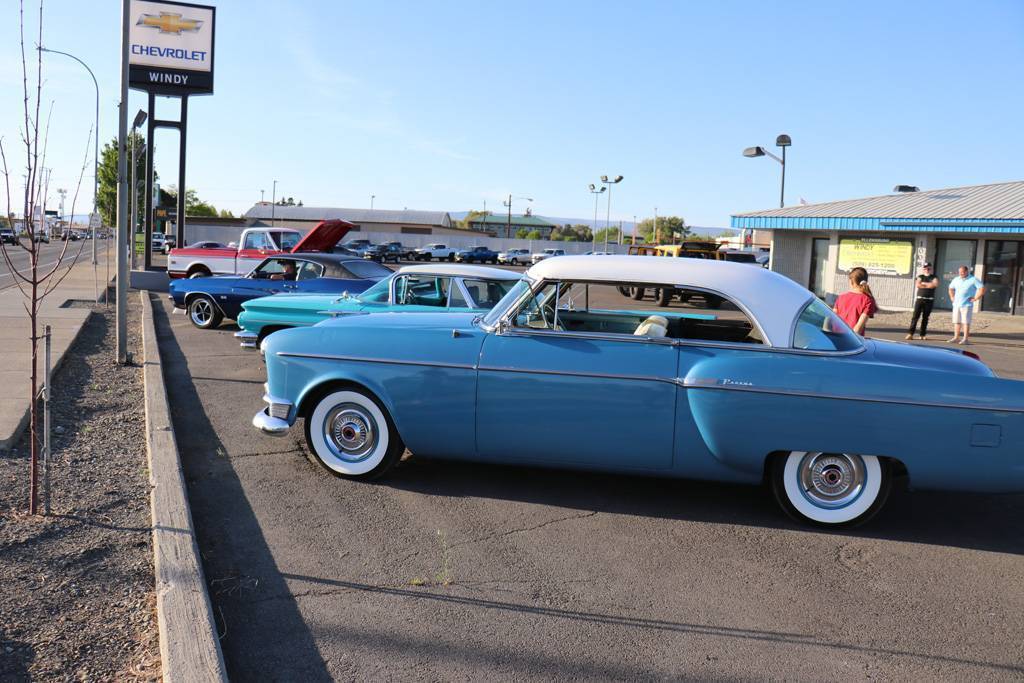 Local garage advertisement.jpg (116.06 KB) Local garage advertisement.jpg (116.06 KB)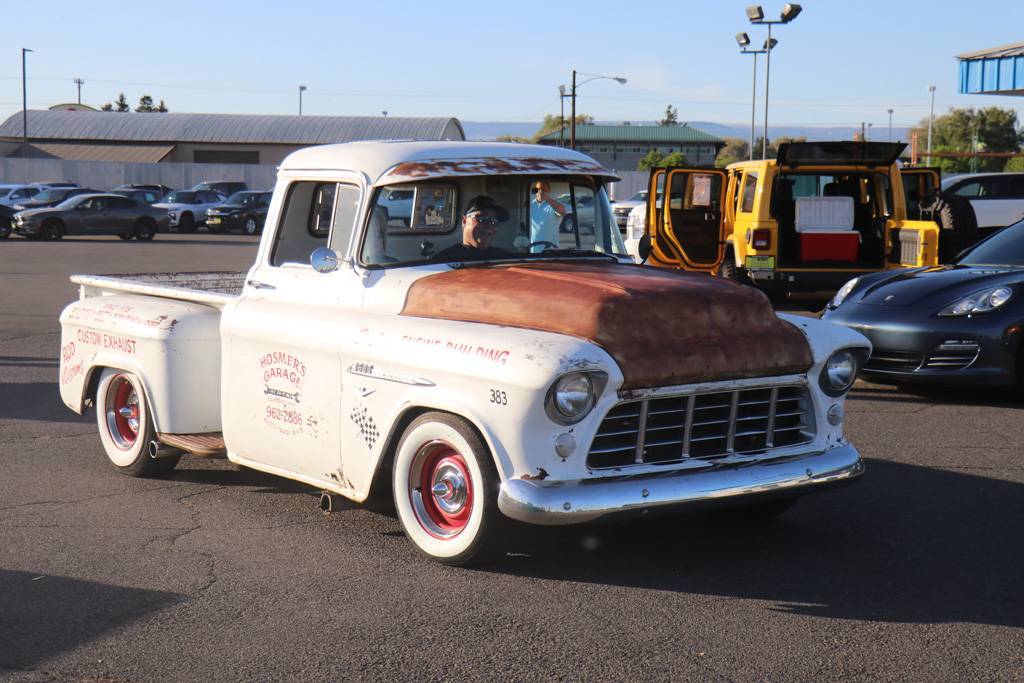 Conscripted labor.jpg (136.84 KB) Conscripted labor.jpg (136.84 KB)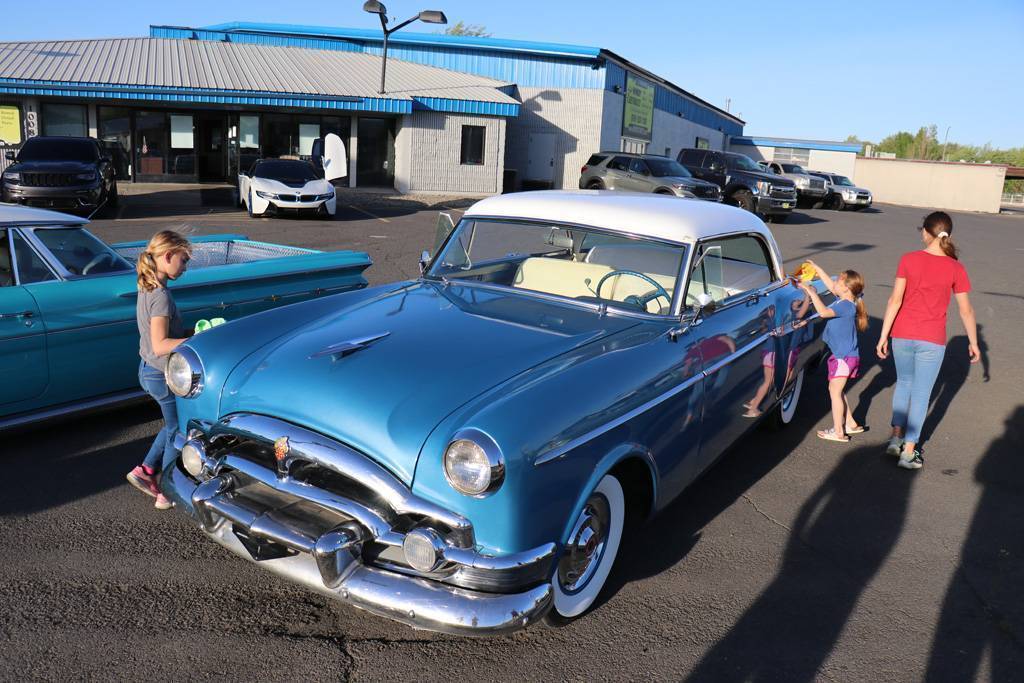 Out of gas.jpg (210.67 KB) Out of gas.jpg (210.67 KB)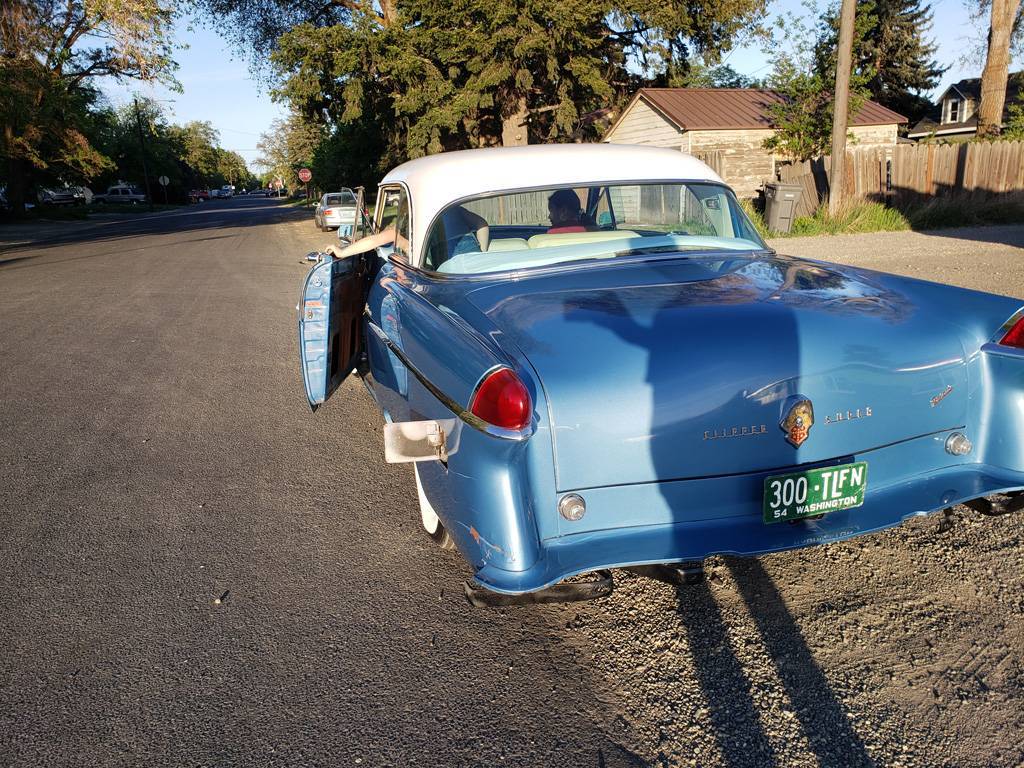 At least it looks better.jpg (87.51 KB) At least it looks better.jpg (87.51 KB)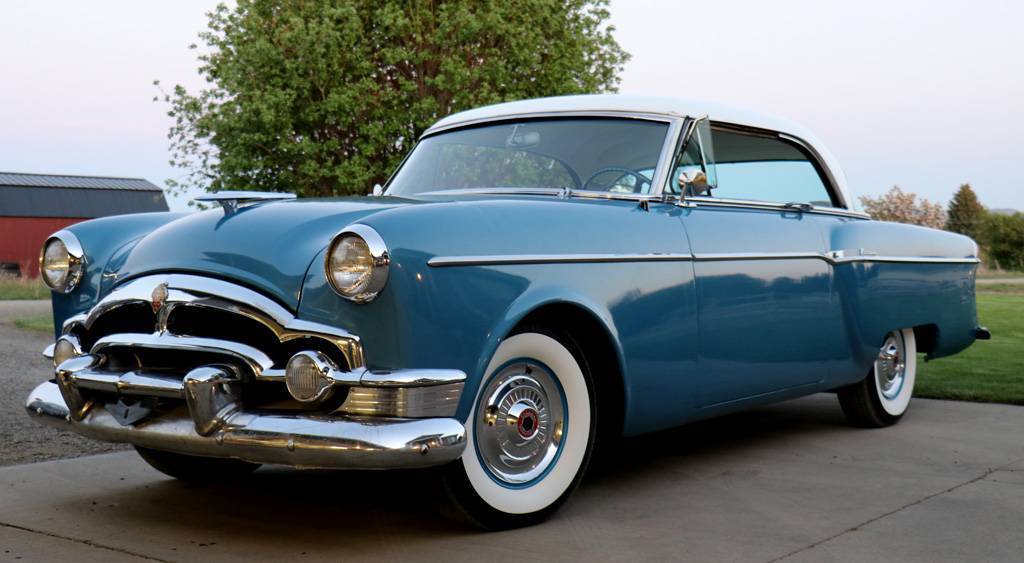 Still no rear bumper.jpg (114.56 KB) Still no rear bumper.jpg (114.56 KB)
Posted on: 2021/5/16 0:07
|
|||
|
||||
|
Re: KPack
|
||||
|---|---|---|---|---|
|
Home away from home

|
Kevin, your car looks fantabulous. There’s nothing like actually driving your car to shake out the bugs. You bought a new battery, right? So after you figure out why it’s not getting charged, if you don’t have a trickle charger, you might get one. Mine is wired to the battery terminals and stays in the car, so when it’s in the garage, I just plug the ac cord into a short extension cord for that purpose. You’ll get there. She looks great just don’t back into anything yet.
Posted on: 2021/5/16 6:28
|
|||
|
||||
|
Re: KPack's 1954 Panama
|
||||
|---|---|---|---|---|
|
Home away from home
|
It is definitely a sharp looking car. It has come a long way from when you had it torn down and had to fix the windshield header. John
Posted on: 2021/5/16 8:41
|
|||
|
||||
|
Re: KPack's 1954 Panama
|
||||
|---|---|---|---|---|
|
Home away from home
|
Car looks great but the best thing I see is the three helpers or assistance that were with you. I really like yo see kids involved with old cars and their parents we need to build a replacement group of car people both boys and girls
Posted on: 2021/5/16 11:07
|
|||
|
C:\Users\veron\Desktop\New folder\1956 Packard Caribbean\753.jpg
|
||||
|
||||
|
Re: KPack's 1954 Panama
|
||||
|---|---|---|---|---|
|
Home away from home
|
Joe - the battery was marked as 4 months old when I bought the car, but I have no idea of what condition the battery was or is in. I need to get a dedicated trickle charger and a cut off switch. Right now I'm just pulling the negative lead when I'm not using the car to keep the battery from draining too much. I like your idea of having the trickle charger wired up in the car ready to plug in.
John - Thanks! It is definitely looking better. I still need to do a bunch of work with the trim. The windshield trim is not fully installed into the gasket (that's a nightmare), and I haven't finished the lower trim. But it's all coming together. Acolds - That's most of the reason why I got the car....so I could enjoy it with my family. The kids are very excited to see it running. Once I get some of these bugs worked out I plan on taking each kid on separate daddy-daughter dates to get ice cream. Then the boys when they get older. My wife and I will do regular date nights driving the Panama. -Kevin
Posted on: 2021/5/16 14:55
|
|||
|
||||
|
Re: KPack's 1954 Panama
|
||||
|---|---|---|---|---|
|
Home away from home
|
Today I popped the rear wheel covers off (using a rolled up rag to protect the painted wheels and the whitewalls) to check the torque on the rear axle. I removed the cotter pins I placed, then set the torque wrench to 200 ft/lbs. I figured that since the specified range is 200-270, that if the nut didn't move at 200 then I was good. I didn't see the nut move on either side. I replaced the cotter pins with larger ones....3/16", I think those are the right size. They fit the hole much better.
I still have that annoying squeaking coming from the back. I thought it was the brakes, but now I'm not so sure. I thought maybe the pinion bearing was getting starved for oil....when I filled the rear diff it was on the lift, so the rear diff was tilted slightly backwards. So I pulled the fill plug and it felt like I could put more in there so I did, until it came pouring out the hole. A quick test drive didn't see to make much difference. I have no idea what it is. Lastly, I took another stab at getting the fuel gauge working. I failed. I dropped the fuel tank (again...I'm getting really good at it) and attached a wire between the two parts of the sending unit. I confirmed the center post was clean. The unit was tested previously and worked. I turned the key on, put the new ground wire to ground, and nothing on the gauge. I have 10 gallons of fresh gas in the tank and the gauge didn't move. So is my gauge the problem now? I can't think of anything else it might be. -Kevin Attach file: Ground wire.jpg (119.07 KB)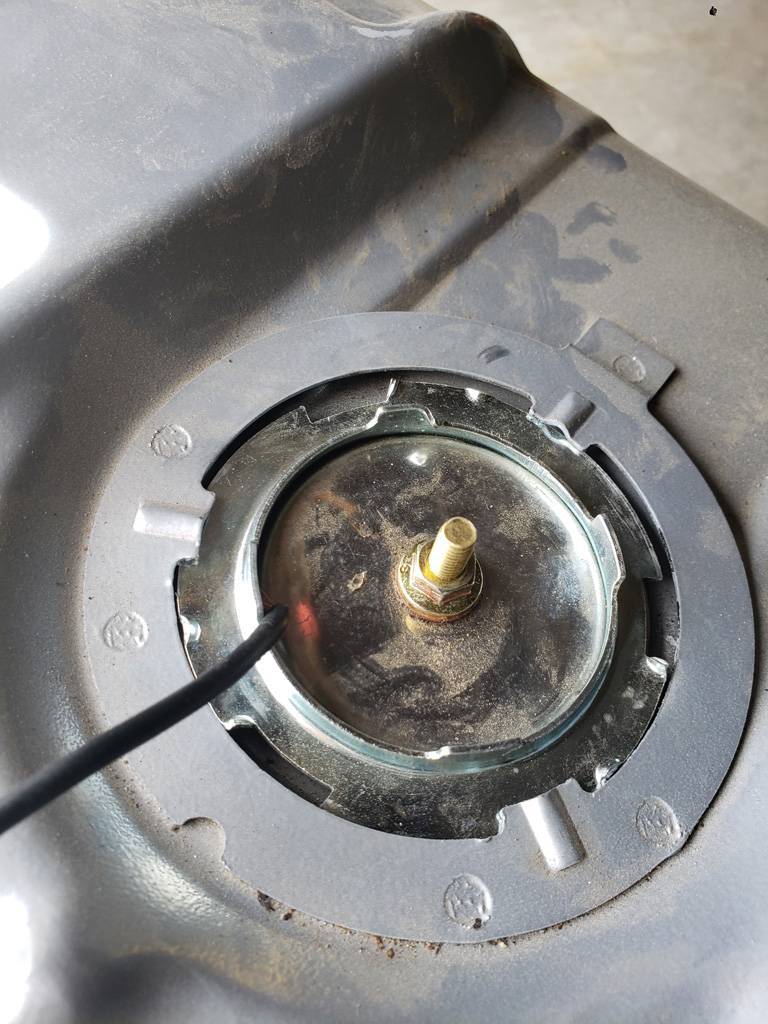
Posted on: 2021/5/17 22:48
|
|||
|
||||
|
Re: KPack
|
||||
|---|---|---|---|---|
|
Forum Ambassador

|
Quote:
Could it be somewhere in the suspension? The spring bushings or the springs themselves squeaking as they move in use going down the road?
Posted on: 2021/5/17 23:21
|
|||
|
Mal
/o[]o\ ====  Bowral, Southern Highlands of NSW, Australia "Out of chaos comes order" - Nietzsche. 1938 Eight Touring Sedan - SOLD 1941 One-Twenty Club Coupe - SOLD 1948 Super Eight Limo, chassis RHD - SOLD 1950 Eight Touring Sedan - SOLD What's this?  Put your Packard in the Packard Vehicle Registry! Here's how! Any questions - PM or email me at ozstatman@gmail.com |
||||
|
||||
|
Re: KPack's 1954 Panama
|
||||
|---|---|---|---|---|
|
Forum Ambassador

|
You can do a quick check of the gauge and interconnect wire by grounding the gauge wire at the sender end -- or if the tank is already in position again there should be an inline connector in the trunk between the body loom and where the wire exits the hole in the rear panel to go under to the tank. You can access all but about 3' of the wire at the connector for measurement or grounding.
Grounding the wire, gauge should immediately start going to the full end. Do not keep it grounded longer than it takes to get to full. If gauge does not move then the wire, gauge or instrument voltage regulator is likely at fault. If it does move then something is amiss with the sender. Using an ohmmeter between the sender terminal and ground, at empty you should read approx 73 ohms and when full about 10 ohms. With 10 gallons I would guess somewhere between 25 and 35 ohms but I have never measured so that value is just a guesstimate.
Posted on: 2021/5/17 23:31
|
|||
|
Howard
|
||||
|
||||


.jpg")


