|
Re: Stewart
|
||||
|---|---|---|---|---|
|
Home away from home
|
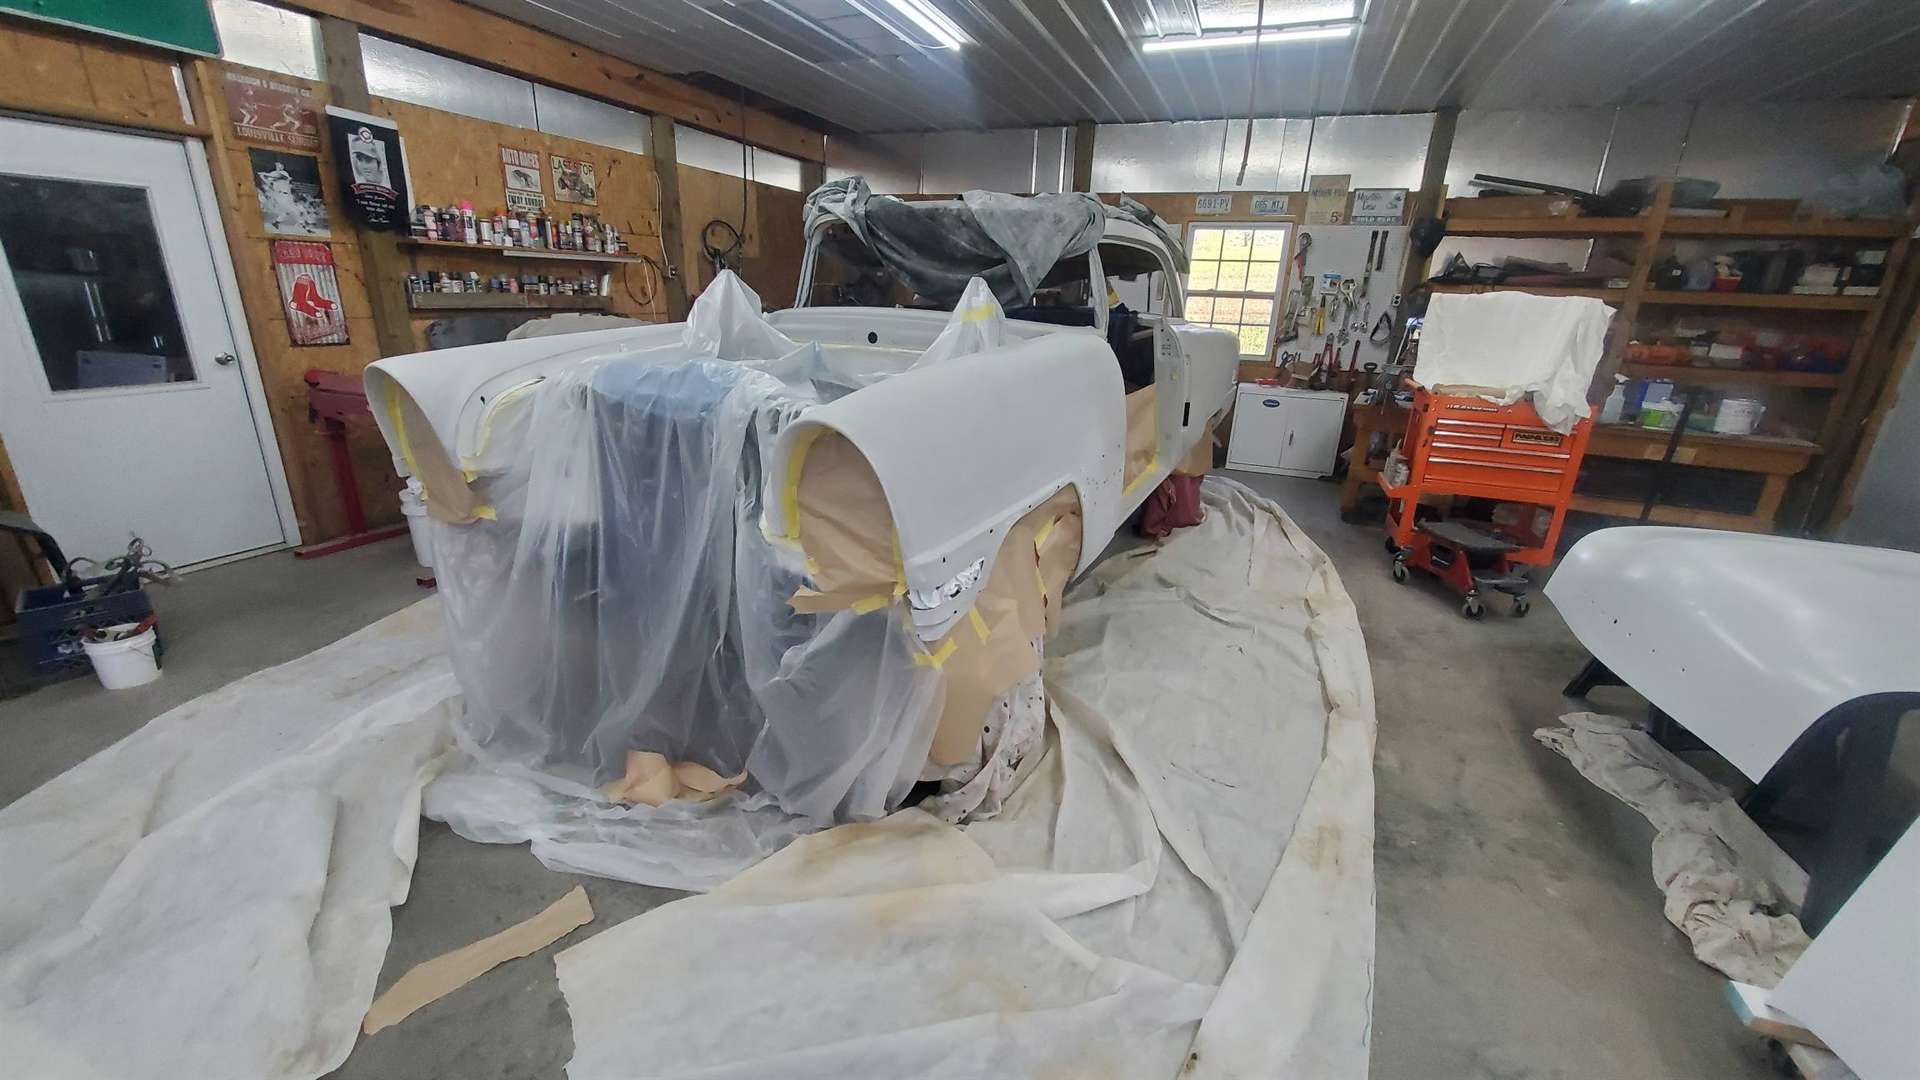
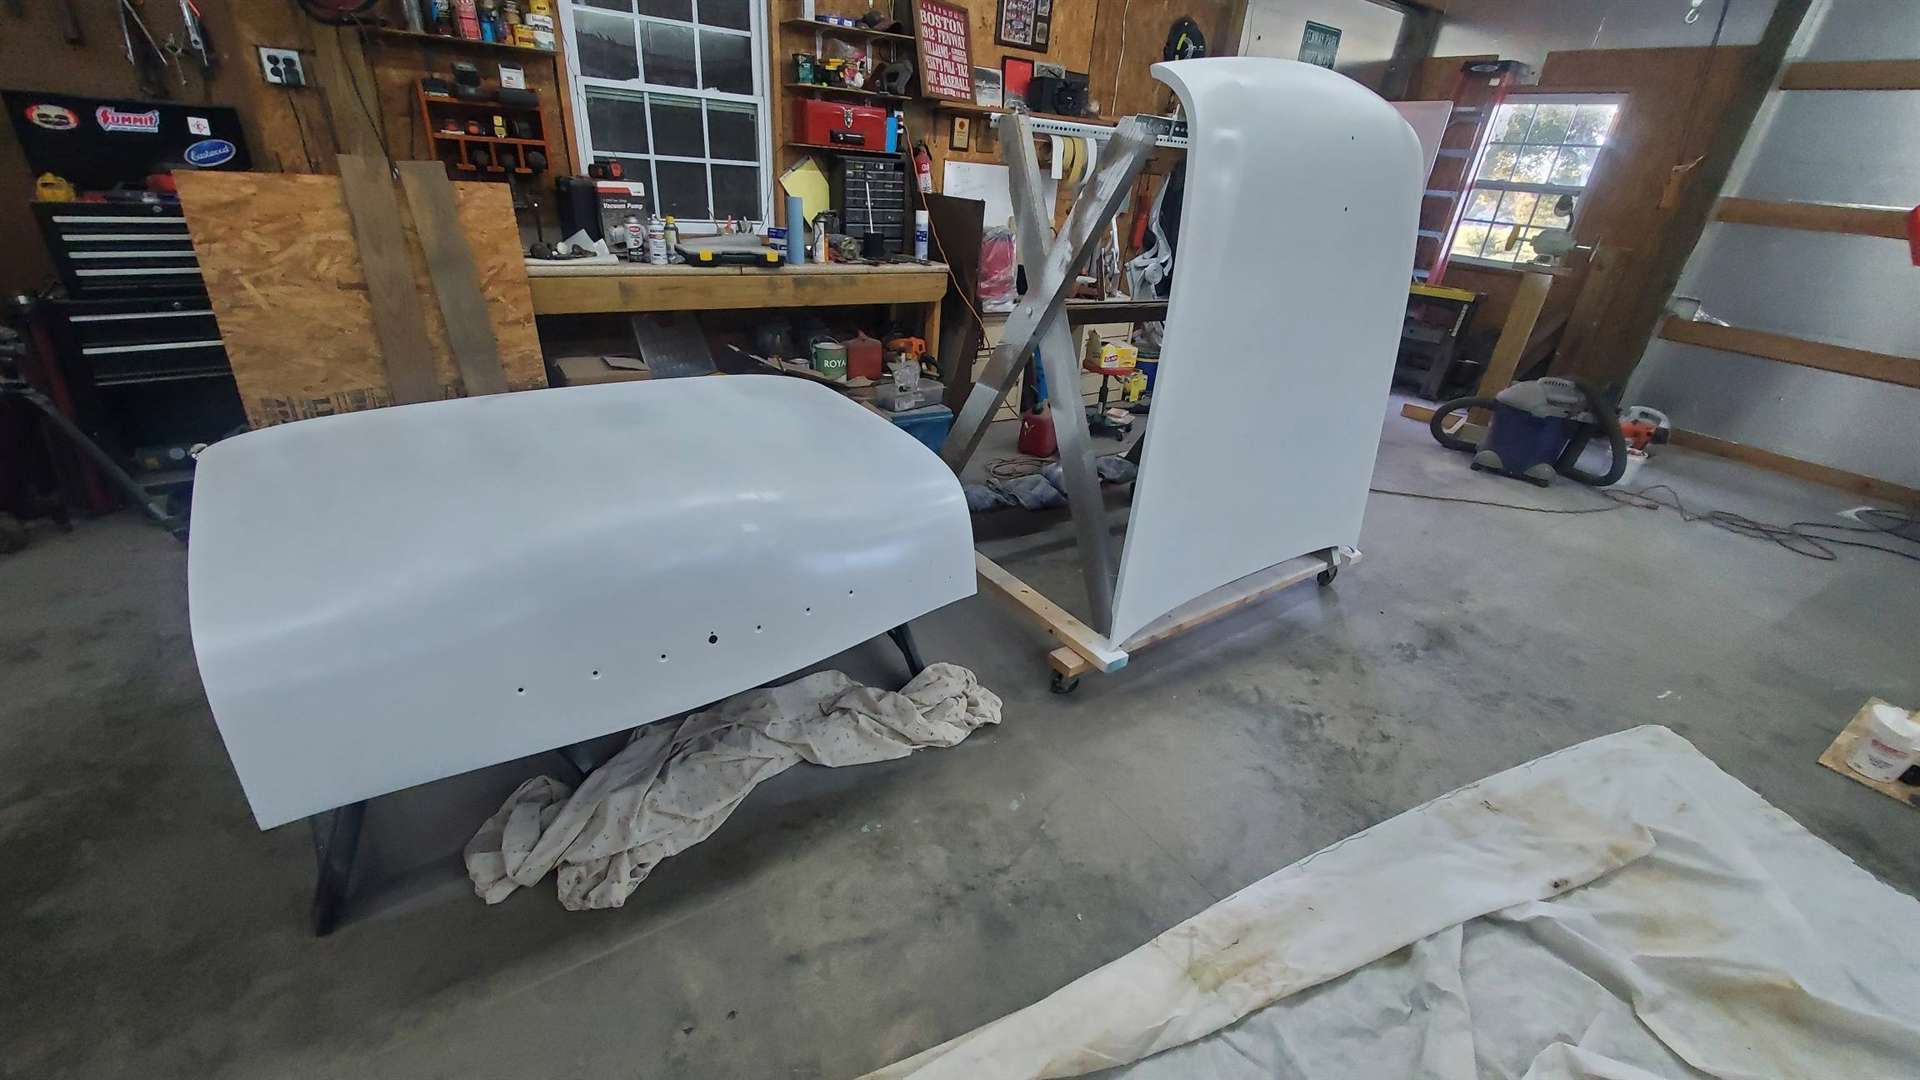
This is exhausting work when you don't really know what you are doing.
Yesterday I applied two coats of epoxy sealer to the trunk and hood and today I applied a coat of polyester high build primer on top of the sealer of both items. Also today I strayed two coats of 2K urethane primer to the whole body. At present the body has: -Two coat of Eastwood epoxy sealer, white -Two coats of Eastwood polyester High-build primer, gray -Two coats of 2K urethane primer, tan Future: Will probably apply another coat of sealer and then the paint in the spring. I used the different colors for each item so if I have to sand something at least I know how deep I am working. Almost sound like I know what I am talking about so don't fooled. Attach file:  20211027_162646_resized.jpg (175.61 KB) 20211027_162646_resized.jpg (175.61 KB)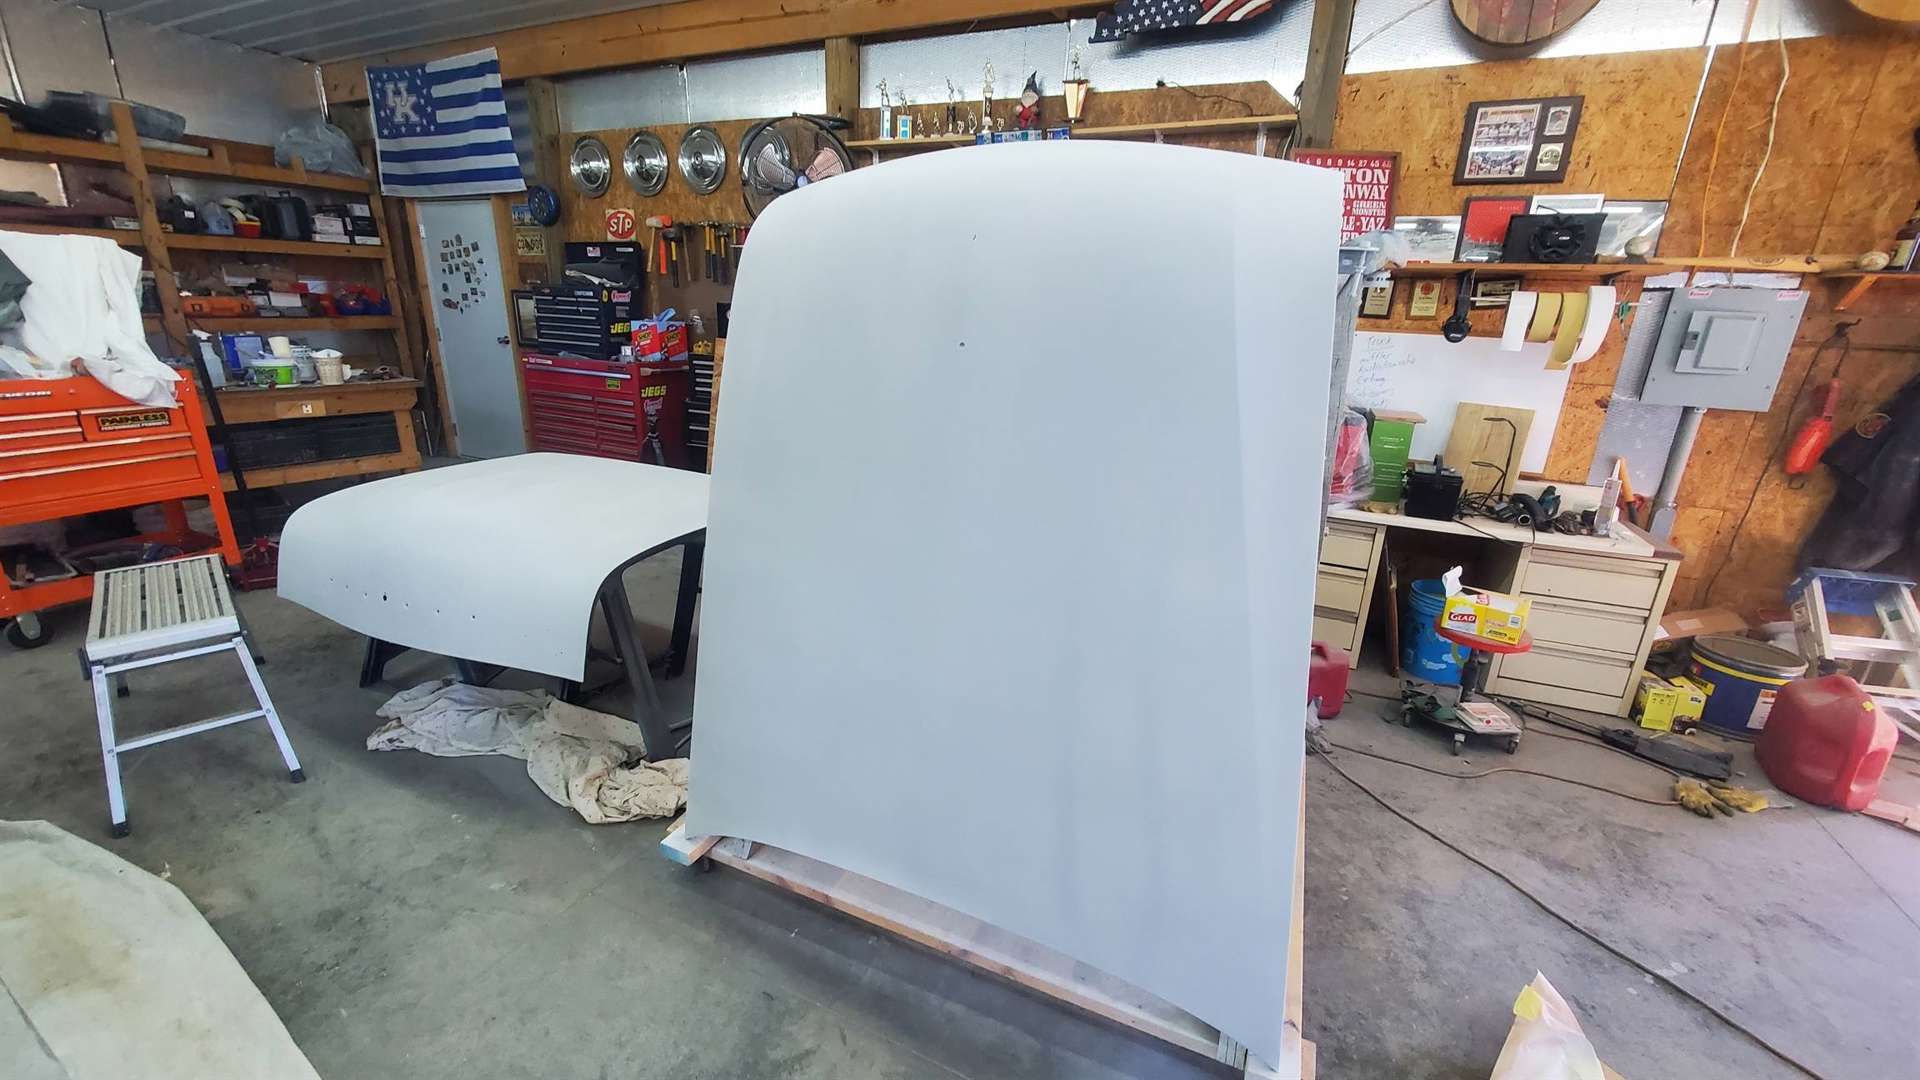 20211027_162658_resized.jpg (158.08 KB) 20211027_162658_resized.jpg (158.08 KB)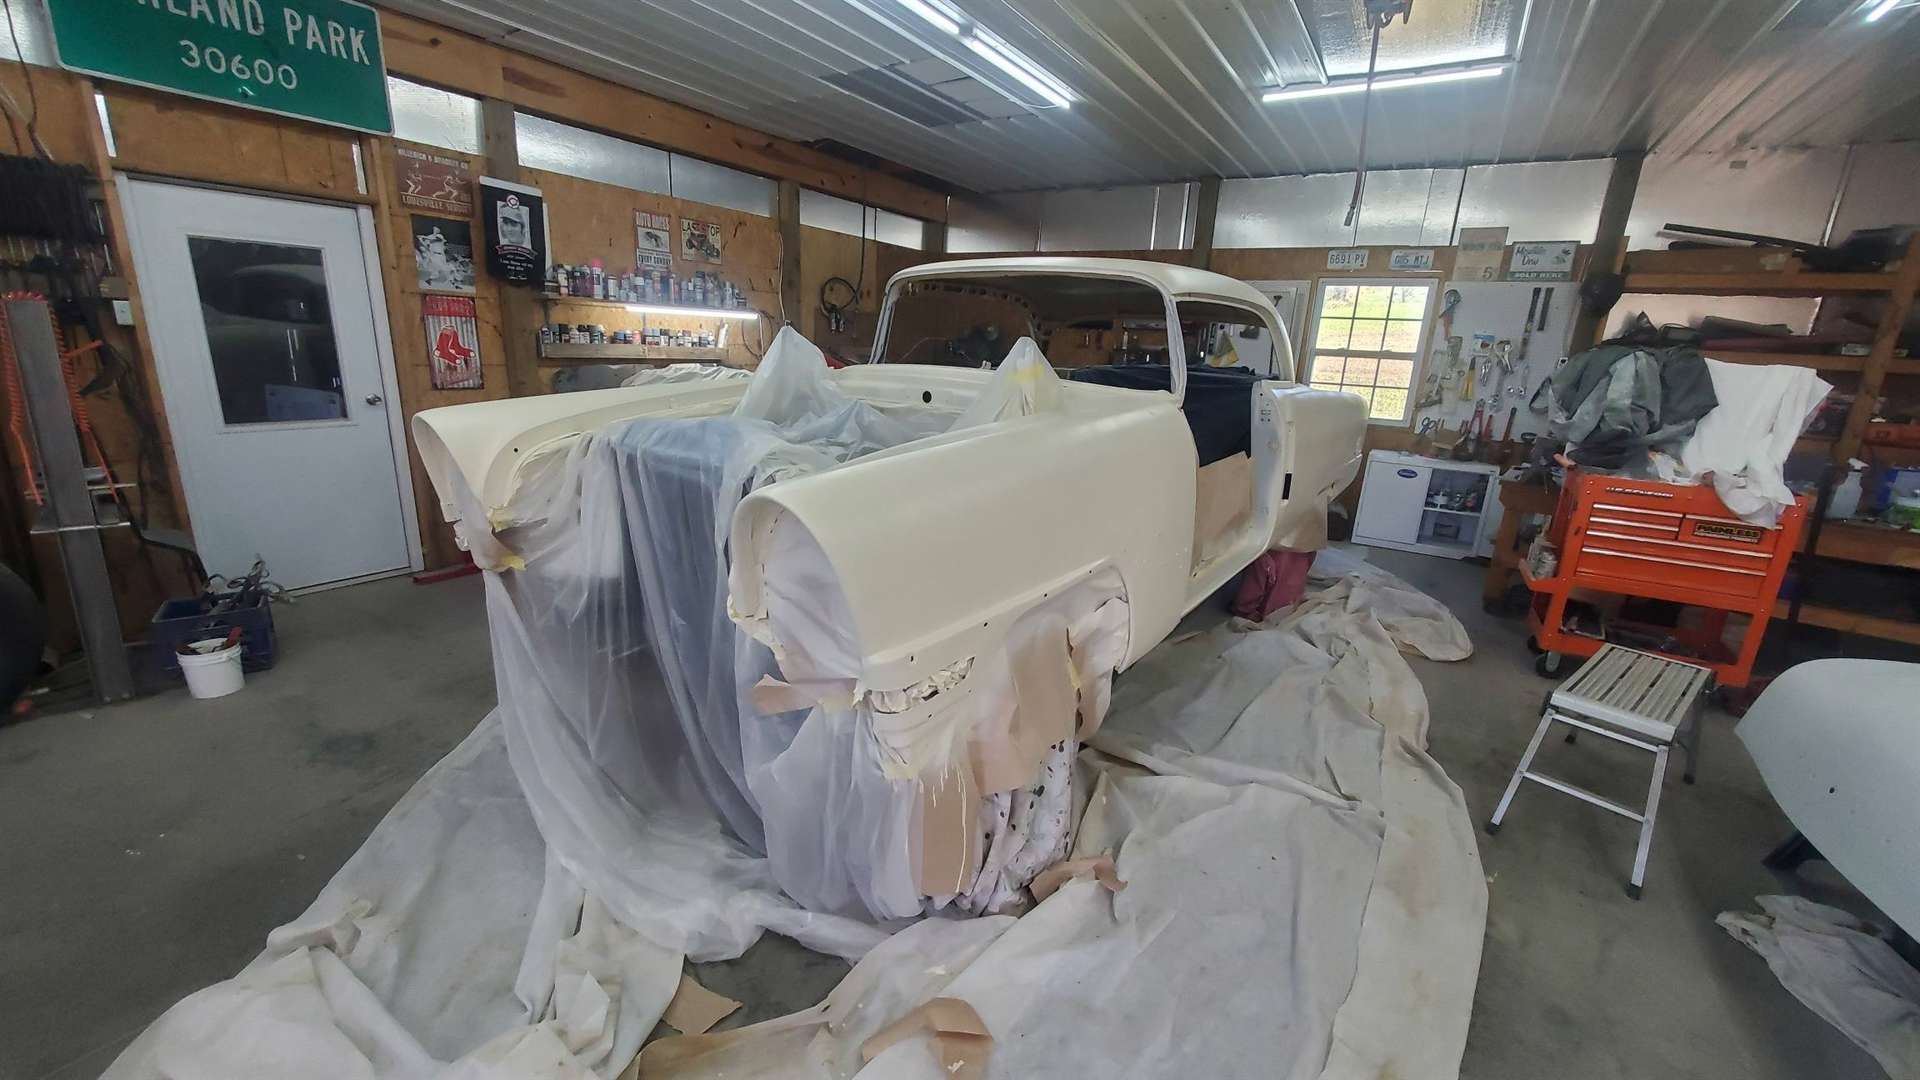 20211027_162658_resized.jpg (158.11 KB) 20211027_162658_resized.jpg (158.11 KB)
Posted on: 2021/10/27 18:17
|
|||
|
Stewart Ballard
|
||||
|
||||
|
Re: Stewart's 1955 Packard 400
|
||||
|---|---|---|---|---|
|
Home away from home

|
It's looking great and from what I remember of my auto body classes that I tool years ago, you are doing it correctly. Of course, Packard used specific primer colors for different finish colors but maybe that was more important with the older types of paint than it is today.
Posted on: 2021/10/27 18:21
|
|||
|
||||
|
Re: Stewart
|
||||
|---|---|---|---|---|
|
Home away from home
|
Some how I uploaded the same image twice. Here is the third one that I thought I was uploading.
Attach file: 20211027_162718_resized.jpg (175.40 KB)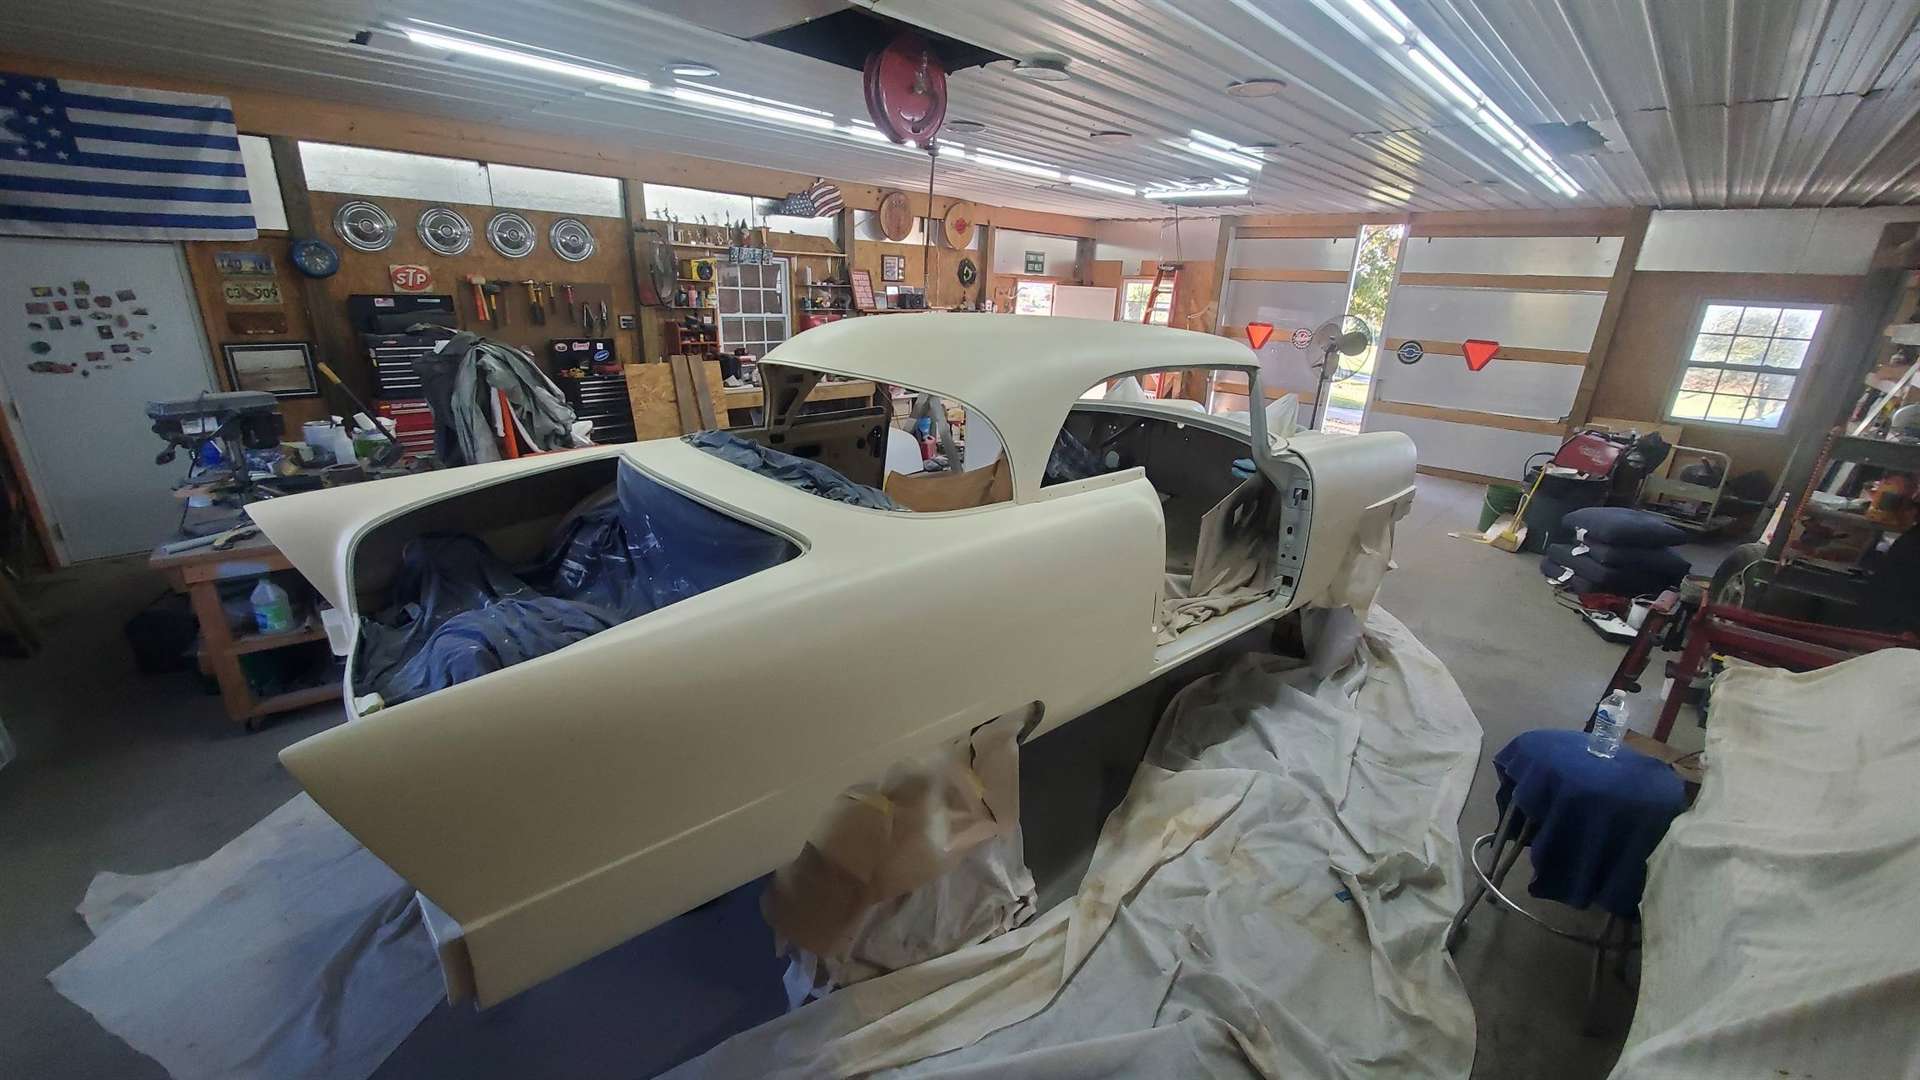
Posted on: 2021/10/27 18:36
|
|||
|
Stewart Ballard
|
||||
|
||||
|
Re: Stewart
|
||||
|---|---|---|---|---|
|
Home away from home
|
Looks good from all angles! You can actually remove the duplicate and insert the proper photo into the original post if you wanted. Just select Edit, then select the image you want to upload while at the same time checking the box of the one you want to delete. When saving the changes, it will have been replaced.
Posted on: 2021/10/27 18:40
|
|||
|
||||
|
Re: Stewart
|
||||
|---|---|---|---|---|
|
Home away from home
|
Anyone have a better way of working with the dashboard?
I am trying not to mess up the paint on it. Right now I have it face down on some wood blocks with some padding in between. It is not easy to work this way. Attach file: 20211107_112158_resized.jpg (231.73 KB)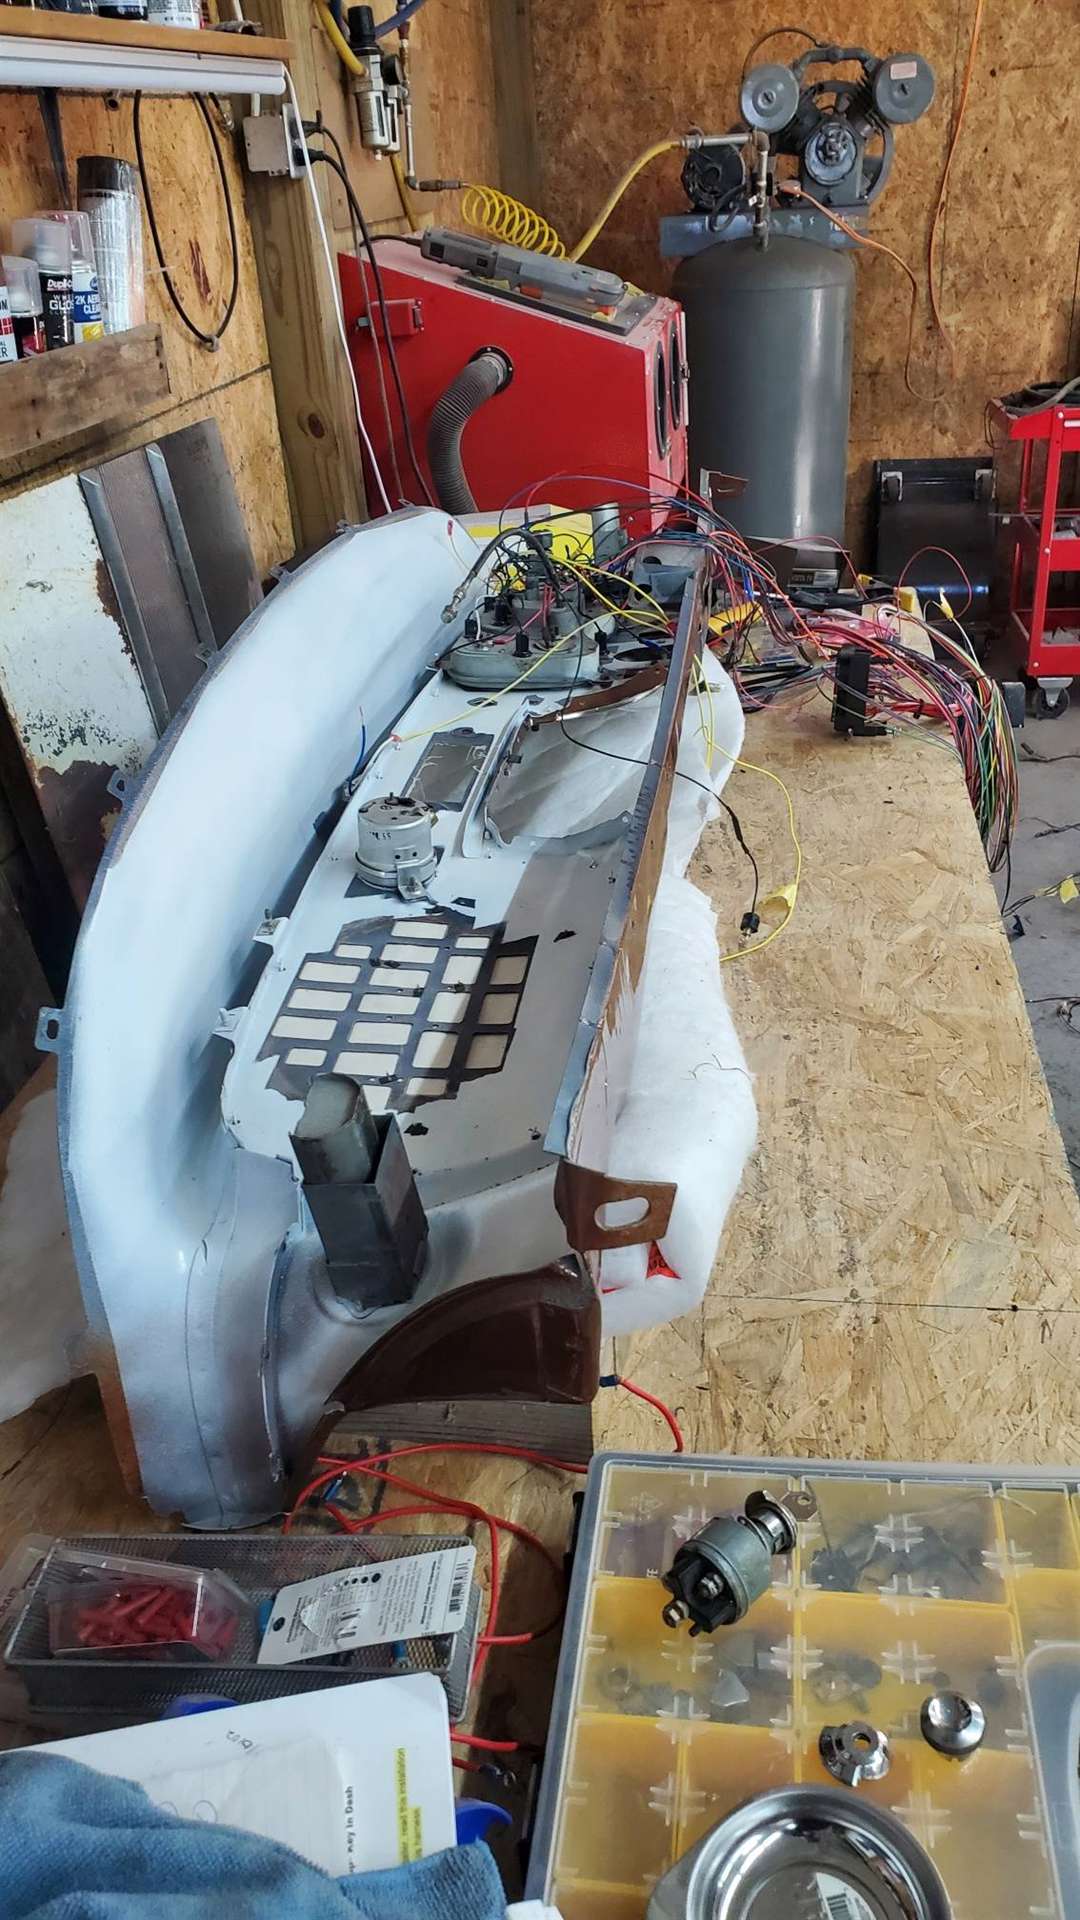 20211107_112215_resized.jpg (211.09 KB) 20211107_112215_resized.jpg (211.09 KB) 20211107_112227_resized.jpg (258.43 KB) 20211107_112227_resized.jpg (258.43 KB)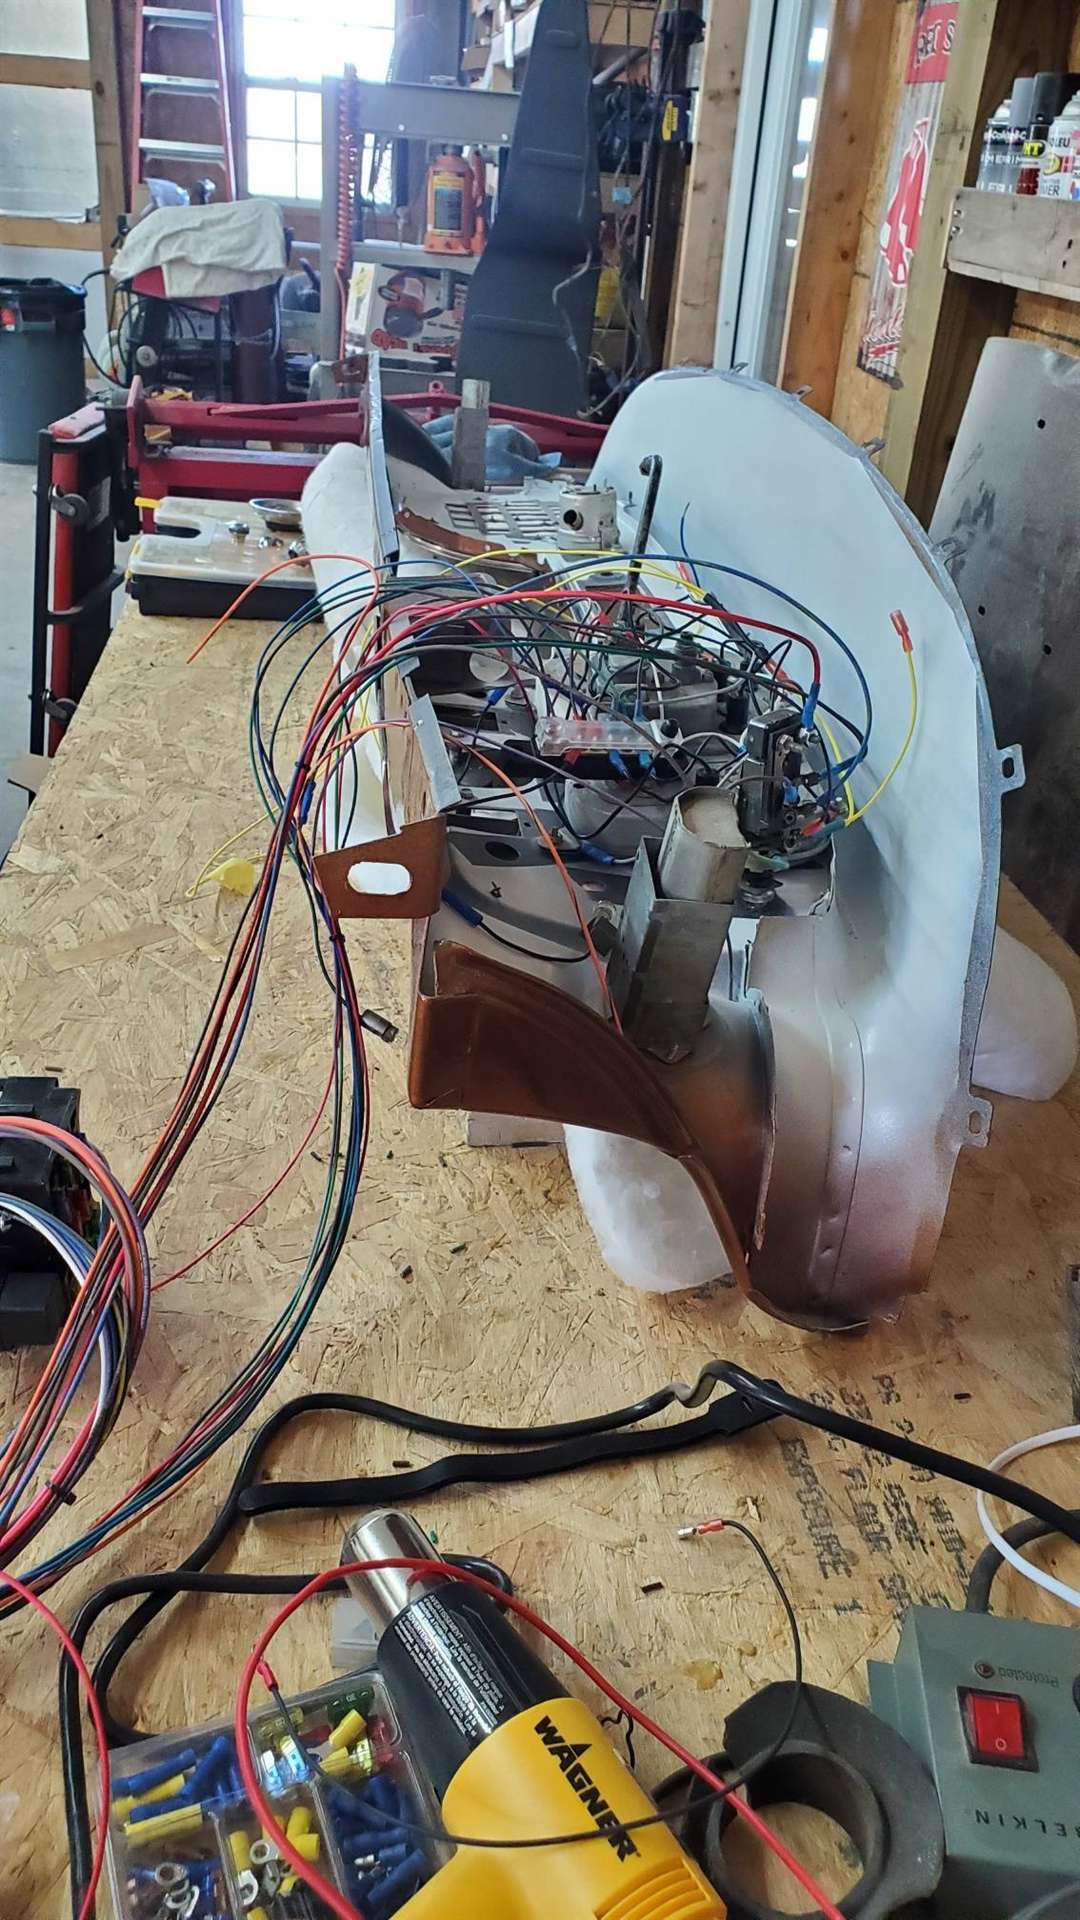
Posted on: 2021/11/7 21:46
|
|||
|
Stewart Ballard
|
||||
|
||||
|
Re: Stewart
|
||||
|---|---|---|---|---|
|
Forum Ambassador

|
I made a pair of brackets out of 2x4s and sat it on my workbench. Since you weld and if you have some bar stock or angle iron that would work too Brackets were sort of shaped like upside down Ts with the cross piece at the bottom to be used as legs and wide enough to keep the dash stable. Put a lag bolt and washer in the two bottom side tabs and have the 2x4s long enough to span the distance from the side tabs up to the dash top as well as raise it off the bench to a comfortable standing height. I can't remember if the ashtrays had to be removed for the wood to clear and reach the top though. For the upper fastening I think I just used wire thru one of the closest holes and fastened that to the 2x4s. Doing it that way with wire allowed some flexibility so the dash angle could be changed a bit. You could do the same thing for standing on the floor by making the legs longer to put the dash at chair height. If you wanted some security against accidental tipping you could also add another thinner piece of wood at the top and brace it to a wall or other fixed piece of furniture.
Posted on: 2021/11/7 23:22
|
|||
|
Howard
|
||||
|
||||
|
Re: Stewart's 1955 Packard 400
|
||||
|---|---|---|---|---|
|
Home away from home

|
The car is looking great! With all the work you are doing on the primer I'm sure the paint will look fantastic. Can't wait to see some color get applied in the spring.
-Kevin
Posted on: 2021/11/8 1:05
|
|||
|
||||
|
Re: Stewart
|
||||
|---|---|---|---|---|
|
Home away from home
|
Thanks again Howard.
I was able to construct a frame from your post to support the dash. I should have figured that out myself. I had plenty of scrape wood around to do the trick. Now I can get to both sides. We have a couple days of warmer temps here so I was able to get the underside of the hood and trunk coated with epoxy primer yesterday. That is probably the last spraying I'll do until spring. Now just between you and me. I am planning to leave the undersides of the trunk and hood as they are right now. I am not planing to top coat them. The epoxy should be durable enough to handle it and there will be an insulation pad under the hood to take the heat. One last thing for today. You see the image of the ignition down below. The lettering should be red but has faded with age. Does anyone have any tips on easiest way to make it red again? Attach file: TrunkAndHooodSealed.jpg (226.32 KB)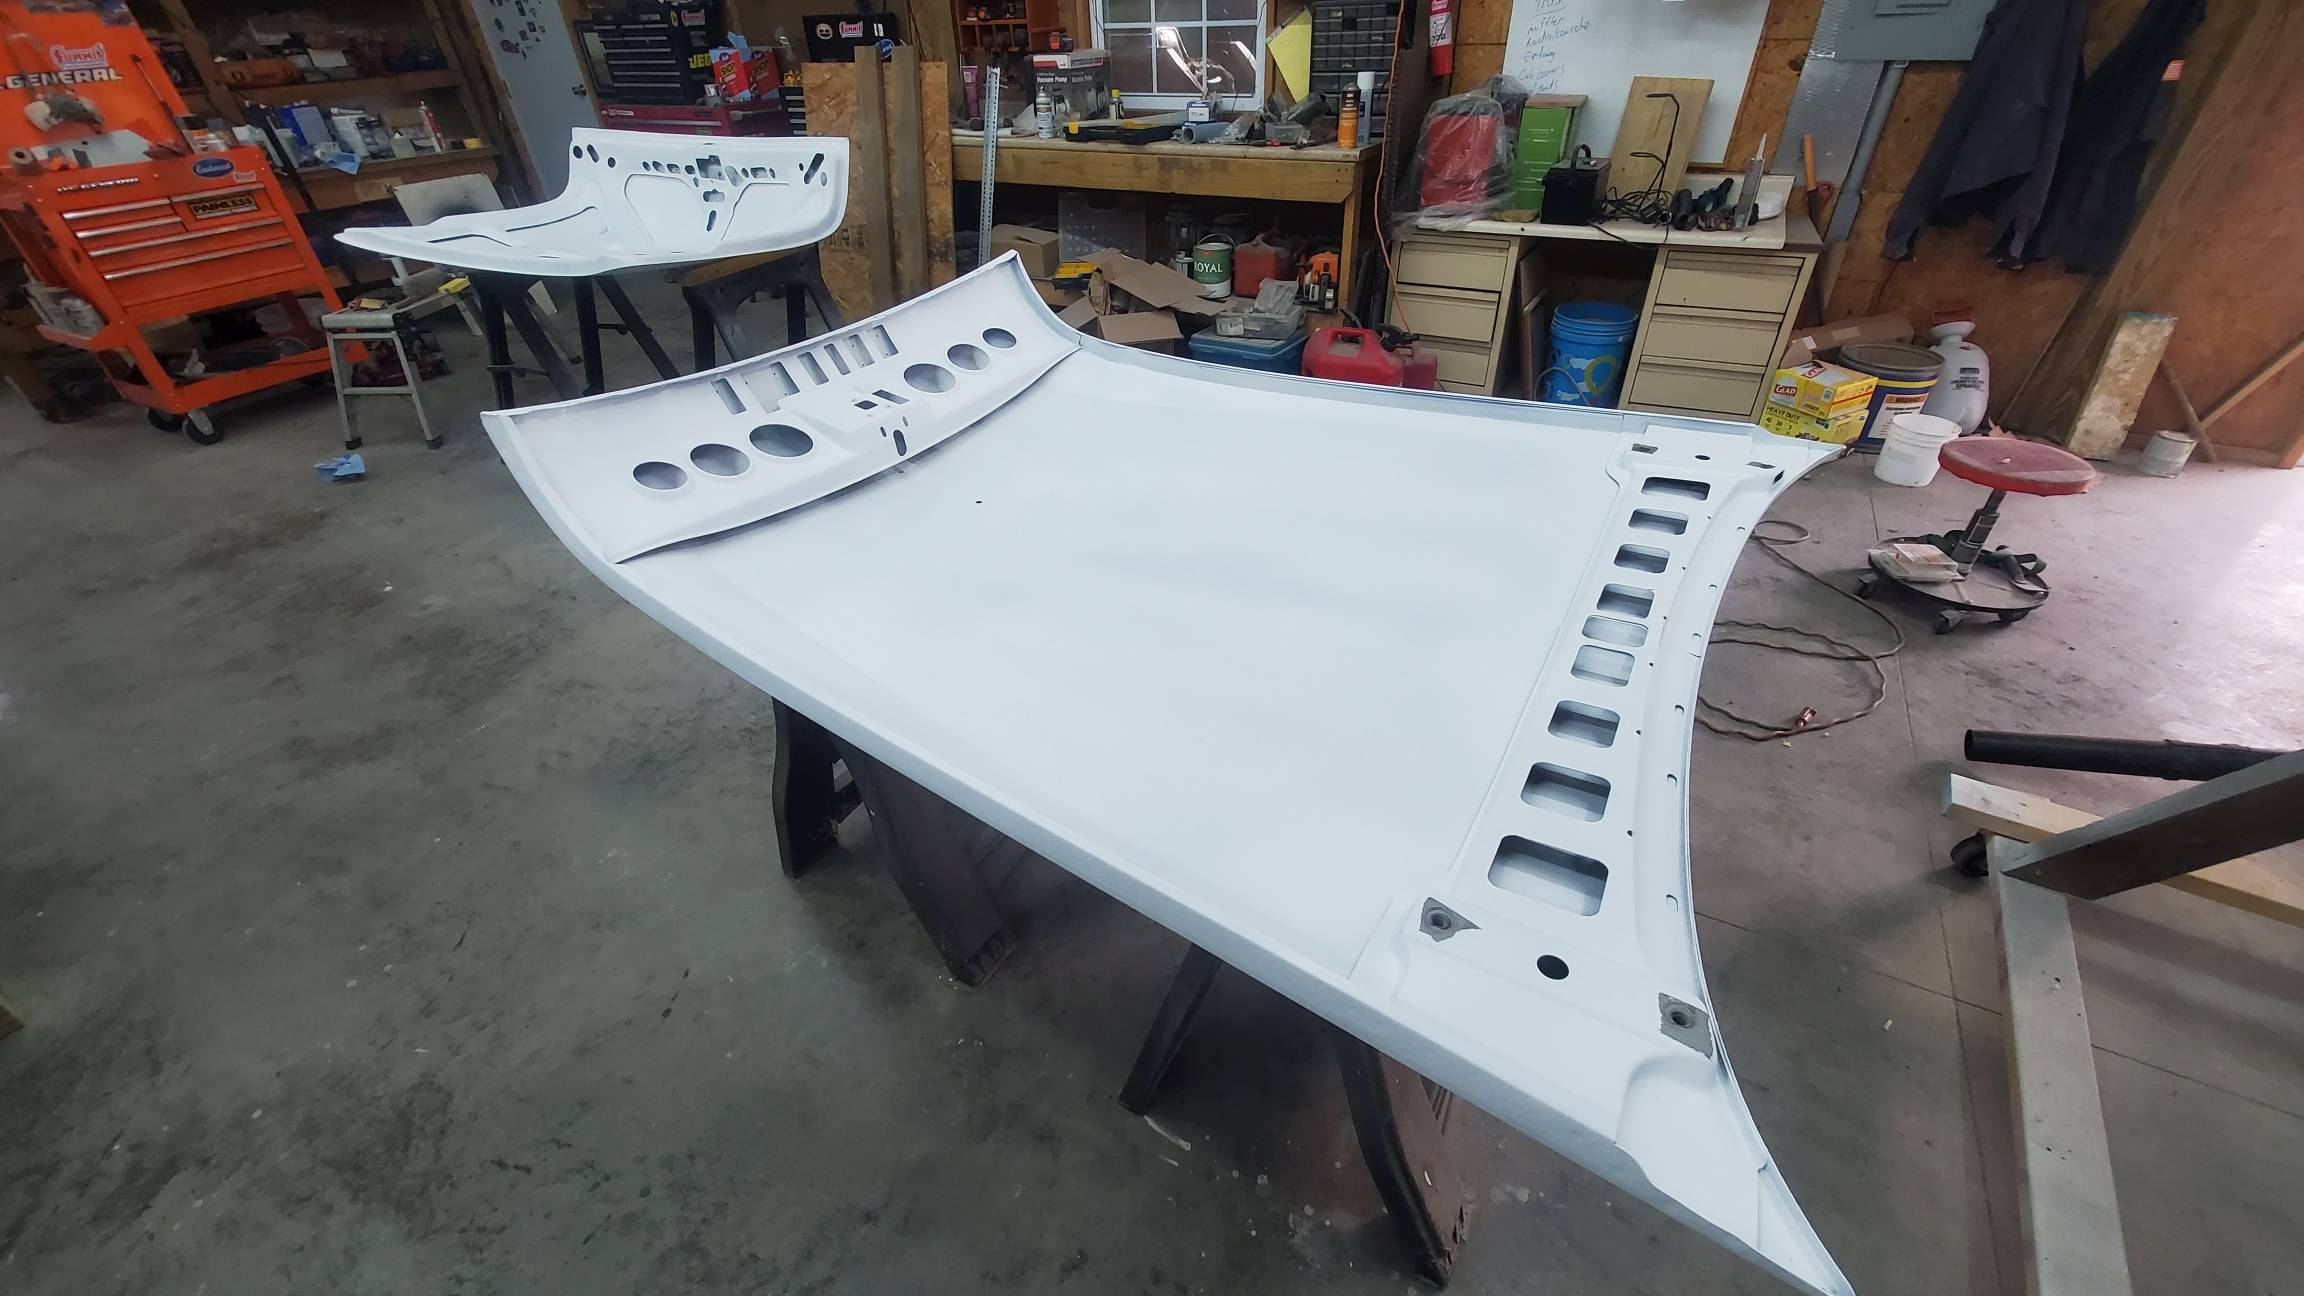 DashStand1.jpg (231.68 KB) DashStand1.jpg (231.68 KB)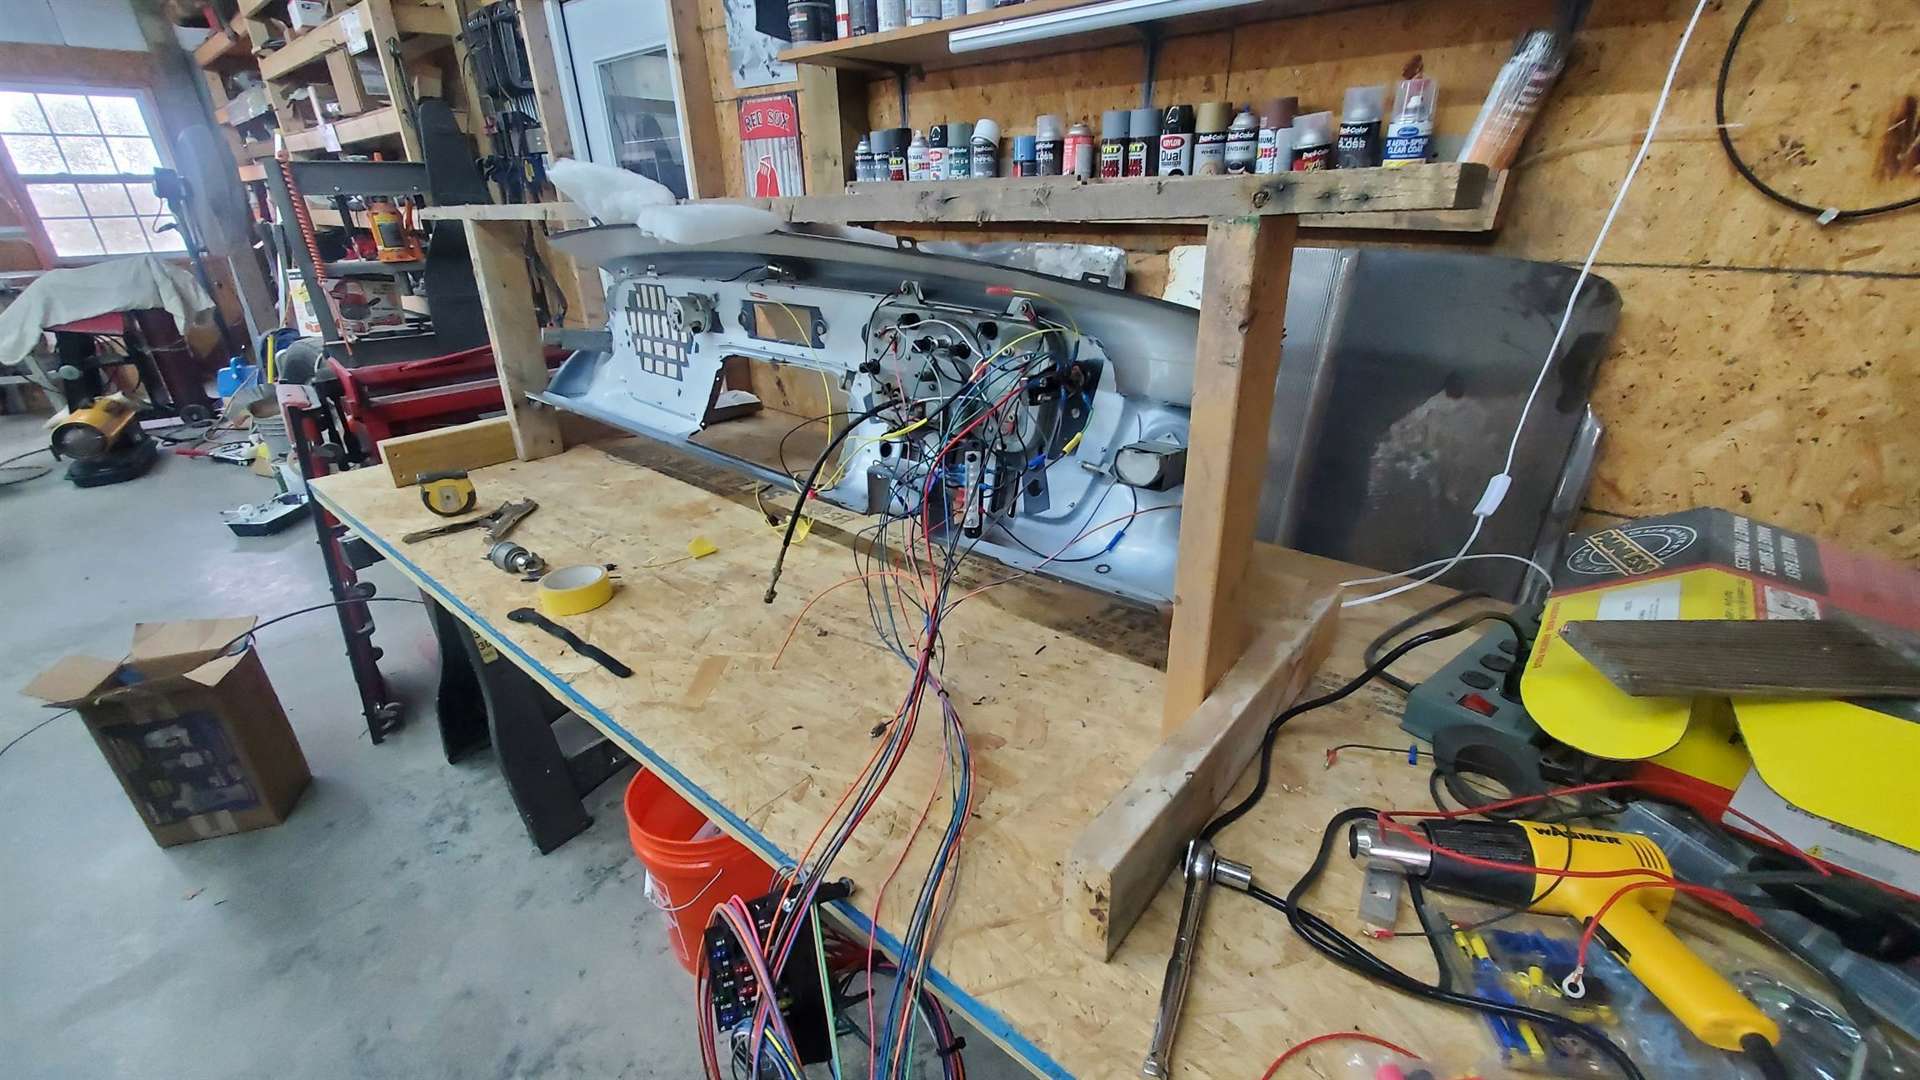 DashStand2.jpg (181.38 KB) DashStand2.jpg (181.38 KB)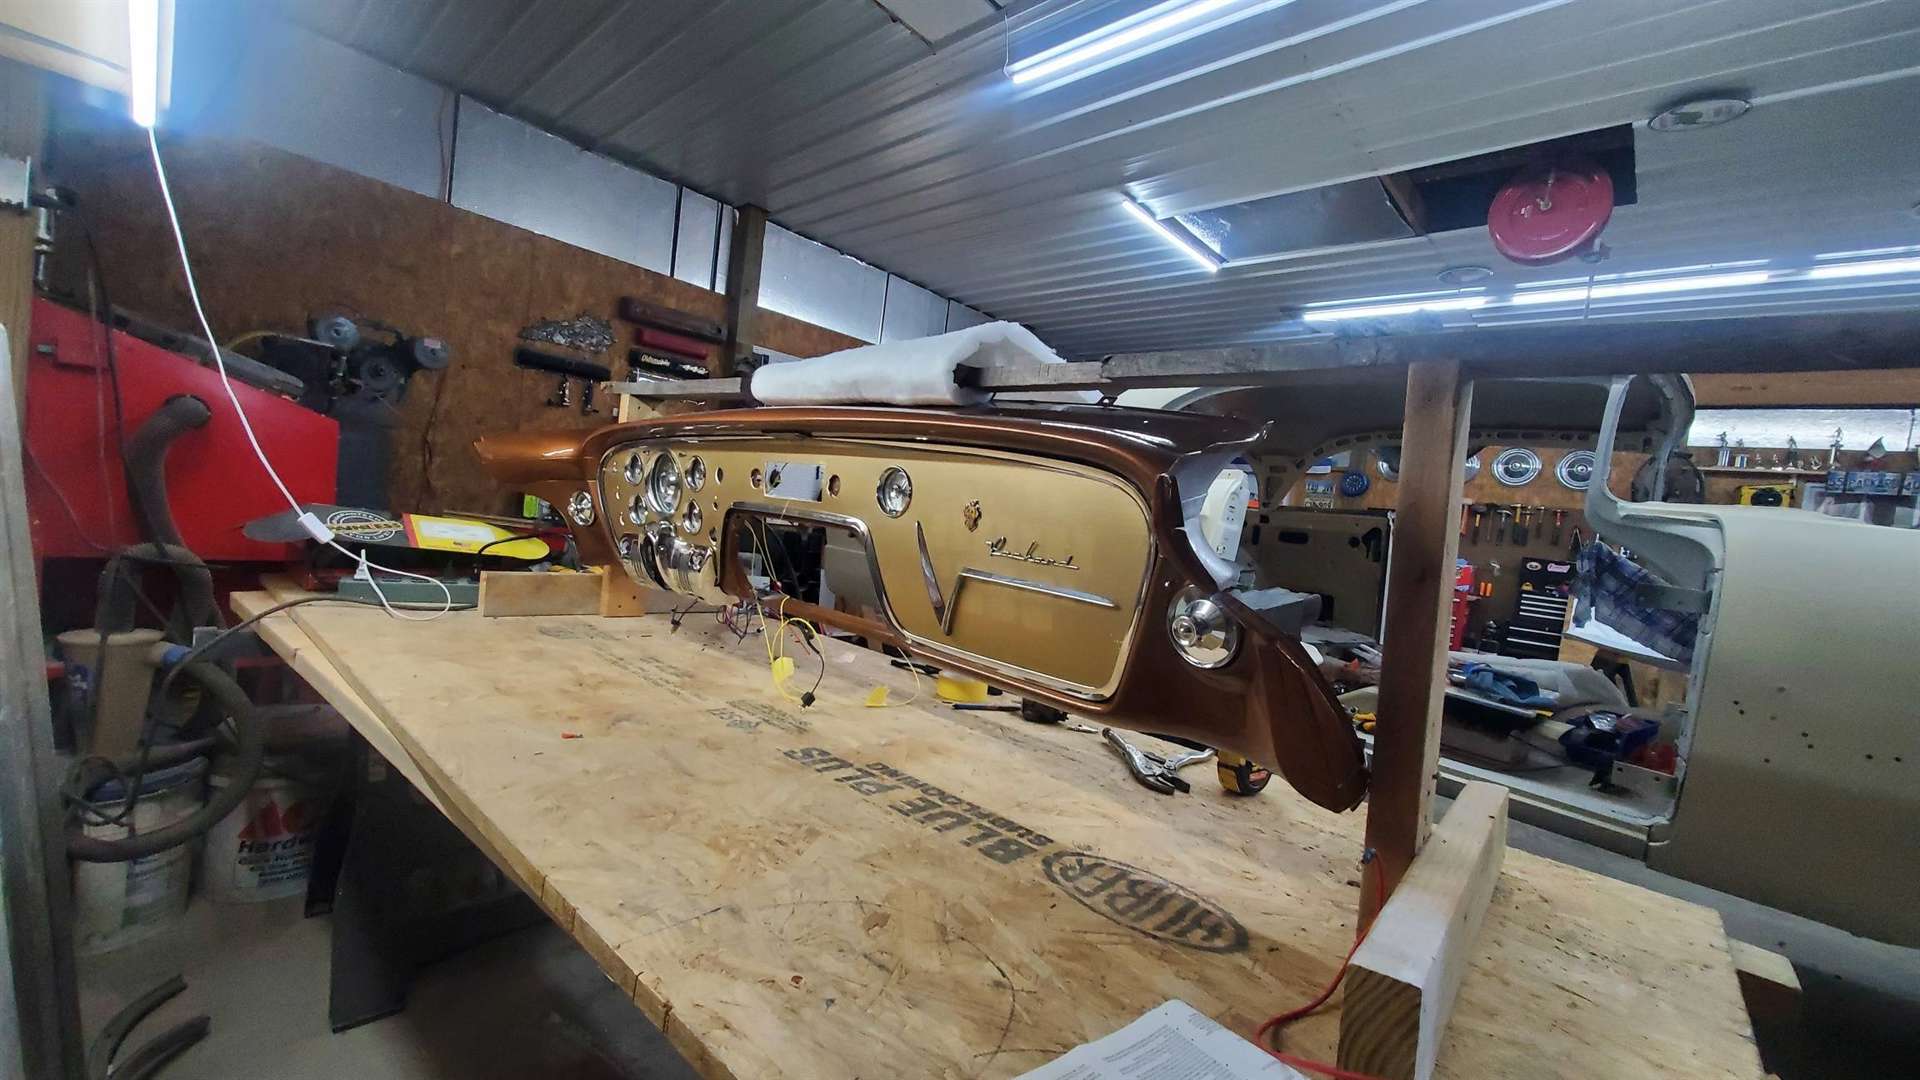 RedLettering.jpg (175.22 KB) RedLettering.jpg (175.22 KB)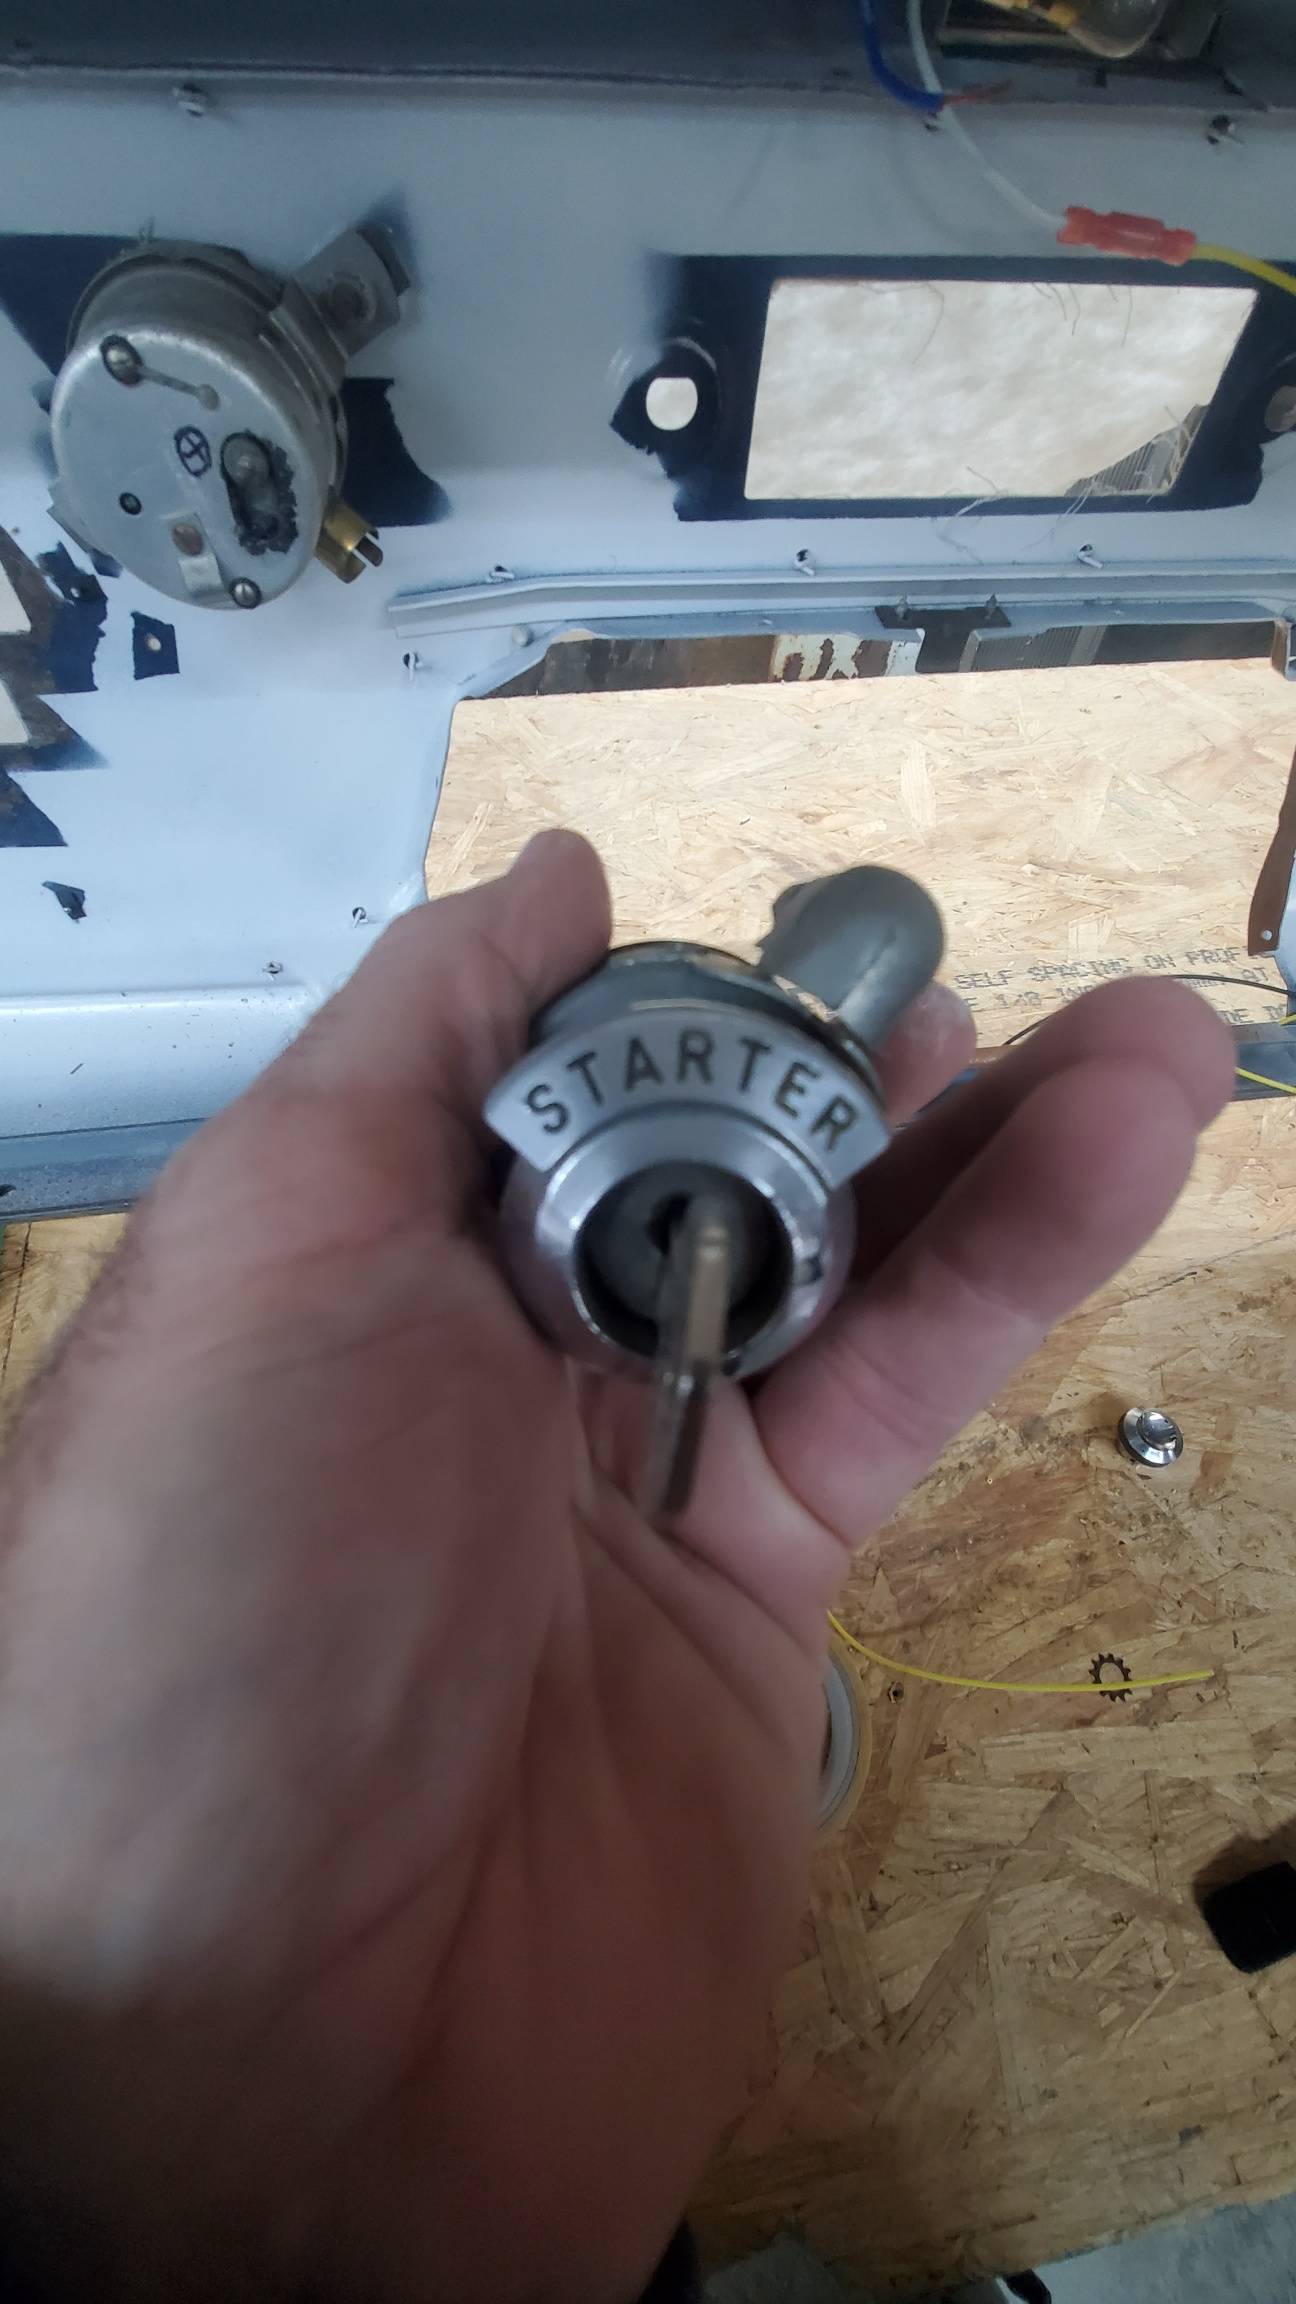
Posted on: 2021/11/9 19:21
|
|||
|
Stewart Ballard
|
||||
|
||||
|
Re: Stewart
|
||||
|---|---|---|---|---|
|
Forum Ambassador
|
I don't remember ever seeing red letters on any of the bezels -- only black -- but then I have never got up close and personal with a 55 and some of the early ones did have different paint treatments such as the dash colored rings on the chrome face of the ashtrays.
Whichever color you use, I take a fine bristle brush like a toothbrush and some mild detergent to get grease, crud and oils out of the letter grooves. Mask the major part of the bezel just leaving the metal bare on the flat lettered surface. I prefer spray paint in a light application but being sure the paint gets in the grooves. I guess brush on paint would work too but try not to let it completely fill up the grooves. Let it set briefly and then before the paint gets dry dampen a soft rag with thinner and carefully wipe the excess paint off the flat metal surface. As long as the rag is not saturated and you do not press hard it should remove paint from the flat surface but leave it in the grooves. If you wanted you could wrap the rag around a small flat wood block so finger pressure does not push the rag in the grooves and pull out the still damp paint. A similar method works in painting the grooves in the side stainless only that is much more tedious because the surface is so much larger and it will need the rag around a flat block.
Posted on: 2021/11/9 20:01
|
|||
|
Howard
|
||||
|
||||


.jpg")


