|
Seat belt installation
|
||||
|---|---|---|---|---|
|
Home away from home
|
I installed 3-point retractable belts for my front seat positions. I wanted the retractable units because they are much more user-friendly and comfortable, and I wanted shoulder belts because of the added safety factor.
I bought my belts from Wesco Performance, but there are many retailers with similar sets.http://wescoperformance.stores.yahoo.net/welr.html The retract unit has to mount straight below the shoulder belt pivot point, and there is a body mount bolt at the base of the door pillar which is a perfect spot to attach it. The body mount bolt sort of floats within a bushing that makes up the center of the mount rubber. The seat belt components mount using 7/16" fine thread bolts, larger in diameter. I wanted the seat belt mount to be solid and not rubber mounts, so I removed the rubber mount pieces and replaced them with washers, with a bushing through the center. The holes through the body and the frame outrigger are larger than the new bolt, so that's why I needed the bushing and large washers. Smaller washers at the top and bottom of the stack clamp it all together, and I used nylon locknuts at all the mounting bolts. The shoulder belt pivot point needs to mount 0-8" above the seatback, I mocked it up a few times until it felt good and ended up at the high end. There is an existing hole in the pillar that happened to match the spot I picked, so all I had to do to mount the backing doubler (that has the bolt threads in it) was slide it up inside the pillar to the proper spot, and attach it with some pop rivets (the bolt is what really holds it tight). I had to bevel the edges of the doubler plate a little as the sheet metal of the pillar is curved a little, and I fished it up in place with some string. The other end of the belt can mount to the floor near the retract unit, and the buckle end mounted to the tunnel behind the seat. I had to cut some slots in the base of the front seat frame for the belts to pass through, and then you have to provide some kind of chafe guard for the metal edges. I am using "cat track", which is some plastic stuff for just this purpose that is an aviation part that we use at work all the time. Attach file:  (83.78 KB) (83.78 KB)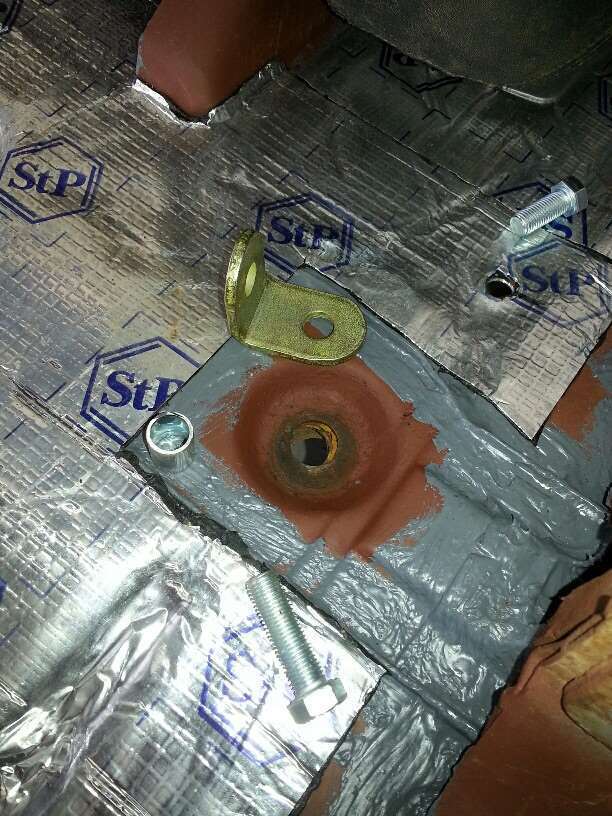 (65.46 KB) (65.46 KB) (42.42 KB) (42.42 KB)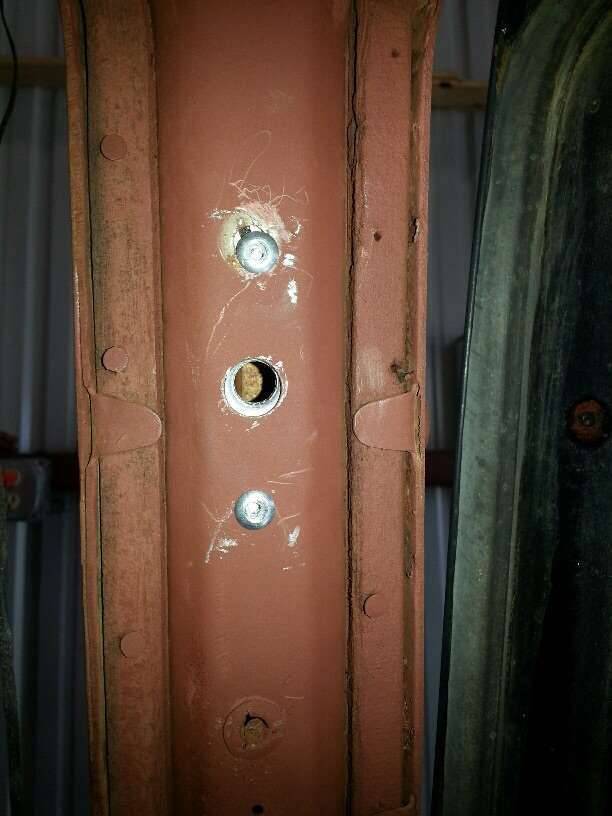 (53.30 KB) (53.30 KB)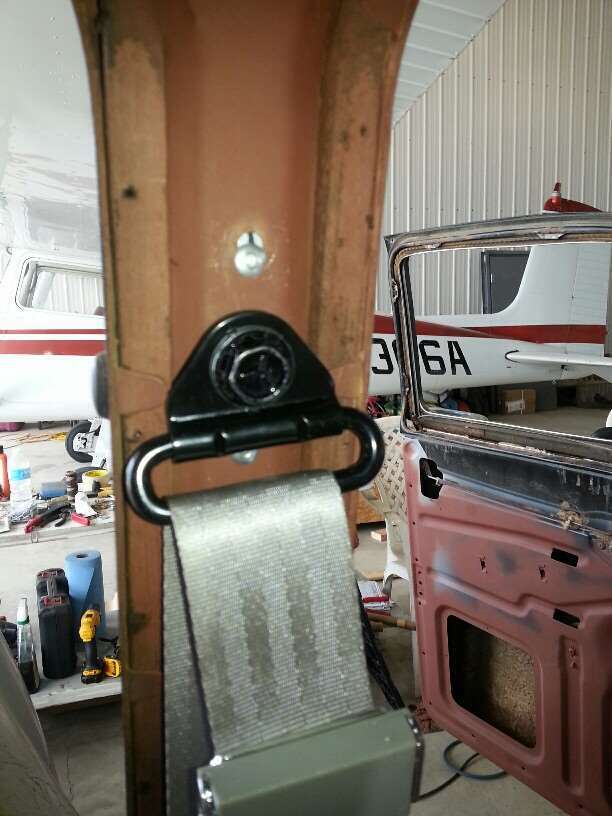 (43.43 KB) (43.43 KB)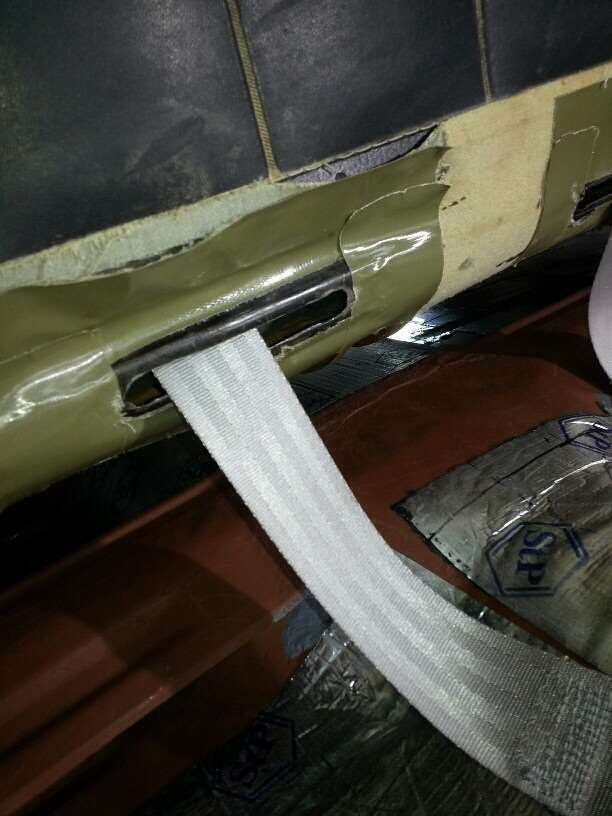 (83.23 KB) (83.23 KB) (61.87 KB) (61.87 KB)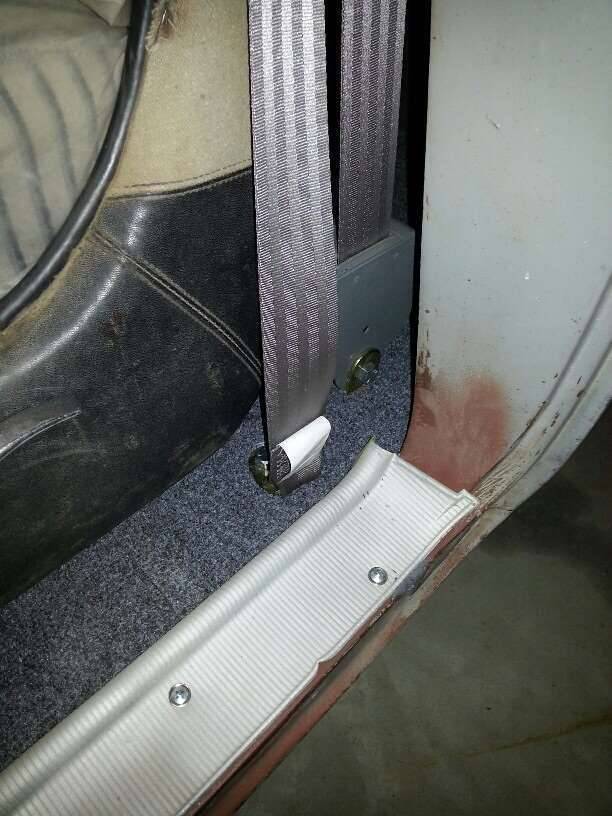 (89.65 KB) (89.65 KB) (50.59 KB) (50.59 KB)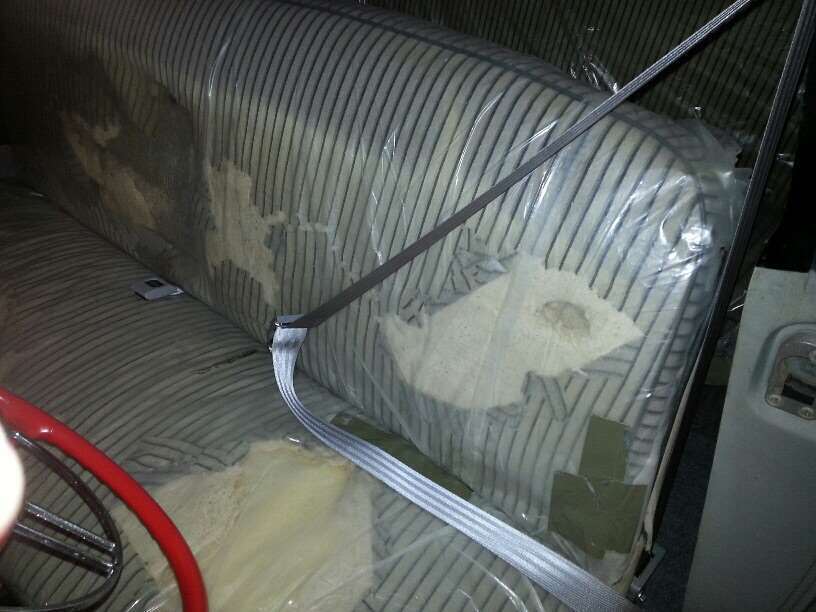
Posted on: 2015/9/22 23:12
|
|||
|
1952 Model 200 Deluxe Touring Sedan
HA's 52 Grey Ghost "The problem with quotes on the internet is you never know if they're true" - Abraham Lincoln |
||||
|
||||

|
Re: Seat belt installation
|
||||
|---|---|---|---|---|
|
Home away from home
|
I cut the slot large enough so that the end of the belt slides through from the front, then is bolted to the floor. I'm pondering whether I can get away with making that slot a little bigger so that I can slide the buckle through, then the seat frame could be removed without unbolting the belts first. Unbolting the belts means a helper and a jack, to get under the car to hold the nuts.
I made the slot with a 1/2" drill bit at the ends and then cut the rest with a die grinder. I didn't do my old rotten upholstery any favors when the drill caught the fabric, and the duct tape it there because I wanted to cover the fabric edges when I cut the rest so I wouldn't set fire to it.
Posted on: 2015/9/23 23:23
|
|||
|
1952 Model 200 Deluxe Touring Sedan
HA's 52 Grey Ghost "The problem with quotes on the internet is you never know if they're true" - Abraham Lincoln |
||||
|
||||
|
Re: Seat belt installation
|
||||
|---|---|---|---|---|
|
Home away from home
|
I had originally decided to install lap belts in the rear seat, but after sitting back there and pondering where my head would go during an impact (right down to the top of the front seat frame) I changed my mind and started to figure out how best to install shoulder harnesses in back too. Below see a picture of my assistant demonstrating the problem.
After looking at catalogs and many versions of installation instructions, I decided on some roadster-type shoulder belts with the retractor mounting to the rear hatshelf area. These are available from the same vendor listed above. When I got my new box of toys, I started mocking up the belt mounts and I didn't think that the hatshelf is really strong enough to take the full load. I experimented with a piece of steel angle as a backup under the shelf, that would cross the entire shelf and pick up both retractor mounts, but I eventually decided that I'd rather mount the retractors to the floor of the trunk and feed the belt up through the hatshelf to a pivot point much like the front belts. So I switched to using the same style belts that I used for the front seats. I built some doublers for under the shelf to mount the pivots and the geometry worked out well. My doublers are 1/8" aluminum from a scrap piece I had laying around (2024-T3 aircraft alloy) and are each attached with seven aircraft structural screws and nuts. The pivot point is mainly loaded in shear so I am not worried about the strength of the shelf with this doubler taking the load of the nutplate piece. The steel will tear before the aluminum plate will, but there are enough screws to spread that load quite adequately. Attach file: (65.27 KB)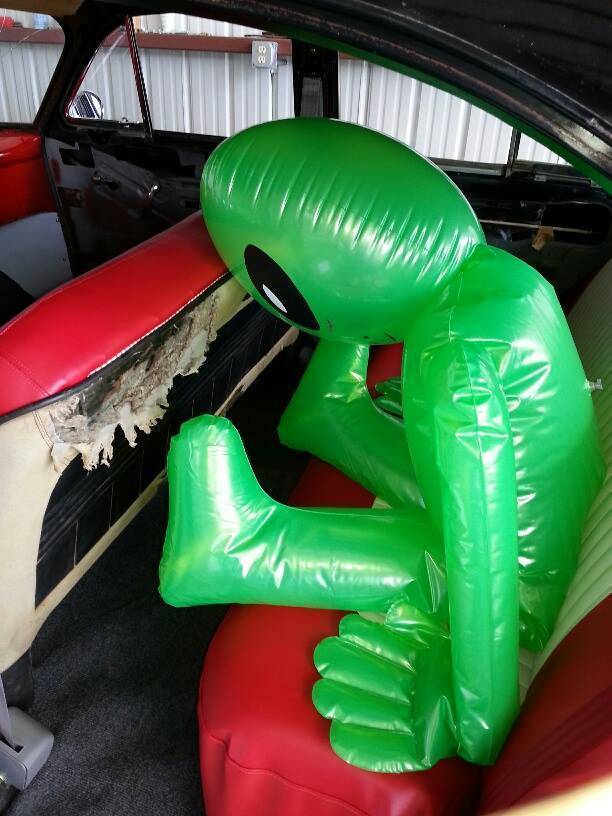 (47.27 KB) (47.27 KB)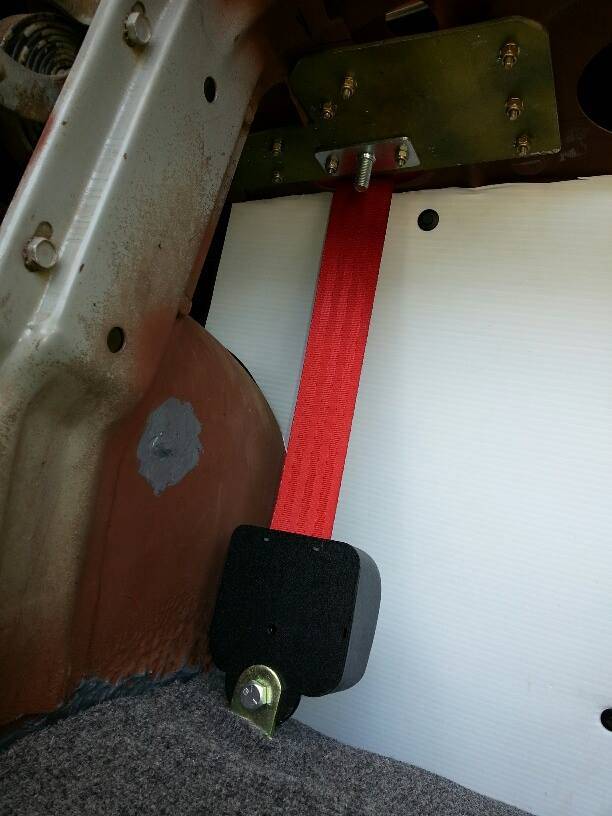 (46.04 KB) (46.04 KB)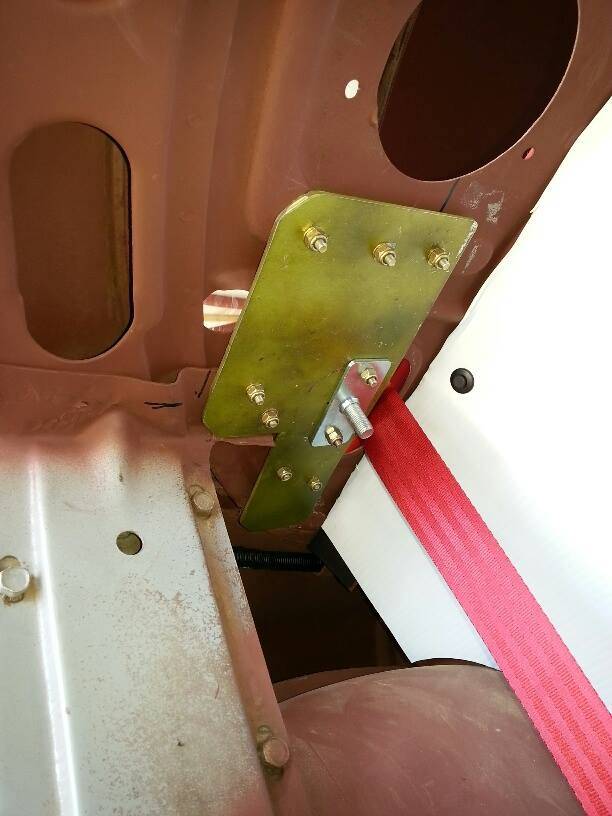 (54.54 KB) (54.54 KB)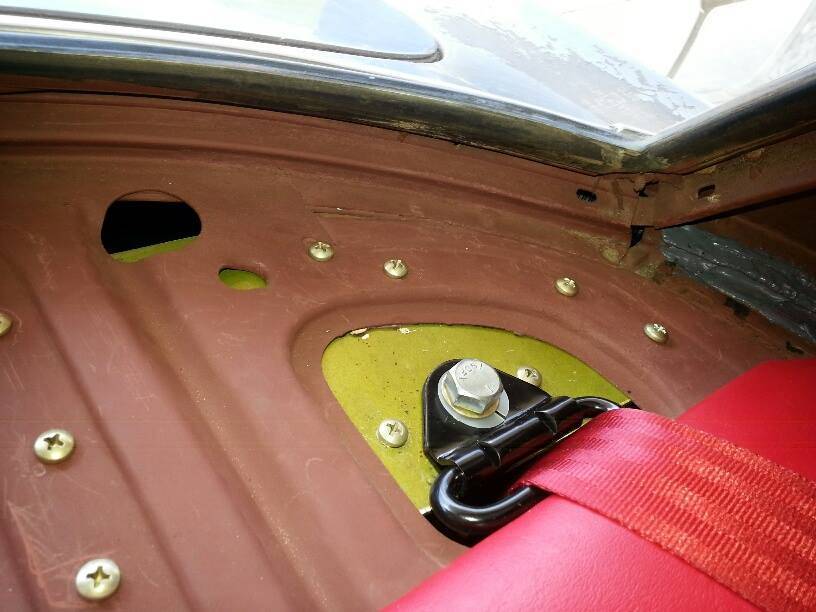 (46.46 KB) (46.46 KB)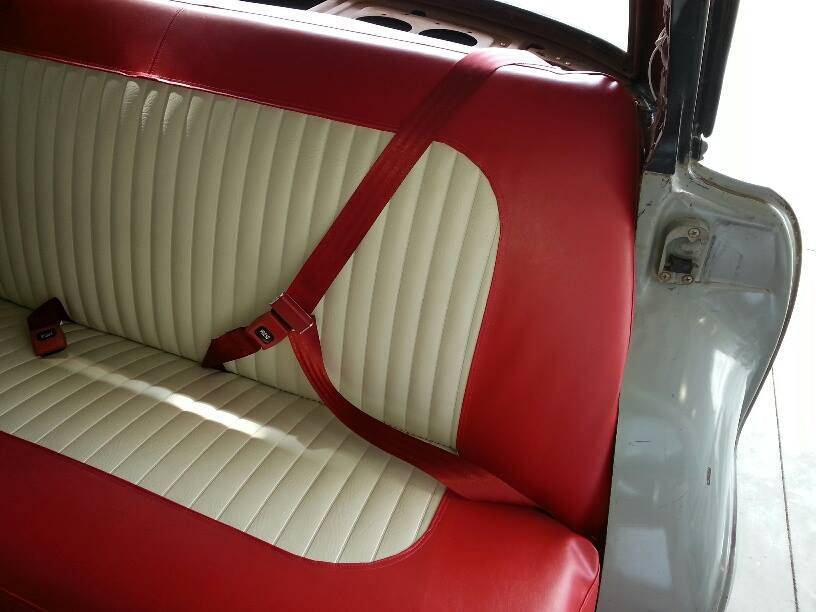
Posted on: 2016/8/9 17:49
|
|||
|
1952 Model 200 Deluxe Touring Sedan
HA's 52 Grey Ghost "The problem with quotes on the internet is you never know if they're true" - Abraham Lincoln |
||||
|
||||
|
Re: Seat belt installation
|
||||
|---|---|---|---|---|
|
Home away from home
|
Nicely done! This has been done before, of course, but on a complete, running car, in particular Keith (PackardV8). I also put seat belts in my 55 Pat, another complete running car.
I will have a similar arrangement on my 1956 Panther, but I'm installing a rollbar to do it since it is a 2Dr HT. I'll post pics when I get to that point. Again: good job! Craig
Posted on: 2016/8/9 20:03
|
|||
|
Nuke them from orbit, it's the only way to be sure! Ellen Ripley "Aliens"
Time flies like an arrow. Frui |
||||
|
||||
|
Re: Seat belt installation
|
||||
|---|---|---|---|---|
|
Home away from home
|
Thanks Craig. I know others have worked this stuff out too but I thought it might be good to just detail my thought process and some ideas for those who might be on the fence about how or whether to install their own belts.
The safety factor is a no-brainer to my mind, I can speak from personal experience having been in accidents both wearing, and not wearing belts. And as evidenced by my minimal craftsmanship, anybody can get it done so no reason to put it off.
Posted on: 2016/8/9 20:36
|
|||
|
1952 Model 200 Deluxe Touring Sedan
HA's 52 Grey Ghost "The problem with quotes on the internet is you never know if they're true" - Abraham Lincoln |
||||
|
||||


.jpg")


