|
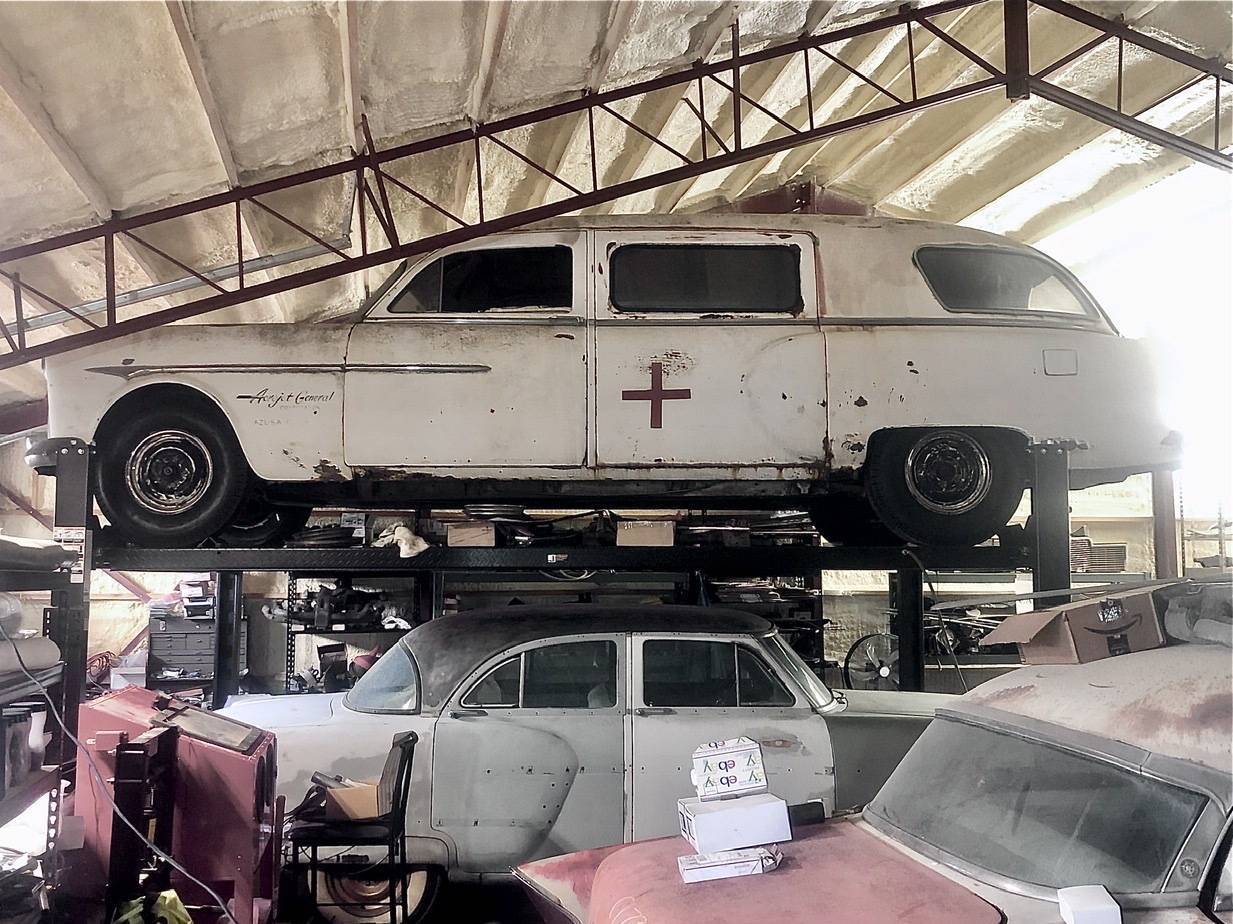
Re: Resurrecting a 1951 Henney-Packard Parts Car
|
||||
|---|---|---|---|---|
|
Home away from home

|
It turned out that I was back at the shop briefly three times the next day before heading to the airport to put inside some packages that arrived.
One was a spare wheel so now it has all five and the other contained the rear stabilizer rods, grommets and bushings along with NOS shocks however the bushings are incorrect. They are for the front of a passenger car, not the back of a Henney! When the Packard Parts Book says ALL, that does not apply to the commercial chassis unless it’s an engine part as it shares nothing else with them body-wise or, especially, chassis-wise! On the arrival of the wheel, my ride to the airport was to pick me up at 3:00 PM but texted that she would be about ten minutes late and good thing as the wheel arrived a few minutes after I was originally to have left so good timing! The third (actually first) trip out was for a lighting controller for the shop as it will use the Lutron RadioRA2 system to make wiring easier and not need to do so much of it. That that setup, I can later add a switch anywhere I want without having to add wiring for it.
Posted on: 2022/5/30 11:23
|
|||
|
||||
|
Re: Resurrecting a 1951 Henney-Packard Parts Car
|
||||
|---|---|---|---|---|
|
Home away from home

|
Good call on the Lutron lighting system. I used Lutron Vive Powpaks in my shop, which means I didn't have to do any wiring to switches. I can add as many remote switches as I want and all I have to do it push a button. And the switches mount inside either standard faceplates or you can buy wall-mounted faceplates. It made things so much easier for me.
-Kevin
Posted on: 2022/5/31 17:30
|
|||
|
||||
|
Re: Resurrecting a 1951 Henney-Packard Parts Car
|
||||
|---|---|---|---|---|
|
Home away from home
|
Good to hear and thank you! The RadioRA2 system has similar devices but in my case, the switches are not something you access directly but rather are hidden, then accessed by a pad near the door or wherever else one is needed. Mine has 7-buttons (in this case but dimmer-types are available too) where individual lights or scenes can be set up to each button.
Posted on: 2022/5/31 19:39
|
|||
|
||||
|
Re: Resurrecting a 1951 Henney-Packard Parts Car
|
||||
|---|---|---|---|---|
|
Home away from home
|
I got to the shop yesterday afternoon to find one of the new tires was low so will take it in on Monday to see what can be done. As rough as the wheels were, I am more surprised that there was only one that was low!
Tonight, after I had worked out there all afternoon, my brother came over in the evening ready to help fix the broken gas tank bolt. We had planned to only take over the welder while it was cool in the evening (days have been hot) and get set up as my shop has only 120v while the welder is 240v but I have a step-up converter that did the trick. For the repair, he cut off the broken bolt above the threads, then another bolt was cut to get the missing portion. After heavily chamfering both ends, they were clamped together in a piece of aluminum angle iron and welded! Probably not quite enough power for the welder due to the connection but in the end it looks fine. Attach file:  67D80C9C-4D73-4F41-8473-47FE74431E1B.jpeg (144.39 KB) 67D80C9C-4D73-4F41-8473-47FE74431E1B.jpeg (144.39 KB) 0EE287DC-728F-4EBB-9DD0-CF5D71641E16.jpeg (160.83 KB) 0EE287DC-728F-4EBB-9DD0-CF5D71641E16.jpeg (160.83 KB)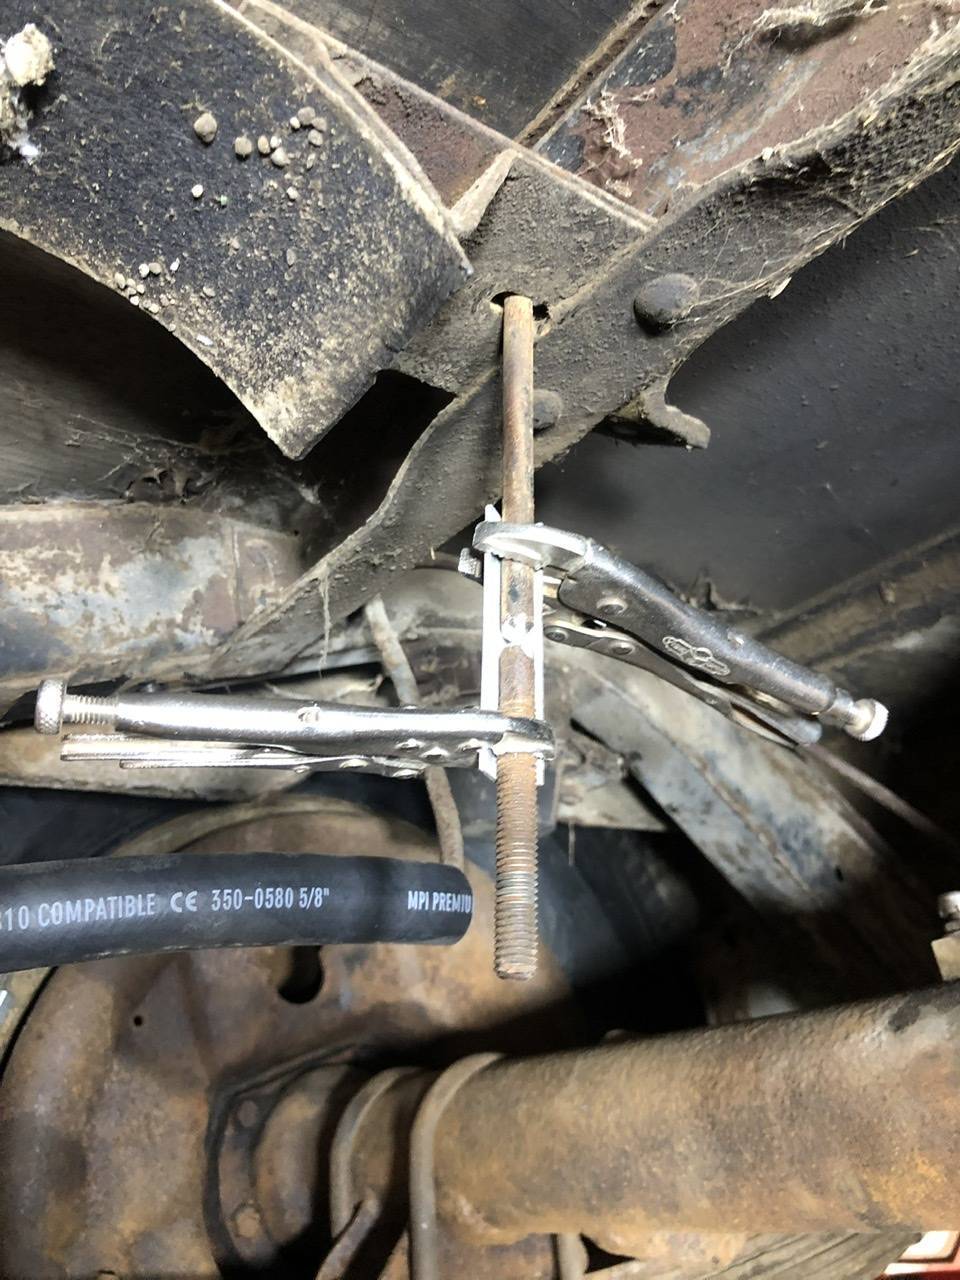 4669B8CD-BC31-4E43-930F-97B6D6566E6E.jpeg (148.02 KB) 4669B8CD-BC31-4E43-930F-97B6D6566E6E.jpeg (148.02 KB)
Posted on: 2022/7/17 2:53
|
|||
|
||||
|
Re: Resurrecting a 1951 Henney-Packard Parts Car
|
||||
|---|---|---|---|---|
|
Home away from home
|
A little more progress today in getting the new rear shackle bushings installed along with new (NOS) shocks and new (reproduction) stabilizer connector rods. The stabilizer itself needs bushings which the dealers do not have but it seems a common size so I’ll check Napa or a local shop tomorrow. I did not replace the bushing for the fronts or the rear springs as doing so is quite involved on these commercial cars.
For the bushings, the first side took a long time and much effort only to have to take it apart again as one of them seemed to have missed the shaft and was being compressed against its shoulder. The second time was easier and the other side was easier yet as I realized that the car was not lifted evenly due to a tire having been removed on one side but not the other. Getting it level helped. I also sat the steel rear brake lines in place to test for fit. It appears that they will need some tweaking but considering how rotten and rusty the ones used as a patterns were, it’s a wonder that they are as close as they are! Attach file: E53FFBD1-0617-4F6E-9F0F-D54701A11E8B.jpeg (206.02 KB)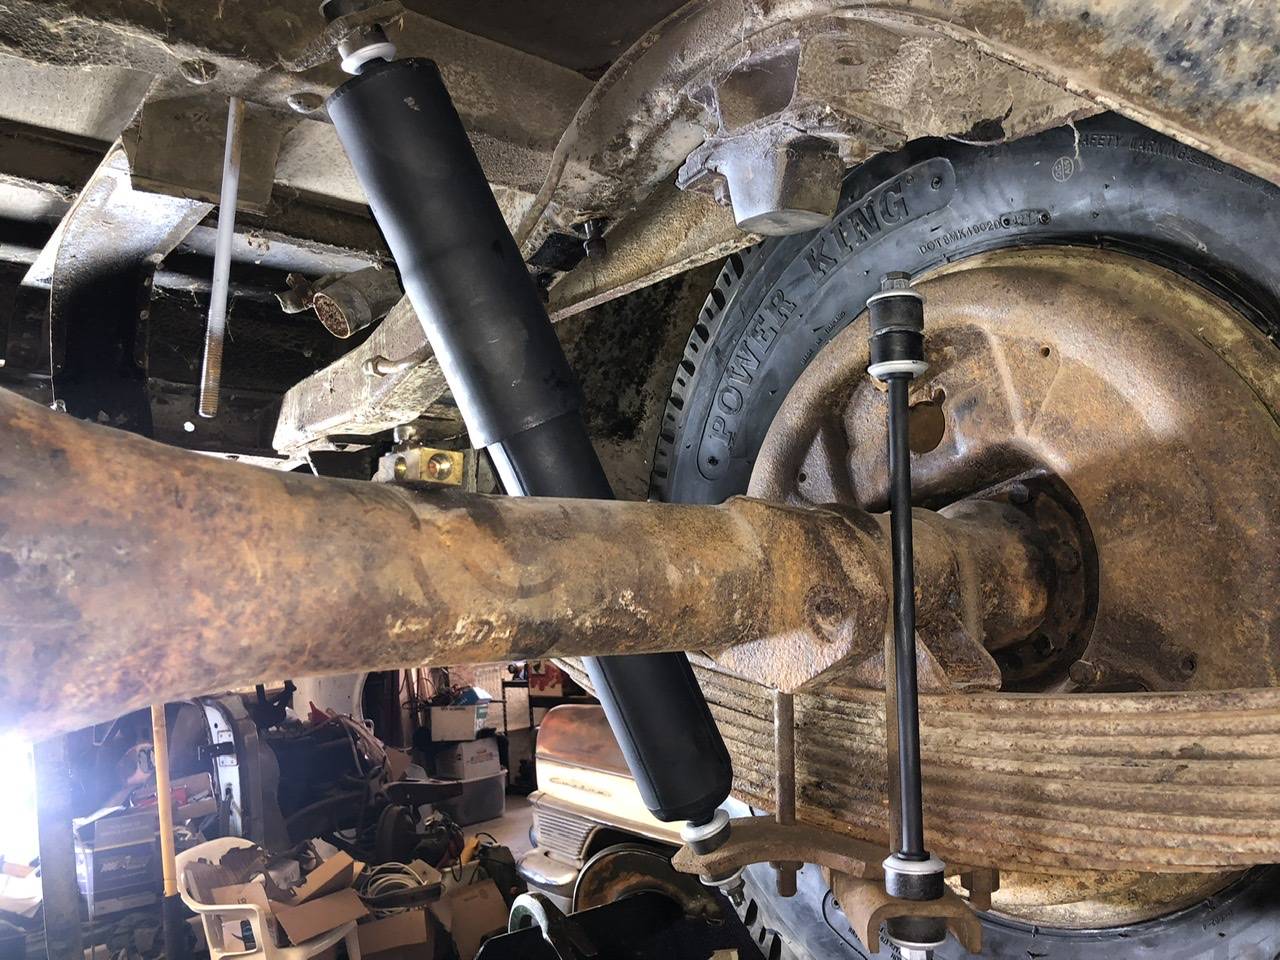 39E09387-3228-4F58-80E6-9E6A28319AAC.jpeg (168.14 KB) 39E09387-3228-4F58-80E6-9E6A28319AAC.jpeg (168.14 KB)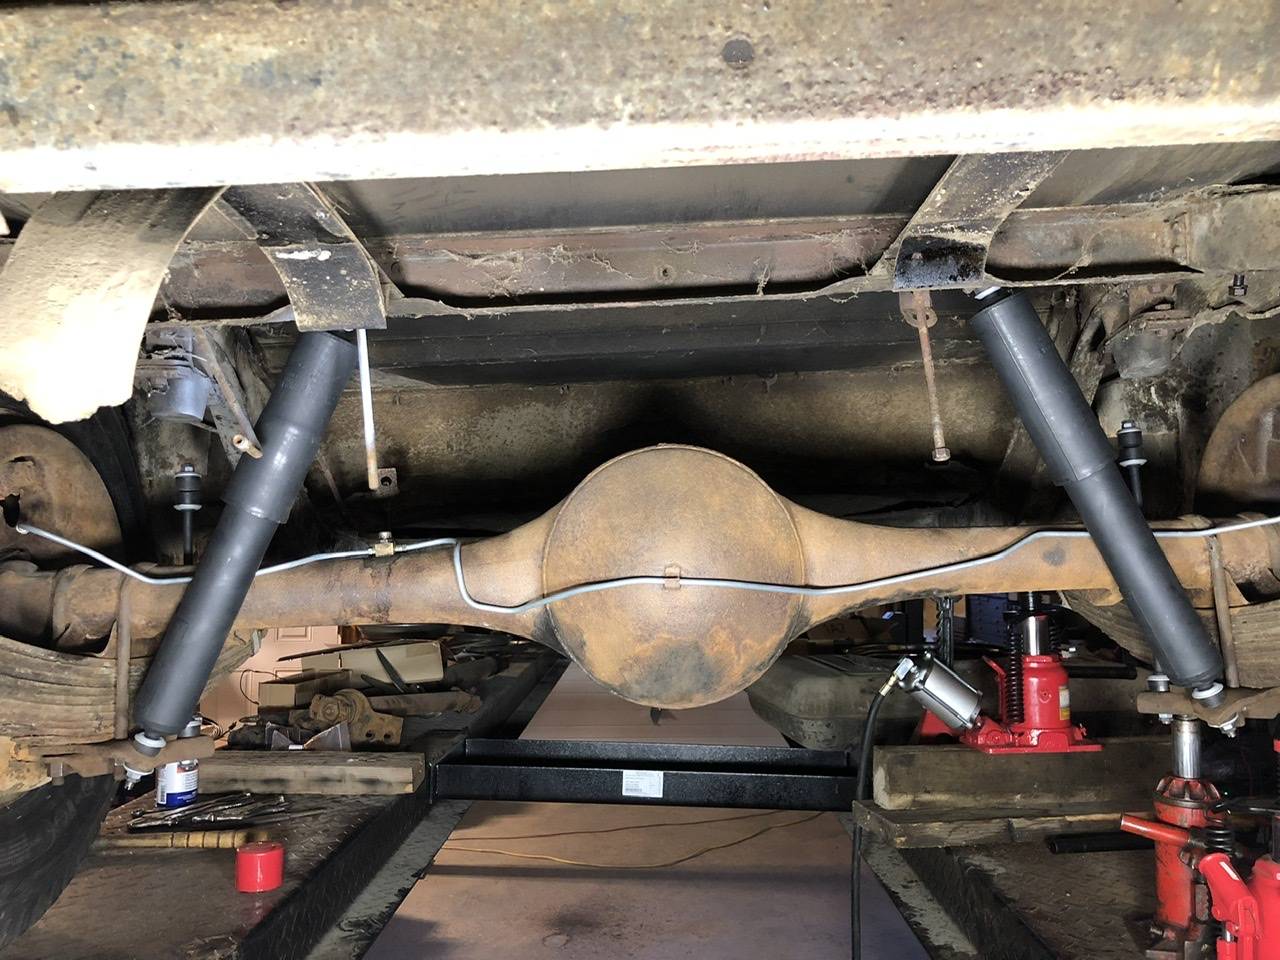 A2867FD1-DD53-4FA8-B794-D2F9F084E2AF.jpeg (183.72 KB) A2867FD1-DD53-4FA8-B794-D2F9F084E2AF.jpeg (183.72 KB)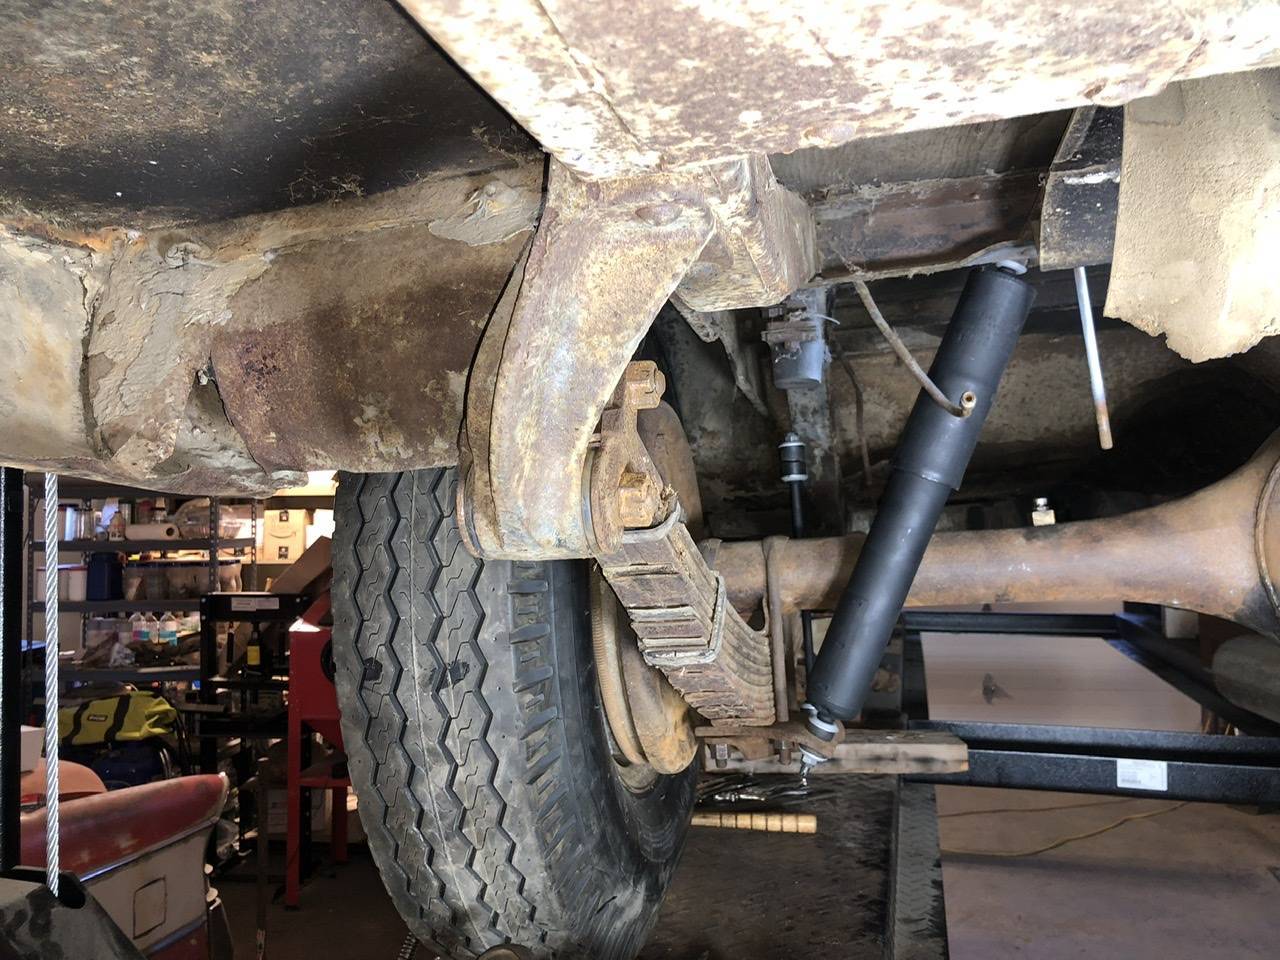
Posted on: 2022/7/17 20:52
|
|||
|
||||
|
Re: Resurrecting a 1951 Henney-Packard Parts Car
|
||||
|---|---|---|---|---|
|
Home away from home
|
Definitely have a heavy set of leaves on those cars.
Posted on: 2022/7/18 10:41
|
|||
|
||||
|
Re: Resurrecting a 1951 Henney-Packard Parts Car
|
||||
|---|---|---|---|---|
|
Home away from home
|
Yes indeed and their rear supports are heavy castings with springs that anchor outside the frame rather than inside as on a passenger car. The shocks and everything else are huge too to handle the weight. Note in one of the photos above that the brake drum has an outside diameter that is nearly the same size as the 16" wheel because it's 14" drum that is very thick.
Posted on: 2022/7/18 10:47
|
|||
|
||||
|
Re: Resurrecting a 1951 Henney-Packard Parts Car
|
||||
|---|---|---|---|---|
|
Home away from home
|
Today I managed to start the process of sealing the gas tank. After dumping out a half cup of rust particles (only one pile is shown but there was another), I added the cleaning solution. Probably not really needed in this case as there was no gum inside to removed but I did it anyway and am letting it soak for the prescribed time. The little dark spots are pinholes so I’ve got to be sure there is sealer on the inside top surfaces when the time comes. The steel is quite heavy-appearing other than those spots.
Attach file: AC5CAE7F-47CF-4596-A55B-784F2829E441.jpeg (272.69 KB)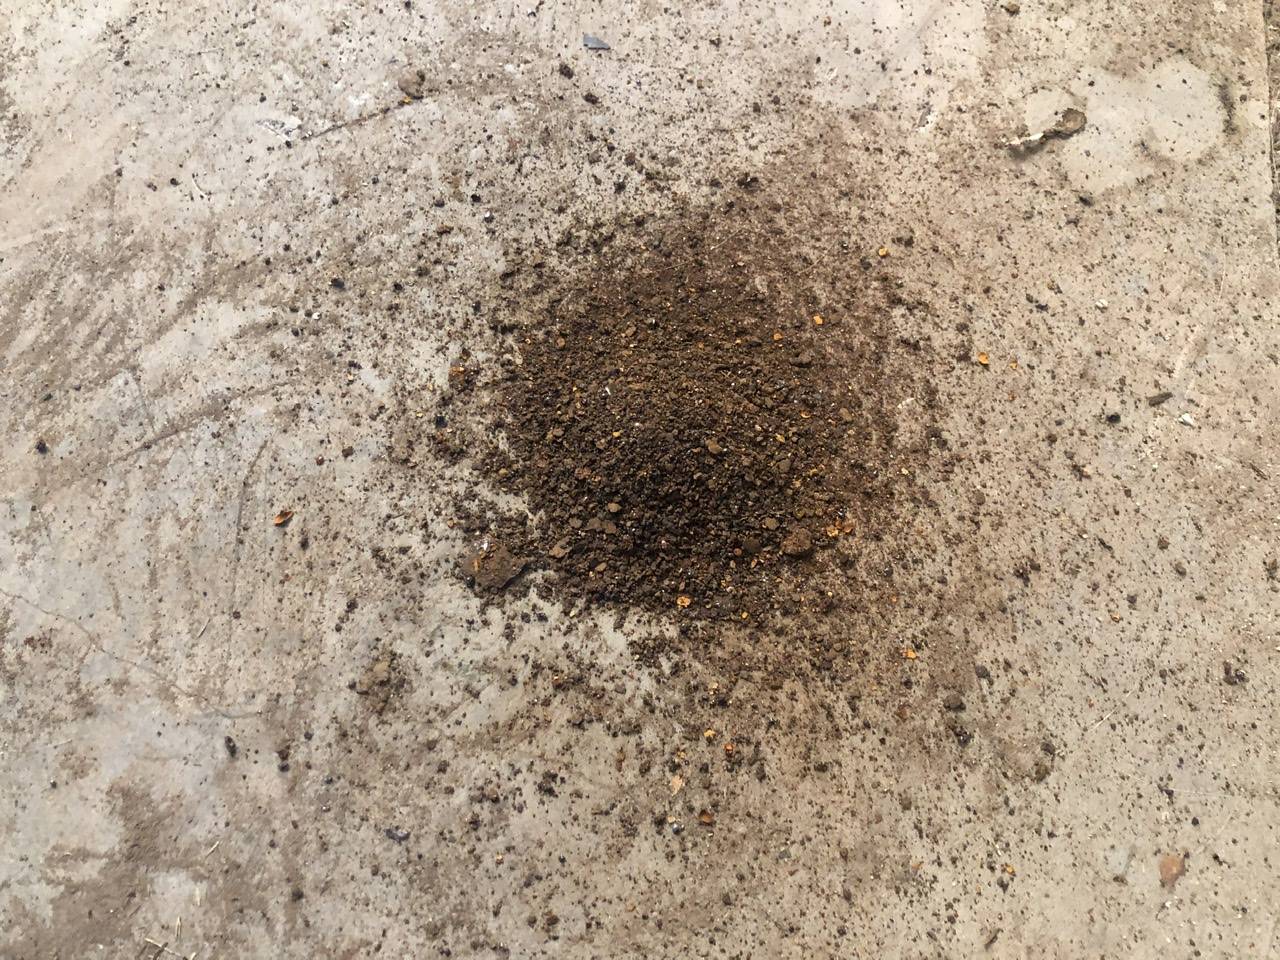 0246D25B-4B11-4276-91E2-840FF04AB944.jpeg (122.17 KB) 0246D25B-4B11-4276-91E2-840FF04AB944.jpeg (122.17 KB)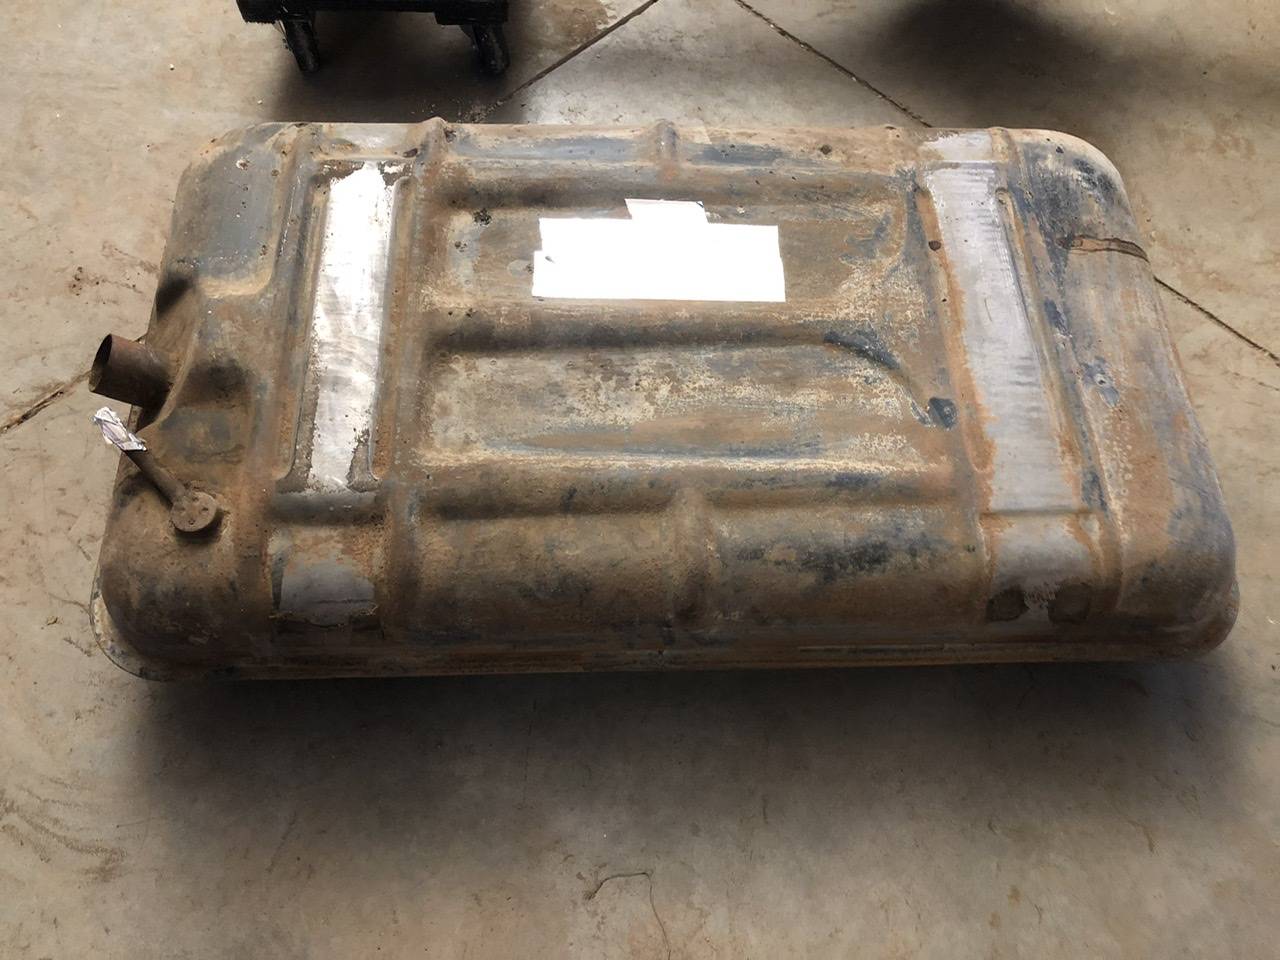
Posted on: 2022/7/18 21:13
|
|||
|
||||
|
Re: Resurrecting a 1951 Henney-Packard Parts Car
|
||||
|---|---|---|---|---|
|
Home away from home
|
Also today I flushed out the brake and fuel lines using an Eastwood product for the purpose. I’m a bit disappointed with it, though, as it seems nothing more than carburetor cleaner with a special applicator. Does anyone know of a cleaner product that will actually remove rust?
To flush the fuel lines and because it has to come out for rebuild anyway I pulled the pump. I noticed immediately that it had several gaskets under it and getting it out I noticed that the arm was very worn. I’ve seen photos of them worn like that but none of mine are! I believe I have cores with good arms, though. Even though I’ve owned the car for decades, I’ve not really done anything to it so I was also surprised to see a vacuum canister. Whether Henney installed it or aftermarket I don’t know. Near the canister is the end of the speedometer cable which has no gear on it so I’ll have to scrounge around for another for an overdrive car. Attach file: 820811C8-DBA2-4CFA-A07C-D5847C42E97A.jpeg (165.17 KB) 6B19EBAC-028D-4279-80B7-E434772C8AF7.jpeg (177.78 KB) 6B19EBAC-028D-4279-80B7-E434772C8AF7.jpeg (177.78 KB)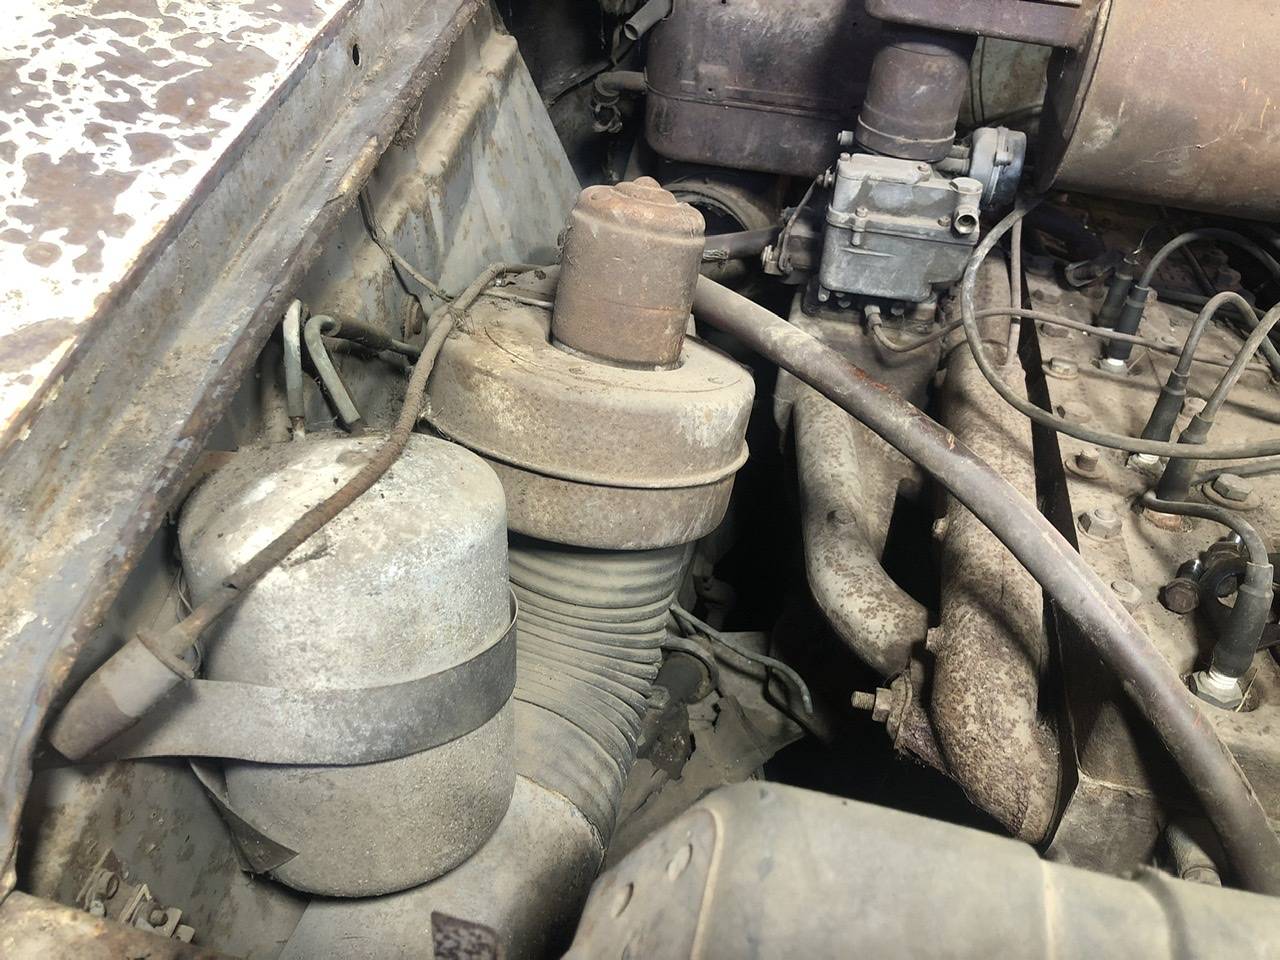
Posted on: 2022/7/18 21:20
|
|||
|
||||


.jpg")


