|
Re: KPack
|
||||
|---|---|---|---|---|
|
Forum Ambassador

|
I can't see much detail on the back of the panels but at a glance it appears you have actual chrome strips which are held to the backing board by bent over prongs rather than the pressed on thin ribbon strips which were purely ornamental. If so that is a huge advantage.
If the panels were mine I would very carefully remove the strips and then the vinyl. The vinyl may be extremely brittle so that might take a bit of care and even might be a good idea to lay them in the sun to warm up a bit before attempting. The padding may also be glued to the panelboard which makes the process even harder. Be as gentle as possible so the panels or vinyl are not farther damaged. Once the vinyl is off lay it flat and try to clean as much of the grime and water stain off as possible. I can't offer much there as some products work well and some won't. At any rate be careful so the vinyl is not damaged by the cleaner. On the bottom corners where it appears to be torn it might take some thin vinyl support material cemented underneath the original to provide some additional support. Important thing is make sure the vinyl is warm and as flexible as possible before trying any pulling or stretching -- either in repair spots or when placing over the new backing. I have found that old stuff is sometimes so brittle it will split or tear if you just give it a slight tug.. Some have used thin 1/8" hard fiber board or masonite like material as was the original which can usually be found at the home centers. Downside to the home center material is, as a rule, it is not water resistant so you might want to give it a good coat of sealer or some kind of water proofing treatment after it is cut and before you fasten the vinyl on. You can also buy water resistant panelboard or cowlboard at several places online such as this onehttps://www.automotiveinteriors.com/waterproof-cardboard-door-panel-board-cowlboard-p/cowl-dp.htm but be careful to check the size offered. Packard panels are quite large compared to some of the more popular cars most of the online places cater to. If you have a friendly upholsterer in your town he might order you a couple of sheets from his wholesale supplier when he places his regular order. That might give a small break on freight charges. His material can be the water resistant heavy cardboard like sheets or, even a thinner PVC sheet material like the upholsterer who did interiors on a couple of my cars preferred. The thickness is important because much thicker than the original and you will have issues closing the door against the thick round windlace. Padding is a bit of a different story. The original thin layered paper or cotton mixture seems a bit elusive but there are modern sheet foams which work. What I don't know is how successful you will be in adhering the new padding to the vinyl as per the orignal so the pattern is prominent and vinyl won't sag away from the panel. Amazon has 1/8" foam but you might search several of the online upholstery supply houses to see what you find. The chrome strips will go a long way toward keeping the vinyl in place but there is still a lot of wide unsupported sections on those panels. Once you have the replacement panelboard, it is a fairly simple but tedious process to lay the old panel over the new and mark and cut to shape and large holes. After that start on the small holes for the prongs with a drill or whatever means you have. Test fit the chrome strips because it is important to get every hole duplicated so you don't wind up needing to cut one or two more while in the process of fitting the vinul back on -- been there, done that.. Also be aware the vinyl may have shrunk a bit and the old holes in the vinyl may not line up with the holes in the panel. Do the absolute best you can to match and maybe even some very gentle heat to stretch will be needed. Try and get the chrome strips to lay back very close to where there were originally. If they are re-fastened differently any of the old position marks may be very noticeable.
Posted on: 2021/9/6 9:11
|
|||
|
Howard
|
||||
|
||||
|
Re: KPack
|
||||
|---|---|---|---|---|
|
Home away from home

|
Howard - Yes, the stainless strips do have the tabs through the back board, so those will be fairly straightforward, and will help hold the vinyl down. I plan to use the polymer type panel board like you linked to. I'd rather not have issues with water damage down the road. I can get replacement vinyl from SMS (without embossing) but I worry that it will be a different color to the faded vinyl on there right now. I'll have to clean up what I have and see how closely it matches the leftover ivory vinyl from the headliner.
I had some time today to tackle a few other things. I had been avoiding installing the rear seatbelts because pulling the rear seat out is unpleasant. I finally took the time to get it out, mark my spots and drilled for the mounts. You can see on the picture where I mounted....same on both sides. I couldn't go anymore toward the side of the car due to the wheel wells. The seatbelts from Retrobelt work great and look nice. It'll all look better once I redo the seat upholstery. Note to those looking for seatbelts in the 51-54 cars.....60" is plenty long for the rear seats. I used 72" and I have tons of excess. Next I pulled out one of the armrests. All four of them are crusty, cracked, and very discolored. I disassembled it (very easy....two small screws in the back, two medium screws in the bottom, bend back one tab on the stainless strip and peel it off) and took inventory of the pieces. The vinyl covers a rubber pad, and is mounted to a metal piece with no protection against rust. I used 0000 steel wool to clean all the crustiness off the lower plastic part, then polished it up with plastic polish. You can see how faded and discolored the plastic is by comparing to the small strip that was covered by the stainless. I removed the vinyl, then used it as a pattern for new vinyl. Unfortunately my supply of professional glue from the headliner had all hardened. So I attempted to use some Super 77 spray adhesive and hated every minute of it. It barely holds and I'll need to redo this armrest when I get more pro glue. I reassembled it anyways to get an idea of how they clean up. Not bad. It will look much better once I get real glue and can really stretch that vinyl over the top. -Kevin Attach file:  Rear seatbelt mounts.jpg (134.35 KB) Rear seatbelt mounts.jpg (134.35 KB)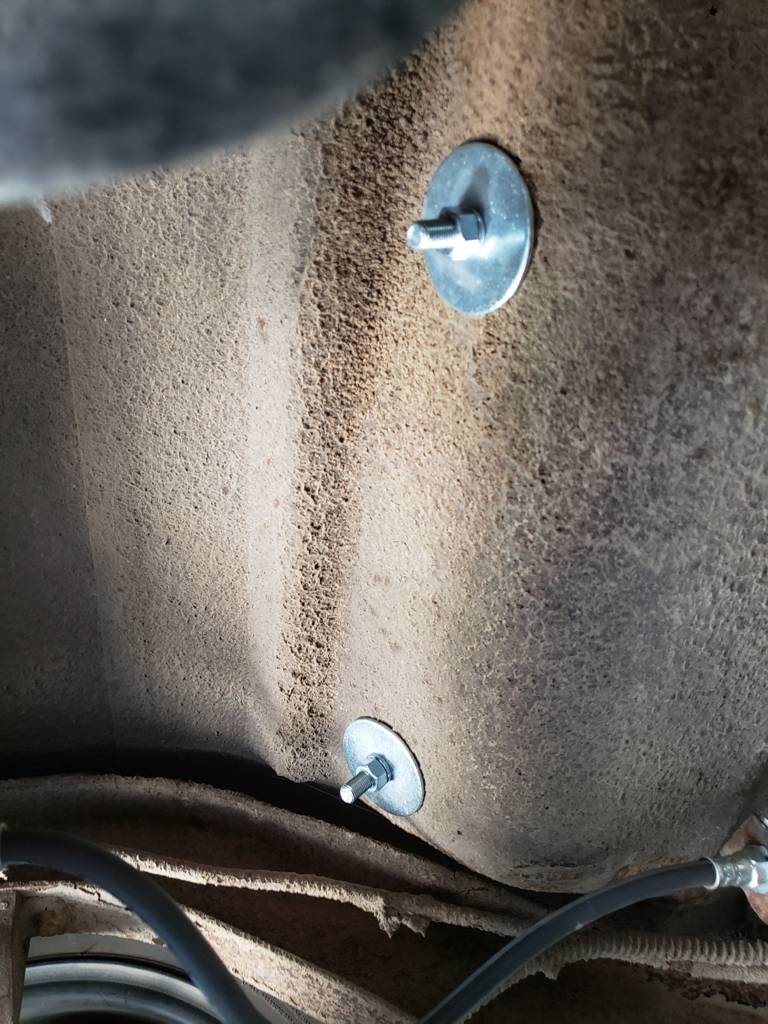 Rear seatbelts installed.jpg (118.31 KB) Rear seatbelts installed.jpg (118.31 KB)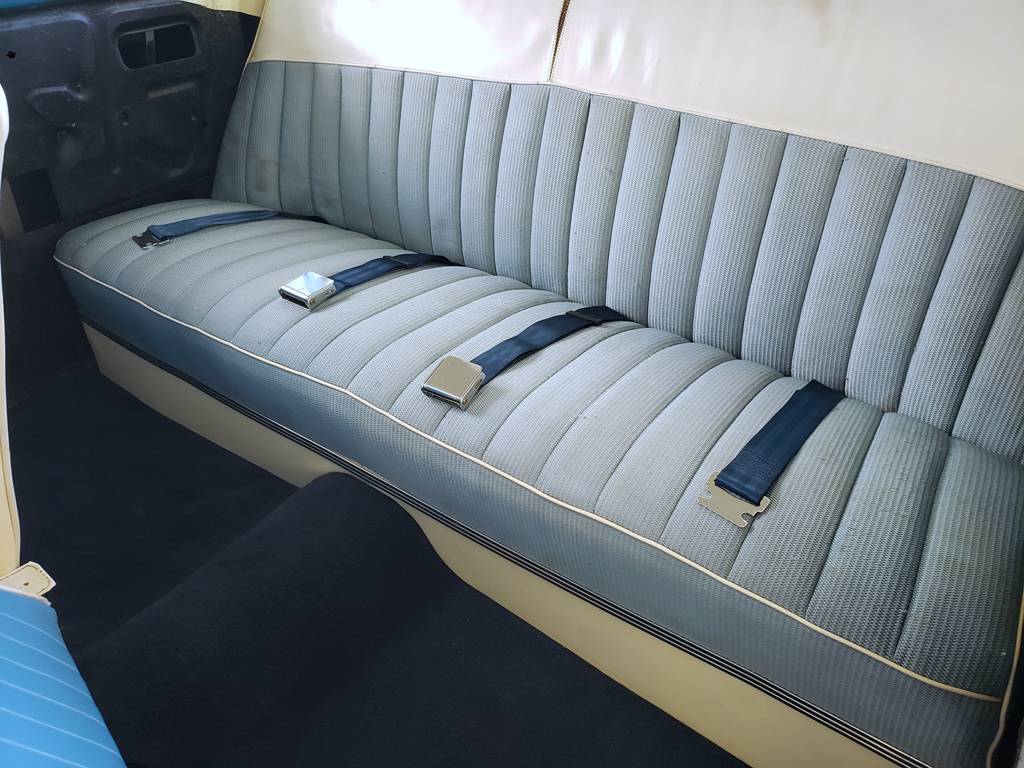 Crusty arm rests.jpg (138.98 KB) Crusty arm rests.jpg (138.98 KB)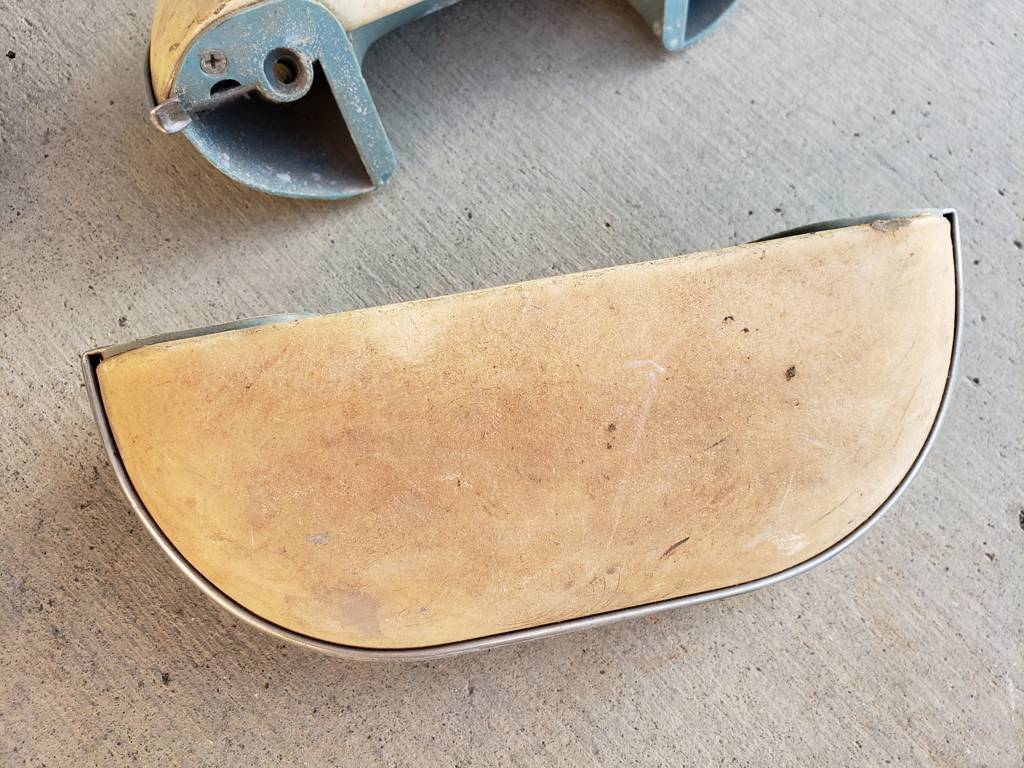 Crusty arm rests 2.jpg (95.55 KB) Crusty arm rests 2.jpg (95.55 KB)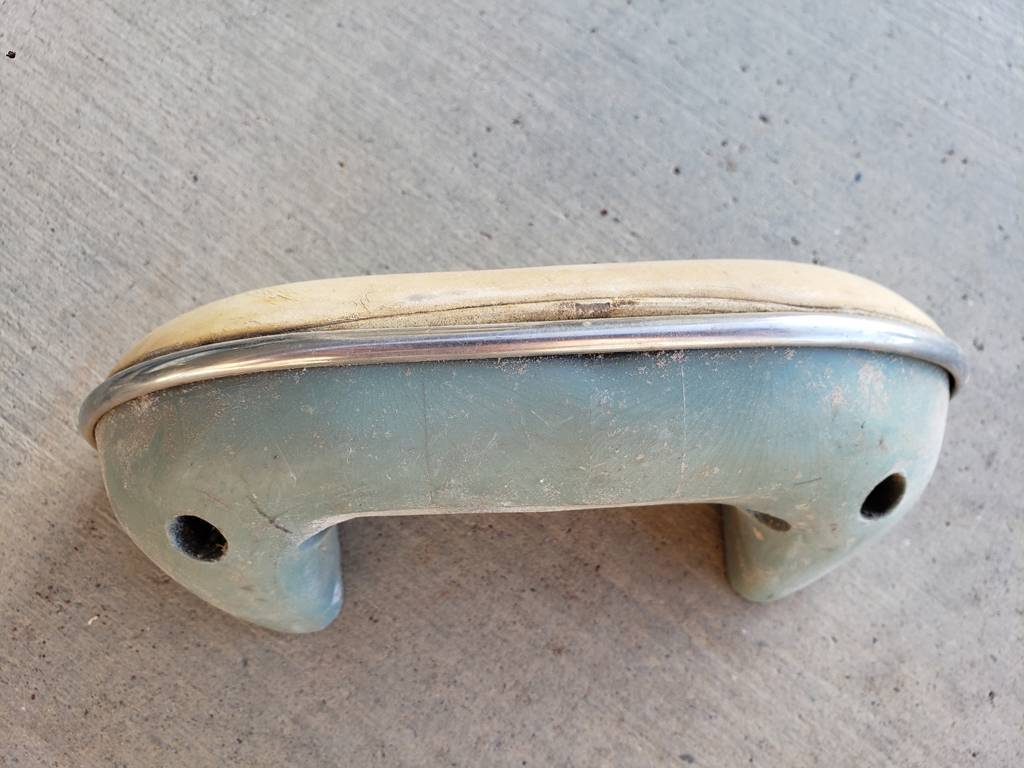 Arm rest disassembled.jpg (188.54 KB) Arm rest disassembled.jpg (188.54 KB)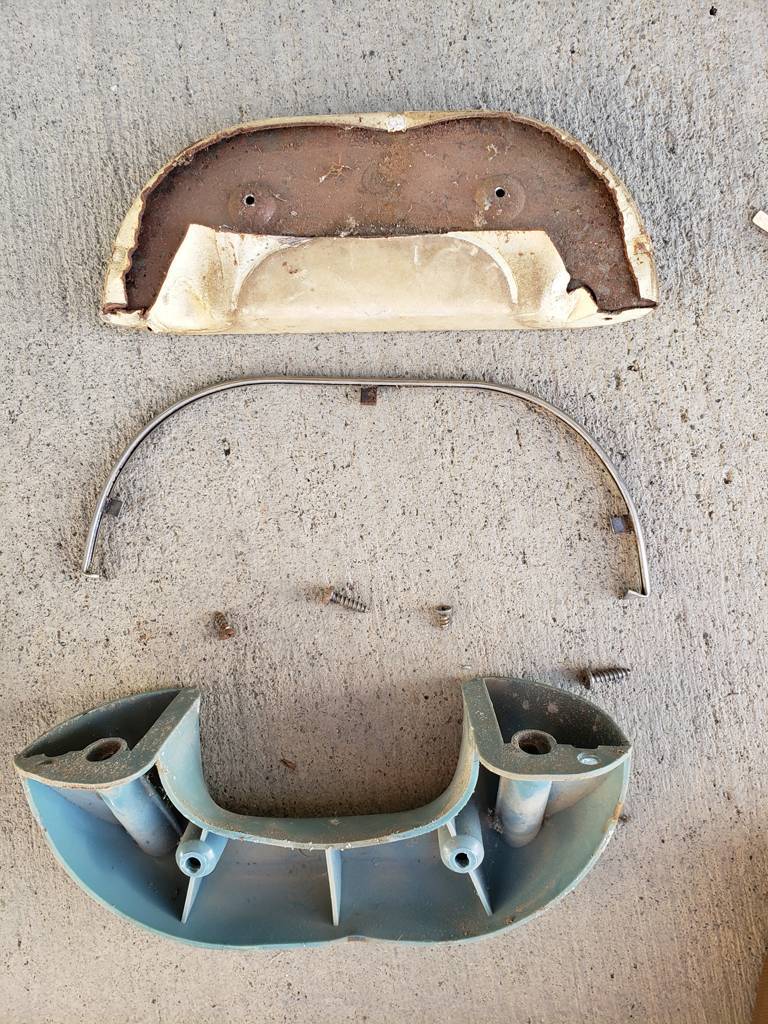 Faded plastic after cleaning.jpg (62.73 KB) Faded plastic after cleaning.jpg (62.73 KB)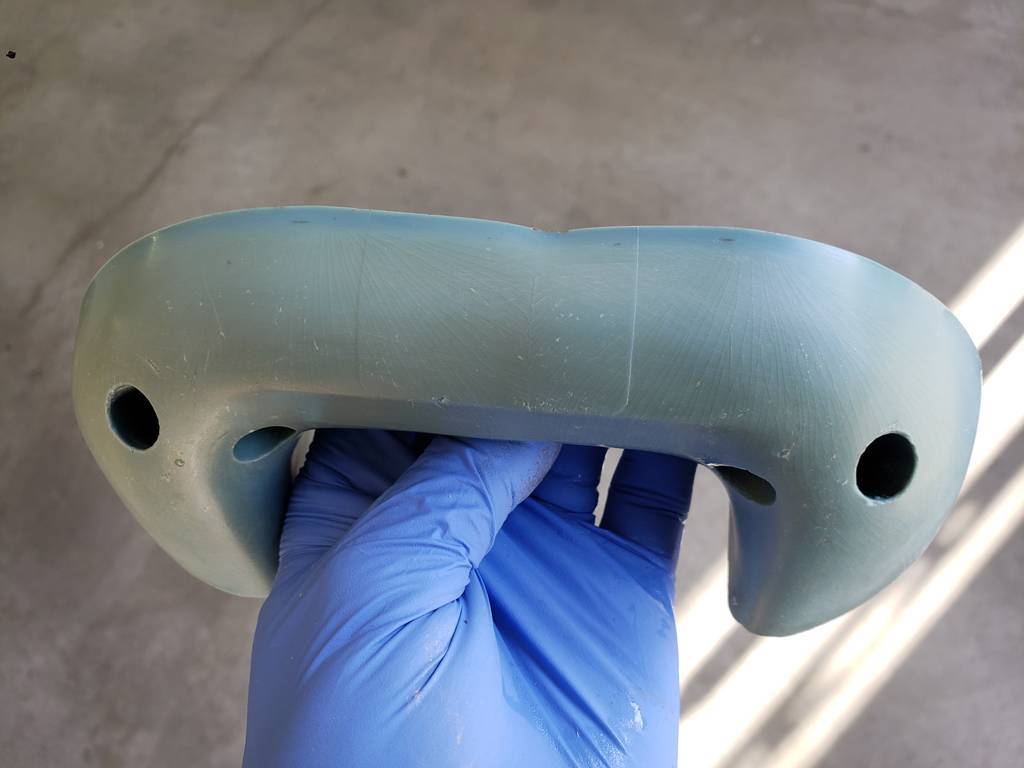 Arm rest vinyl removed.jpg (182.06 KB) Arm rest vinyl removed.jpg (182.06 KB)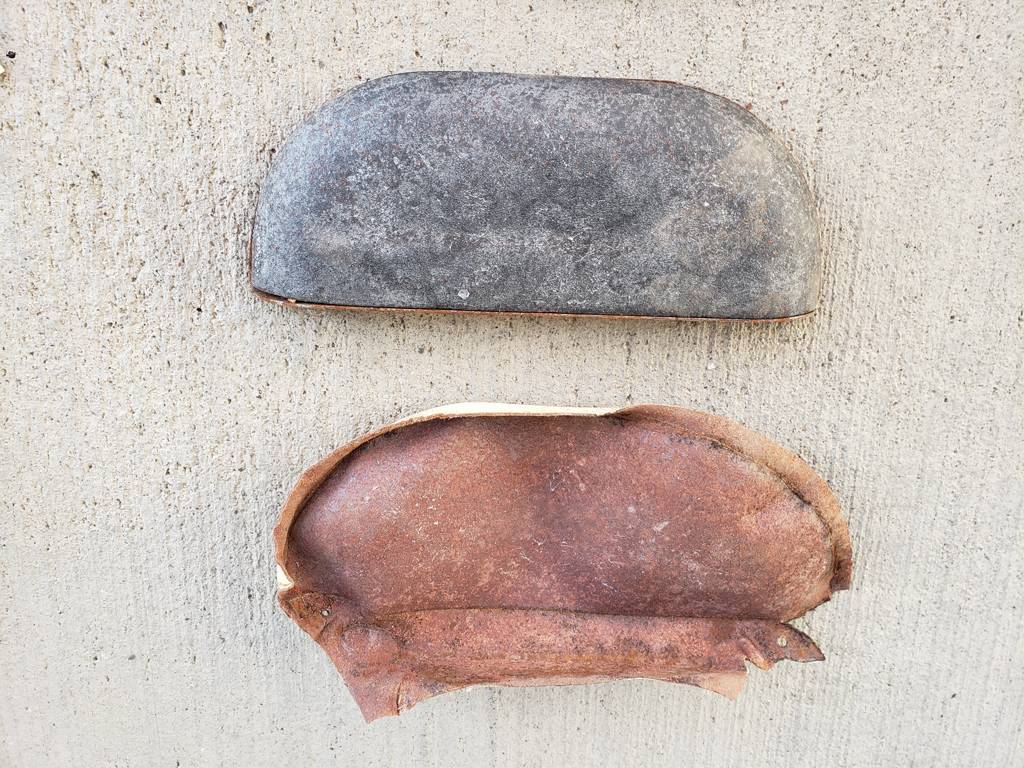 Arm rest reassembled with new vinyl.jpg (65.63 KB) Arm rest reassembled with new vinyl.jpg (65.63 KB)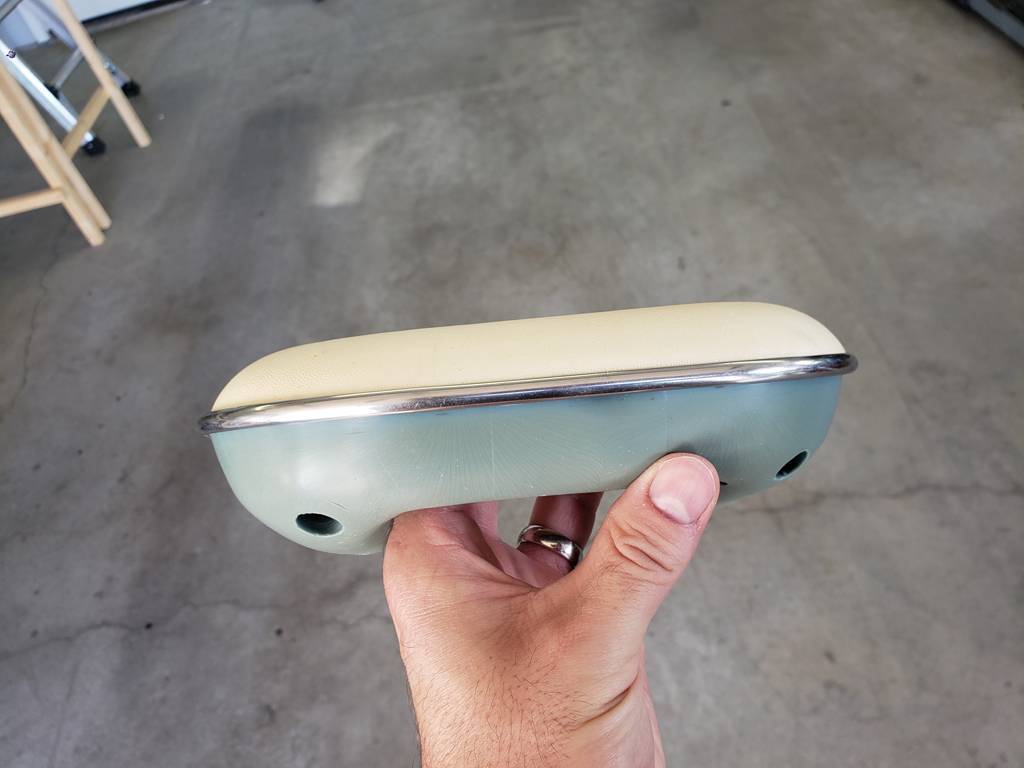 Arm rest isses with spray glue.jpg (58.42 KB) Arm rest isses with spray glue.jpg (58.42 KB)
Posted on: 2021/9/7 0:02
|
|||
|
||||

|
Re: KPack
|
||||
|---|---|---|---|---|
|
Home away from home
|
Oh man, good you caught that! Remember, these cars are Single circuit brake systems. 1 failure, and you will only have your e-brake to stop. (My worst nightmare)
I would spray it off with brake cleaner then dry it. Then have a helper Apple the brake firmly while you look to see where the leak is coming from. You'll get it.
Posted on: 2021/9/9 6:37
|
|||
|
1953 Clipper Delux Club Sedan, 1969 912, 1990 Miata, 2009 Ford S-Max.
|
||||
|
||||
|
Re: KPack's 1954 Panama
|
||||
|---|---|---|---|---|
|
Home away from home
|
Thankfully my car was converted to a dual master cylinder before I got it. So I'm not as concerned about everything completely failing at once.
I went back and looked at pictures of when I did the brakes, and now I'm thinking it's not the wheel cylinder. I'll pull the drum when I get a chance just to double check, but based on the way things are set up inside the drum, I wouldn't expect to see the brake fluid dripping down the back of the backing plate the way it is. I'd expect to see it running down the inside of the backing plate, around the grease seals, and down the bottom of the backing plate, where it would be visibly wet between the backing plate and drum. So my guess is that I must not have tightened the hose nut tight enough. I've had a couple times where I had to jam on the brakes and maybe that increased pressure was enough to find a slight gap? -Kevin
Posted on: 2021/9/9 10:25
|
|||
|
||||
|
Re: KPack's 1954 Panama
|
||||
|---|---|---|---|---|
|
Home away from home

|
Kevin;
As you said, there’s only the hose and bleeder screw on that side of the backing plate. As a minimum those should be checked, but for completeness, now that the car has a few miles on it, I would also lay a wrench on the bolts that hold the cylinder to the backing plate. dp
Posted on: 2021/9/9 17:56
|
|||
|
||||
|
Re: KPack
|
||||
|---|---|---|---|---|
|
Home away from home
|
I pulled the drum off the driver's side tonight, and as expected it was all clean on the inside. I also checked inside the rubber boots on the wheel cylinder and all was well. I rechecked all the bolts on the backside of the backing plate, one of the wheel cylinder bolts was able to be tightened more, and I had already tightened the hose more. I'll keep an eye on it and make sure it does not leak more.
I was happy to see that my hard work cleaning up the inside of the drums is still looking good. Not that anyone will see it... I also redid the grounds on my front parking lights/turn signals. That fixed the problem with my turn signals ceasing to work last week. However, I still have both indicators flashing at the same time on the dash. Both sides do it. Test drive went fine. I'll probably need to readjust the brakes or at least the front. I noticed it wasn't dragging or "whiffling", as Ross puts it, when I put the wheel back on. -Kevin Attach file: Driver's front no leak.jpg (128.54 KB)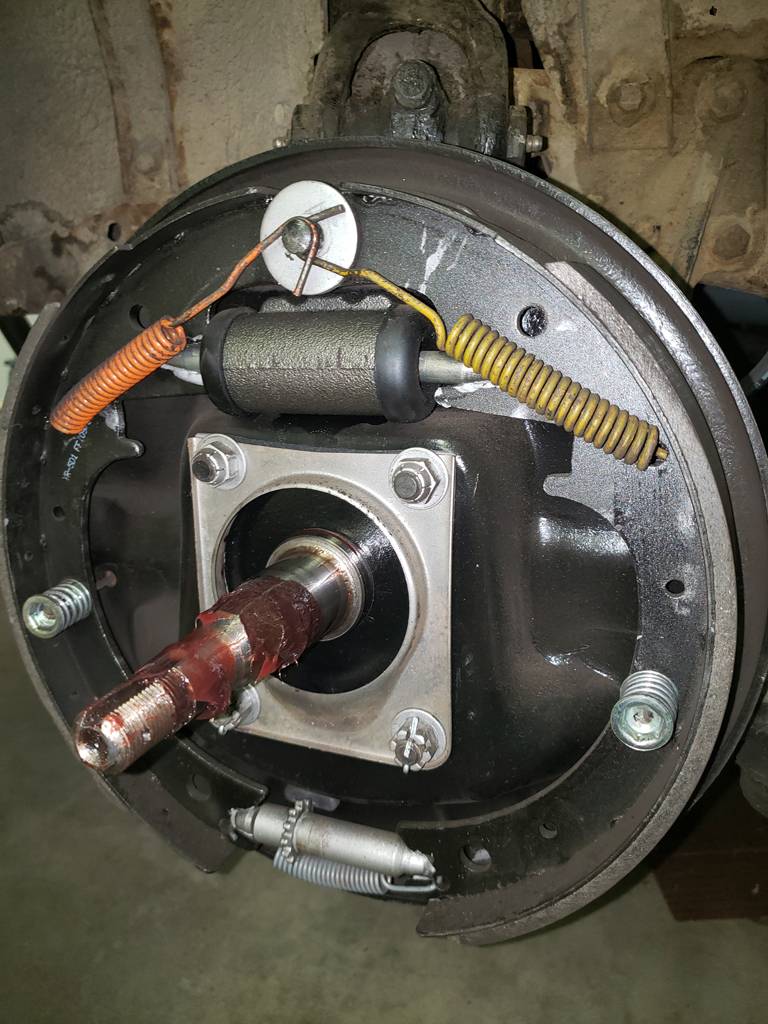
Posted on: 2021/9/9 23:24
|
|||
|
||||
|
Re: KPack
|
||||
|---|---|---|---|---|
|
Home away from home

|
Kevin, did you use new copper washers on all the hoses? They didn’t come with the hoses and Napa insisted that my 1954 Patrician didn’t require them even though I knew better so, of course, I got some and installed them.
Posted on: 2021/9/10 11:58
|
|||
|
||||
|
Re: KPack's 1954 Panama
|
||||
|---|---|---|---|---|
|
Home away from home
|
Don - mine all came with new washers. I ordered through RockAuto.
-Kevin
Posted on: 2021/9/10 12:17
|
|||
|
||||
|
Re: KPack
|
||||
|---|---|---|---|---|
|
Home away from home
|
Finally had some time to get the exhaust done today. I should have done this long ago...
The exhaust guy wanted me there to watch/help. He was worried that the parts I brought wouldn't fit and that we'd have all sorts of issues. Thankfully it all went pretty smoothly. The kit I bought was from Kanter, made by Classic Exhaust. It included everything from front to back, and Kanter sent the exhaust flange gasket. That is needed because the flange design is different on the new kit compared to original. Most things fit without too much of an issue. We did have to trim a couple of pipes in the back to get the over-the-axle piece to sit correctly. In the end we got everything level and lined up perfectly. He even threw on a chrome tip to dress it up a bit. I might put on a 50's style tip, but I may just leave it as is. All in all, took about an hour and a half, and cost me $150 for his time. Money well spent. The guy knew what he was doing and got it done right. Checked for exhaust leaks and none there. It's like the Panama is a different car now. When I started it up I couldn't tell if it was running or not. The engine is so quiet now. The only thing I can hear are some of the valves and the fuel/vacuum pump. And so far it seems like the car smells better too. Every time I drove it before I came out smelling like I'd been running a weedwhacker or lawnmower for an hour. Fingers crossed that this solves that problem. -Kevin Attach file: Setting up the new exhaust system.jpg (165.04 KB)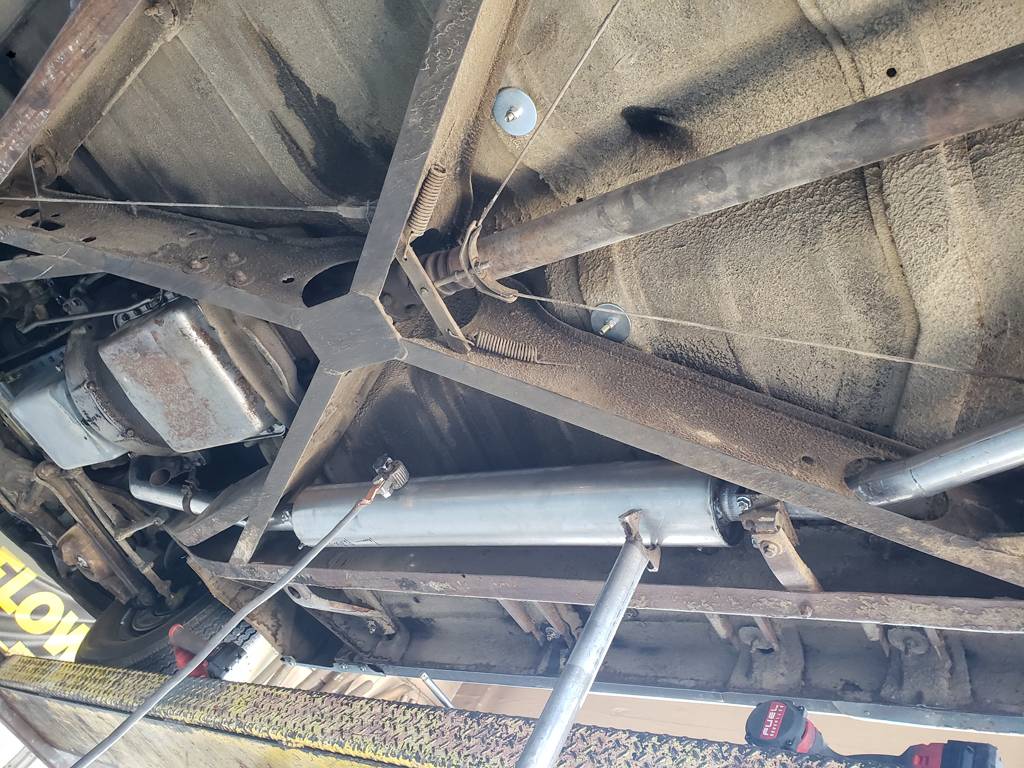 Getting the tailpipe straight.jpg (125.96 KB) Getting the tailpipe straight.jpg (125.96 KB)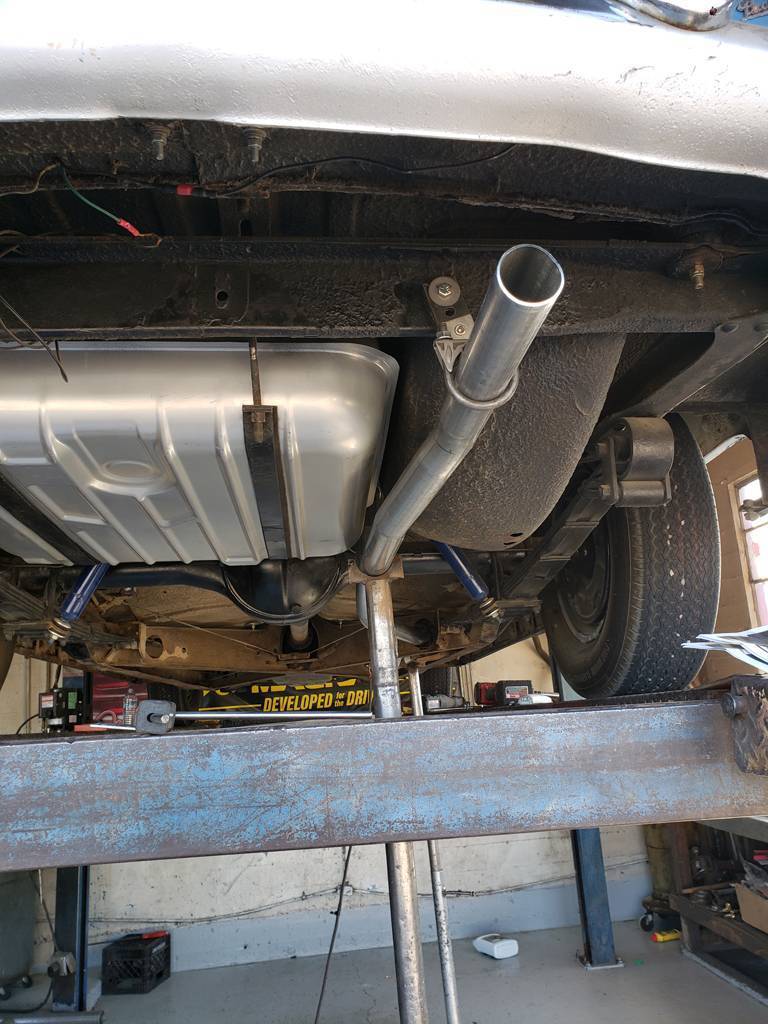 Welding up the new exhaust.jpg (138.65 KB) Welding up the new exhaust.jpg (138.65 KB)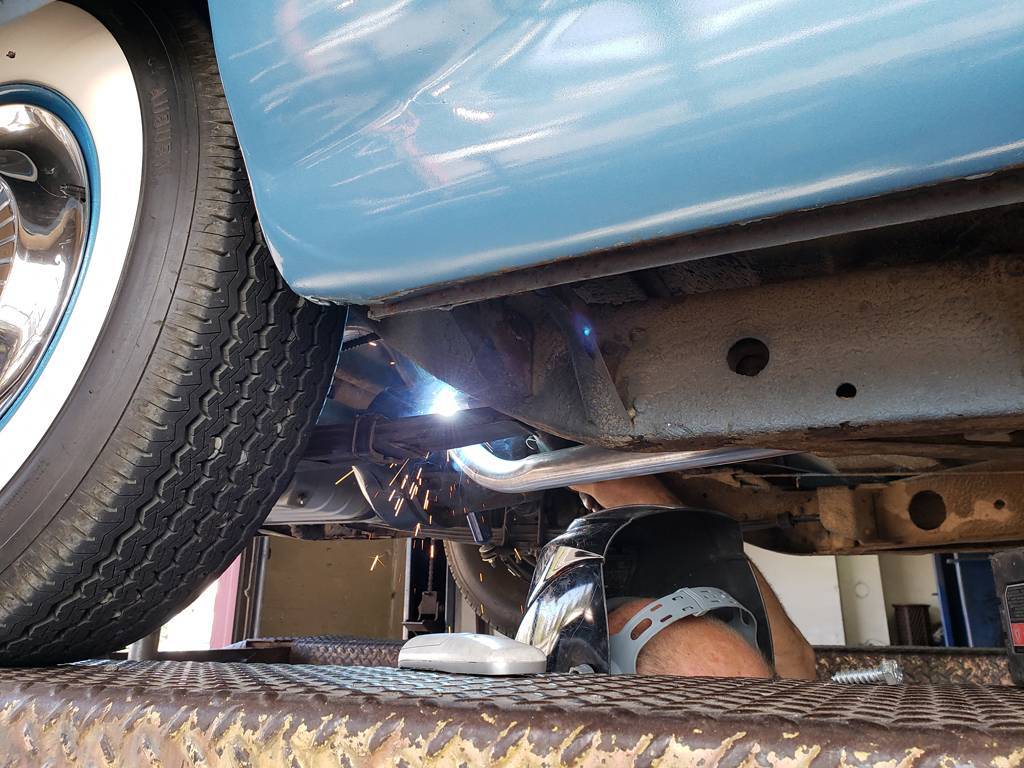
Posted on: 2021/9/20 17:32
|
|||
|
||||


.jpg")


