|
Re: Packard Engine to GM Auto Transmission Adapters
|
||||
|---|---|---|---|---|
|
Forum Ambassador
|
The Packard pushbutton assy is actually fairly complex with all the buttons interlinked with levers and blockers so two buttons cannot be pushed at once. The mechanisms are what holds the buttons in so not sure how easy or even successful you would be in removing all the mechanical interconnections and trying to add individual springs.
Depending on what type actuator you would use on the transmission another issue might be that the electrical output from the buttons is fairly "dirty" and if you are going to try and interface with any modern solid state actuators the signal may be too erratic for reliable operation. You might need to convert the mechanical contacts to some sort of solid state switching with a decent solid state compatible power supply. If you do succeed in making the buttons spring loaded individuals, then instead of solid state switching maybe removing the long duration slide type contacts and converting to fast snap action microswitches as Riki detailed in his blog could work instead. That might provide a clean enough signal the solid state didn't go crazy. You may still need to provide a rock solid clean power supply though. It might be easier to try and adapt some sort of modern control assy into the existing pod. I don't know what all is out there in the way of shift units but here is one that works with a GM trans and looks to be fairly flexible. If you wanted to keep a stock look possibly some method of attaching the existing plastic and chrome PB caps to the new controller could be found but not sure if the layout (on this brand) can be changed or if there is another brands control assy that would orient properly in the Packard pod.
Posted on: 2022/3/15 9:39
|
|||
|
Howard
|
||||
|
||||
|
Re: Packard Engine to GM Auto Transmission Adapters
|
||||
|---|---|---|---|---|
|
Home away from home
|
I would imagine that as long as the switches work "properly", i.e. have clean and springy contacts, that the signal would be clean enough. If not, then the best solution might be to use some microswitches IF they would physically work well.
You could also make some delay circuits using a relatively simple array of capacitors, resistors, and transistors/SSR's but this is likely overkill. Just having like a 1mF capacitor bridged across + and - between the button and actuator would help filter the signal and would probably be good enough. If you are having only minor problems, or no problems but you worry that you might later, this would probably be the best solution. Warning: capacitors will burst if you hook them up with reversed polarity.
Posted on: 2022/3/15 18:20
|
|||
|
'55 400. Needs aesthetic parts put back on, and electrical system sorted.
'55 Clipper Deluxe. Engine is stuck-ish. |
||||
|
||||
|
Re: Packard Engine to GM Auto Transmission Adapters
|
||||
|---|---|---|---|---|
|
Just popping in
|
I did mine last winter. The system doesn't want to upload my file. I'll see if Kev will post it for me.
Transplanting a 700 R4 Transmission in a 1956 Packard Because of my difficulty in finding details required to perform this fete I offer my experiences. I will clarify that I am no more than a shade tree mechanic with no formal training, of average mechanical ability at best but with 50 years of fooling around with cars, farm tractors and such. I have an abiding interest in history and all things antique, particularly if it has wheels. I have restored from the ground up, among other antiques, two Model A Fords, and a 1934 Allis Chalmers WC tractor and previously refurbished a Model A Ford right out of high school. Most importantly I never give up on a project until it is conquered. I have a three bay, fairly well equipped four season shop. Equipment includes a four post lift and air compressor in addition to tools. Some type of hoist or lift is probably indicated for this job unless you’re still in your twenties, in excellent health, highly motivated and athletically inclined. I borrowed a transmission jack from a neighbor that didn’t lift high enough for my 6’2’ 69 year old frame. Thus, I spent too much time hunched over while switching transmissions. Get one that fits your height. The process began following two experiences with the Packard Ultramatic transmission. The tranny is early and unrefined. The second car didn’t always shift as it should and I lost PARK while bringing it up to road worthy standards. After significant deliberation I made the decision to proceed with the GM transplant. Finding the adapter kit was by far the easiest challenge. Finding out it doesn’t include all parts for the transmission to function was less than a positive revelation. The website photo shows parts in the kit the manufacturer no longer supplies. One positive was that the kit included the Carburetor Flange (riser) which I didn’t expect. If this part needed to be built it could easily be accomplished with the intake manifold as a pattern, ¼” flat stock and someone with a CNC Machine. The kit manufacturers notify the purchaser that the kit “may need mild to extensive modifications to fit your vehicle” (not found in my case) as well as “This project is not for a novice mechanic”. I agree with this statement. I think the disclaimer indicates the manufacturer is a bit hesitant to provide guidance. They refused to refer me to someone who had completed the project. It took some studying and a couple of calls to the kit source to work through the instructions. They are not written for the novice. The manufacturers are nice enough people who may simply be skittish about potential legal ramifications. I found a retired transmission specialist locally to advise me. The 700 R4 went in fairly well. FYI, you will likely need to remove the exhaust system prior to removing the old transmission and installing the replacement. I also removed the frame cross member which supports the rear of the transmission and the trans tail shaft to remove it from the car frame. Before installing the GM trans it is important to level the car body prior to finalizing the indicated engine/trans tilt via the final frame cross member fitting. As you have disconnected the battery and removed the starter and flywheel cover thus disconnecting the electric power to the torsion bar system I used a scissors jack on the rear body cross member to level the car. I learned the engine should have a 3 degree tilt from front to rear. This seems to be the same as a level transmission pan and a level carburetor when mounted to the intake manifold. A carpenter’s dial indicator in degrees worked well for measuring these settings. WARNING!! Jack up the right rear wheel and block the other three both front and rear before startup to test your new transmission! It was a good thing I did as my trans was in gear with the shift indicator in PARK because I initially installed the replacement linkage upside down on the tranny. Shown below is the GM shift pattern. The following are parts you will need to complete the conversion; 1. Transmission a. The earlier two-wheel drive 700 R4 is often preferred to latter transmissions because it is not computer controlled b. They’ve been around a long time and are becoming scarce. Four wheel drive versions are more readily available. You don’t want one of these. c. I only found one in a salvage yard in NW Wisconsin d. Rebuilders had them on hand at the time of this writing at a wide range in price. e. They are available on-line and they are expensive. Not to mention shipping cost. f. If you are fortunate to have or can find one in a vehicle try to get the parts below as well as the transmission. 2. TV (Throttle Valve) Cable (May be supplied with a rebuild transmission) a. Available aftermarket 3. TV cable carburetor bracket a. Original will need modification to mount on carb linkage and assure both complete extension of the TV cable and max to min movement of the carb linkage. I made a bracket that bolts on the carb linkage and spot welded the bracket to it. The TV cable hold-down mounting bracket attaches (weld) to the carb riser. This is the only reason for the riser. Both the carb bracket and the TV Cable mounting bracket must be positioned in line and at a distance between them to assure free and complete travel of both the carb linkage and the TV Cable. My transmission specialist adjusted the lockout and shift points. I am told this is critical to avoid burning up the new trans. b. After-market- An after-market will likely need modification as well as they are not made specifically for the Packard carburetor. 4. Transmission Adapter Kit- Understand and follow directions supplied. 5. Cross Member a. The kit manufacturer no longer supplies this item. A kit supplier was much more forthcoming in attempting to get the manufacturer to make me one. The quote was for $500. I made my own. If you buy a universal cross member on-line I think you’ll need to rebuild it to fit the Packard frame. b. Whether you use your own steel or one from a donor vehicle, modification is required. Cut the end tabs off of the Packard and the GM cross members. Fill in the center with square tubing or the center of the GM cross member by welding the Packard tabs on the ends. I did this in the car so I knew it would fit. Because the new member ends up in a slightly different spot on the frame to level the trans pan than the original, I drilled new mounting holes through the frame. I can’t guarantee I can remove it without cutting it but at my age I hope this doesn’t become an issue. A better designer should be able to angle the ends so the original bolt holes may be used. Mine is a straight shot. 6. Drive Shaft and U-joints a. The length of the new driveshaft is determined by placing the GM U-Joint yolk in the rear shaft of the transmission and the Packard yolk in the differential shaft. Pull the front yolk towards the rear approximately 5/8” away from the trans rear seal. Measure between each yolk from the center of the U-Joint of the front to the center of the rear. Report both measurements as well as the front yolk from rear seal distance to your drive shaft builder. b. My drive line person explained that because the Packard and GM drive shafts are of different gauges and diameters they can’t simply be married together. A new shaft must be cut and joined to GM and Packard U-joint yolks. A reduction yoke is used to marry the Packard joint to the shaft tubing. Make certain you select a shop that also balances the new shaft. My builder supplied all parts with the exception of the GM yolk and the Packard U Joint which I procured. 7. Shift Linkage- shown below a. Original GM shift linkage may be fitted to the new application by reducing its width and flipping the linage 90* (Packard shift direction is opposite the GM.). Be sure you have the GM transmission shifter rod bracket for this application. Otherwise, the hot rod parts suppliers have an aftermarket bracket and shift rod. The modified horizontal rod will protrude through the frame, necessitating cutting a hole in the frame. A new bracket to mount the frame end of this rod will need to be fabricated. I used angle iron and one of the Packard horizontal shift shaft bearings to make this. 8. Transmission Cooler a. The original GM cooler was part of the radiator core. b. The original Packard cooler and lower radiator hoses are discarded and replaced with Gates 20610 or NAPA NPH 7371 hose. c. Some advisors may recommend a hose loop rather than a cooler. d. After-market coolers are available and economical. Some are cheap in cost and in quality. e. You will need approximately 9’ of 3/8” coolant hose to make the connections when placing the cooler in front of the radiator. Mine came with 6’. 9. Flexible Dip Stick/Filler Hose a. An after-market item. b. If you can make the GM metal tube work you’re a better man than I! 10. Vacuum Switch a. This controls the internal trans solenoid b. I attached the hot wire feed for this switch to the Packard stop light switch terminal for the torsion ride suspension. Thus the feed is hot until the brake deactivates the power to both the suspension control and the trans solenoid. c. The vacuum hose may be connected to one of the vacuum lines behind the carbonator. d. Another aftermarket item. I don’t know where rebuilders get their parts but GM Dealer Parts Departments list everything for this transmission as obsolete. 11. Neutral Safety/Backup Light Switch Kit a. Ron Francis may have a combination switch to cover both functions. b. Otherwise, the others I found are either/or. c. I chose the safety application in PARK vs. the other option which is NEUTRAL. The switch is a pressure activated ball. In this case, other options exist for a backup light. None, toggle switch or modifying a second either/or and developing your own mount on the transmission or, mounting another switch to the linkage somehow. d. The wires on the Packard stop light switch can be removed and lengthened for attachment to this new switch. 12. Transmission dust cover a. Whether your tranny comes with a lower dust cover or not, it will have to be modified to fit. The covers come in about four different versions so confirm you are getting one that fits your transmission. They were made in sheet metal and plastic. After-markets are available but I am told the fit is even worse than many after-market items. In order to fit the upper curved portion of the dust cover up and around the Crank Shaft Adapter and along the Torque Converter Drive Plate you will need to remove at least 2” from the cover. A critical issue is assuring the dust cover clears the Torque Converter Drive Plate bolts. Test this by turning the starter over in short bursts with the coil wire removed to prevent the engine from starting. If the starter stalls, the Drive Plate bolts are locking up on the dust cover indicating more material should be removed. b. With dual exhausts I also needed to remove the hump on the lower right hand side of the cover, make a flat piece of sheet metal to fill the void and weld it in to clear the exhaust pipe. I also fitted a second piece in the old starter gap (arrow) to finish off the cover. I.e. The GM starter is on the right side and is mounted through the dust cover. You will use both the Packard flywheel cover and starter. 13. Speedometer Cable a. Buy one from the kit manufacturer or their distributor 14. Miscellaneous a. Various bolts and screws b. Automotive electrical wire and various splices and ends c. When I removed the exhaust pipe from my manifolds I was fortunate enough to break off the front (blind) bolt on the driver’s side manifold. Reasoning that if I could get to the manifold bolts I would likely damage one or more of these, I made the decision to pull the head so I could work on it on the bench. Of course this required investing in intake, head, water jacket and exhaust gaskets. d. One or two carb gaskets depending on the condition of your original. e. 4 speed gear shift indicator i. Although available at one time for the Packard I was unable to find a supplier. I purchased a GM version attached it to a hose clamp with double sided tape and positioned it on the steering column just in front of the Packard indicator. December 2022 Itemized costs: • Transmission, overhauled with TV cable, vent hose and shift shaft bracket- $900 • Transmission Adapter Kit- $1,200. Shipping within state $50- $1250 • TV Cable to carb and bracket to riser- salvaged- $ 0 • Frame cross member from shop supplies- $25 • Drive Shaft and U Joints/shipping 1 U joint $530 • Shift Linkage, salvaged- $0 • Transmission cooler and lines/shipping- $64 • Lower radiator hose- $30 • Flexible Dip Stick-Filler Hose/shipping- $70 • Vacuum Switch/shipping- $50 • Neutral Safety Switch/shipping- $65 • Transmission dust cover, salvaged- $0 • Packard to GM speedometer cable/shipping- $67 • Misc shop supplies- $100 • Engine gaskets (one head only)/shipping, optional- $104 • GM gear shift indicator lens/shipping- $16 Grand Total: $3271 Well, the text came in minus the pictures. Please E-Mail me for the complete paper.
Posted on: 2023/5/29 16:15
|
|||
|
||||
|
Re: Packard Engine to GM Auto Transmission Adapters
|
||||
|---|---|---|---|---|
|
Forum Ambassador
|
G'day Kenbwisc,
 to PackardInfo. to PackardInfo.I invite you to include your Packard with GM Auto Transmission in PackardInfo's Packard Vehicle Registry.
Posted on: 2023/5/29 17:19
|
|||
|
Mal
/o[]o\ ====  Bowral, Southern Highlands of NSW, Australia "Out of chaos comes order" - Nietzsche. 1938 Eight Touring Sedan - SOLD 1941 One-Twenty Club Coupe - SOLD 1948 Super Eight Limo, chassis RHD - SOLD 1950 Eight Touring Sedan - SOLD What's this?  Put your Packard in the Packard Vehicle Registry! Here's how! Any questions - PM or email me at ozstatman@gmail.com |
||||
|
||||
|
Re: Packard Engine to GM Auto Transmission Adapters
|
||||
|---|---|---|---|---|
|
Forum Ambassador
|
Posted on: 2023/5/31 14:17
|
|||
|
Mal
/o[]o\ ====  Bowral, Southern Highlands of NSW, Australia "Out of chaos comes order" - Nietzsche. 1938 Eight Touring Sedan - SOLD 1941 One-Twenty Club Coupe - SOLD 1948 Super Eight Limo, chassis RHD - SOLD 1950 Eight Touring Sedan - SOLD What's this?  Put your Packard in the Packard Vehicle Registry! Here's how! Any questions - PM or email me at ozstatman@gmail.com |
||||
|
||||
|
Re: Packard Engine to GM Auto Transmission Adapters
|
||||
|---|---|---|---|---|
|
Just can't stay away
|
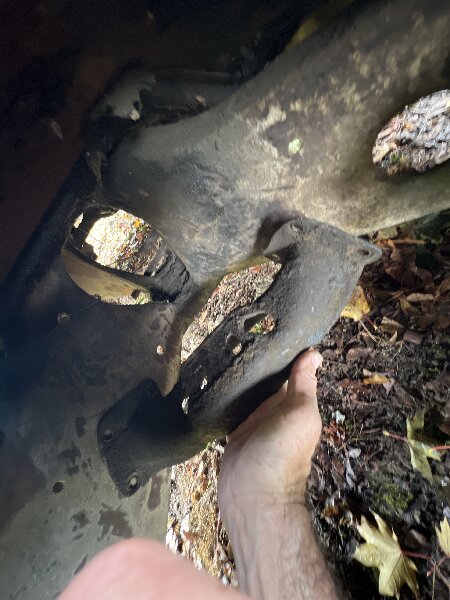
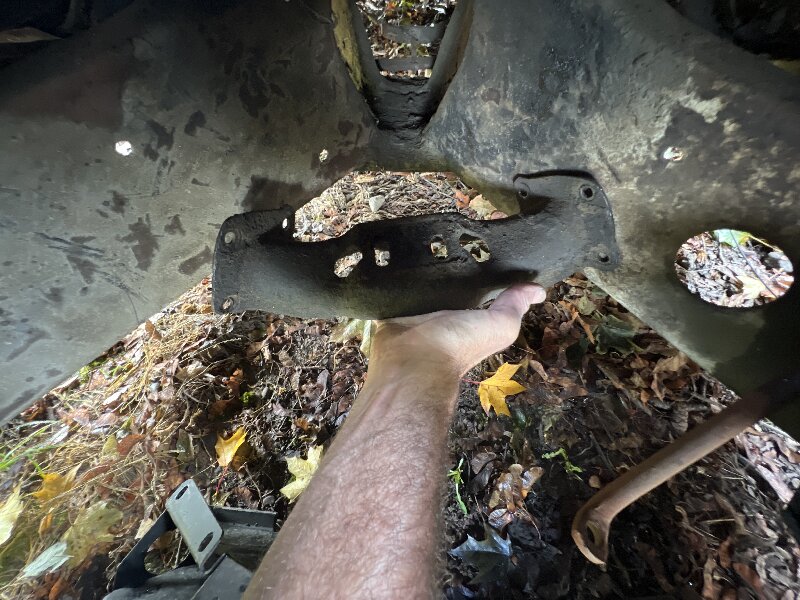
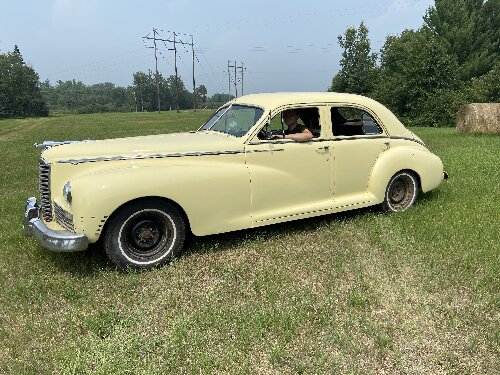
Well, I was hoping beyond doubt that a 51 ultramatic rear mount would fit directly in the “X” of the frame of my 1949 without more modifications, but it doesn’t exactly look that way.
Friendly folks have done it with mid-50s Packards but I’m still looking for a guiding predecessor who’s pathed the way on this for a 22nd series…
Posted on: 2023/11/4 13:54
|
|||
|
||||
|
Re: Packard Engine to GM Auto Transmission Adapters
|
||||
|---|---|---|---|---|
|
Home away from home
|
As you discovered, 1951-1954 is totally different but if you had a 1949-1950 Ultramatic, it would bolt right in with the original mount. I have one at my Oregon shop but it is really just a core that would take work to rebuild.
Posted on: 2023/11/4 14:40
|
|||
|
||||
|
Re: Packard Engine to GM Auto Transmission Adapters
|
||||
|---|---|---|---|---|
|
Forum Ambassador
|
This might be question for Ross since I have never worked on a 49-50 Ultra but there is a difference in tail housings for the 23rd series Ultramatic and the 24-54th Ultramatic. The 23rd housing appears to be several inches shorter. The case is the same for all 23-54 series original type Ultras so in theory the 23rd tail would bolt to the later improved transmissions but I don't know that for fact since there may be something internal that would prevent it.
I have no idea how hard it would be to find either item but possibly an Ultramatic crossmember and tail housing from a 23rd series would work better in your car. One possible issue causing all the difficulties with things such as the brake shaft and crossmember lining up is where they made wheelbase differences. On the 48-50 models those differences were made ahead of the cowl and body in the engine space. That is reflected by seeing differences such as the short and long front fenders. On 51 and later models the changes were made in the body and frame just behind the front seat and that can be seen by examining the rear door edge opening in relation to the rear tires. EDIT: I just saw Don't post and if he has the tail and cross that might be the answer and worth picking up the trans. I don't believe I would want to install the original 23rd series transmission in its entirety. By 52 there was enough field data and a lot of things in the unit was substantially improved.
Posted on: 2023/11/4 15:00
|
|||
|
Howard
|
||||
|
||||
|
Re: Packard Engine to GM Auto Transmission Adapters
|
||||
|---|---|---|---|---|
|
Just can't stay away

|
I had my 1955 Packard 400 adapted to a GM 700r Automatic transmission. I purchased the Transmission and the adapter from Bendtsens transmission adapters. I had the conversion done by a local shop in Audubon NJ it was the best thing I ever did to that car-I had replaced 3 Twin-Ultramatics over the years and none of them lasted longer than 2 years.
Posted on: 2023/11/4 22:20
|
|||
|
||||

 for including your
  image.jpg (284.76 KB)