 (94.87 KB)
|
Re: Kevin AZ's - 1955 Packard Senior Steering Wheel Restoration
|
||||
|---|---|---|---|---|
|
Home away from home

|
No special paint. I actually used a cheaper automotive paint for the wheel. I used Nason.
Posted on: 2012/7/11 16:51
|
|||
|
||||
|
Re: Kevin AZ's - 1955 Packard Senior Steering Wheel Restoration
|
||||
|---|---|---|---|---|
|
Home away from home
|
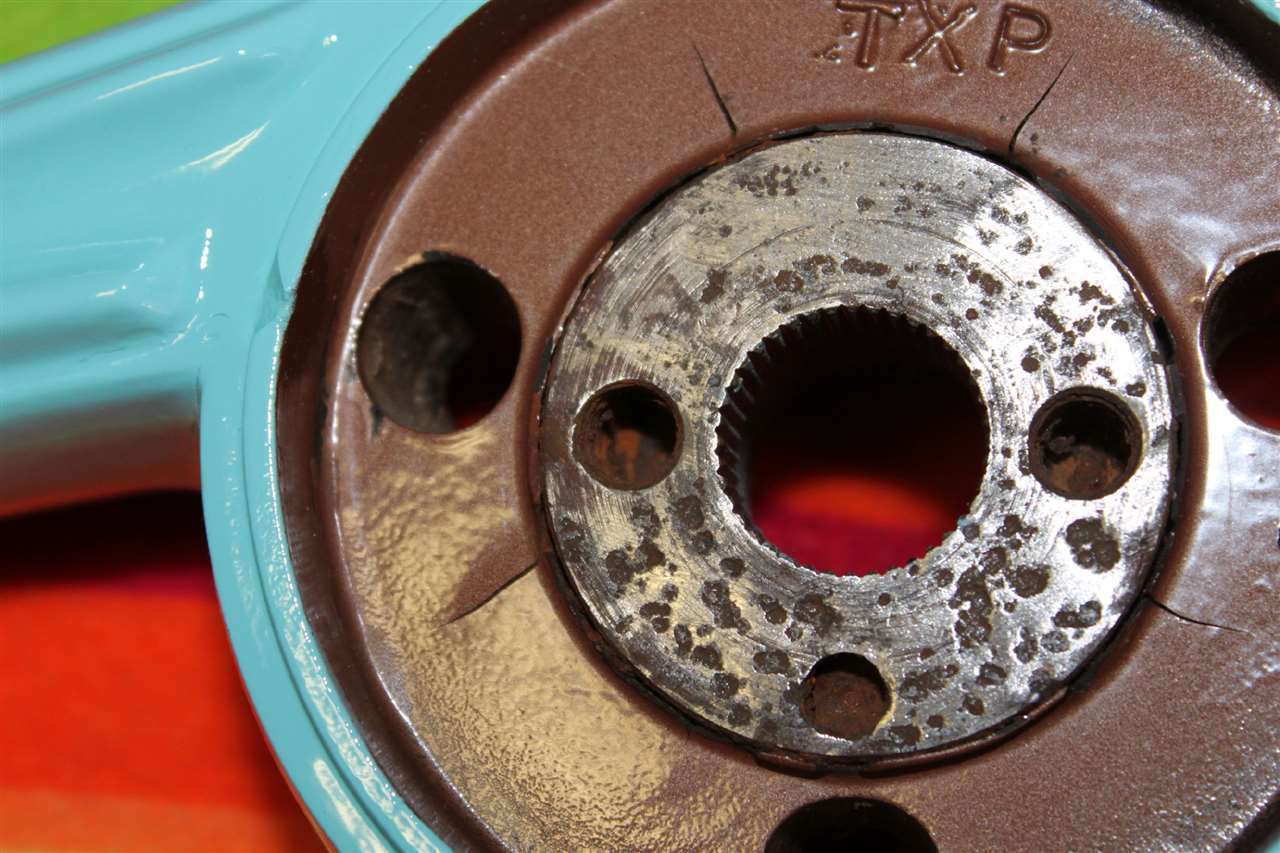
It's a 5/16 nf 24.
Posted on: 2012/7/11 19:21
|
|||
|
||||
|
Re: Kevin AZ's - 1955 Packard Senior Steering Wheel Restoration
|
||||
|---|---|---|---|---|
|
Home away from home
|
The newly restored steering wheel was put into place this afternoon. Boy it looks so nice on the car! Additionally, the rubber grommet that rests between the lower dash and the steering tube was also replaced with one acquired from Mike Dulinski. Replacing the grommet was a royal pita as all internals behind the wheel first had to be moved.
Posted on: 2012/9/2 19:59
|
|||
|
||||
|
Re: Kevin AZ's - 1955 Packard Senior Steering Wheel Restoration
|
||||
|---|---|---|---|---|
|
Home away from home
|
wow,,that came out factory, where do you get nason paint?, must be enamel,,wears better, lacquer?....easier to use. two part enamel?.. back in the day nason was a top of line paint, i have old cans of it.. and a can for my dads 56 pat. he had made back in the 60s. i think its tar now..
nice work kevin..ps, where you are ,, you have baked on enamel...............
Posted on: 2012/9/3 1:56
|
|||
|
Riki
|
||||
|
||||
|
Re: Kevin AZ's - 1955 Packard Senior Steering Wheel Restoration
|
||||
|---|---|---|---|---|
|
Just can't stay away
|
I was interested in your post on re-furbishing our steering wheel. I am thinking about doing the same thing. How is the steering wheel removed. I assume that the emblem on the horn button can be pryed off, but I want to make sure before I break something. My car is a 46 clipper.
Posted on: 2014/11/30 16:48
|
|||
|
||||
|
Re: Kevin AZ's - 1955 Packard Senior Steering Wheel Restoration
|
||||
|---|---|---|---|---|
|
Forum Ambassador

|
Quote:
I was interested in your post on re-furbishing our steering wheel. I am thinking about doing the same thing. How is the steering wheel removed. I assume that the emblem on the horn button can be pryed off, but I want to make sure before I break something. My car is a 46 clipper. If stock, the horn button emblem and horn ring on your Clipper should be held on by three screws coming in from the dash side of steering wheel hub. You should see some roughly 1/4" holes drilled into the side of the plastic hub or wheel center about half an inch in front of the metal shroud. Takes a small phillips screwdriver straight in from the dash side and once screws are out, the entire metal part should be free. You can then see the nut and cup holding the wheel. NOTE: Not sure how familiar you are with Packard wheel removal but you will have to remove the horn contact before you can remove the nut. To avoid cutting wire or damaging the contact assy, you can disconnect wire at the douglas connecter near the steering box and, if there are no modifications such as bulky splices or repairs pull wire out from the top. The hole at the bottom is quite small though so the wire has to be in good condition to pass thru. If you absolutely have to, you can pull the contact assy up a few inches and unsolder or cut then push wire back down the shaft a bit. Downside to that is sometimes wire falls down so far it becomes a challenge to retrieve it to reconnect. Once contact is out of the way you can remove the nut and cup. You will need a steering wheel puller to remove the wheel from the shaft. If you removed the wire, then to replace it, the easiest way is to run a stiff wire up from the bottom, attach the horn wire to it with some tape making the connection to the pull wire as secure and small as possible. Tape it so the area pulling thru as it goes back down is tapered and smooth. Use the pull wire to bring the horn wire back down. Space is very limited at a couple of spots so make sure there are no bulky areas to get caught caused by the tape.
Posted on: 2014/11/30 17:26
|
|||
|
Howard
|
||||
|
||||


.jpg")


