|
Re: '40 110 advice needed
|
||||
|---|---|---|---|---|
|
Home away from home

|
Many years ago, my late dad and I were restoring my 1940 110 sedan and we had to remove both headlight buckets in order to prepare the car for painting. The buckets are held down by a single large nut. As I recall, it was a 1" nut. The nut threads on to a hollow bolt that fits through the bottom of the bucket and the wiring threads through the bolt center. It is quite a job to get off, but I would just cut through the wire and then pull it out once you remove the bezel, lens and reflector. You are going to want to redo your wiring anyway. Then, you should be able to get a socket onto the nut. Good luck. But if you already have the whole front clip off, it shouldn't be that hard. My dad and I opted to just remove the headlight buckets and leave the rest of the car assembled as my front sheet metal was in pretty good shape. I had to crawl under the car to get access to the headlight nuts. Removing the grille with the grille shell on the car wasn't fun either, nor was reassembling the grille after replating and then trying to get it back on the car. But we somehow managed.
Posted on: 2023/3/5 17:12
|
|||
|
||||
|
Re:
|
||||
|---|---|---|---|---|
|
Home away from home

|
Thanks--that's probably what I'll do. Now that it's up in the air, I can soak it pretty well with rust penetrant; once the wires are removed I'll likely heat it up with a propane torch and then tag it with the Dewalt impact wrench to break it loose, gently.
Attach file:  e4b482c5-fa81-47cf-9662-6e465a80ba95.jpg (57.83 KB) e4b482c5-fa81-47cf-9662-6e465a80ba95.jpg (57.83 KB)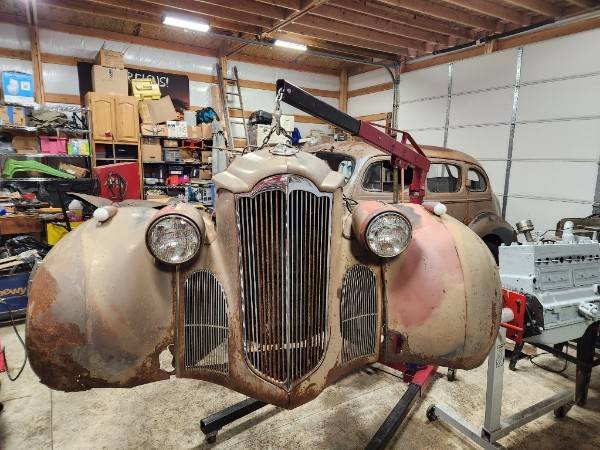
Posted on: 2023/3/5 18:21
|
|||
|
||||
|
Re:
|
||||
|---|---|---|---|---|
|
Home away from home
|
I don't know what your budget is or how keen you are in doing it all yourself but there is a vintage car restoration shop in Terrebonne, OR that can make quick work of it. They just fixed the damaged front clip of my 1965 Imperial LeBaron and did an excellent job.
Posted on: 2023/3/5 19:58
|
|||
|
||||
|
Re:
|
||||
|---|---|---|---|---|
|
Home away from home
|
I'm a DIY guy, thanks.
Friends and family think I'm out of my mind doing these kinds of projects, but I've been doing them for the better part of 45 years. It's fun learning new skills. oh, and new tools of course.... Some people like murder mysteries; I like automotive puzzles....
Posted on: 2023/3/5 22:56
|
|||
|
||||
|
Re: '40 110 advice needed
|
||||
|---|---|---|---|---|
|
Home away from home
|
tsherry. Looks like you are going to have your work cut out for you on repairing that front end sheet metal. That RF fender looks pretty rough. Maybe someone has one in better shape they can share. Looks like your car's original color was Cuban Tan. My 1940 110 was painted the same color when I purchased it, but I opted for Centennial Blue for the repaint. Please post more pics as work progresses.
Posted on: 2023/3/6 17:12
|
|||
|
||||
|
Re: '40 110 advice needed
|
||||
|---|---|---|---|---|
|
Home away from home
|
Certainly the case.
I've repaired worse though.
Posted on: 2023/3/6 22:14
|
|||
|
||||
|
Re: '40 110 advice needed
|
||||
|---|---|---|---|---|
|
Home away from home
|
My hat is then off to you, sir. I really admire people who have metal working skills. Sadly, it is a lost art these days.
Posted on: 2023/3/7 12:22
|
|||
|
||||


