|
Re: Proud New Owner of a 49 Packard Club Sedan
|
||||
|---|---|---|---|---|
|
Just can't stay away

|
After many delays, the head is decked and repainted, and the block surface has been cleaned. New head gasket, sprayed with copper coat. The head went on with few problems. Torqued it to spec in three phases, and put everything back together.
Finally fired it up today, and it ran just like it did before the head gasket replacement, and if anything it coughed out MORE white smoke than it did before. Ran it up to temperature, shut it down, and retorqued the head. Took 3-4 pulls per nut to do so. Now it won't even start. Gave up in disgust and put the charger on the battery. Is it possible the choke and idle mixture are way too rich, thus instaflooding it? Newly cleaned spark plug came out black after we shut down. It has fire, but it seems weak. Won't even hit a lick on starting fluid. Any ideas?
Posted on: 2018/12/1 17:07
|
|||
|
||||
|
Re: Missing, dead cylinder
|
||||
|---|---|---|---|---|
|
Just can't stay away
|
Good points all, but doesn't that make head thickness a better indicator? If I put a new cam and new solid lifters in (max valve height) and then put a skinny head on it, there is real danger of disaster. On the other hand, a skinny head on a used engine would probably not be a worry. Hydraulic lifter engines would of course between these two extremes. It would also make a difference in buying a head. I would think a skinny one would be worth less because of these potential problems.
Posted on: 2018/11/15 18:39
|
|||
|
||||
|
Re: Missing, dead cylinder
|
||||
|---|---|---|---|---|
|
Just can't stay away
|
I had the exact same problem. It seems to me that there should be an easier way to guard against a head that has been decked into uselessness.
The clay test is a bit of a pain. Does anyone have an no's head or an undecked one they can mic? I'll measure mine and put it on here. This would give at least some guidance as to how close the head is to uselessness. For example, if the head is supposed to be 1.5 inches thick, and a 1.4 works, then we know that a bad one is something less than 1.4. Over time, we can determine a thickness that is closer to head ruination. I think it's worth the effort, as there are a lot of posts about blown head gaskets.
Posted on: 2018/11/14 20:47
|
|||
|
||||
|
Re: Proud New Owner of a 49 Packard Club Sedan
|
||||
|---|---|---|---|---|
|
Just can't stay away
|
Great chart, but the thing has nothing on it except made in the USA and the letter A in a circle. Pic attached.
Did a head clearance check and we are GO for reinstallation once the new head nuts and washers arrive and some painting is done. What color iare the accelerator linkage and brackets supposed to be? Engine color? As for the lower splash panel rubber, Steele has some stuff that is within a quarter inch, part No 70-1446-99. It's not expensive. I got the drivers side vent system painted, so all of that is ready to go back in once I get the inner fender painted. Attach file:  (198.03 KB) (198.03 KB)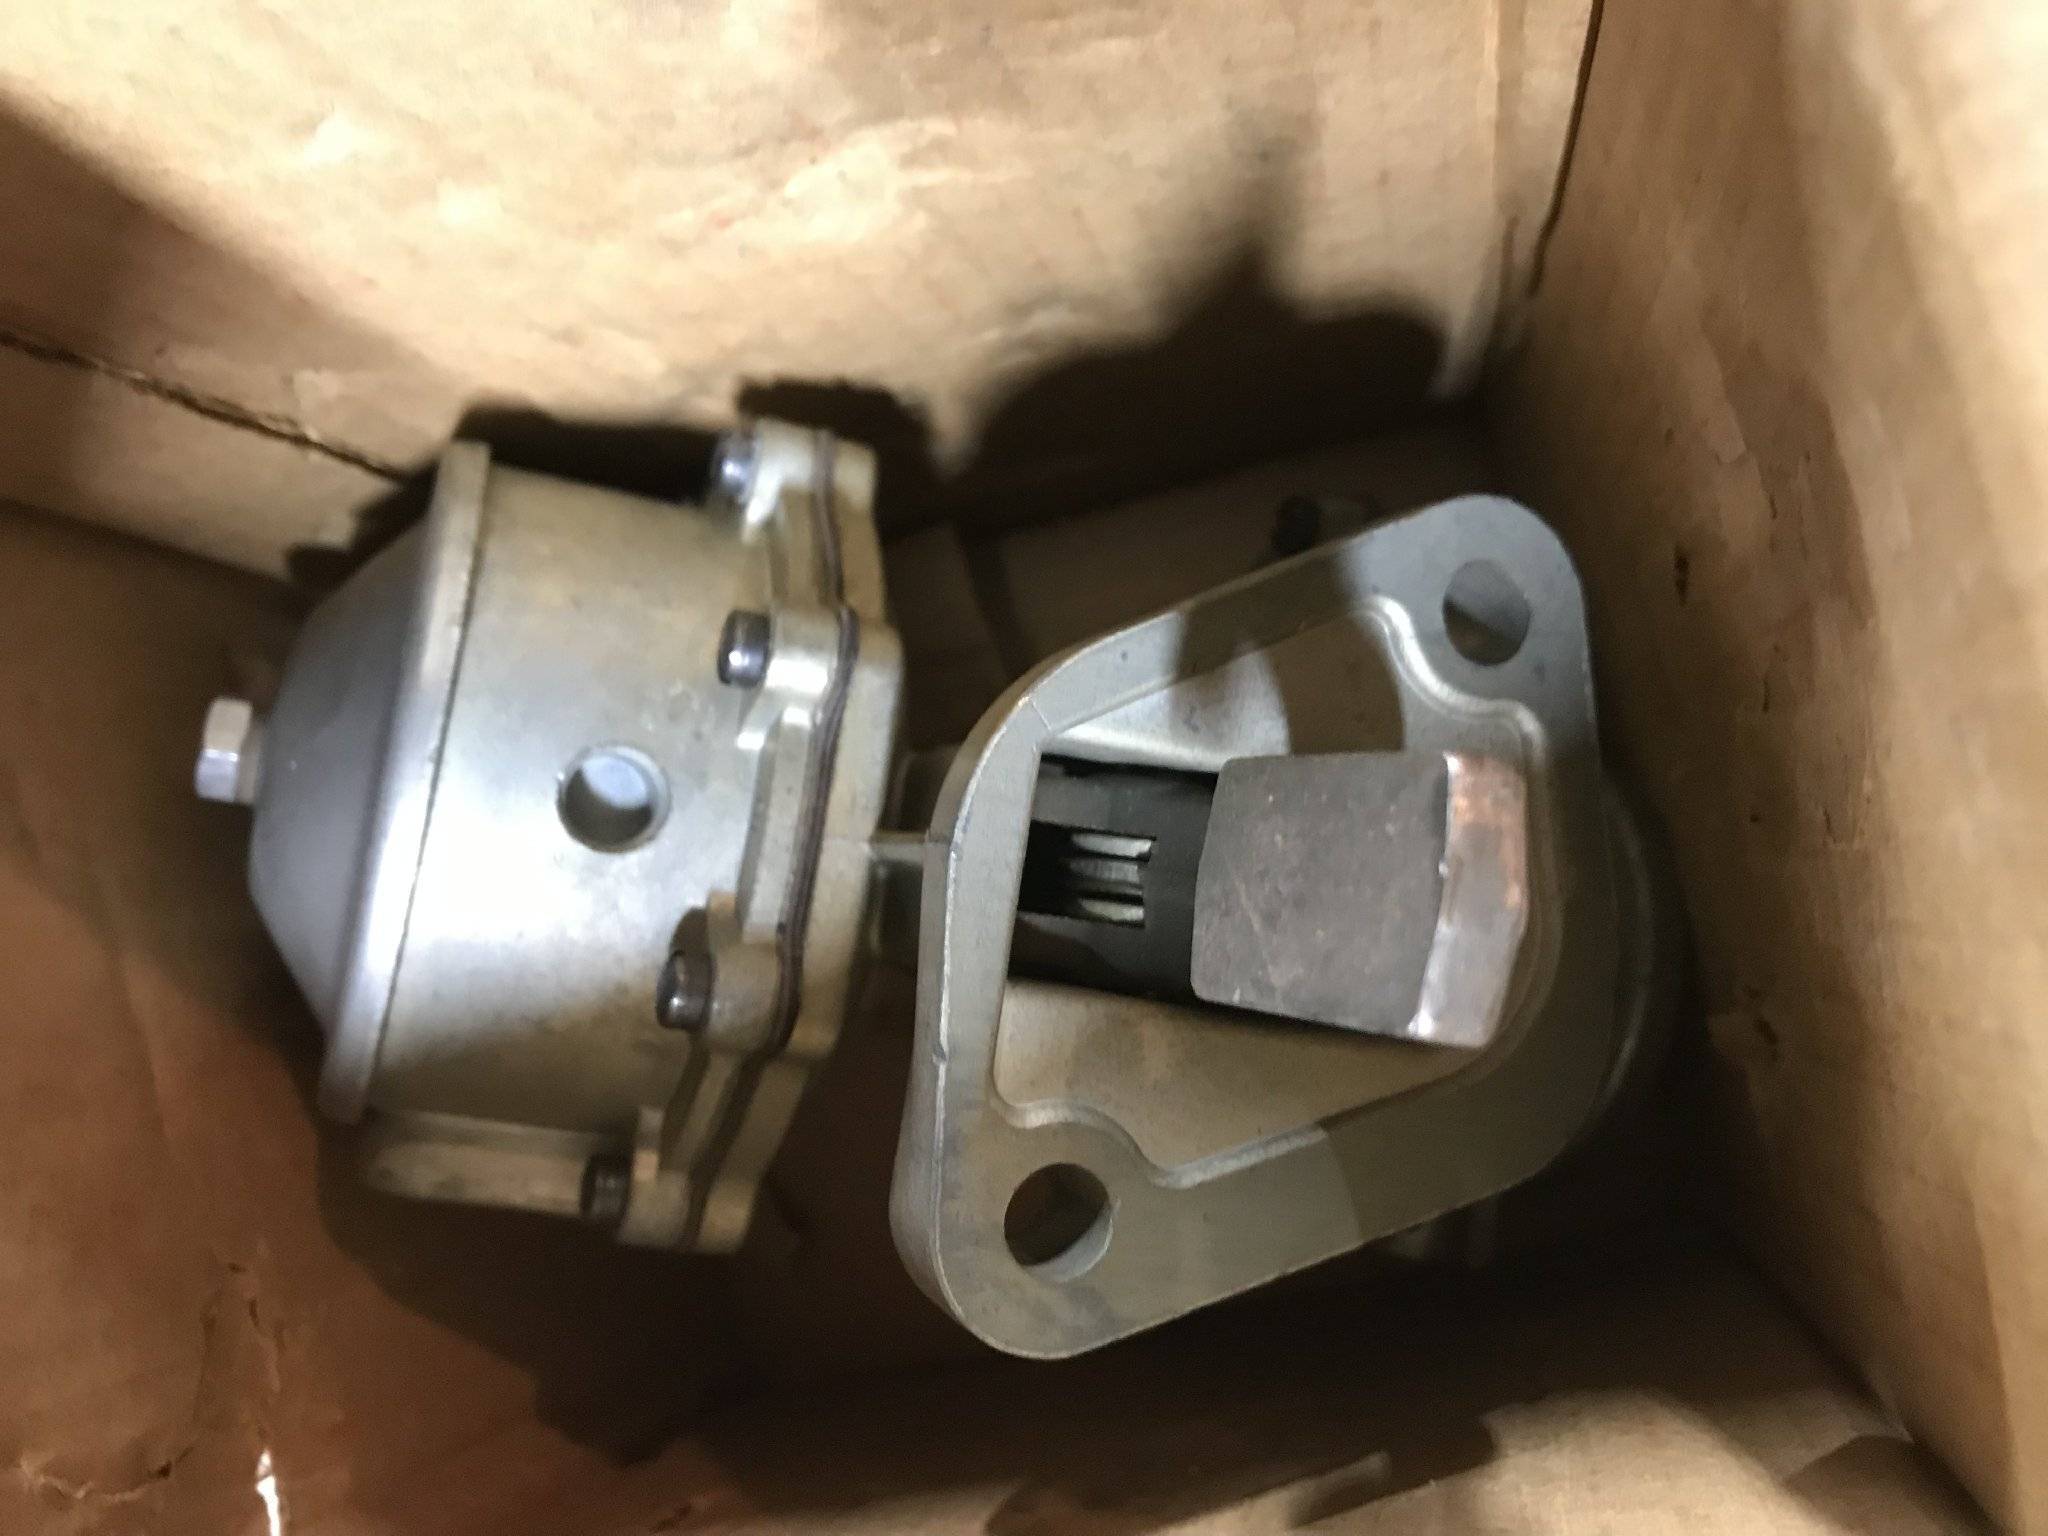
Posted on: 2018/11/14 20:08
|
|||
|
||||
|
Re: Proud New Owner of a 49 Packard Club Sedan
|
||||
|---|---|---|---|---|
|
Just can't stay away
|
The head is decked! My engine guy had to take 20 thou off of the ends, so I'll have to do a clearance test. The "modeling clay" suggested for this is also known as play dough, by the way. When Algore takes over, I will claim carbon credits for all of the carbon I took out of the head. We also decarbonized the block, paying especial attention to the area between the valves and the cylinder. We could see no cracks, so I went over it with a magnifying glass, and still no problem. Waiting for new head nuts, washers and paint before reinstalling.
I also took the vent system out of the parts car. Every bolt in was either broken off or had to be ground off, but the system itself was not in bad shape. It turns out that my car is also missing the lower splash shields, so I pulled them out, too. the ducts collect a lot of dirt. I have one extra that is rusted, and appears to be from the inside. I used one of those odd cans of wrong color spray paint to paint the insides, and am working on the outsides. All of the rubber bulkhead seals broke into pieces, but I can recreate those. However, on the upper edge of the lower splash shield there is an L shaped piece of rubber where it mates to the upper. Does anyone make those? While the splash shields are out, I took the opportunity to change out the fuel pump. Of course, the good deal I got on one on ebay does not fit. Instead of the usual shape of the fuel pump mounting flange, this one is a parallelogram, ie, a rectangle pushed over to one side. the rest of the pump looks correct. Any idea what this thing is? I'd like to recoup my loss, or at least some of it.
Posted on: 2018/11/14 10:16
|
|||
|
||||
|
Re: Proud New Owner of a 49 Packard Club Sedan
|
||||
|---|---|---|---|---|
|
Just can't stay away
|
As you will recall, I had a compression issue on No. 3 cylinder, and resolved to remove the head. I've had bad luck with manifold bolts, and so I decided to try to do it without removing the manifold.
My son and I got the car into the shop, removed the hood and drained the radiator. We pulled off everything attached to the head or that went over it. the hardest thig was getting to the vac line that went to the vac advance. Its under the carb and hard to see. WIth all of that done, we pulled off the acorn nuts on the head studs. My plan was to inject penetrating oil into the stud-head hole interface and let it soak for 24 hours. Then I would spin the engine and hope that he compression would pop the head. If not, I had brand new putty knives, wooden wedges, screwdrivers, and an engine hoist ready. Without my permission, my son put a putty knife where the water was coming out and tapped it gently with a hammer. I went tight to the stud. He did it again a little further down, and it want right to the stud. Hmmmm.... So we did it a few more times, with the same result. We went thru all of our putty knives, when I lifted up on one. AND THE HEAD MOVED! We had it off within a minute. So much for the engine hoist. glad I did not buy those huge C clamps! The stuff I put into the holes was a combination of PB blaster and some stuff from the dollar store called "LUBE." That's it. Just "LUBE." Its from the orient, and I assume full of strychnine and whale oil, but it sure works. We soaked the antifreeze out of the cylinders with paper towels, and then coated the cylinder walls with oil, and pout some in each cylinder. I got the white glob out of No. 7; it was in the oil we put in. It appears that the head gasket was blown between 4 and 5. My engine guy says the head is warped, so it needs decking. I have a new head gasket that came with the car (yes, I thought that was odd), but have just ordered new head nuts and washers so it will be next week before I can get it all back together. What puzzles me is that I can't see anything that would cause low compression on Number 3. I still have to spin the engine to do a valve operation check. While it is down, I might as well take care of some cosmetic issues. What color is the distributor supposed to be? Engine color, black, or something else? Attach file:  (331.36 KB) (331.36 KB)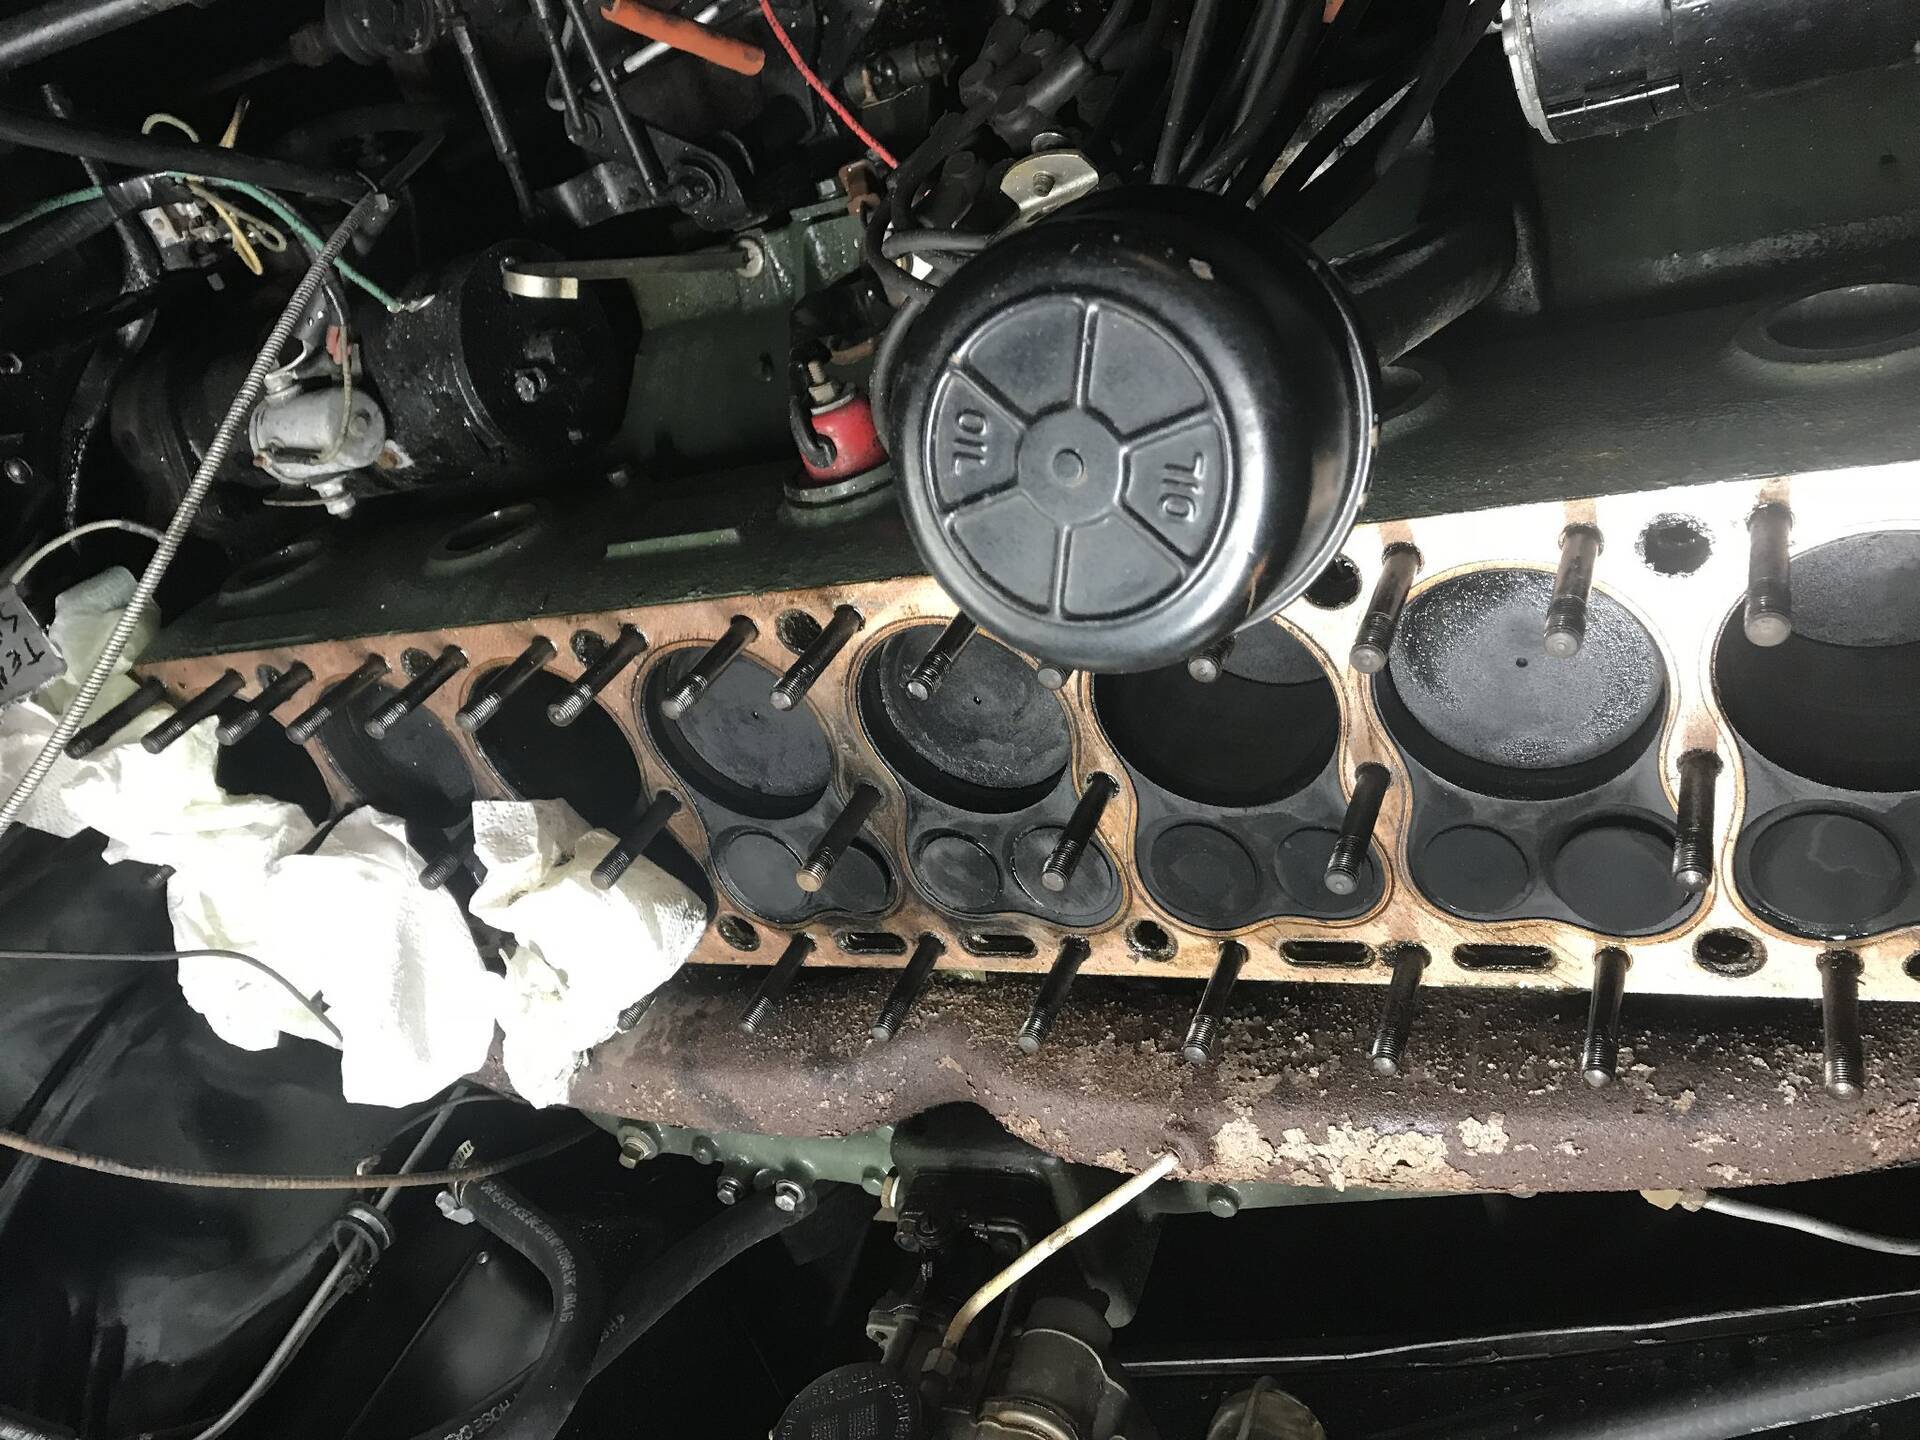 (411.01 KB) (411.01 KB)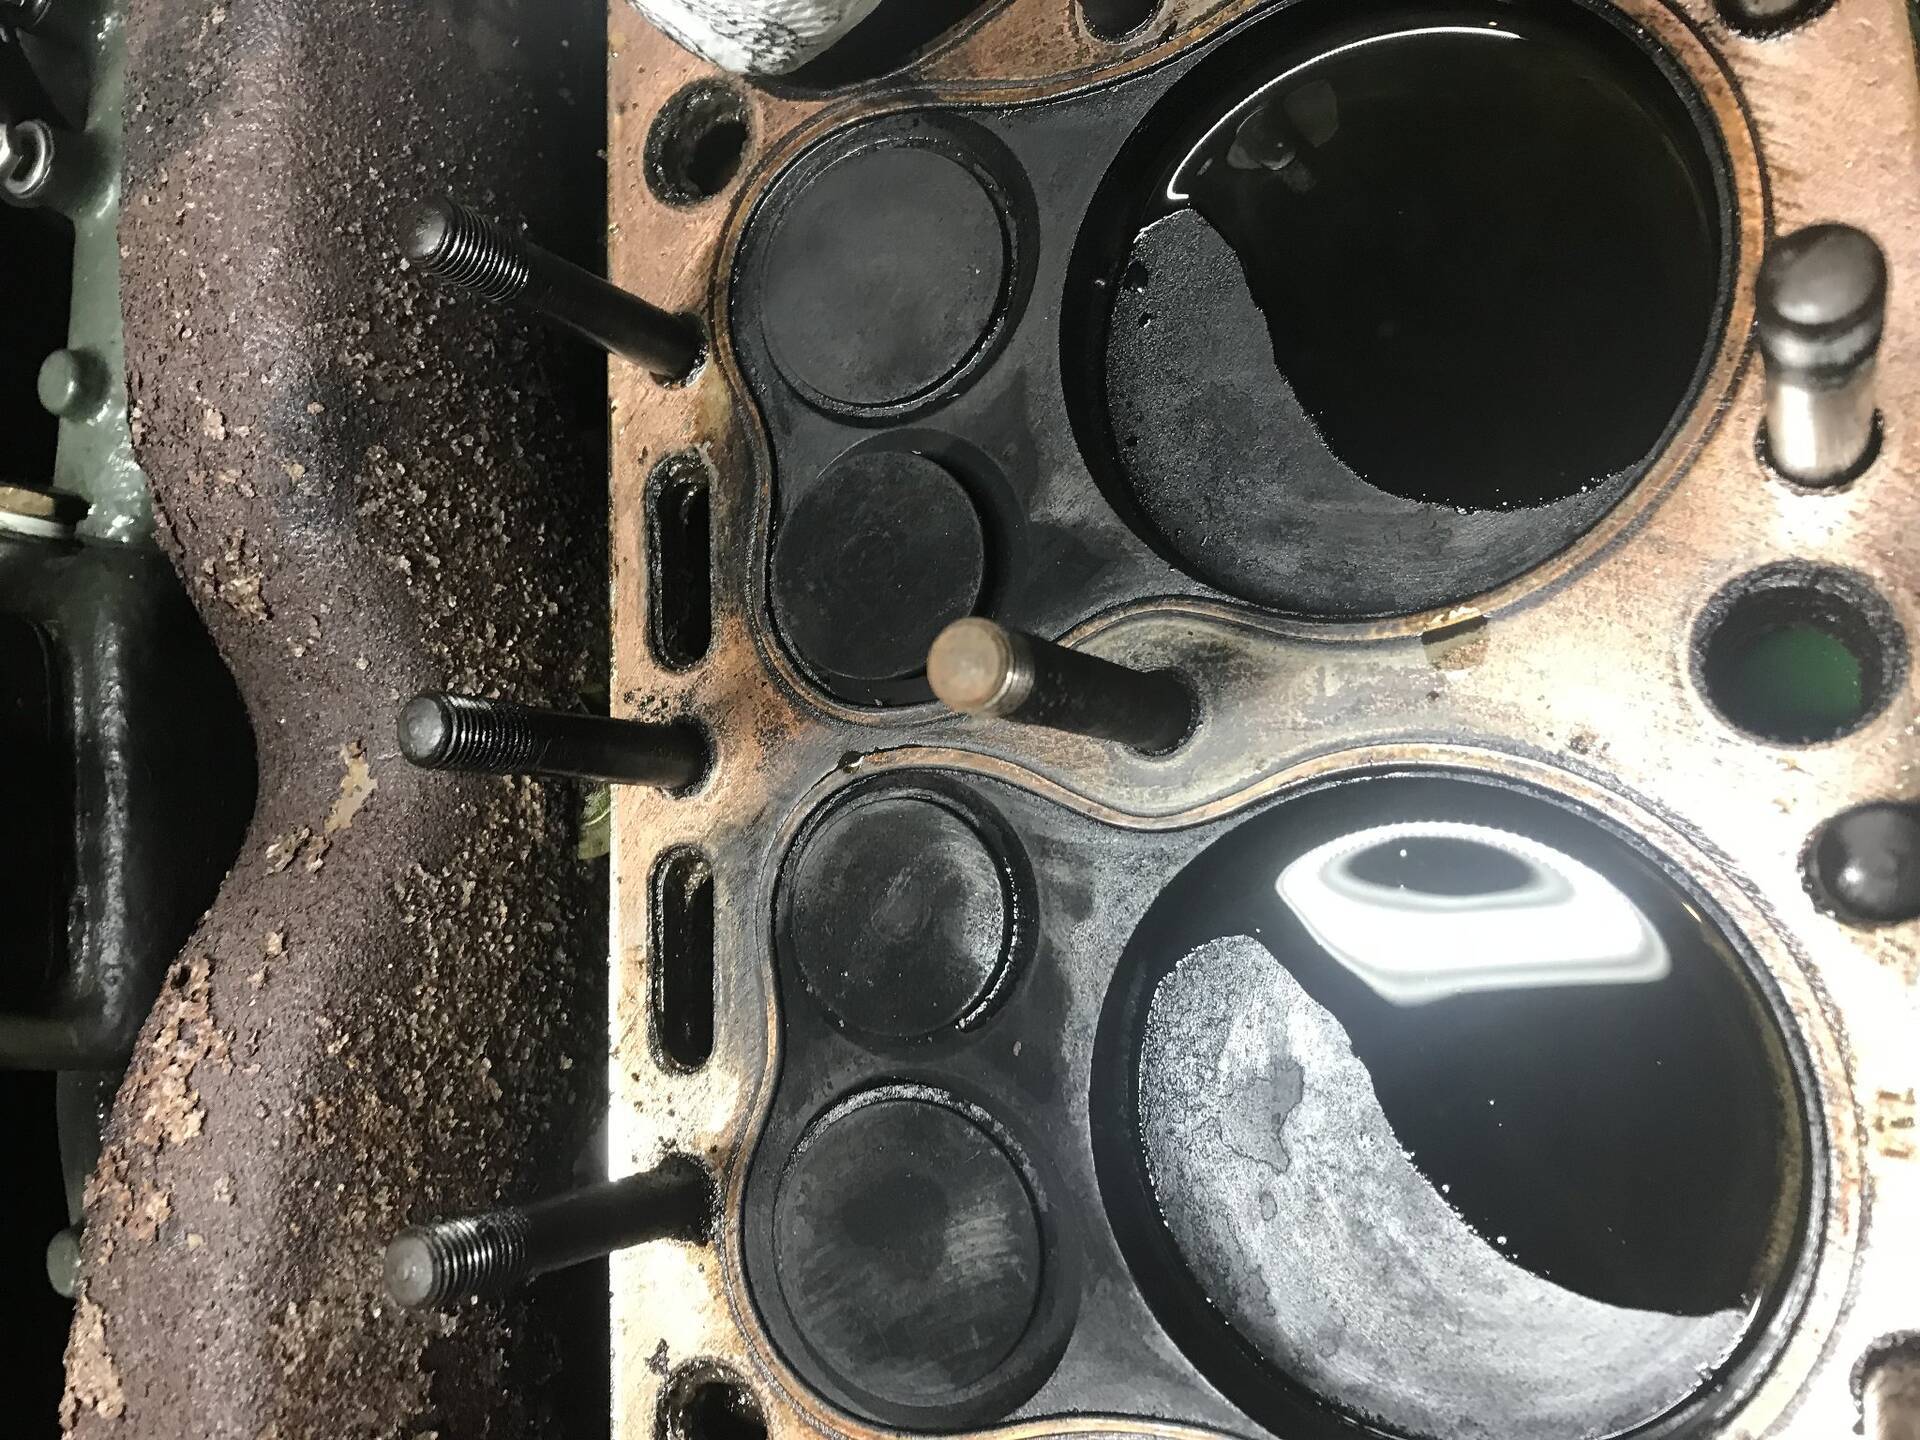 (325.74 KB) (325.74 KB)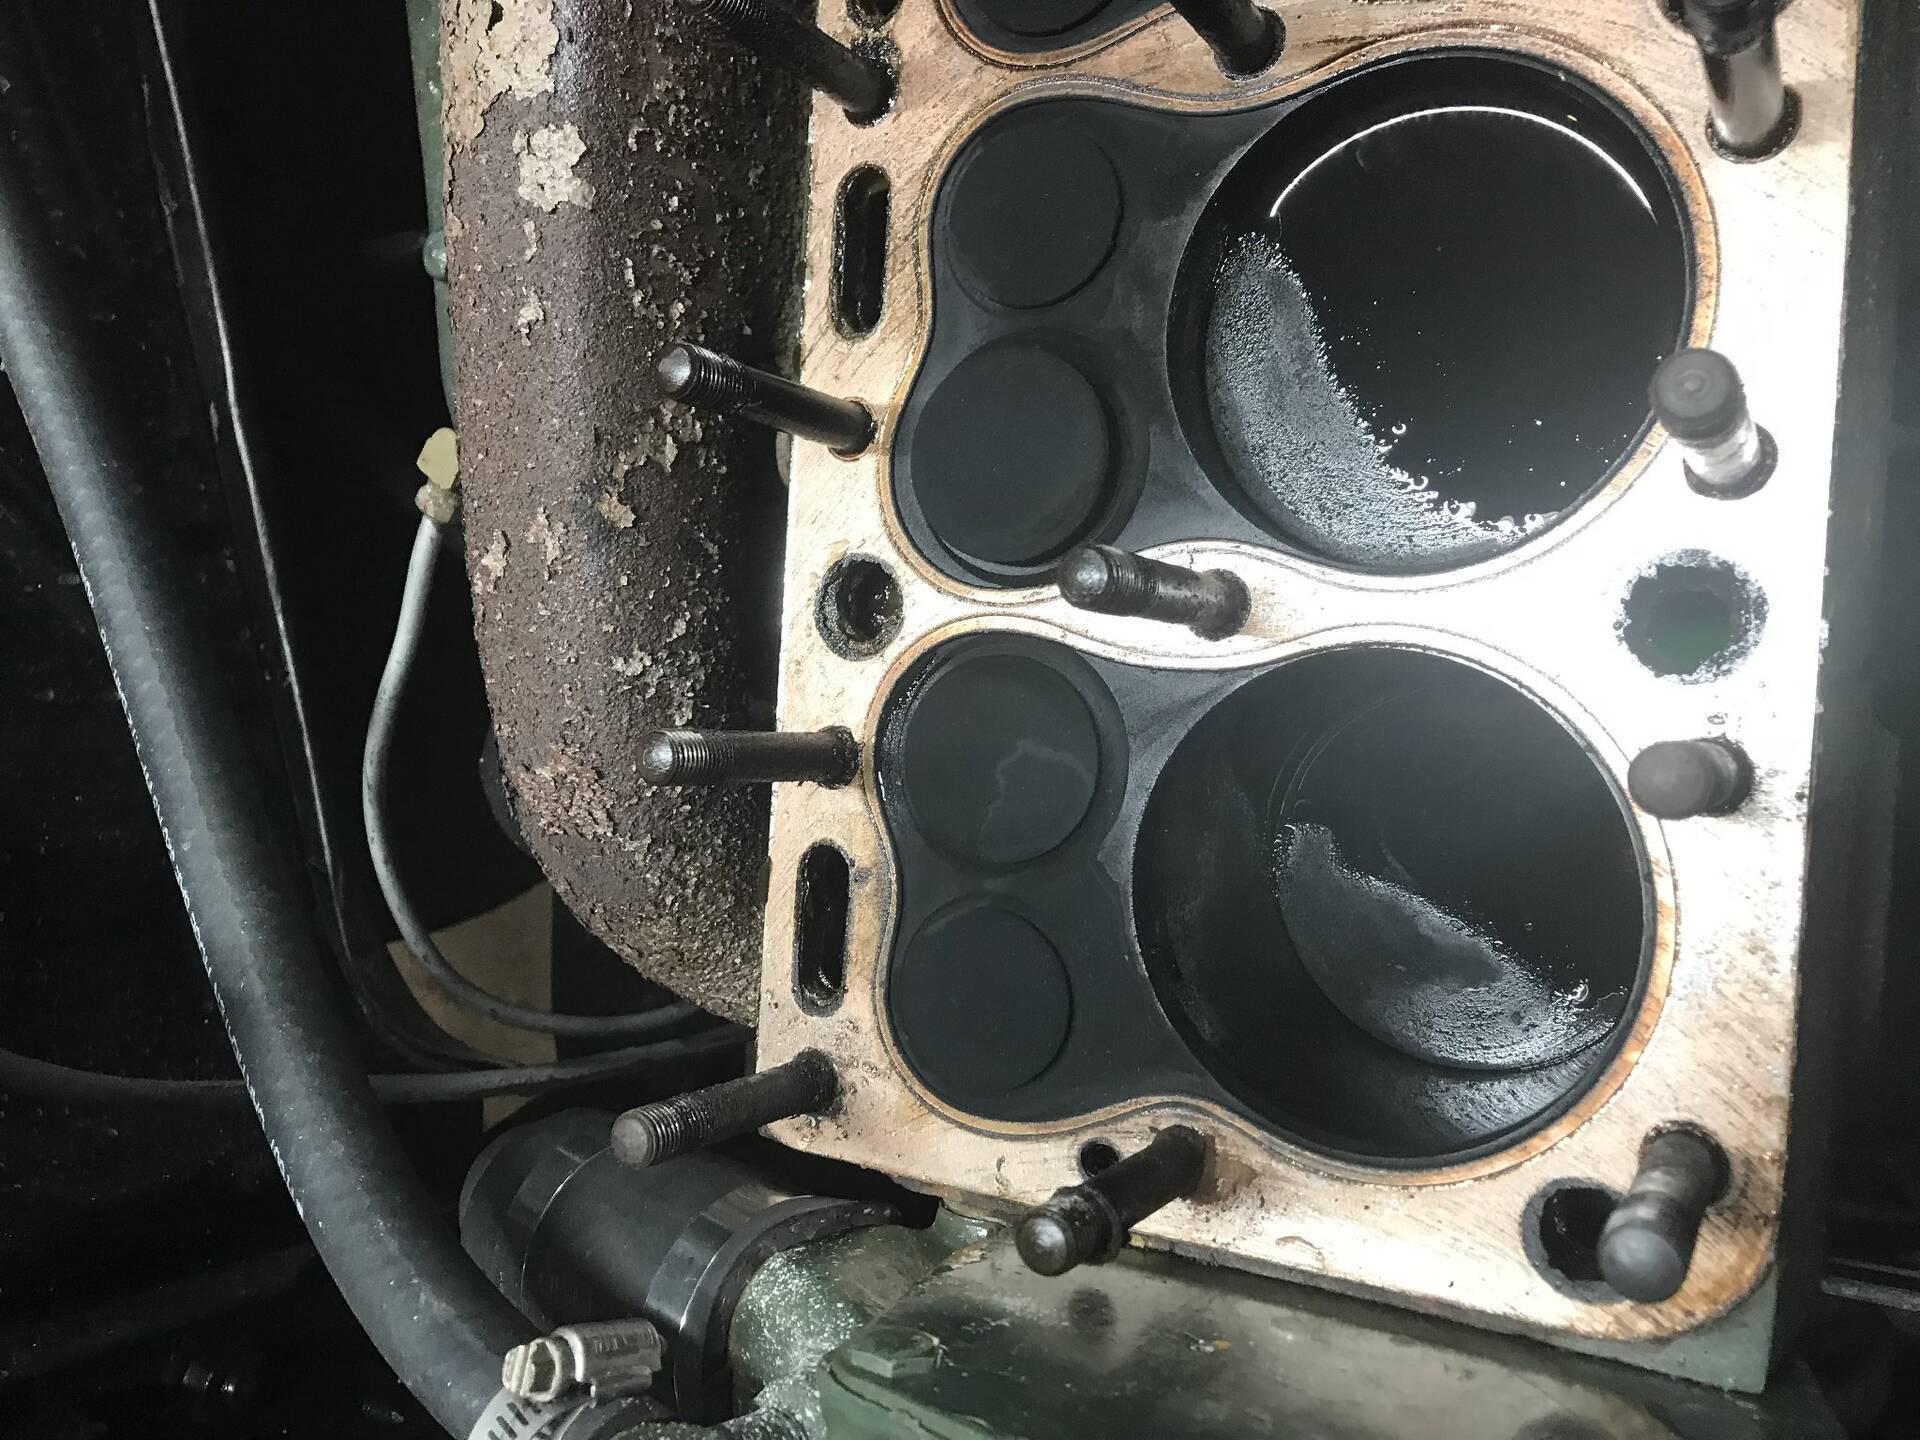 (376.43 KB) (376.43 KB)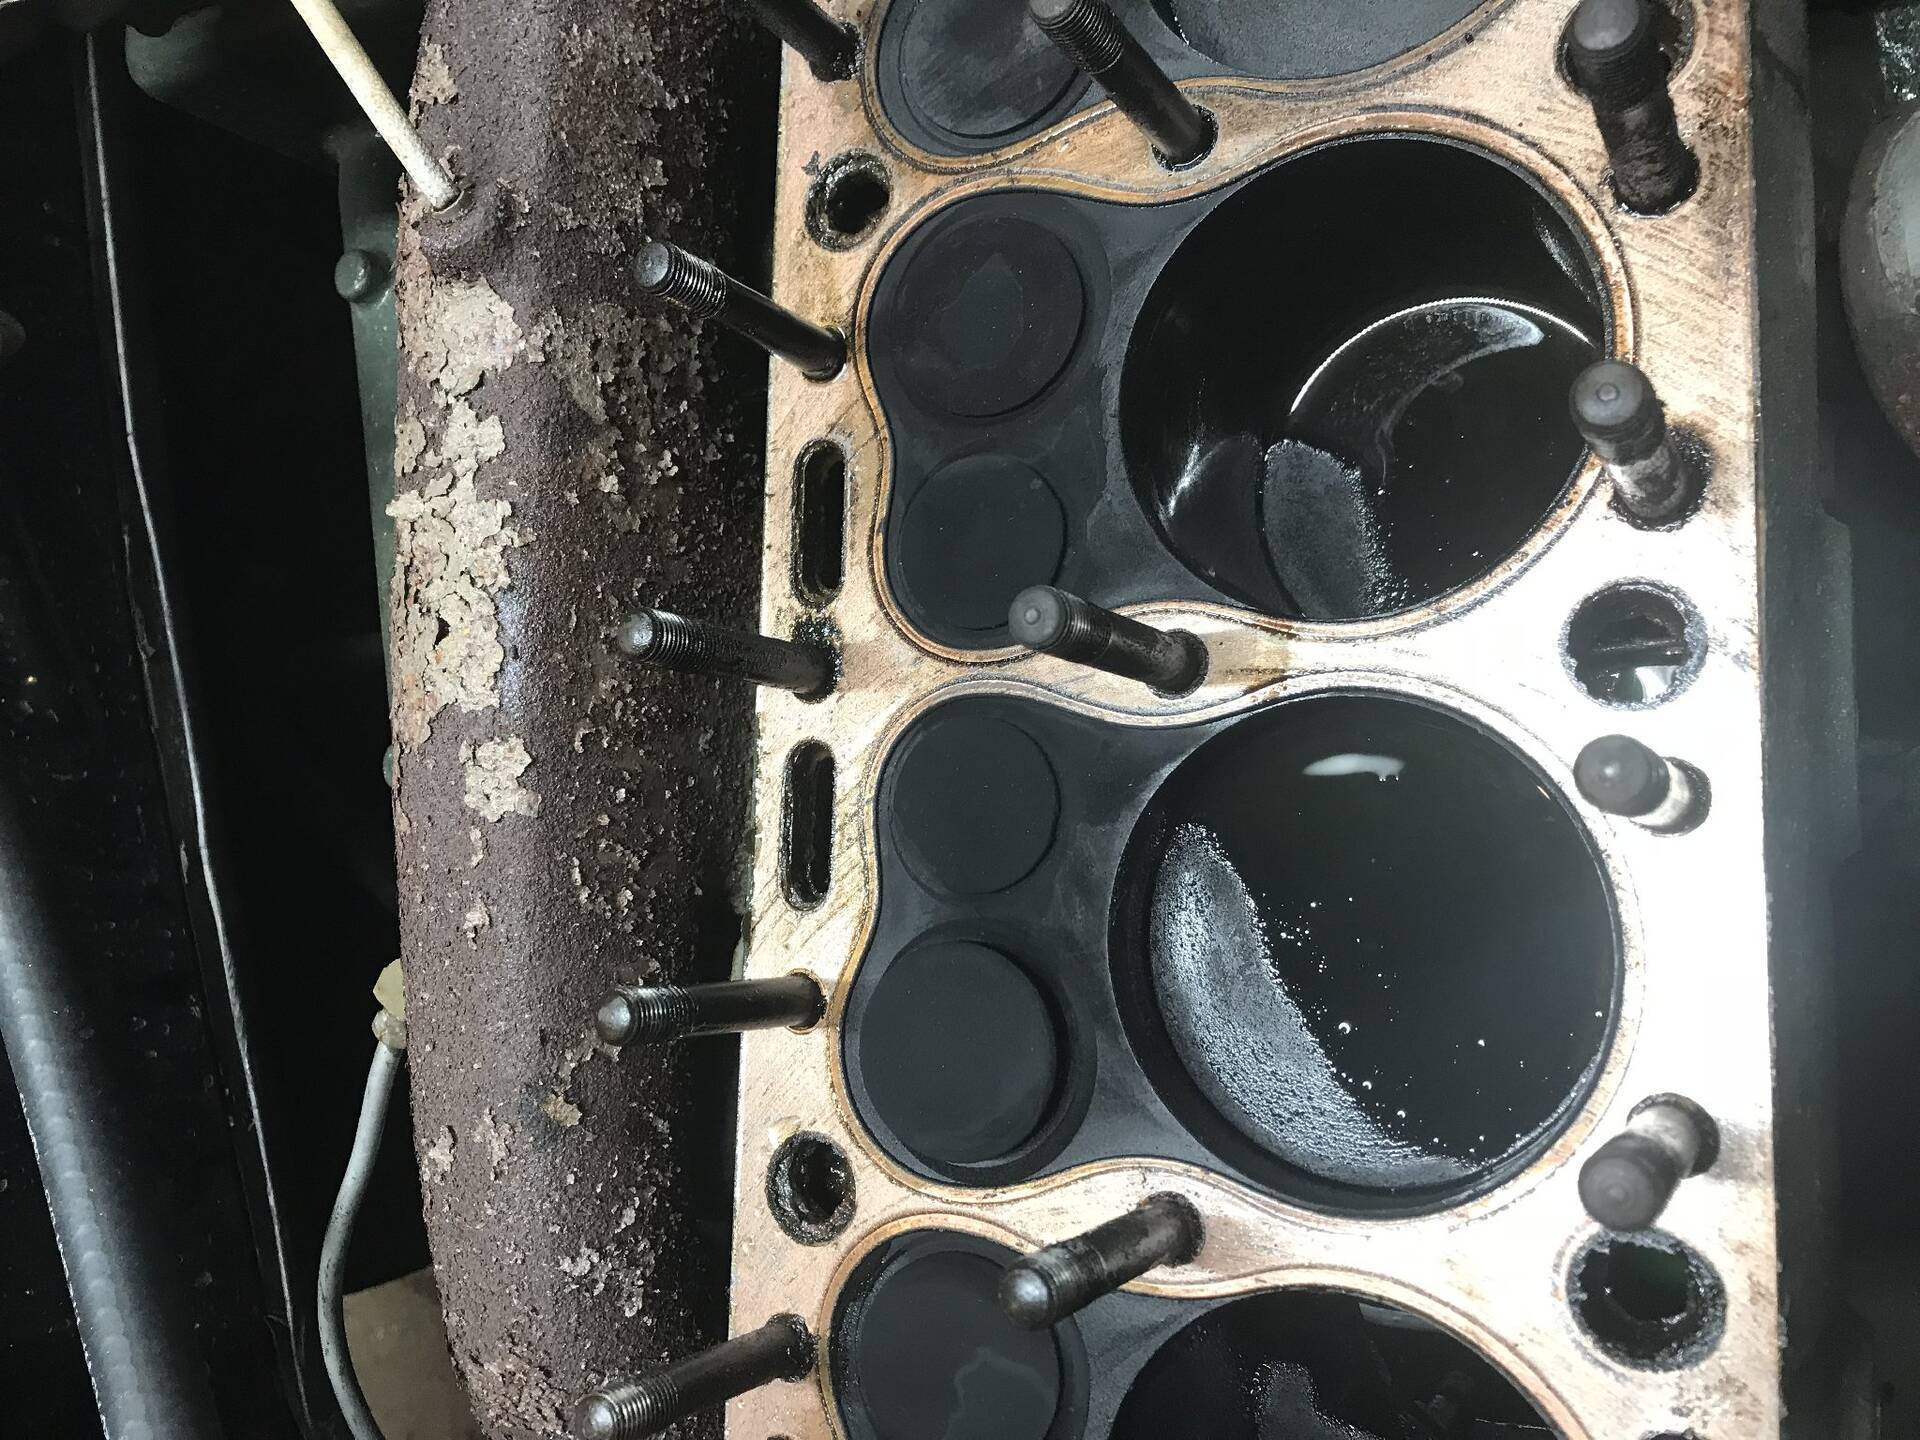 (380.76 KB) (380.76 KB)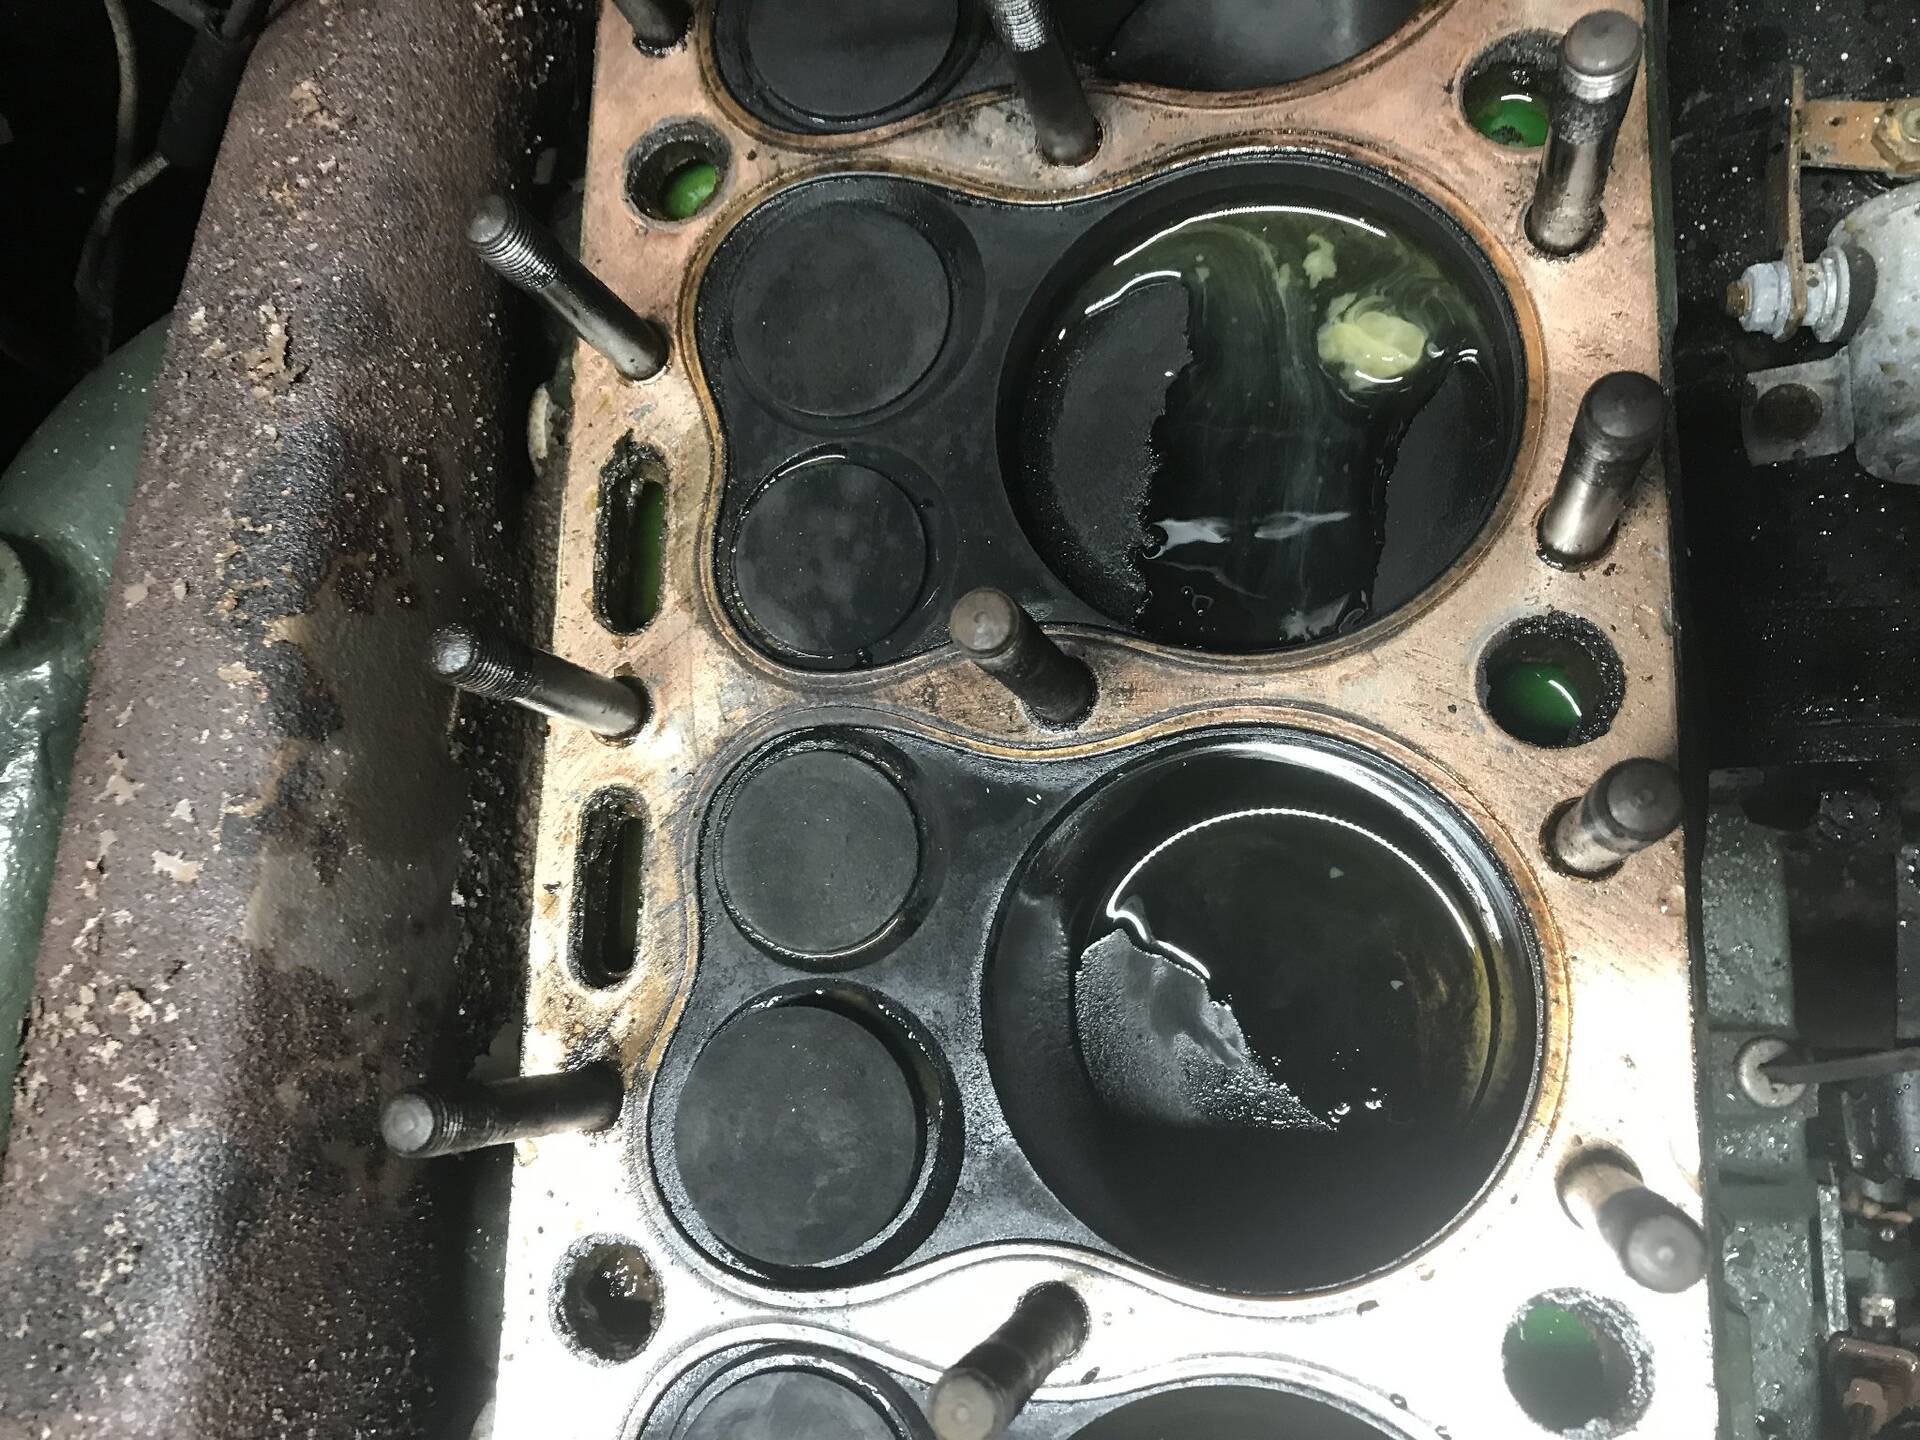 (301.35 KB) (301.35 KB)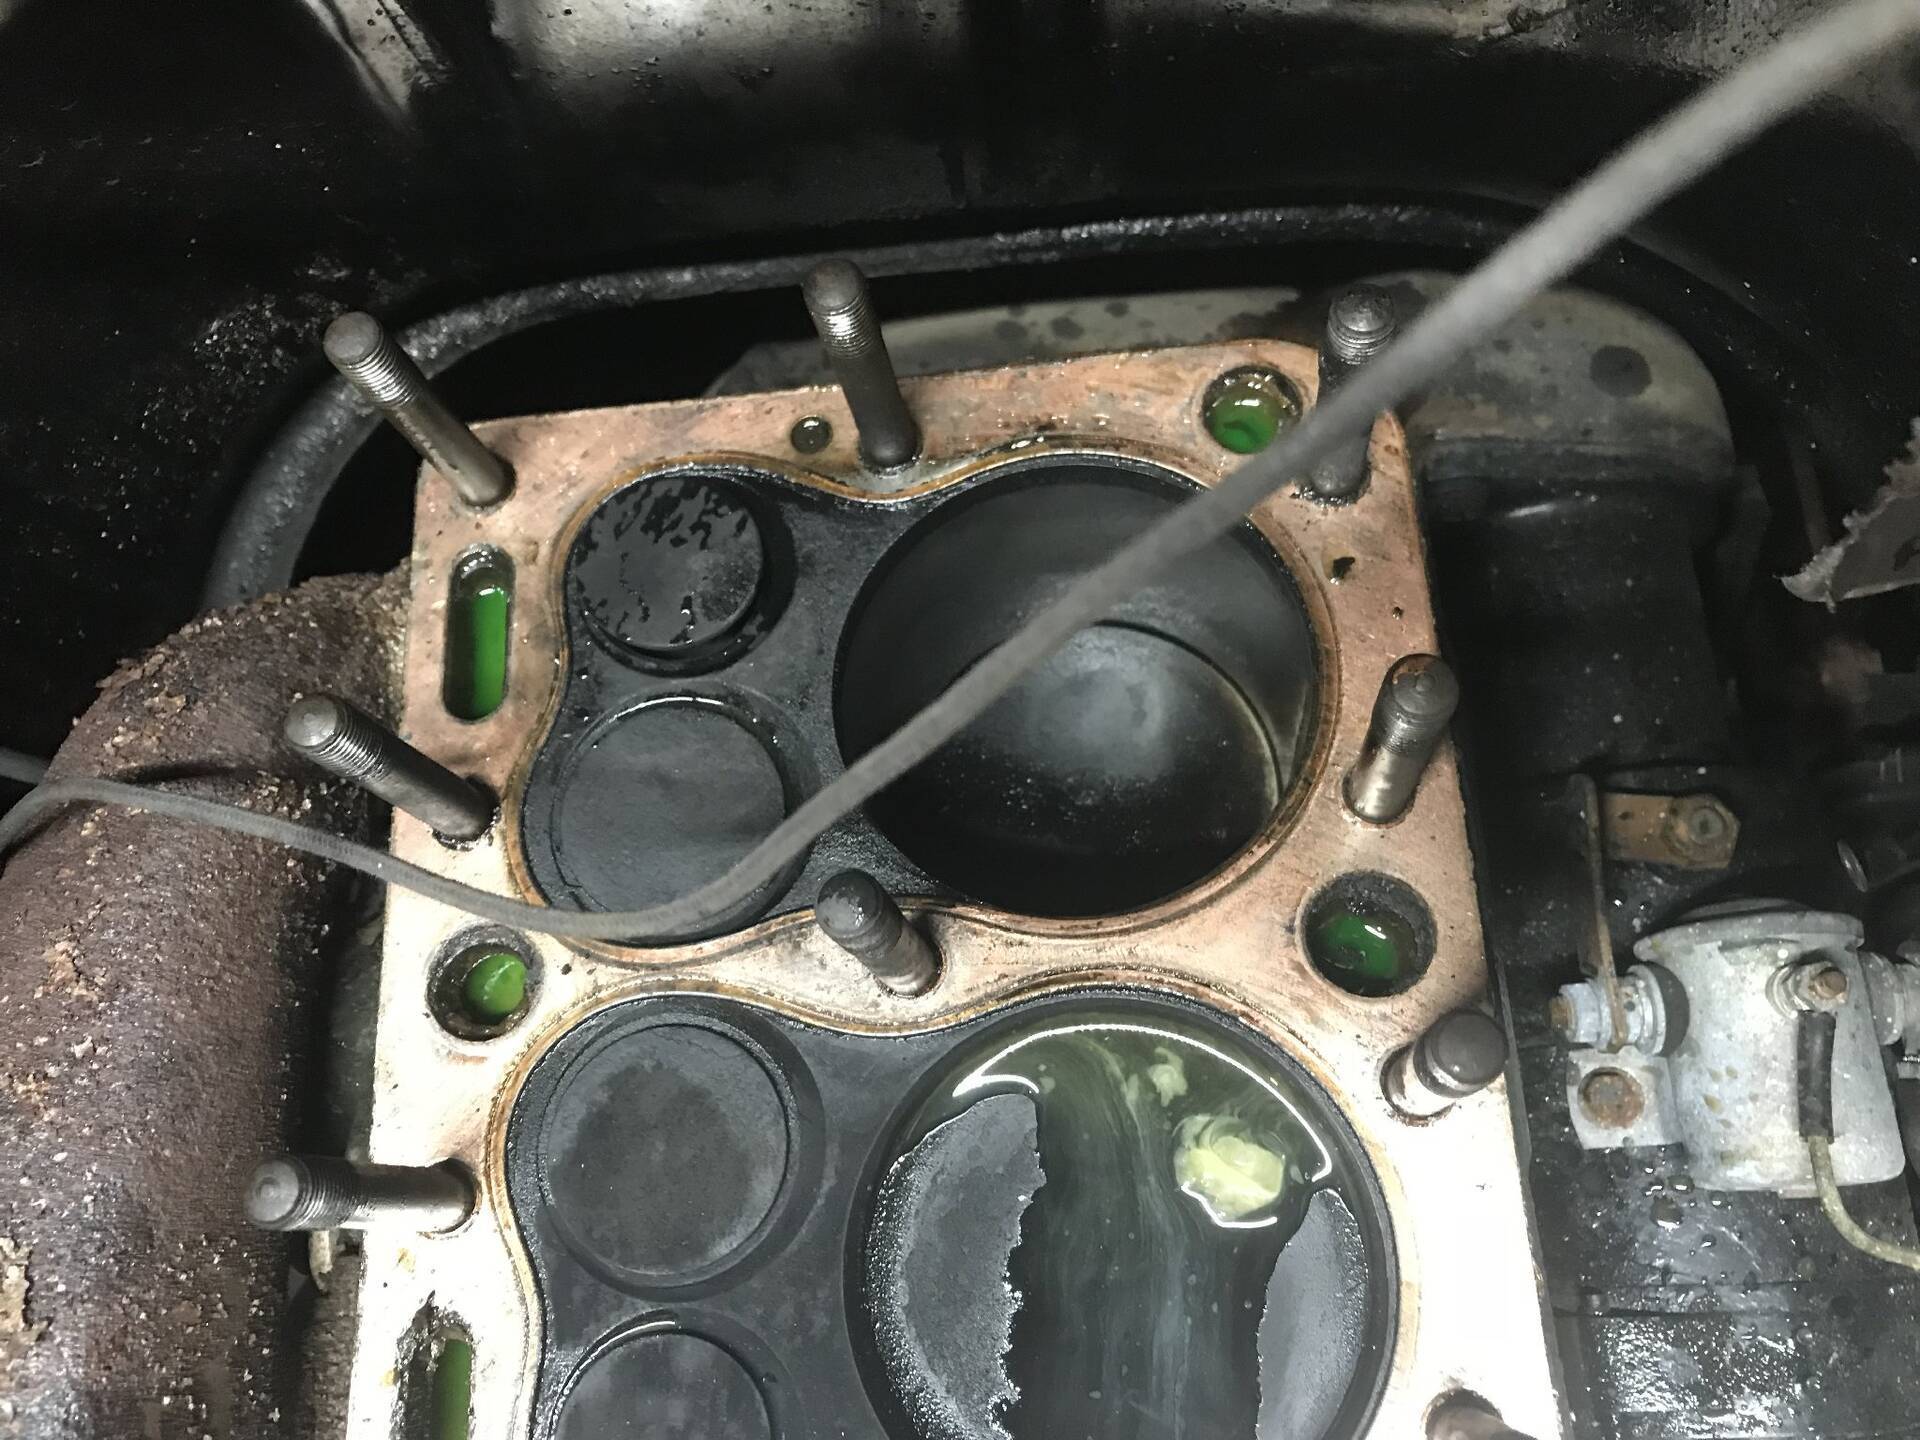
Posted on: 2018/11/9 13:33
|
|||
|
||||
|
Re: Proud New Owner of a 49 Packard Club Sedan
|
||||
|---|---|---|---|---|
|
Just can't stay away
|
It looks like the engine is hanging from the head!
Posted on: 2018/10/22 10:15
|
|||
|
||||
|
Re: Proud New Owner of a 49 Packard Club Sedan
|
||||
|---|---|---|---|---|
|
Just can't stay away
|
I was afraid of that. They make the engine look very dressy, but they'll have to go.
Posted on: 2018/10/22 10:14
|
|||
|
||||
|
Re: Proud New Owner of a 49 Packard Club Sedan
|
||||
|---|---|---|---|---|
|
Just can't stay away
|
Project Update! The Overdrive is fully operational! I had the shop raise the brake pedal height, because my car has the "padded" gigantor accelerator option, and my foot would hit the accelerator when braking, a heart stopping moment each time. Also, I went to take a look at the under fender ducts, and the lug nuts were STUCK. My son and I bent a four way and they did not budge, so I had the shop take them off and put them back on.
The bad news is that a compression test shows that No. 3 cylinder has but 36 lbs of compression. I have looked into the cylinder and the piston is black towards the exhaust valve. Whether its a valve, piston, or something else, the head is going to have to come off. My car has chrome acorn nuts as head bolts. Were these a Packard option, or are they aftermarket? I'll need to know so I can replace them. I plan to get the acorns off, then blast the studs with PB and let them soak for a while before lifting. I've got the good metal putty knives already for the effort. It looks to me like I have to remove the intake/exhaust manifold to get to that side of the head, so I'll soak those fasteners, too, beforehand. Any other tips/pitfalls to look out for?
Posted on: 2018/10/19 9:23
|
|||
|
||||


