|
Re: 1938 39 SUPER 8 CLUB SEDAN BARN FIND
|
||||
|---|---|---|---|---|
|
Home away from home

|
Here's what NADA has on values.
Attach file:  (91.95 KB) (91.95 KB)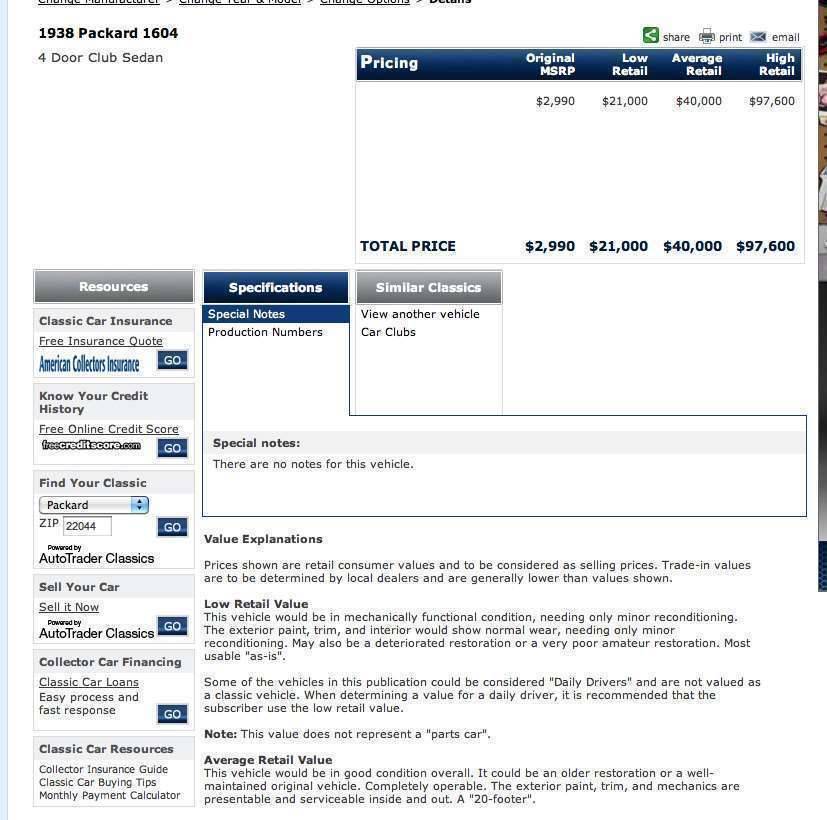
Posted on: 2012/8/23 12:59
|
|||
|
||||
|
Re: 1940 Brake Adjustment
|
||||
|---|---|---|---|---|
|
Home away from home
|
After being horrified to think I have been driving around with a pound of grease all over my left front brakes, and having to clean it up, I decided to spring for those costly but most correct seals... $22 each less my AAA discount and no Oregon tax.
Why wouldn't my brakes pull the car to the right, I wonder? There are so many Packard firsts. Early ABS? Another incentive was I could pick them up at noon to slow the Donald Duck pinwheels in my eyes after he told me he had them in stock. And I have a bearing driver now. So, can't wait to get home.
Posted on: 2012/8/14 19:06
|
|||
|
||||
|
Re: Is this color correct?
|
||||
|---|---|---|---|---|
|
Home away from home
|
Lots of two-tone blue then as well. Light and dark combo. Looks very 41 (or/and 42?)
Posted on: 2012/8/14 16:42
|
|||
|
||||
|
Re: 1940 Brake Adjustment
|
||||
|---|---|---|---|---|
|
Home away from home
|
Per NAPA, the 18149 seals I had in the car are off on the inside diameter by a tenth or a hundredth, so no wonder. This number is for International trucks.
West's 17523 is still off on the outside diameter (both had the same outside diameter) and width, but correct for the inside diameter, so I ordered those, have to come from Seattle, but will be in tomorrow morning. They are $11-something each. Packard Spec is O D 2.734 +/- .002 I D 1.750 Width = 31/64 (.484) See 17523 specs below. Both sides held for a long while with the wrong seals, but all it took was some wearing to cause the one side to leak, plus a good dose of wheel bearing grease when we repacked the bearing a few months ago. The right front was fine. I also bought a 2" socket on sale to tap them back in. A bearing driver kit is about $50. I considered it. I've always been glad when I have a rarely used, specialized tool to do the job right, so maybe I'll buy a kit later. And I bought a wheel bearing packer where you put the bearing between a couple cones and pump grease through a fitting. WHOOPS, edit: JD, The specs of 17599 are closer than 17523 because the width is spot on. So now I'll call NAPA and see if they have those. Then I can start working. EDIT 2: And the beat goes on. According to NAPA the width will not make any difference. He has the 17599 in stock, too ... but they are more than double the price, $22 each. He also found a bearing driver for $30 that does several sizes, so I think I will use the savings of that. UNLESS ... Attach file: (38.46 KB) (32.73 KB) (32.73 KB)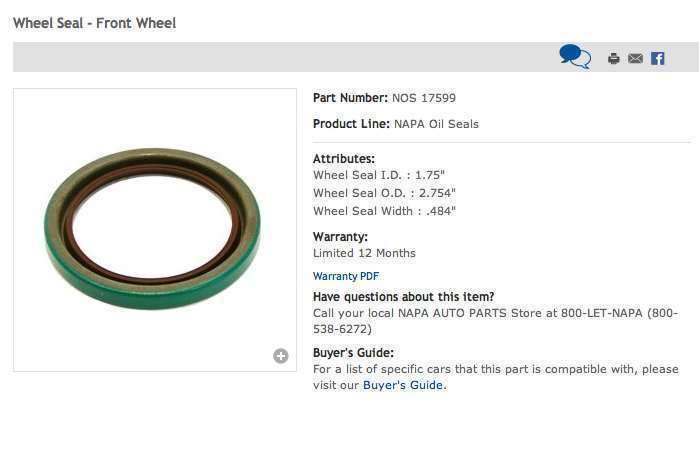
Posted on: 2012/8/14 11:46
|
|||
|
||||
|
Re: 1940 Brake Adjustment
|
||||
|---|---|---|---|---|
|
Home away from home
|
West-
In looking at Peterson's 1940 Packard post #37. the words say tap it from the inside of the hub to push the inner bearings out and the seal will drop out. But the picture shows someone tapping the outside of the hub. A similar confusion with post #38, if you tapped from the inside, how does the race stick up on the inside? I'm going to tap it from the inside and see what comes out. Napa needs a number. Once I see what comes out, I'll probably under the words and pictures better than I do now. I was mixing up the inside of the hub with the inside of the wheel. So to tap the inner wheel bearing out, I should set the wheel on the ground with the hub side up. Get a long tool and stick it down into the hub and start tapping around the edges. Let me tell you, I don't relish tapping on a bearing. My sockets are too big or too small to slip inside and line up with the bearing. But I won't be tapping from the inside of the wheel. edit2 The inner bearing and seals are out. It was easy as instructed. I used the handle of my hammer, so tapping with wood on the bearing. Reduced risk of damage. The Packard part # for the seal for 1803 is 316756 (supercedes 302680). The seals installed have a stamped number of 18149...CR...USA. The dimensions should be Outer Diam = 2.734 +/- .002 Inner Diam = 1.750 Width = 31/64 So tomorrow we'll see what NAPA turns up. Joe
Posted on: 2012/8/13 22:39
|
|||
|
||||
|
Re: Wade's Workshop
|
||||
|---|---|---|---|---|
|
Home away from home
|
Mal,
I think what you have is the filler tube for a late-1940 or later, and the cap from a 39-early 40. The short filler tube, which I have on my car, doesn't provide as much ventilation as the longer one. And the cap was changed, too, to provide more ventilation in late 1940 or maybe later on 356s. Then the fan tube was added to blow more air that way. I'm keeping my short tube and filler cap because it is correct for my early 40. But I have the longer one and updated cap as well. I think the filler tube should be green, btw. And your blog is the greatest. Restorers here have not learned that sharing their challenges and techniques actually builds great credibility and appreciation of their skills. It takes time to keep a blog, take pix, and share. But one result is tremendous goodwill toward your shop, and confidence in the value of the work you do there. What you're doing is entertaining all right, but also educational. My Duchess blog is all about one car's misfortune to have ended up in the hands of a clueless mechanic. But one car doesn't have the variety of problems, though it may seem that way sometimes, that Wade tackles there. The pictures and explanations are well done. Both Packard clubs stopped restoration assistance in their publications long ago. That fact makes packardinfo.com even more valuable, much thanks to you and the usual suspects. Joe Attach file: (23.02 KB)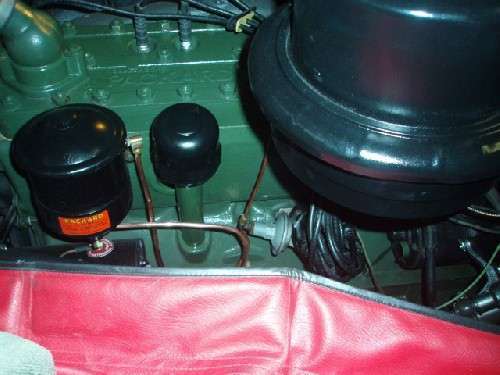 (34.29 KB) (34.29 KB)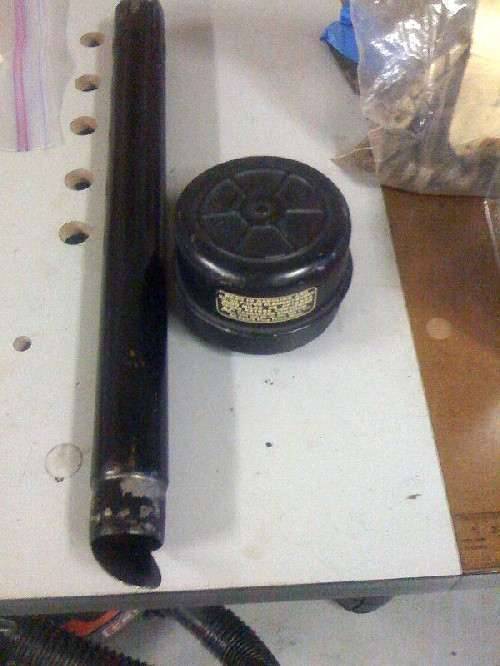
Posted on: 2012/8/13 16:58
|
|||
|
||||
|
Re: 1940 Brake Adjustment
|
||||
|---|---|---|---|---|
|
Home away from home
|
Turned drums and brake shoes have only 3,000 miles. I'm not leaking fluid anywhere.
I will use all this help to get the brakes adjusted and that wheel sealed. Tim, I'll check the position of the untouched eccentric on the left front wheel, to approx how it should be on the right one, and readjust. Vaughn said the right front, which is out of adjustment, is riding on a ridge, so when I apply the brakes it feels like the pedal is high, but when I put pressure on the pedal, it drops down to where the pedal was normally before I tried to adjust (monkeyed with) it. The shoe is finding its rightful place. And thanks for the cues. We probably slapped too much grease on that bearing, but the seal could be old. I'll get a Handi-Packer. I have wheel bearing grease. Depending on availability and cost, I prob should replace both front seals together. West, The photos are a big help. I'll look for a seal driver, too. Imagine, a couple years ago when I started in earnest, I just had a pair of pliers. We'll see how it goes tonight. Also running the test on my vacuum advance. Then on to the carburetor. Take your hands off your eyes.
Posted on: 2012/8/13 14:29
|
|||
|
||||
|
Re: 1940 Brake Adjustment
|
||||
|---|---|---|---|---|
|
Home away from home
|
It appears I need a wheel seal assembly. It looks like it is pressed into the hub, so I may not be able to do that. I've wiped it all down. I'll get some brake cleaner and clean it all, reassemble and get it to a brake place next week. An old brake place.
Posted on: 2012/8/12 13:44
|
|||
|
||||
|
1940 Brake Adjustment
|
||||
|---|---|---|---|---|
|
Home away from home
|
I tried to adjust the brakes, starting with the right front wheel. I turned the start the wrong way, then turned it back until the wheel locked, then backed it off until the wheel turned freely, per manual.
But when I went to measure the distance between the brake shoe and drum, should be .015 in., it was like 3/16 in. ... like .18. Puzzled, but thinking it has something to do with the eccentric, measured the clearance on the left front wheel, since I hadn't touched that. I rotated the inspection slot to the 5 o'clock position and stuck the .015 feeler gauge in. It came out greasy black. I hadn't touched the left wheel. How could it be messed up? I decided to pull the hub of the right wheel and have a look. Everything looks right, except the adjustment is tightened almost all the way, sucking the bottom of the shoes in toward each other. I decided to look at the left front wheel. There's grease everywhere. About 4 months ago, my son helped me pack the wheel bearings. He's knowledgeable mechanically, but he lives an hour away. The brakes have been fine since then, until only recently they felt like they needed adjusting. Perhaps I only needed to adjust the pedal. In applying the brakes, they never pulled to the right or left. I'm going to clean off the left wheel. Look at it as an investment. It took me 2 weeks to learn to do a basic tune-up, but I can do the entire thing now from replacing plugs and assembling/setting points, to timing. I won't have to ask about that issue again, knock on wood. Attach file: (198.85 KB) (104.36 KB) (104.36 KB)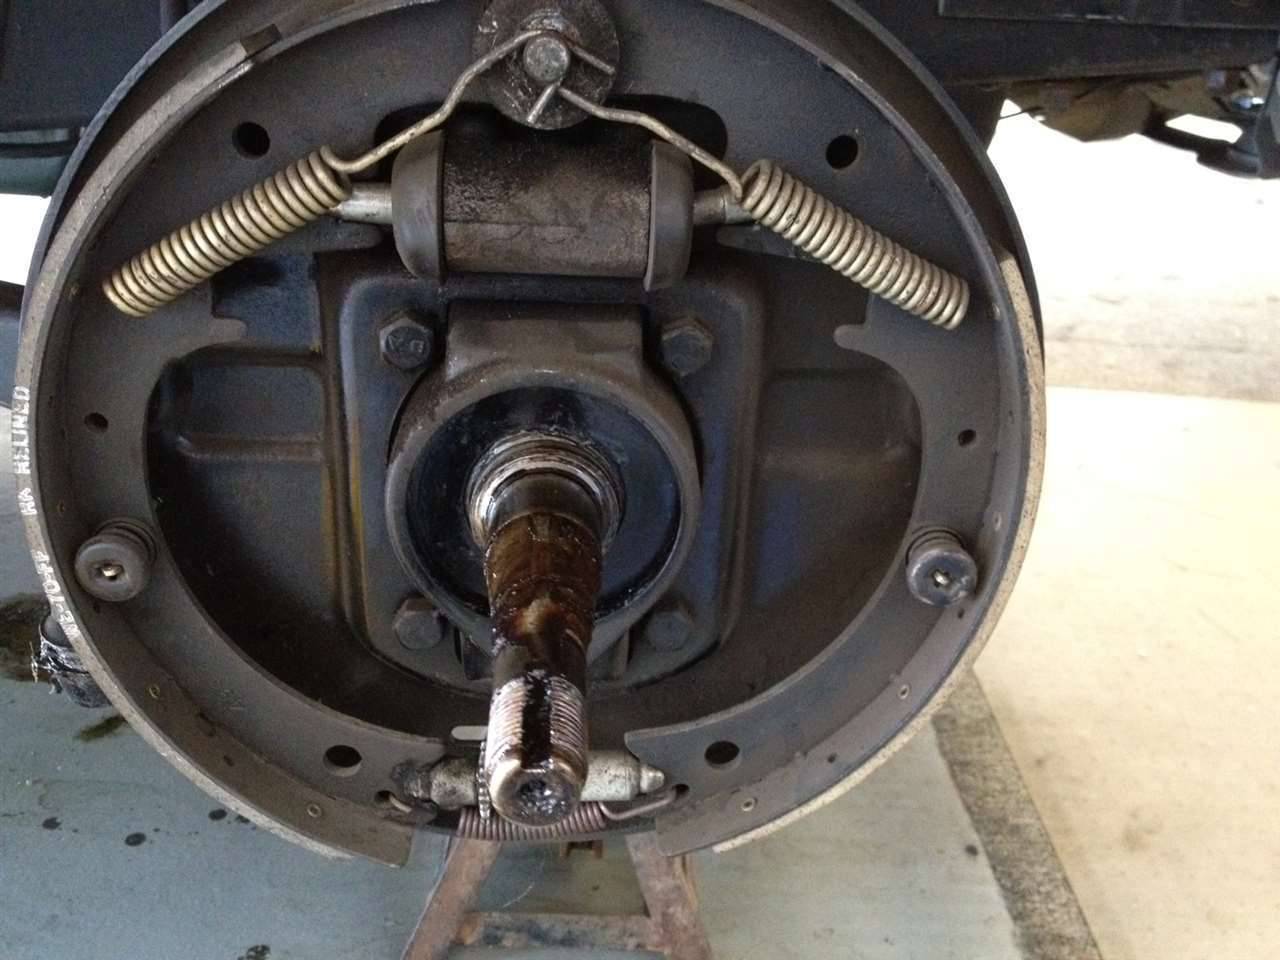 (125.76 KB) (125.76 KB)
Posted on: 2012/8/12 13:06
|
|||
|
||||
|
Re: connect a 6v timing light
|
||||
|---|---|---|---|---|
|
Home away from home
|
... spare battery. But I have a 6v timing light.
Drove to my friend Vaughn's and he made a couple little adjustments. Then we put the top down.
Posted on: 2012/8/11 16:32
|
|||
|
||||


