|
Re: Series 23 tire sizes?
|
||||
|---|---|---|---|---|
|
Home away from home
|
To be specific, when you get to the Model Info, select your specific model and the tire size is at the very bottom of the specifications.
Posted on: 2017/7/29 10:14
|
|||
|
||||
|
Re: Joe's '49 Club Sedan
|
||||
|---|---|---|---|---|
|
Home away from home
|
Packard Project Summary 2015 - Part 1
With most of the work on the chassis was completed, attention turned to the engine and transmission. The engine ran well and the transmission shifted fine but the overdrive was inoperative and there was a massive rear main oil leak and the clutch was slipping and chattering. I decided to go ahead and rebuild the engine. Once the transmission was removed, it was obvious why the clutch was malfunctioning. The oil from the engine caused the disk to slip and burn the surfaces of the flywheel and pressure plate. As well, there were broken springs in the pressure plate that contributed to the problems. A clutch shop in Tampa resurfaced the flywheel, completely rebuilt the pressure plate with all new springs and rebuilt the original disk with new friction material at a very reasonable cost. To work on the engine, I built an engine stand out a hoist and pieces of another traditional engine stand. There were 3 different front mounts for the engine stand so it could be worked on right side up, upside down or sideways. It is absolutely the heaviest thing I've ever worked on. The engine was in very good shape. It was disassembled and thoroughly cleaned and flushed. It got a new set of standard rings and rod and main bearings and gasket set from Egge. No machine work was necessary just the cylinders honed and valves ground. After reassembly, it was masked up, primed and painted. The transmission was inspected and was free of damage or worn-out parts. It was cleaned and flushed and reassembled. At this point, the engine and transmission were ready to go back in the chassis. Attach file:  (49.98 KB) (49.98 KB)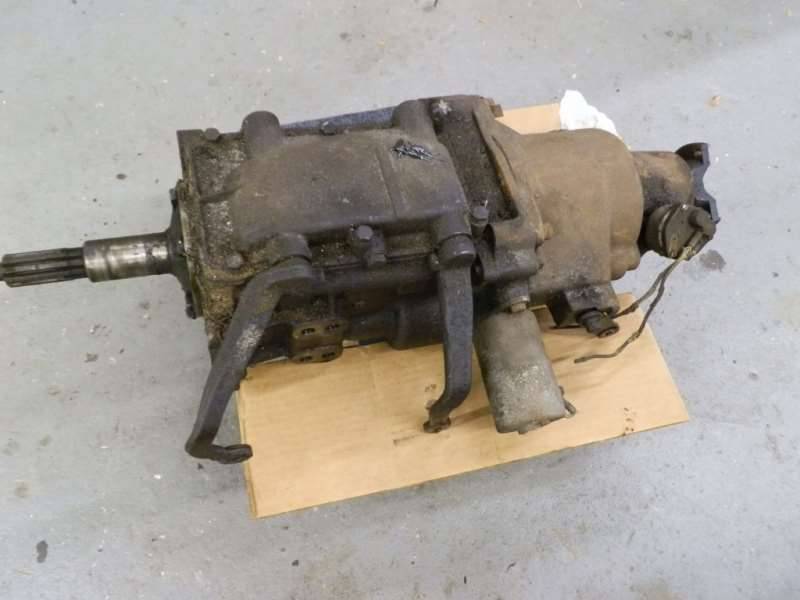 (56.17 KB) (56.17 KB)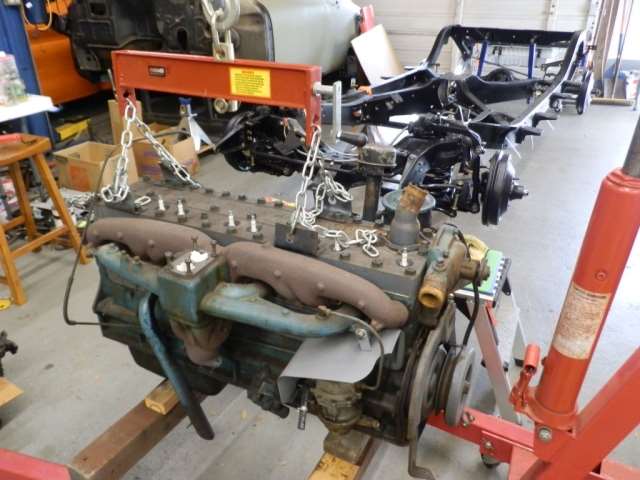 (42.20 KB) (42.20 KB)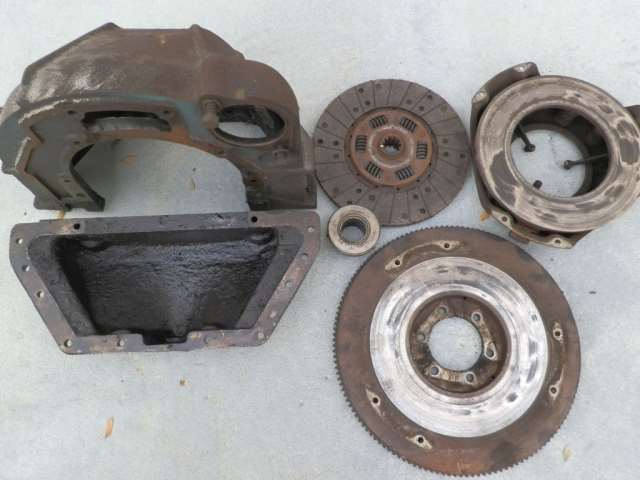 (40.17 KB) (40.17 KB)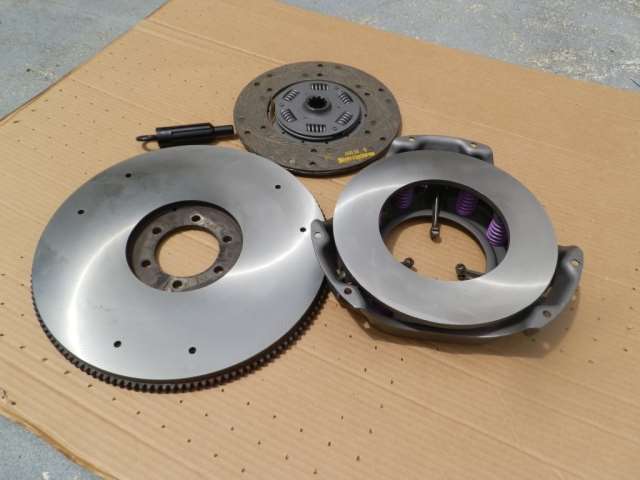 (44.21 KB) (44.21 KB)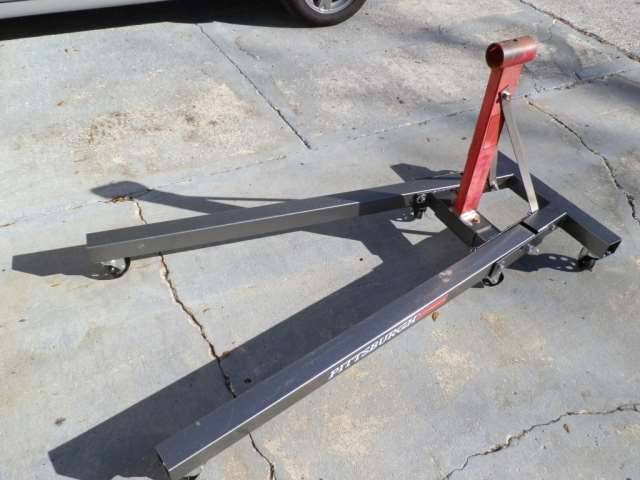 (42.18 KB) (42.18 KB)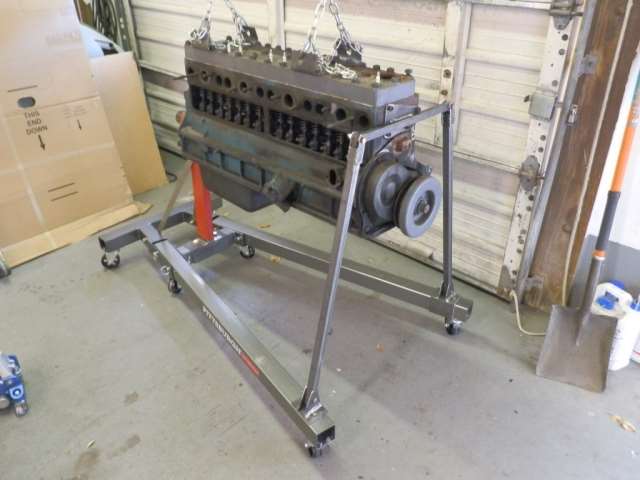 (57.35 KB) (57.35 KB) (48.41 KB) (48.41 KB)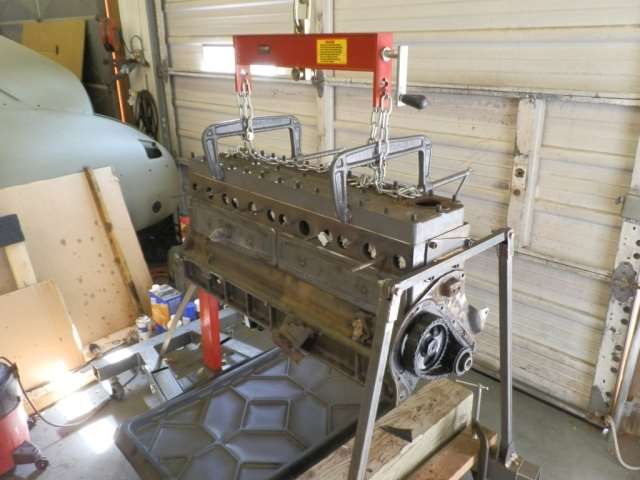 (40.79 KB) (40.79 KB) (52.94 KB) (52.94 KB)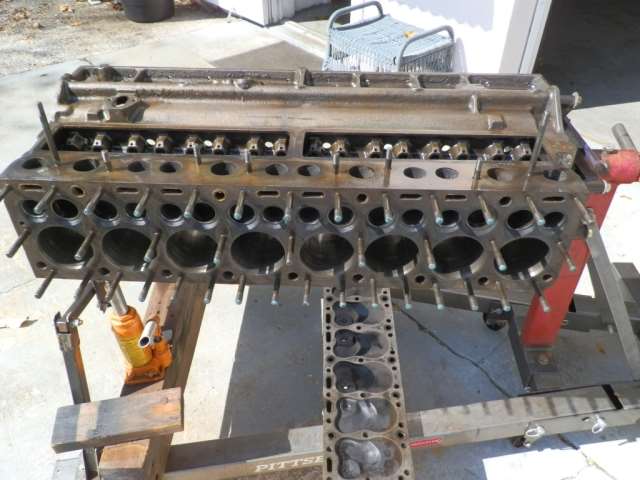 (48.66 KB) (48.66 KB) (51.18 KB) (51.18 KB)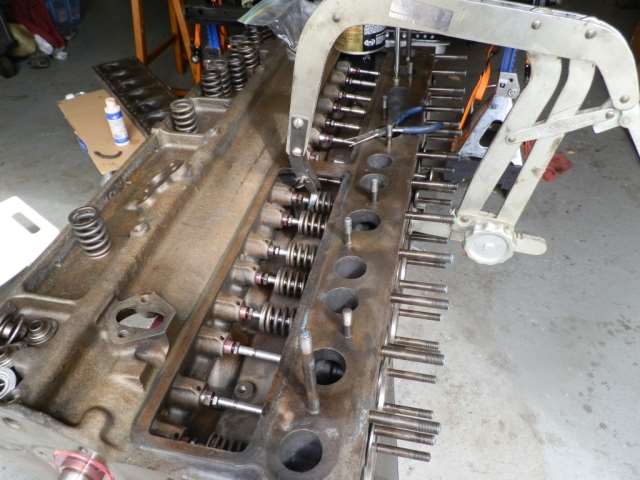 (46.53 KB) (46.53 KB)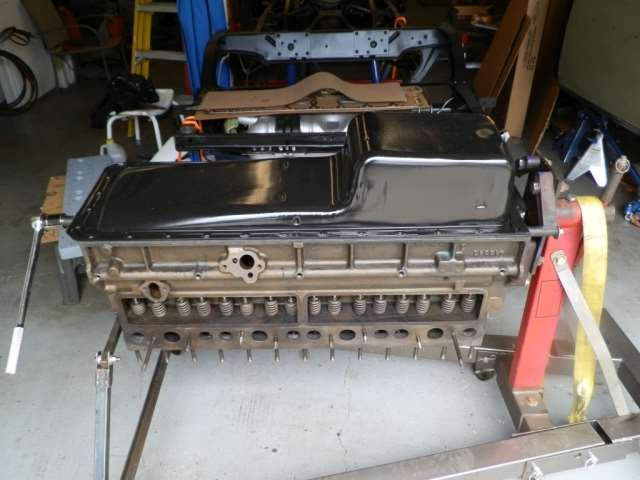 (48.53 KB) (48.53 KB)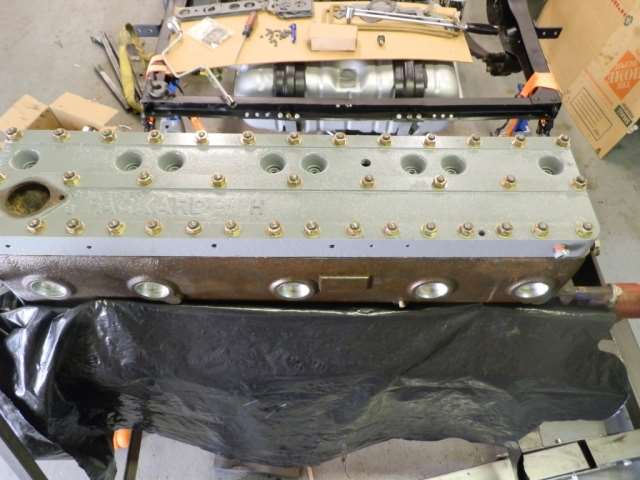 (49.29 KB) (49.29 KB)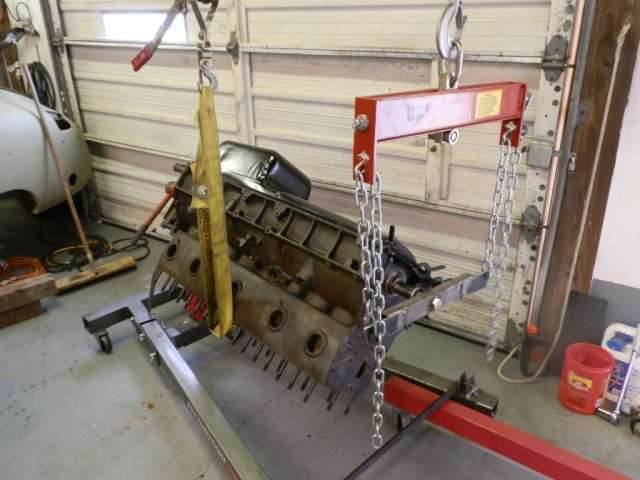 (45.30 KB) (45.30 KB)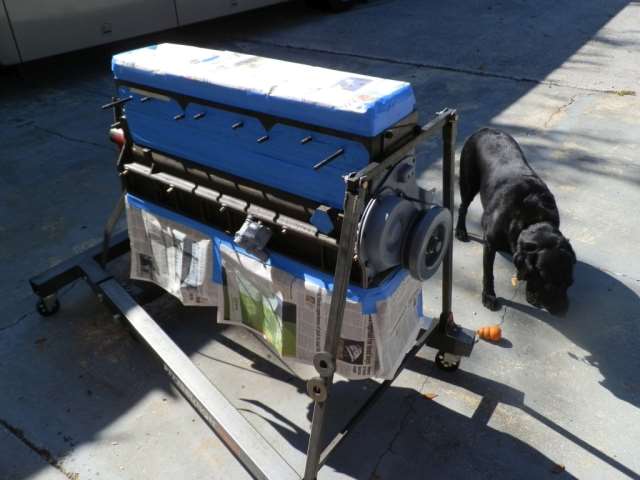 (48.76 KB) (48.76 KB) (44.76 KB) (44.76 KB)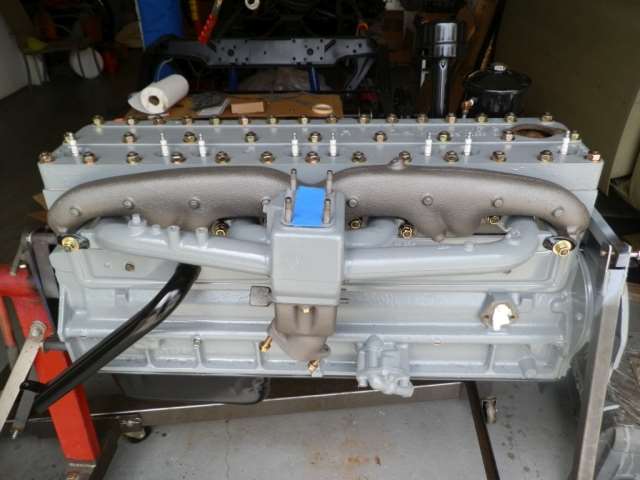 (53.59 KB) (53.59 KB)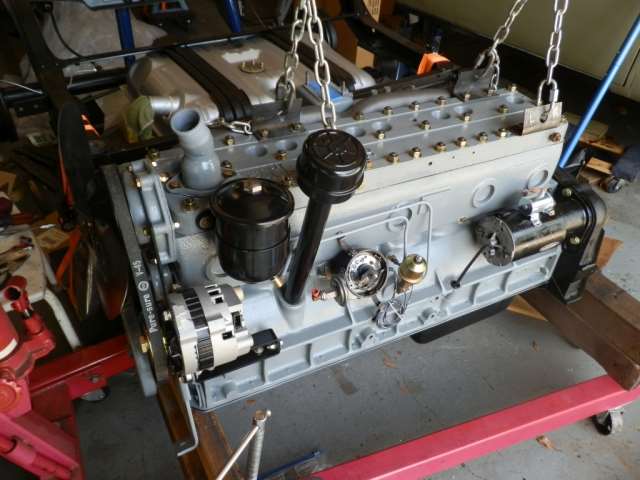 (41.63 KB) (41.63 KB)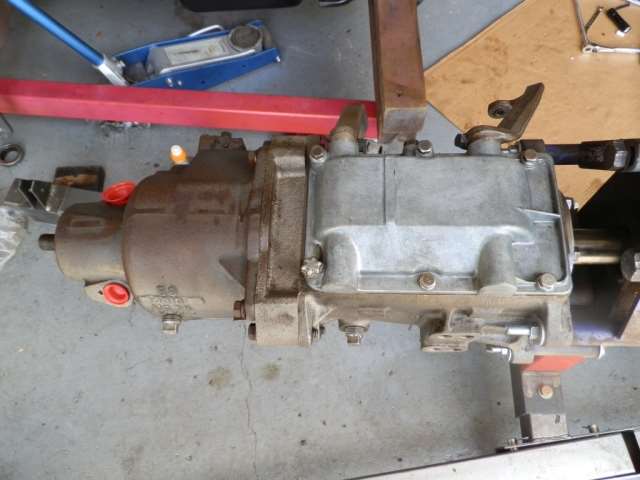
Posted on: 2017/7/28 11:06
|
|||
|
||||
|
Re: Joe's '49 Club Sedan
|
||||
|---|---|---|---|---|
|
Home away from home
|
Packard Project Summary 2014
Coming to my senses after New Year's, I put the upholstery aside and got back to the less desirable job of bodywork. The car was stripped of the grille trim and bumpers. The areas around the taillights were badly rusted and poorly repaired. Someone had slapped fiberglass cloth right a large rust hole! Peeled it out, cut out the bad section and welded in a patch, filled, sanded and primed. Rusted areas of the floor by the rockers cut out and patched. At this point, the worst rusted parts of the body were repaired and it was time to work on the rest of the pieces. The hood, front fenders and the body were prepped and primed. The body was unbolted, removed from the chassis, placed on a body dolly and put aside while the drivetrain and chassis were addressed. The engine and transmission were removed from the chassis and the chassis was stripped bare. It was cleaned, primed and painted. Likewise, all the chassis components, the front and rear suspension, pedals and linkages were also cleaned and painted. As the year came to a close, the reassembly of the chassis began and new fuel and brake lines were mocked up. Attach file: (73.10 KB)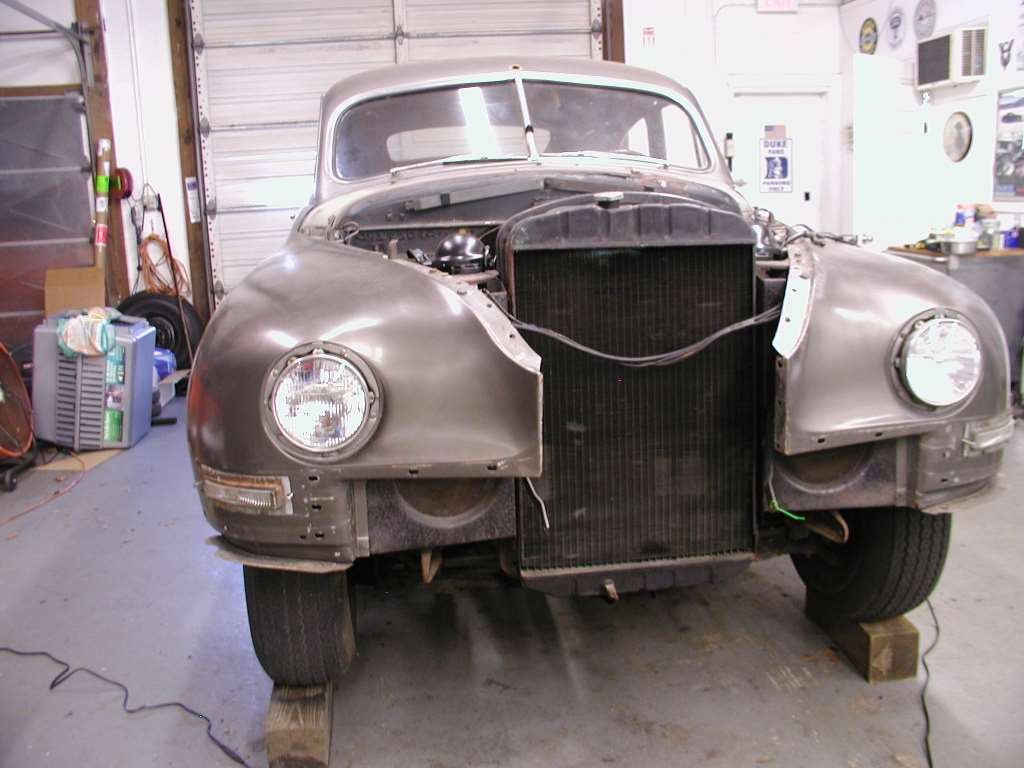 (59.53 KB) (59.53 KB) (70.12 KB) (70.12 KB) (55.48 KB) (55.48 KB) (88.17 KB) (88.17 KB)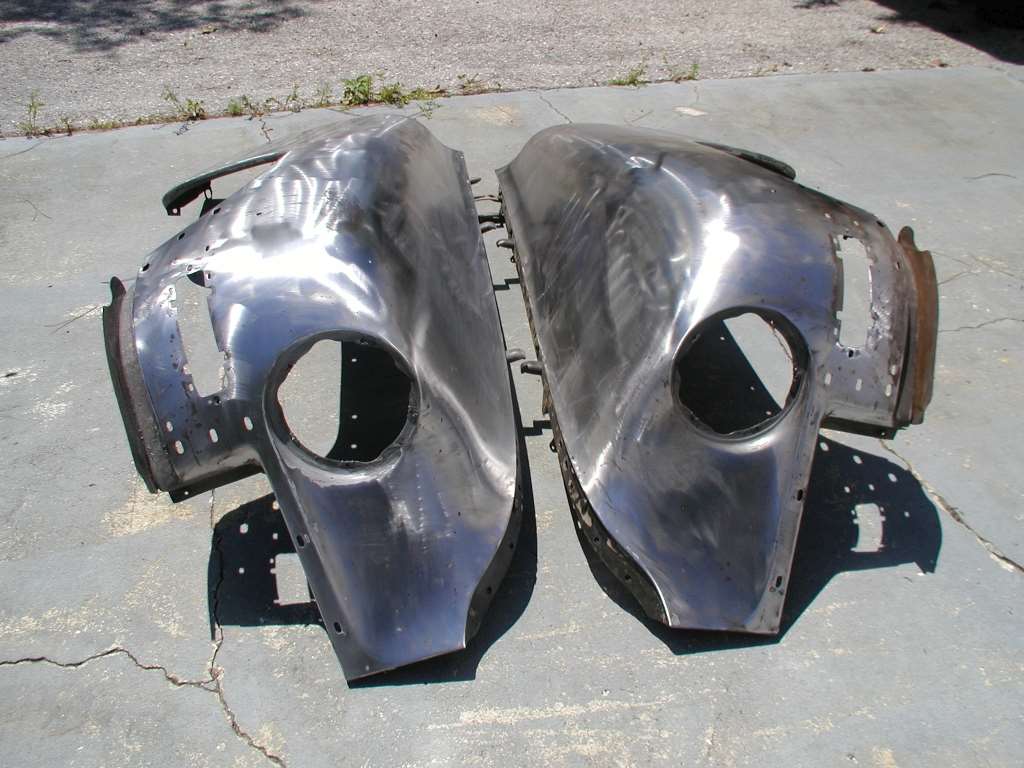 (73.24 KB) (73.24 KB)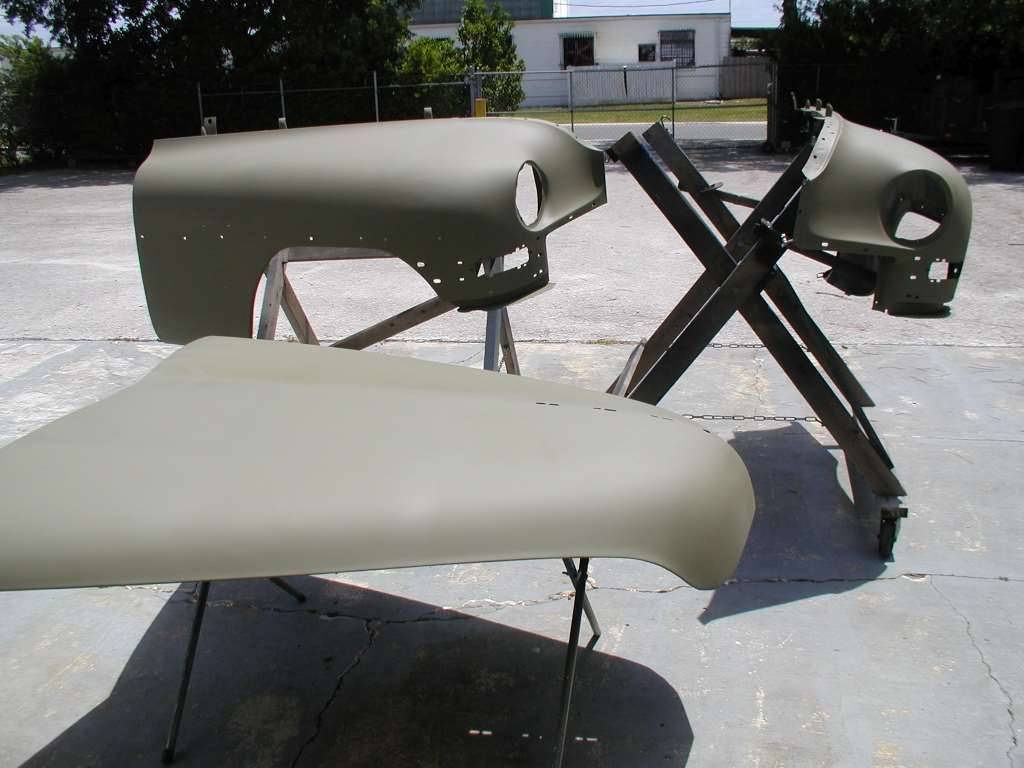 (50.79 KB) (50.79 KB) (59.86 KB) (59.86 KB)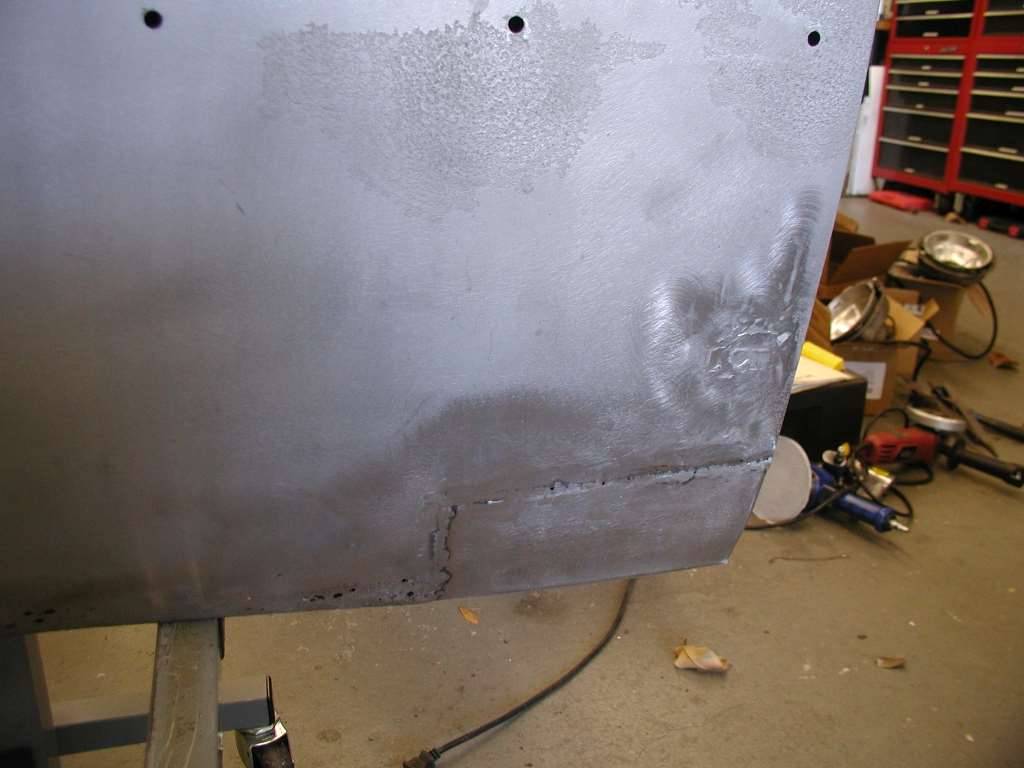 (51.83 KB) (51.83 KB) (83.80 KB) (83.80 KB)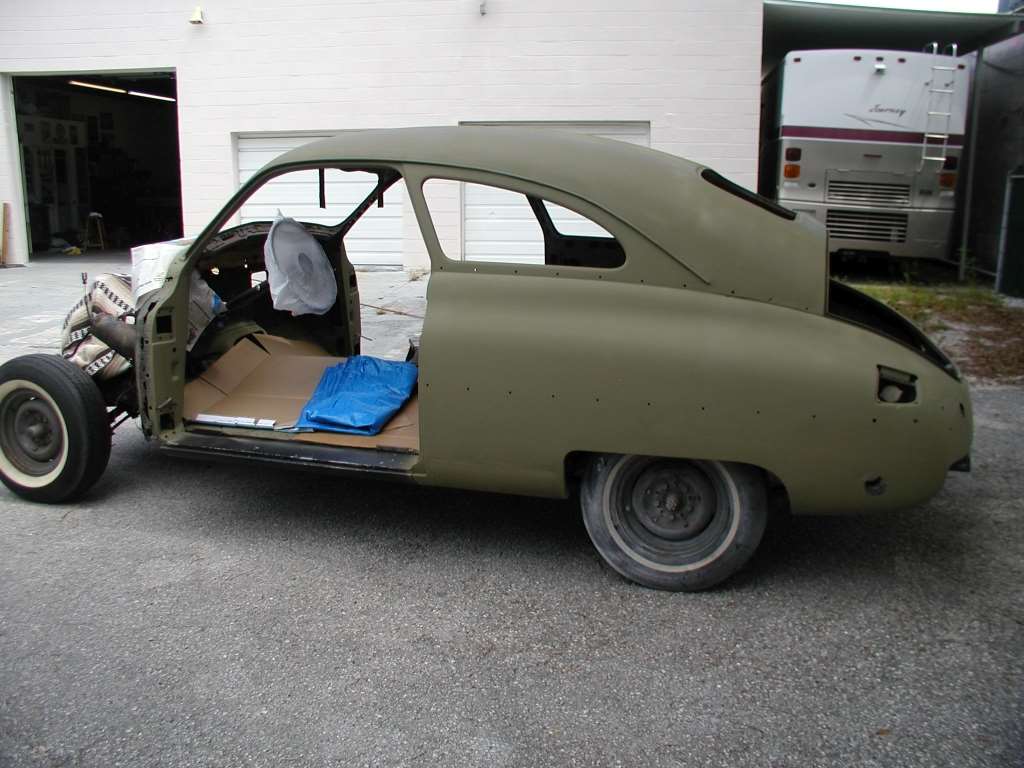 (57.35 KB) (57.35 KB)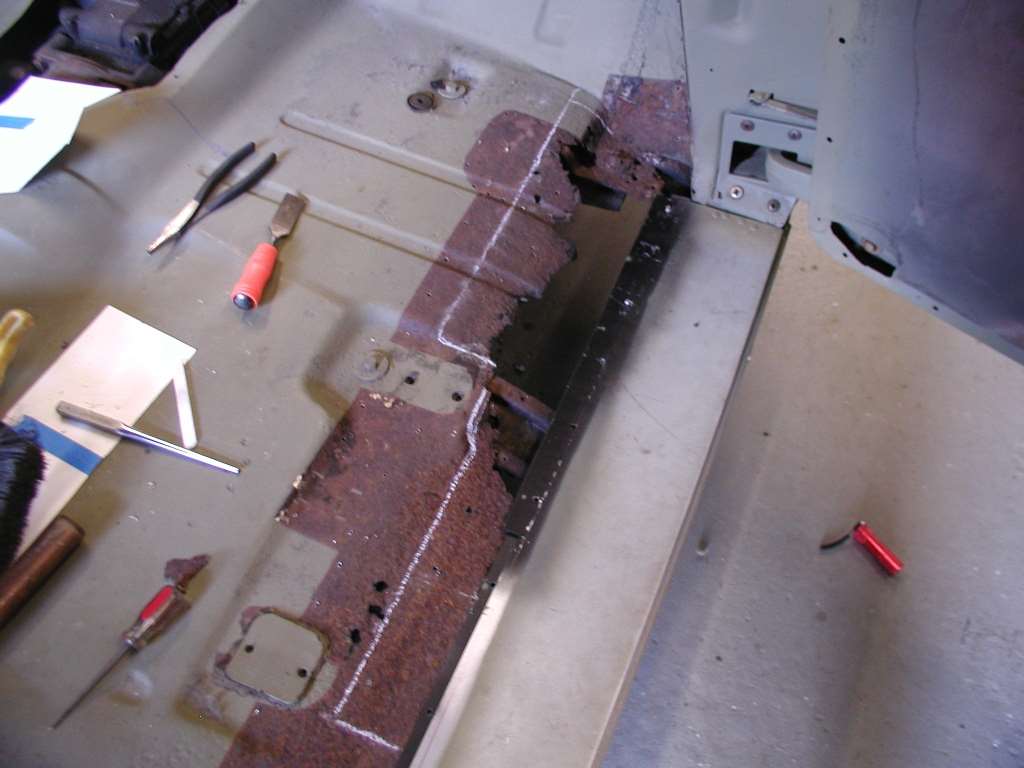 (63.67 KB) (63.67 KB)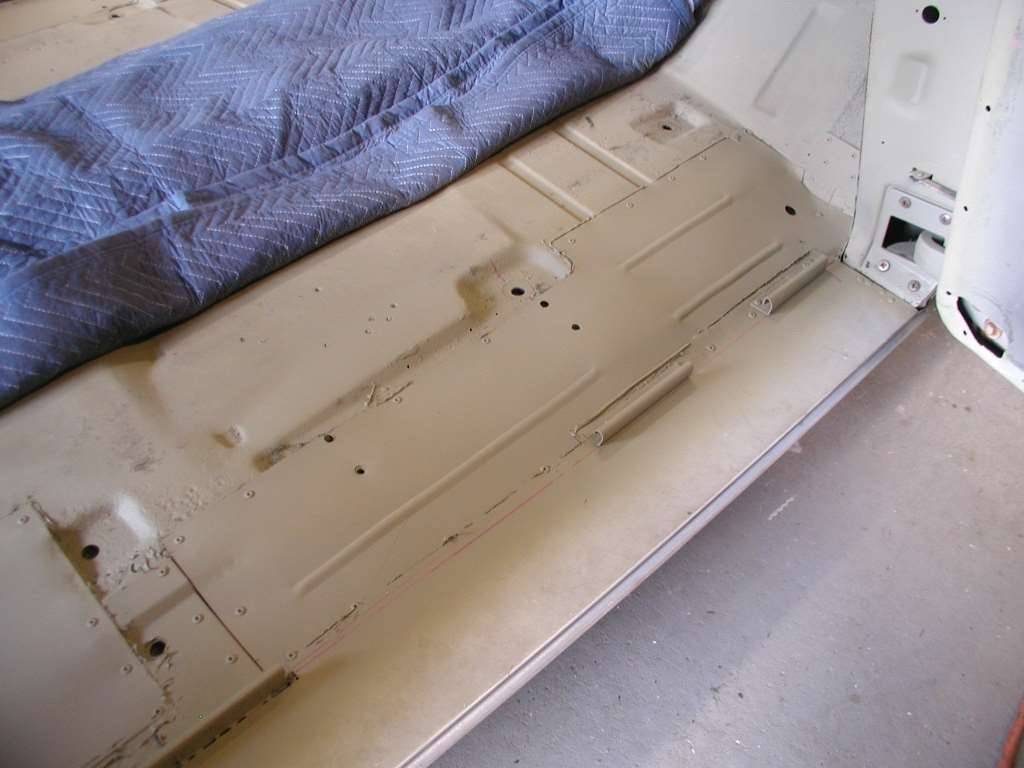 (90.62 KB) (90.62 KB)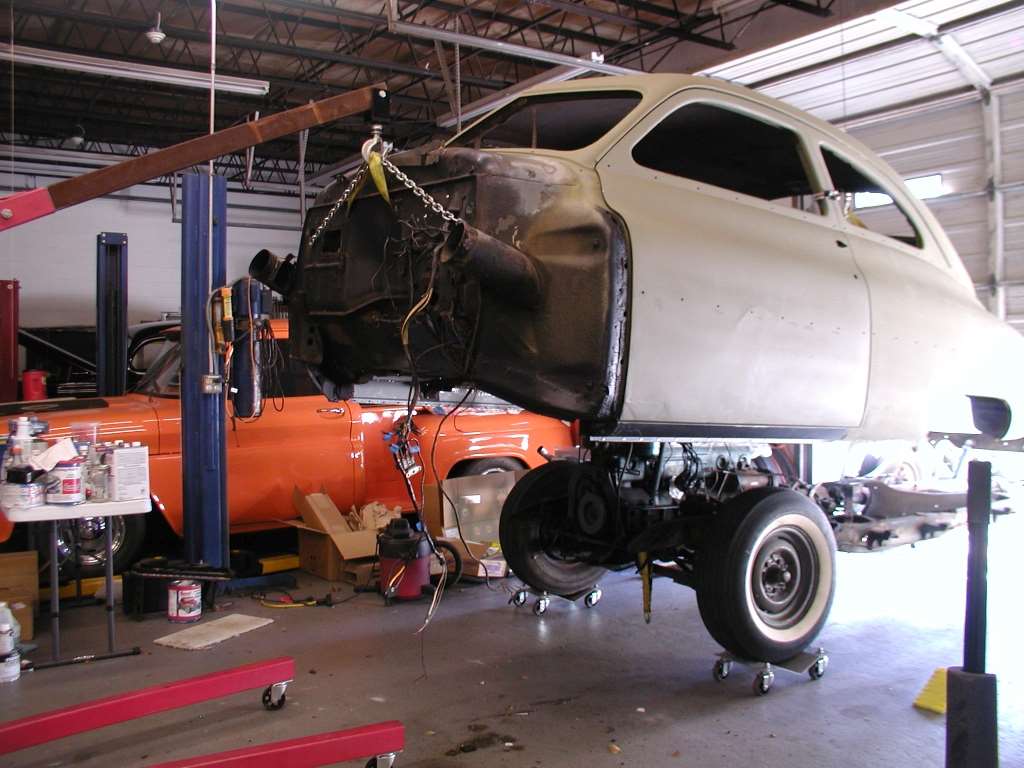 (103.91 KB) (103.91 KB) (102.90 KB) (102.90 KB)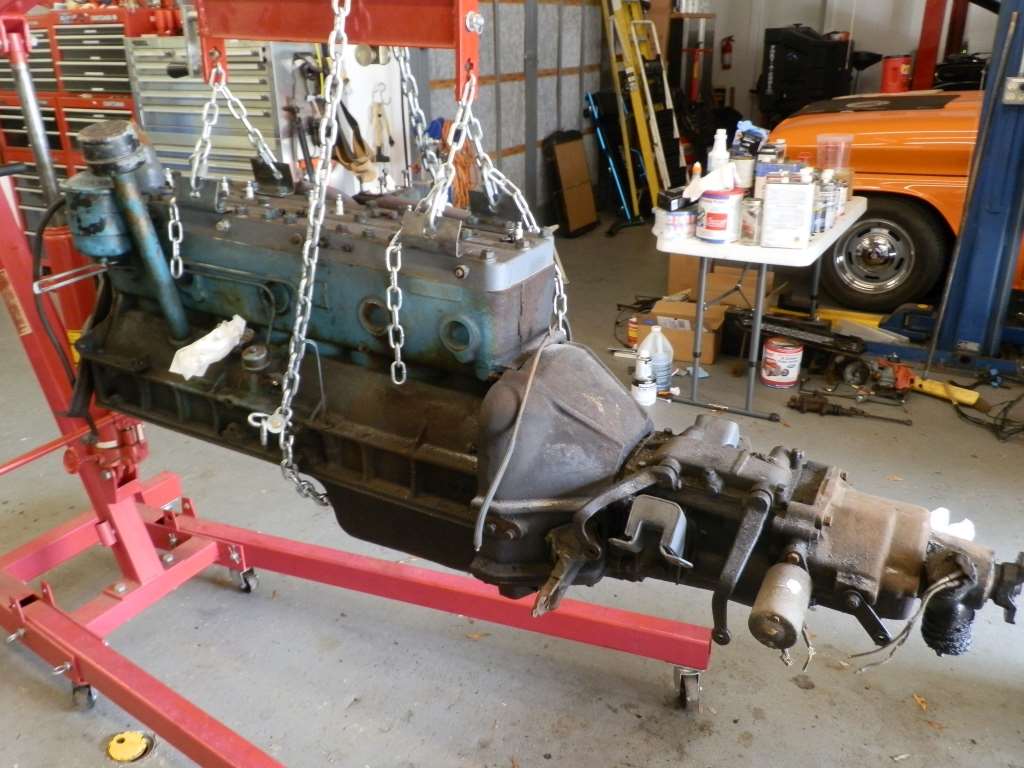 (88.51 KB) (88.51 KB) (96.58 KB) (96.58 KB)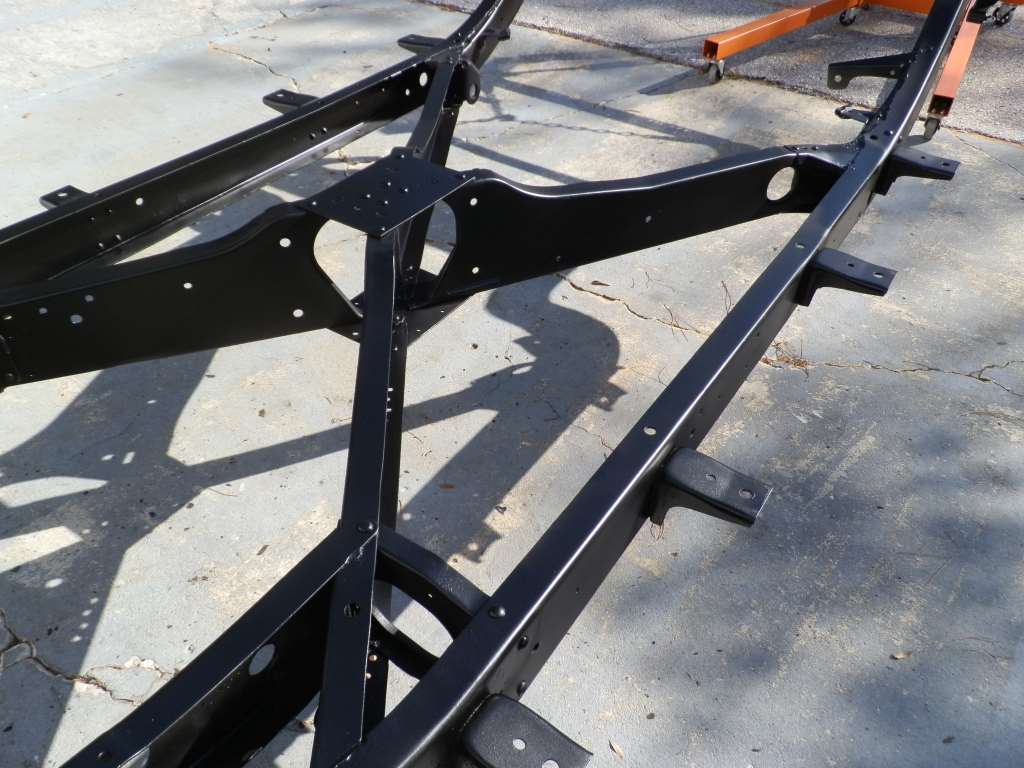 (104.87 KB) (104.87 KB)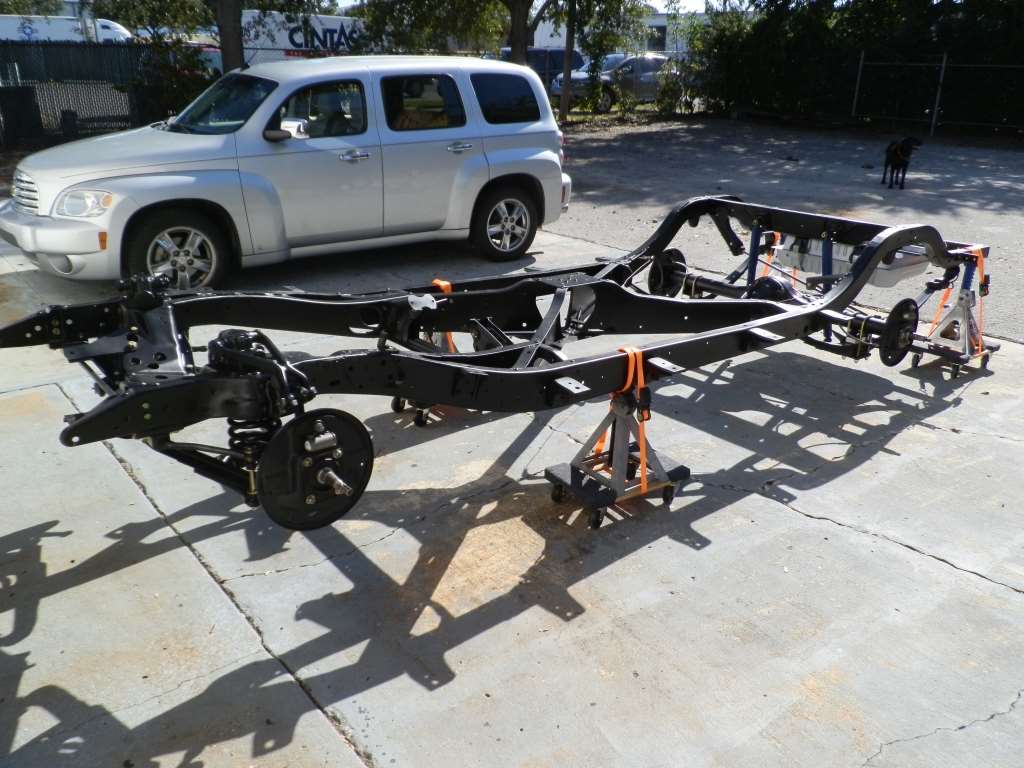 (100.27 KB) (100.27 KB)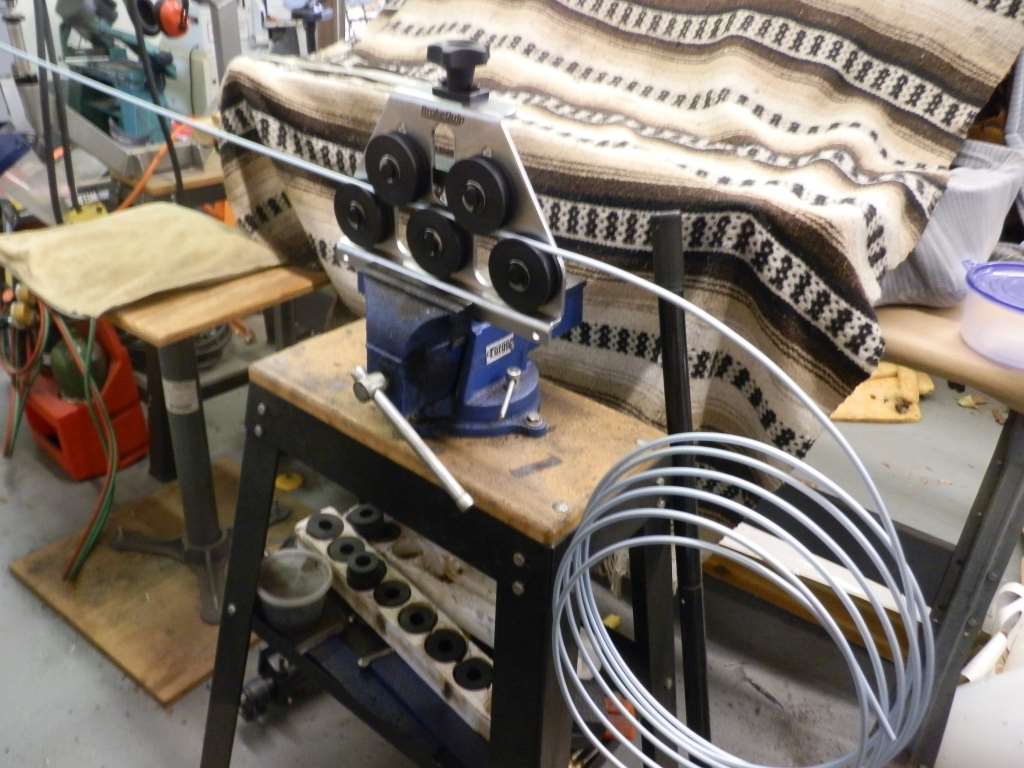 (86.83 KB) (86.83 KB)
Posted on: 2017/7/27 12:07
|
|||
|
||||
|
Re: Joe's '49 Club Sedan
|
||||
|---|---|---|---|---|
|
Home away from home
|
My '49 Packard project has been slowed down somewhat by the extreme heat here in Florida and a torn meniscus in my knee. I've been going through the thousands of pictures I've taken since this adventure began in 2013 and put together a summary of the progress of the project over the last 4 years.
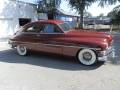
Packard Project Summary 2013 I purchased the car in May 2013 after seeing it sitting in a gas station in St. Petersburg, FL. The previous owner took it to the gas station to have the brakes worked on. The costs were getting out of control and he threw in the towel and put the car up for sale. The engine ran but the car was rusted badly. I was actually looking for an early 50s Mercury but when I saw this car I loved the design and thought it make a nice driver that would be different from the vast number of Fords and Chevys around. I knew it could never be a show car because every piece of chrome on the car with the exception of the bumpers was shot. Fortunately, sometime in the past, the front fenders and hood were replaced from a rust-free Series 22. The doors, rockers, quarters and trunk were badly rusted and that was the first task to repair. The trunk and rockers were replaced with new sheetmetal purchased on ebay. Patches were fabricated for the bottom of the doors and both quarter panels. The broken passenger window glass was replaced with a piece made by a local glass shop. The car was starting to look much better and my watching ebay for replacement parts was starting to pay off. I was able to replace all of the interior chrome and the entire front grille and associated trim from ebay at a reasonable price. At this point, I figured the car might have a brighter future than originally envisioned. I like to do upholstery, so for a change of pace, I rebuilt the front and rear door panels and started on a sewing a new headliner. So ended 2013. Attach file: (414.22 KB) (295.77 KB) (295.77 KB)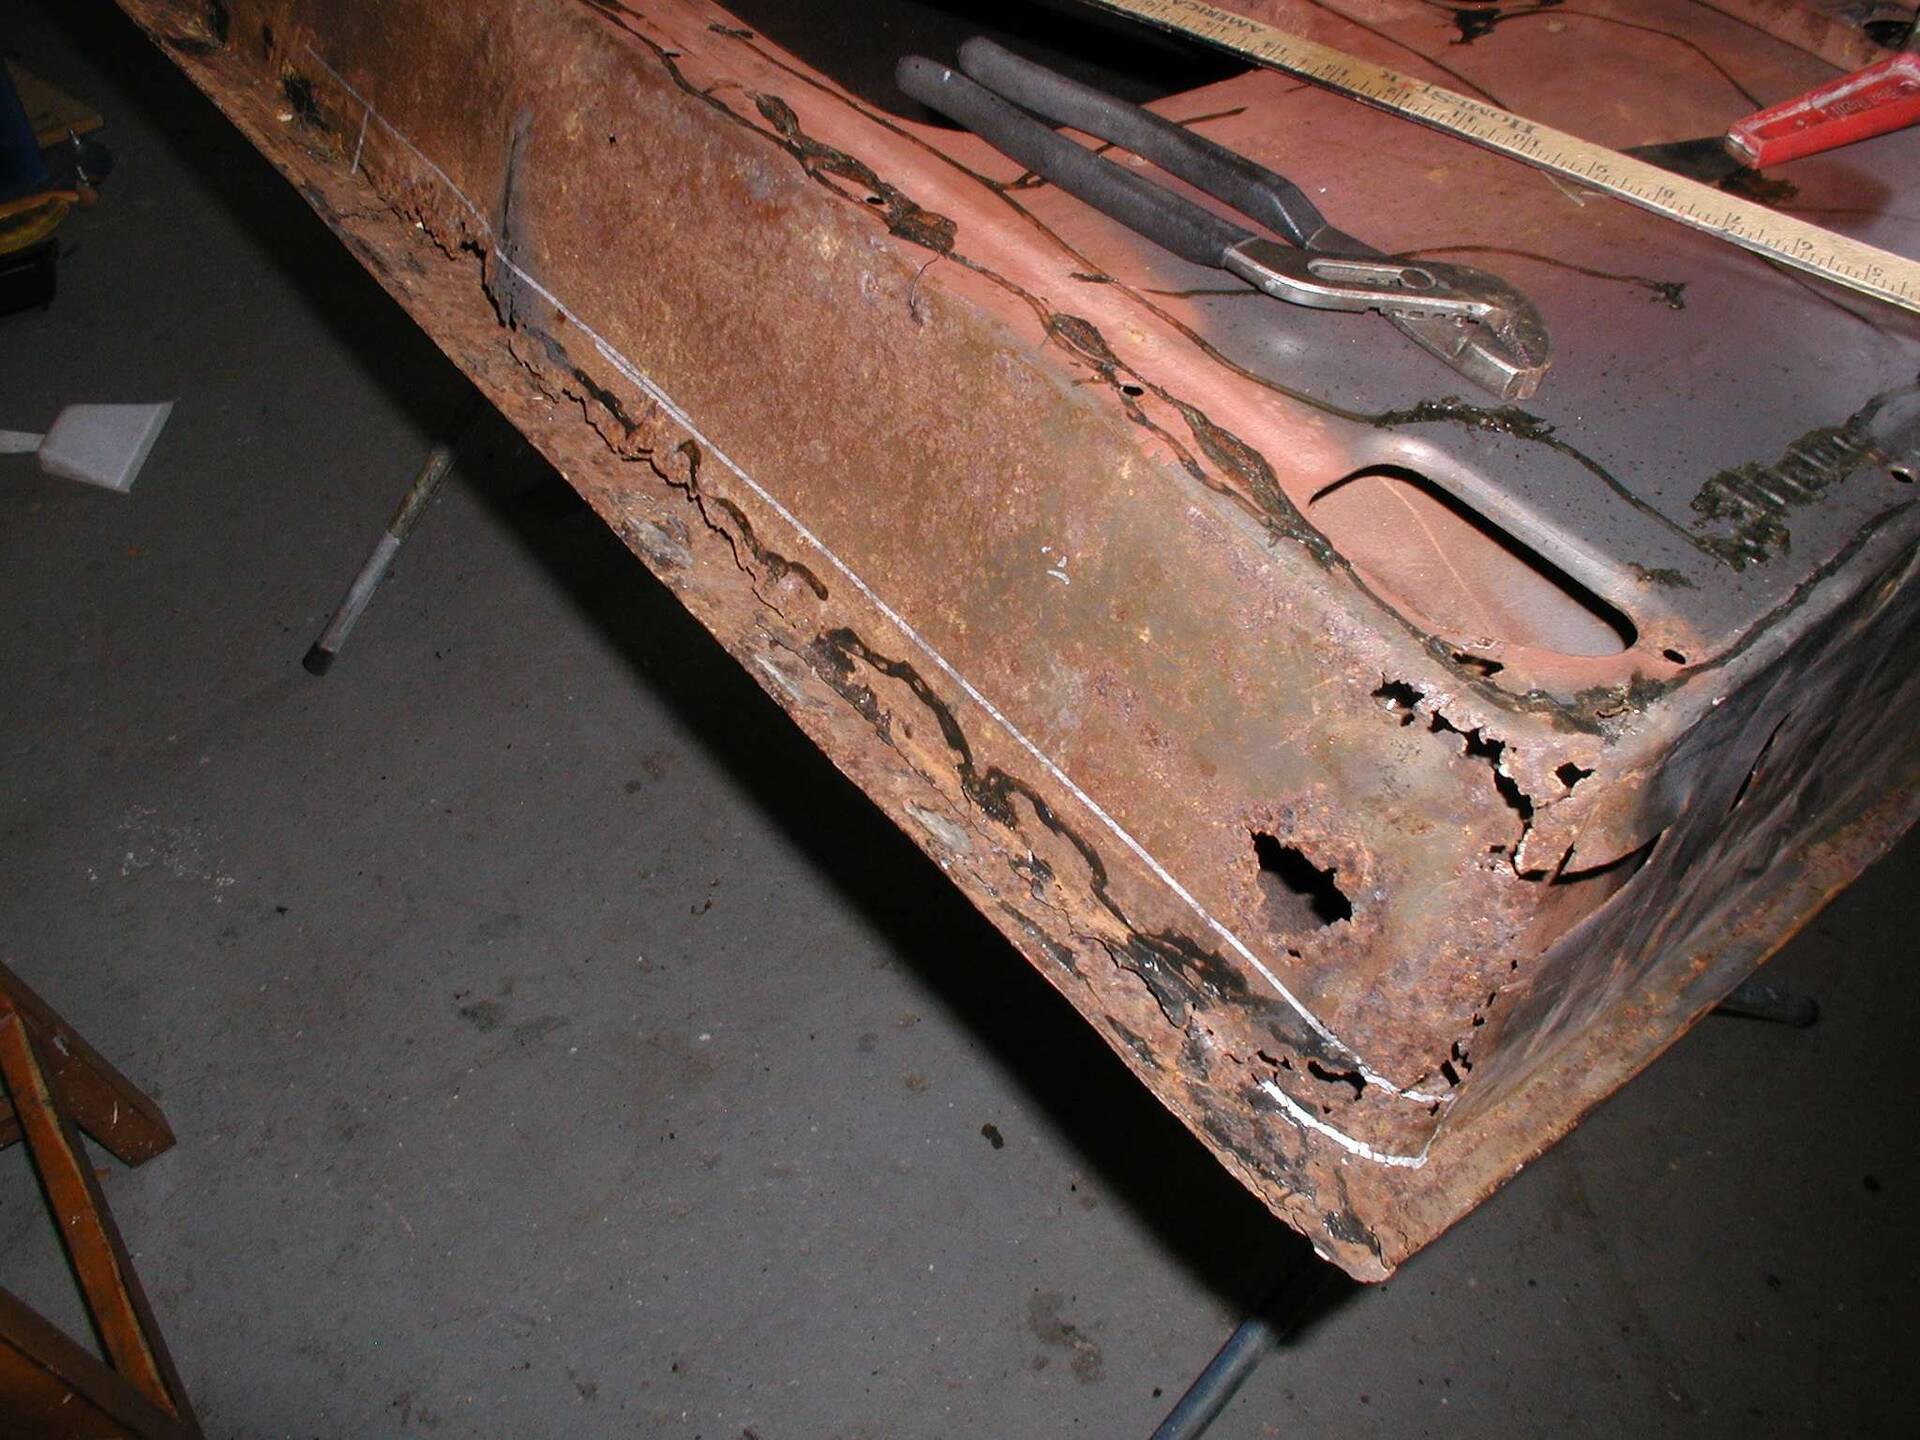 (243.85 KB) (243.85 KB)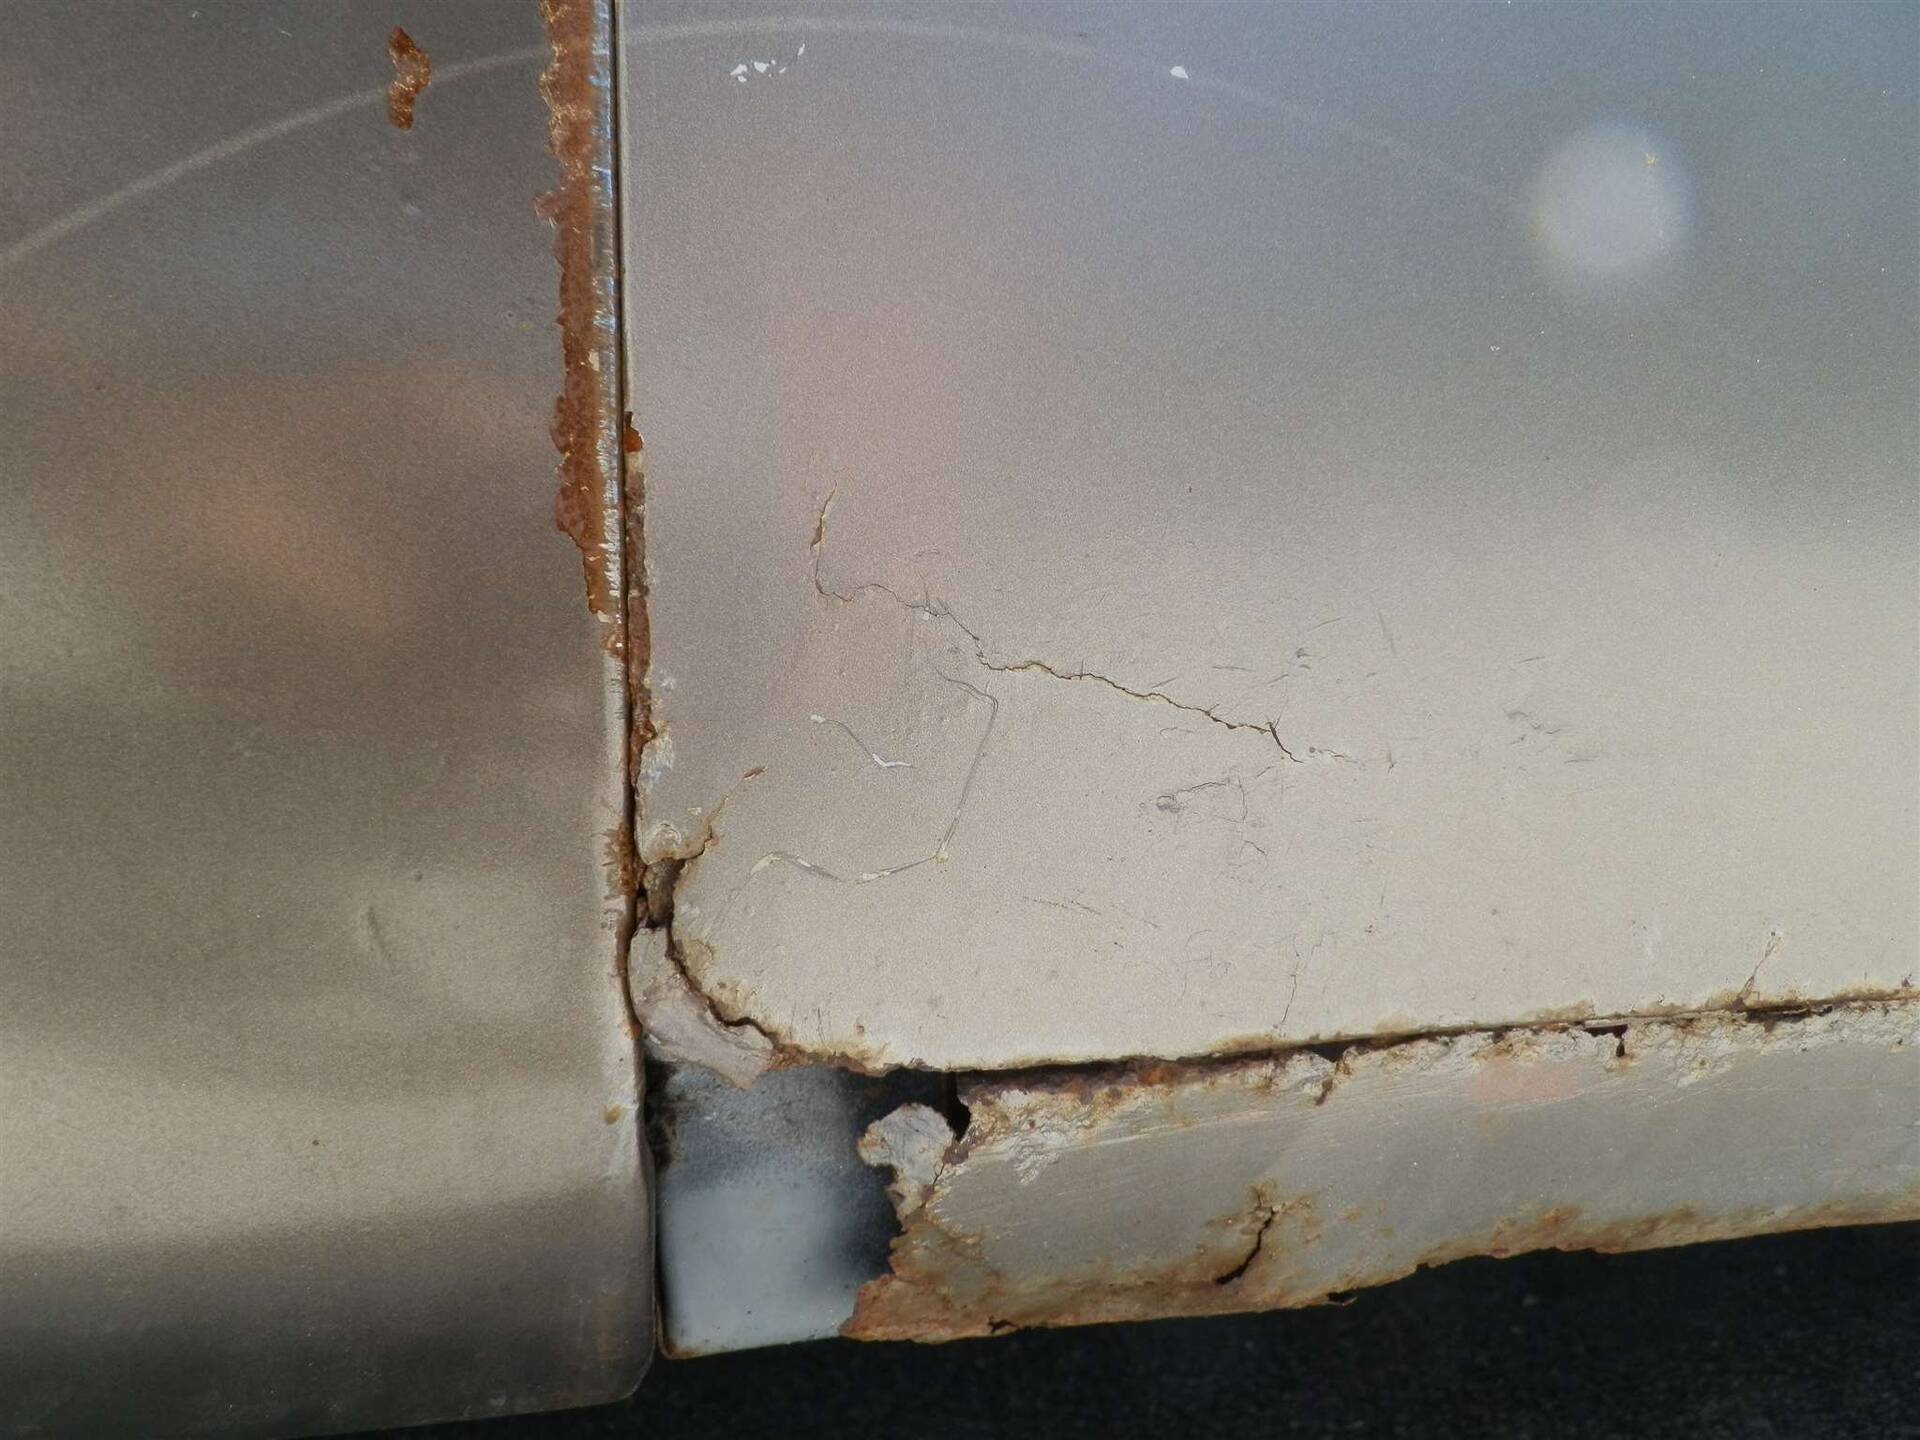 (284.56 KB) (284.56 KB)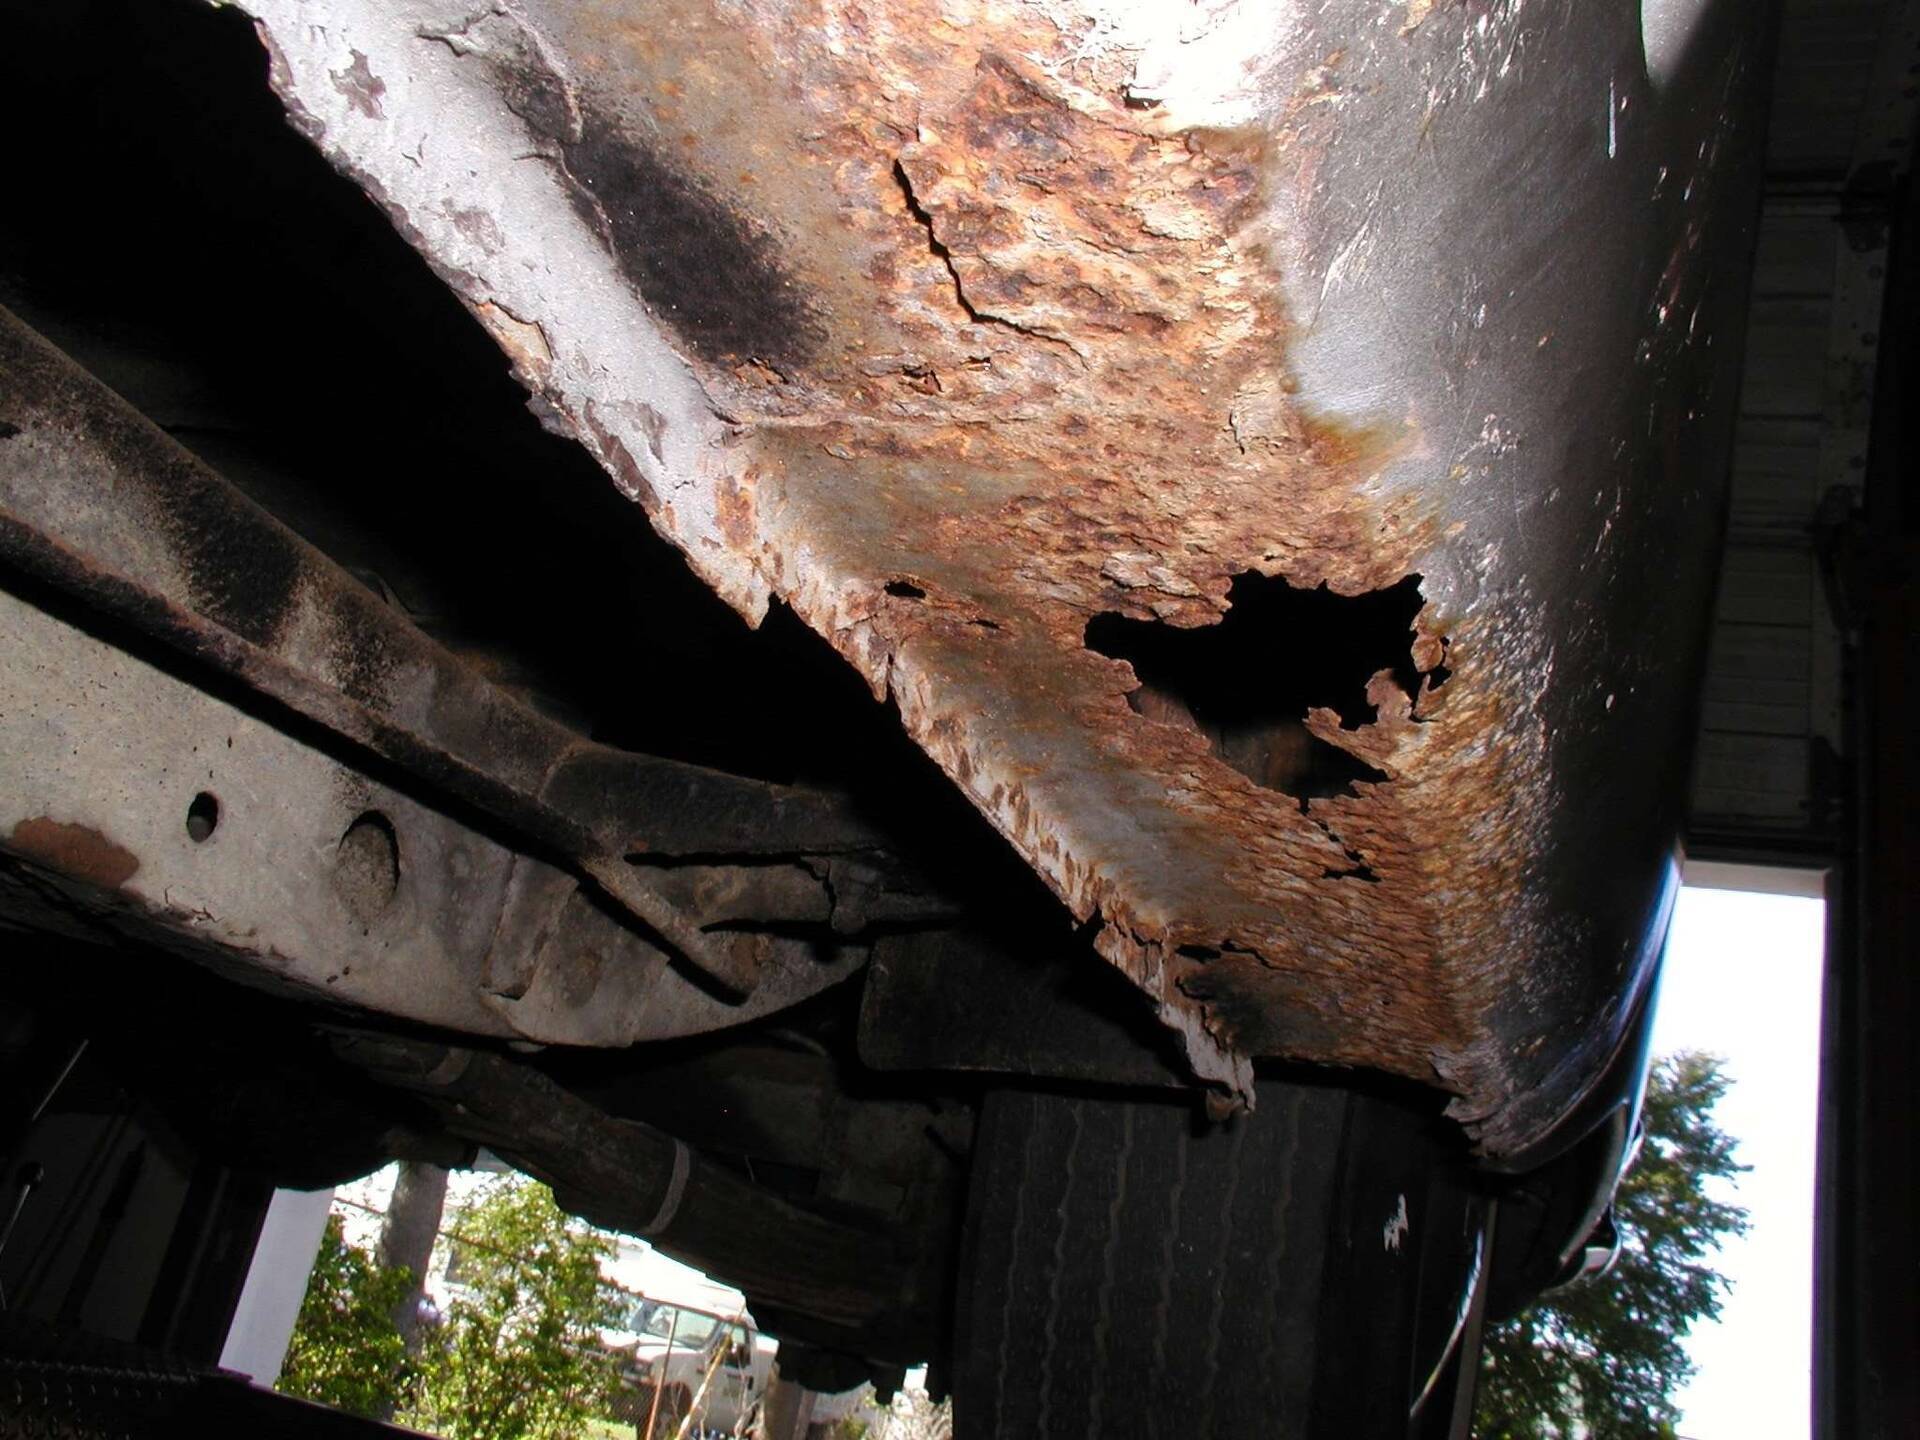 (294.96 KB) (294.96 KB)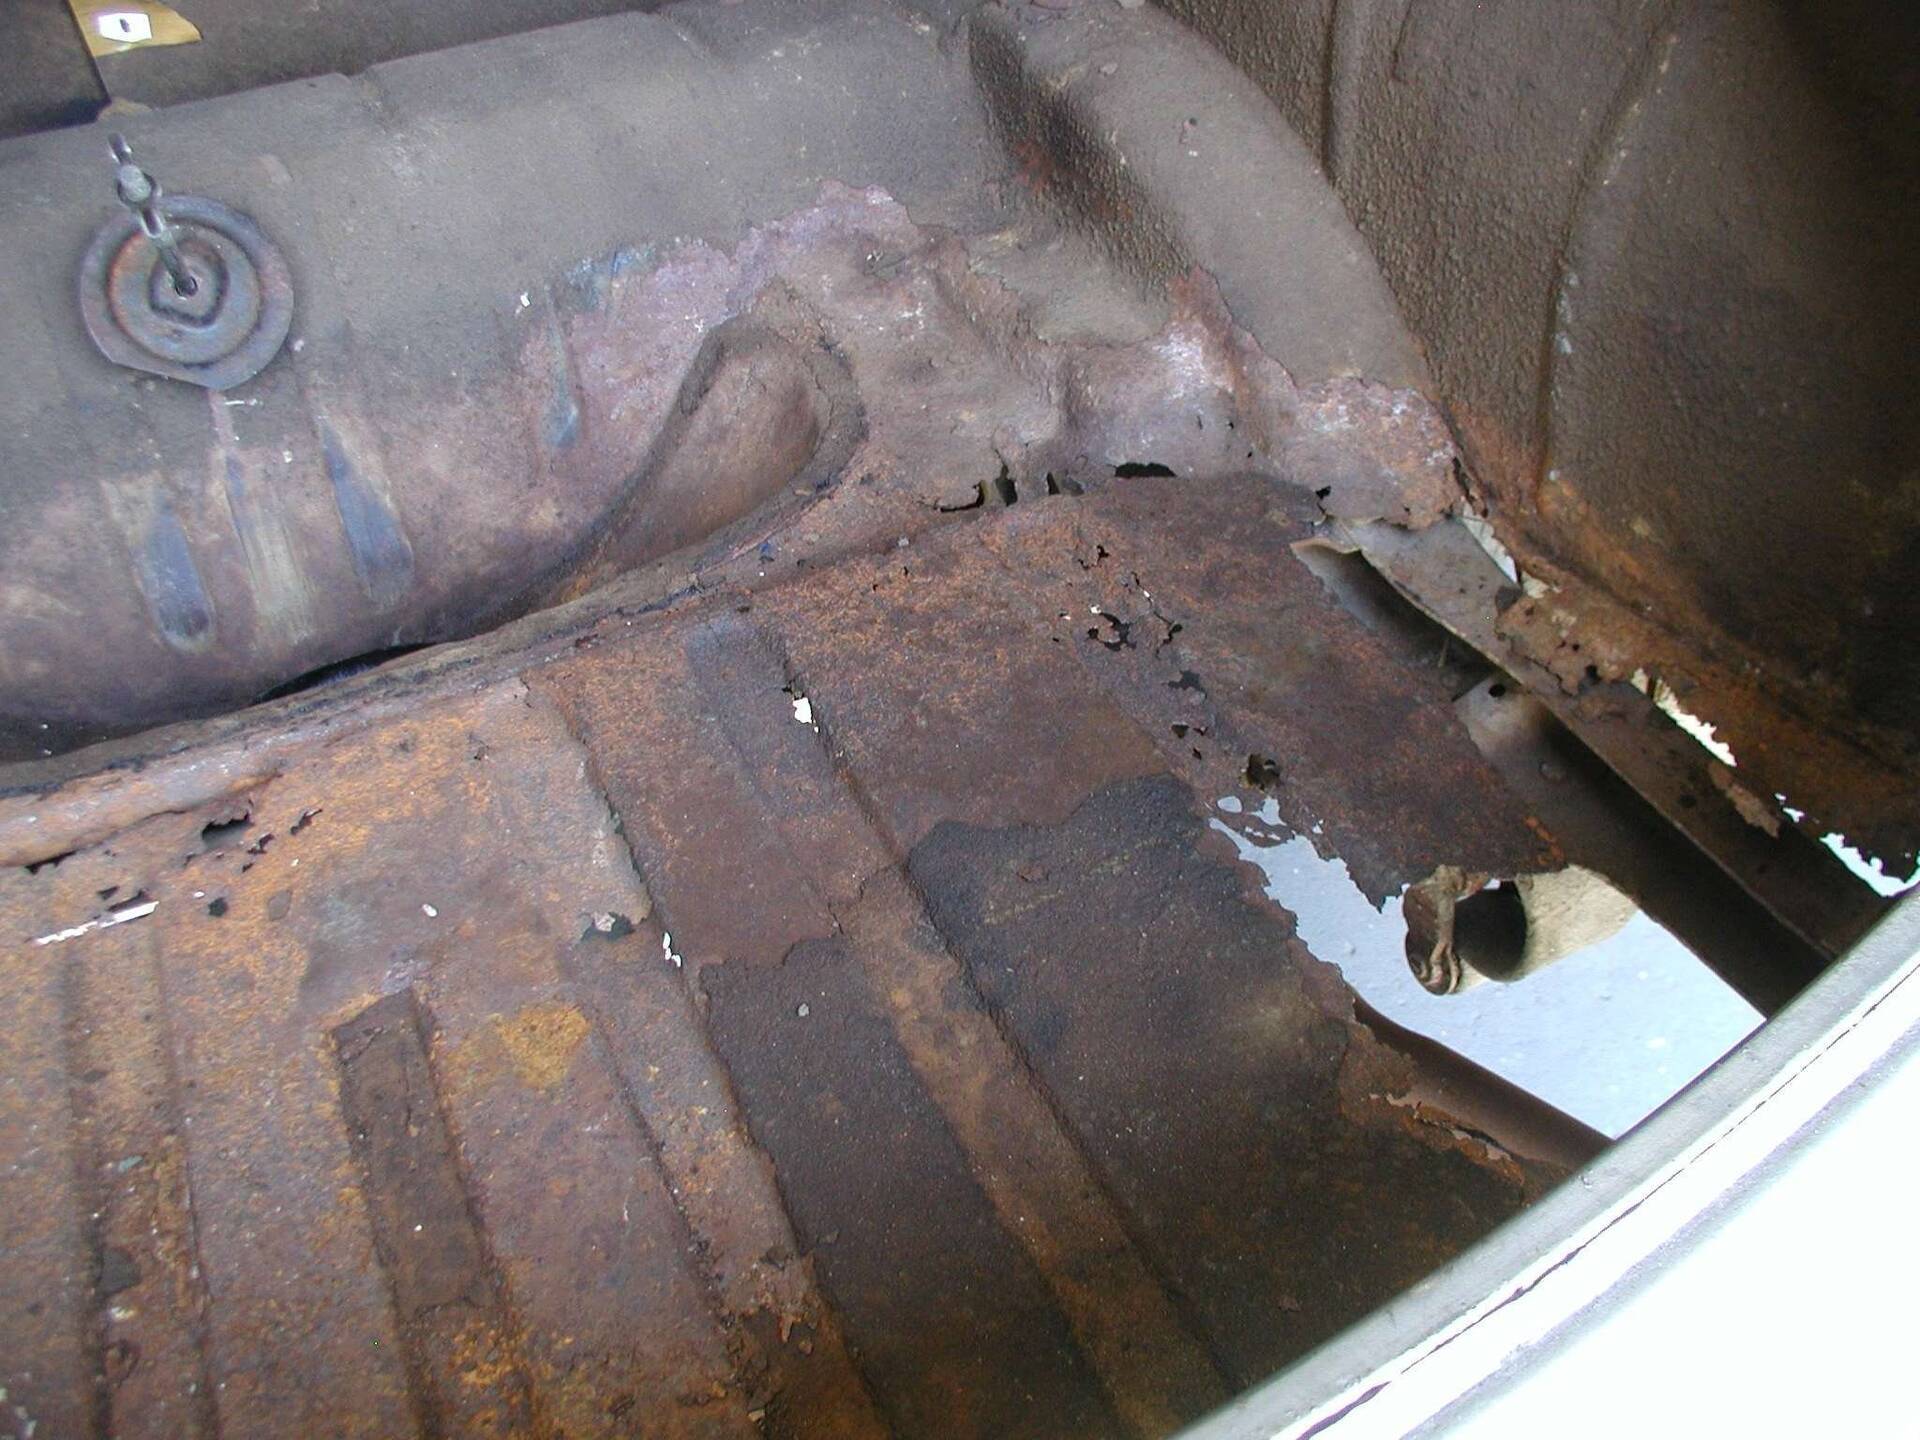 (217.55 KB) (217.55 KB)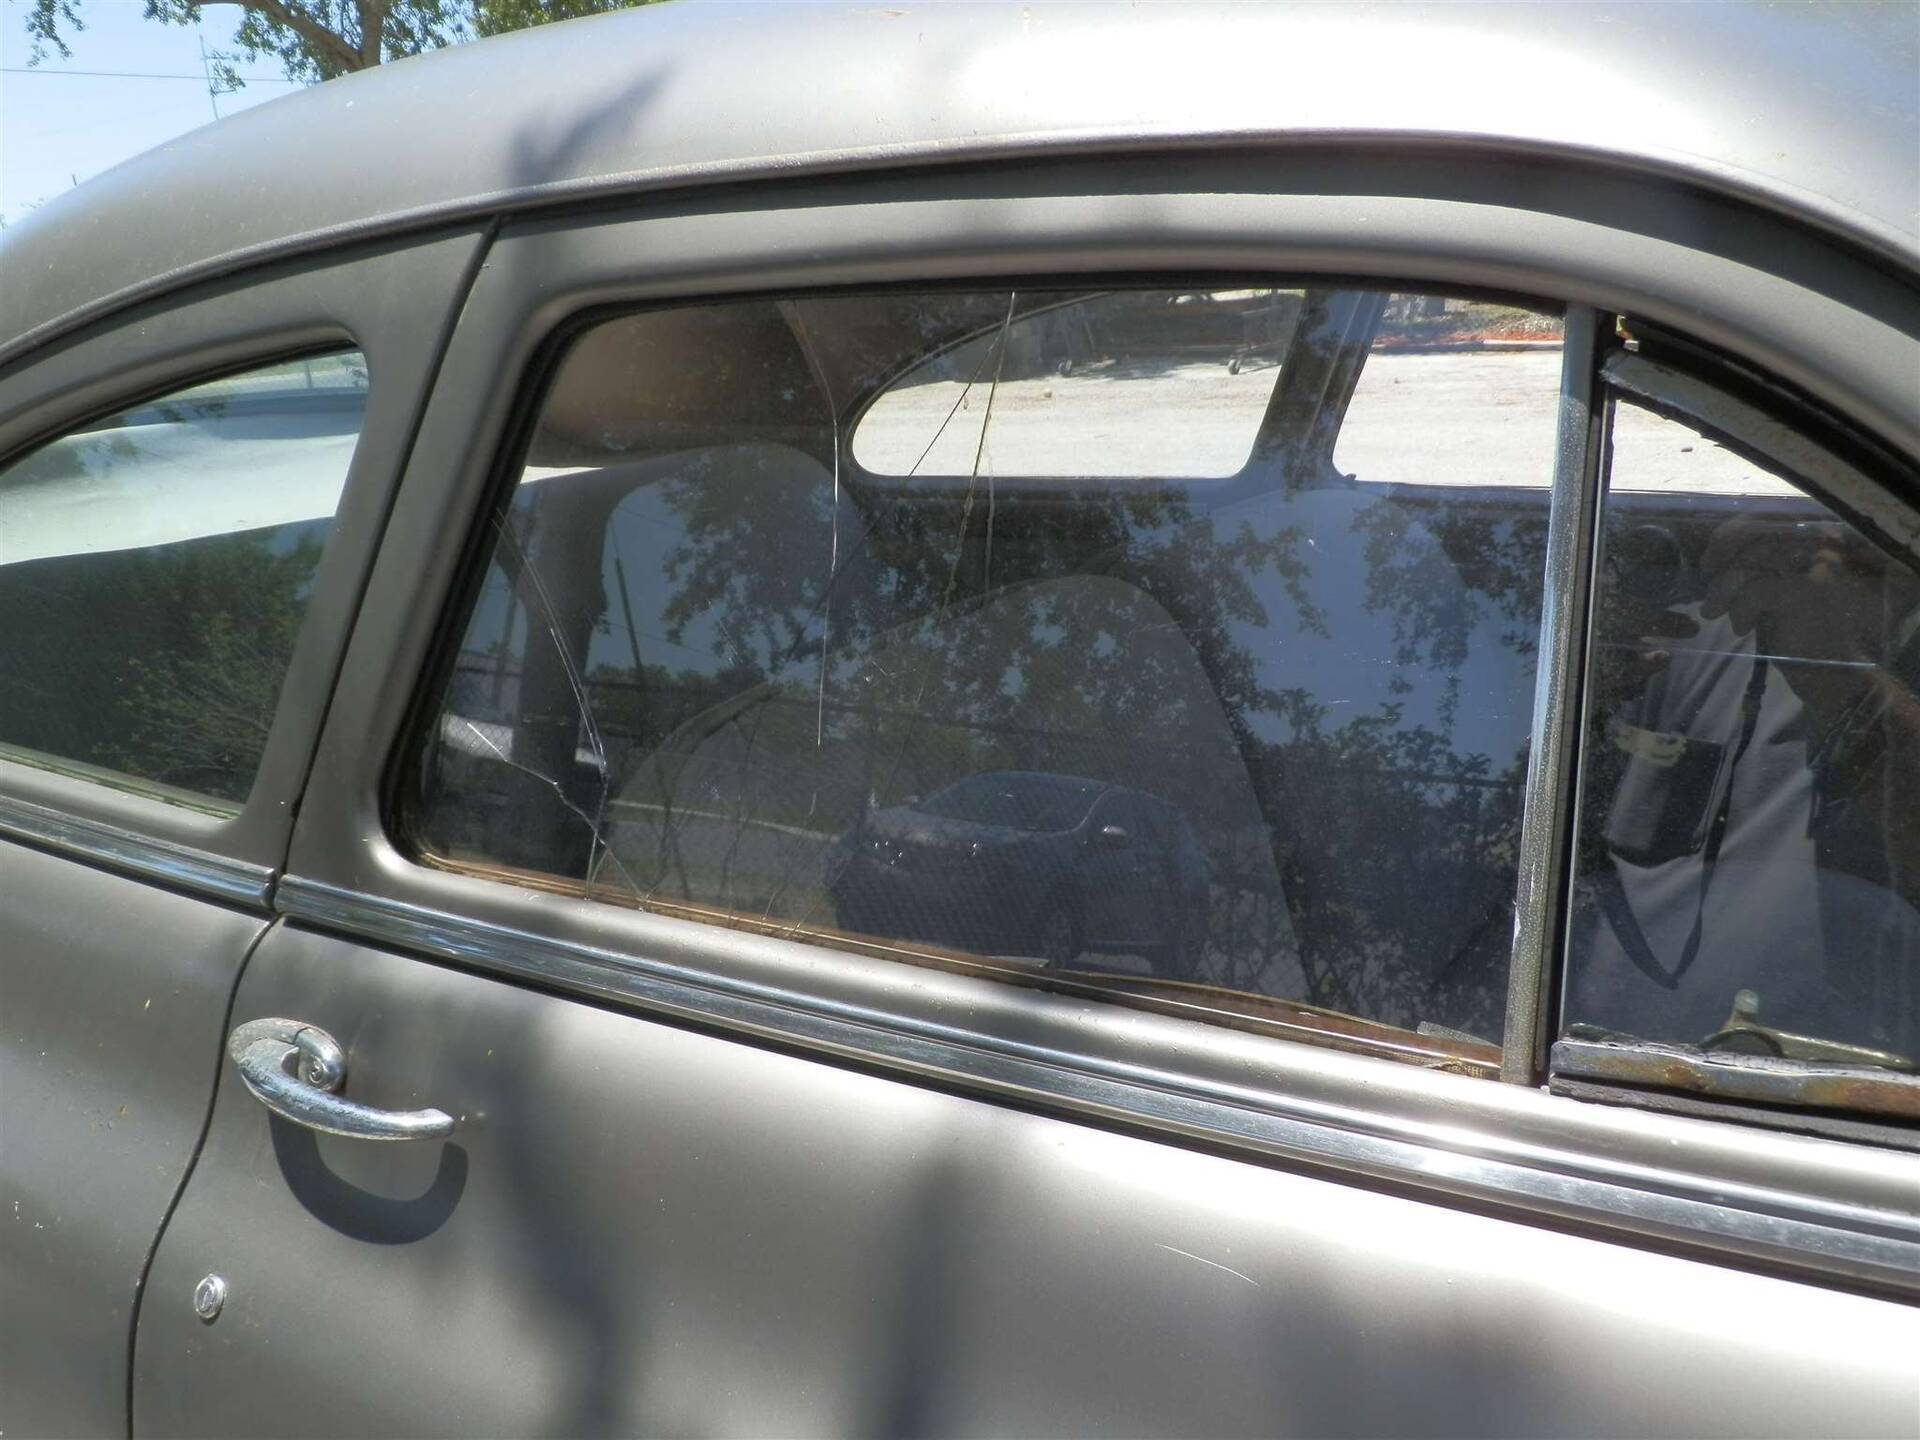 (245.29 KB) (245.29 KB) (290.79 KB) (290.79 KB)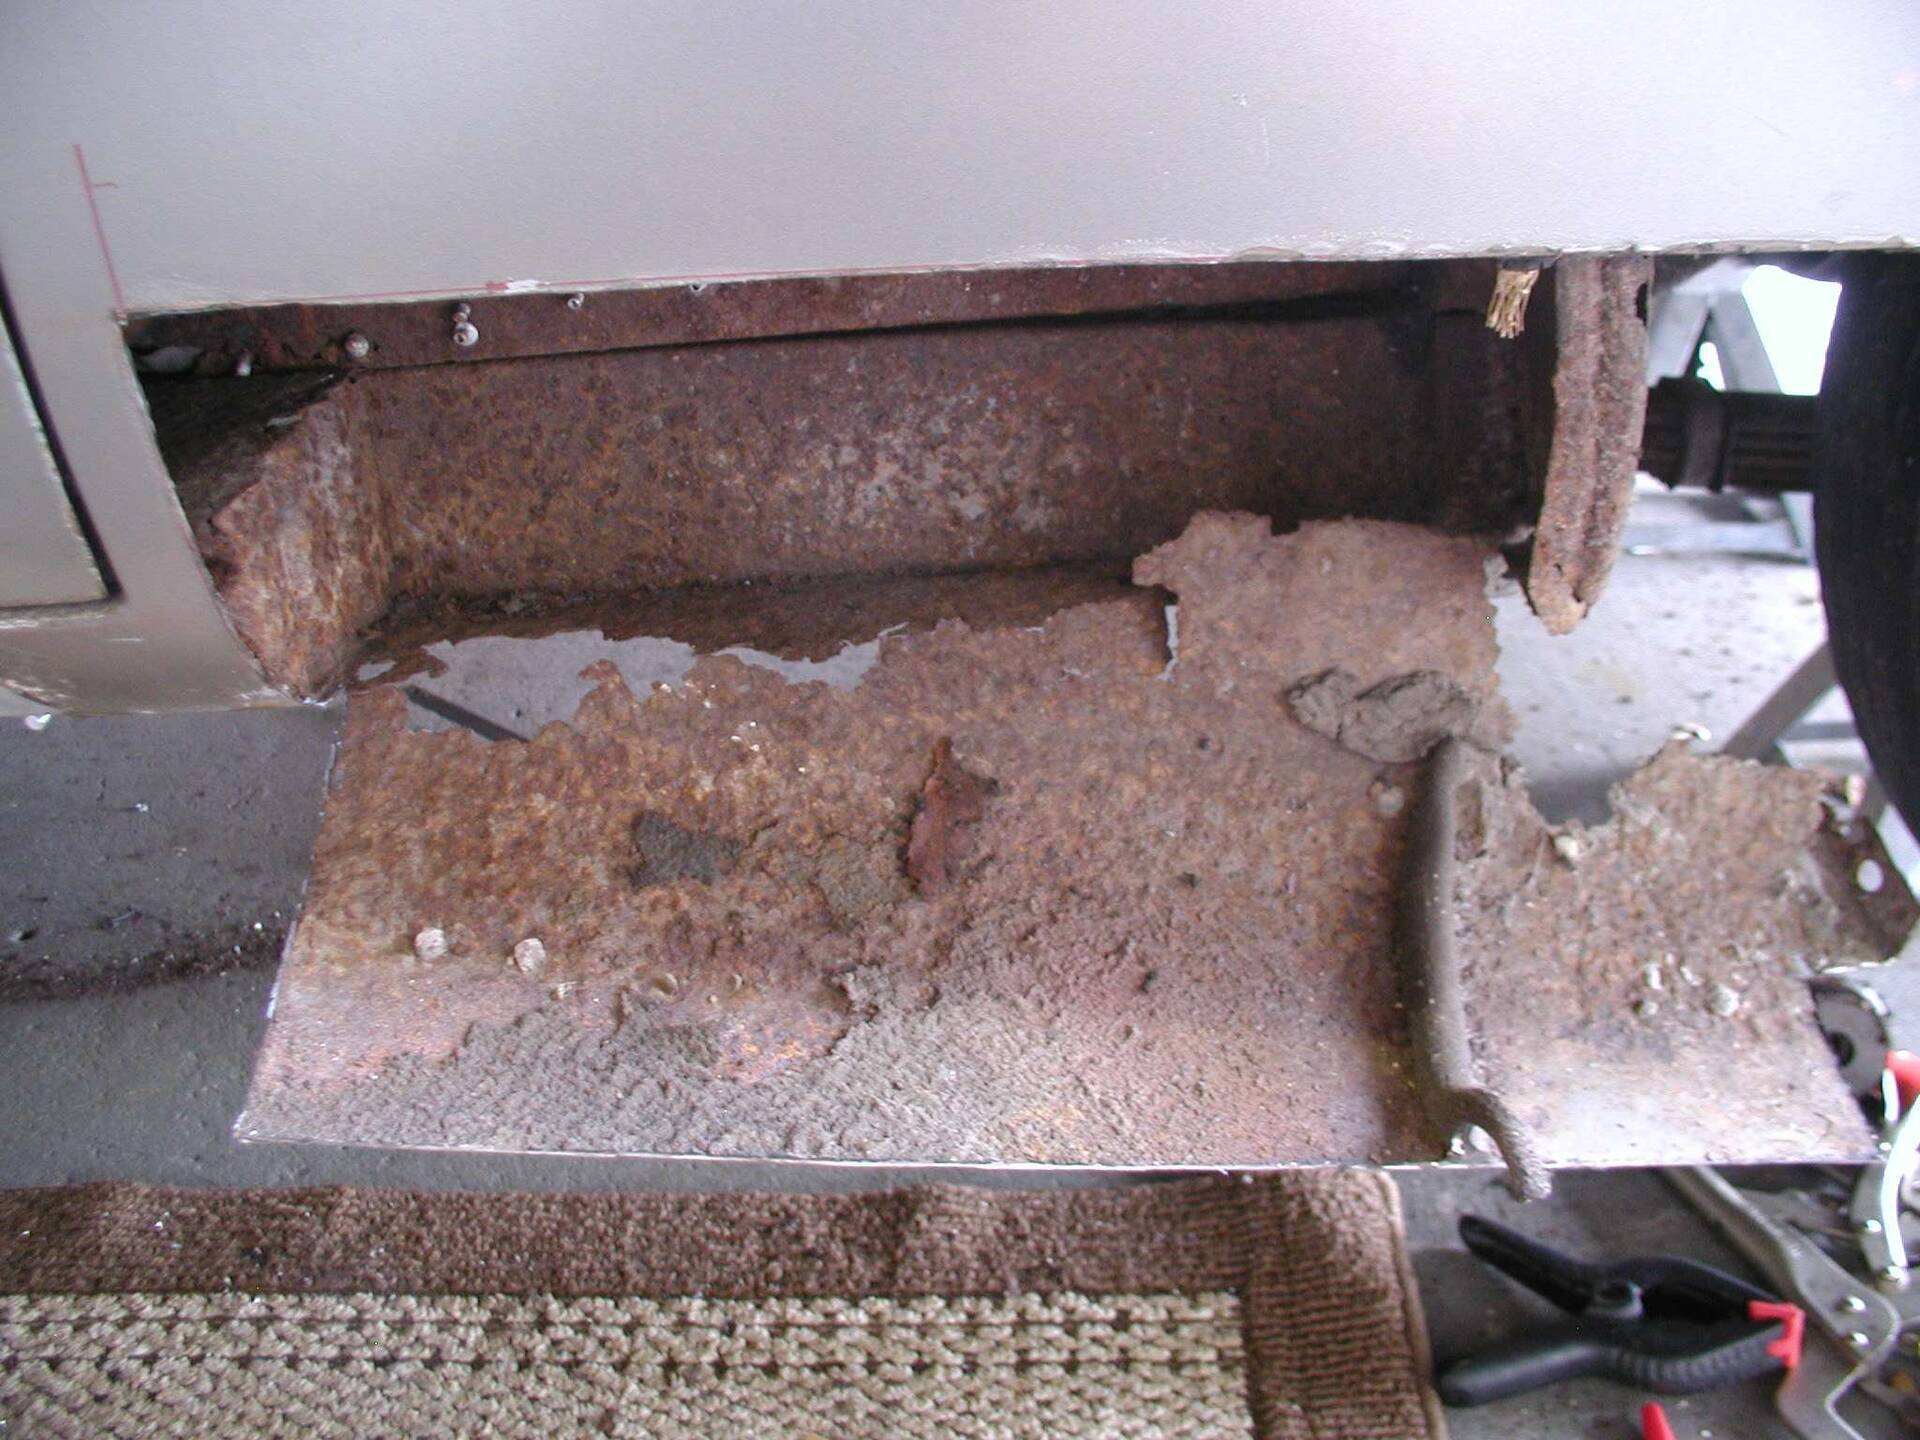 (65.64 KB) (65.64 KB)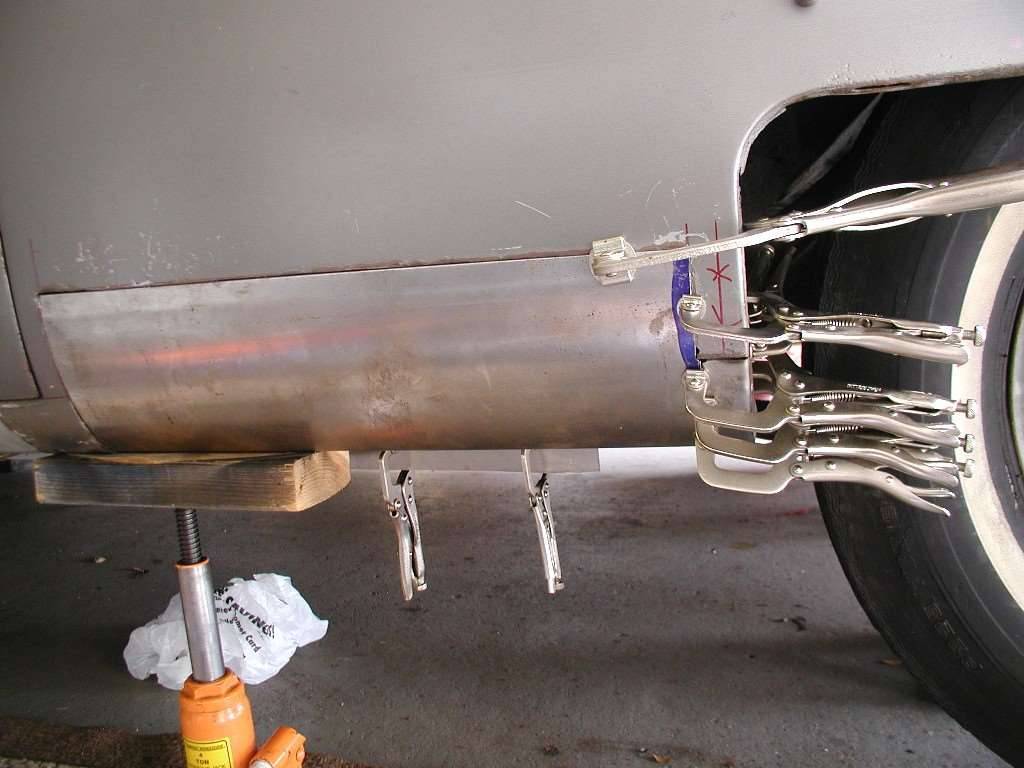 (278.72 KB) (278.72 KB) (227.99 KB) (227.99 KB)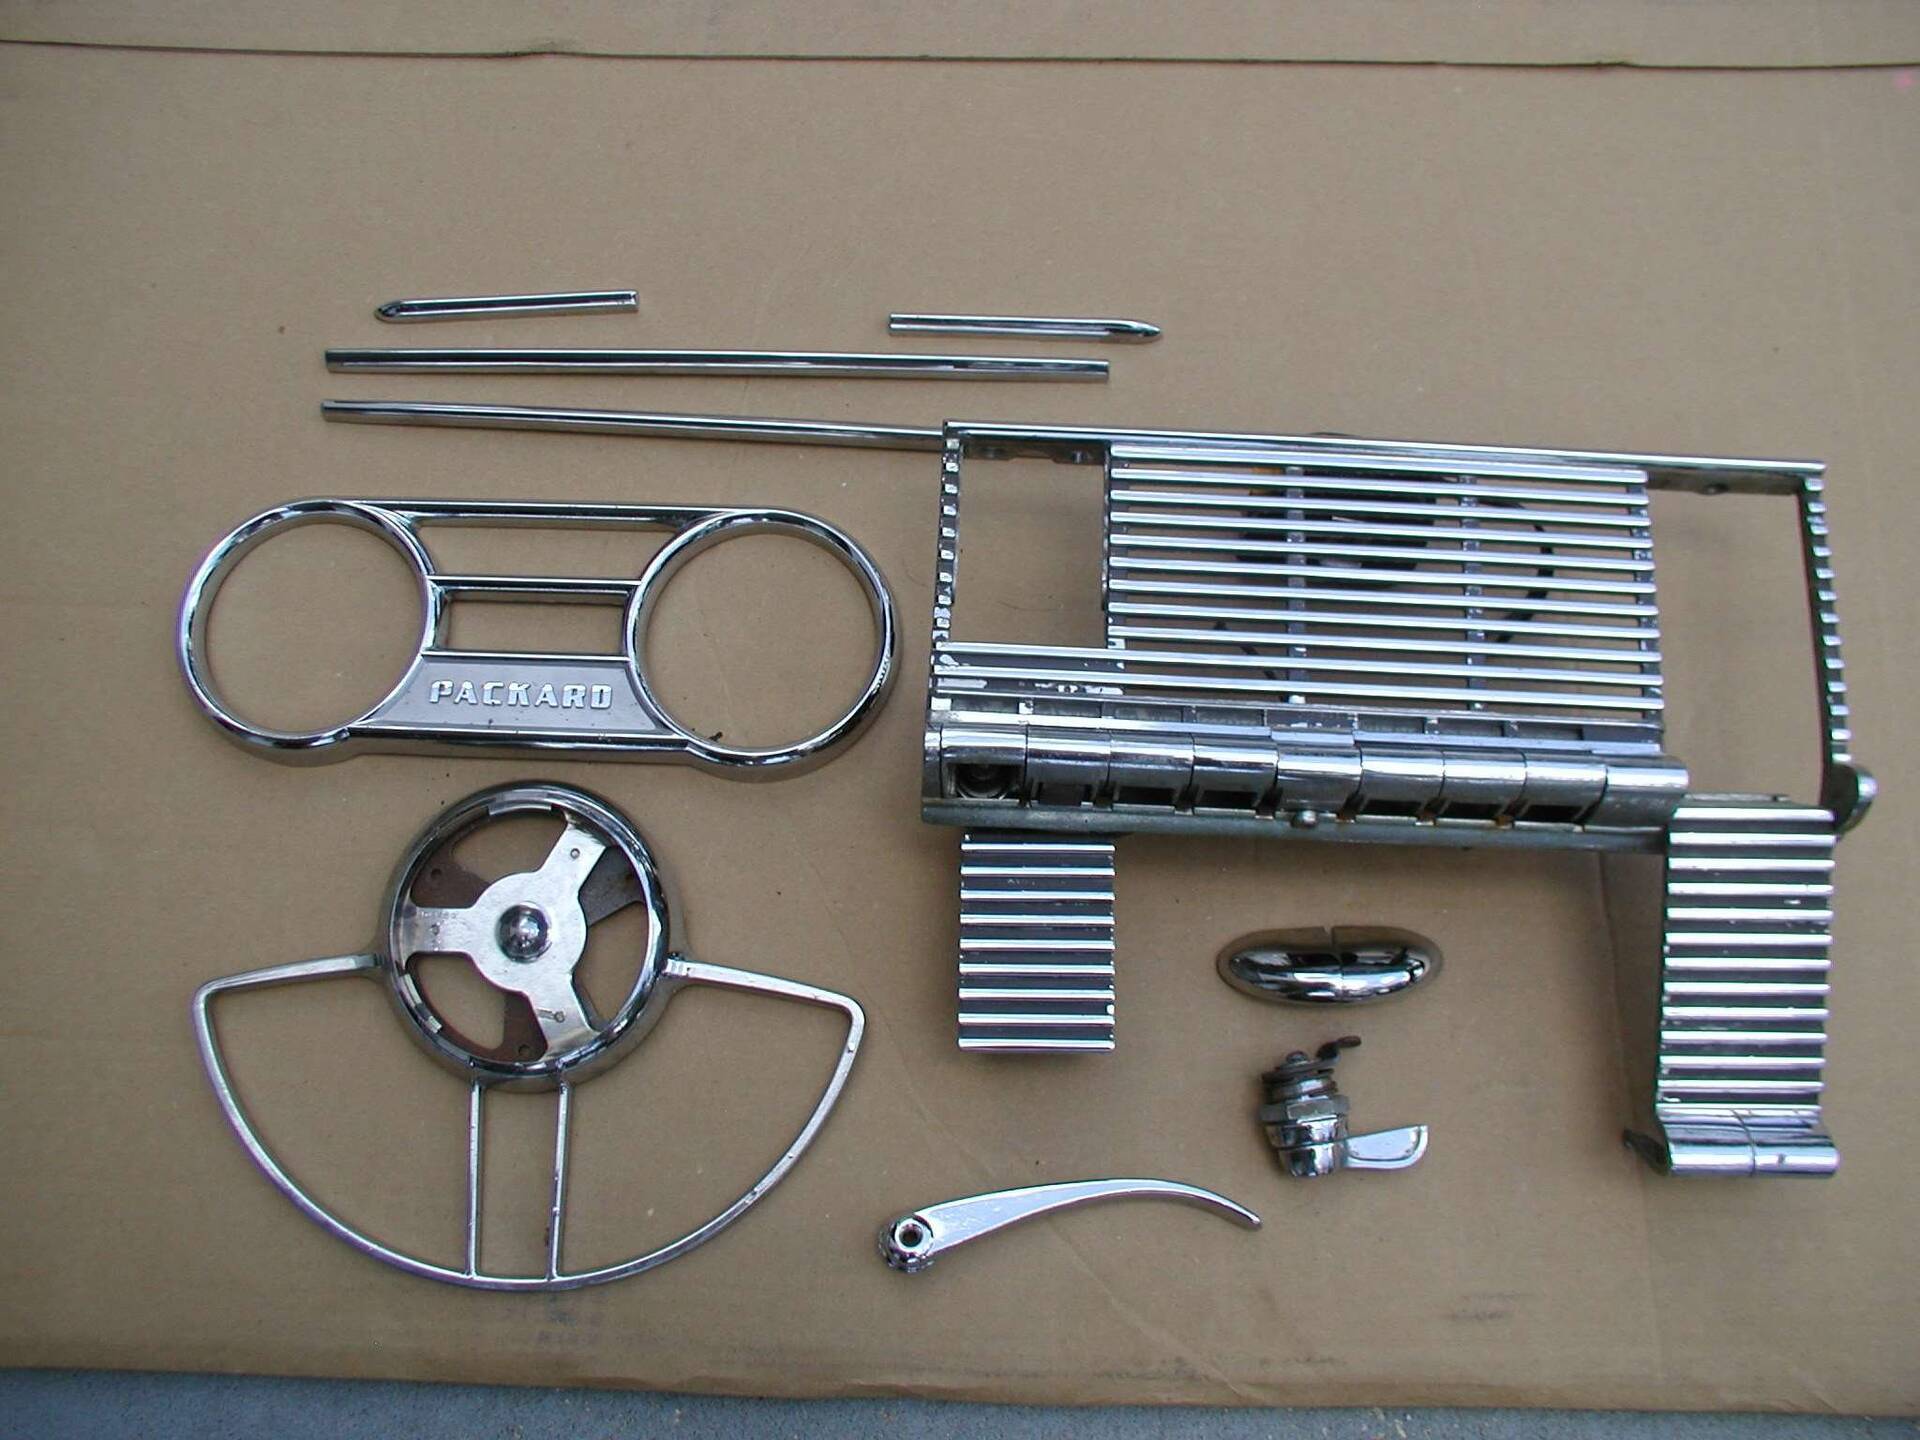 (170.64 KB) (170.64 KB)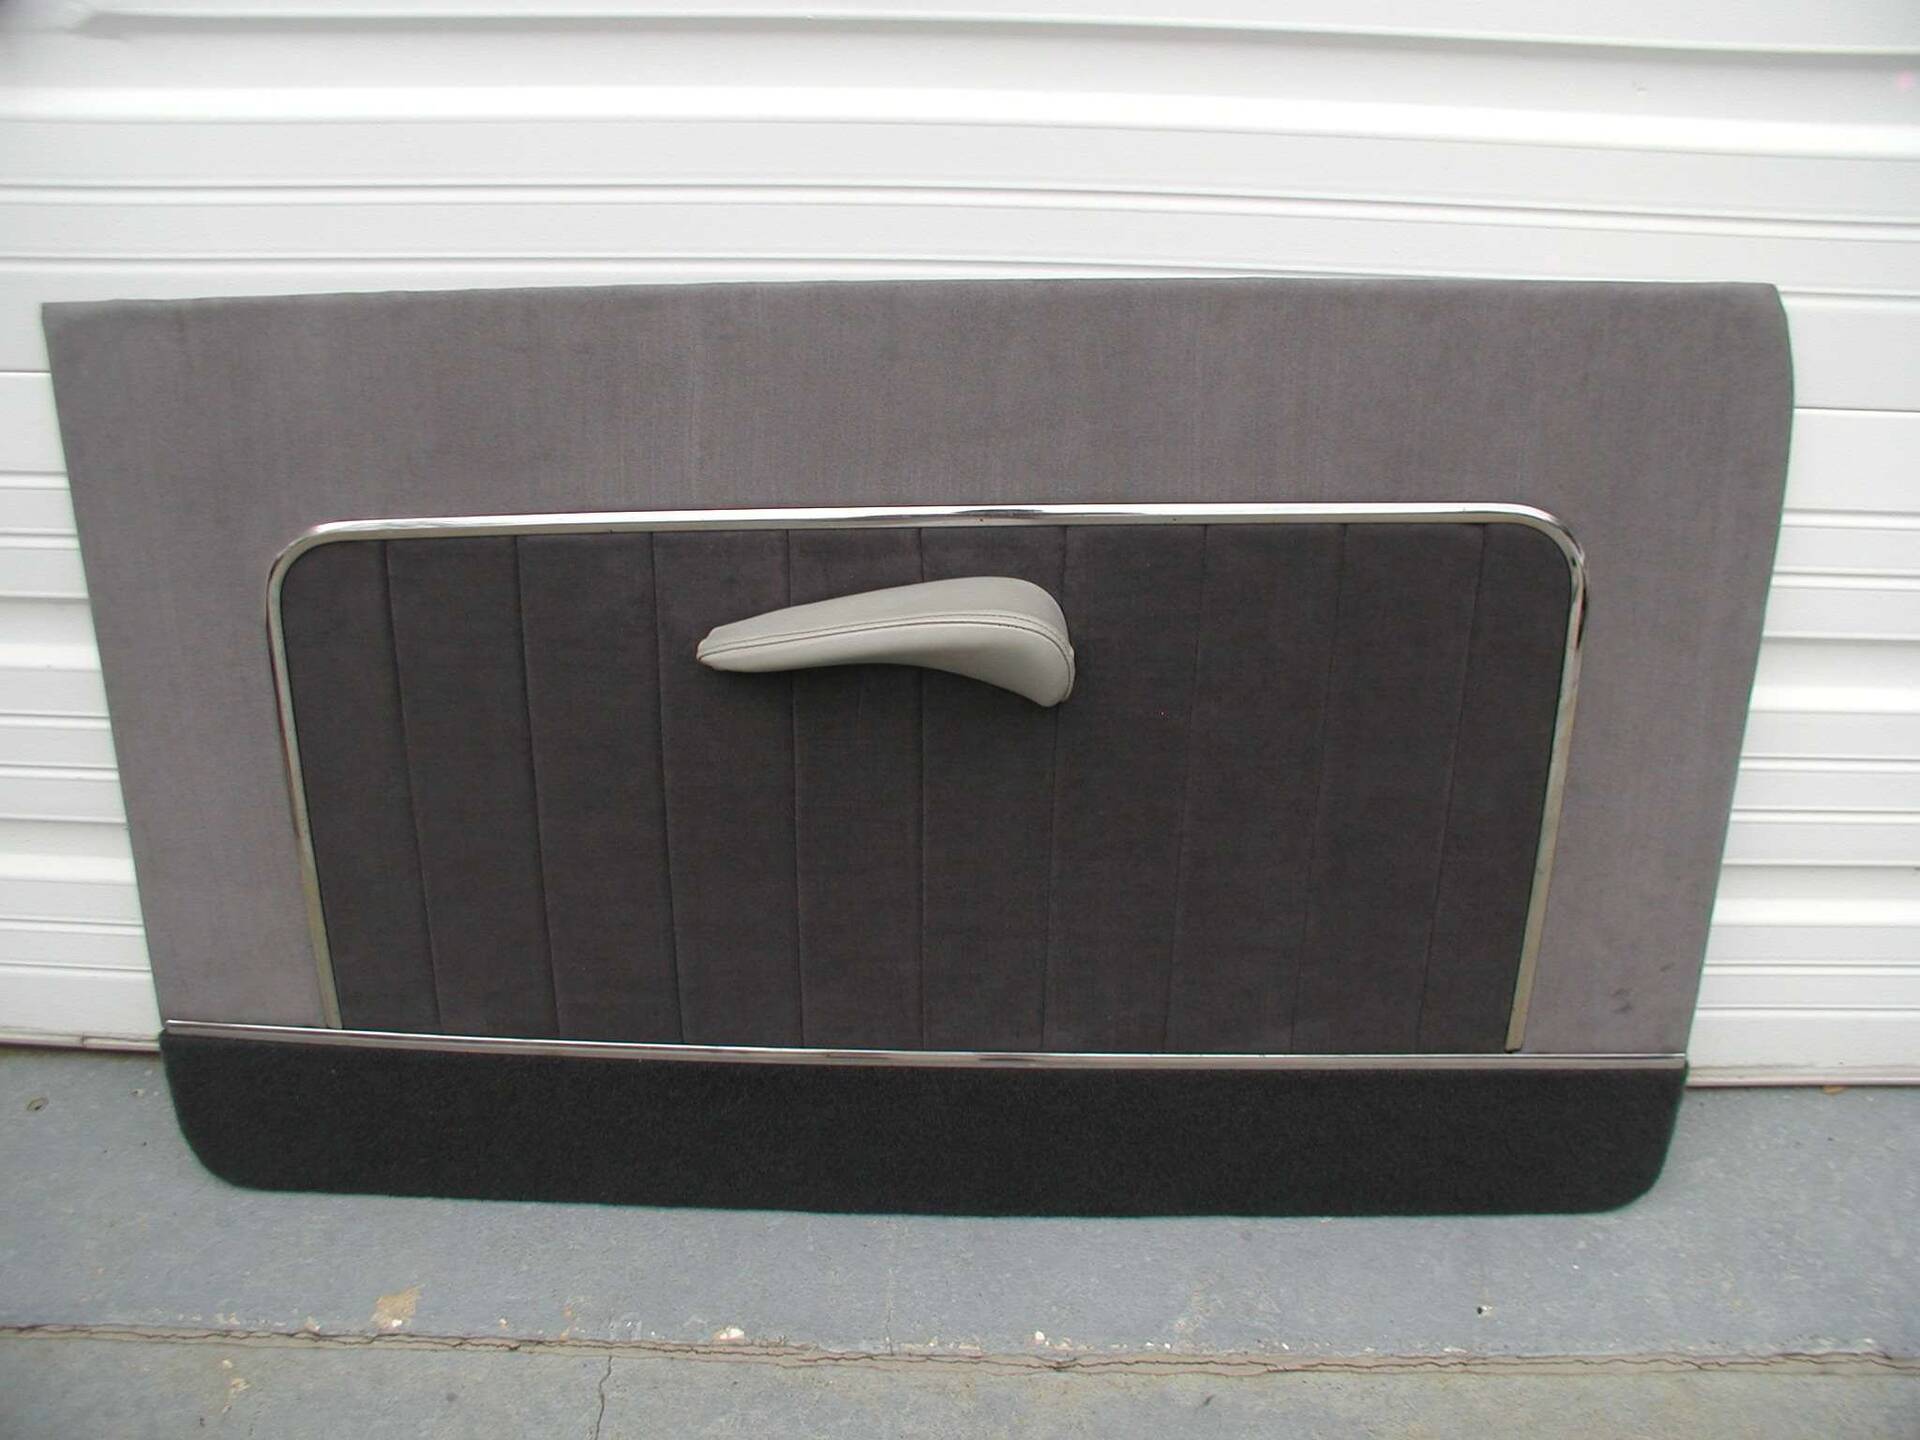 (165.51 KB) (165.51 KB)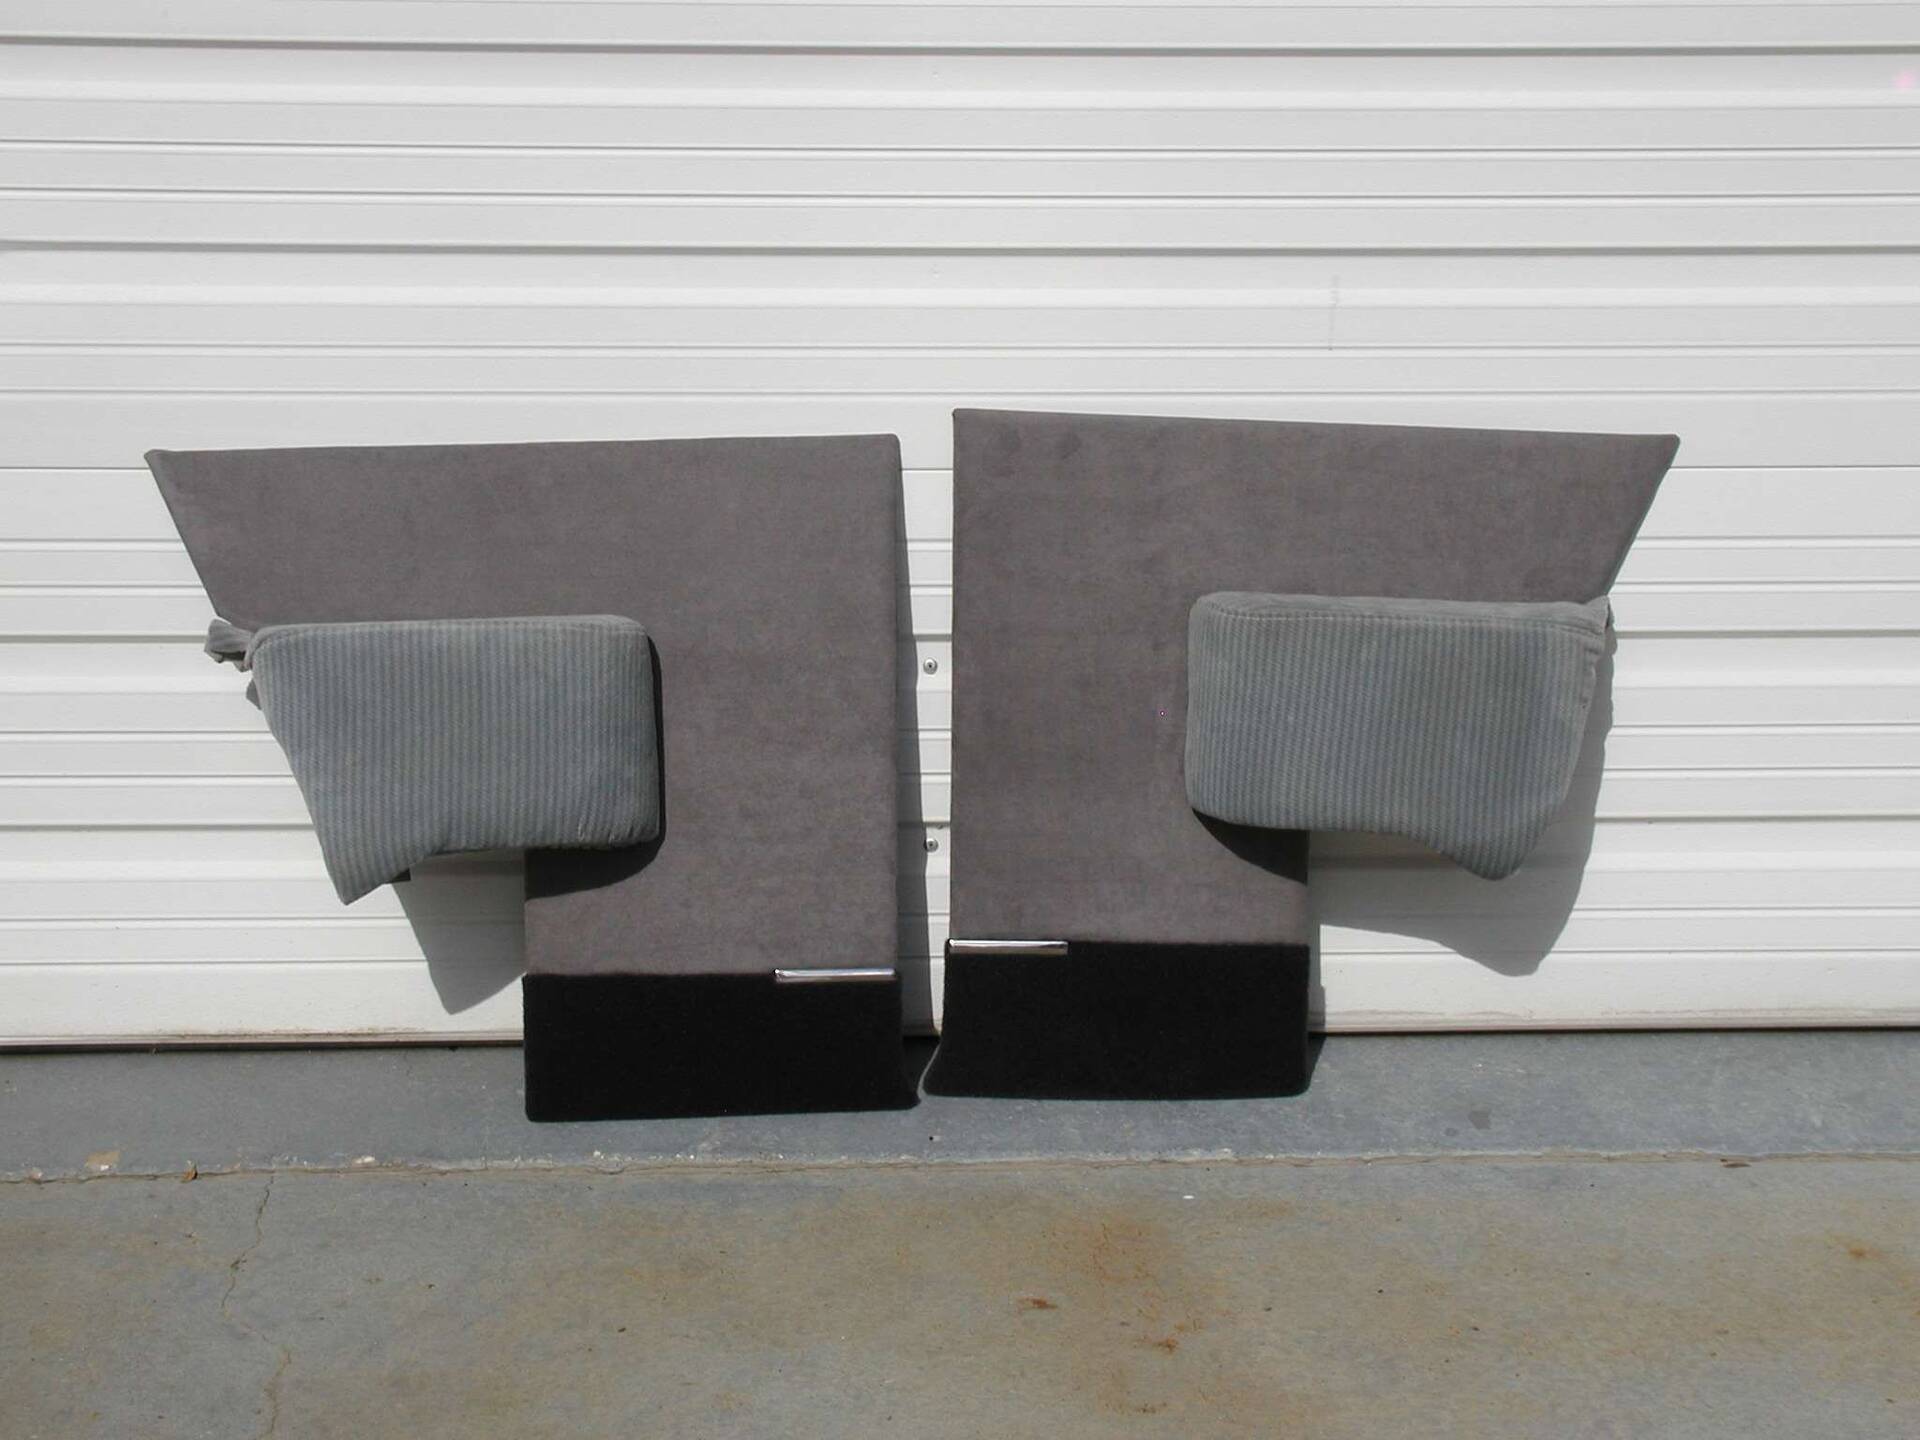 (163.75 KB) (163.75 KB)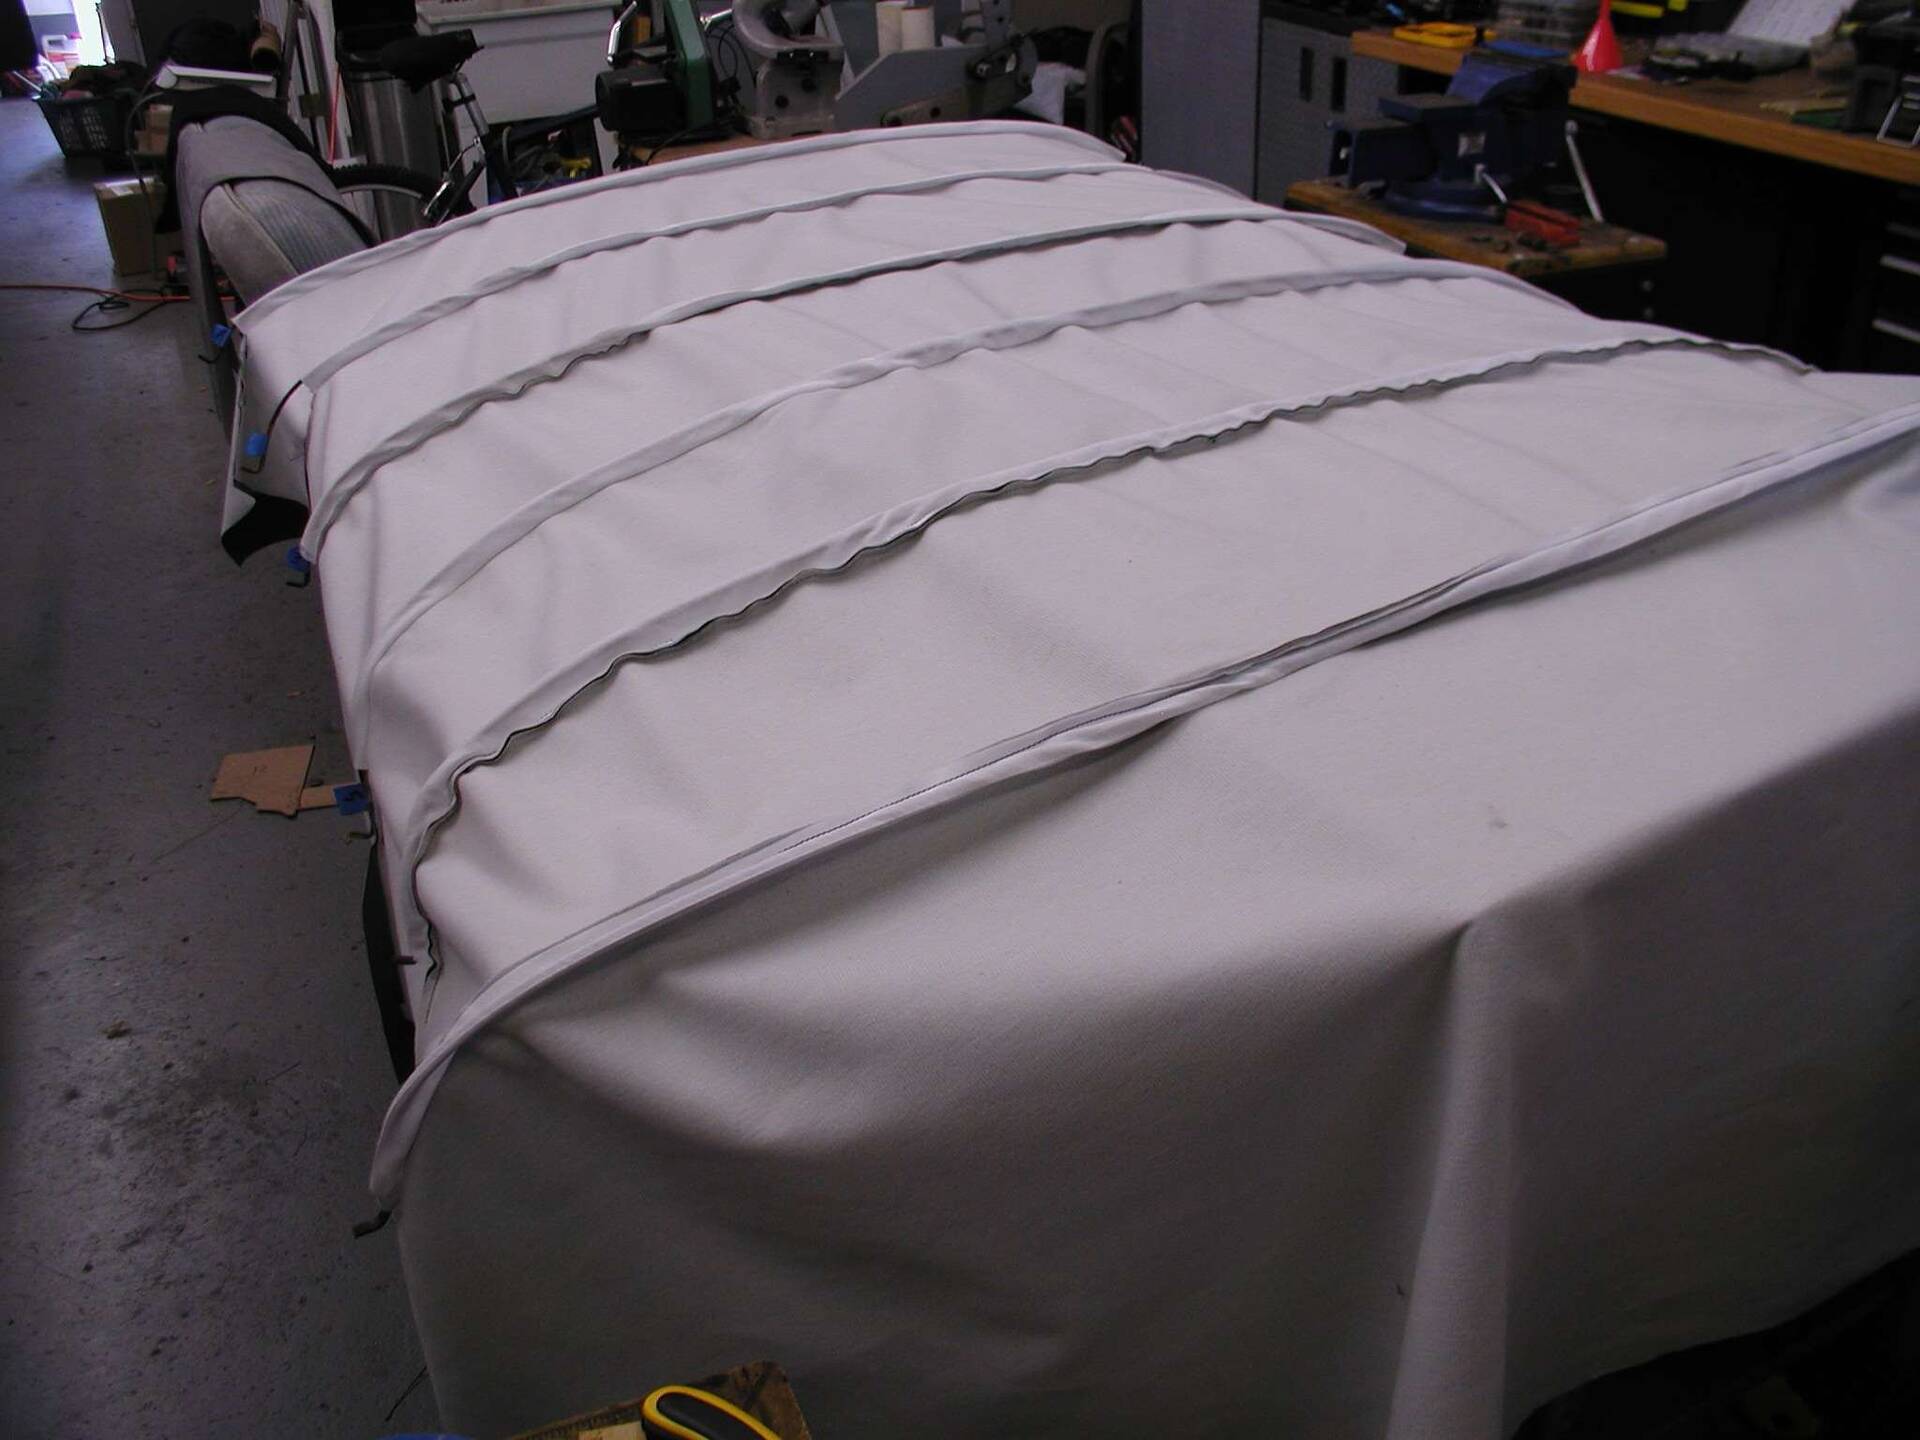
Posted on: 2017/7/26 13:09
|
|||
|
||||
|
Re: Joe's '49 Club Sedan
|
||||
|---|---|---|---|---|
|
Home away from home
|
I removed the flasher. It was setup for both turn signals and hazard. The base was 5 or 6 pin with an LED-capable flasher. The original turn signal flasher was wired using power from one of the fused circuits. There was a horn relay wired directly to the panel. It was 12 volt and used a 3-pin relay. Removed the relay and the wire from the panel and will use the original horn relay connected to a fused circuit. The panel came with a 30A fuse in the panel. I replaced the fuse with a 30A circuit breaker wired to the original headlight switch which also has a 30A CB. It wasn't too difficult to merge the 12V fuse panel to the original wiring diagram, being careful that the wire gauges were sufficient for a 6V system. Since only the firewall back has been finished, I haven't cleaned up my wiring notes yet. Here's the link to the wiring diagram for the kit I used.
http://www.americanautowire.com/PDFLink/92971504%20510625%20IN%202.0.pdf Someone asked me about the switch in the fog light position in the picture, it's the starter button.
Posted on: 2017/7/17 13:03
|
|||
|
||||
|
Re: Joe's '49 Club Sedan
|
||||
|---|---|---|---|---|
|
Home away from home
|
I'm getting ready to start assembling the front sheetmetal on my Packard. There are an awful lot of parts involved, not including the fenders themselves. I'm going to try putting it together a piece at a time with the fenders last rather than all at once like at the factory. Probably test fit it to make sure I know where everything goes.
Attach file: (65.32 KB)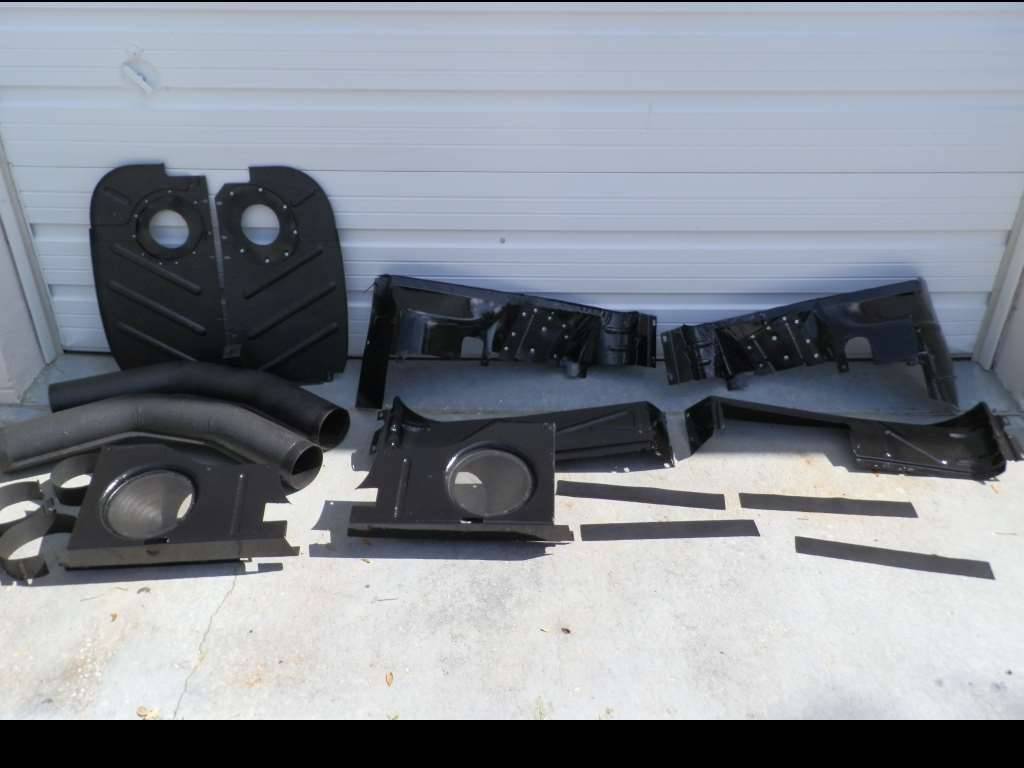
Posted on: 2017/7/16 10:30
|
|||
|
||||
|
Re: Joe's '49 Club Sedan
|
||||
|---|---|---|---|---|
|
Home away from home
|
Finished the dash wiring using a 9-circuit fuse panel modified to work with the 6 volt car. All the circuits are now individually fused rather than spliced to a circuit breaker. Since all the wire was replaced anyway, I think this is a better arrangement. Under hood wiring will be completed once the fenders are back on.
Attach file: (120.58 KB)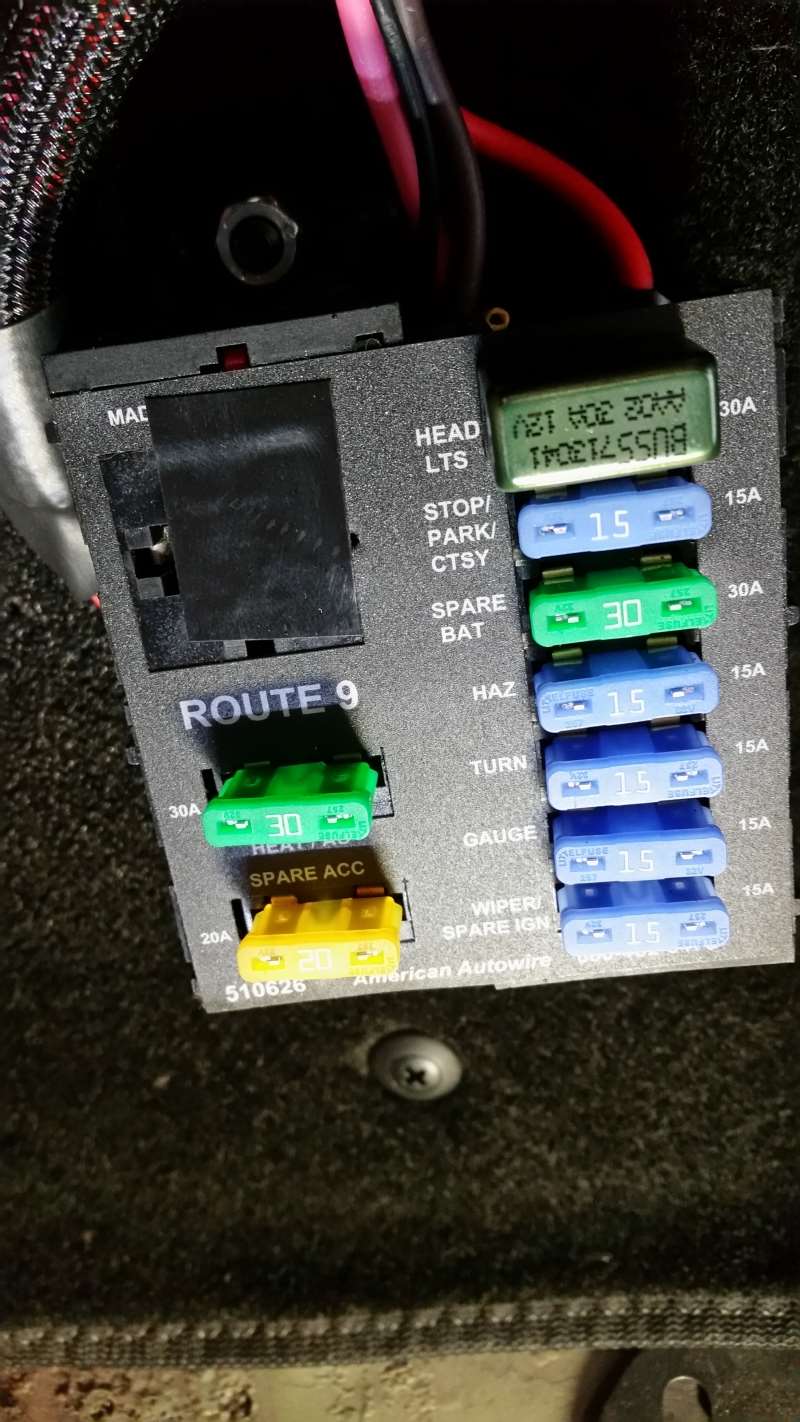 (81.62 KB) (81.62 KB) (77.50 KB) (77.50 KB)
Posted on: 2017/6/27 13:12
|
|||
|
||||
|
Re: Joe's '49 Club Sedan
|
||||
|---|---|---|---|---|
|
Home away from home
|
I was obviously trying read too much into it's possible function. Snapped into place. Thanks for the quick reply!
Joe 
Posted on: 2017/5/30 10:29
|
|||
|
||||
|
Re: Joe's '49 Club Sedan
|
||||
|---|---|---|---|---|
|
Home away from home
|
When working on a long-term project, in my case 4 years, it seems to always turn out that there was a picture you didn't take or bags you didn't label or notes you failed to jot down. The problem I'm having is re-assembling the turn signal mechanism in the steering column. There is a wire spring the attaches to the groove in the shifter shaft and I believe it's attached to the turn signal mechanism. I'm guessing it serves as the cancelling mechanism with the pins on the steering wheel. I'm at a loss to remember how it attaches to the mechanism and the last thing I want to do is break something. I've searched Packardinfo looking for a picture or description to no avail. As a newcomer, I'm not as skilled at knowing exactly where to go. Can anyone point me in the right direction to get this properly installed?
Thanks! Joe Attach file: (75.04 KB)
Posted on: 2017/5/30 9:23
|
|||
|
||||
|
Re: Joe's '49 Club Sedan
|
||||
|---|---|---|---|---|
|
Home away from home
|
Mal,
Got the info in the registry. Joe
Posted on: 2017/5/25 9:44
|
|||
|
||||


