|
Re: Stewart's 1955 Packard 400
|
||||
|---|---|---|---|---|
|
Home away from home
|
I thought I had the power steering leak fixed.
I finally got a socket on the top bolt of the Bendix. It turned about 3/4 of a turn. After about 4 days there was no leak. Then today I refilled the reservoir and the first leak started again. It's not coming from the reservoir. It does appear to be coming from the shaft. I am pointing to it in the image. Every time I put a rag under the shaft there is oil there. Attach file:  20230920_141502.jpg (353.91 KB) 20230920_141502.jpg (353.91 KB)
Posted on: 2023/9/20 16:49
|
|||
|
Stewart Ballard
|
||||
|
||||
|
Re: Stewart's 1955 Packard 400
|
||||
|---|---|---|---|---|
|
Home away from home
|
The fluid is not red and it did not start dripping until I filled the reservoir a month ago.
Posted on: 2023/9/16 17:06
|
|||
|
Stewart Ballard
|
||||
|
||||
|
Re: Stewart's 1955 Packard 400
|
||||
|---|---|---|---|---|
|
Home away from home
|
Thanks for the pictures guys. They did help. I lost most of the pictures that I took when I tore all that stuff down and I don't remember all the facts. One thing I do recall is that my original tail harness crossed under the driver's feet and ran right down the left side of the "hump". So Packard had some variations as one of you had a harness that went along the rocker.
I believe I fixed that leak in the power steering reservoir. It was the center bolt as mentioned here. I now have a second leak but it's underneath. I had two drips (indicated by the arrows) but I tightened the bolt next to the one on the left a few days ago and it appears to have helped. However, I still have a slow drip coming from the arrow on the right. I am not sure where it's coming from as it appears to be under that "sliding plate on the Bendix pump. I rebuilt all that some time ago. Attach file: 20230913_155544_resized.jpg (191.42 KB)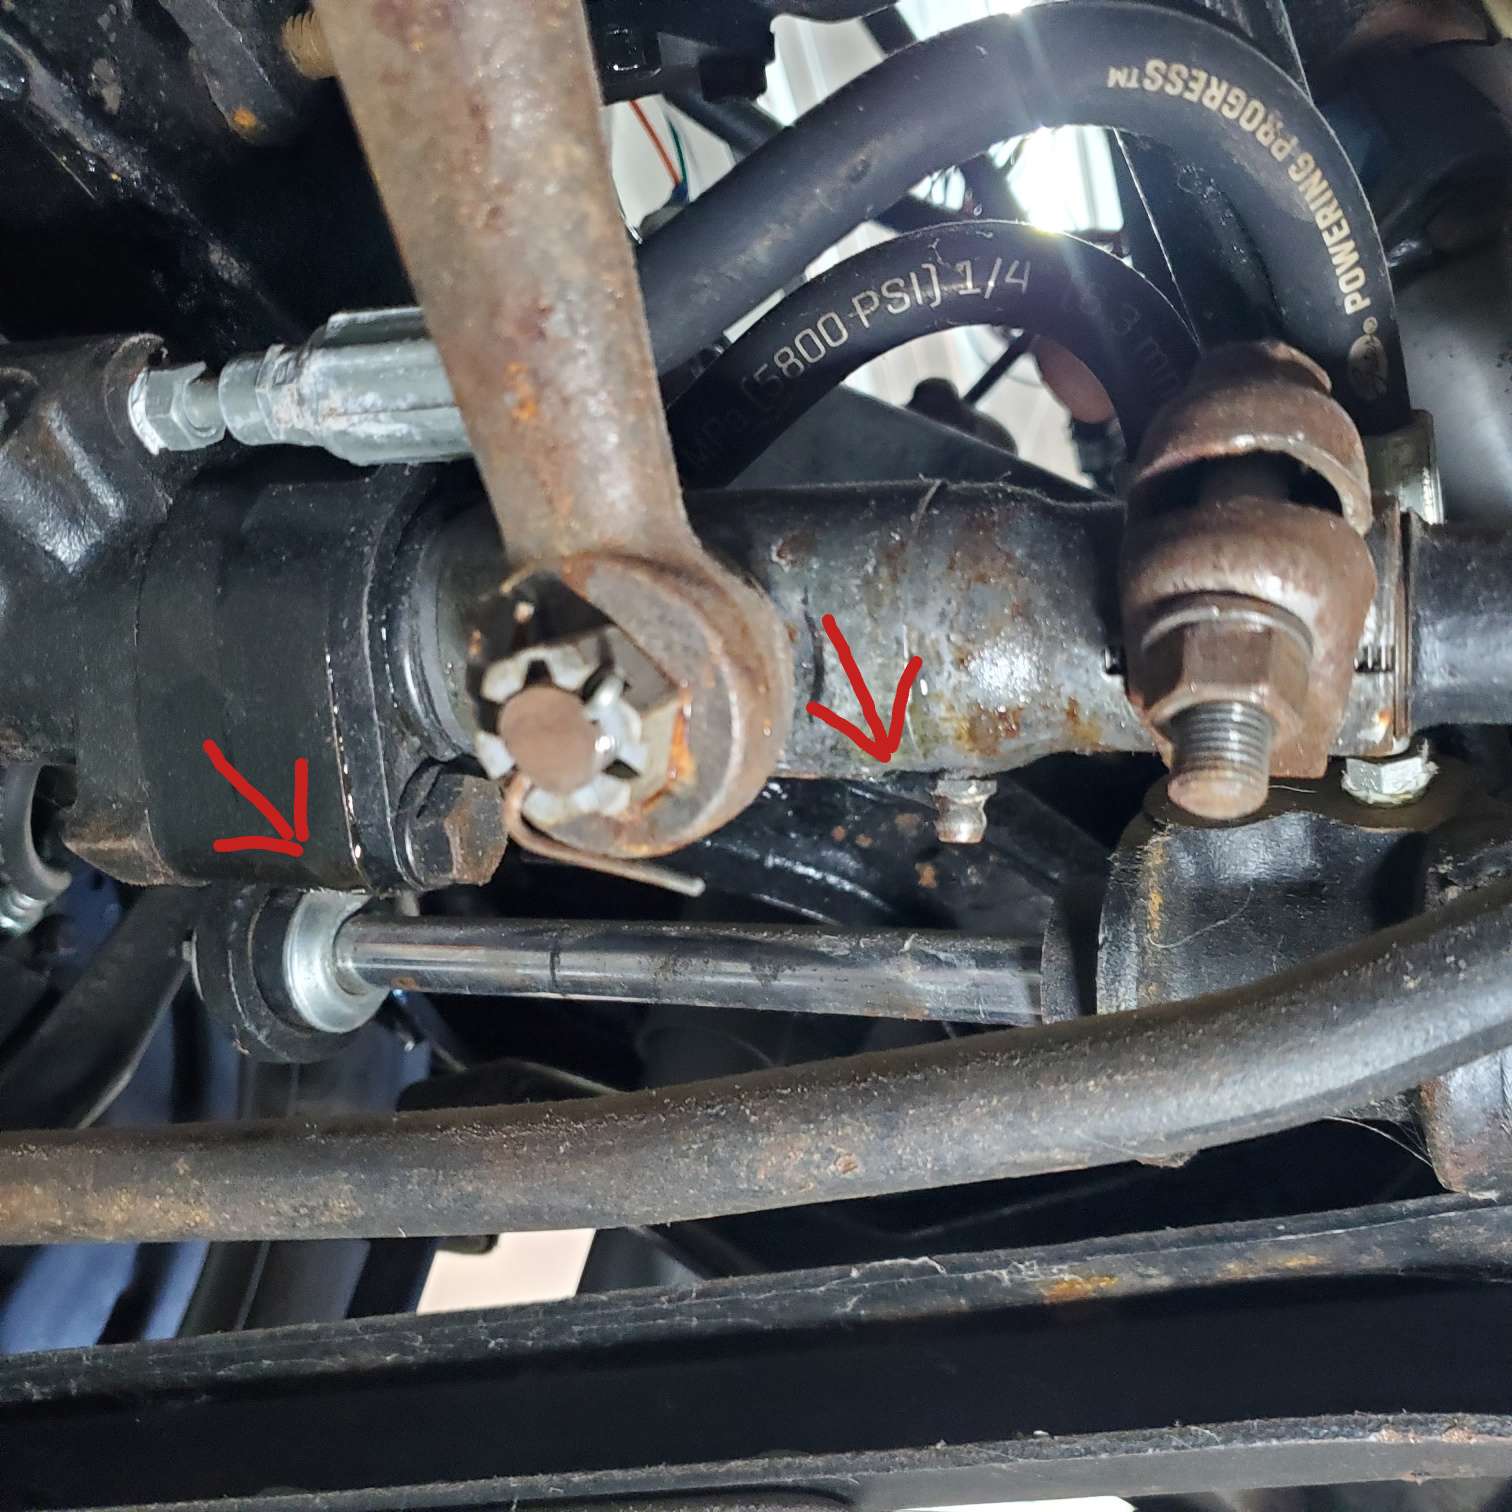
Posted on: 2023/9/15 18:24
|
|||
|
Stewart Ballard
|
||||
|
||||
|
Re: Stewart's 1955 Packard 400
|
||||
|---|---|---|---|---|
|
Home away from home
|
Thanks for those measurements. I actually needed one of each length.
I am working with the wire harness this week. I can not recall how the tail section was routed. Does it go under the rear seat directly into the truck area and over the rear fender or does it go through the opening on the driver's side, under the rear window, and then over the rear window? Attach file: 20230912_132108_resized.jpg (64.35 KB)
Posted on: 2023/9/14 18:20
|
|||
|
Stewart Ballard
|
||||
|
||||
|
Re: Stewart's 1955 Packard 400
|
||||
|---|---|---|---|---|
|
Home away from home
|
I need to purchase two replacements of that thin stainless steel strip that is circled in the image below. I am being asked for its length but, I forgot to measure it and my interior guy has them at the moment 20 miles away.
Does anyone have door panels like this that they can measure that strip for me, please? As the title of this blog states, this is a 1955 Packrd 400. Thanks Attach file: 20230906_094627_resized.jpg (197.37 KB)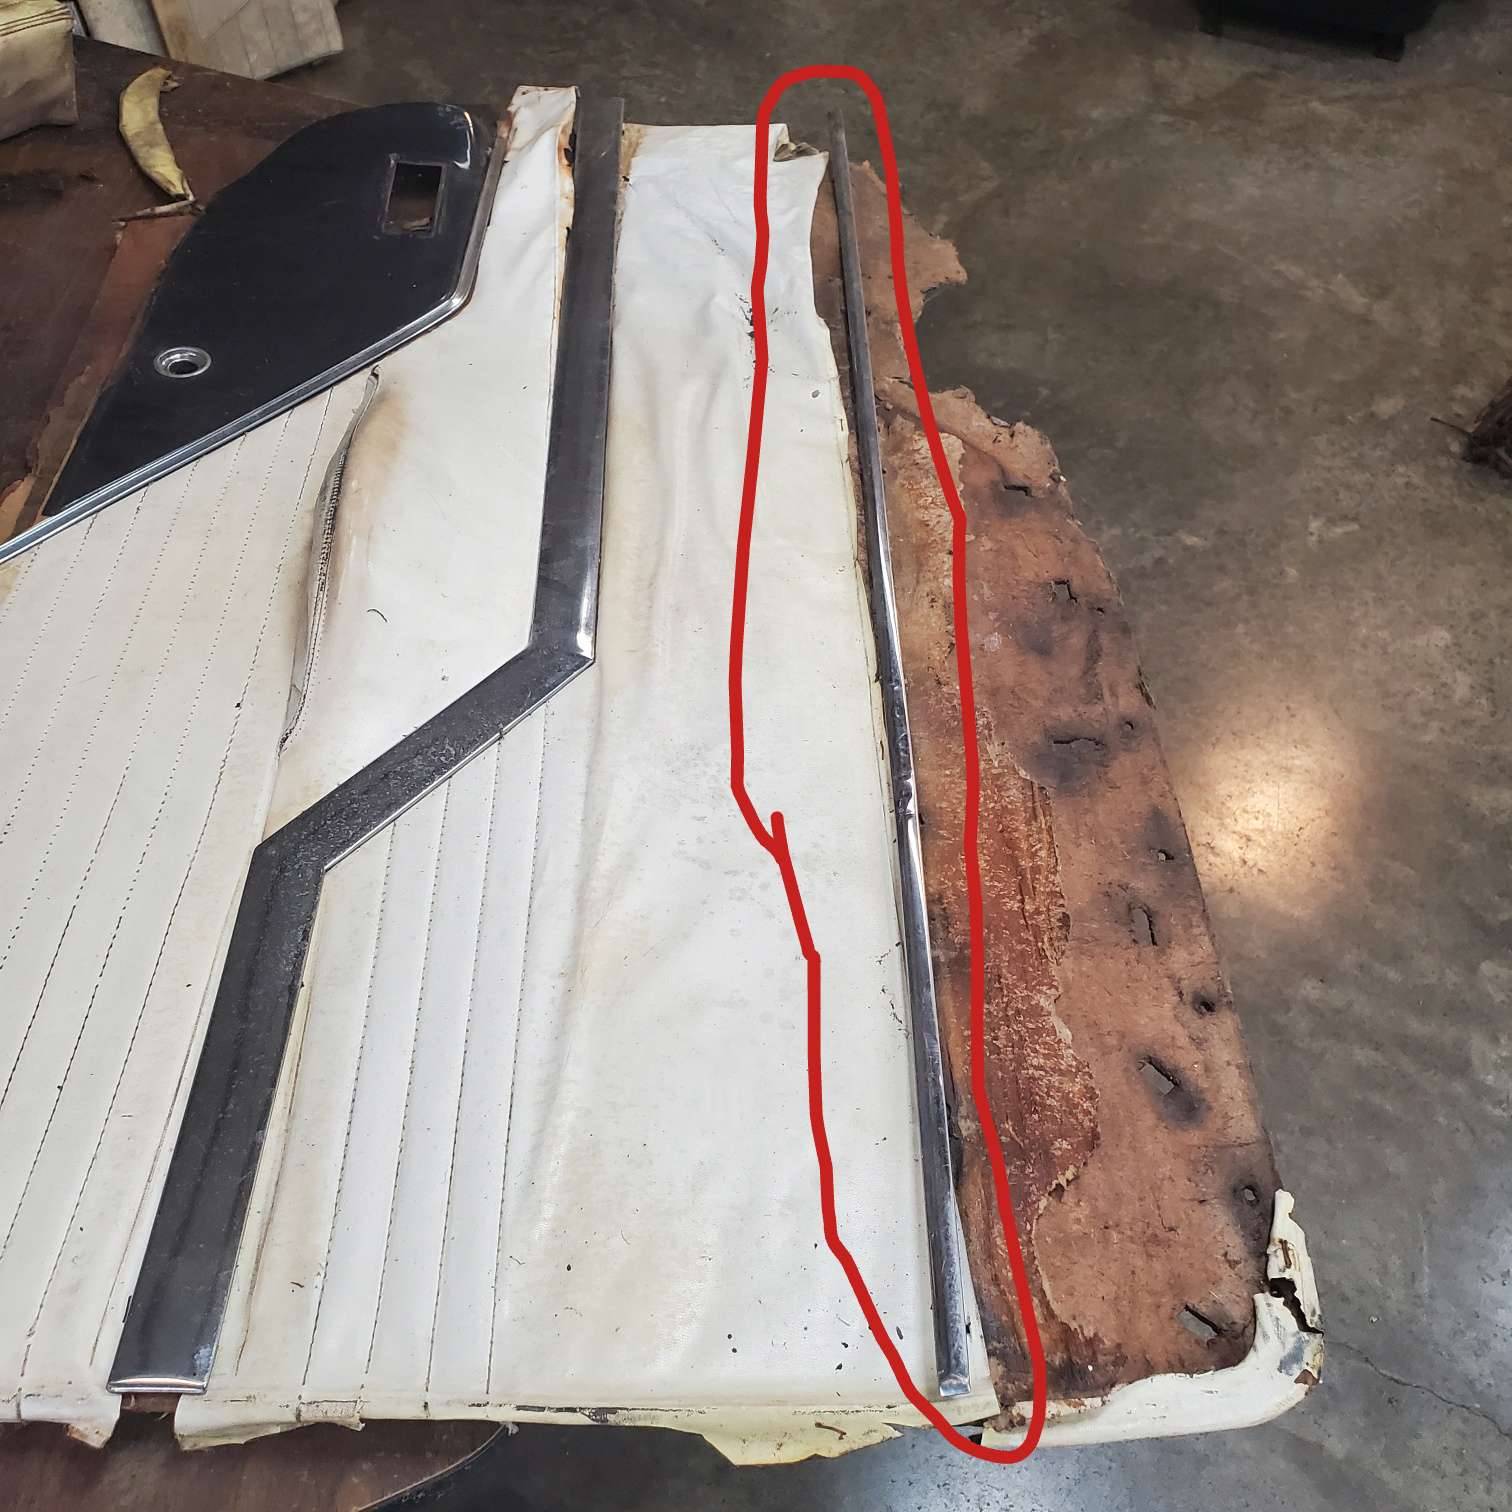
Posted on: 2023/9/7 18:49
|
|||
|
Stewart Ballard
|
||||
|
||||
|
Re: Stewart's 1955 Packard 400
|
||||
|---|---|---|---|---|
|
Home away from home
|
Currently weighing my options on the power antenna. I messed with it a long time ago and found the plastic drive cable/thing broken.
I've not touched it since that one time when I cracked it open. I am not sure it is worth the expense to have it fixed now. I plan to send the radio away to be "modernized". So, I'll never actually need the antenna again, will I? Do I just install the unit to cover the hole? Looking for recommendations. I would love to have it working but would rather use my money on more important parts.
Posted on: 2023/9/7 18:29
|
|||
|
Stewart Ballard
|
||||
|
||||
|
Re: Stewart's 1955 Packard 400
|
||||
|---|---|---|---|---|
|
Home away from home
|
Howard: I made no modifications to the pinion shaft. It is exactly as it came out of the original motor. I am a little concerned about that urethane piece also but it is not like this car will be driven daily. I am counting on it holding up in the time that I own it.
Mounting the Dorman motor to the regulator. The 3 holes indicated, in SideTwo.jpg, need to be drilled out to ¼”. I purchased a length of ¼ all-thread and cut 3 pieces about 3 ¼”. FYI, if you cut the all-thread at 3 ½” it may not go into the opening in the door. I also purchased (from Mcmaster and Carr) some 1 ½” long nuts You can see in the pictures how I assembled the all-thread and the long nuts. You may need to add a washer or two on top of the long nuts. For some reason, I needed washers for this one in the pictures but did not need them in the first unit that I assembled. My biggest concern throughout the whole process was the height of this modification. Laying flat on a table, the original motor and regulator are about 3 ¾” tall. The mod described here is 5” tall. Having said that, it still fits into the door and does not appear to interfere with any other door components. The door is narrower at the opening but gets wider as you move it upwards. There is still about an inch or more of play between the motor and the sheet metal of the door when it's bolted in place. This concludes my explanation of my PW mod. Fill free to ask questions or show me my mistakes. Attach file: assembled1.jpg (58.31 KB)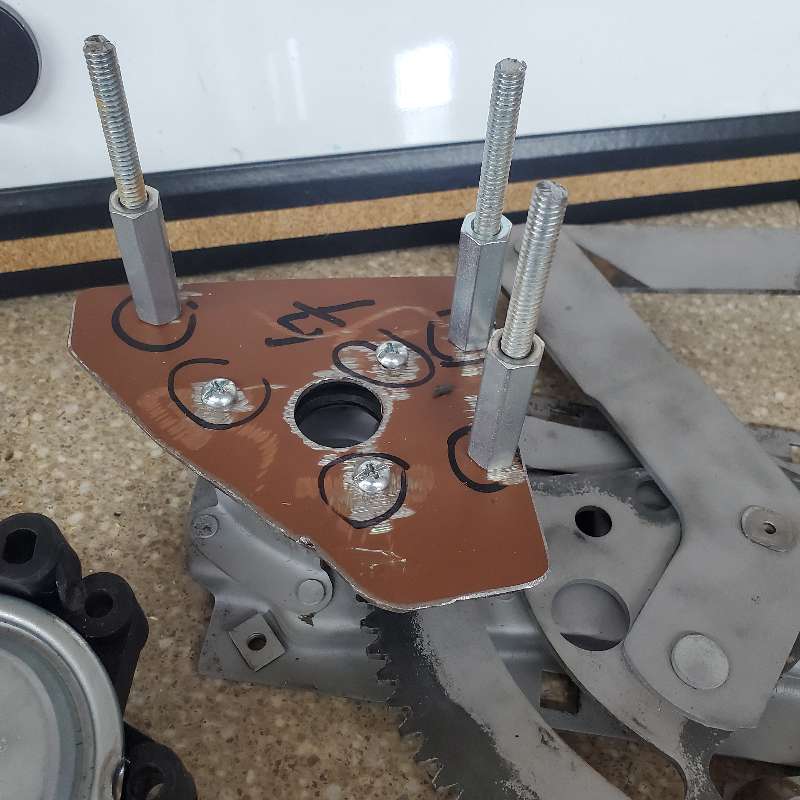 assembled2.jpg (57.85 KB) assembled2.jpg (57.85 KB)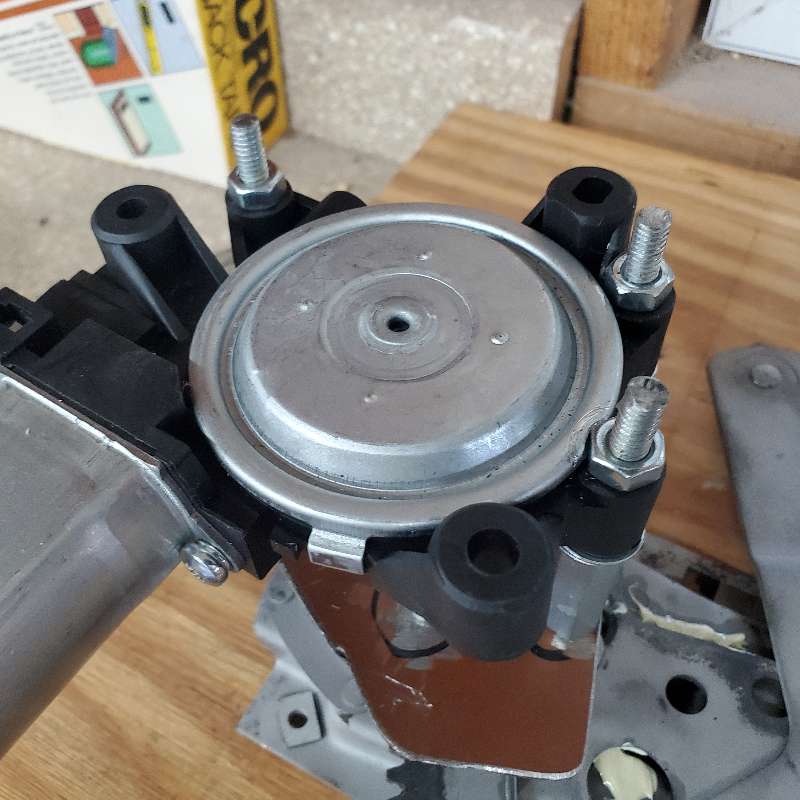 assembled3.jpg (49.57 KB) assembled3.jpg (49.57 KB)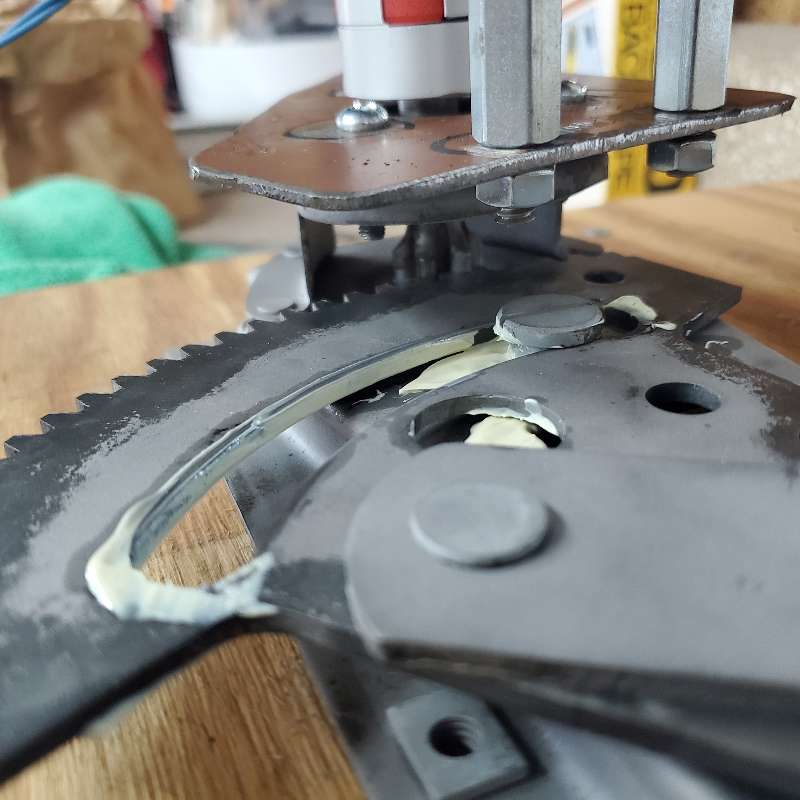 assembled4.jpg (71.01 KB) assembled4.jpg (71.01 KB)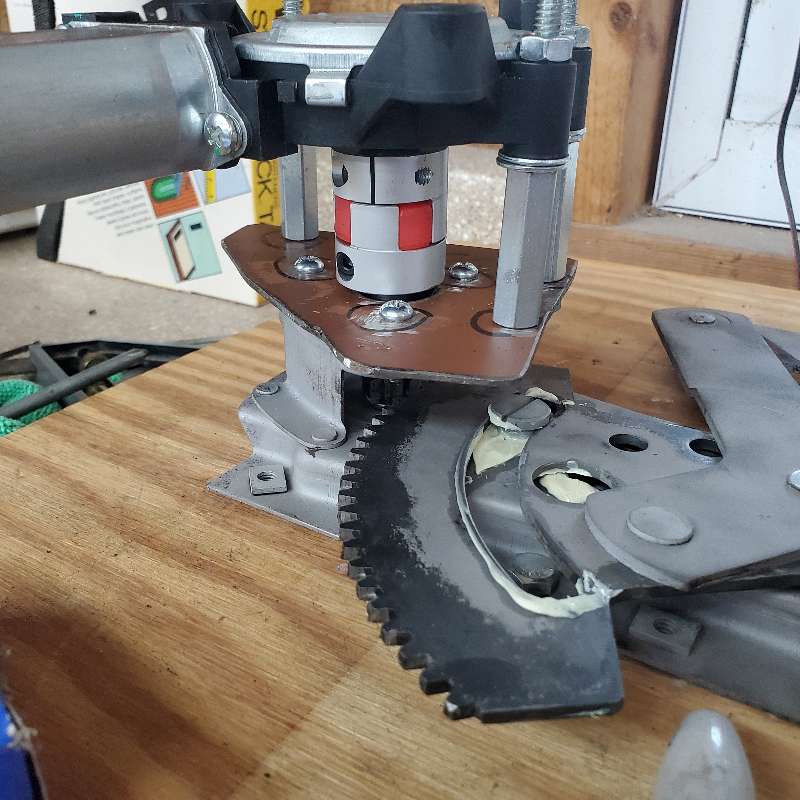 door1.jpg (68.50 KB) door1.jpg (68.50 KB)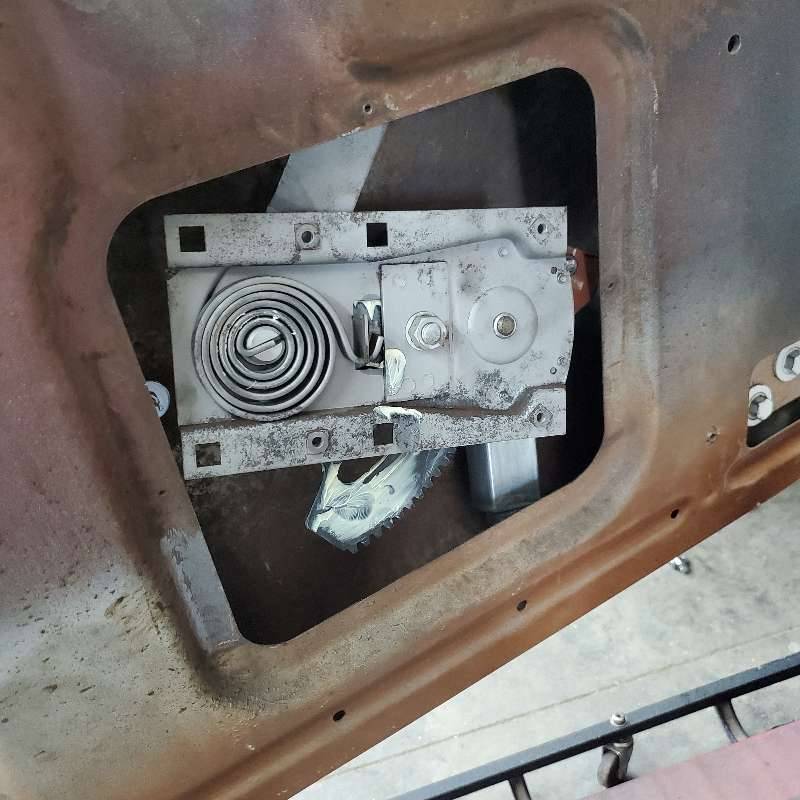 door2.jpg (75.94 KB) door2.jpg (75.94 KB)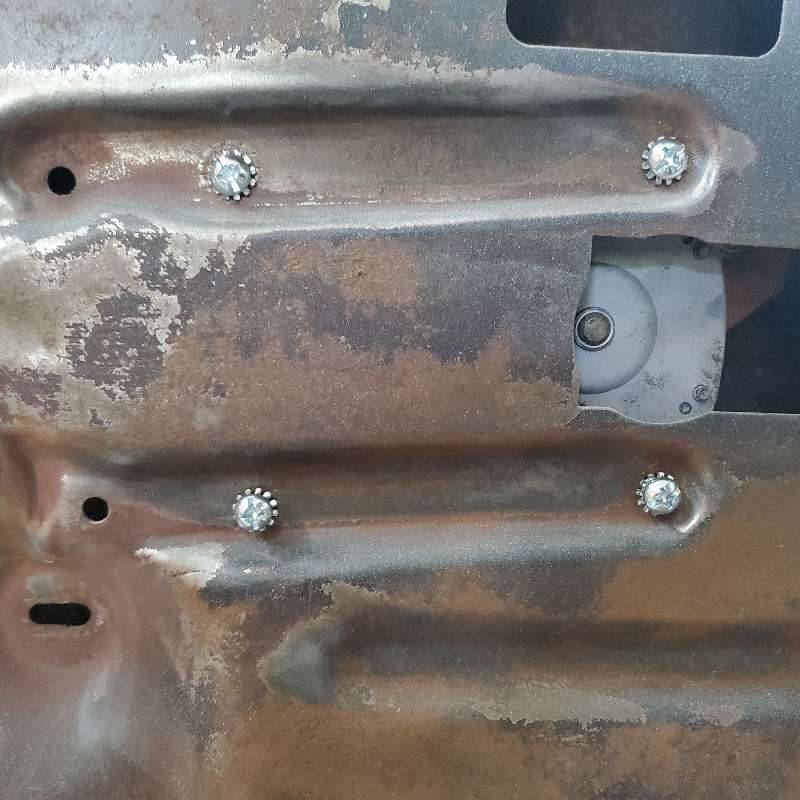 LookingDownIntoDoor.jpg (47.06 KB) LookingDownIntoDoor.jpg (47.06 KB)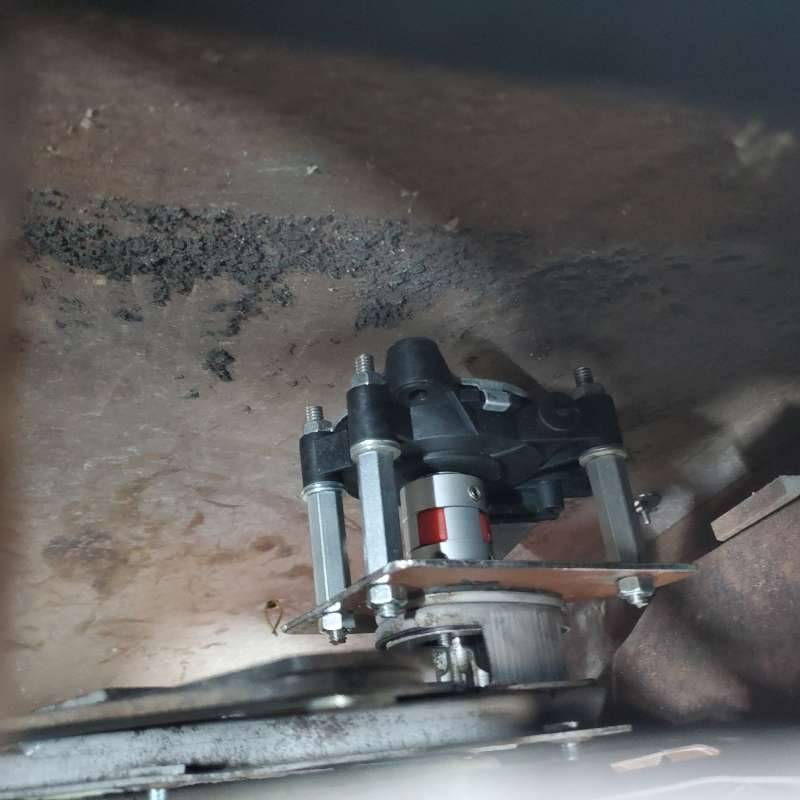 LookingUpIntoDoor.jpg (62.09 KB) LookingUpIntoDoor.jpg (62.09 KB)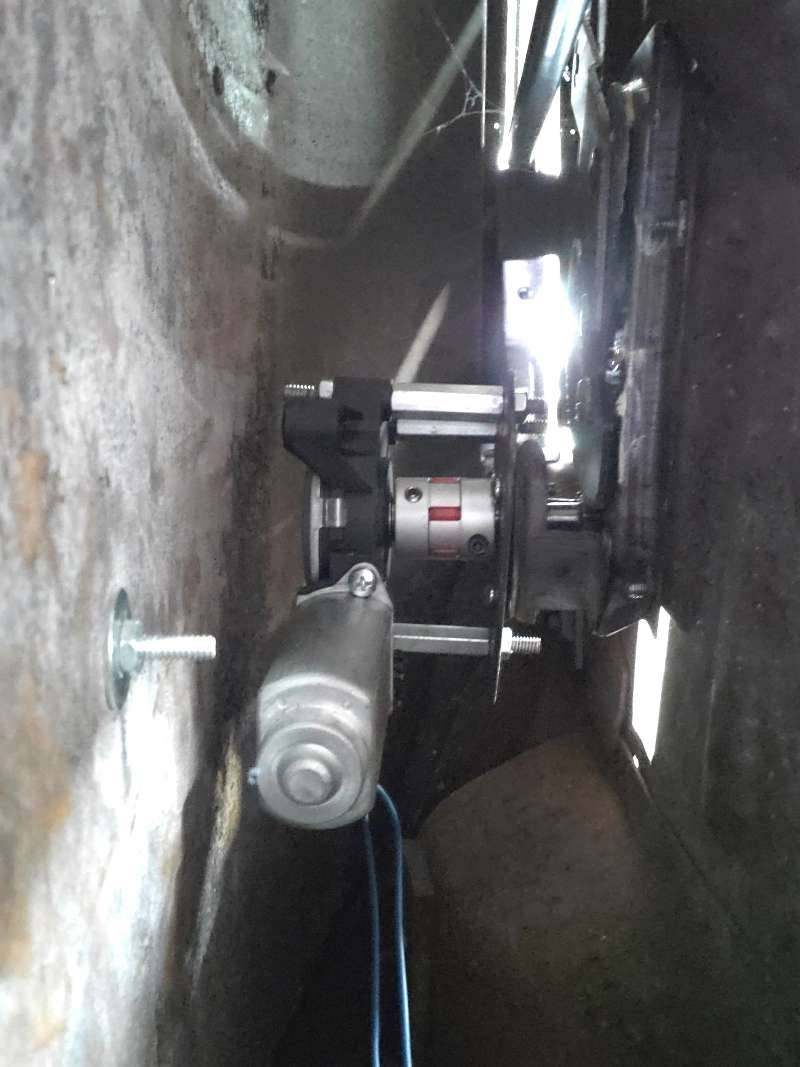
Posted on: 2023/9/3 15:37
|
|||
|
Stewart Ballard
|
||||
|
||||
|
Re: Stewart's 1955 Packard 400
|
||||
|---|---|---|---|---|
|
Home away from home
|
I bought this coupling on Amazon for about $12 (coupling2.jpg). It is an 8mm to 14mm adapter coupling. I tried several other couplings but this one worked best. The 14mm end fits the Dorman motor like a glove. I had to drill the 8mm end out to ⅜” for the original gear/shaft to fit up to the flat section (coupling3.jg & coupling4.jpg).
I had little faith in the clamping screws on the adapter coupling to be strong enough to hold either the motor or the shaft for very long so, I just went ahead and drilled two holes into the side of the coupling and used a ¼-20 tap to thread the holes and inserted two Allen screws as set screws (coupling5.jpg & coupling6.jpg). You can see how the motor, shaft, and coupling fit together in the last image. I am working on the post for mounting it to the adapter plate now and will post it later. Attach file: Coupling2.jpg (40.06 KB)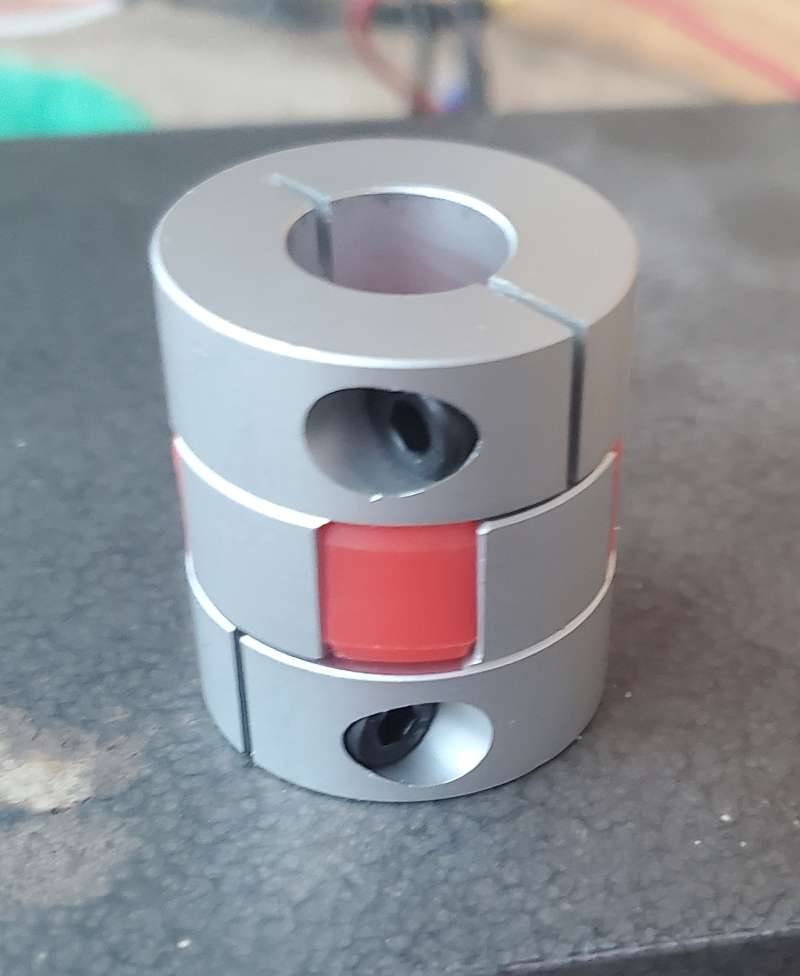 coupling3.jpg (81.82 KB) coupling3.jpg (81.82 KB)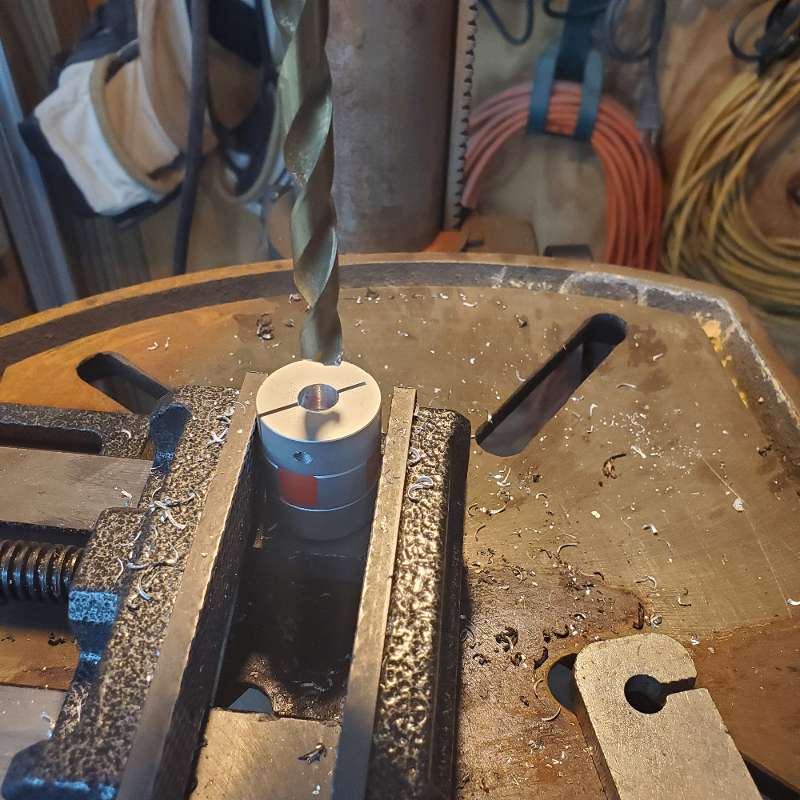 Coupling4.jpg (33.19 KB) Coupling4.jpg (33.19 KB)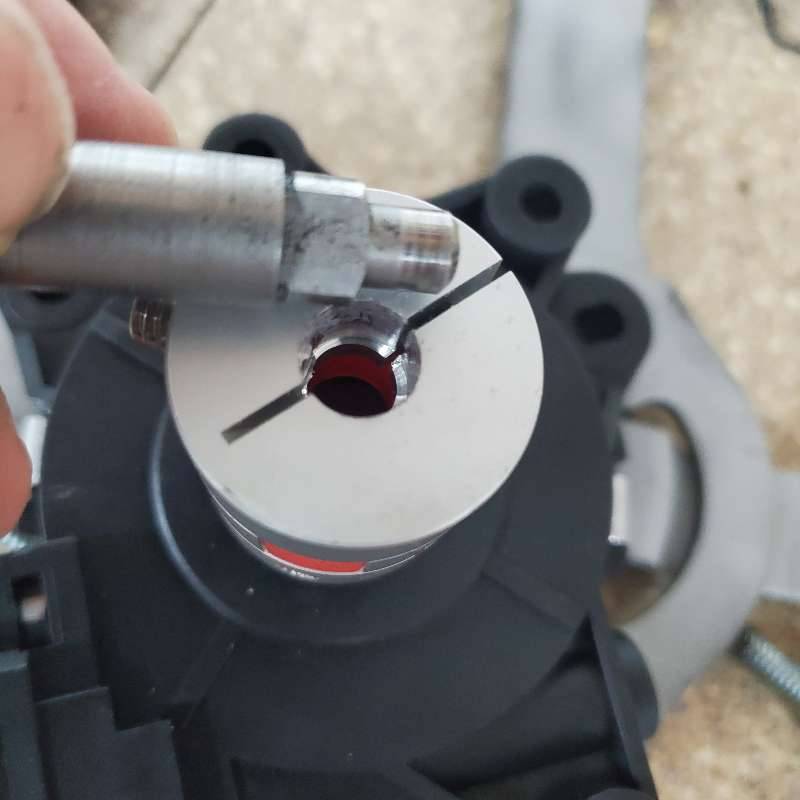 Coupling5.jpg (71.71 KB) Coupling5.jpg (71.71 KB)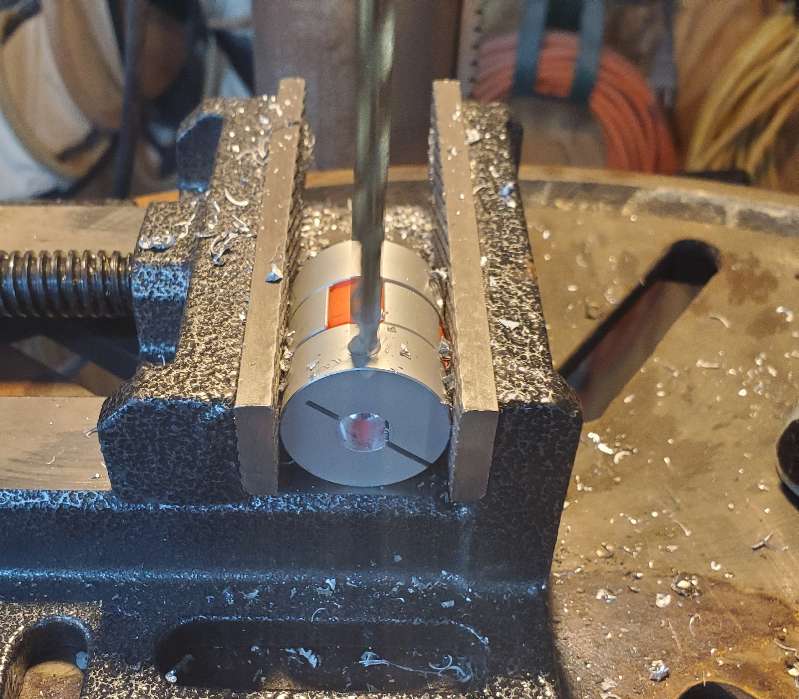 Coupling6.jpg (53.91 KB) Coupling6.jpg (53.91 KB)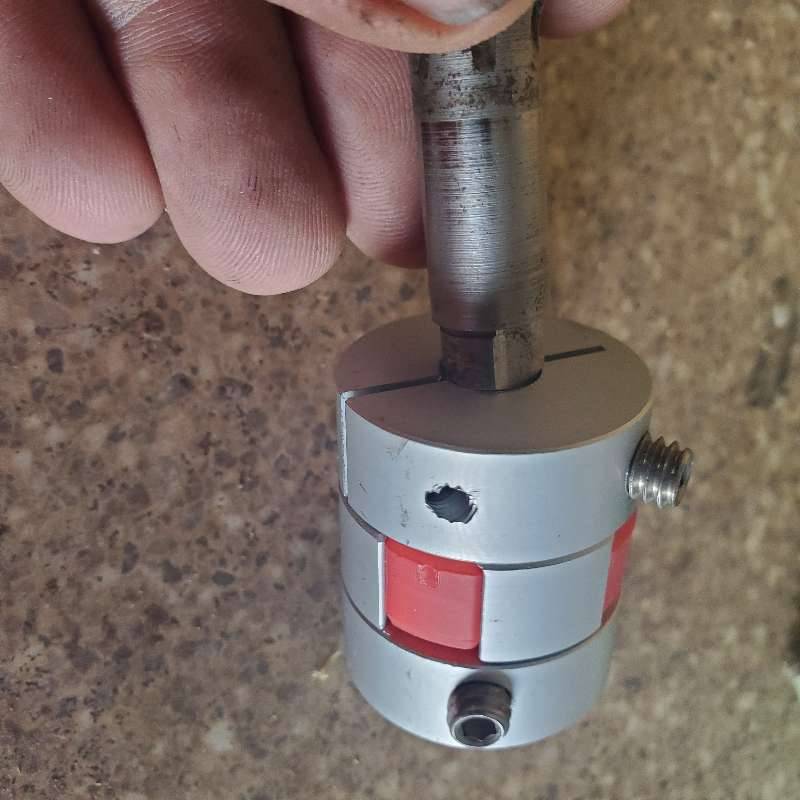 coupling1.jpg (79.02 KB) coupling1.jpg (79.02 KB)
Posted on: 2023/9/3 11:54
|
|||
|
Stewart Ballard
|
||||
|
||||
|
Re: Stewart's 1955 Packard 400
|
||||
|---|---|---|---|---|
|
Home away from home
|
Here is how I created the adapter plate for the Dorman PW motor to my Packard regulator.
I am not smart enough to provide a detailed blueprint /diagram of hole placement and measurements but will do my best to show you how I got this done. I used some scrape ⅛” plate metal that I had left from another project. Then I used one of the “egg” shaped, rubber bushings from the original motor and traced its shape onto the metal plate. That gave me the center hole and the 3 holes to mount it to the window regulator (Adapter1.jpg). Again have the regulator lying nearby so you can keep up with the orientation of the motor. It's easy to get turned around. Another hint is getting the shaft of the new motor aligned over the center hole so you can mark the location of the three holes that will be used to attach the motor to the adapter plate. First, I drilled those first 3 mount holes out to ¼. I then drilled the center hole just large enough so that the new gear/shaft of the new motor fits through it, about ½” (adapter2.jpg). I’ll drill the center hole out more later but for now, I need it smaller. Once those first 4 holes are drilled, I put the gear/shaft of the motor through the center hole and use a scribe to mark the 3 holes for mounting the motor. Sidetwo.jpg shows the 3 holes that I used to mount the motor to the adapter. There are 6 mount holes on the motor itself but I only used the 3 lower holes, shown in the image. Now I drilled those 3 holes out to ¼” as well. I also enlarged the center hole out to ⅞” (adapter4.jpg). I use ¾” - #10 screws to attach the adapter plate to the regulator (adapter6.jpg). I tried to show how I used some of the original parts in the mounting (adapter5.jpg). Now the motor is ready to mount on the adapter. For those of you that cannot wait the last photo is for you. It shows the adapter that I am using to tie it all together(coupling1.jpg). I’ll explain that in the next post. The only special tool that I use in this whole project is a drill press. I am sure I have forgotten something. If so, I’ll pick it up in a later post. Attach file: Adapter1.jpg (49.38 KB)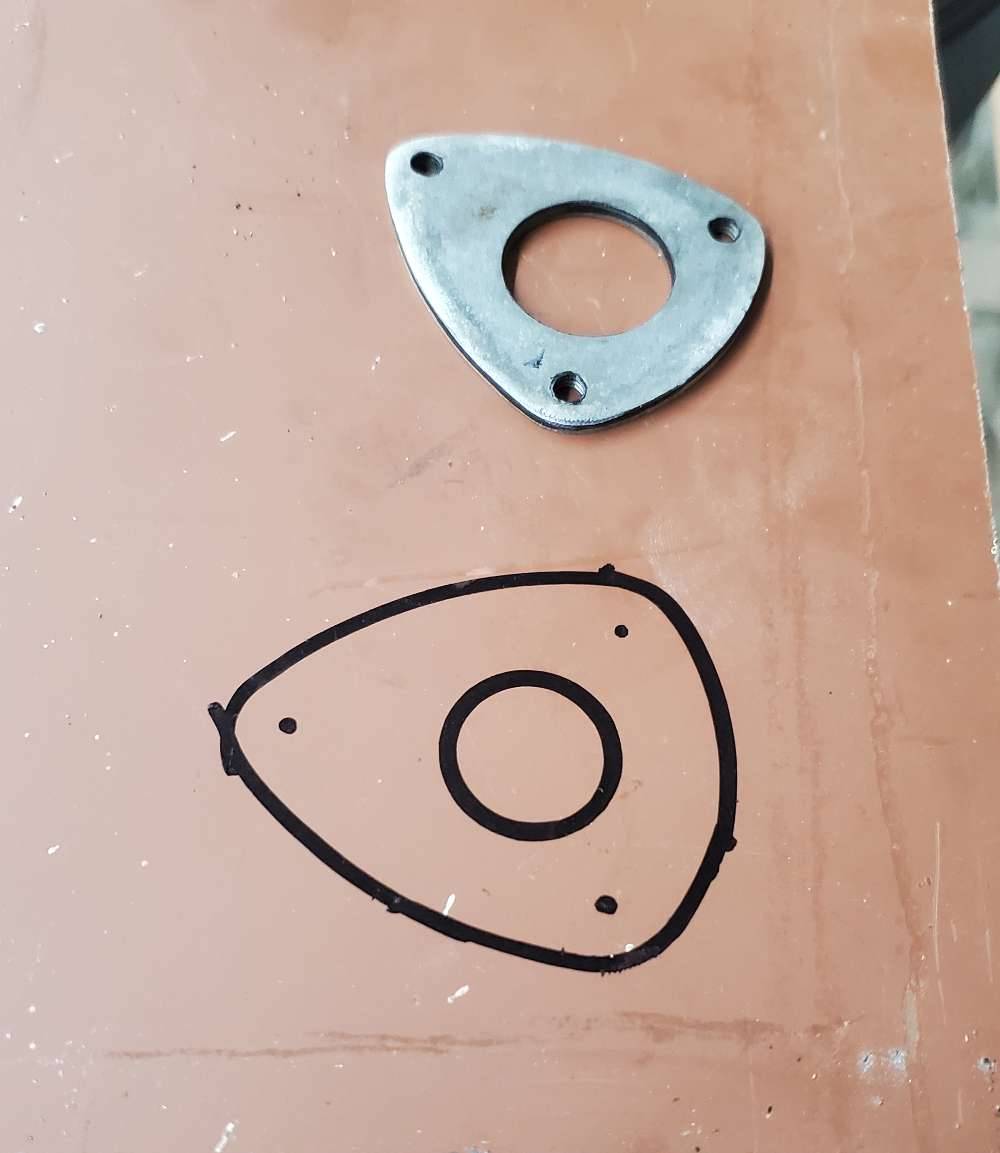 Adapter2.jpg (136.11 KB) Adapter2.jpg (136.11 KB) SideTwo.jpg (103.57 KB) SideTwo.jpg (103.57 KB)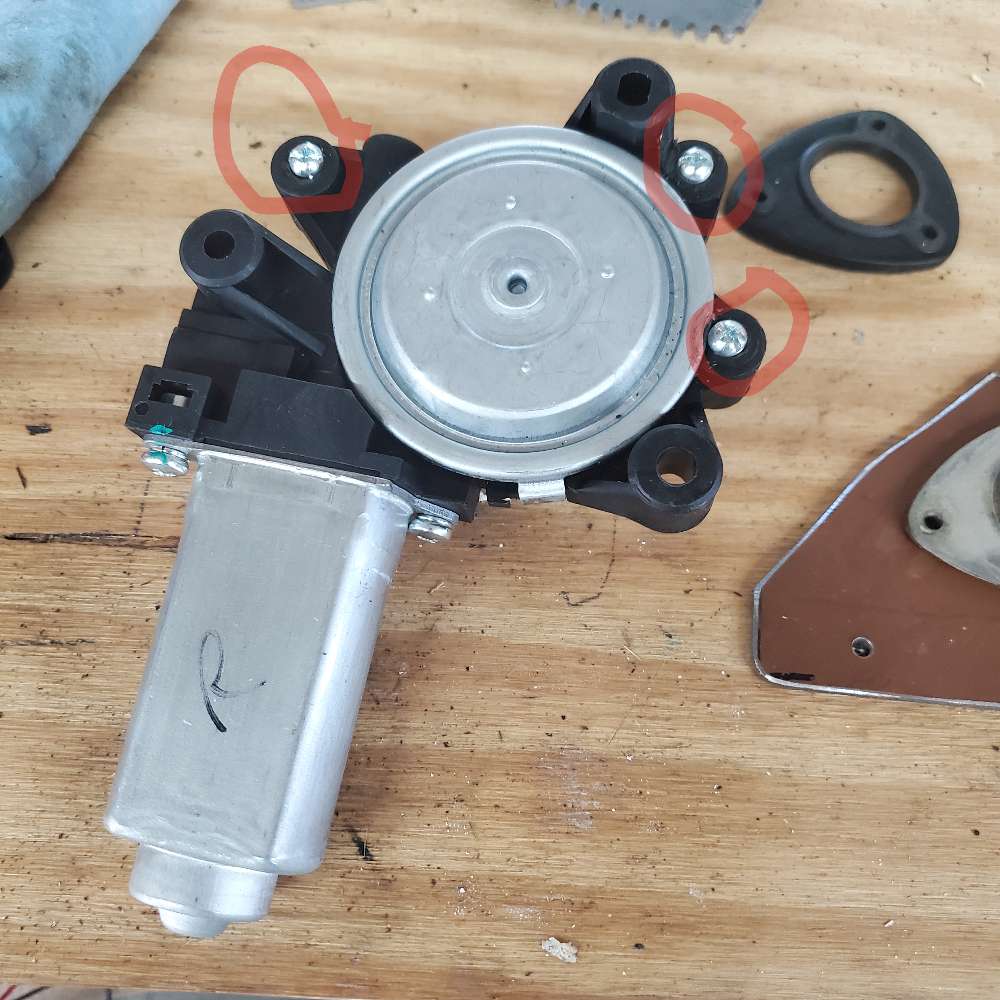 adapter4.jpg (72.11 KB) adapter4.jpg (72.11 KB) adapter6.jpg (156.22 KB) adapter6.jpg (156.22 KB) adapter5.jpg (96.43 KB) adapter5.jpg (96.43 KB)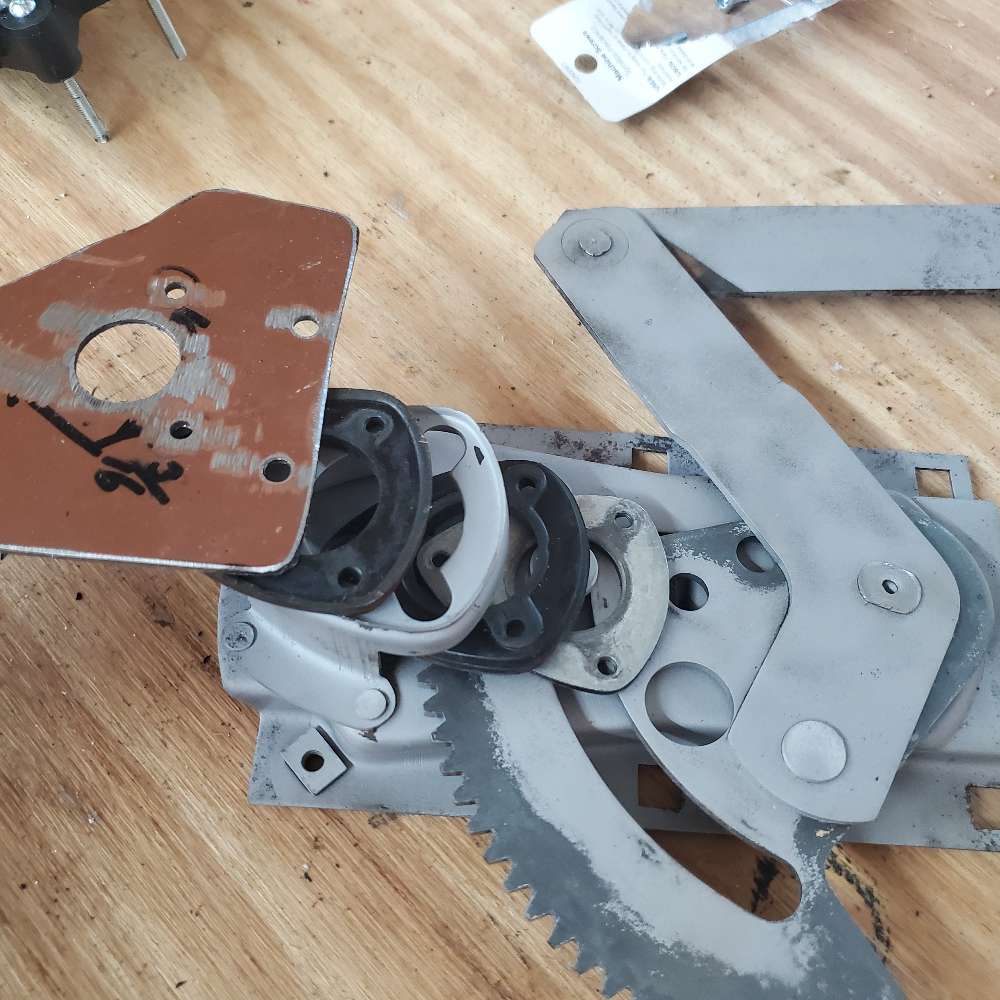 coupling1.jpg (79.02 KB) coupling1.jpg (79.02 KB)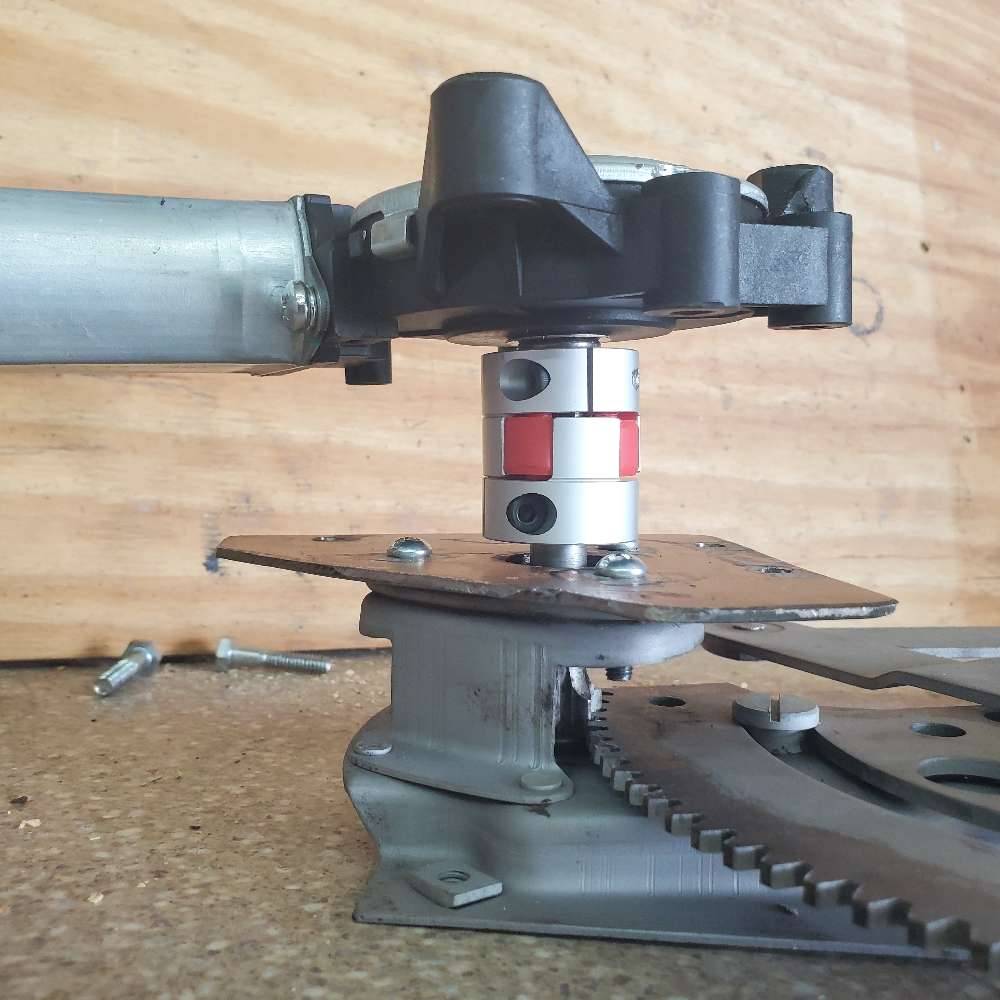
Posted on: 2023/9/2 19:37
|
|||
|
Stewart Ballard
|
||||
|
||||
|
Re: Stewart's 1955 Packard 400
|
||||
|---|---|---|---|---|
|
Home away from home
|
Well, I am still an idiot but as I lay awake last night it dawned on me that I was using my tabletop power source to try to raise the window glass. It works well to test the motor and regulator on my workbench but does not have enough power with a load on the motor.
I rolled the battery over to the passenger door today and hooked it up (through the relays of course) and the window goes up and down link a champ. I'll sleep much better tonight. I finish up my modification posts after I assemble all the photos I took. Also, I finally got the steering wheel painted today. Attach file: SteeringWheel.jpg (407.40 KB)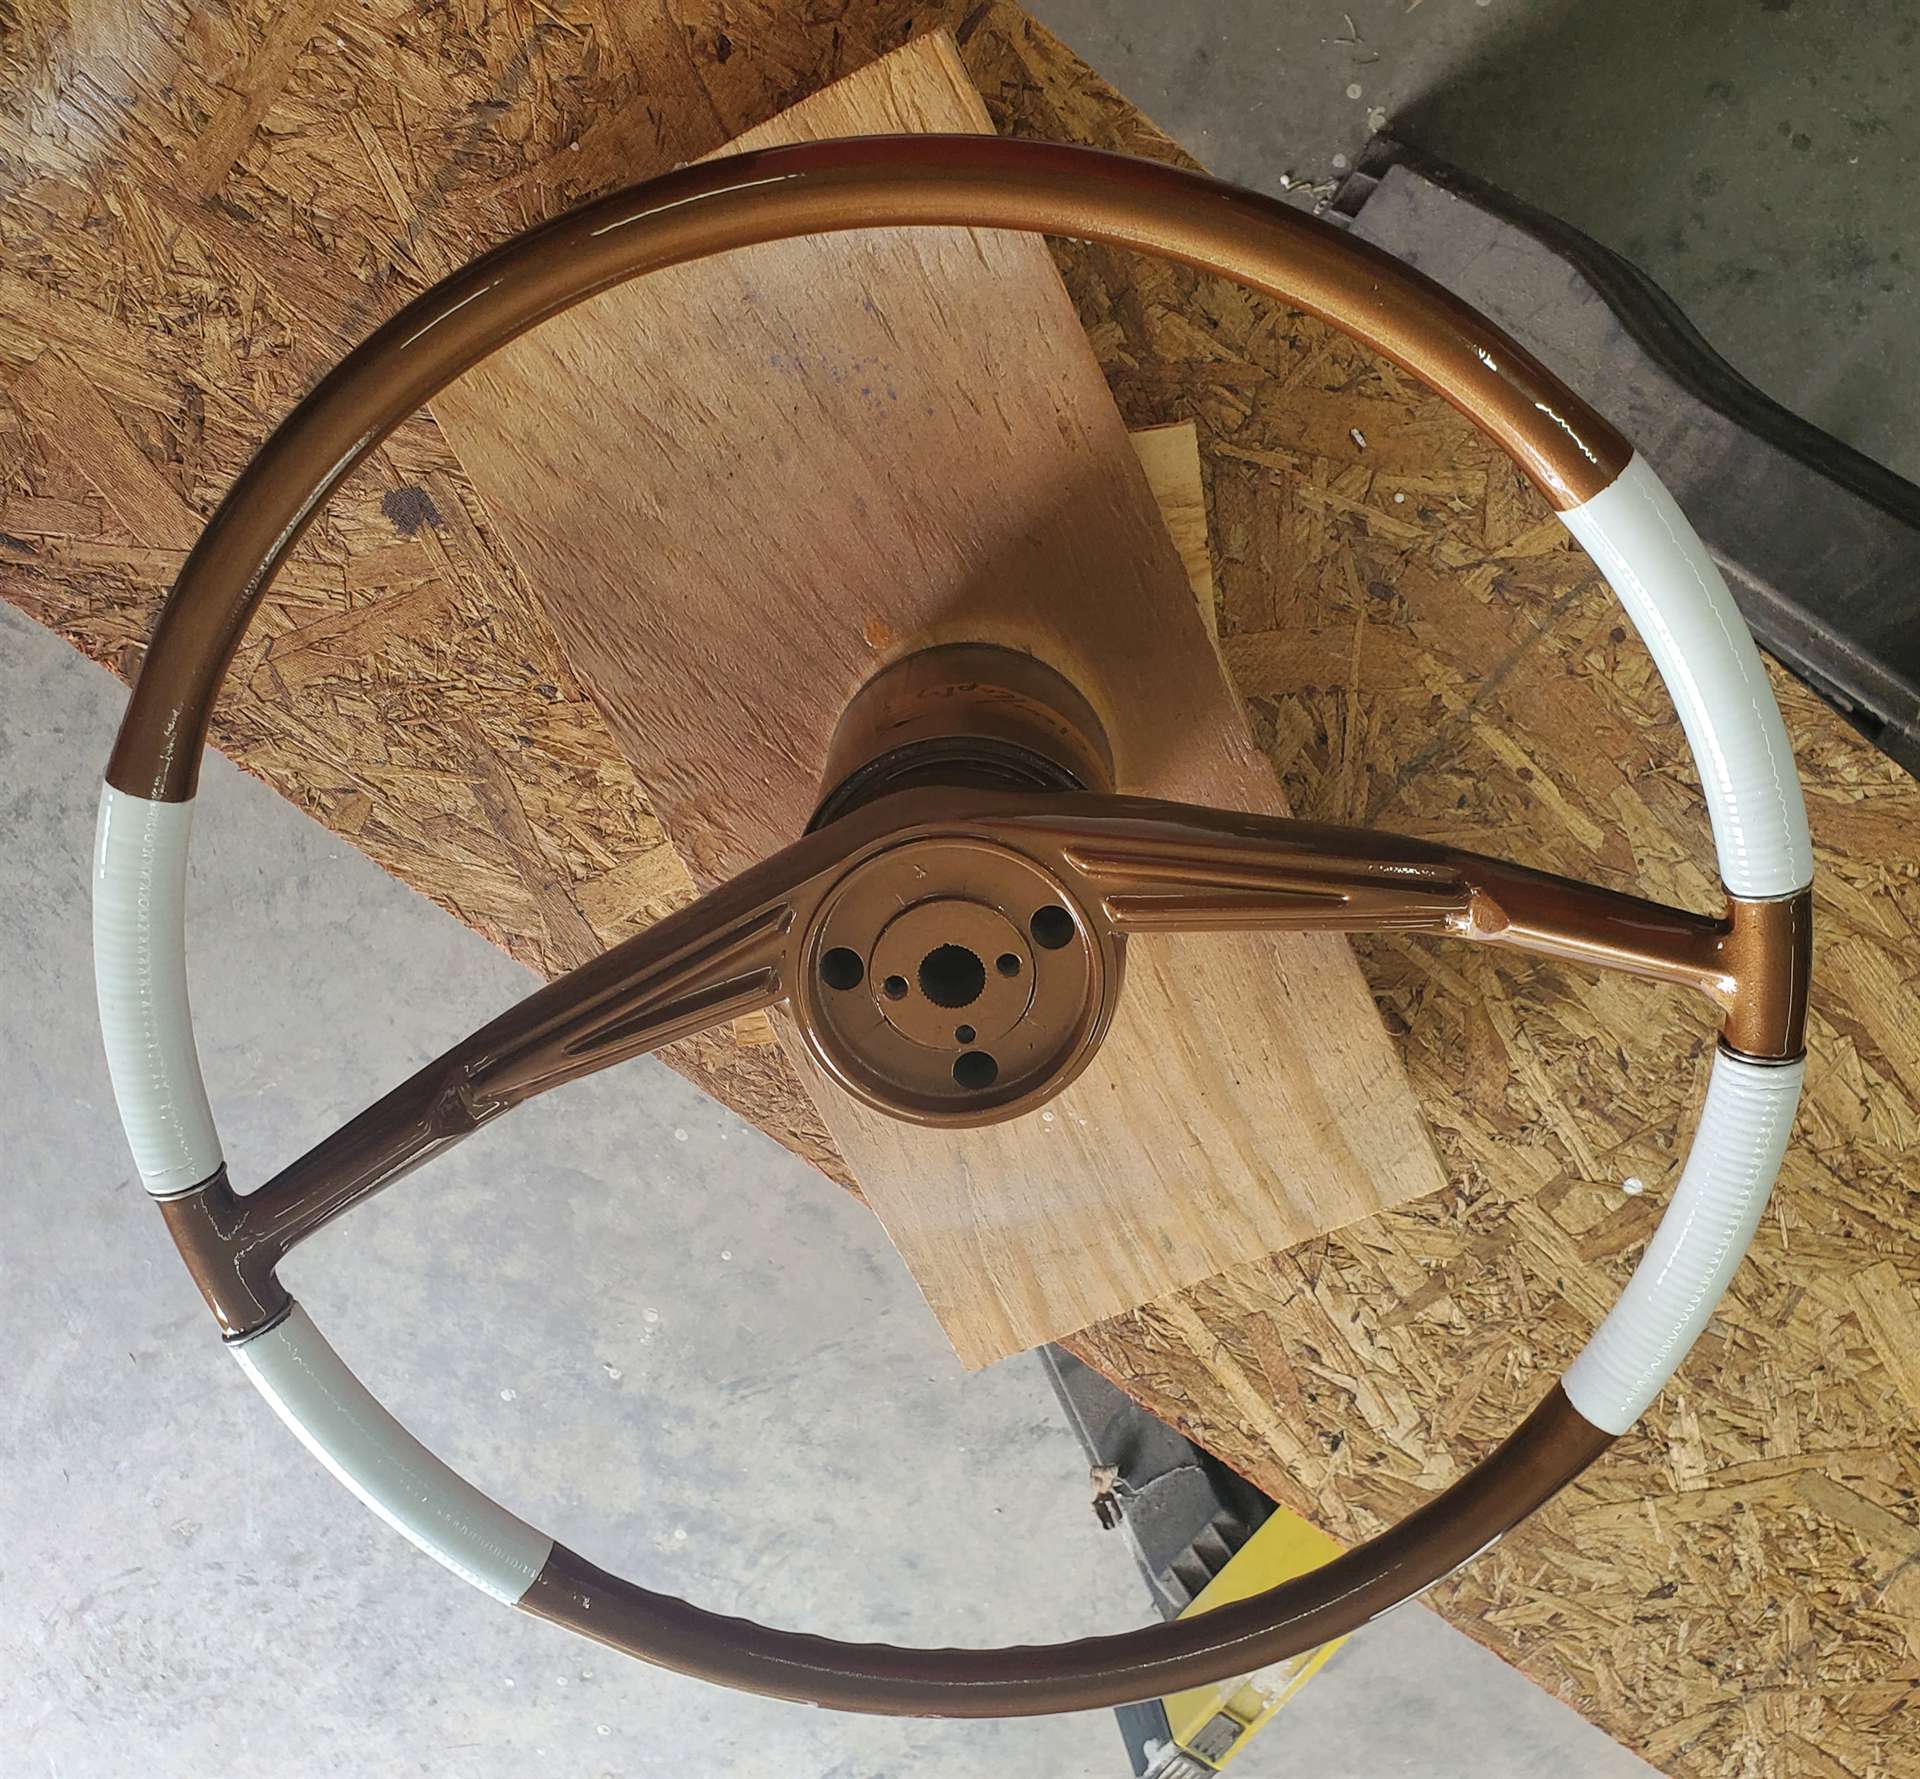
Posted on: 2023/9/2 15:04
|
|||
|
Stewart Ballard
|
||||
|
||||


