|
Re: 626 bumper bowtie color
|
||||
|---|---|---|---|---|
|
Home away from home
|
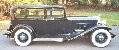
Kurt,
Black seems to be the color of choice. Hard to tell in the last picture, these guys seem to be in a hurry. Regards, Dave Attach file:  (14.53 KB) (14.53 KB)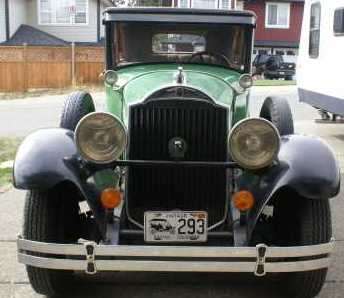 (49.60 KB) (49.60 KB)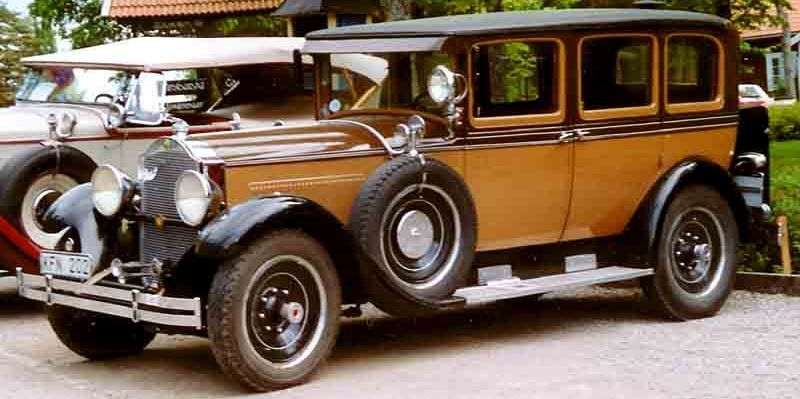 (35.40 KB) (35.40 KB) (7.58 KB) (7.58 KB)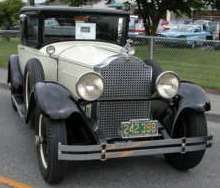 (34.69 KB) (34.69 KB) (13.30 KB) (13.30 KB)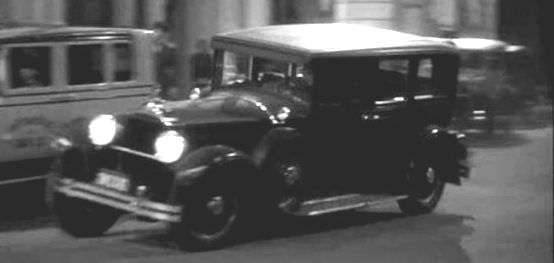
Posted on: 2010/12/30 11:25
|
|||
|
||||
|
Re: Adjusting 32's horns
|
||||
|---|---|---|---|---|
|
Home away from home
|
Here's some of what I was trying to say previously, showing where to look.
Thanks to Owen for the drawing. Attach file:  Size: 88.12 KB; Hits: 200 Size: 88.12 KB; Hits: 200
Posted on: 2010/12/29 13:11
|
|||
|
||||
|
Re: Adjusting 32's horns
|
||||
|---|---|---|---|---|
|
Home away from home
|
New external horn brackets for '32's.
http://cgi.ebay.com/ebaymotors/1932-Packard-Horn-Vibration-Dampers-/190483083485?pt=Vintage_Car_Truck_Parts_Accessories&hash=item2c59ad30dd Attach file: (7.72 KB)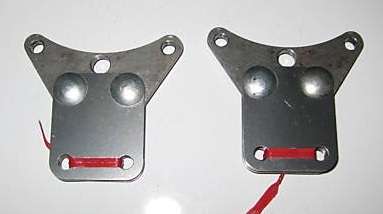
Posted on: 2010/12/29 9:25
|
|||
|
||||
|
Re: Adjusting 32's horns
|
||||
|---|---|---|---|---|
|
Home away from home
|
Tbirdman,
My experience has been with external mounted Sparton horns. You can adjust them for a sweet tone. The Sparton horns have a set of points that can be adjusted to control the movement of the spring steel diaphragm in the horn. There is a small clearance between the iron core connected to the spring steel diaphragm and the iron armature surrounding the core. The iron armature surrounding the core has the copper field windings that drive the iron core up and down as the horn is energized. Adjusting the points will increase or decrease the movement of the iron core and the horn diaphragm, which will change the horn tone and loudness. A few things can happen to turn the horn cormorant song into a duck quack; 1. The points have corrosion on them, preventing full movement of the diaphragm. 2. Corrosion can build up between the solenoid and armature, also preventing full movement, but also dampening movement of the diaphragm. Instead of a pure tone that resonates, you get a short tone that doesn't sound quit right. 3. The brackets holding the horns to the radiator shell have multiple thin strips of spring steel in them. Over time these strips either corrode away, or corrode together. The purpose of these is to isolate the horns from the rest of the car, so the horn vibration doesn't transfer and the horn assembly is allowed movement. Classic and Exotic in Michigan has a similar one listed on their site. They also have some other good Packard stuff..... 4. The thin spring steel diaphragm is rusty, cracked or has rust holes in it. http://www.classicandexotic.com/store/p-46-klaxon-k-22-k-19-horn-spring-mount.aspx Regards, Dave
Posted on: 2010/12/29 8:43
|
|||
|
||||
|
Re: BigKev's 1954 Packard Clipper Deluxe Sedan
|
||||
|---|---|---|---|---|
|
Home away from home
|
BigKev,
No change shorting the plugs eliminates piston, wrist-pin, con rod noise, and loading the motor should change the noise if it was the flex plate. Good clue with the starter noise.....If the starter pinion / ring gear mesh is to tight the starter Bendix may not be disengaging from the ring gear. Or a bad Bendix that is not kicking the starter pinion out of the ring gear. You may want to look at the Bendix to verify its condition and then cut some shim stock to mount between the starter boss and flywheel housing. If the pinion / ring gear mesh is tight the shim stock will open this up. Another way to check this is to remove the starter, pack some clay around the starter pinion and bolt it back in. Remove the starter and check the thickness of the clay. You may have to spin the starter pinion gear our and tape it in position so you make sure it meshes with the ring gear when you bolt it in. PackardV8's comment about the floating pickup screen sounds good, a quick and easy check by dropping the oil level. If the floating pump screen is stuck in position this may not show it. Dropping the pan may be required. If dropping the oil level doesn't change anything, how about pulling the plugs and turning the engine over using a socket / breaker bar on the crank harmonic balancer nut? If the crank is hitting the non-floating pump pickup screen you may be able to hear it by turning the engine by hand. K-D also makes a simple tool that hooks on the flywheel ring gear teeth to rotate it by hand. http://www.sjdiscounttools.com/kdt2270.html Your previous comment of having some distributor shaft side play - I've seen .005" max. shaft side play as a service limit it a few shop manuals for distributors with points. Regards, Dave
Posted on: 2010/12/28 8:48
|
|||
|
||||
|
Re: BigKev's 1954 Packard Clipper Deluxe Sedan
|
||||
|---|---|---|---|---|
|
Home away from home
|
BigKev,
Does the "tick" change when you short a plug wire? To eliminate piston, wrist pin, rod noise.... Your point on harmonics got me thinking, could the noise be originating from outside the engine and the block is magnifying / changing it. I had a 79 jeep Cherokee that had an engine "tick" that drove me crazy. I traced it down to a broken flex plate tab on the TH400 transmission. I was sure it was a rod knock. Another "tick" I ran across was on a '30 Ford , the thrust bearing on the crank was worn so much there was enough end-play in the crank to bias the flywheel towards the back of the engine. One of the pressure plate bolts was just a little longer than the rest and it was hitting the bell housing. If the "tick" is loud enough maybe pulling the plugs and spinning it over with the starter would show something. Second thought when you turn the key off and the engine winds down does the "tick" continue? Please send some CA weather our way, I just finished digging out from 48" drifts driven by 55 mph winds, and it's supposed to be 8 deg. F tonight. Some warm Santa Anna winds would be nice... Regards, Dave
Posted on: 2010/12/27 18:29
|
|||
|
||||
|
Re: BigKev's 1954 Packard Clipper Deluxe Sedan
|
||||
|---|---|---|---|---|
|
Home away from home
|
BigKev,
Thanks for all the work you do to make this site what it is. My 1 ? cents regarding the engine tick: Your video is 17 seconds long; I counted approximately 25 "ticks" in 5 seconds of video. This gives 5 ticks per second. If we assume the engine was idling between 450 and 650 rpm, a "tick" related to crankshaft rpm should be in the range of 7.5 to 10.8 "ticks" per second, depending on rpm. It would be helpful if you could record the exact engine rpm next time you fire her up and record video / audio. If you're engine rpm measures 650 and your video records "ticks" at approximately 5 per second, this is a good clue that the noise is coming from something being driven at ? the crankshaft rpm since 650 rpm's at the crankshaft gives 10.88 "ticks" per second and 5 "ticks" per second is very close to ? of 10.88. If the "tick" occurs at ? engine speed I would look closely at the valve train or any engine component being driven at or near to ? engine rpm (distributor / oil pump / engine accessory, water pump impeller), etc... For example - Could the noise be a loose or missing distributor weight spring, causing the weight to hit the side of the distributor housing, loose valve seat insert, loose cam gear key-way, master link on the cam chain hitting something , a loose distributor drive gear / pin, etc... Hope this helps, I had a problem setting vales on an engine that was traced to bent cam lobes. It "only" took me two months to figure it out. Regards, Dave
Posted on: 2010/12/27 13:03
|
|||
|
||||
|
Re: 29 Packard front engine seal
|
||||
|---|---|---|---|---|
|
Home away from home
|
29tons,
Yes, usually the engine needs to be jacked up slightly, approx. 1/8" to make it easier to remove the timing chain cover. The harmonic balancer or damper does not need to be disassembled to replace the felt seal in the timing chain cover. Once the nut on the front of the crankshaft is removed the harmonic balancer will slide off. Sometimes these are a tight fit to the crankshaft and may require a puller to remove. You will have to remove the two bolts on each side of the front crankcase motor mounts, which will allow you to tilt the motor up slightly. Removing the nut at the front of the crankshaft will allow removal of the harmonic balancer. With the balancer off, the nuts holding the front timing chain cover can be removed, and then the timing chain cover itself. The front crankshaft seal is a felt seal that sits in a pocket in the front timing chain cover. Be sure to oil the new seal before installing it. It would be a good idea to check the timing chain condition while you have this apart. Order of dis-assembly: Drain the cooling system and remove headlamps, hood, and radiator. Loosen the water pump nuts and remove fan belt. Loosen the crankshaft front nut and remove harmonic balancer. Remove the two front motor mount bolts. Jack up the front of the engine slightly, about 1/8". Remove the front timing chain cover nuts. Remove the front timing chain cover. Remove and replace the felt seal, oil prior to installation.
Posted on: 2010/12/27 8:47
|
|||
|
||||
|
Re: Merry Christmas
|
||||
|---|---|---|---|---|
|
Home away from home
|
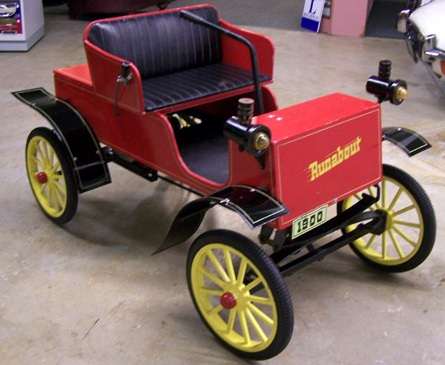
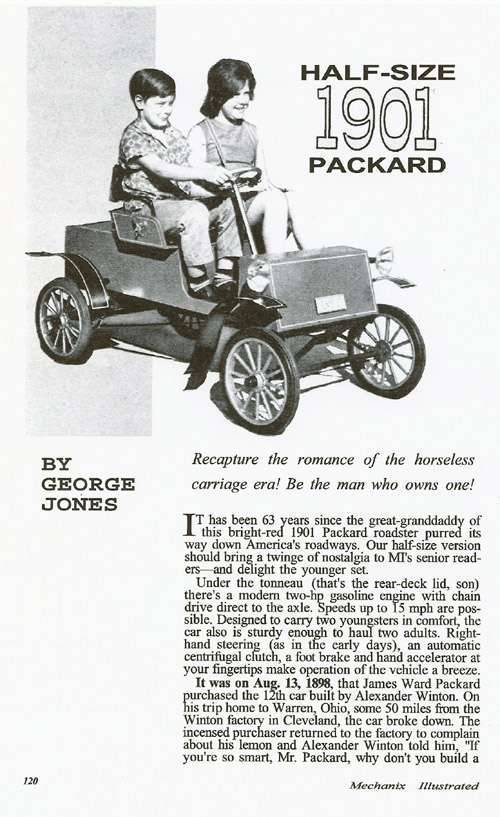
Big & small toys for under the tree....
http://www.motorcarportfolio.com/product.php?id=3805 Happy Holidays to all!
Posted on: 2010/12/24 13:28
|
|||
|
||||

|
Re: Sanding Car ready for Paint
|
||||
|---|---|---|---|---|
|
Home away from home
|
An excellent reference book covering all phases of auto body repairing and painting.
In print and available from Amazon and most local book stores. Title - Auto Body Refinishing Author - William Toboldt
Posted on: 2010/12/24 12:39
|
|||
|
||||


