|
Re: Larry's 1951 Club Sedan Project
|
||||
|---|---|---|---|---|
|
Home away from home

|
Wow...what incredible attention to the details! I admire your dedication to this car and its preservation.
Posted on: 2011/3/13 20:23
|
|||
|
[url=h
|
||||
|
||||
|
Re: Larry's 1951 Club Sedan Project
|
||||
|---|---|---|---|---|
|
Home away from home

|
Buck up 51 your car will be just as nice if you don't run out of lumber ha ha just kidding lol.
Posted on: 2011/3/13 22:58
|
|||
|
||||
|
Re: Larry's 1951 Club Sedan Project
|
||||
|---|---|---|---|---|
|
Home away from home

|
51 thanks for your kind comment. Ain't it fun! So much to learn and master.
Reading your blog . . . . I haven't a clue about the innards of Ultramatic trannies and sometimes I sit bolt upright in bed imagining what a mess I'm likely to make when I eventually have to tackle mine. However your blog has a mile of good info that I can refer to - it's already helped by making me feel a bit more confident about the 'Ultramatic challenge'to come.
Posted on: 2011/3/14 7:57
|
|||
|
1951 Packard Club Sedan | [url=ht
|
||||
|
||||
|
Re: Larry's 1951 Club Sedan Project
|
||||
|---|---|---|---|---|
|
Home away from home
|
Thanks for the drip-pan update. Look forward to the pics. Good luck.
Posted on: 2011/3/14 12:47
|
|||
|
||||
|
Re: Larry's 1951 Club Sedan Project
|
||||
|---|---|---|---|---|
|
Home away from home
|
Modification to eliminate corrosion in rear quarter panels and rear floor area.
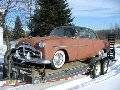
Here are pics relating to the 'drip tray' modification that I've mentioned previously, and provided rough drawings / diagrams for (- see back one page - Post #48). I'll be placing specially made aluminium drip trays in each rear quarter to catch the water that typically enters the area due to poor design in these 24th (and other?) series Coupe's like my Club Sedan. The problem was known to Packard and they released a modification kit (post-production) to try and address the problem. For details see section regarding water ingress in the '51-54 Service Manual: Section XIX 'Body' page 24: 'Rear Quarter Water Leaks (Club Sedans)'. The trays are now made and I checked they can be fitted OK. Won't be fitting them until the car has been painted and schutz /anti-rust coatings etc have been sprayed into the rear quarters as required. Trays are thin Aluminium sheeting, pop-riveted, and joints have been sealed with SikaFlex 227. I bent the sheet at a friend's place (- he has a brake so it was easy) but you could easily bend it yourself by clamping along a bench edge etc and using a mallet or rubber hammer. These trays are not visible so it's not necessary to do a perfectly neat job with them. The curved upper tray back was able to be bent in a vice (vise?) - a little at a time to get a smooth curve. See marks made to achieve this. Pics below show the idea I have for fitting the drain pipe into the trays, using 1/2inch copper pipe and flaring the end so as to secure it into the tray. The hole in the tray will be 'countersunk' as shown, and I'll use a putty like the one shown (- dead easy to use this and it works really well) to secure it although you could use bondo or most other fillers would do the trick. The pipe will be bent so it feeds into the larger pipe already fitted into the sill. Not shown is the flexible 'rubber sheet' (- I may use some other thin sheeting instead of rubber-) which will be attached (glued with sealant) to the metal sides above the trays. This sheet will direct the water into the tray instead of letting it run down the sides and then flowing into the rear floor area to create rust. Ready to assemble  Pop riveted  Sash clamp to compress the tray before riveting  Fixing detail. Sealant will be used to prevent leaks from the trays  Bending method for the curved (upper) tray  Close . . .  Completed  Full unit  Mock-up of pipe fitting   Quiksteel Epoxy putty   Sealant applied  Hmmm . . . yep, there ARE poor quality pop rivets . . . they break in the wrong place and jam in the rivet gun.  The main aluminium drip tray sitting in position inside rear quarter of the '51 Coupe.  Water collected by this tray will pass via a short tube and into the copper tube brazed into the sill, then drain onto the roadway.  The curved drip tray will extend over the inner rear mudguard (fender) to catch water from window. A thin rubber sheet glued to the body will direct any water that gets in, into the trays. Hopefully no more rust! 
Posted on: 2011/4/4 5:48
|
|||
|
1951 Packard Club Sedan | [url=ht
|
||||
|
||||
|
Re: Larry's 1951 Club Sedan Project
|
||||
|---|---|---|---|---|
|
Home away from home
|
Larry,
If you are putting aluminum in contact with copper you will need to be careful of galvanic corrosion. The standard electrode potential between copper and aluminum is -2.18ev. This is a large potential, and even a weak electrolyte will result in oxidation of the copper and eventual failure of the joint. If there is any potential for AC current leakage (common with cheaper battery chargers) this reaction will be greatly sped up. This galvanic corrosion potential is the reason behind never directly joining aluminum and copper wiring. Even putting steel and aluminum together is not a great idea if you are in a humid environment. Therefore, I would recommend insulating the junction between the copper pipe and the aluminum tray. Or, alternatively you could install a sacrificial zinc. Or I could just be paranoid from working on boats  . .Tom
Posted on: 2011/4/12 8:54
|
|||
|
||||
|
Re: Larry's 1951 Club Sedan Project
|
||||
|---|---|---|---|---|
|
Home away from home
|
Years ago I saw an old Land Rover at a marina. At first glance it looked good but all the body panels were hanging loose and flapping. The flanges were all corroded off where the aluminum body panels bolted to the steel understructure. They were supposed to be isolated by strips of cloth but in this case it did not work and the aluminum powdered away. Have seen similar corrosion on aluminum parts bolted to steel bodies on other cars.
Posted on: 2011/4/12 17:45
|
|||
|
||||
|
Re: Larry's 1951 Club Sedan Project
|
||||
|---|---|---|---|---|
|
Home away from home
|
Thanks Tom and Rusty. Good point.
I'll use a different material for the tube. Aluminium tubing would be the best choice if I can flare it very slightly, although being harder/brittle compared to copper it will be more likely to split I think. If it doesn't flare OK I guess coating the copper and aluminium mating surfaces with epoxy paint (- even a few coats of good ol' POR15) should do the trick. Also will insulate the Al trays where they make contact with the Coupe bodywork. I was going to use Tek screws to secure trays and that will need some consideration regarding insulation. Probably can work something out using plastic block or rawl plugs and self-tappers . . . .
Posted on: 2011/4/21 7:08
|
|||
|
1951 Packard Club Sedan | [url=ht
|
||||
|
||||
|
Re: Larry's 1951 Club Sedan Project
|
||||
|---|---|---|---|---|
|
Home away from home
|
Removal of Old Seam Sealer Around the Turret
The body was grit blasted and in many areas the old seam sealer and dum-dum was blasted away. In some places only limited blasting was done, to avoid panel distortion, so the old seam sealer remained, especially around the gutters of the roof (turret). After removing some of this old sealer and dum-dum it was found that a small amount of rust was present in some areas, and surface rust was present almost everywhere under the sealer. Seems back in those days Packard didn't prime the metal before sealing the seams. I'm obsessive about getting rid of rust, so wanted to give the car the best possible treatment so nil rust can remain or return later. It took a couple of days of tedious work to remove the sealer which was a hard rubber compound. In some areas I used a heat gun to soften it and it melted fairly easily. Then it could be scraped out with various implements such as a ground hacksaw blade, scribers, bent screwdriver blades etc. Never used heat guns much in the past but now I'm finding them totally great! Many uses already, like heating panels prior to filling or spraying . . . more about that later. Sealer had penetrated well into the joins so it was also softened by applying lacquer thinners with a small artist's paint brush. Then it could be removed more easily. The final process was to double over a piece of 240 wet and dry and continually rub it along the join, edge on. This got well into the joints of the gutter - turret and removed almost all the old filler. I was lucky - there was no serious rust anywhere along these seams, with only one hole found in the entire length of the gutters. The seams were treated with Deoxidine from both sides (- I could get to the gutter seams from inside the car as well) then primed before applying the new sealer. Two coats wet on wet of something very fluid and slow-drying that can be applied by brush I considered to be a much better option than a quick-drying (air drying) sprayable primer, which might not penetrate into the seams as well. Better to use a slow-curing primer so it has time to get right in, and fully seal any rust there. So it was POR-15 I used. It'll seal the metal super well, and there's no problem over-coating it. I reckon you've got to get the gutters totally water tight and rust-proof. Most pre-1970's cars had seams that were visible and the sealer used formed a visible 'line' along the seam, described as a "visual definition seam'. 3M Heavy Drip-Chek is designed to reproduce these visible seams. Doesn't sag, and because it shrinks considerably, you create a bead that is larger than the final seam thickness needed. The Drip-Chek then shrinks (a lot) and gives a neater final result as any imperfections and slightly uneven thicknesses also shrink making the new seam look pretty good. Instructions say make the bead bigger than required to take into account the shrinkage. The Heavy Drip-Chek can be painted over when dry. You can also add more over existing Drip-Chek if necessary, it bonds really well. You must prime the seam before using the sealer - something Packard didn't do on my car. Next product recommended as a good replacement for original dum-dum is also from 3M. Inexpensive and very easy to use, 3M Caulking Strip comes as a box full of strips and can be painted over. In many seams it will be easier and more effective to use Sikaflex HS-227 (cartridge application). Here are a few 'before and after' pics of the work done . . . . Not too bad for rust . . . just a small amount under where the old sealer was placed  Some minor rust forming along the gutters . . .  . . . and the worst place was at the rear section where water would linger longer  Small surface rust up and under the gutters also, where it formed on the 'unprimed' metal  The gutter cleaned and roughed with 60-grit, ready to take the POR-15 sealer (2 coats).  POR-15 painted into the gutters. This stuff is hopefully seeping right into the cracks and forming a total barrier to water.  The front pillar will get the same treatment  
Posted on: 2011/5/14 4:13
|
|||
|
1951 Packard Club Sedan | [url=ht
|
||||
|
||||


