|
Re: Stewart's 1955 Packard 400
|
||||
|---|---|---|---|---|
|
Home away from home
|
Stewart,
Lookin' good! FYI, the D-side trunk hinge pivot pin on my 55 Pat sheared one day while opening the trunk. I got the trunk lid closed and when I got home in the garage, I replaced the pin with a Grade 8 bolt of the appropriate size. You might look at yours for wear. WRT the muffler hanger, I thought that they had a flex joint in them to prevent engine exhaust vibration from transmitting to the chassis. Craig
Posted on: 2017/5/7 13:02
|
|||
|
Nuke them from orbit, it's the only way to be sure! Ellen Ripley "Aliens"
Time flies like an arrow. Frui |
||||
|
||||
|
Re: Stewart's 1955 Packard 400
|
||||
|---|---|---|---|---|
|
Home away from home
|
Hi Craig
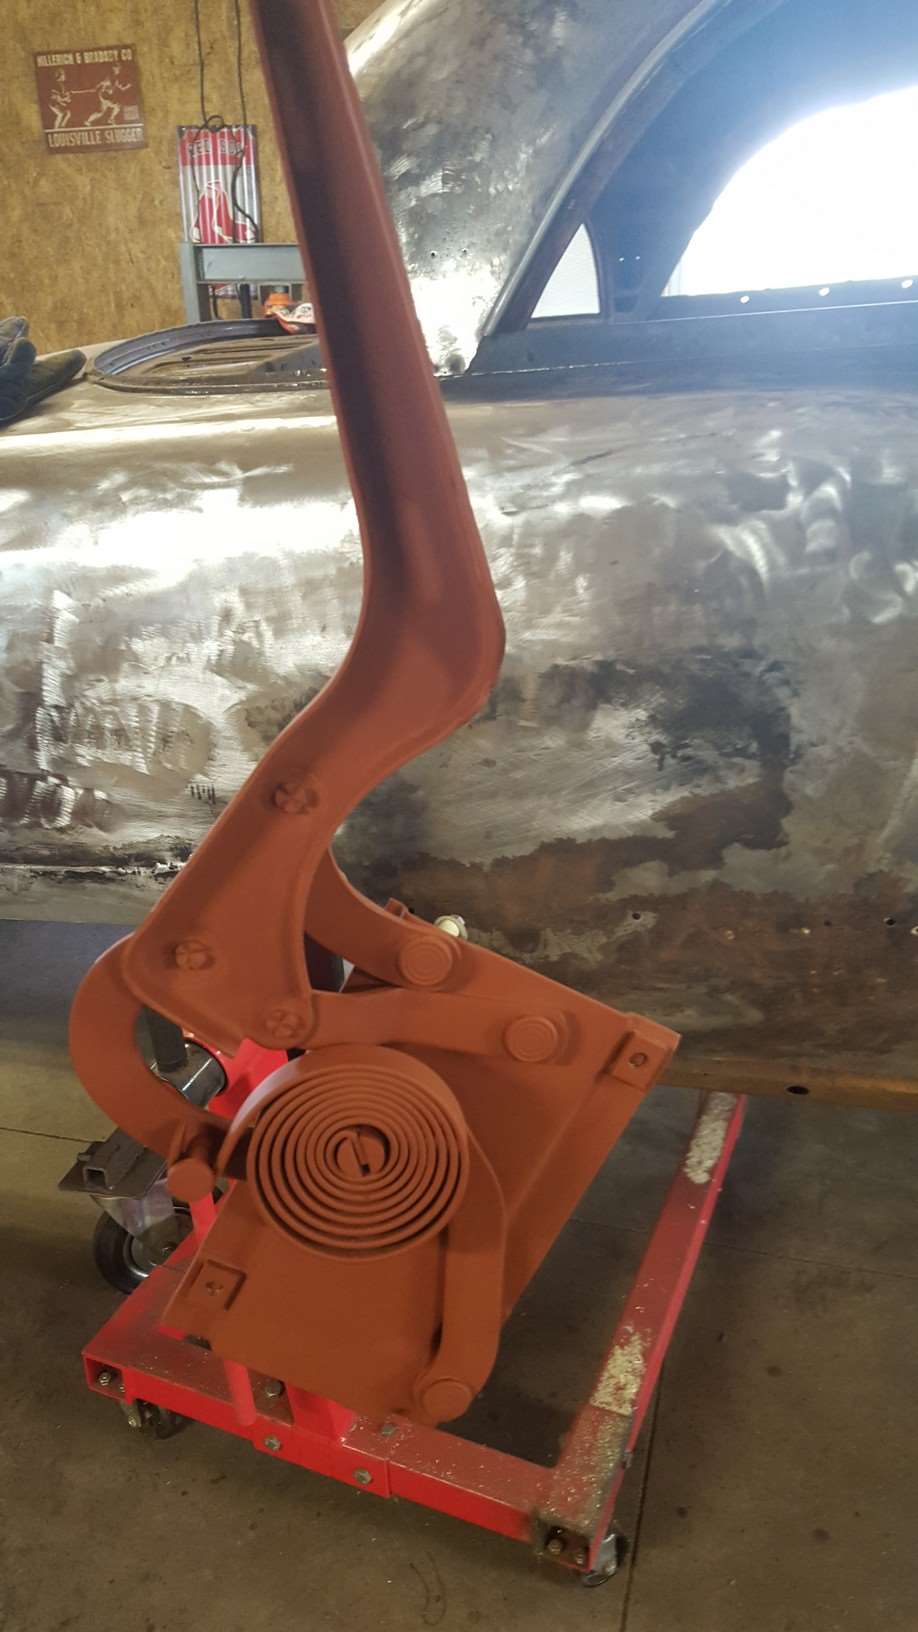
These exhaust hangers do flex. It just hard to see in the previous post. Here are a couple better images. I still need to figure out what to do where the exhaust passes through the frame. I only half of one of the originals. I may have to drill a couple holes if I can find a suitable replacement. Attach file:  (95.07 KB) (95.07 KB)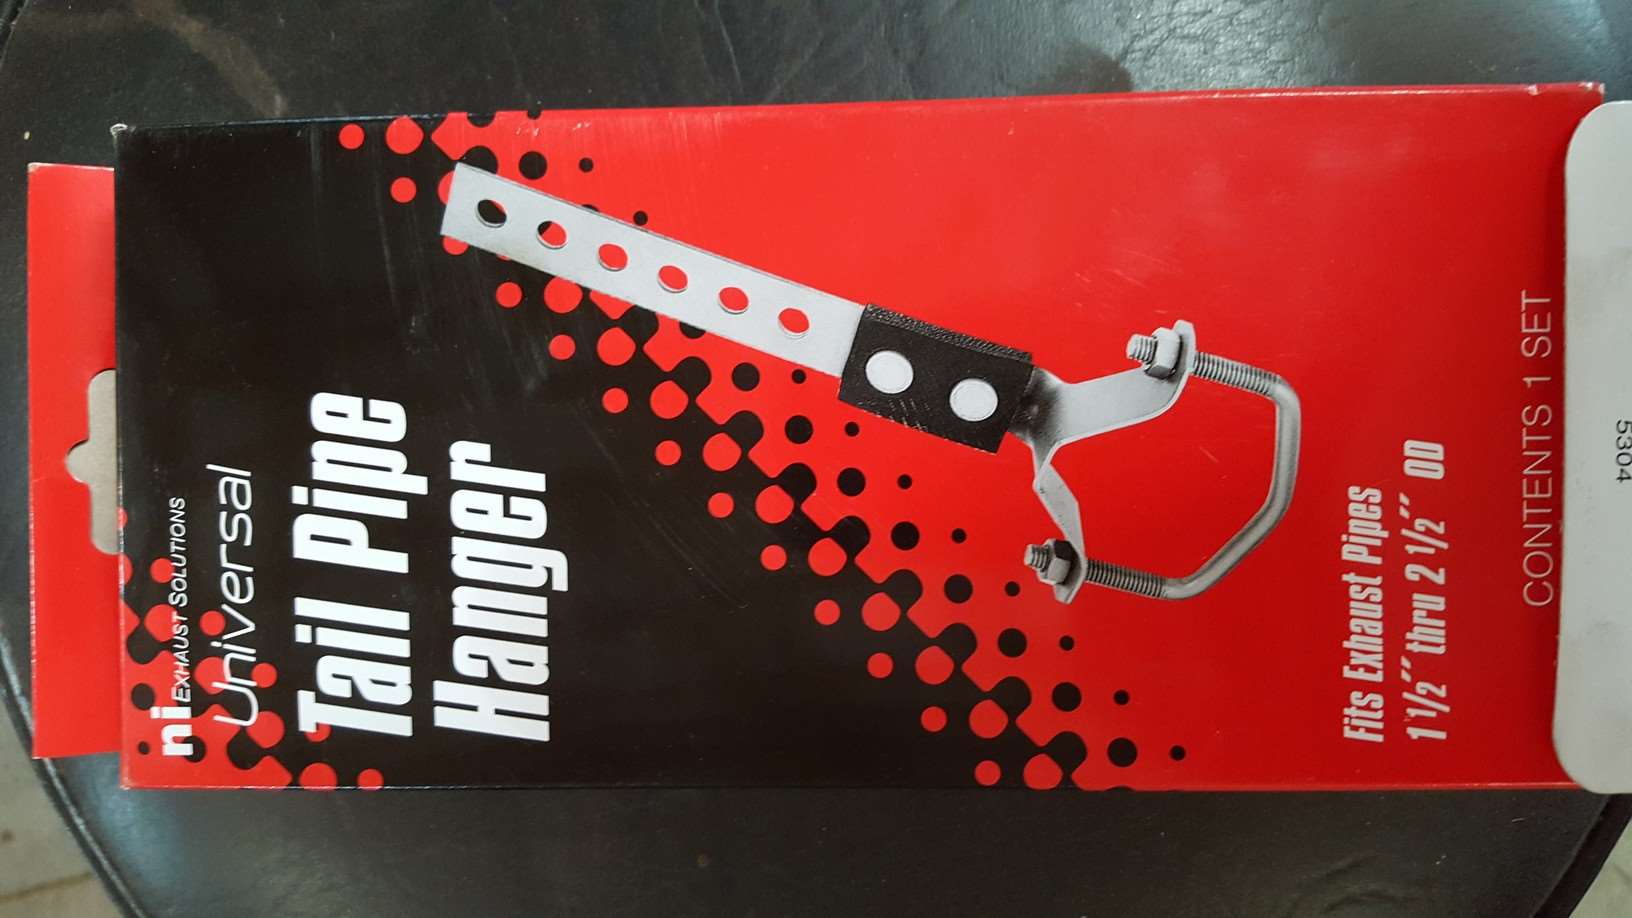 (100.63 KB) (100.63 KB)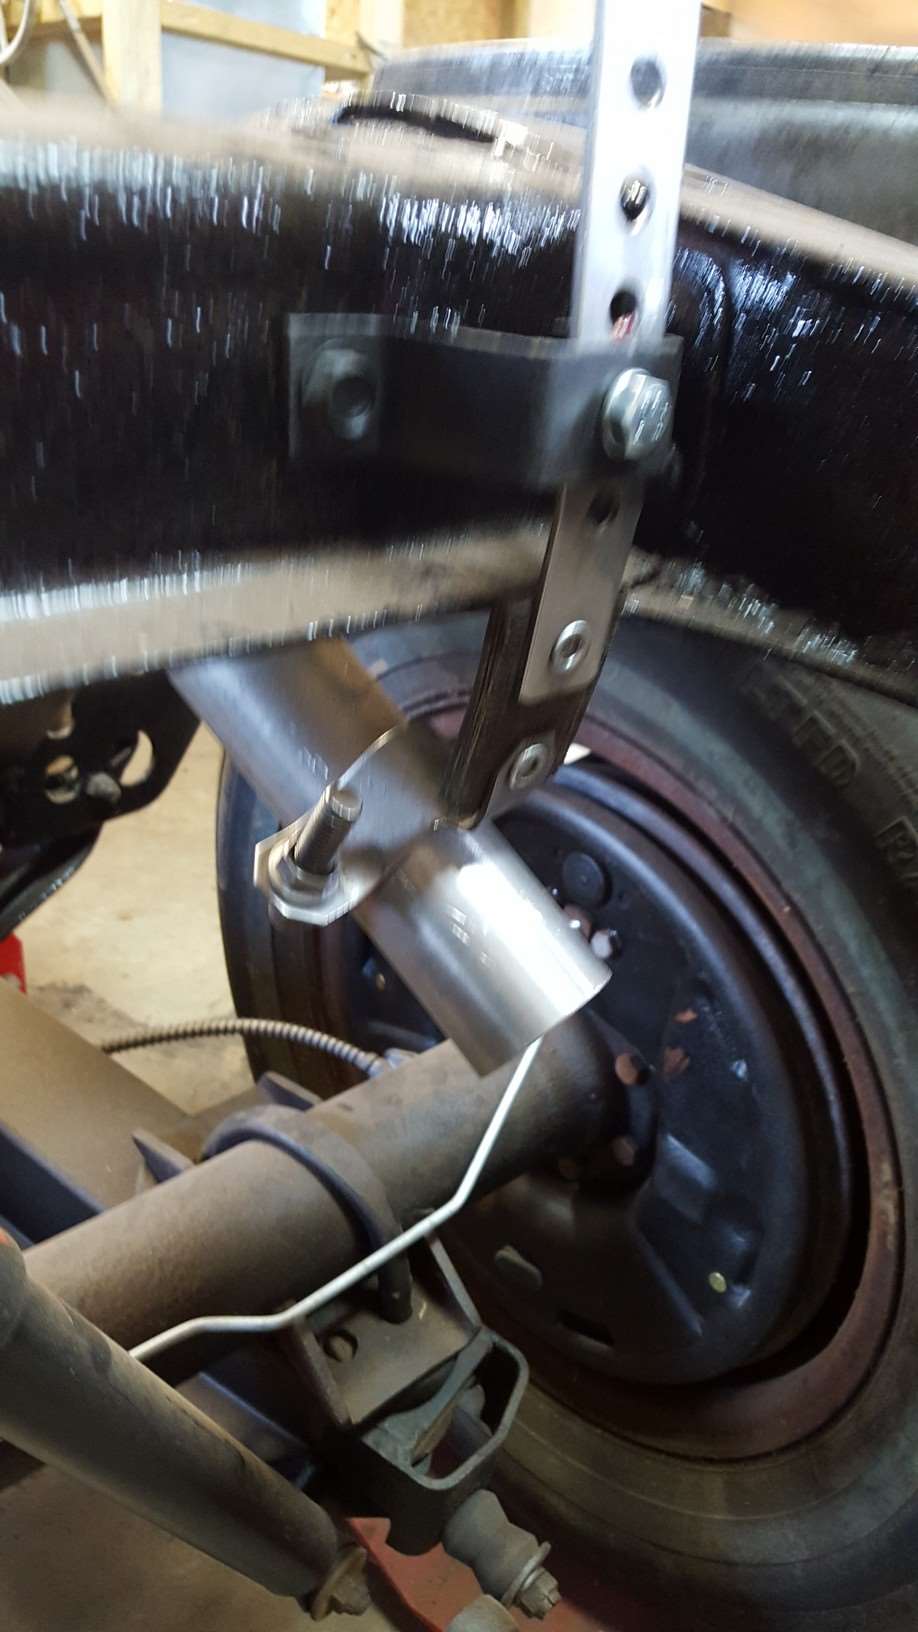 (87.90 KB) (87.90 KB)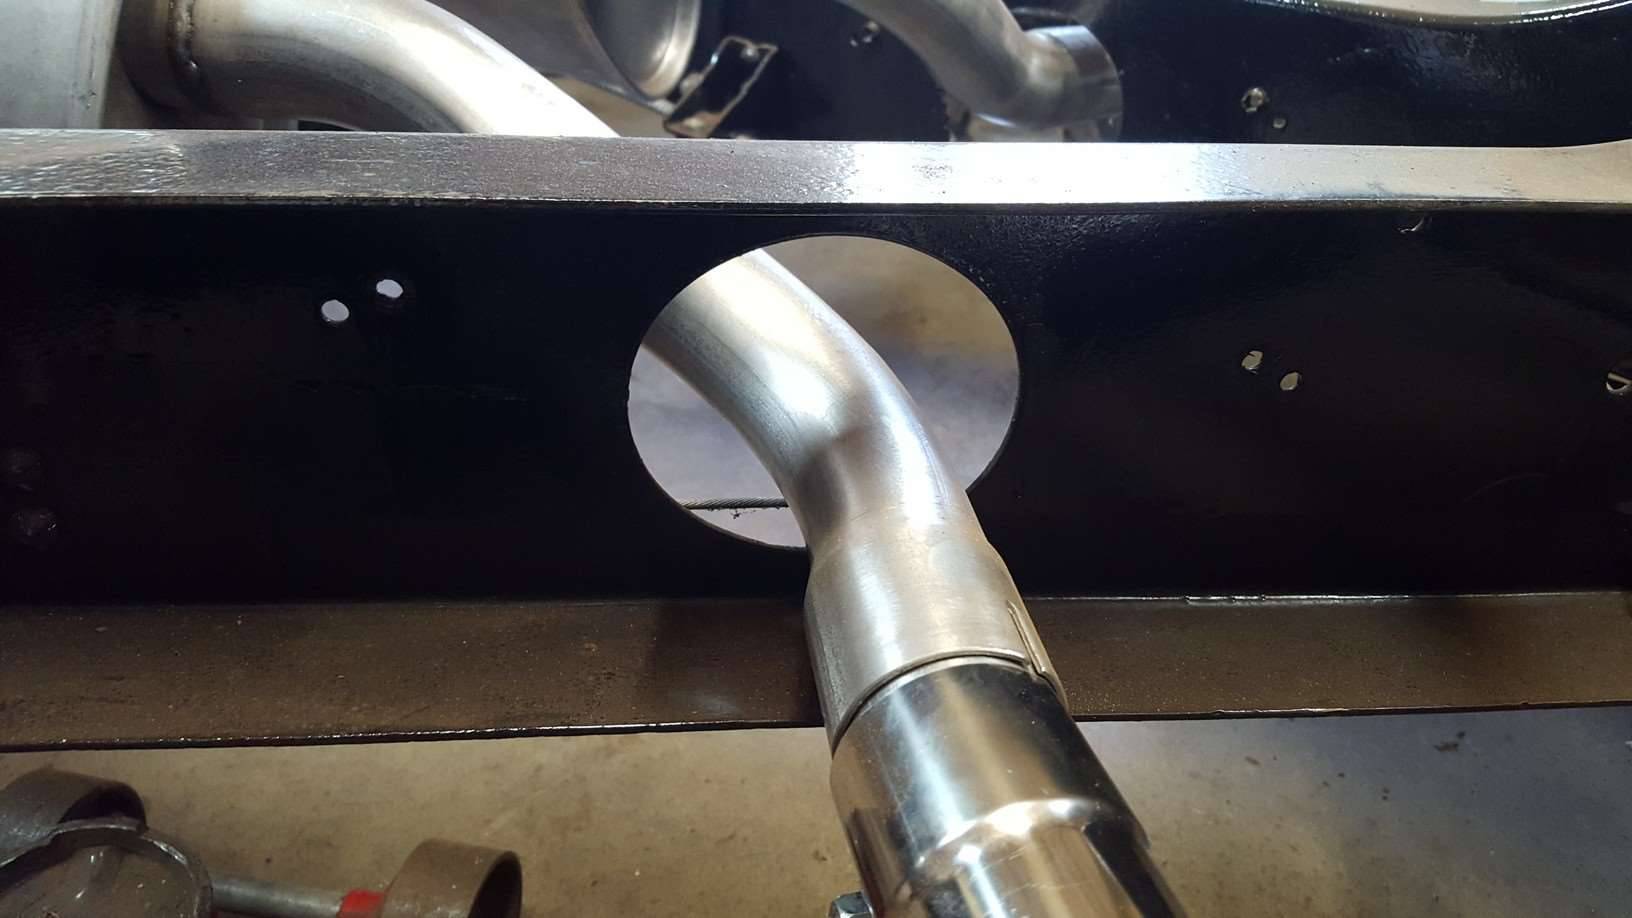
Posted on: 2017/5/7 20:17
|
|||
|
Stewart Ballard
|
||||
|
||||
|
Re: Stewart's 1955 Packard 400
|
||||
|---|---|---|---|---|
|
Home away from home
|
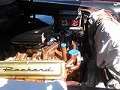
Received my Ross Miller rebuilt Bendix T.V. Friday.
I put it in the mail on the 4th and received it back on the 12th. Impressed me. He found a hole in the aluminium housing and replaced the whole thing. His note said it was the old brake fluid that caused it. It was quite a bit pitting inside. I'll put it on the shelf for now with the other rebuilt parts. It will probably be winter before I put it on the car. I gave a lot of thought on whether or not to have the TV rebuilt. A couple years worth of thought actually. In the end I just didn't have the knowledge to convert to a modern master cylinder and feel safe with it. Some of the threads here make it look pretty simple or straight forward but I don't even have the automotive knowledge that some of you do let alone the engineering background. Talked to KevinAZ about his T.V. briefly while visiting him in January and of course read everything on this site and just decided that this was my best bet. I also didn't want to give up my fresh air vent. Attach file: (157.41 KB)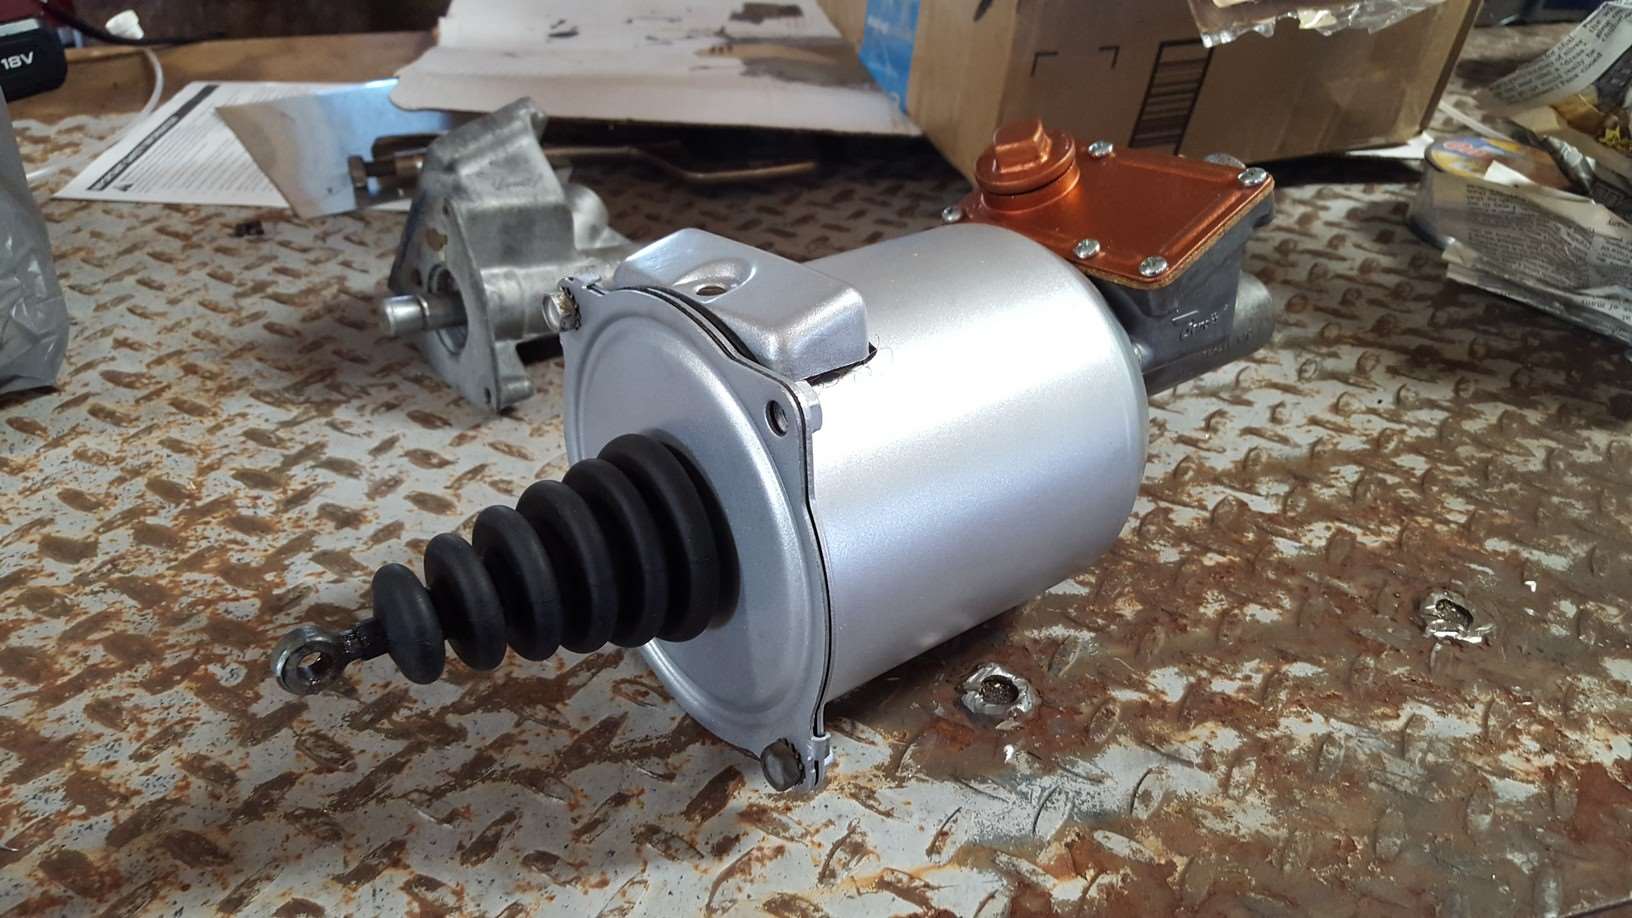 (153.16 KB) (153.16 KB)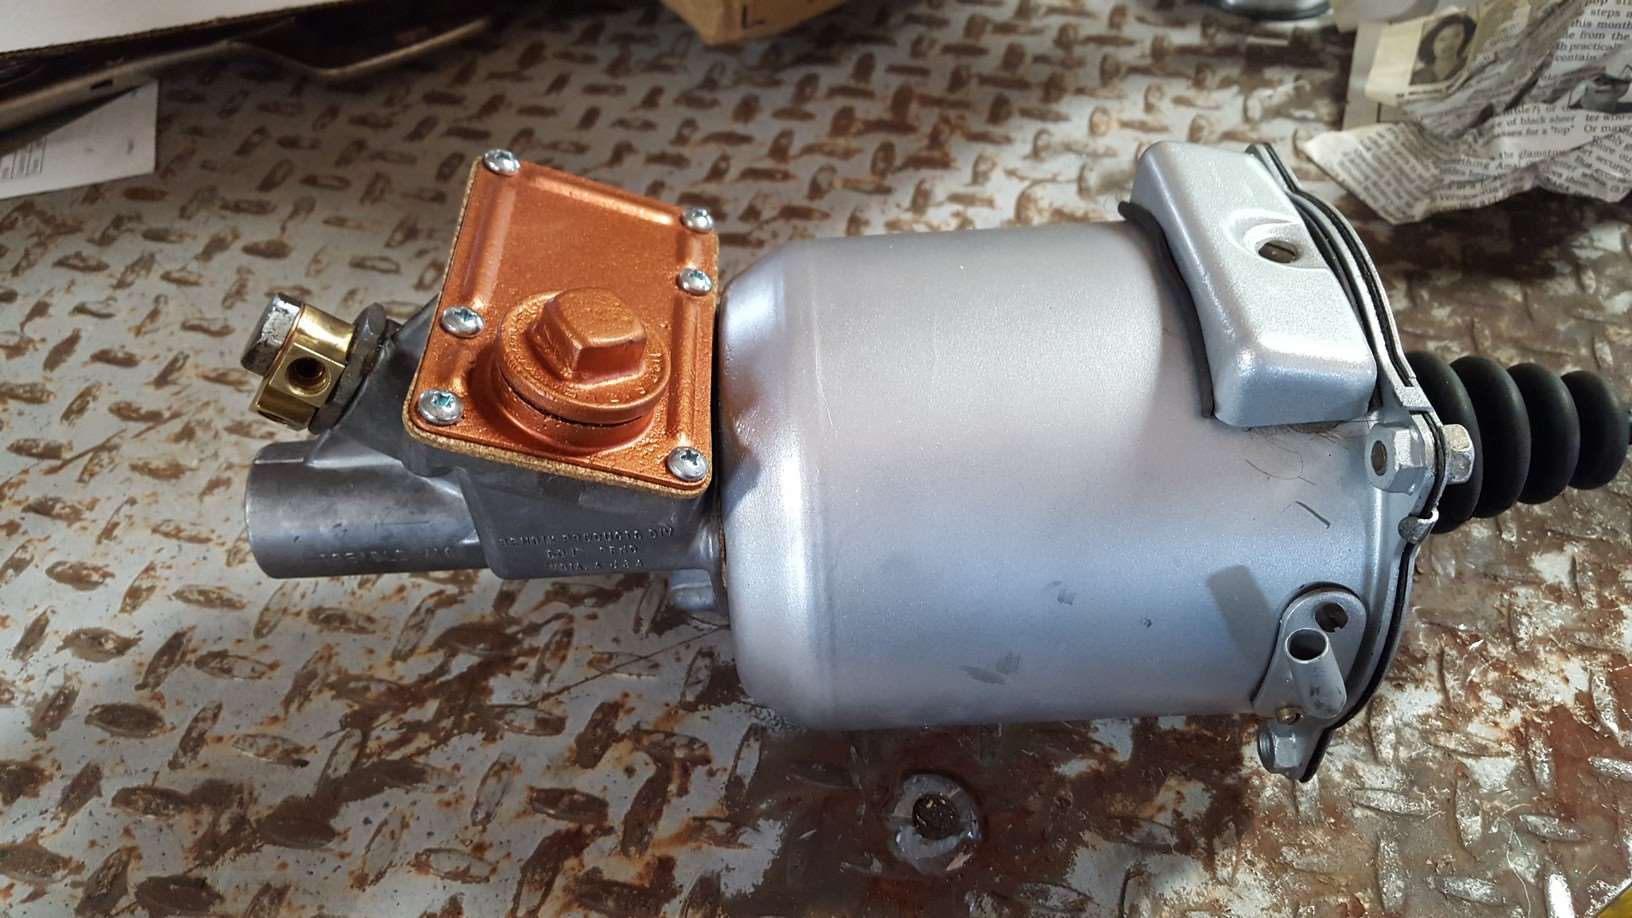 (115.55 KB) (115.55 KB)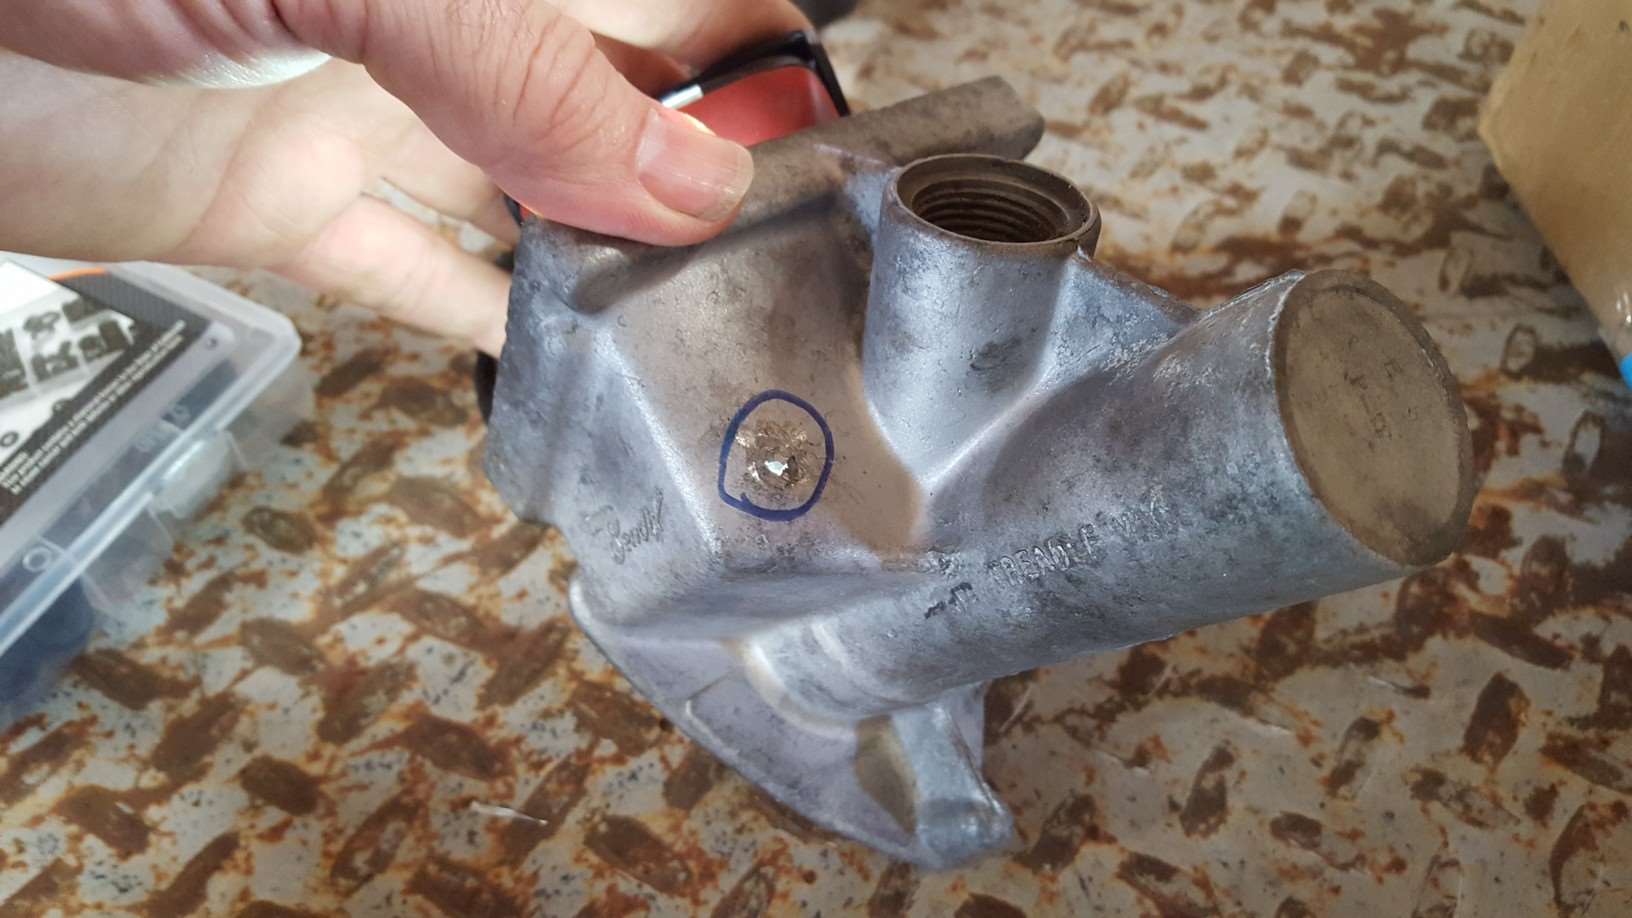 (128.19 KB) (128.19 KB)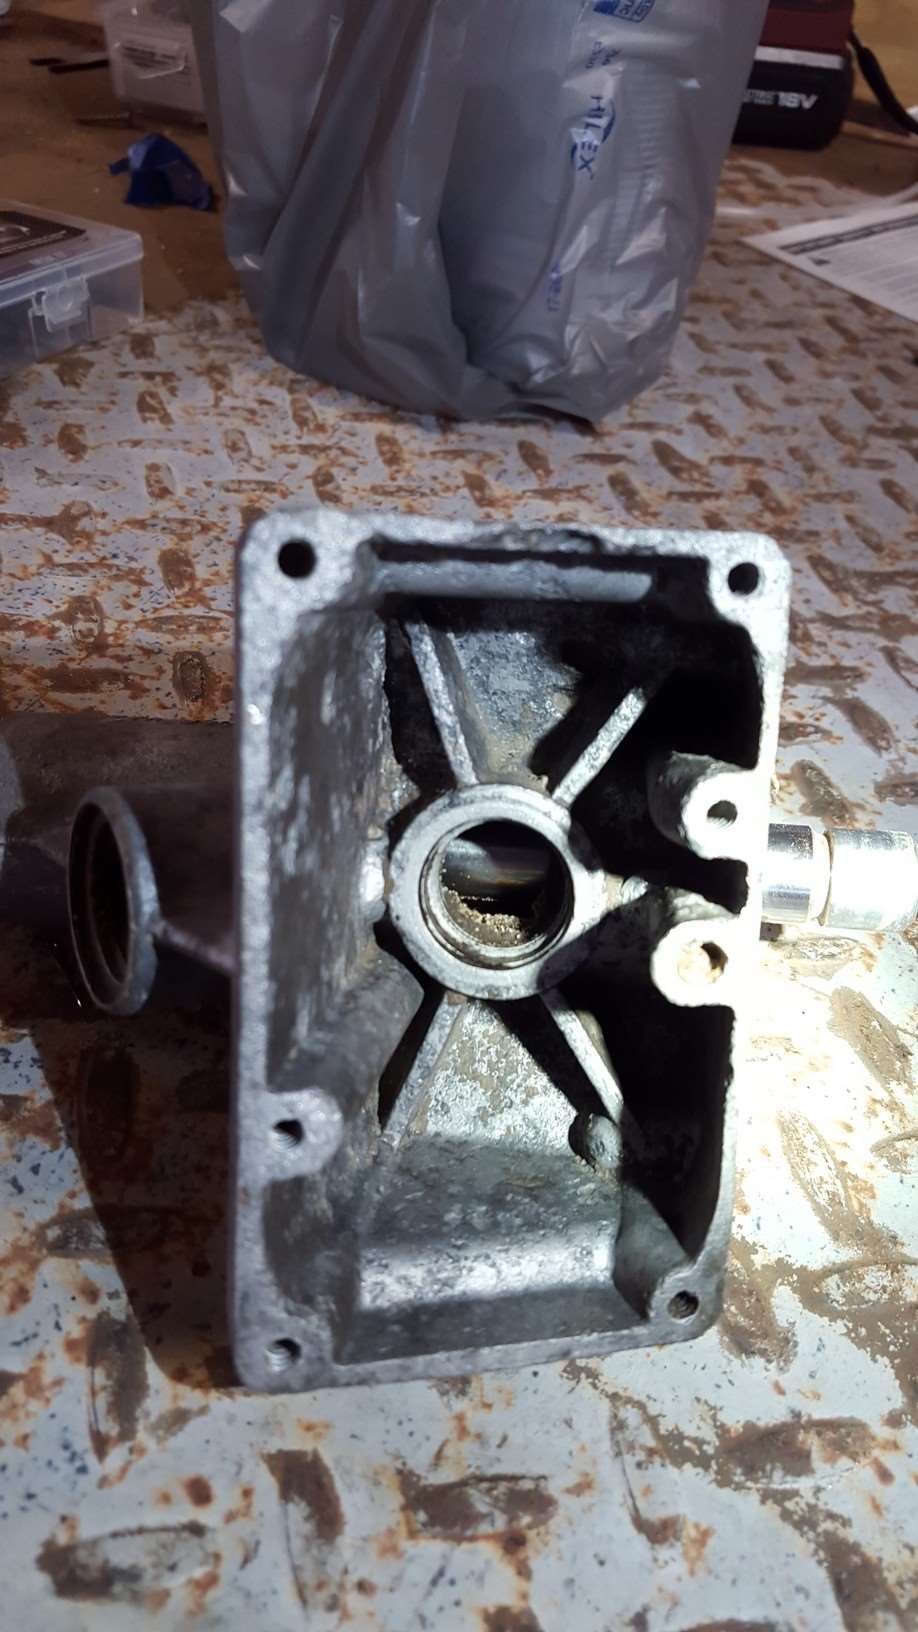
Posted on: 2017/5/14 18:52
|
|||
|
Stewart Ballard
|
||||
|
||||
|
Re: Stewart's 1955 Packard 400
|
||||
|---|---|---|---|---|
|
Home away from home
|
Stewart.
If you need dimensions. For rubber I should be able to find my original s. I had to make mine. Did you put resonator on to see where pipe. Sits..packard had a hole in pipe to set angle. The hanger had a nipple..on bottom piece.
Posted on: 2017/5/15 0:38
|
|||
|
Riki
|
||||
|
||||
|
Re: Stewart's 1955 Packard 400
|
||||
|---|---|---|---|---|
|
Home away from home
|
Riki
I'm not 100% sure which one you are talking about. I have not mounted the resonators yet since I have nothing to mount them to with the body off. I know the length of the universal exhaust hangers above may be off a little bit. I am going to try and leave as much of the access on top of them that I can so I can make adjustments later on. I am still trying to find something simple that will work where the pipe passes through the chassis. If I wanted to weld something to the frame I could find lots of options but that's plan B.
Posted on: 2017/5/15 9:54
|
|||
|
Stewart Ballard
|
||||
|
||||
|
Re: Stewart's 1955 Packard 400
|
||||
|---|---|---|---|---|
|
Forum Ambassador

|
Quote:
I am still trying to find something simple that will work where the pipe passes through the chassis. If Kanter or one of the used parts guys can't come up with original brackets perhaps they could be made. It looks like maybe a couple of pieces of angle iron or L shape brackets bolt into the holes on either side of the pipe with a short strap hanging off each side. A metal bar at the bottom for the U bolt connects the two straps. McMaster has 12" square pieces of 1/4 or 3/8 rubber & fabric belting material which could be cut for straps. You might even be able to adapt the commercial universal double strap mount available from Summit. The single grommet type might be usable if there is enough depth to have the hanger end up somewhat vertical. Attach file: (17.95 KB)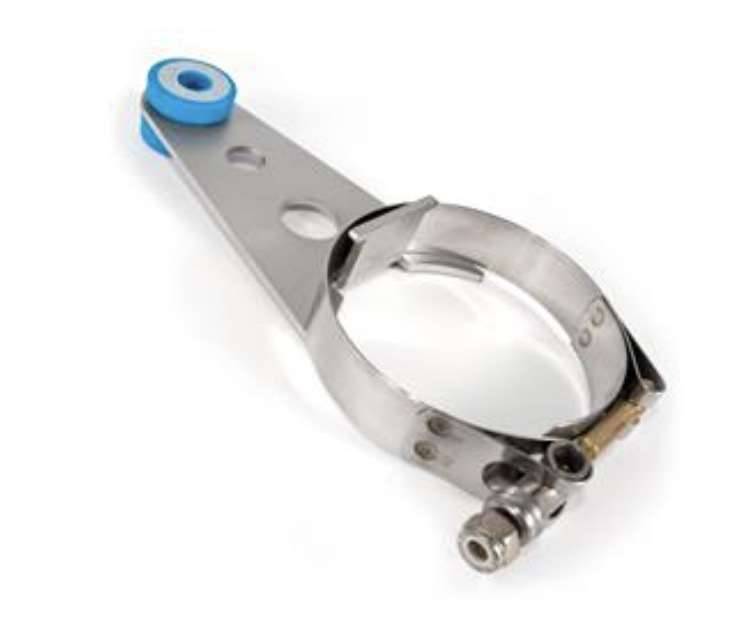 (28.11 KB) (28.11 KB)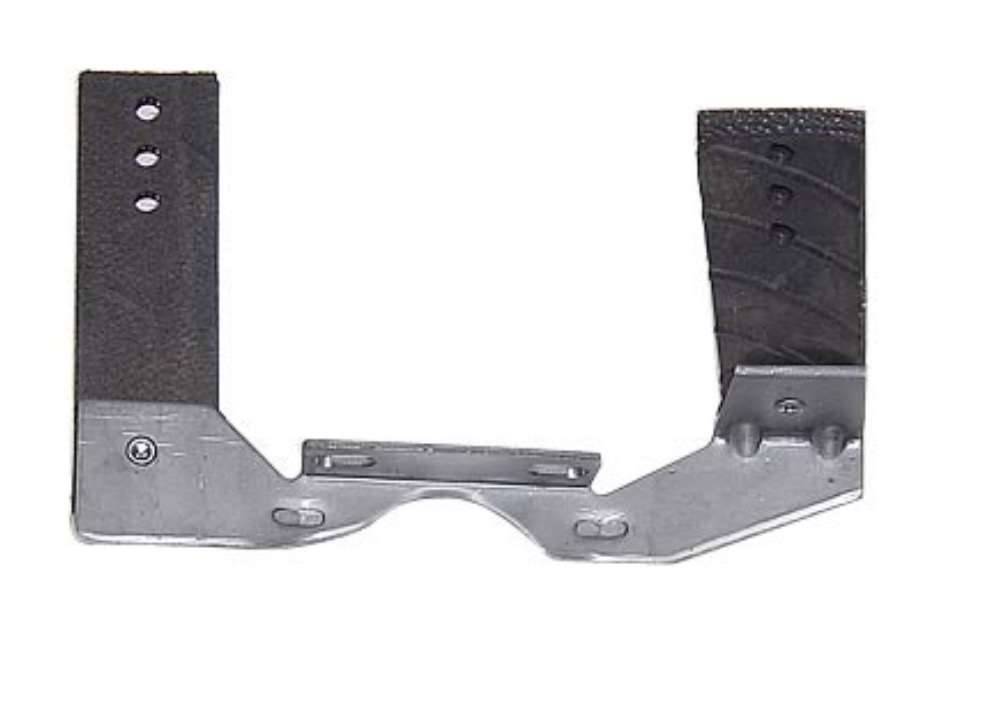 (18.36 KB) (18.36 KB)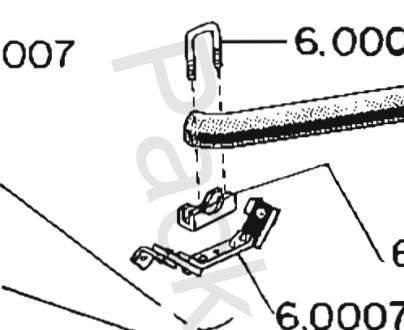
Posted on: 2017/5/15 10:13
|
|||
|
Howard
|
||||
|
||||
|
Re: Stewart's 1955 Packard 400
|
||||
|---|---|---|---|---|
|
Home away from home
|
It's almost harvest time here on the farm again. Hopefully I will get some more shop time soon.
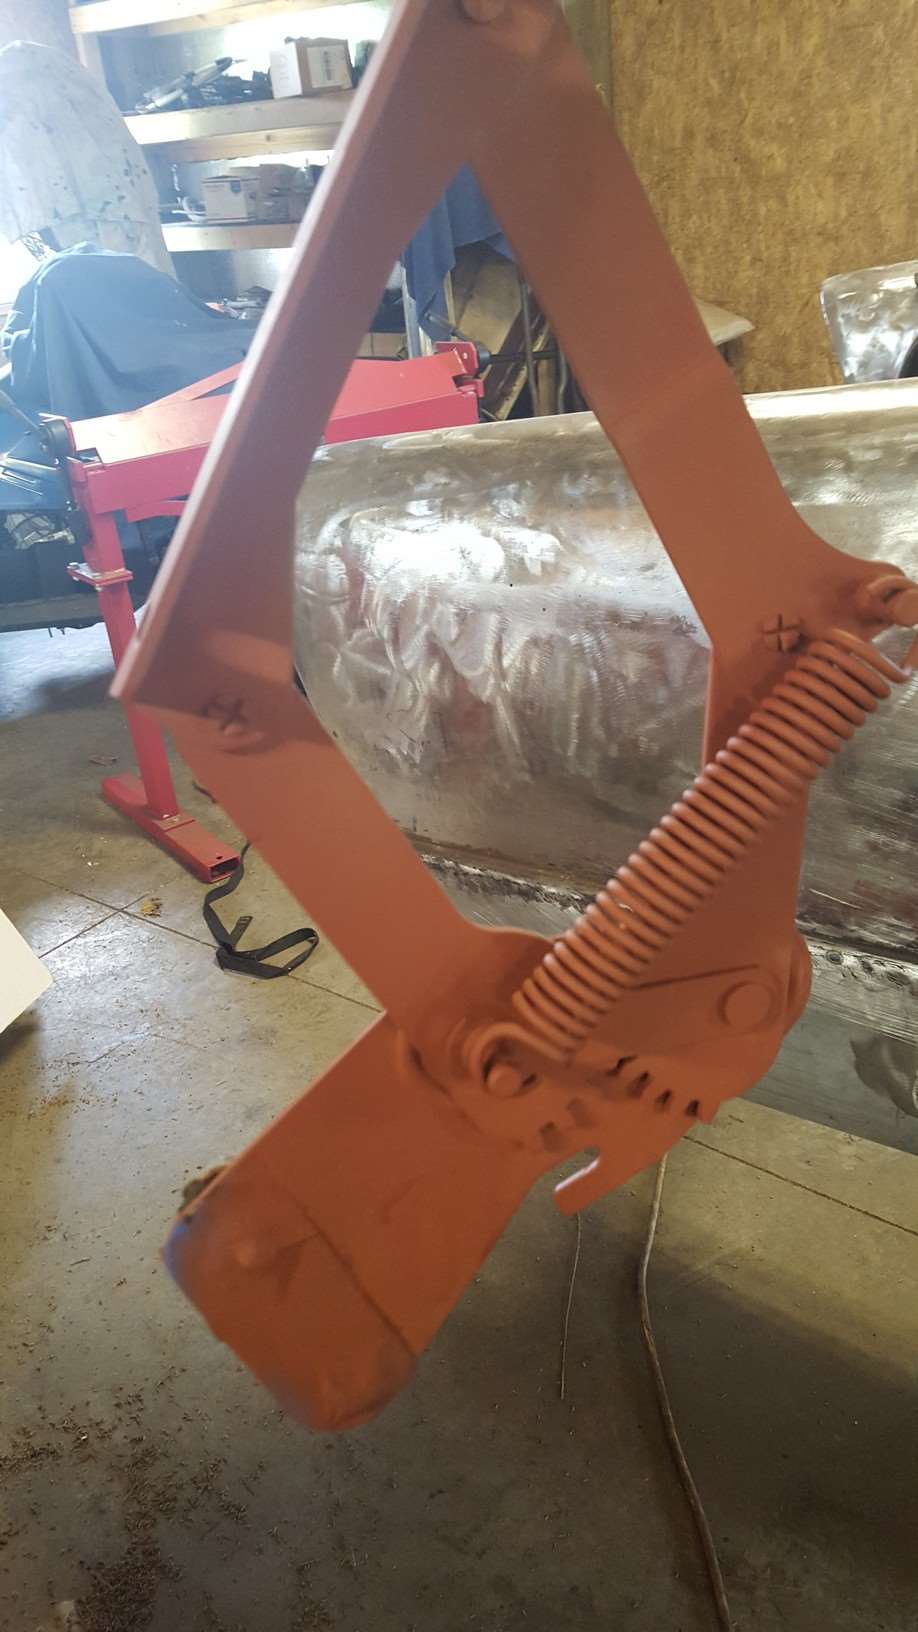
I contacted Southwest Packard and got a pair of the exhaust hangers that I needed where the pipes pass through the frame. I had already cleaned up the one I had but theirs was a little different so I used both of those. On my bracket the "dimple pin" was on the lower portion of the center bracket as shown below. On the two I received the "dimple pin" is in the u-bolt. Since my new exhaust pipes do not have the dimple at all I'll just replace the u-bolts with newer ones. I have already replaced all the rubber in in the brackets. I was also hoping to use those nifty pipe clamps through-out the whole systems so that I do not crush the pipes. However, the pipes connect right here where these clamps go and I can't use both. So, it looks like I'll be using the u-bolts in this location. The u-bolts are not pictured here as I have not picked up the new ones yet. Attach file: (141.77 KB)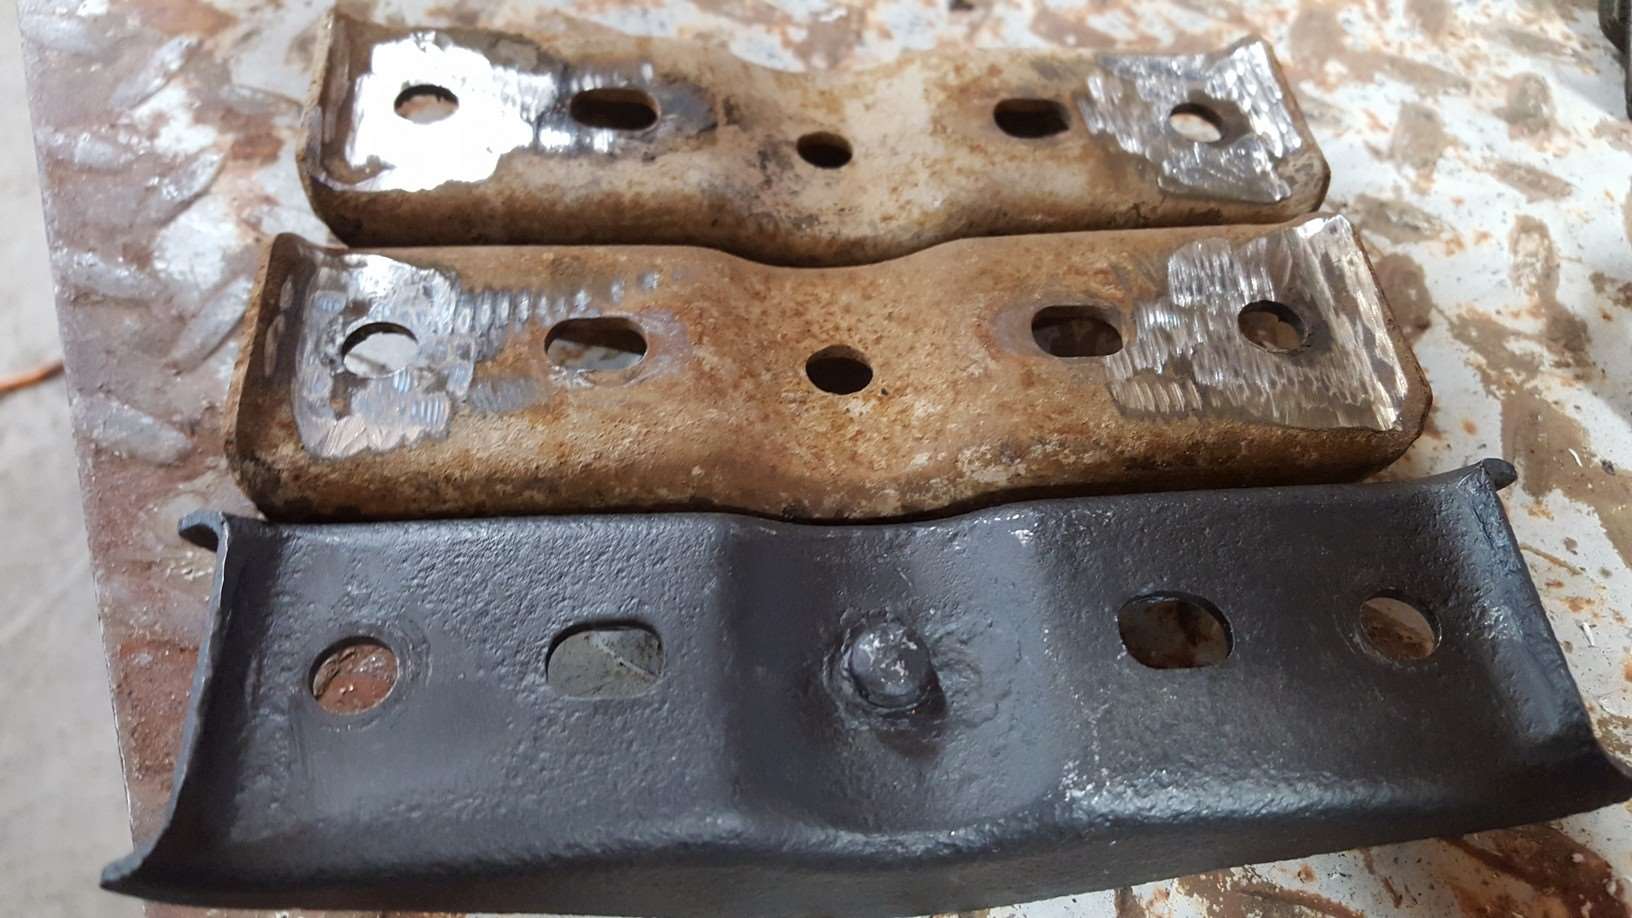 (130.49 KB) (130.49 KB)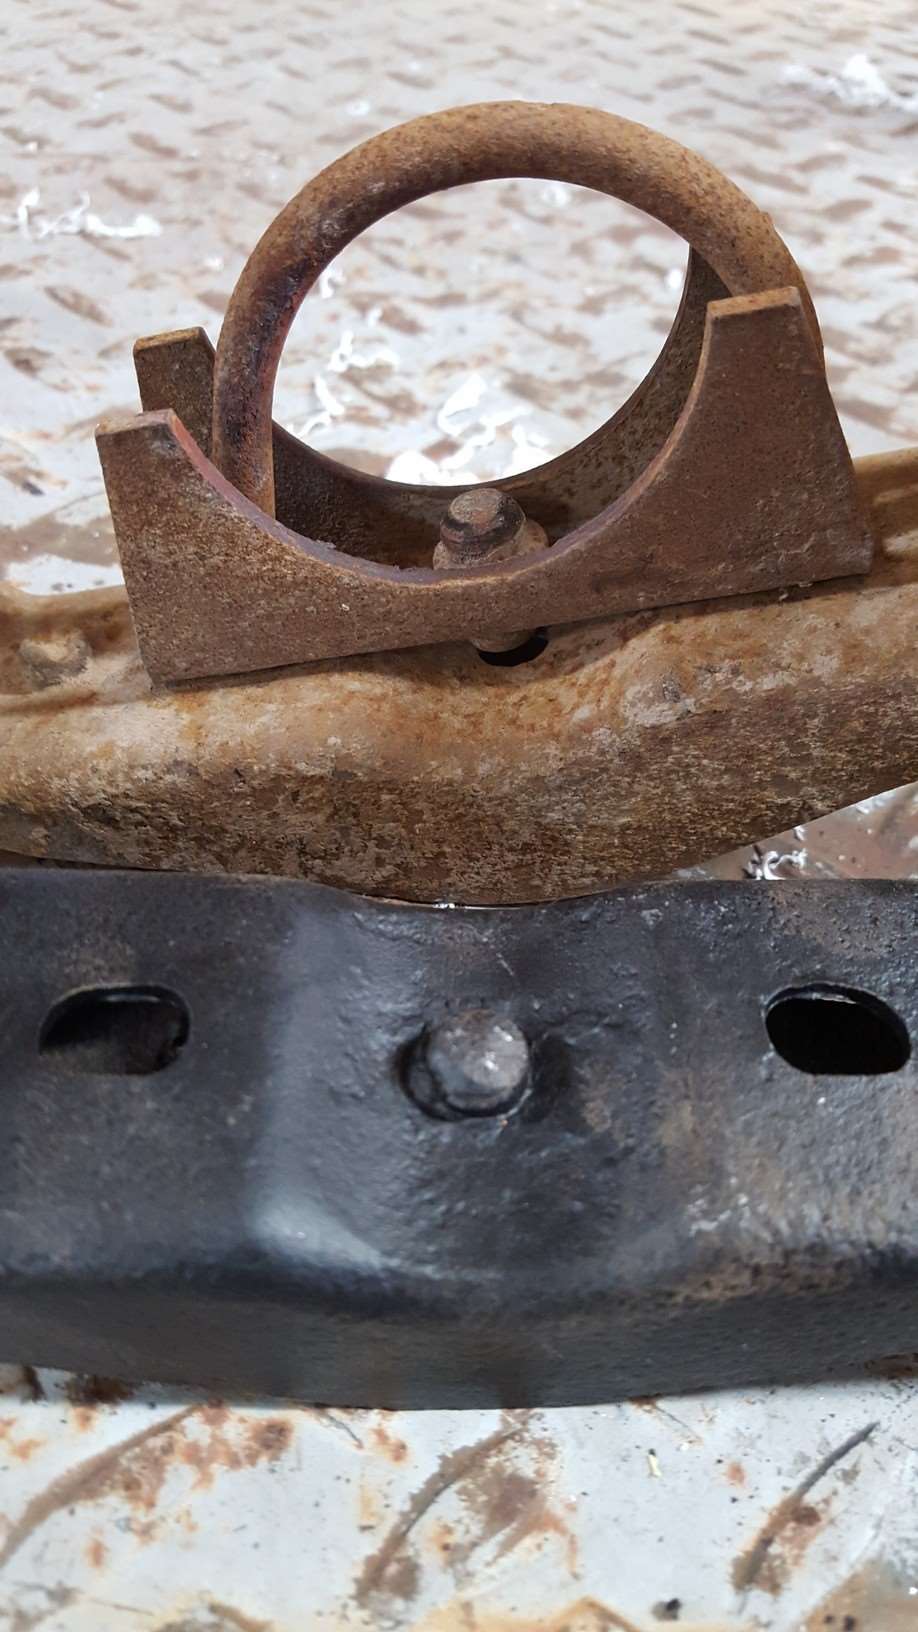 (95.76 KB) (95.76 KB)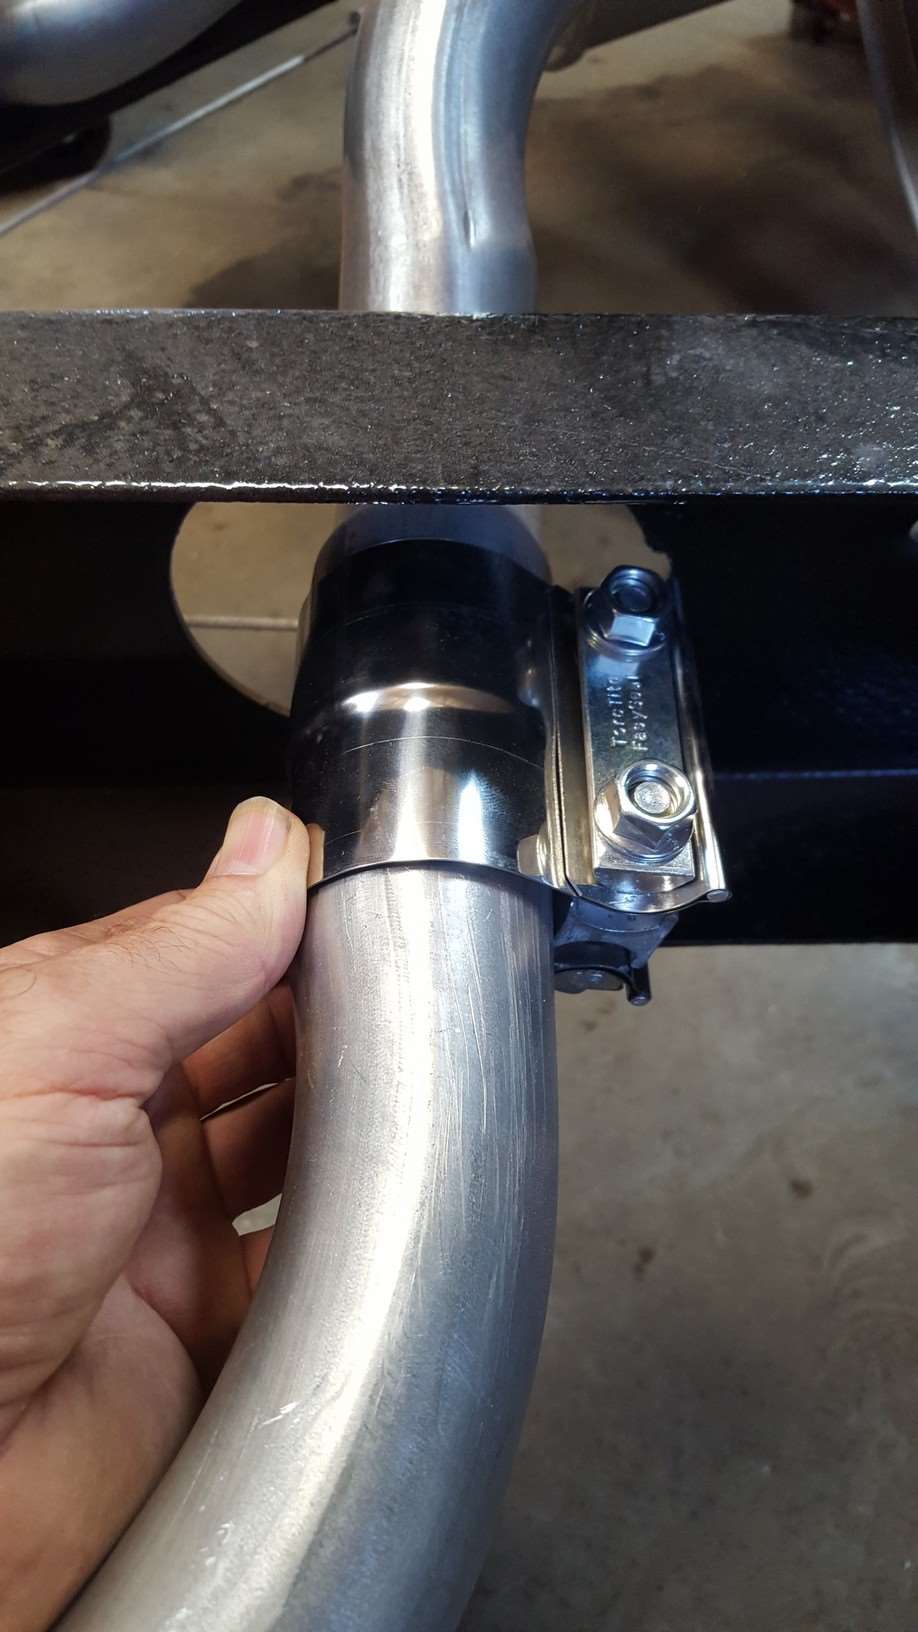 (104.08 KB) (104.08 KB)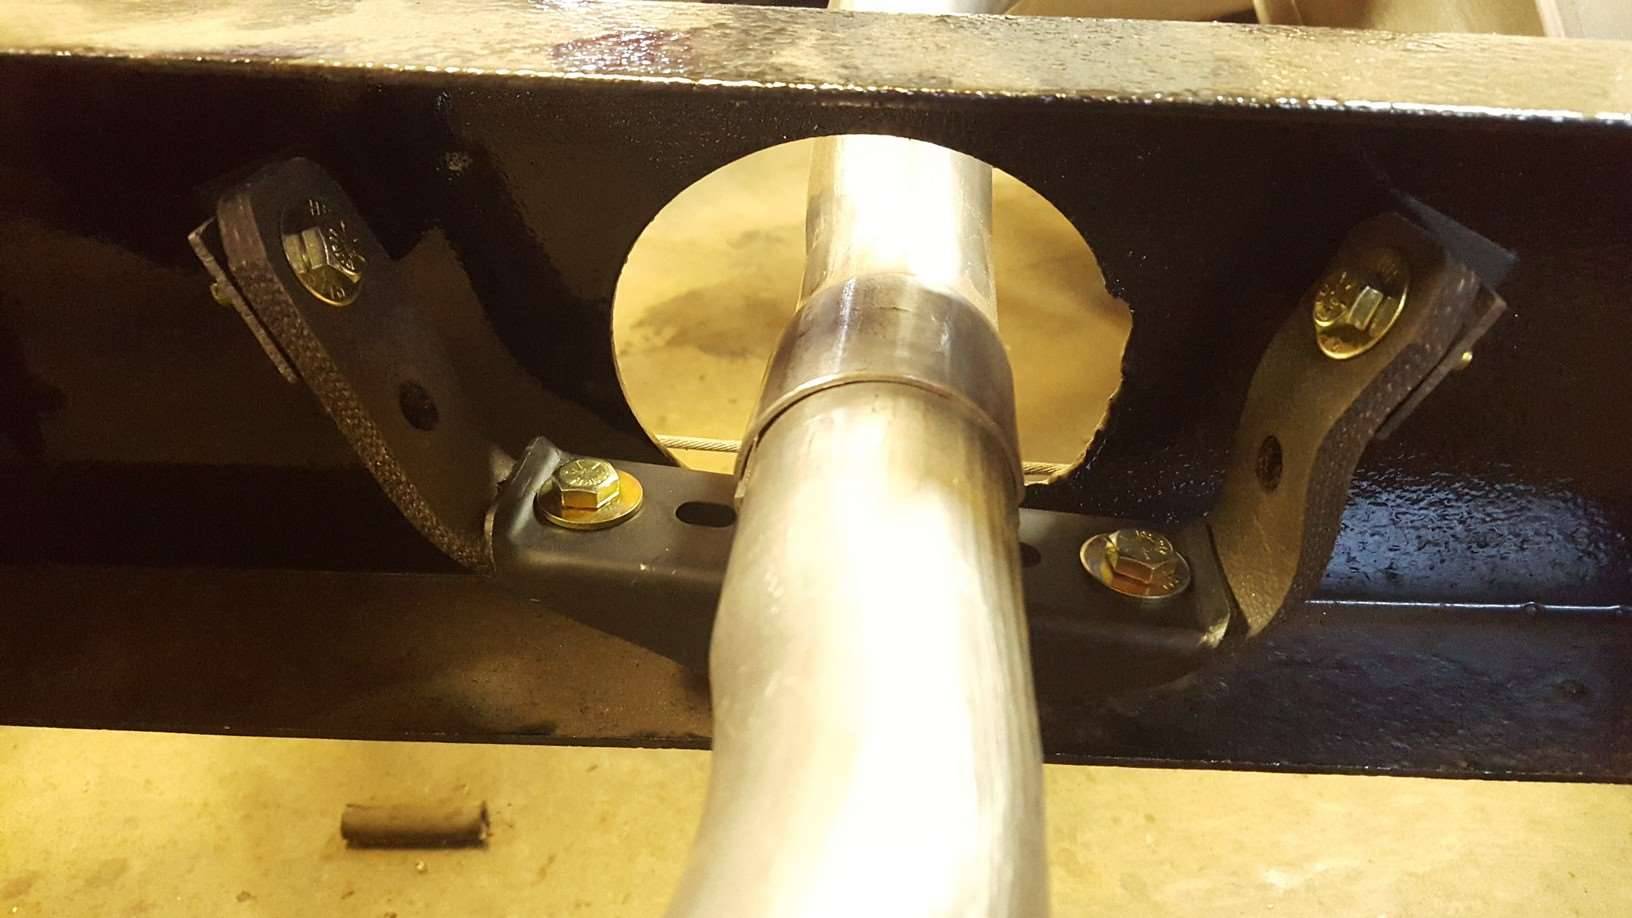
Posted on: 2017/6/6 19:58
|
|||
|
Stewart Ballard
|
||||
|
||||
|
Re: Stewart's 1955 Packard 400
|
||||
|---|---|---|---|---|
|
Home away from home
|
Our harvest is finally complete and I get a few hours on my more important project each week.
I am finally getting the undercoating applied to the underside of the body. I am using the Rust-o-leum truck bed liner. Using a roller to apply most of it but also using cheap foam brushes to apply in tight spots. Giving two coats to everything. I am about 3/4 done. Am skipping the area where the fuel tanks goes for now. I'll get that after I get the spare tire well back in place and I can do that after I get the body back onto the frame in a month or two. As you can see, in that area, I am only applying the undercoat where the frame well set and I won't be able to get to it later. I still have to do the very front of it under the front floor pan but will have that done in the next week two. I ordered all the rubber body mounts last week. Got some sticker shock from that. Attach file: (131.00 KB) (77.58 KB) (77.58 KB)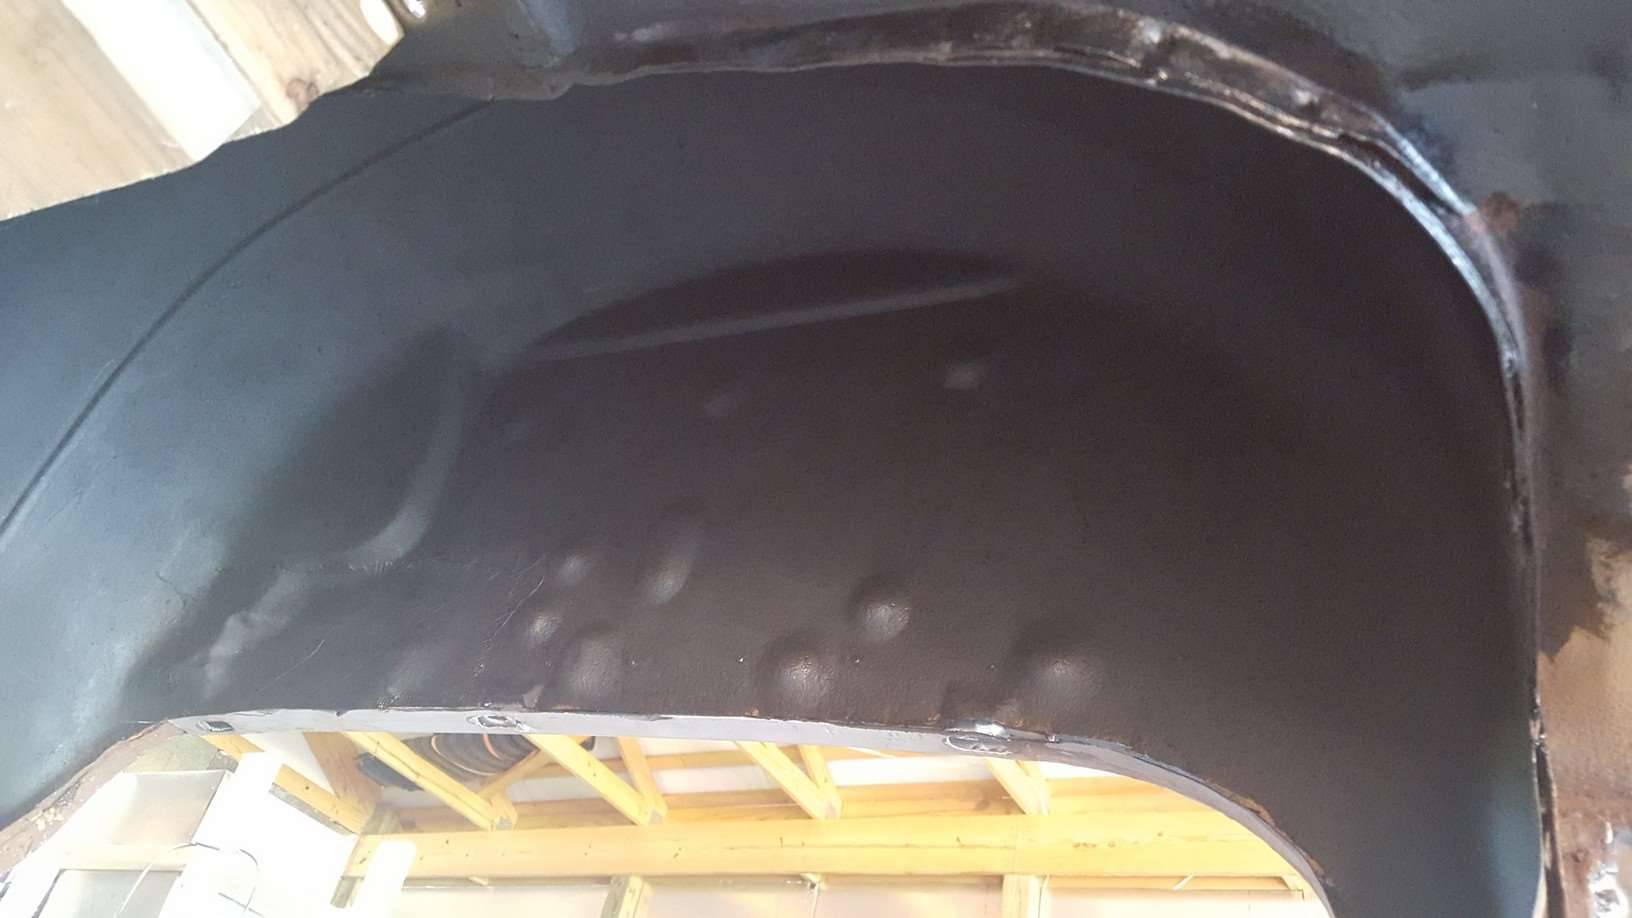 (96.64 KB) (96.64 KB)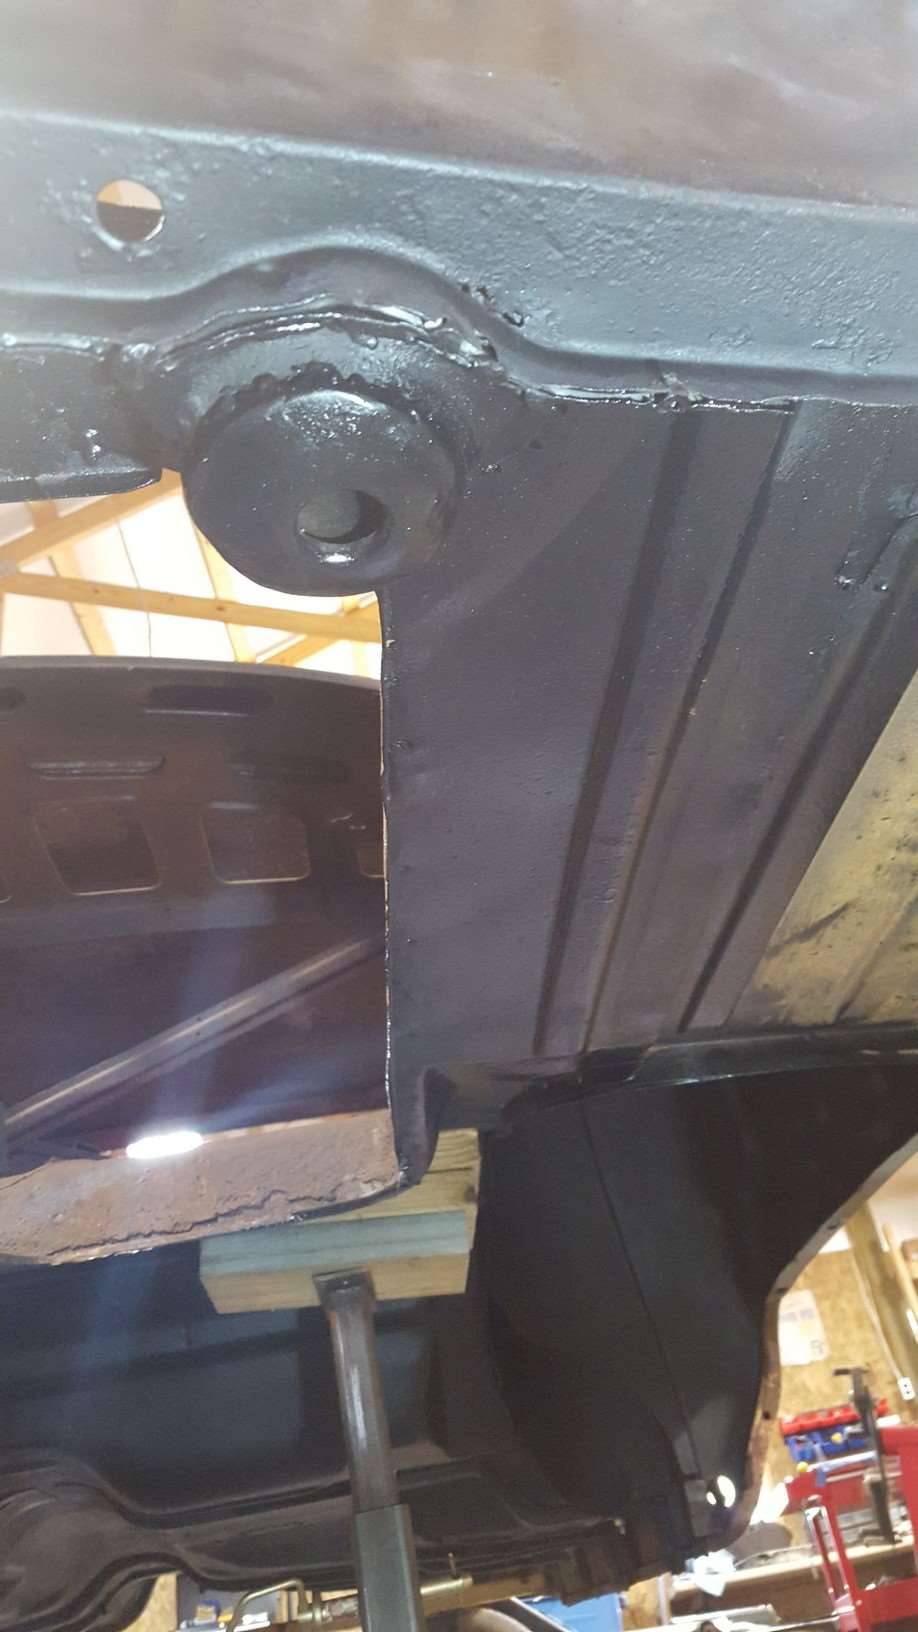 (130.66 KB) (130.66 KB)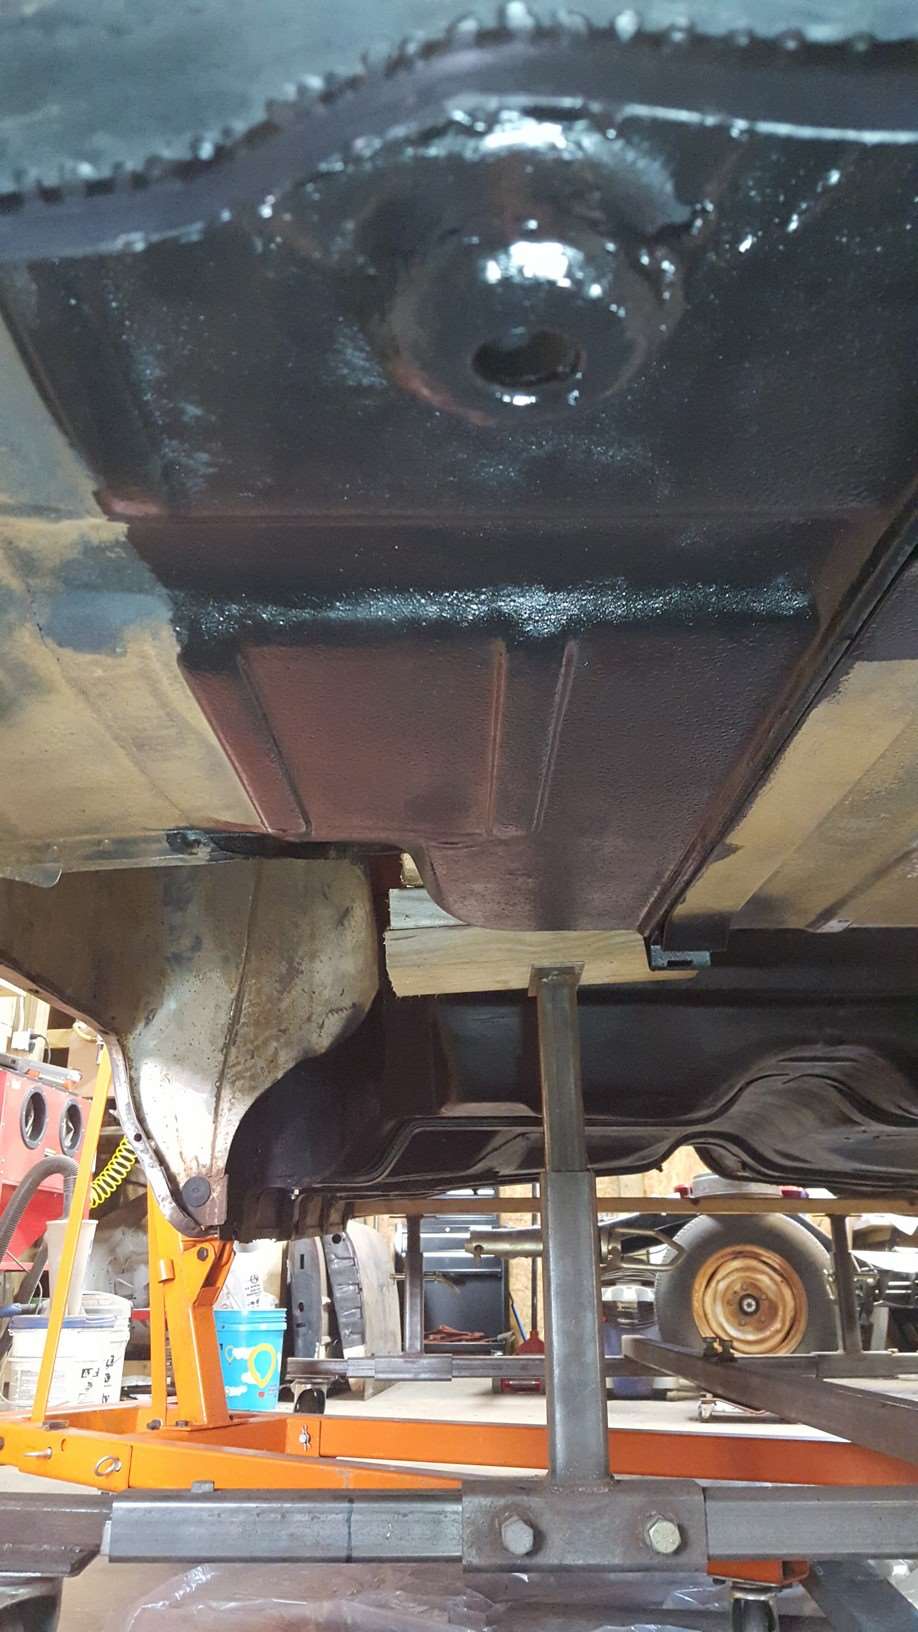
Posted on: 2017/7/17 21:12
|
|||
|
Stewart Ballard
|
||||
|
||||
|
Re: Stewart's 1955 Packard 400
|
||||
|---|---|---|---|---|
|
Home away from home
|
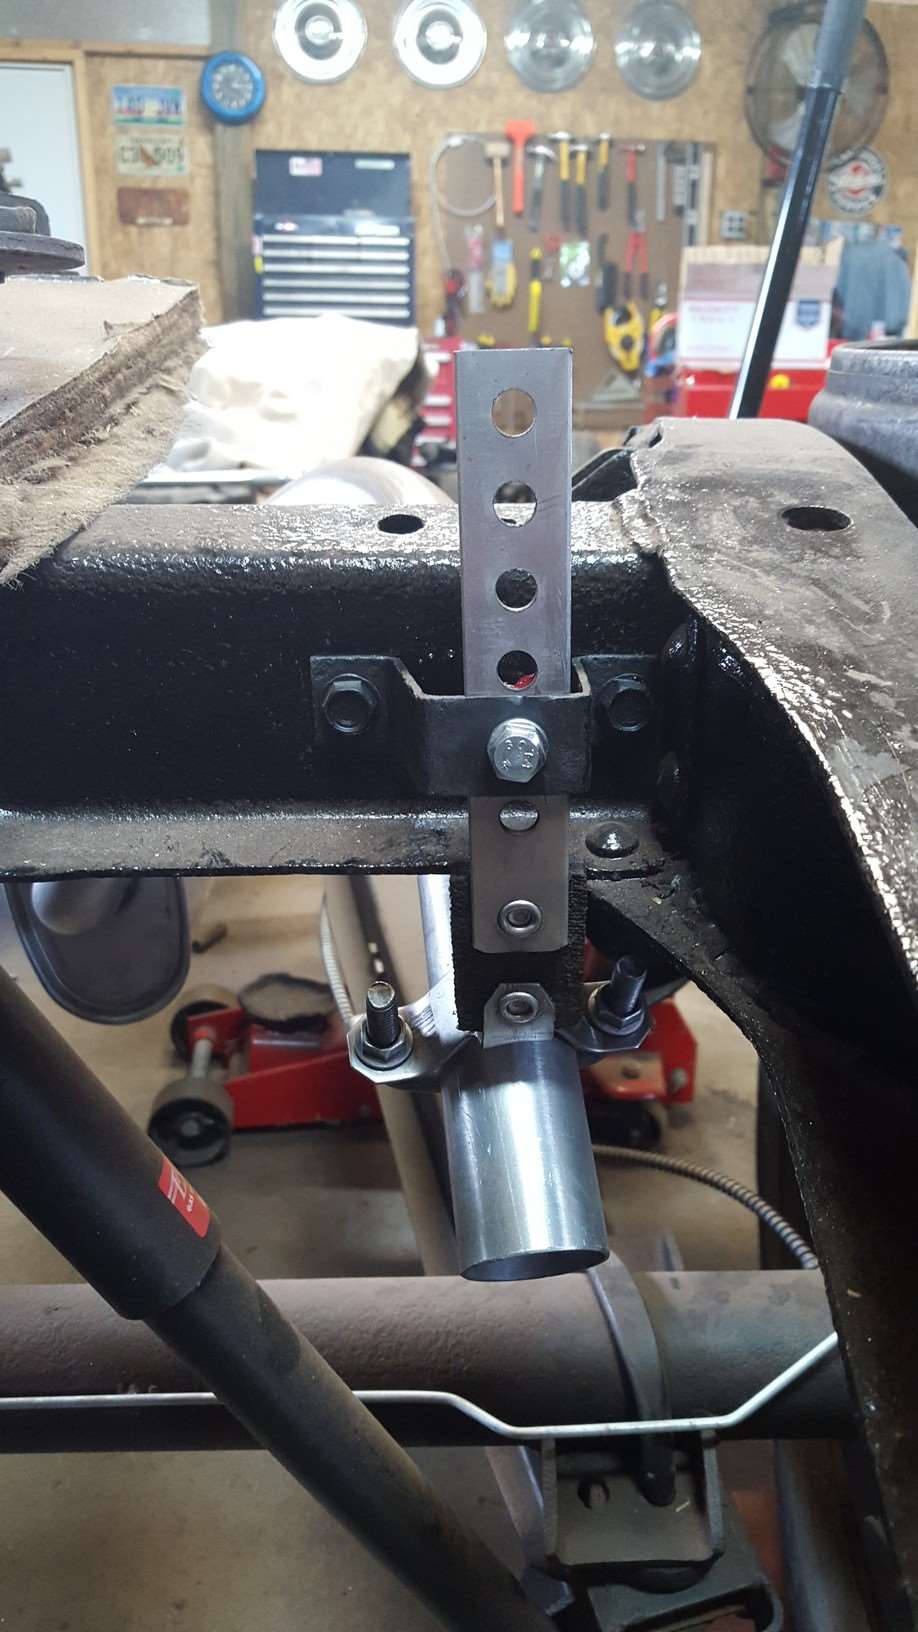
I had pretty much ignored the two holes, on the chassis, at the top of the wheel well. One of them is circled below. They were completely filled with rust and dirt and I just never payed any attention to them, until now.
I have been been giving the body mounts a good hard look lately and really was not sure that's what these were for until now. I don't believe I had ever removed the bolts from these two locations as they had rusted away or broke off before I owned it. After cleaning it up I found broken bolts in both locations. Somehow I was able to drill out the bolts and re-thread them both in about 20 minutes. I have no idea how I hit the center of the bolts since there were visible signs of the edges to gauge the center location. Also discovered that I primed the hood hinges (several post above) and I should not have. They should be bare metal so I am re-blasting those. I have some friends coming over the weekend of Sept 9-10 to help me get the body back on the frame. Attach file: (262.29 KB)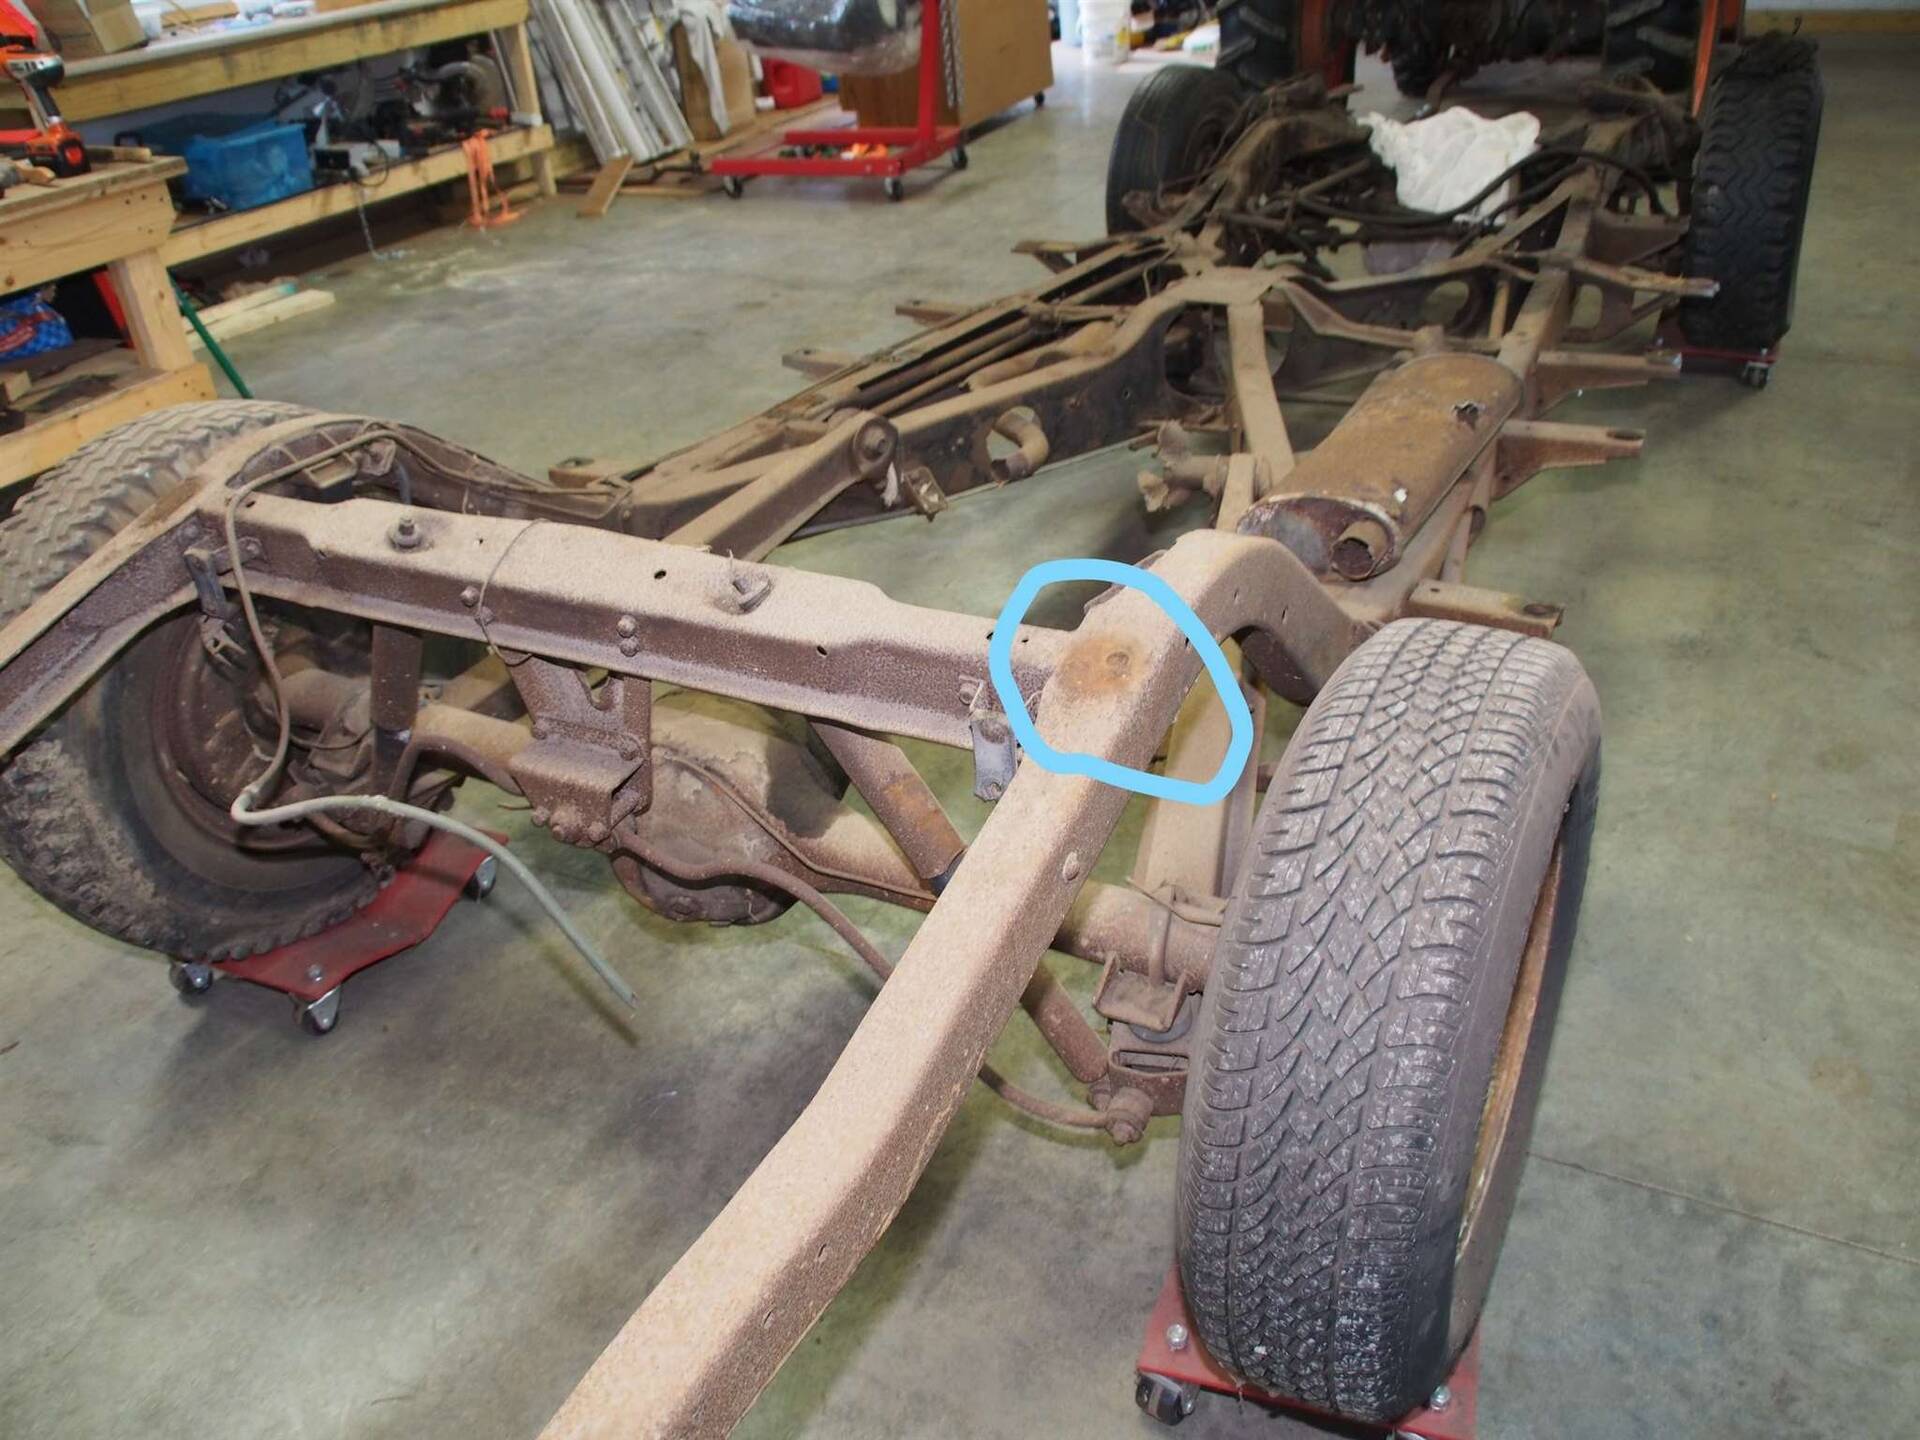 (136.57 KB) (136.57 KB)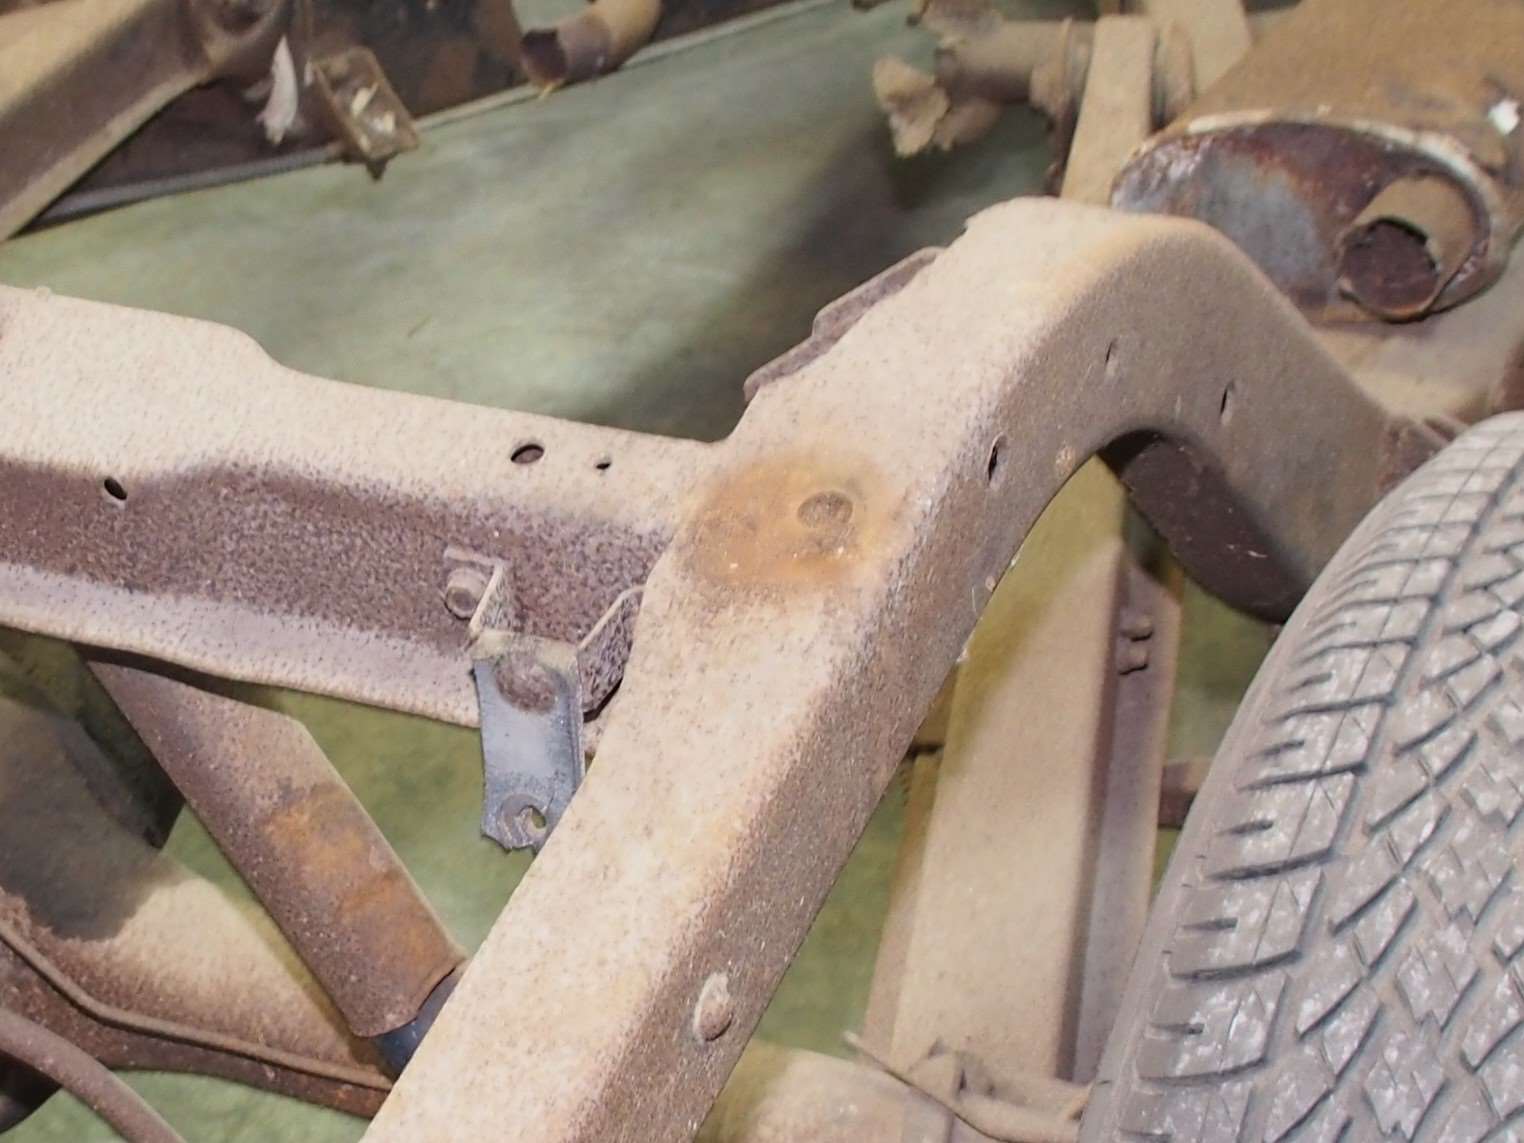 (169.29 KB) (169.29 KB)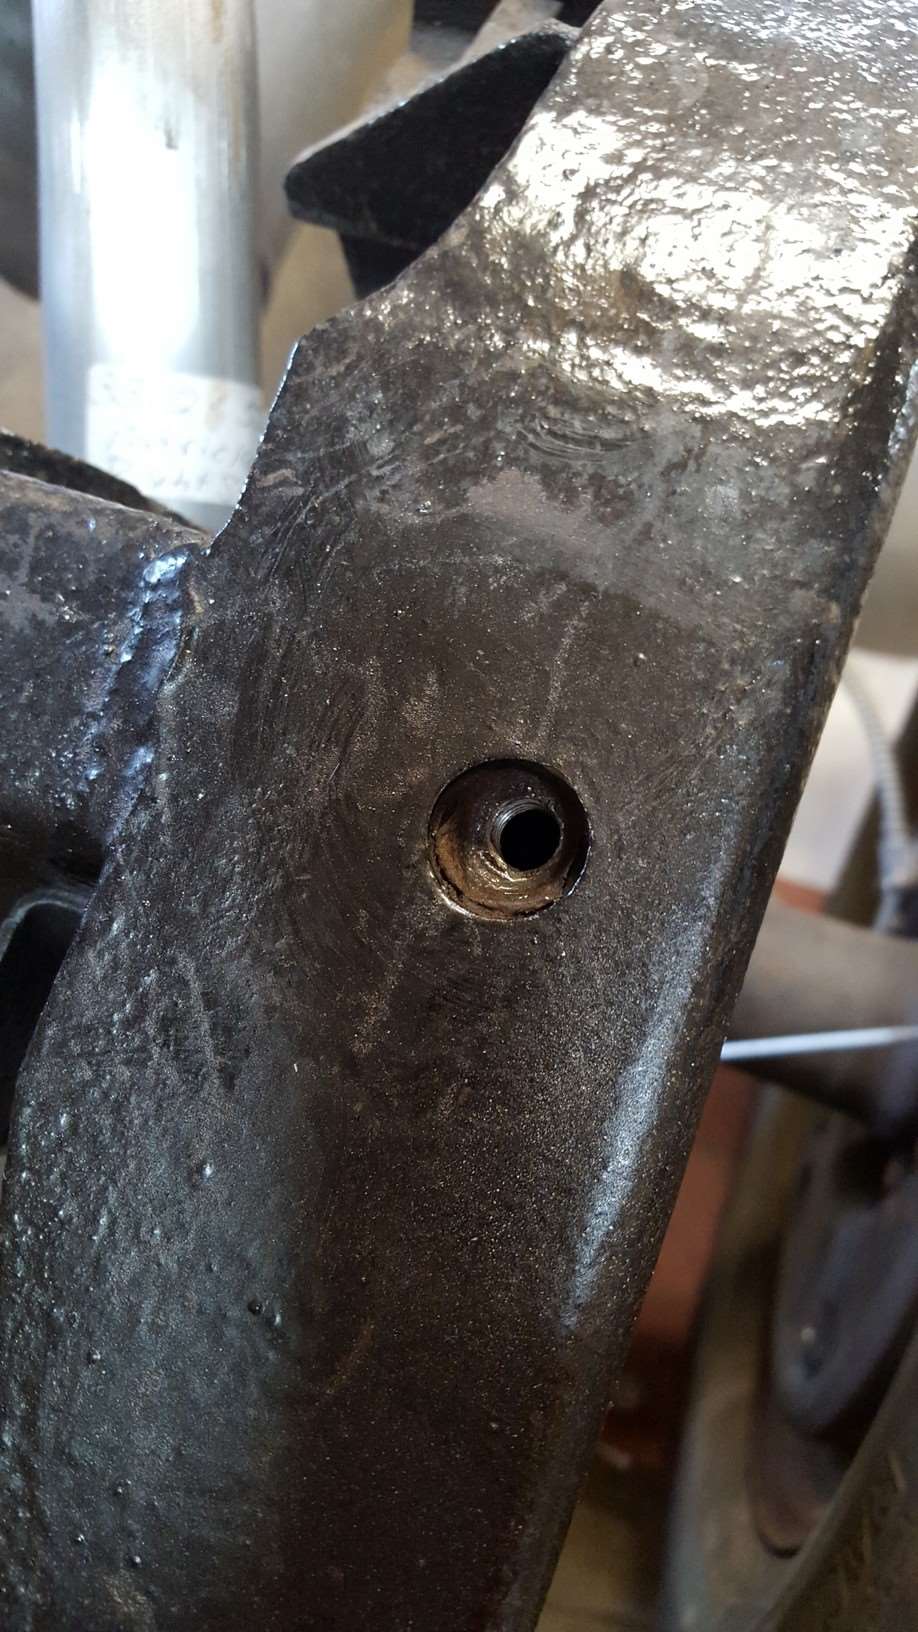
Posted on: 2017/8/10 21:14
|
|||
|
Stewart Ballard
|
||||
|
||||


