|
Re: 1940 120 Convertible Coupe Restoration
|
||||
|---|---|---|---|---|
|
Home away from home

|
Thanks Wes, there are a few floor braces that are original still, although I've had to brace them to make them stronger structurally. A small section in the front of the trunk over the axle will be reused. The rest of the bottom ~10" will be all new metal.
Posted on: 2015/7/29 10:29
|
|||
|
Project Goldilocks '66 C10 Short Fleet BBW Build
[url=http://67-72chevytrucks.com |
||||
|
||||
|
Re: 1940 120 Convertible Coupe Restoration
|
||||
|---|---|---|---|---|
|
Home away from home
|
I have the right inner fender bottom welded in, and the rear seat pan welded in on the areas that I can get to. I'll have to flip it on the rotisserie to finish welding the middle section, there is about 16" in the middle that I can't reach from the top side.
Attach file:  (38.74 KB) (38.74 KB)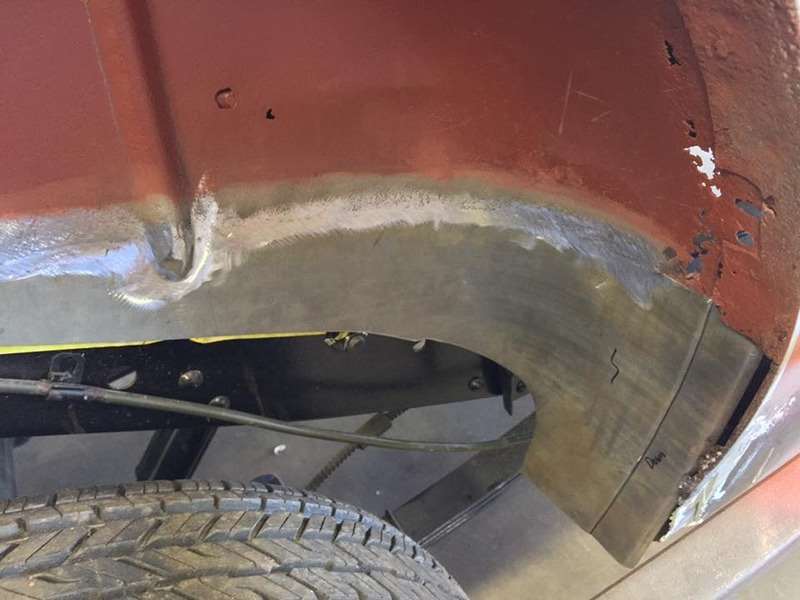 (43.55 KB) (43.55 KB) (44.31 KB) (44.31 KB)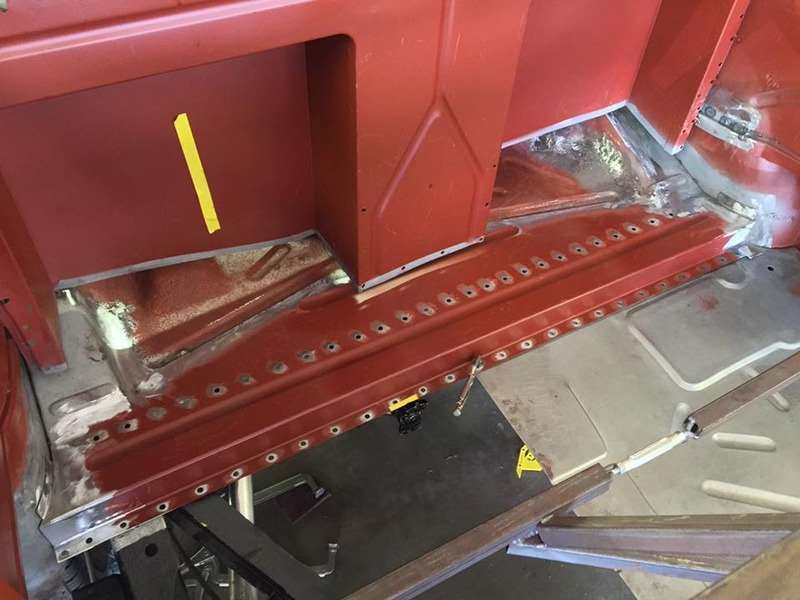
Posted on: 2015/7/29 10:31
|
|||
|
Project Goldilocks '66 C10 Short Fleet BBW Build
[url=http://67-72chevytrucks.com |
||||
|
||||
|
Re: 1940 120 Convertible Coupe Restoration
|
||||
|---|---|---|---|---|
|
Home away from home
|
With the seat pan in I mocked up the inner/outer rockers and floor pans so I could start on the inner B-pillar brace and finish the outer B-pillar section. I have the bottom half of the B-pillar brace fabricated.
Attach file: (51.34 KB)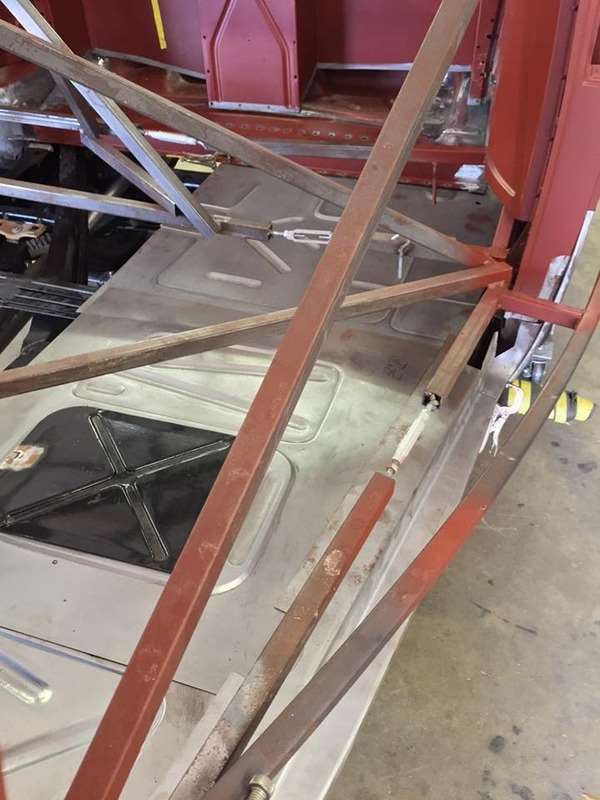 (38.96 KB) (38.96 KB)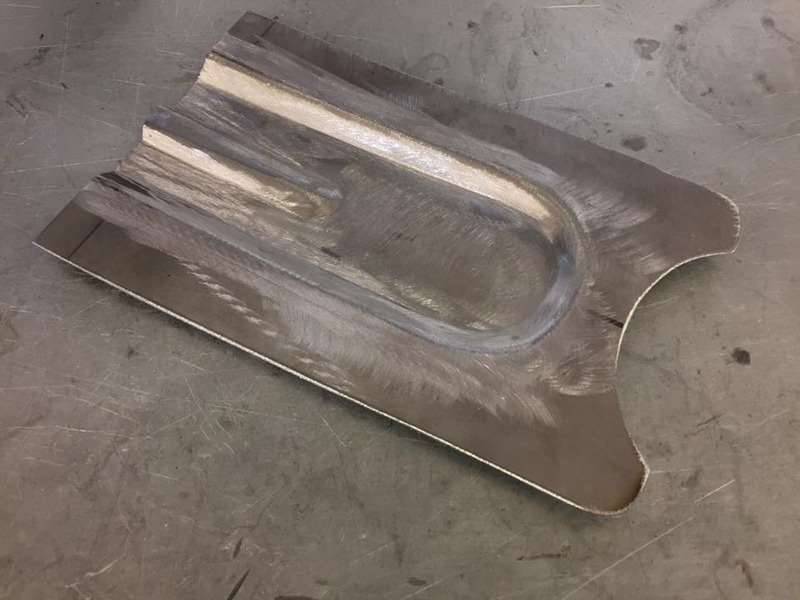
Posted on: 2015/7/29 10:32
|
|||
|
Project Goldilocks '66 C10 Short Fleet BBW Build
[url=http://67-72chevytrucks.com |
||||
|
||||
|
Re: 1940 120 Convertible Coupe Restoration
|
||||
|---|---|---|---|---|
|
Home away from home
|
Been working on finishing the driver side B-pillar inner brace. I layered three pieces of 1/8" x 3/4" steel to make the 90* turn (didn't have a piece of 3/8" x 5/8" laying around). I thought that a solid piece would be stronger than sheet metal, and that area needs all the help it can get to help keep the quarters in alignment. Just need to do some final trimming to fit it to the car. Making it solid also make it possible to "sculpt" the shape of the "bead" so I could blend from the round lower bead on the floor section to the square upper bead on the B-pillar, matching the appearance of the factory piece.
Attach file: (39.39 KB)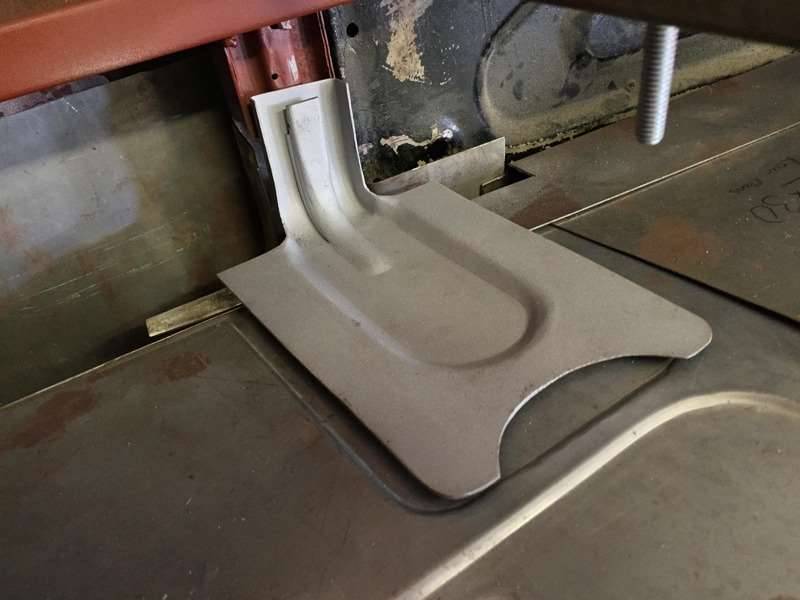 (46.01 KB) (46.01 KB)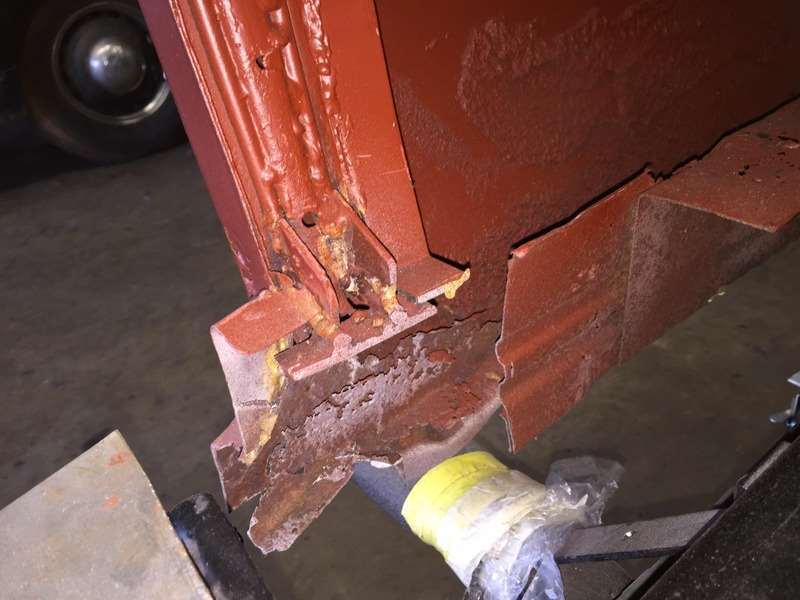 (78.69 KB) (78.69 KB)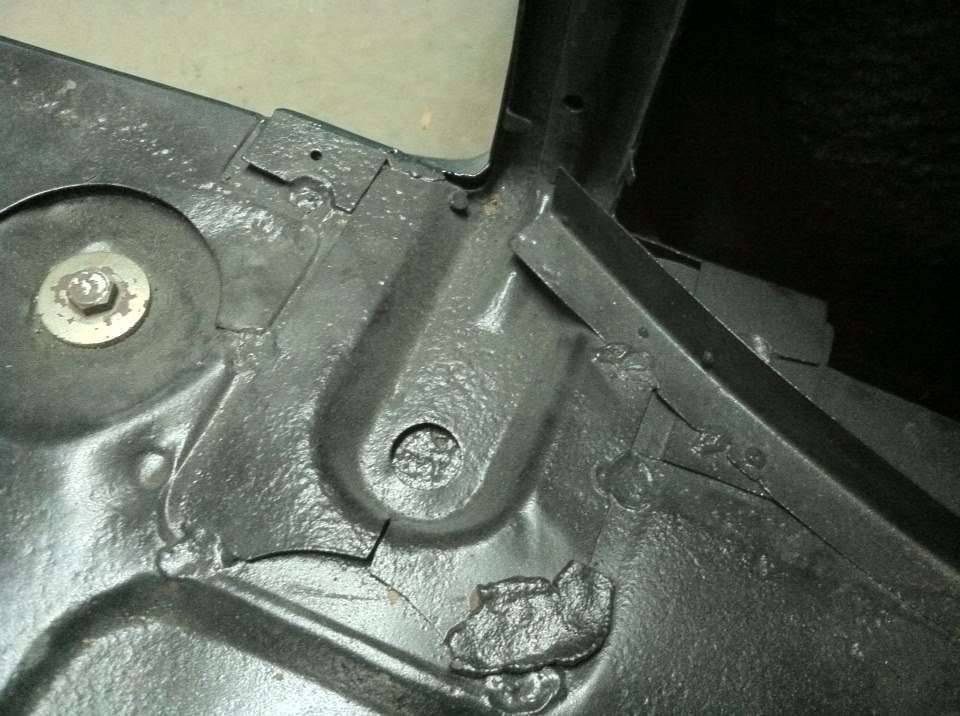
Posted on: 2015/8/11 12:52
|
|||
|
Project Goldilocks '66 C10 Short Fleet BBW Build
[url=http://67-72chevytrucks.com |
||||
|
||||
|
Re: 1940 120 Convertible Coupe Restoration
|
||||
|---|---|---|---|---|
|
Home away from home
|
Also have been working on the driver side rocker. I made the front edge too round where it meets the A-pillar, so when I tried to test fit the door the front/bottom edge wouldn't clear. I had to make a couple relief cuts to drop the edge down. No pics but you can see the difference between the original shape and what I originally made. I should have made a template of the corners before I cut everything out. I'll know better on the passenger side...
Attach file: (38.53 KB)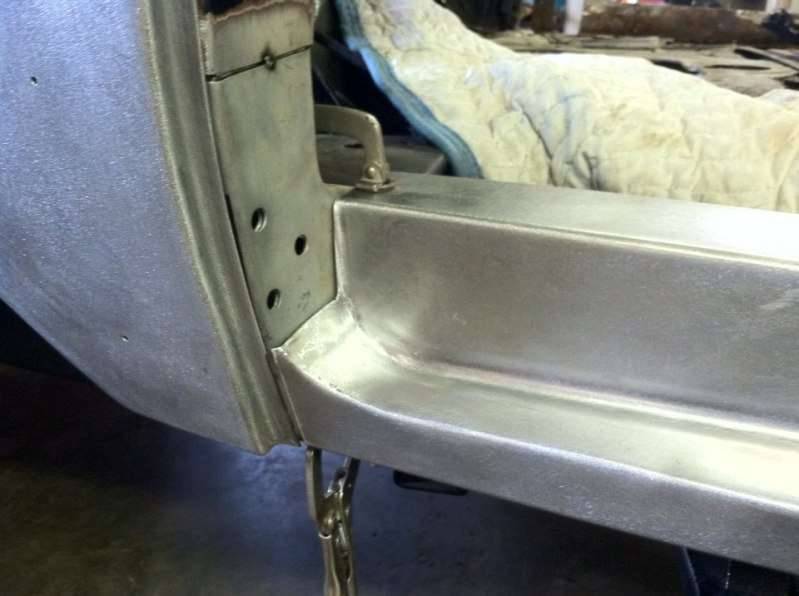 (86.70 KB) (86.70 KB)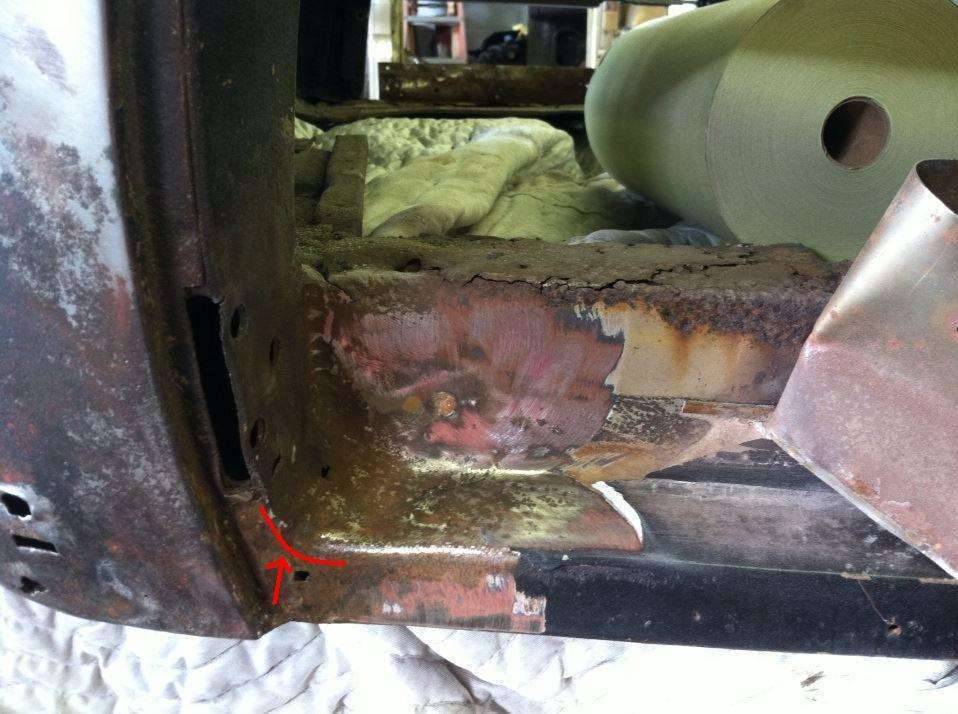
Posted on: 2015/8/11 12:54
|
|||
|
Project Goldilocks '66 C10 Short Fleet BBW Build
[url=http://67-72chevytrucks.com |
||||
|
||||
|
Re: 1940 120 Convertible Coupe Restoration
|
||||
|---|---|---|---|---|
|
Home away from home
|
The B-pillar bracing is pretty much finished up. Had to extend the rocker panel 9" rearward so the outer B-pillar piece had something to weld to along it's outer and upper edges. This was rusted away on the original pieces so I didn't know it should have been longer than I originally made it. Didn't know exactly how it should look so I just made it functional, it won't be seen once the outer piece is welded on. Also pulled the rear floor pan back out to recess the area under the inner B-pillar brace. The rocker extension also had to be recessed. I should have everything for the left side finished this week so I can pull it all out for cleaning/priming. Then it'll be ready to be welded in. All I'm missing now is one rear body mount brace at the rear inner fender; I started on it yesterday. Also need to blast the original rear floor pan braces, hopefully they'll be nice enough that I won't need to make new ones.
Attach file: (38.52 KB)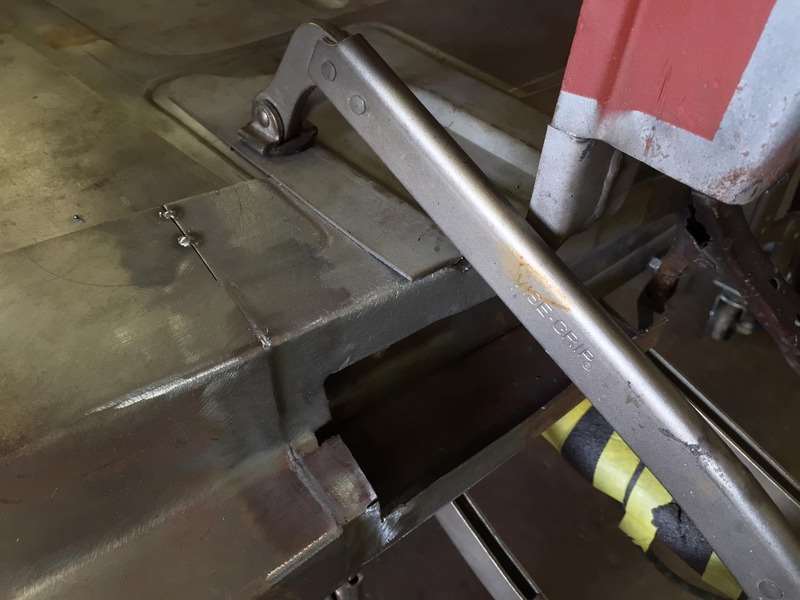 (40.67 KB) (40.67 KB)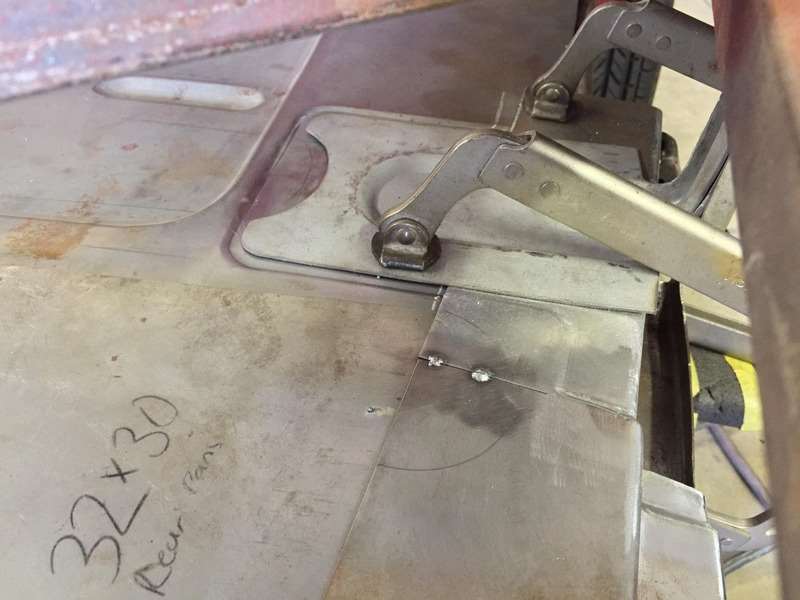 (35.98 KB) (35.98 KB)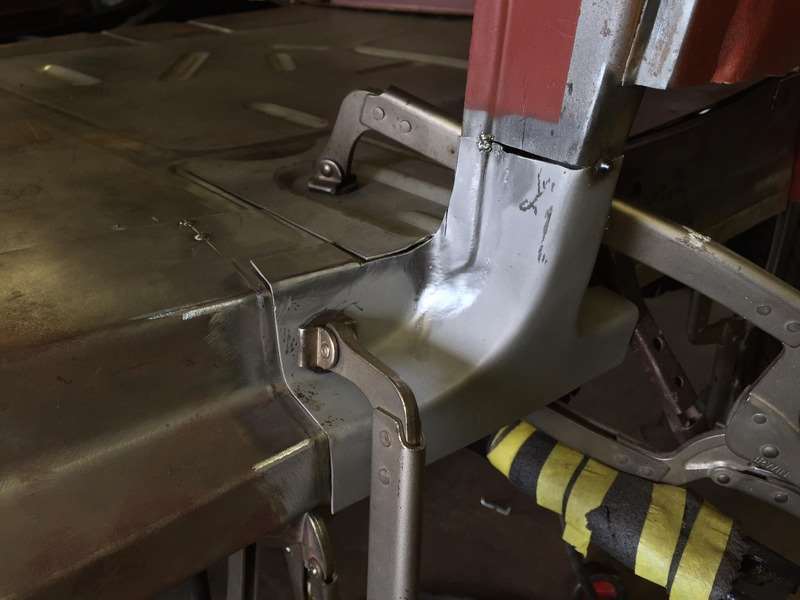
Posted on: 2015/8/18 7:42
|
|||
|
Project Goldilocks '66 C10 Short Fleet BBW Build
[url=http://67-72chevytrucks.com |
||||
|
||||
|
Re: 1940 120 Convertible Coupe Restoration
|
||||
|---|---|---|---|---|
|
Home away from home
|
Started on the last piece of the driver side, the fenderwell/floor brace for the body mount at the end of the inner rocker. Still need to finish it up so I don't have any progress pictures but it's roughly shaped. I'll wait to do the final shaping once the rest of the panels are back in for good.
Also pulled everything back out, then either blasted the parts or cleaned them with PPG DX579 and DX520 before spraying PPG DPLF epoxy. I'll start welding everything in next week. Attach file: (41.43 KB) (38.76 KB) (38.76 KB)
Posted on: 2015/8/20 13:03
|
|||
|
Project Goldilocks '66 C10 Short Fleet BBW Build
[url=http://67-72chevytrucks.com |
||||
|
||||
|
Re: 1940 120 Convertible Coupe Restoration
|
||||
|---|---|---|---|---|
|
Home away from home

|
You are doing an amazing job. Take a look at my 1940 160 trunk here:
https://packardinfo.com/xoops/html/modules/newbb/viewtopic.php?topic_id=5878&viewmode=flat&order=ASC&type=&mode=0&start=10 After all this work was done to mine to make it solid again and rebuild the supports (looks like Frankenstein next to what you are doing) I found out about Classic 2 Current Fabrication. They had 1940 120 pans. I never did find out if the 120 and 160 trunks are identical. Now it seems what they have is reversed. They show a Super 8 convertible coupe pan, '38-'40 for $99. This is what they show for 1940. When I searched 5 years ago, they had 120, but not Super 8, so maybe there's some confusion. But might be worth a call to see if they have anything that would help you. It surprises me that they have so much for the 110, but not 120. But with your talent, you could modify what they have easily. http://www.c2cfabrication.com/collections/all/packard+1940 Joe
Posted on: 2015/8/20 13:39
|
|||
|
||||
|
Re: 1940 120 Convertible Coupe Restoration
|
||||
|---|---|---|---|---|
|
Home away from home
|
Appreciate the comment!
From what I've found, C2C is pretty much the only company offering any panels for early Packards. The owner of the '40 had purchased a full set of Classic 2 Current floors before he delivered the car to us. The only way they would be workable is if you had small holes to patch, and even then they would only be adequate to cover the hole. They are by no means an accurate reproduction of the original floors. They also were too small to completely replace certain sections of the front floor (nothing forward of the toe board). The body mount areas were flat, no recessed stampings to align and fit into the floor braces. The bead rolled patterns were similar but the wrong sizes, depths, and placement of the bead were off. The opening and stamping shape for the transmission cover were so far off that there was no way to fit the cover. There are pictures of the C2C floors compared to the more-correct floors I fabricated earlier in the topic. Anyone attempting a correct restoration should look for another option.
Posted on: 2015/8/21 14:08
|
|||
|
Project Goldilocks '66 C10 Short Fleet BBW Build
[url=http://67-72chevytrucks.com |
||||
|
||||


