|
Re: Stewart's 1955 Packard 400
|
||||
|---|---|---|---|---|
|
Home away from home
|
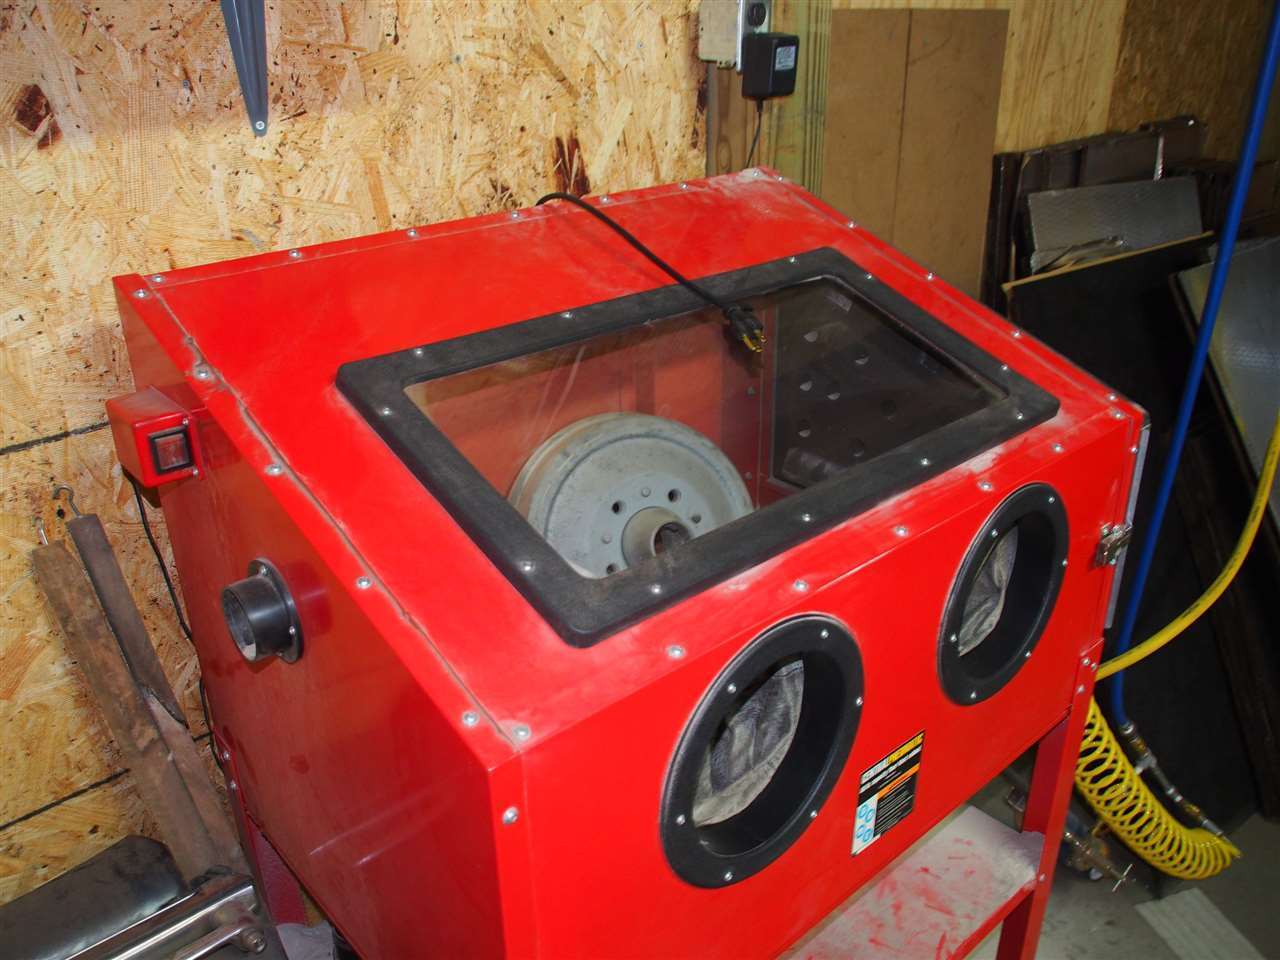
Stewart, when I cleaned up the rear axle vent it looked like the vent fitting is just a loosely crimped cap to serve as a dust cover over the vent hole. So blow shop air through it or something to make sure you don't leave any blasting media in there. If you don't like the rust holes in the cap, I guess I'd just smear a light coat of sealant or JB weld over it. Just don't glue it down tight so it doesn't vent freely.
Posted on: 2015/8/15 0:00
|
|||
|
1952 Model 200 Deluxe Touring Sedan
HA's 52 Grey Ghost "The problem with quotes on the internet is you never know if they're true" - Abraham Lincoln |
||||
|
||||
|
Re: Stewart's 1955 Packard 400
|
||||
|---|---|---|---|---|
|
Home away from home
|
Should look like this?
Attach file:  (135.45 KB) (135.45 KB)
Posted on: 2015/8/15 1:54
|
|||
|
||||
|
Re: Stewart's 1955 Packard 400
|
||||
|---|---|---|---|---|
|
Home away from home
|
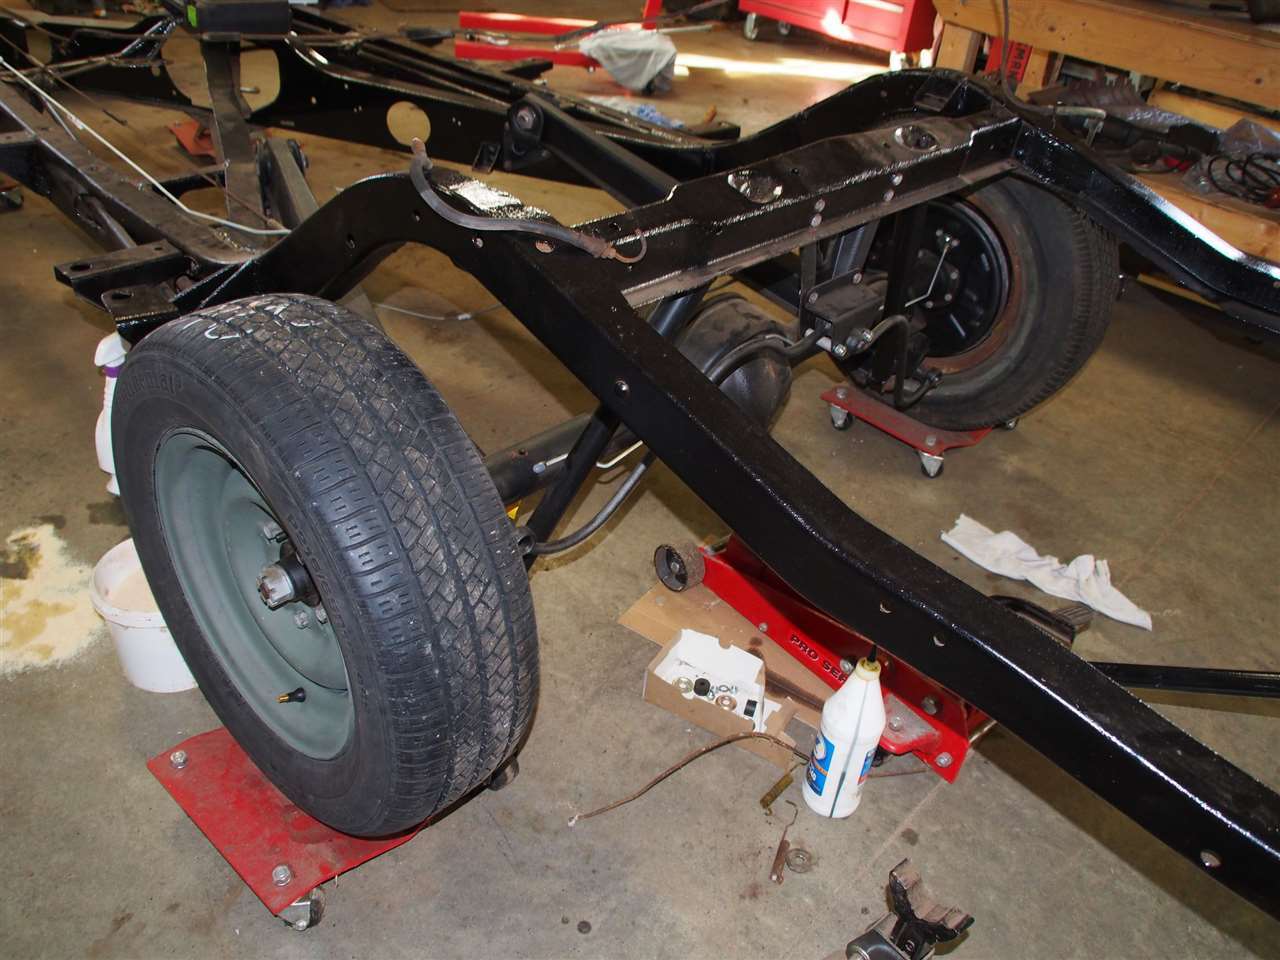
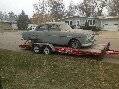
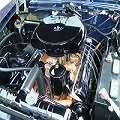
The front end is almost back on the ground. The brakes are in place and the hubs are blasted and painted. I have all the bearings and races on hand just have not had time to pack the bearings yet. It will be good to get this done and move on to the steering and the T/L.
Attach file: (121.39 KB)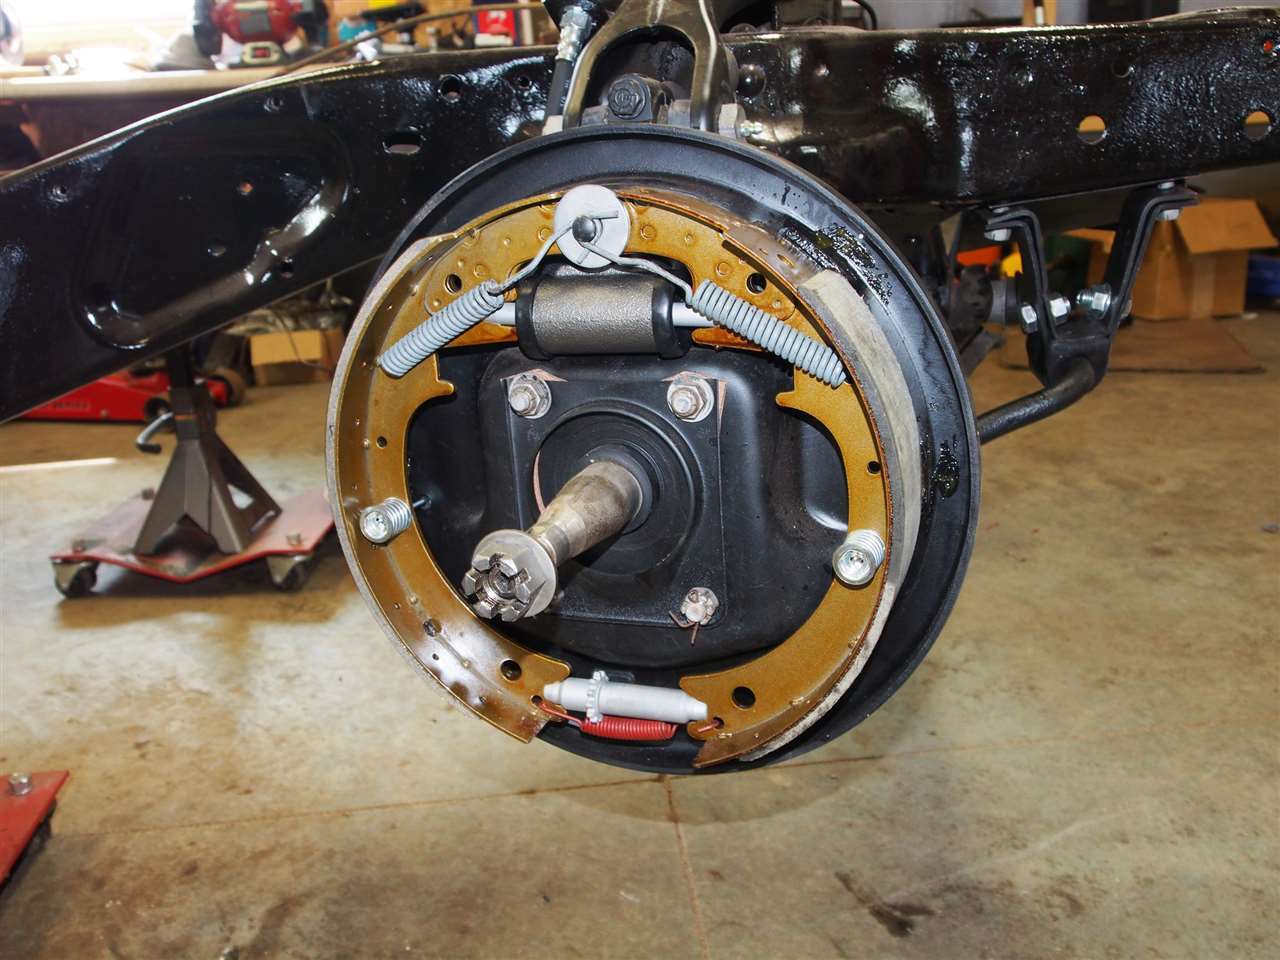 (104.57 KB) (104.57 KB)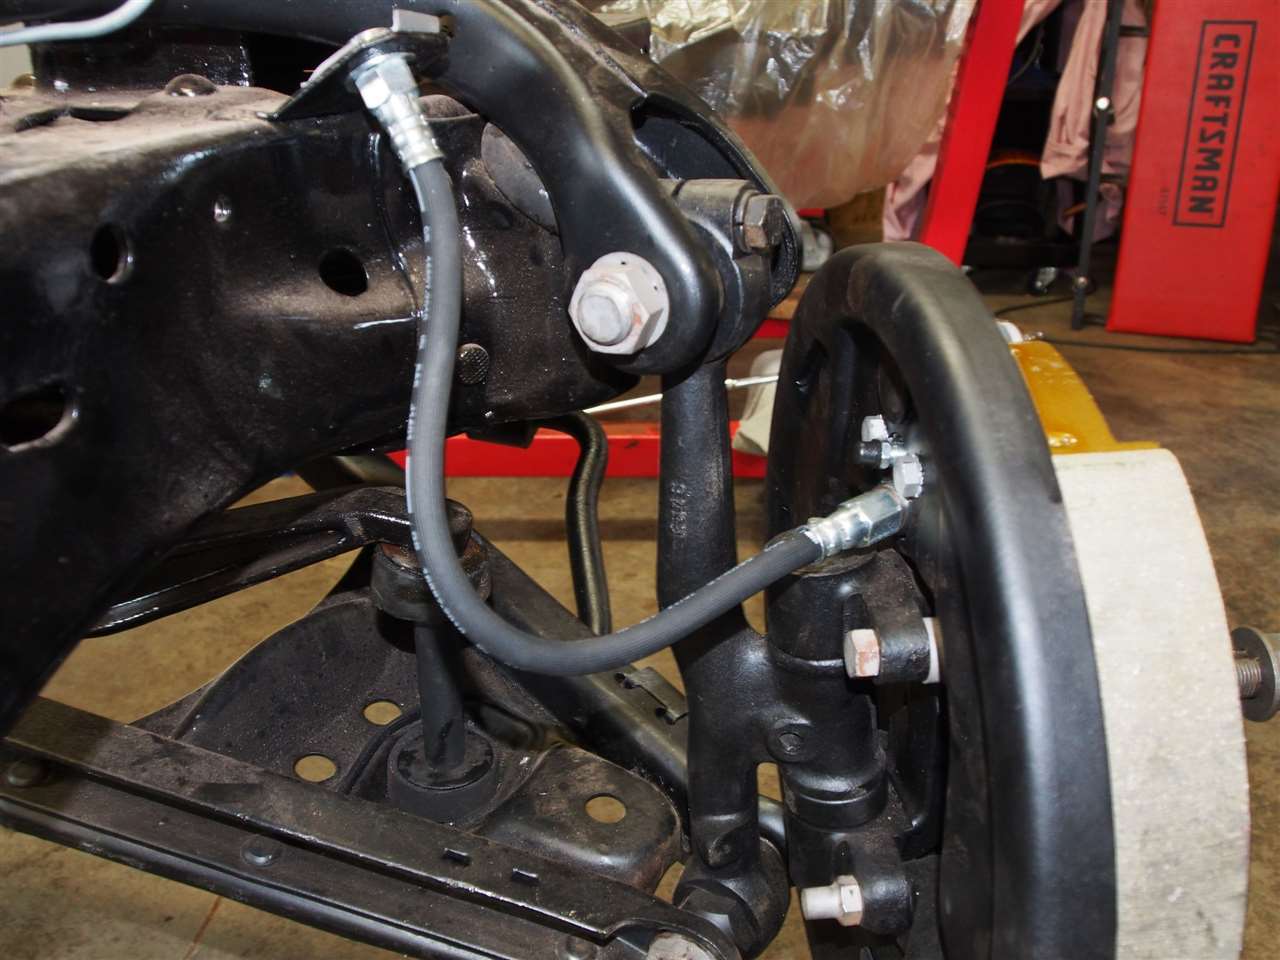 (113.68 KB) (113.68 KB)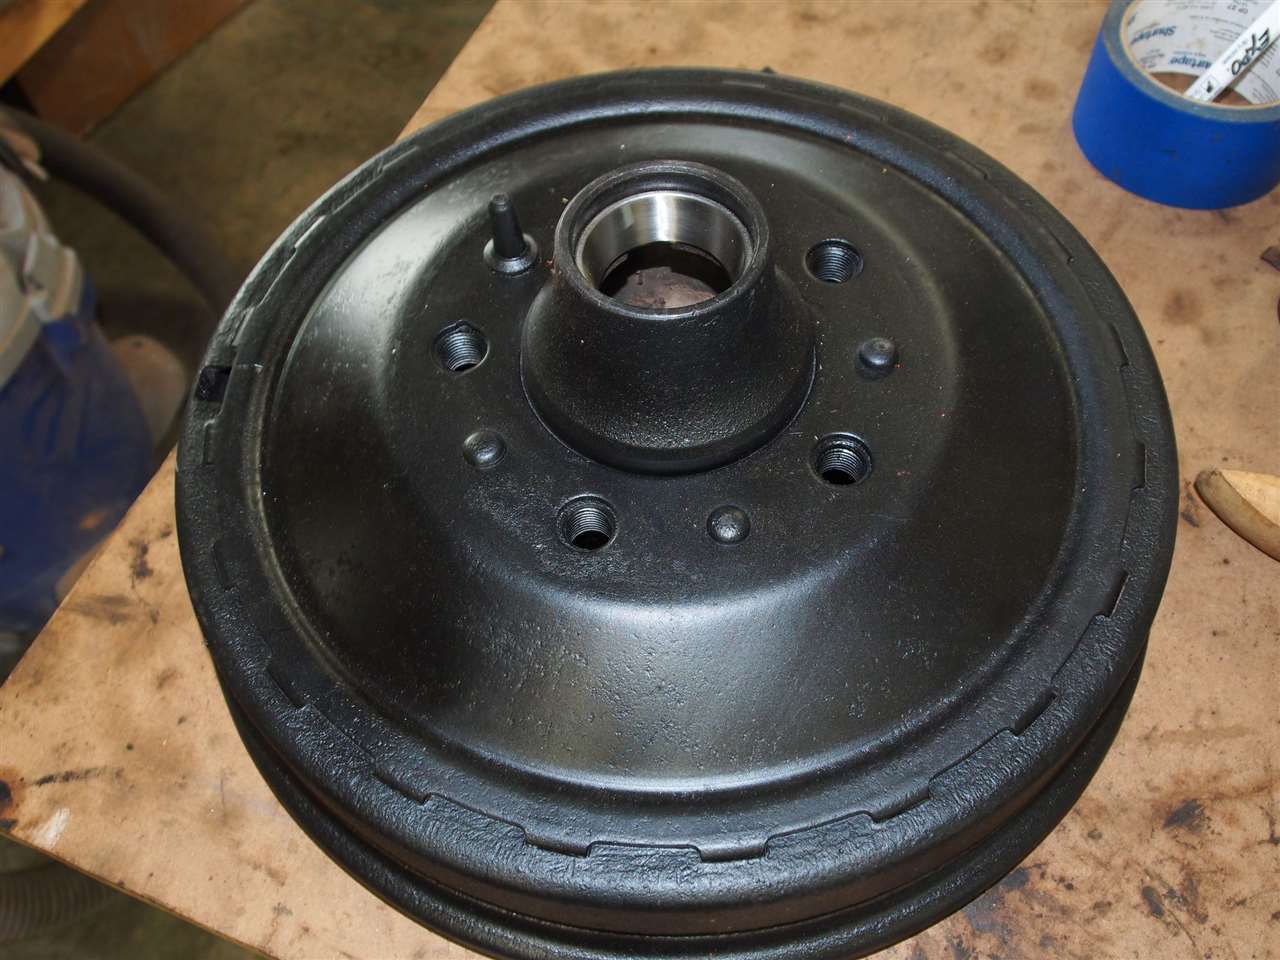 (106.34 KB) (106.34 KB)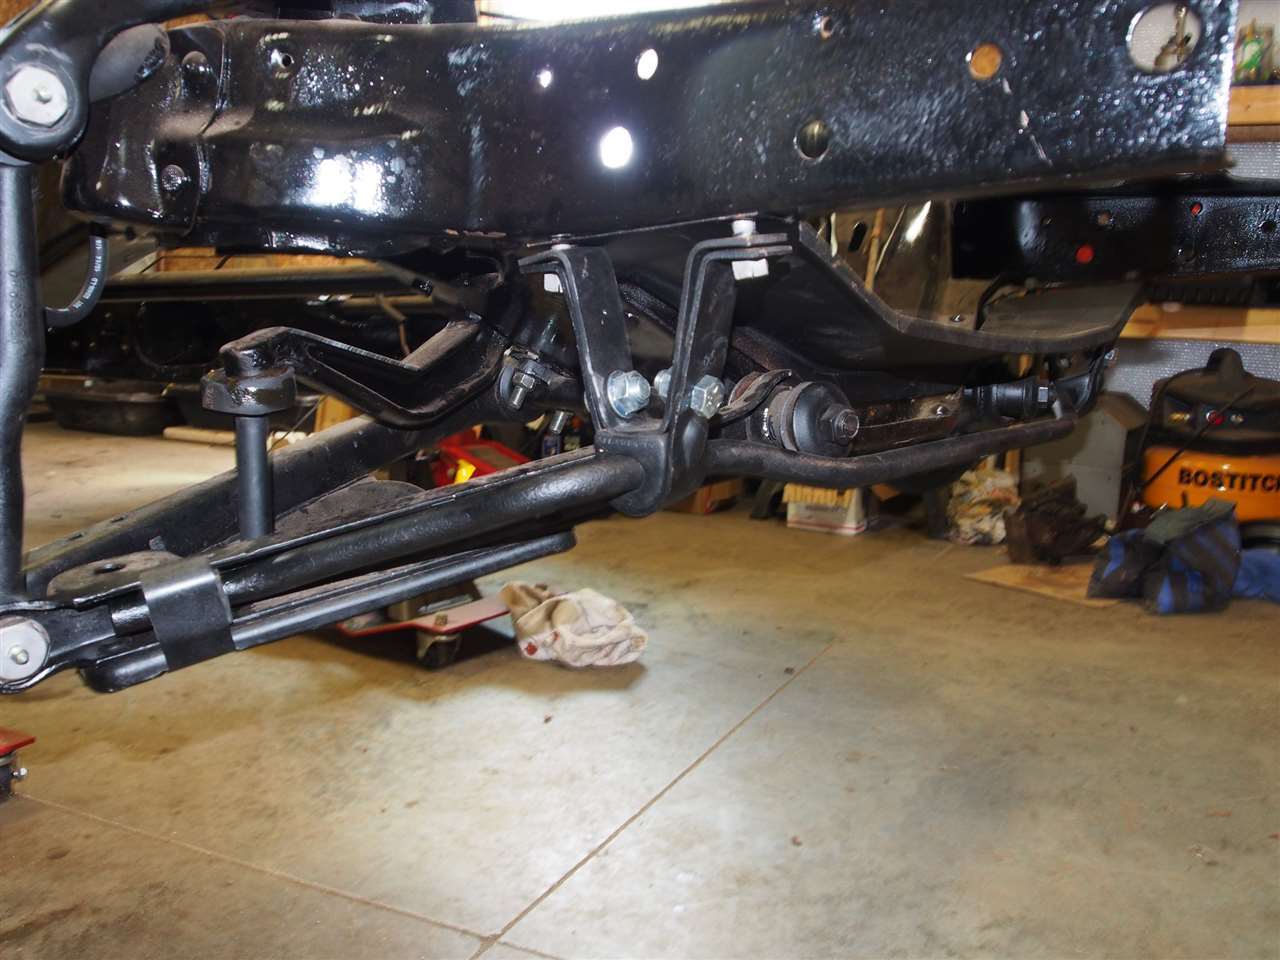
Posted on: 2015/9/10 6:55
|
|||
|
Stewart Ballard
|
||||
|
||||
|
Re: Stewart's 1955 Packard 400
|
||||
|---|---|---|---|---|
|
Home away from home
|
Stewart, I received your motor and box today.. we will hit it this weekend
Posted on: 2015/10/6 19:11
|
|||
|
[url=https://packardinfo.com/xoops/html/modules/
|
||||
|
||||
|
Re: Stewart's 1955 Packard 400
|
||||
|---|---|---|---|---|
|
Home away from home
|
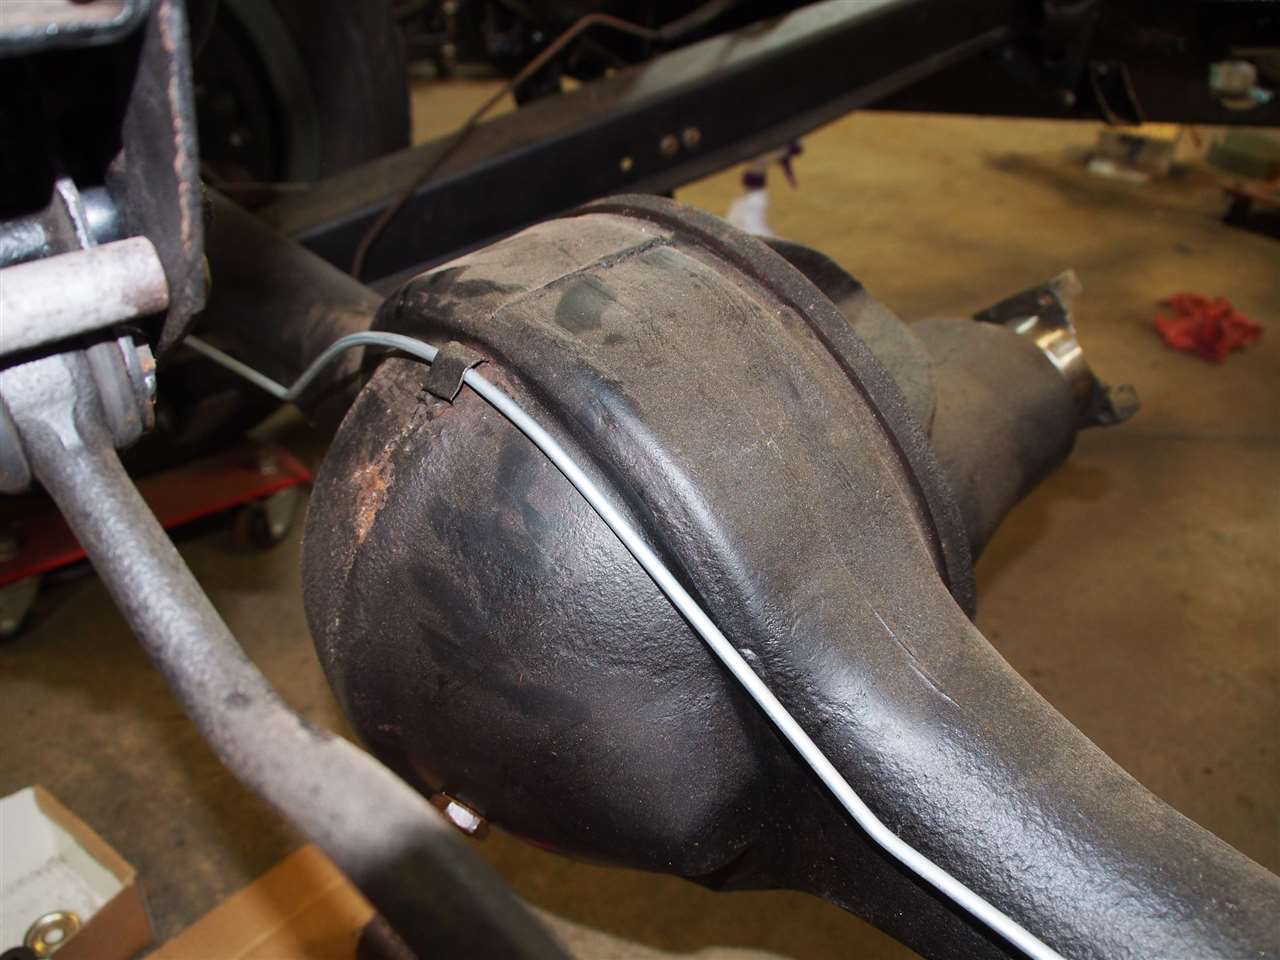
All four tires are back in place. I have moved onto the Steering and T/L assembly.
I was going to redo the T/L compensator motor myself but shipped it all off to Michiana Packard yesterday instead. The coating on the armature was deteriorating and small chips were missing. It would have taken me month to do myself so now its Troys problem. Was looking back through some old threads here talking about the solenoid on the T/L. Found one that suggested Cole-Hersee model 24046 - 12V Insulated Intermittent Duty SPST Solenoid (the top image). But I am wondering if the one in the second image might be better. Model 24071 12V Grounded Intermittent Duty SPST Solenoid. Anyone have any input? Attach file: (10.64 KB)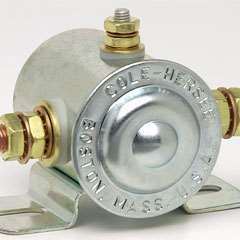 (6.51 KB) (6.51 KB)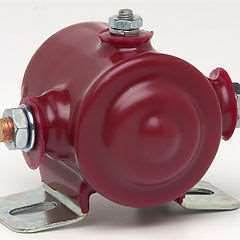
Posted on: 2015/10/6 19:13
|
|||
|
Stewart Ballard
|
||||
|
||||
|
Re: Stewart's 1955 Packard 400
|
||||
|---|---|---|---|---|
|
Home away from home
|
Thanks Troy.
UPS must have caught the jet stream. I didn't drop it off until 4:30 yesterday afternoon.
Posted on: 2015/10/6 19:15
|
|||
|
Stewart Ballard
|
||||
|
||||
|
Re: Stewart's 1955 Packard 400
|
||||
|---|---|---|---|---|
|
Home away from home
|
I got the T/L Compensator and motor back from MichinaPackard this week. Its looks fantastic. To bad I have to hide it underneath.
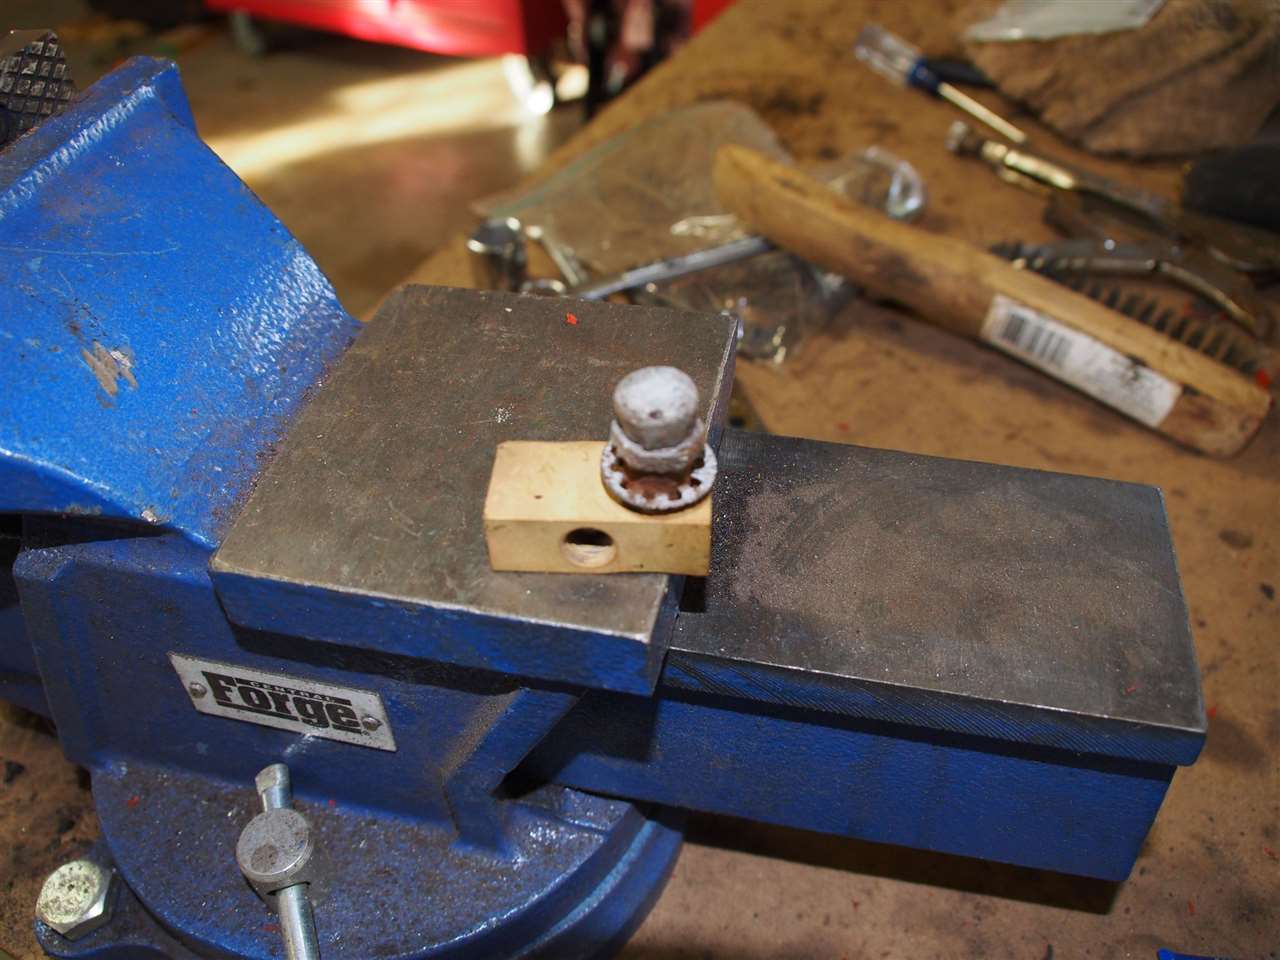
I am getting all the T/L related parts cleaned, blasted and painted for reassembly. I have a question about the control assembly in picture 4 below. I need to remove that black tar like substance from the wire connectors. What should I replace it with? Everything I can think of is more or less permanent (like silicon). Also photo 5 is of the steering cylinder. I removed the snap ring from the end of the column but how is the rod removed. Do I have to do something special or do I just clamp it into the vise and just keep pulling? I have a number of new parts on the way for both the T/L and the steering so have plenty to keep me busy. Attach file: (94.42 KB)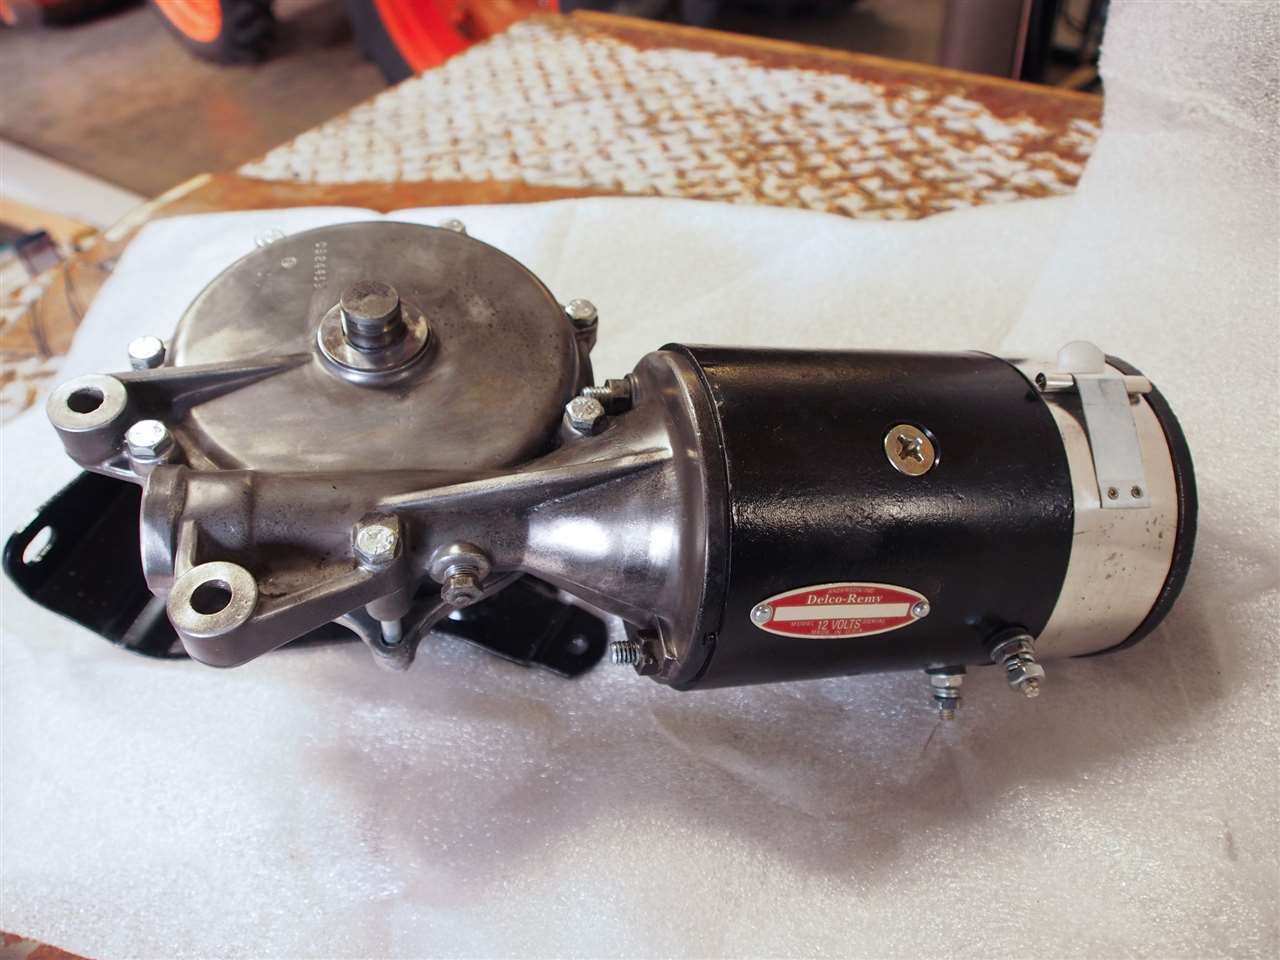 (104.29 KB) (104.29 KB)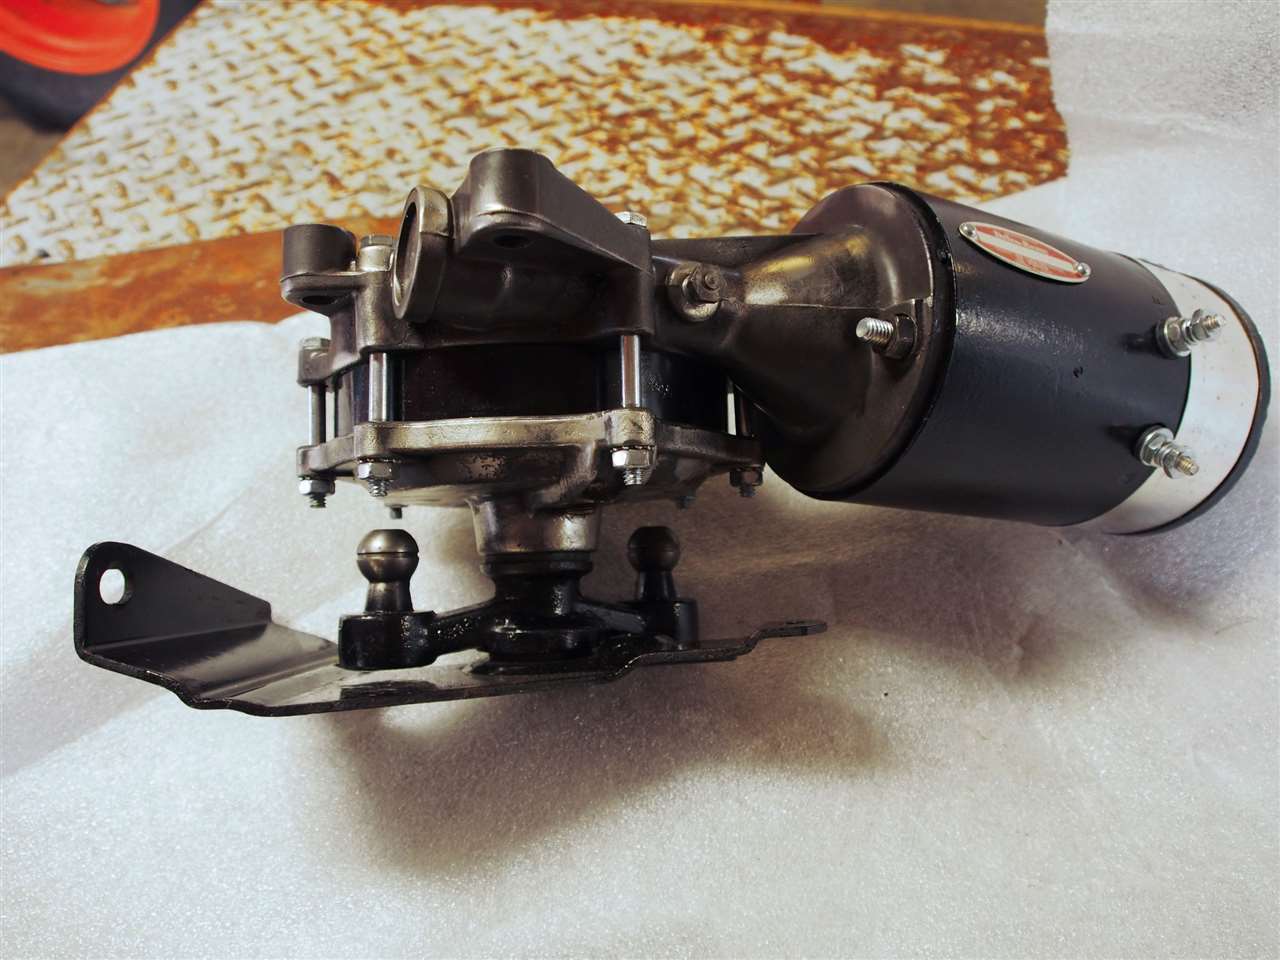 (95.31 KB) (95.31 KB)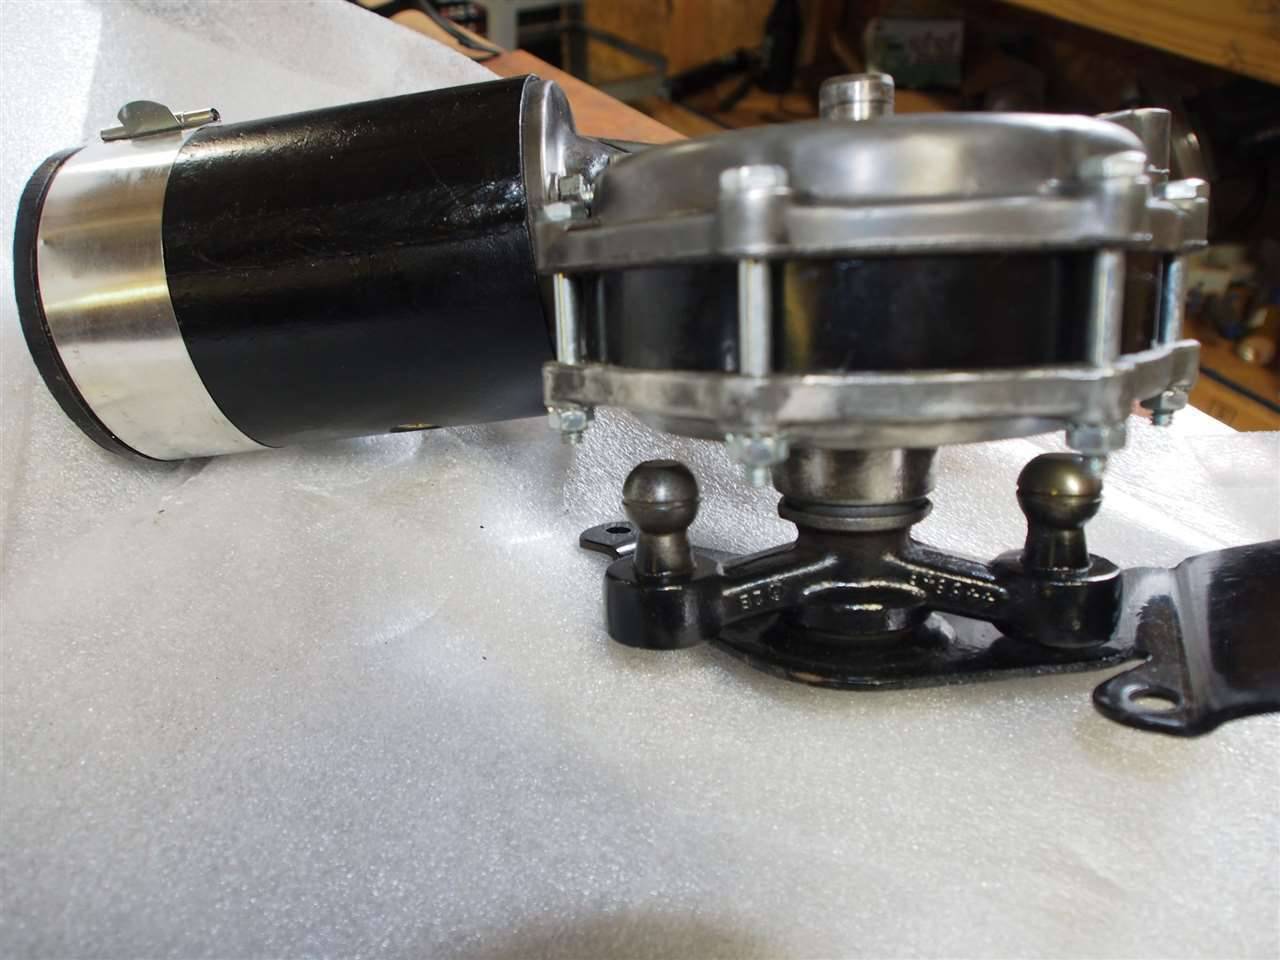 (80.68 KB) (80.68 KB)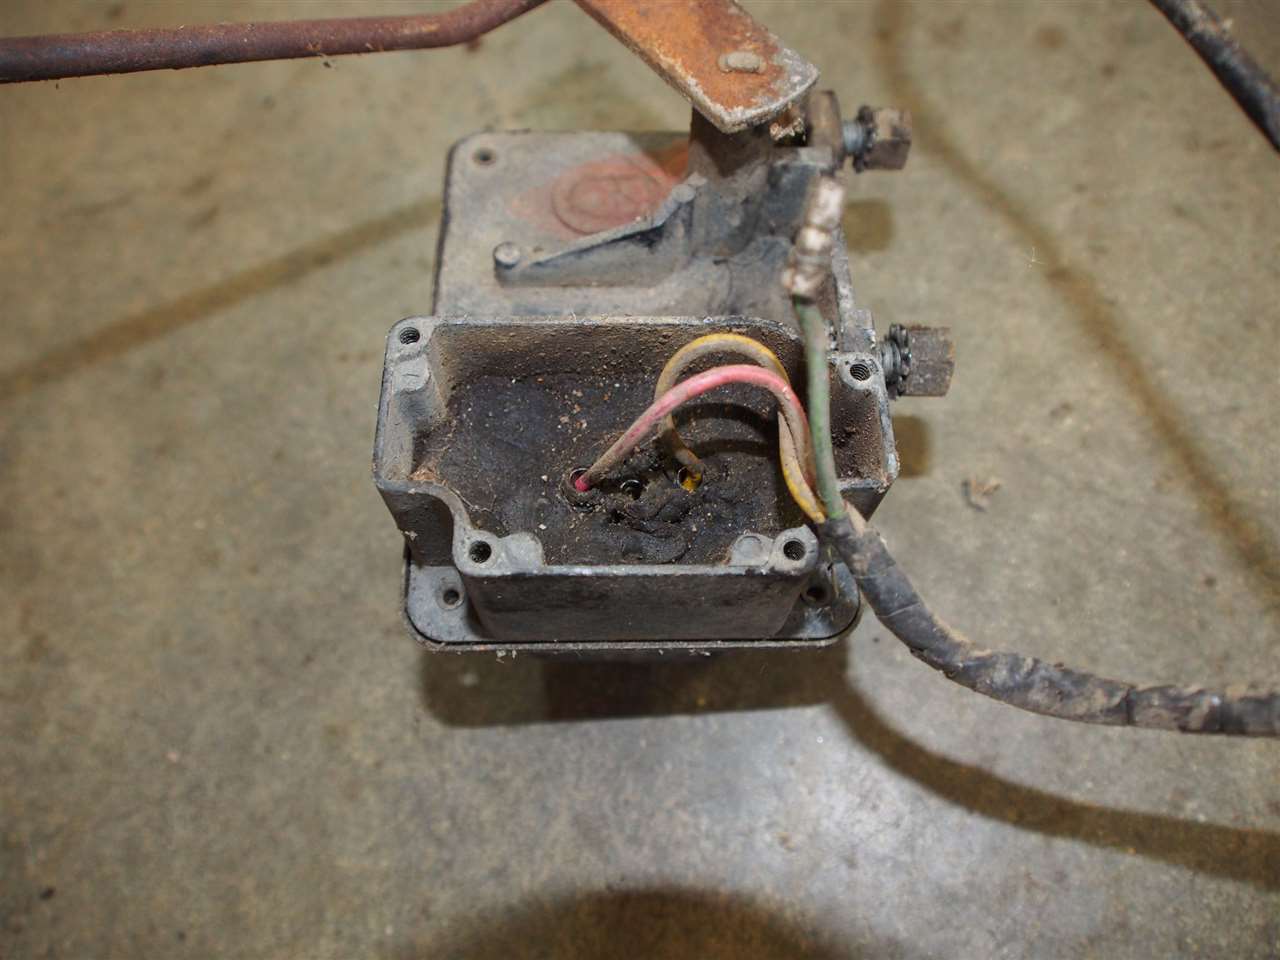 (99.91 KB) (99.91 KB)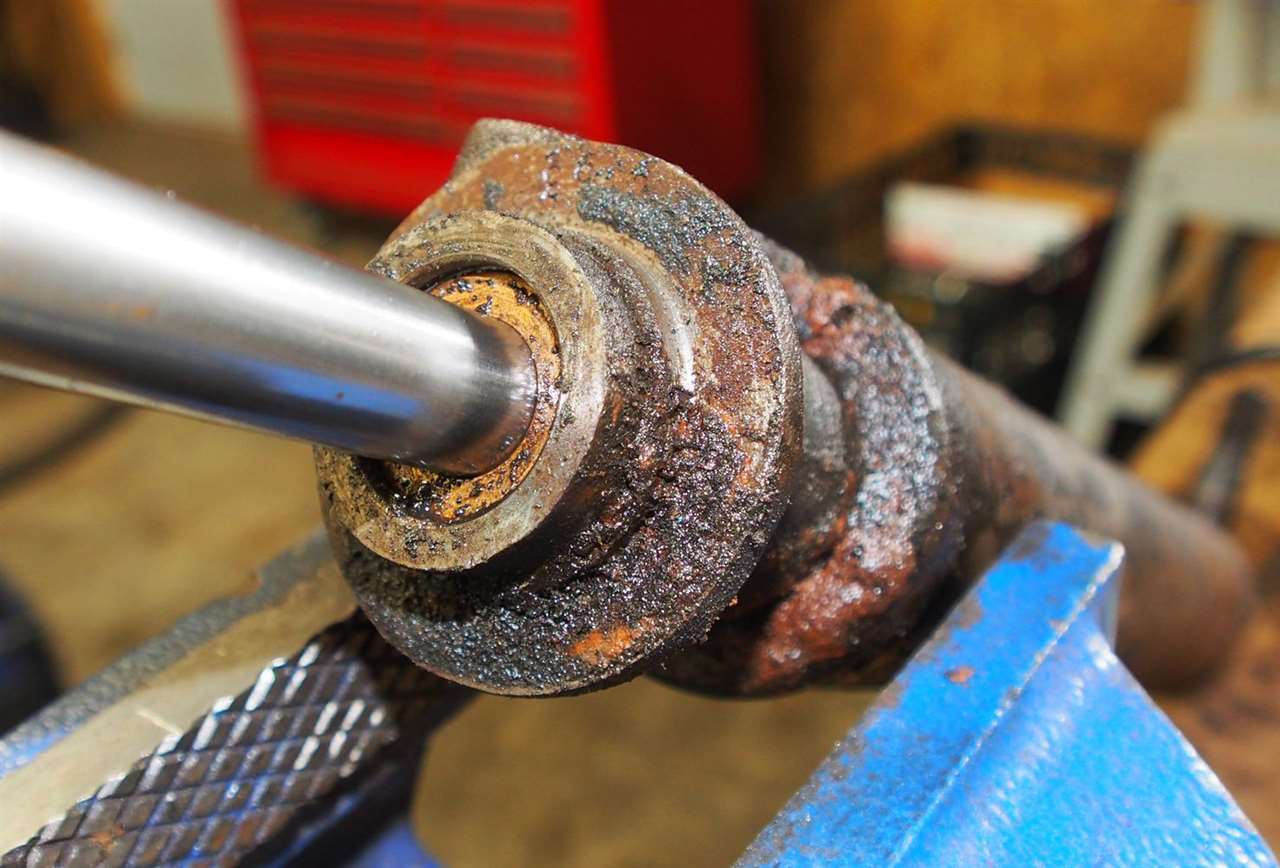
Posted on: 2015/10/28 19:18
|
|||
|
Stewart Ballard
|
||||
|
||||
|
Re: Stewart's 1955 Packard 400
|
||||
|---|---|---|---|---|
|
Home away from home
|
Stewart-
The cylinder is a closed unit, you can not remove the rod / piston. This is a gland seal only repair. Now that you have the snap ring out, the fun part of removing the metal seal and washers. Take a look at Max Merritt seal kit picture on their sight and you can see the pcs that need to come out. T
Posted on: 2015/10/28 19:23
|
|||
|
[url=https://packardinfo.com/xoops/html/modules/
|
||||
|
||||
|
Re: Stewart's 1955 Packard 400
|
||||
|---|---|---|---|---|
|
Forum Ambassador

|
Here is the official Packard instructions for the seal install. It is a little late now but one article mentioned a way to get the seals out after removing the lock ring was to pressure the cylinder by turning the steering wheel slightly back and forth. That would force fluid to push the seals and also move the shaft at the same time. While it didn't specifically state all the details of the procedure I imagine there would have been a catch pan and maybe rags around the shaft to keep oil in check.
The control switch is interesting. I don't recall ever hearing or seeing photos of that particular 3 terminal arrangement unless the two outer terminals were removed or are hidden by the tar like stuff. Does it appear to be factory or has it possibly been something done in the field. The enclosure appears to be the 56 version which should have a weathertight cover with a tight rubber grommet over the loom where the wires enter. No tar would have been needed. There is a service counselor article mentioning that when 55 stock ran out they would only supply the 56 switch for service. Dealers had to splice a short harness section with the bullet style connectors onto the original loom to connect the switch. Those switches would have had 5 terminals with the two end terminals being doubled for use as a tie point for the 56 limit switches. Only the 3 center teminals are used for 55 cars. If it were mine, I would find or make a cover to screw on instead of using any compound. If that is not feasible then perhaps some Plasticote brush on vinyl or the spray on rubber would serve as a weatherproofing material. The rubber stuff doesn't need to be very thick and will generally peel off well enough if the wires have to be removed. Attach file: (52.75 KB)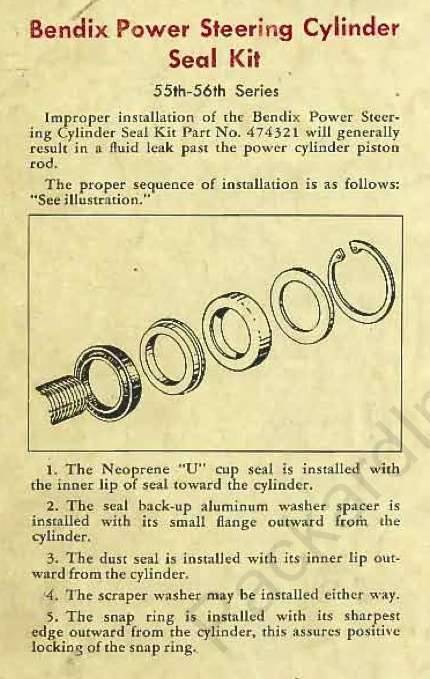
Posted on: 2015/10/28 20:01
|
|||
|
Howard
|
||||
|
||||


