|
Re: Dashboard wiring
|
||||
|---|---|---|---|---|
|
Home away from home

|
Of course there's more.
In the process of installing the radio and searching for the short, two wires came loose from the connectors circled in green in the attached photo. I don't know which wire goes to which connection point. Any (more) help is appreciated. Attach file:  (1,019.96 KB) (1,019.96 KB)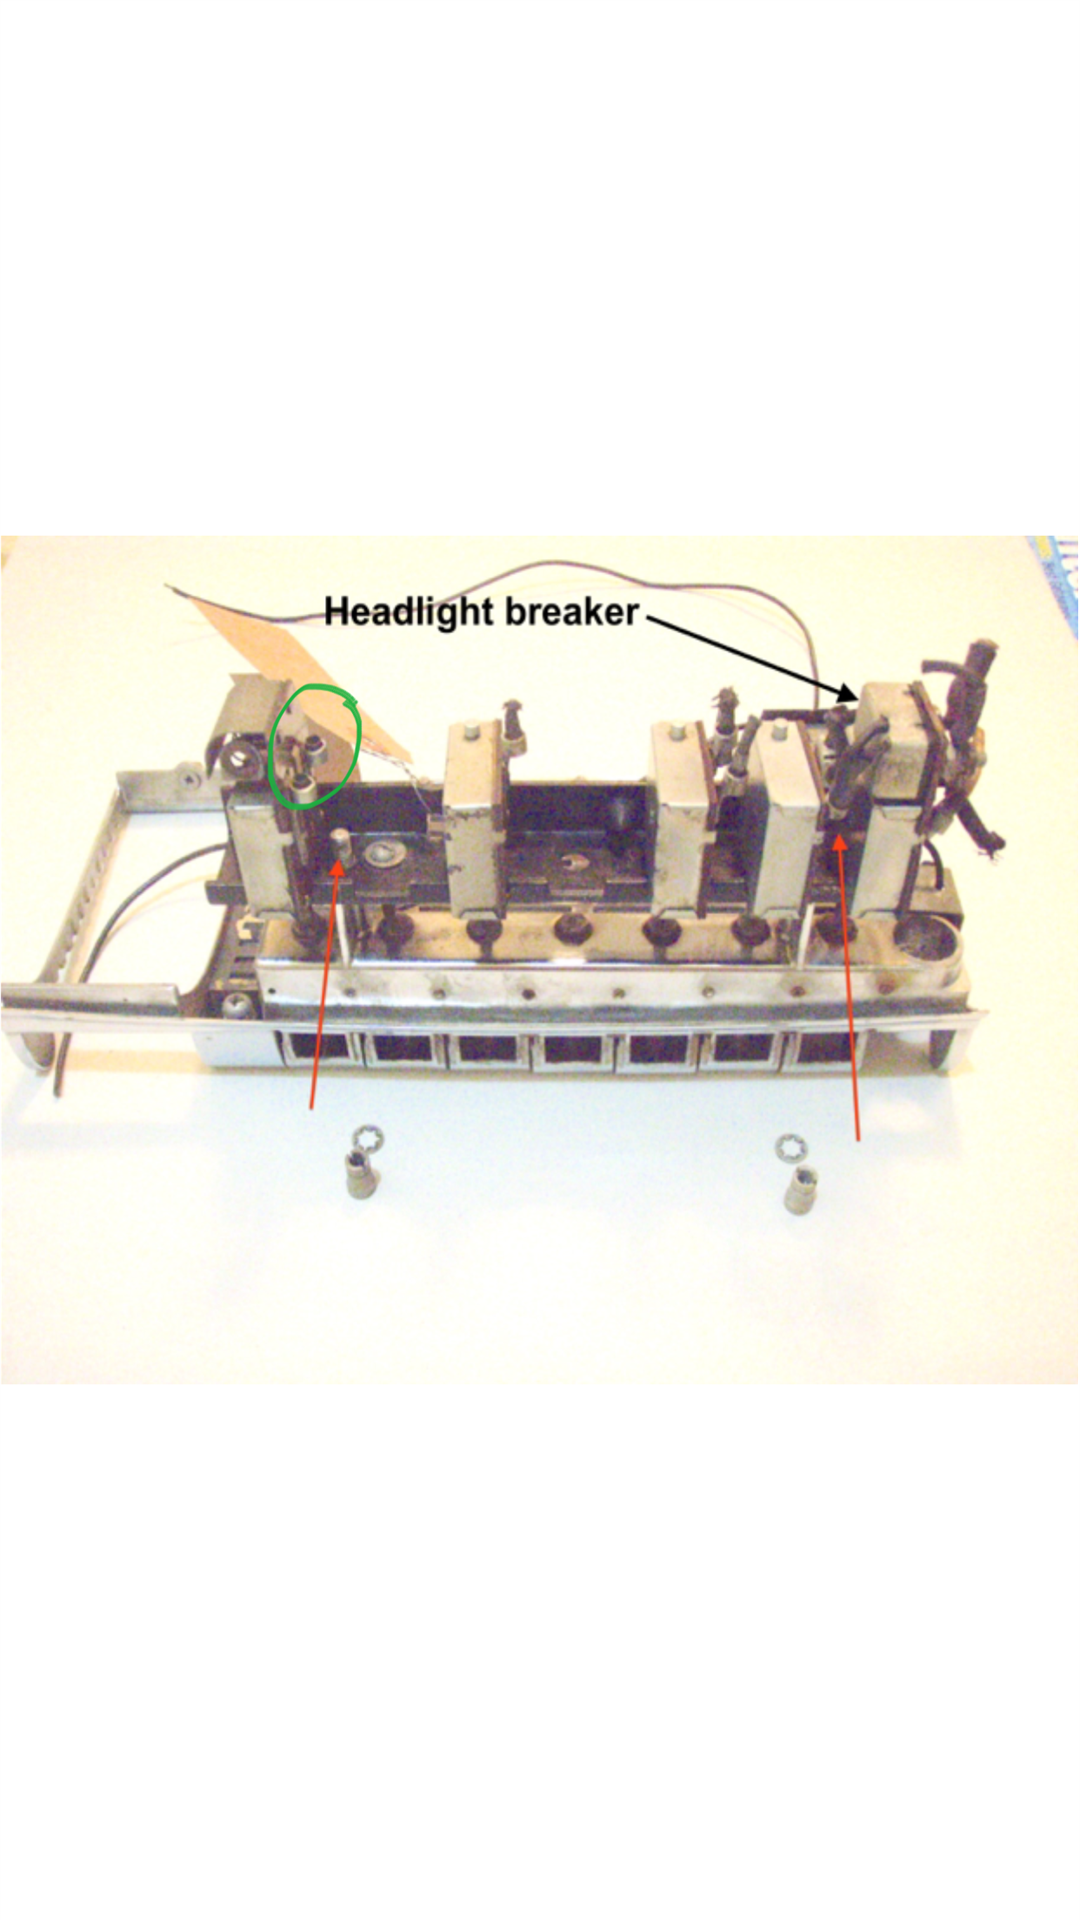
Posted on: 2016/12/7 1:25
|
|||
|
||||
|
Re: Dashboard wiring
|
||||
|---|---|---|---|---|
|
Home away from home

|
The circled connections are on the heater blower switch. One of the wires should have an inline fuse and that one goes to the lower terminal. The wire on the upper terminal should go through the firewall to the blower motor.
Posted on: 2016/12/7 2:03
|
|||
|
||||
|
Re: Dashboard wiring
|
||||
|---|---|---|---|---|
|
Forum Ambassador

|
Glad you found the problem. It had to be the accessory circuit breaker on the instrument cluster doing the pinging. With the glovebox wire shorted, that breaker would be where it was getting its power. Believe you said you hadn't hooked up the radio yet. If not, on your car believe the fuse is in a holder mounted to the radio side and will get its power directly from the GA terminal on the ign switch. That should be the longer terminal with 3 or 4 wires already on it.
Posted on: 2016/12/7 11:58
|
|||
|
Howard
|
||||
|
||||
|
Re: Dashboard wiring
|
||||
|---|---|---|---|---|
|
Home away from home
|
Thanks all for the hand holding on dealing with the short.
Next up will be installing the dash wiring harness. Is that typically done with everything behind the dash still in place or is some (or a lot) disassembly required? You won't hurt my feelings if you tell me that job is better left to a professional.
Posted on: 2016/12/13 2:23
|
|||
|
||||
|
Re: Dashboard wiring
|
||||
|---|---|---|---|---|
|
Home away from home
|
As long as we're at it, where does the wire in the connection circled in orange come from in the attached picture and what is it powering? Thanks.
Attach file: (1,022.70 KB)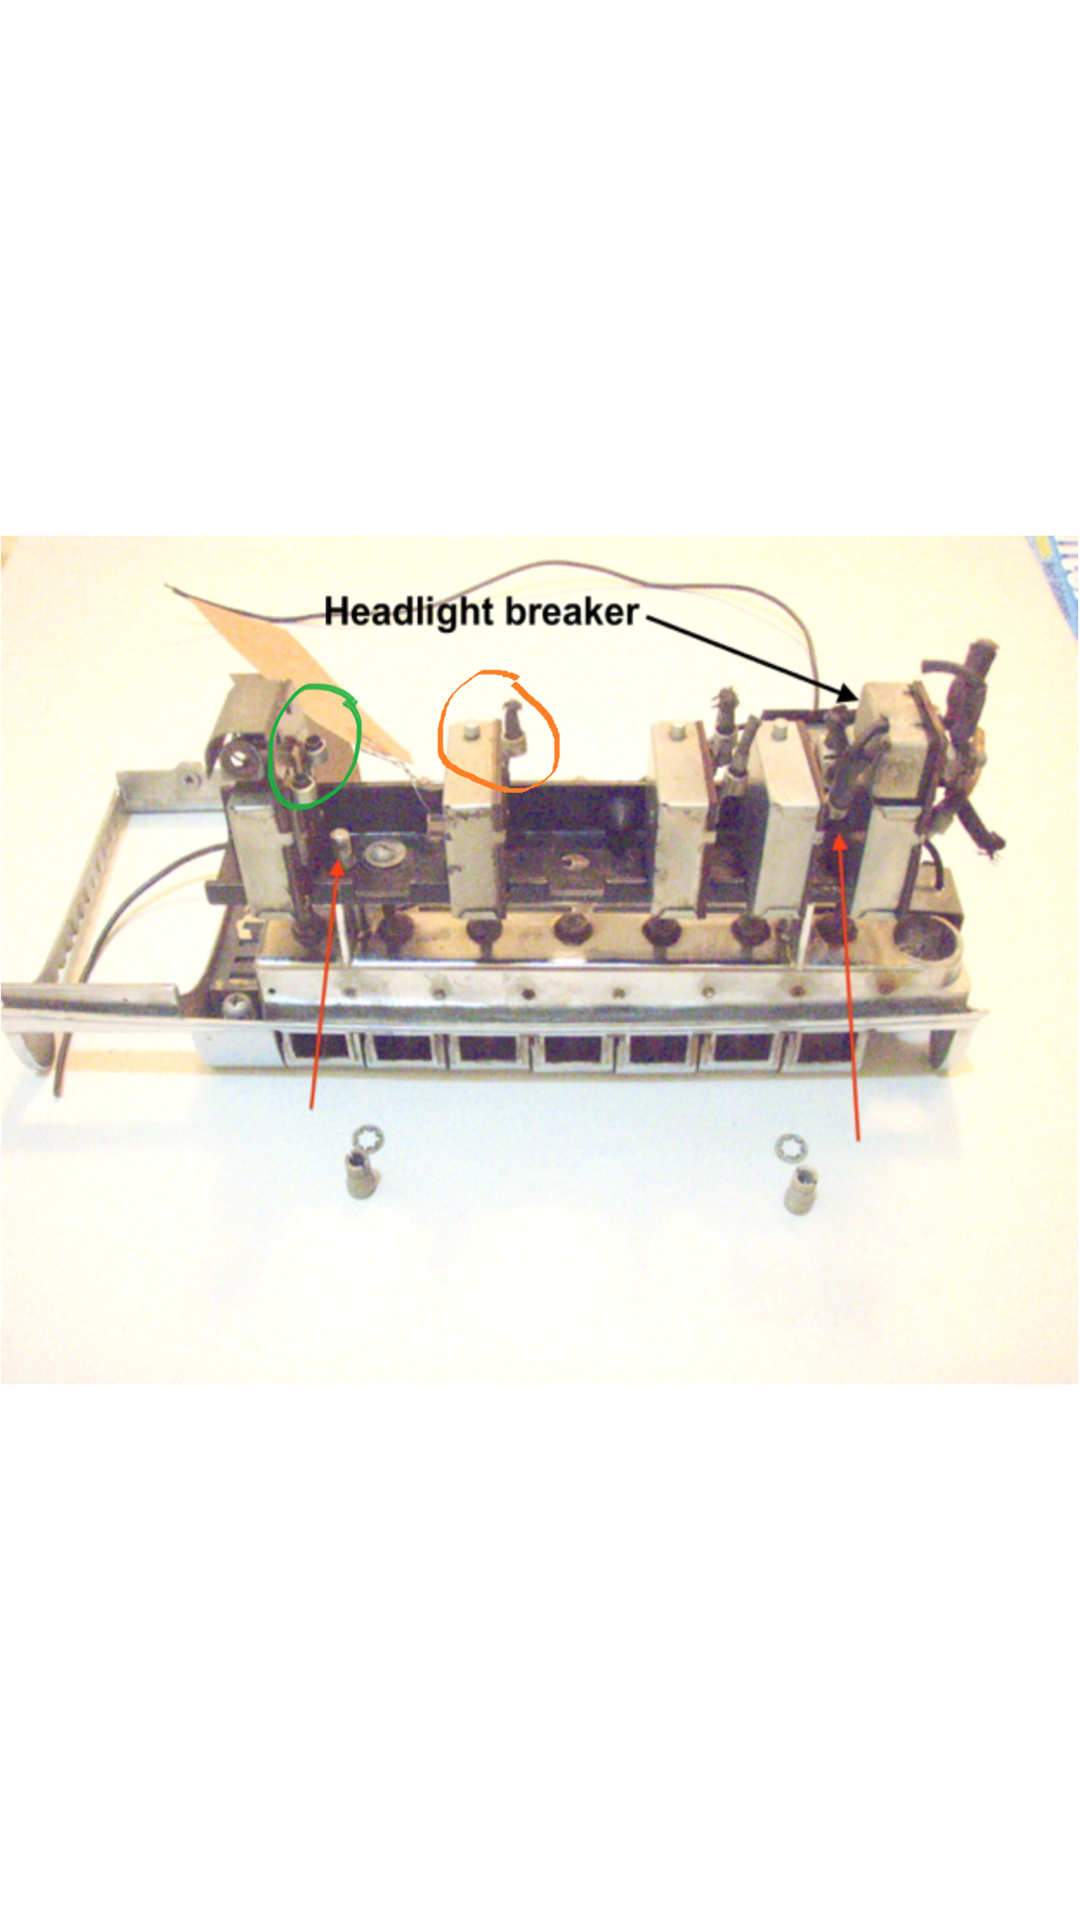
Posted on: 2017/2/18 20:36
|
|||
|
||||
|
Re: Dashboard wiring
|
||||
|---|---|---|---|---|
|
Forum Ambassador
|
Believe that is the map light switch and is in parallel with the two front door jamb switches. There should be a loose wire going to the courtesy/map light loom and spliced in. Some looms were wrapped but since the lights were an option on some models, usually they are just loose wires held in clips or sometimes just laying on the bottom dash edge. All the switch does is ground the wire going to the lights to turn them on just as if a door was opened.
Posted on: 2017/2/18 21:18
|
|||
|
Howard
|
||||
|
||||
|
Re: Dashboard wiring
|
||||
|---|---|---|---|---|
|
Home away from home
|
Thanks for the info.
Can you tell me how much disassembly is involved in replacing the dash wiring harness? I'm wondering if the job requires removal of all/most of the equipment behind the dash or if it is possible to do the job with the components in place.
Posted on: 2017/2/19 0:34
|
|||
|
||||
|
Re: Dashboard wiring
|
||||
|---|---|---|---|---|
|
Forum Ambassador
|
It is not a fun job no matter which way you approach it. As I see it, there are three options:
1. Remove the dash and wire that up with it out of the car. Advantages: Everything is visible, accessible and you can remove one wire at a time and reconnect the new or remove one item as needed to clean or repair anything else you find in need. Once the dash is wired there is one long nicely wrapped and easily handled bundle of wire to stick thru the hole in the firewall. Disadvantages: The dash in itself is a project to remove. Unless you cut the old loom in two, all the wires in the engine side need to be disconnected so the wiring can pull thru the hole. It requires some disassembly, some molding removal and lots of mounting screws to be removed. For the best experience, a helper to assist in maneuvering the heavy and cumbersome assy to avoid scratching or accidental damage to anything else. 2. Remove the cluster and switch assy and pull those away from the dash so the wiring can be seen and connected more or less unobstructed. Advantages: Only those two items need to come out. Disadvantages: Removing the cluster can in itself be a project because the screws are not very visible or easily accessed. The still connected wiring may be wrapped around another component preventing either item from dropping far enough for full access and you still have to partially work under the dash. It can get confusing having a bulky new loom and a bulky old loom coexisting in the confined space. 3. Leave the dash and components in place and do all work under. Advantages: There is less chance of damaging anything during removal and it can be done alone. Disadvantages: It is extremely cramped and dark under the dash. For best access, at least the switch plate assy should be dropped down and, IMO the radio should be removed too. No matter what light you use it is never in the right spot and there are a lot of obstructions to work around. People with large hands or bodies may find it difficult to get under or to work in the confined space. No matter where you position yourself the steering column and pedals or a handle of some kind will be in the way. You still have the issue of old and new looms being worked on together. I am anxious to hear what methods others have used. I have not done a 22-23 series dash but have rewired a 47, 54 and 56. On those I chose to remove the dash. If I were to leave the dash in I would at the least remove the front seat to be able to stretch out and get somewhat comfortable while laying on my back and reaching up. If not that then at least have a wide space to work in so you can have the doors wide open. You can make some sort of platform or cushioning to lay flat and at an angle extending out the drivers door or if that is not an option, making a cushion the same height as the hump and on both sides and working thru the passenger side. I can assure you that trying to cram yourself in between the seat and dash while laying on your back over the hump is not a fun experience.
Posted on: 2017/2/19 11:22
|
|||
|
Howard
|
||||
|
||||
|
Re: Dashboard wiring
|
||||
|---|---|---|---|---|
|
Home away from home

|
I rewired my Series 23 sedan a few years ago. It was a monster job for an old guy and I would not like to do it again.
The latest tool that would be a big help is the small LED lights. I just bought a couple of them at Harbor freight and they work great under the dash. I wish they were available when I did my rewiring. The things I really like are: 1. Bright light (there are a number of choices) 2. Small size 3. Does not get hot enough to burn you 4. A small magnet built in to help hold it in position 5. A small spot light on the tip if needed to light up a deep dark place (like the ignition switch wiring or the hidden screws attaching the dash). If I was doing this job now I would give the lighting my highest priority. I would buy several different types. They are quite low cost.
Posted on: 2017/2/19 12:56
|
|||
|
Fred Puhn

|
||||
|
||||


