|
49 club coupe owner here
|
||||
|---|---|---|---|---|
|
Just popping in
|
Just wanted to say hello to the members. I recently inherited a 49 club coupe that runs, but needs a lot of work to get it back to presentable. Currently it is all the original, even the interior (and man does it smell terrible). The plan is a rolling restoration at this point, and perhaps go frame off later on.
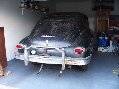
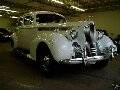
I will need to do some body work to get rid of my rusted out rocker panels, lower door frames, and as well as some other body patches. Any ideas where to find of the body parts or will I need to have them custom fabbed? I contaced Kanter, but they are out of the rocker panels they advertise. BTW, here is a pic of the rear of it the day it got delivered to the house.....more to come if interested! Adam Attach file:  (34.79 KB) (34.79 KB)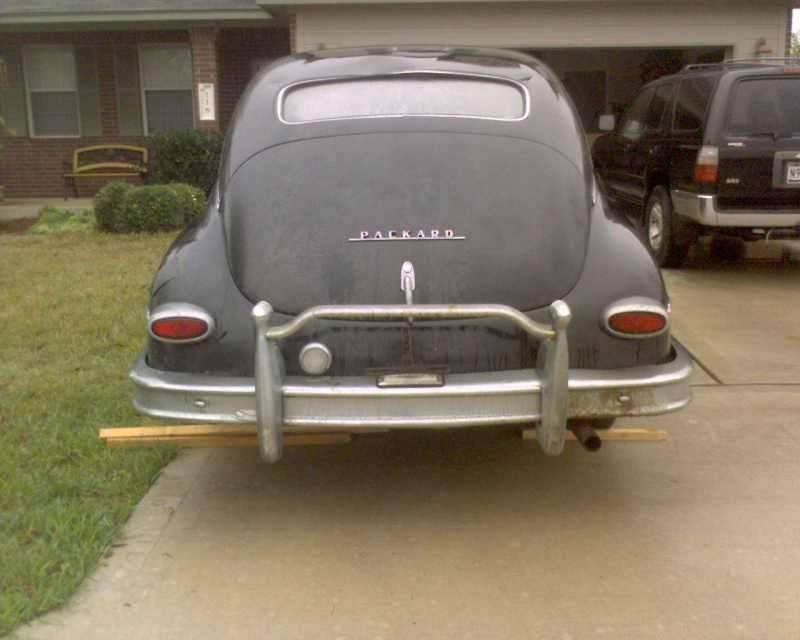
Posted on: 2007/8/21 12:53
|
|||
|
||||
|
Re: 56 TL Suspension Nervousness
|
||||
|---|---|---|---|---|
|
Forum Ambassador

|
Robert -
IF the electrical components on your Carib are wired up correctly, you should be able to use a jumper wire to ground the solenoid terminal with the orange wire, which should spin the compensator motor in the UP direction. After a few seconds of "wind up", you should notice the rear of the car coming up, and since the interconnected suspension pivots on its center of gravity, the front of the car will begin to come down - though much less, proportionally and alleviate the load on the upper jounce bumpers. Yet, with so much weight presently removed from the front end, the rear may have to come up several inches above normal to make the car appear to be level. Work carefully. BH
Posted on: 2007/8/21 12:15
|
|||
|
||||
|
56 TL Suspension Nervousness
|
||||
|---|---|---|---|---|
|
Home away from home
|
Gents,
I was in my garage this weekend changing out the oil pan gasket for the second time. I experienced a small leak at the front and before I went to the trouble to install the steering linkage, I wanted to button up the oil pan. That work is now done and after starting the engine a couple of times and letting it run for 10 minutes each time no leaks. That job is a real pain in this heat but now appears successful! The reason for my post is that while being under the car all weekend, the TL suspension seems to be putting undue pressure on the upper control arms. (TL switch is in the off position.) So much so that the new passenger side bumper stop is crushed and the drivers side is seriously mashed. I do have the entire front clip off the car so there is not enough weight to bring the car to level. I was previously planning to allow the car to remain up until I am able to begin putting weight back on the front but now I am very nervous that the upper control arms could be damaged in their current position. Is there a definitive way to lower the front using the TL motor manually? If I was able to lower the front with the TL motor would it just rise back up again due to the lack of weight on the front end? Again, this just has me very nervous. Thanks in advance for your advice. Robert.
Posted on: 2007/8/21 8:23
|
|||
|
||||
|
Re: Pic Test; Packard & Olds Pumps
|
||||
|---|---|---|---|---|
|
Home away from home
|
There is also a pic of my other 56Js engine (the grungiest one), and a pic of the Olds HV and Packard pumps.
Joe H
Posted on: 2007/8/20 18:19
|
|||
|
||||
|
Re: Pic Test; Packard & Olds Pumps
|
||||
|---|---|---|---|---|
|
Home away from home
|
These are actually a few pix I was trying to post about a month ago. The clutch fan is visible in some, and the AC compressor mount is visible in others.
Joe H
Posted on: 2007/8/20 18:16
|
|||
|
||||
|
Re: Pic Test; Packard & Olds Pumps
|
||||
|---|---|---|---|---|
|
Home away from home
|
It is a sirocco style (double pass) aluminum radiator. Has two,1" cores, and weighs about 8 lbs dry. It cools a little better than a stock 3 core, but not as good as a copper & brass, 5 core desert cooler I had custom made a few years ago when living in the California desert.
The five core weighs around 35 lbs dry though. The fan shroud definitely does its job well. The electric fan works great if ever stuck in traffic on hot days, i.e. Palm Springs or L.A. Probably could do without it here on the east coast, bet better to have it and not need it... Joe H
Posted on: 2007/8/20 18:13
|
|||
|
||||
|
Re: Summer Heat....
|
||||
|---|---|---|---|---|
|
Just can't stay away
|
BigKev Not a problem. You mentioned earlier that your house is an older building. Not one builder I know of today in California is allowed to rely on the old style diag bracing. All local and state codes have been up graded and require shearing. If you feel it is necessary, check with your local planning commission. Before you shear it make sure you have your electrical in. A double light switch at the door is handy for a exterior light and turning on the interior lights, and maybe a receptical box for inside and outside. Its easy to do now before the shear treatment. I'm not an electrician so your on your own with things that go ZZZZAP.
5 or six 2x4s, 2 sheets of 1/2 inch ply and a 4' 4x8 and your in business. I'm assuming your exterior wall is stucco. I have a diamond blade for the skill saw that can cut the opening to size for the new door. try to buy one that is already mounted in a jamb and is solid core. Tell them it is for exterior use. Because you cannot use stucco molding, it will have to have casing for the weather. Do you plan on mounting the door unit on top of the existing raised footing or flat with the garage floor? Take into consideration if your yard floods during heavy rains. Removing that piece of footing can be challenging but it is possible. Don't forget a lockset for the new door, any local lock shop can key it to your existing locks, and for piece of mind a dead bolt is reccomended. We have got to be boring the heck out of folks with this PM me next time and lets give them a break unless you feel this is an ok place to talk about it. Ron
Posted on: 2007/8/20 16:09
|
|||
|
||||
|
Re: Summer Heat....
|
||||
|---|---|---|---|---|
|
Webmaster

|
Ron, thanks for the info. That corner of the garage wall is about 8 feet long before it merges with the house. That is the only portion of the garage that has exposure to the backyard. So the only place for a door logically would be in that section of the wall where the overlap with the house ends and the corner, and that is where the brace is currently. Being that the wall is also 60-70% shared with the house, does that make any differnce? Would just plywood sheeting the interior of that 8 foot section, and putting a door in the middle of it work?
Posted on: 2007/8/20 13:27
|
|||
|
-BigKev
1954 Packard Clipper Deluxe Touring Sedan -> Registry | Project Blog 1937 Packard 115-C Convertible Coupe -> Registry | Project Blog |
||||
|
||||
|
Re: Wheel question...Please read or another Packard is history
|
||||
|---|---|---|---|---|
|
Home away from home

|
Eric. Thanks for the details on the Dodge wheels. Yes, my 80 Dodge Picup was a D100. Very bottom of the line picup for 1980. The only accessory it had was AM radio.
The lug pattern on my 88 Ranger 2.0 4 cyl (14 inch) is the same as the 80 Dodge D100 (15 inch). The only real difference in the 80 Dodge and 56 packard jr wheels is about a 1/4 inch on the center offset.
Posted on: 2007/8/20 4:03
|
|||
|
||||
|
Re: Summer Heat....
|
||||
|---|---|---|---|---|
|
Just can't stay away
|
BigKev you can cut those diagonal braces if you shear nail a good grade plywood at least 4'wide x8'high on the sides of the opening. Shear nailing is 1 - 8 penny nail every 3 inches on the perimeter and 6" in the field. Use 1/2" plywood. If you can't get 4' on each side of the opening go 8 foot wide on one side and whatever you can on the other side of the opening. It will be 100 times stronger than that old diag bracing. I built homes for 10 years and am a certified Construction Coordinator with 27 years of experience for the film industry. Piece of cake. If ya need a hand let me know.
Posted on: 2007/8/20 1:20
|
|||
|
||||


