|
Re: Jeff's 48 Custom 8 Victoria Project
|
||||
|---|---|---|---|---|
|
Home away from home
|
Here's the final batch of progress pictures from my part of the Packard restoration. I came close to the original goal of having the car 100% roadworthy and able to pass the Swedish safety inspection. The only major item that didn't get addressed is a new set of tires. That may turn out to be a good thing, as we had planned to install a set of reproduction bias-ply tires on the car, but I see that many of the Packard Info members recommend switching to the radials instead. The only other significant mechanical issue is a persistent leak in the radiator right below the overflow tube. My local radiator shop tried to fix it twice, but the corrosion on the cast iron elbow is making it difficult to get the brass flange for the cap to seal to the elbow. I had been running the engine for a while on Wednesday evening and all of a sudden I noticed that there was antifreeze spraying all over the engine bay. I drained out ? gallon of coolant, and that should keep it from making a mess again. It took over an hour to clean it up. So far, the oil leaks appear to have been tamed. I have some slight seepage out of the fuel pump where the pivot shaft comes through the pump body, but there's nothing I can do about that. The front seal was the main problem, and I had two small leaks at connections on the external oil lines on the left side of the engine. One required a new fitting on the bottom of the oil filter and much to my chagrin, I had to bend up a new small line between the flow reducer "T" and the block. That tiny line was a pain to do with the engine out of the car the first time. It had been seeping a bit, then after I tried to tighten it a bit more, it started spraying oil all over the place. The do-it-yourself flaring tools just don't make as good of a flare as the factory can. I have a top of the line Imperial flaring kit too, but I often have problems with the flares that I make leaking. I also have a minor leak starting at the pitman shaft seal on the steering box. I had filled it with the same 90wt that I used in the trans. I'm not sure if that means that the box was totally empty before or if the 90wt is much thinner than what was in it. Back when I worked for Toro we used a super-thick oil in the gang mower gearboxes. It was close to being liquid grease. I don't remember what it was called, but it would probably work well in old manual steering boxes.
The transplant of the 1948 Dodge door latch wheel turned out to be a success. I'll put the photos of the process here, instead of on the original post in the postwar section. The Packard had a broken return spring on the pivot where the inside handle attaches. First I tried to swap just the spring, but the tabs on the housing broke when I straightened them out to take it apart. Instead I swapped the rod that goes to the latch onto the Dodge pivot and installed it on the car. I later found that the shafts are clocked 45 degrees off between the two cars, so the door handle can't be installed in the correct position. That's a minor thing that will have to be addressed later on. A while back I scored a beautiful set of outside door handles on ebay, so I replaced the broken handle on the driver door. Lots of lubrication got the passenger side latch working good, so it turns out that I was wrong about a wear issue on that latch. The trunk latch was missing when we got the car, and I was able to find a good one on ebay a while back, so that was installed too. The only front end work required on the Packard was a new idler arm and stabilizer bar end links. The idler is sold as two separate parts. I got the frame bracket from Kanter and a vintage NORS arm off of ebay. Way back in 1988 I bought the biggest tool set that Sears had in their catalog. It came with a set of huge straight bit sockets that I believe are specifically made for removing and installing the threaded caps on the ends of the old style center links. After all these years I finally got too use one for it's intended job. The front brakes got the same treatment as the rears. New wheel cylinders were installed, everything was cleaned and lubed, bearings were repacked, and the drums were media blasted where the shoes ride. I had to remove the bearing races to get all the old, mucky grease out. Because I was going to blast the drums, nothing sticky could remain in the hubs for the grit to get into. The hubs appear to have been painted green on the back and blue on the front from the factory, though I suppose it's possible that they were all green and the front part faded to blue. As I was replacing the rear brake hose I notice that some knucklehead completely smashed the right side brake line with a J-hook when the car was transported on a rollback, most likely the dealer that I got the car from, as the damage looks fresh. Goody-Goody, time to bend up another line. Thanks, rollback driver.  I filled and flushed the system with silicone fluid. I use the silicone in everything that I can. I've had so many problems with the standard fluid over the years, especially in vehicles that spend a lot of time sitting. I've never had a component failure on anything with the silicone in it. I filled and flushed the system with silicone fluid. I use the silicone in everything that I can. I've had so many problems with the standard fluid over the years, especially in vehicles that spend a lot of time sitting. I've never had a component failure on anything with the silicone in it.Most of my fuel line clips had rotted away, so I procured replacements from a couple 1968 Chrysler products that I have sitting outside. The Chrysler clips are a similar design, but mount the line about ? inch lower. If no one is repopping the originals, the Chrysler clips make suitable replacements and are readily available from multiple sources on ebay. I finally got my hands on the correct tail light gaskets for a Custom Eight, so I could assemble the lights to the car. The gaskets are top notch reproductions, but don't come cheap at just under $100 for the pair. I finished up the install on the front park lamps, making sure to provide a good ground path like I did with the rear lamps. The license lamp and license plate brackets came from Packard Info members. I'm impressed with how bright all the lights are. Six volt systems have long been associated with dim lights, but that doesn't seem to be the case when your wiring and grounds are in good shape. I went with halogen headlamps, and those are very bright too. The car came with two long carriage bolts, which I assumed were for the battery hold down, so I had cleaned and painted them back when I prepped the hardware. I never thought about why they were different lengths. Turns out that one was too long and the other too short, so who knows what they came off of. I ended up going with 3/8" carriage bolts, since 10" long bolts weren't readily available in 5/16". I only had to grind a little bit off the square section under the head to get them to work. I wasn't going to spend $40 for two bolts to be 100% authentic. I do find it a bit strange how the side of the battery is exposed inside the wheel well. Am I missing something to fill that hole? Next up were the horns and the air deflector. I have to say that I'm totally shocked that both horns work. Obviously, horn quality went down hill over the next 20 years, considering how many horns from the 1960's I throw away because they don't work anymore. The air deflector was off the car when I got it so I don't know what was used to bolt it to the car, but I had some ?-20 phillips head screws with real nice plating on them, so they were recruited for the job. There was no time to do much with the filler panels that go between the frame and the inner fenders. They received a quick shot of undercoating to pretty them up. They put up a fight going back in. I had to take off the radiator support braces to get them in place, and it was still a struggle. I don't recall any trouble at all removing the one on the left side back when I took the engine out. The right side was removed by someone else. The baffles between the frame and engine were also off when the car arrived. There was an extra baffle for one side, but not the side that had the mangled baffle. That's typical. There was no time to do anything with the baffles. They will need lots of TLC to look nice again. After I got the electrics hooked up, it was finally time to test my favorite feature of the car, the ultraviolet instrument lighting. I can't say how disappointed I was to find that only half of the illumination bulbs were working. I figured it had to be a wiring problem, as I installed all new US-made bulbs when I put the cluster together. Well, it turns out that I got a bad batch of bulbs. Some of those sockets are real tough to get back in with the cluster in the car. The turn indicator wasn't working either, and that turned out to be a bad flasher. For anyone re-doing a '48, I strongly recommend changing to the 1950 remote mounted flasher. It's quite a challenge to get up in the dash to remove the flasher that screws to the upper left corner of the cluster. With all my bulb issues cleared up, I have to say that the instruments look really cool at night. With the engine running, the spedo and clock are plenty bright to read at night. The writing on auxiliary gauges could be a bit better, but it's easy to see where the needles are pointed, so you know what's going on. It appears that the dampening spring on the ammeter has seen better days, as it bounces all over at times. I recall someone else with the same issue recently. My gas gauge isn't working, but I think the sender is the culprit on that one. I added a blue filter to the bulb for the switch call outs, so that they would better match the cluster. It did a good job toning down the too-orange look of the plain bulb. The filter came out of the dash of a mid-70's Chrysler Newport. I think it's made of silicone and stretches right over the bulb. I can't get an accurate photo of how the cluster looks at night. The camera picsk op the UV lighting much better than the naked eye does. I can shut off the lighting, but the camera is too slow to capture the glowing gauges at maximum brightness. Last on the list was re-torqueing of the head and manifolds, and a little fine tuning on the carb. I have a special socket for tightening chrome lug nuts that worked nice on the head nuts. It has a plastic insert to protect the chrome, and worked nice on the painted nuts. I have a bit of a dead spot in the carb and noticed that the accelerator pump linkage was lagging behind the throttle plates due to some wear in the lever holes. I moved the pump spring to the other side of the pump so that it now helps to apply the piston instead of return it. This takes all the slack out of the linkage. Some newer Carter carbs have the spring in this location. I'm still not sure about some things on my throttle linkage, so I may post a separate query on that later. After I finish this post, I'm heading up to the shop to get the Packard loaded up and onto the trailer. The weather tomorrow for the trip to Bayonne is supposed to cooperate, so all systems are go for now. November 2013. Finishing touches Attach file:  (67.46 KB) (67.46 KB) (76.57 KB) (76.57 KB) (72.43 KB) (72.43 KB)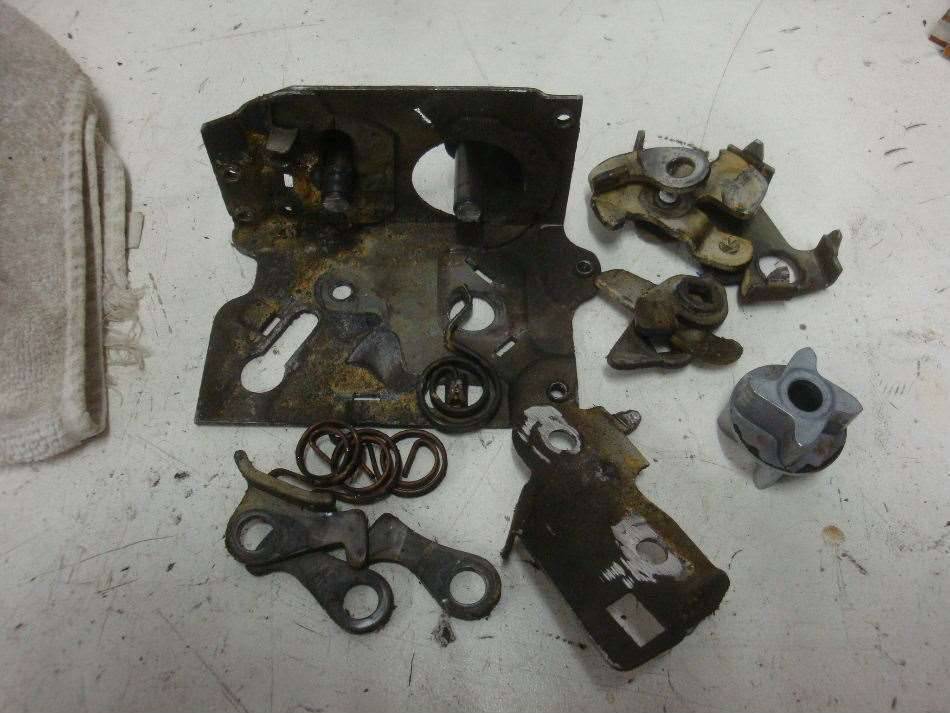 (85.23 KB) (85.23 KB)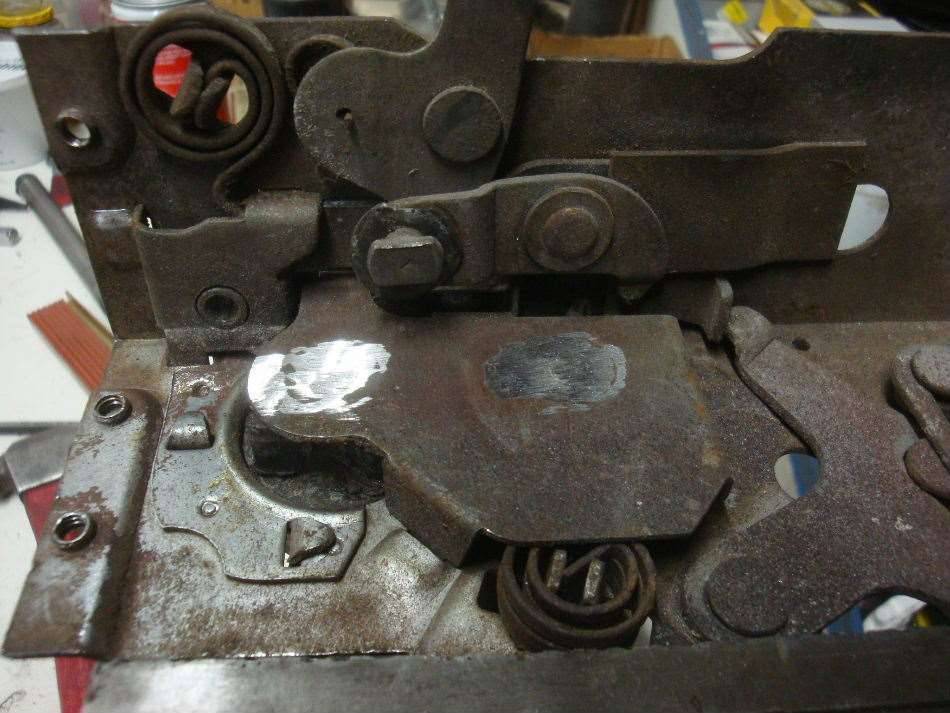 (60.73 KB) (60.73 KB)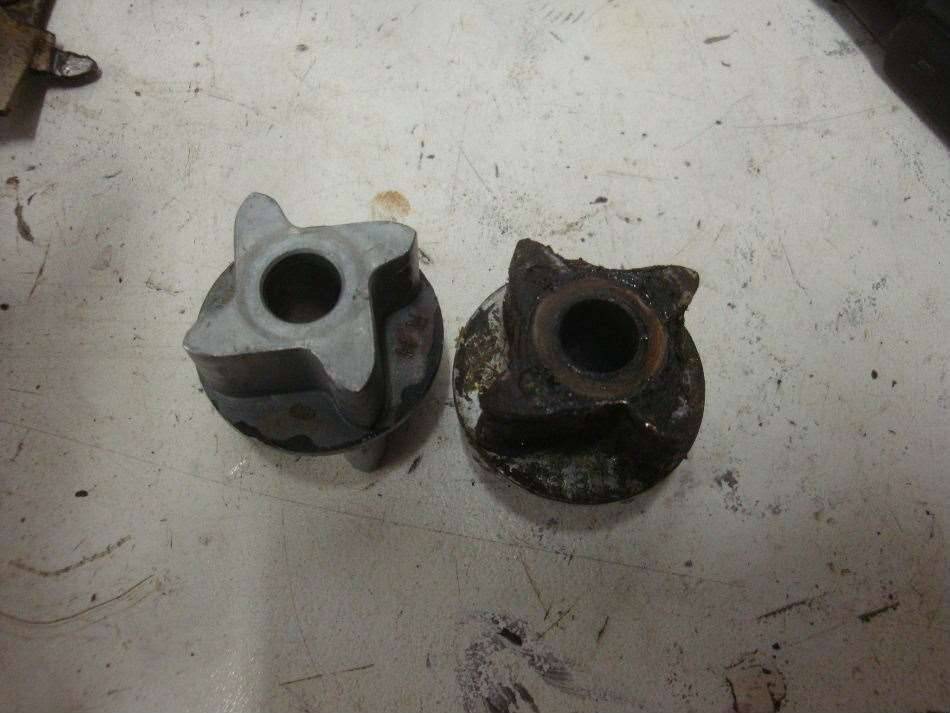 (91.62 KB) (91.62 KB)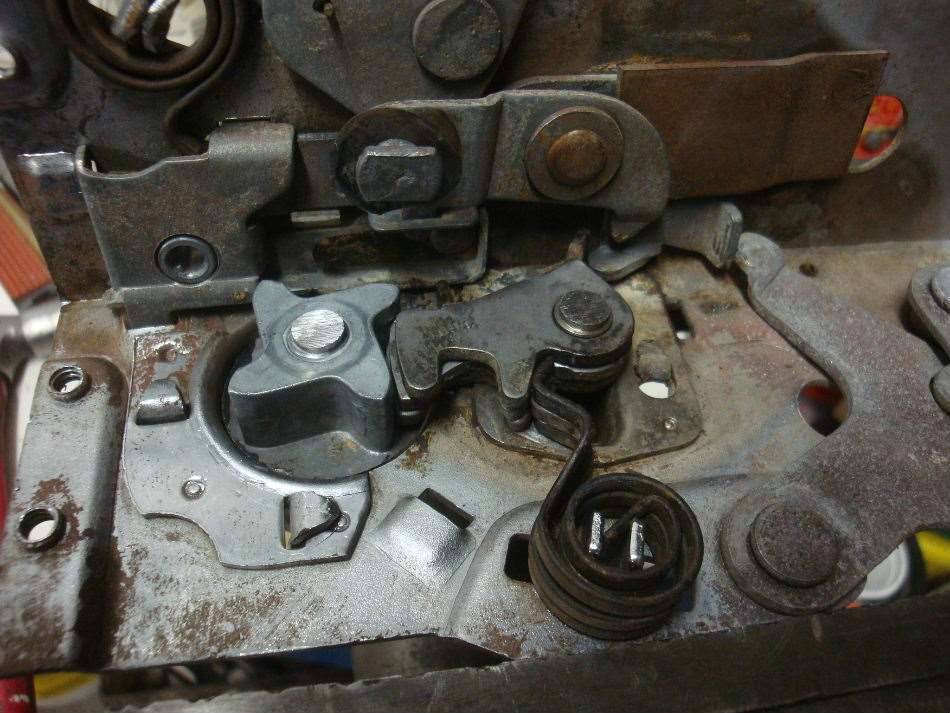 (81.76 KB) (81.76 KB)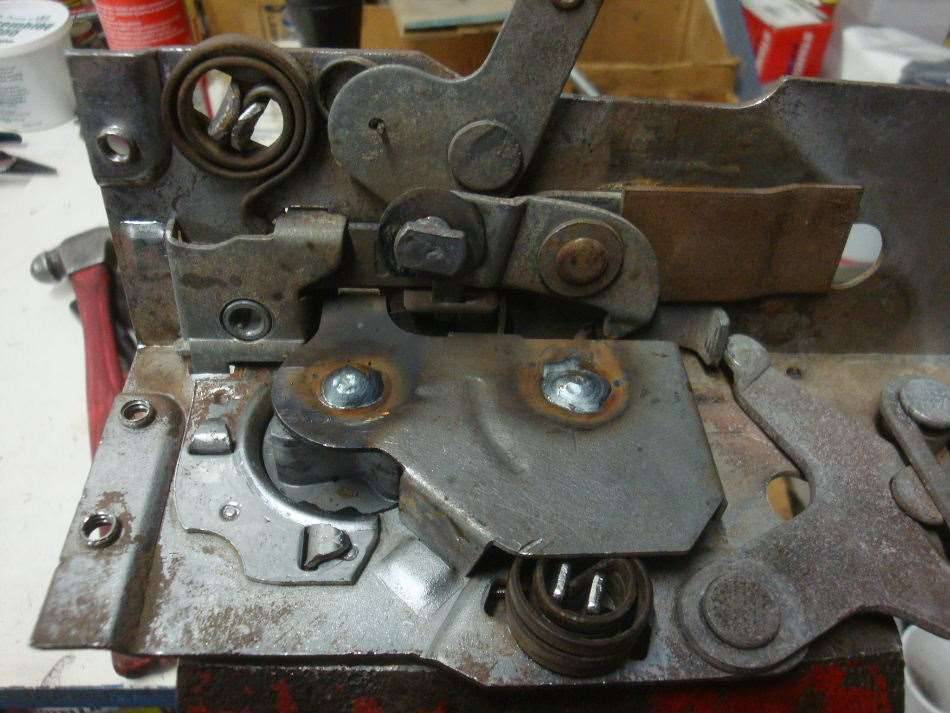 (56.76 KB) (56.76 KB)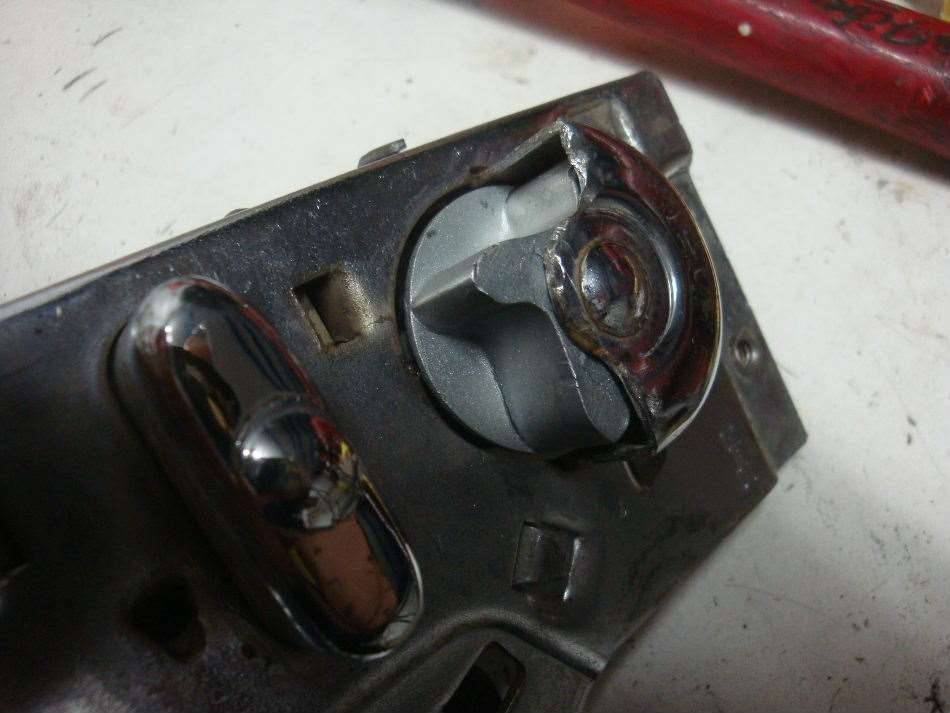 (60.43 KB) (60.43 KB)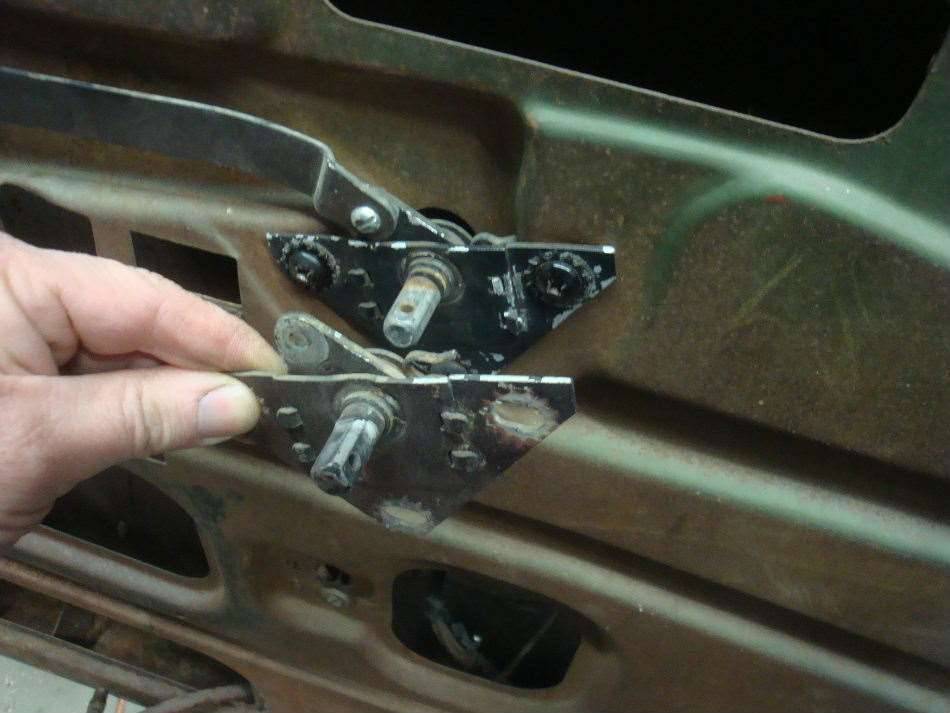 (60.47 KB) (60.47 KB) (53.27 KB) (53.27 KB)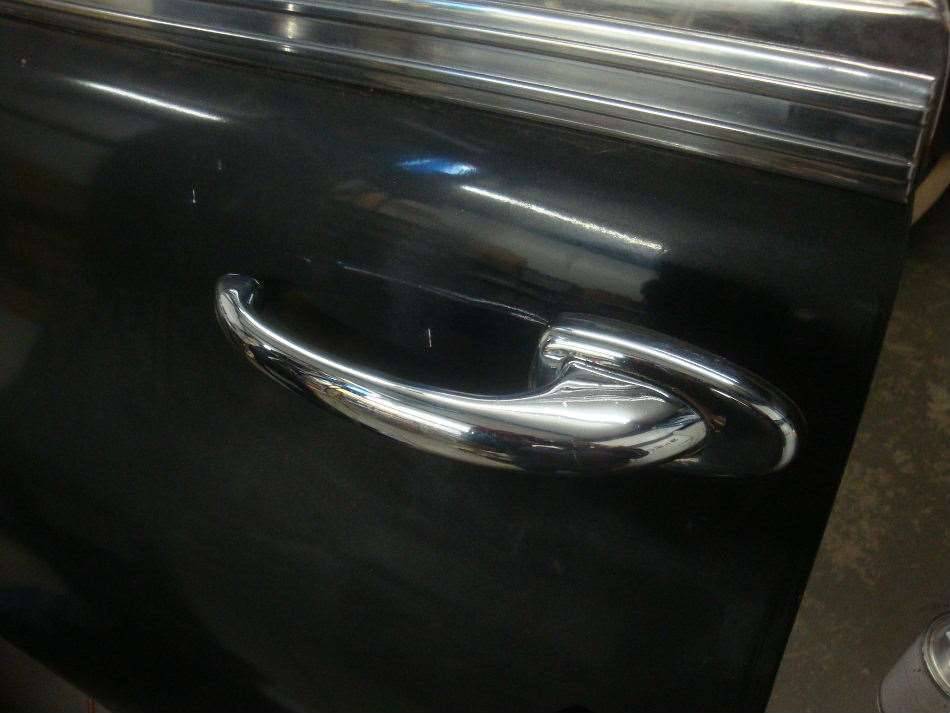 (66.10 KB) (66.10 KB)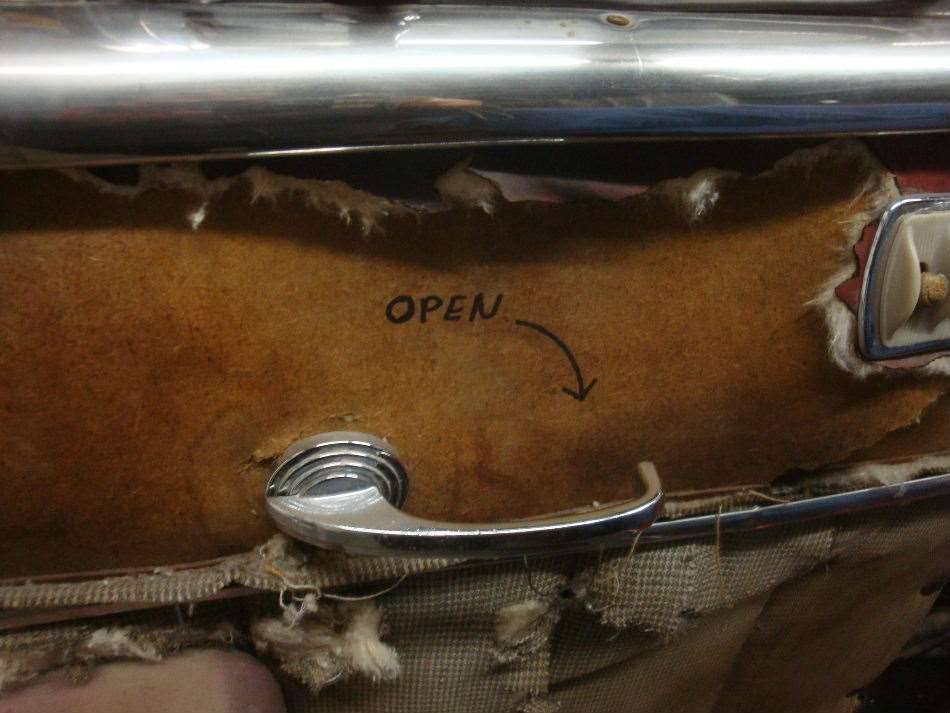 (73.23 KB) (73.23 KB)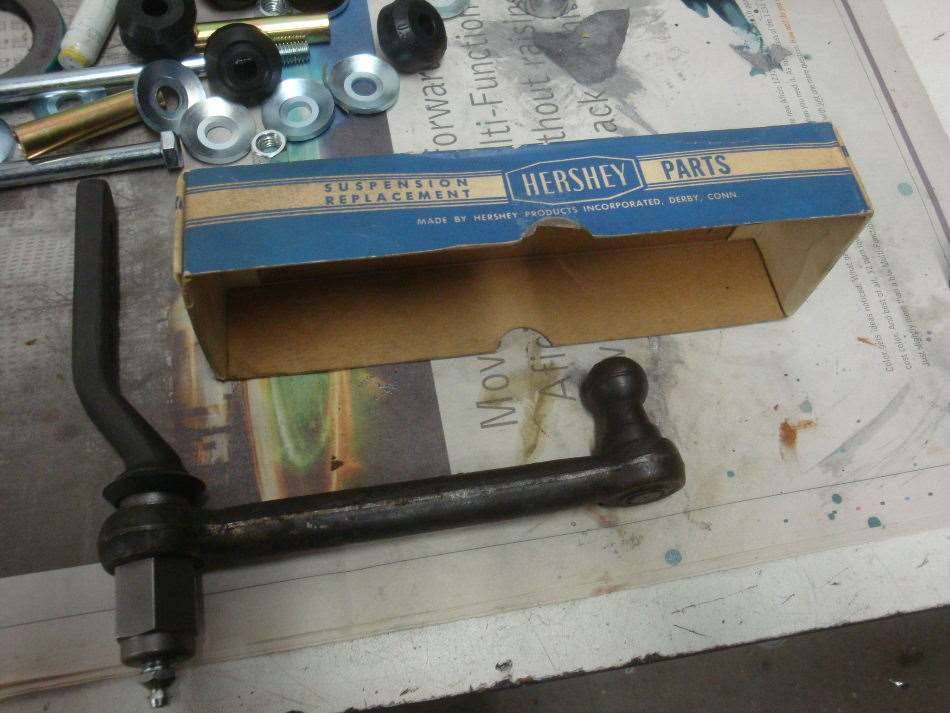 (72.92 KB) (72.92 KB)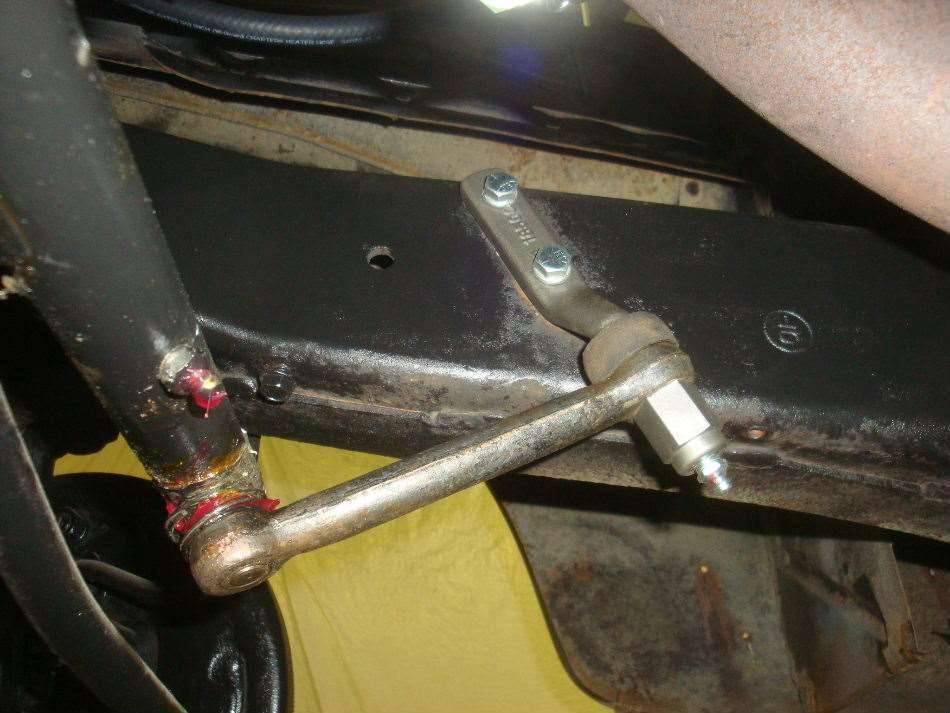 (56.52 KB) (56.52 KB)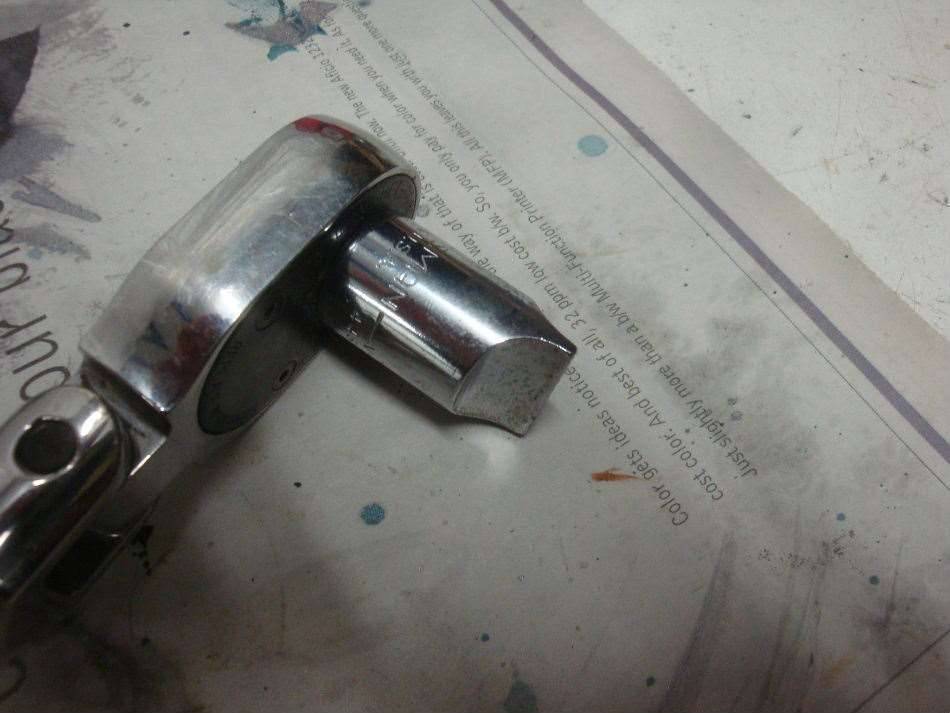 (84.13 KB) (84.13 KB)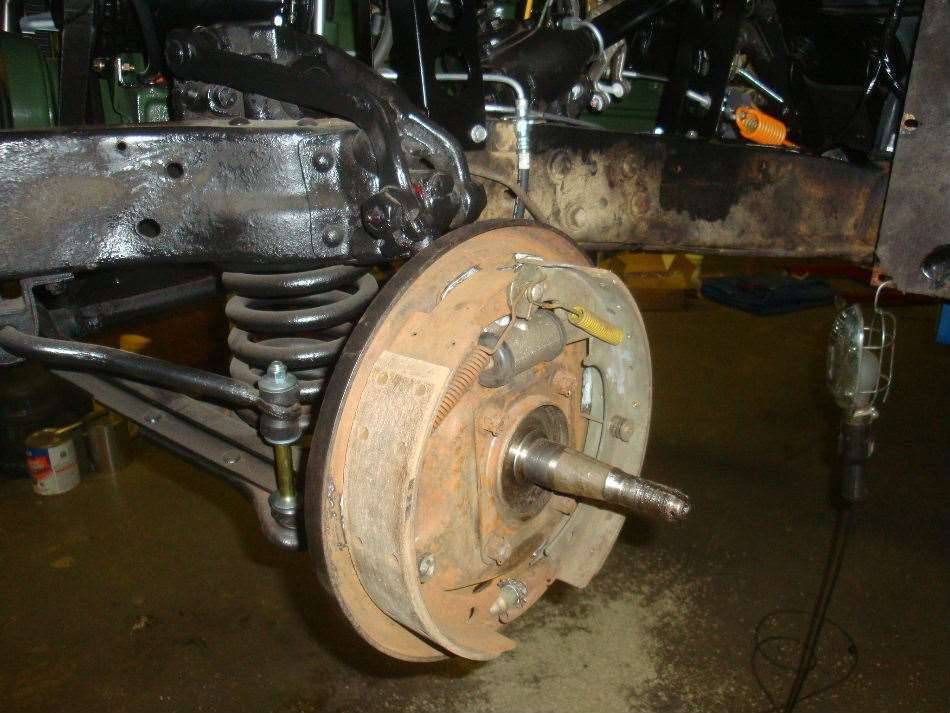 (77.00 KB) (77.00 KB)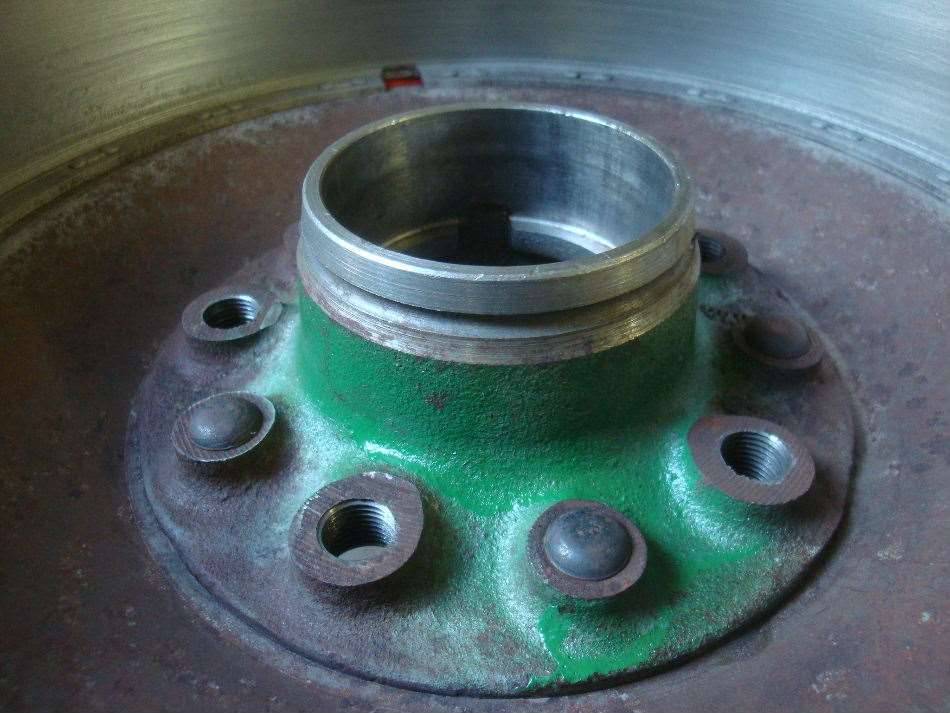 (101.22 KB) (101.22 KB)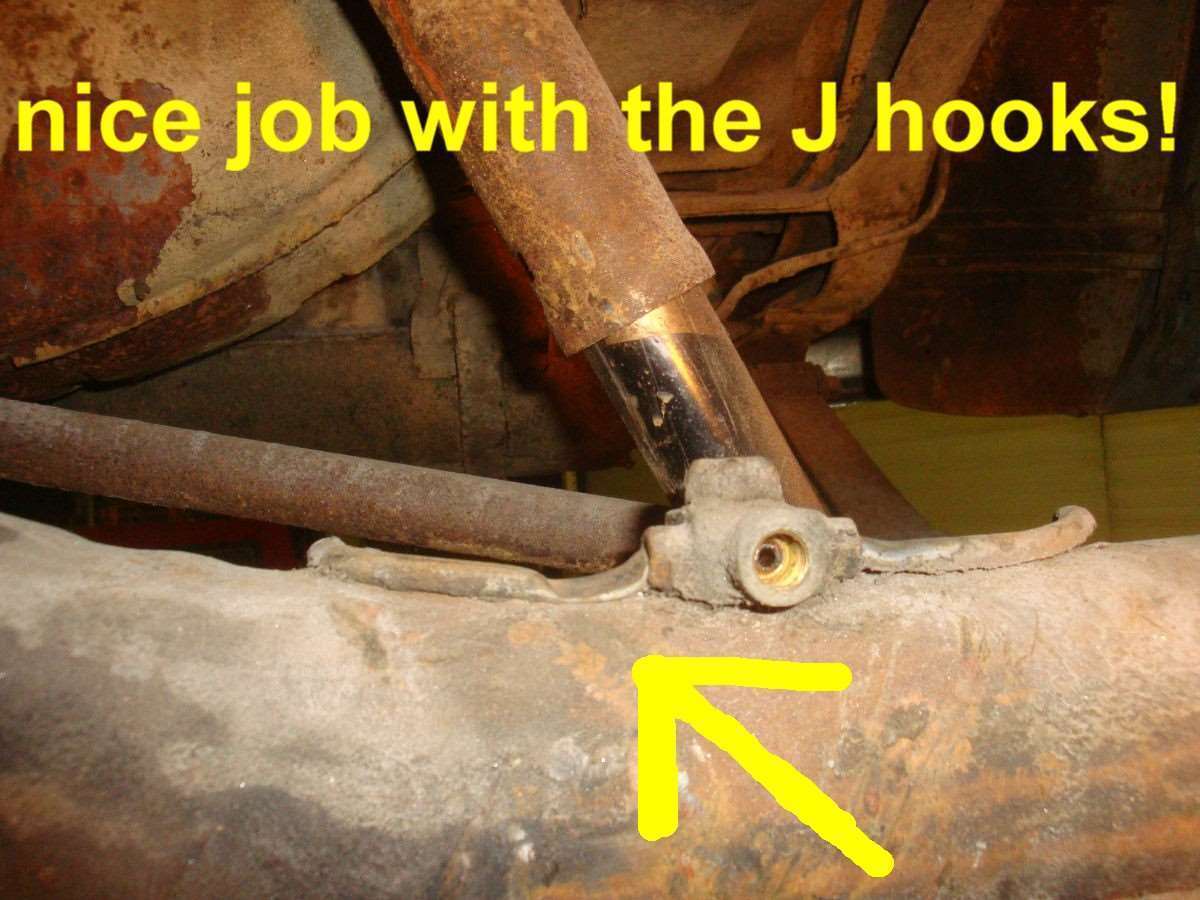 (89.30 KB) (89.30 KB)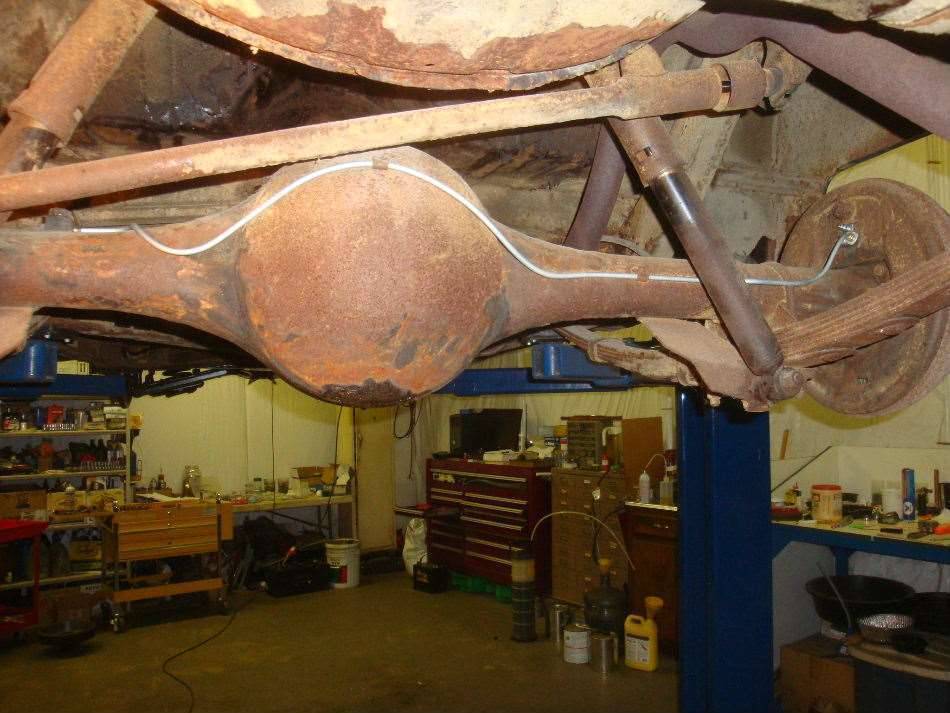 (68.94 KB) (68.94 KB)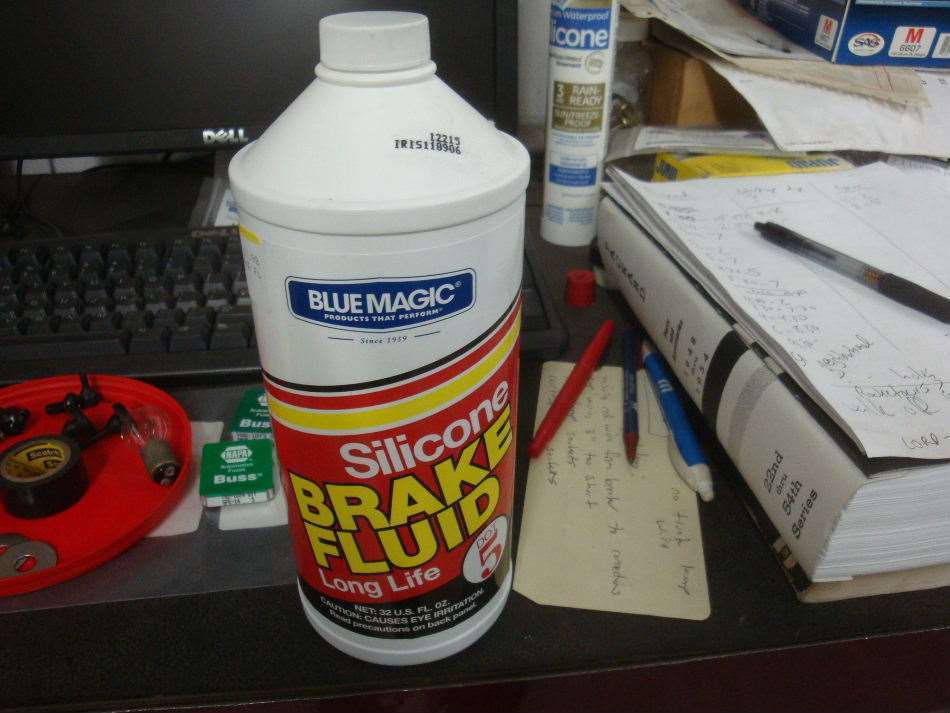 (53.48 KB) (53.48 KB)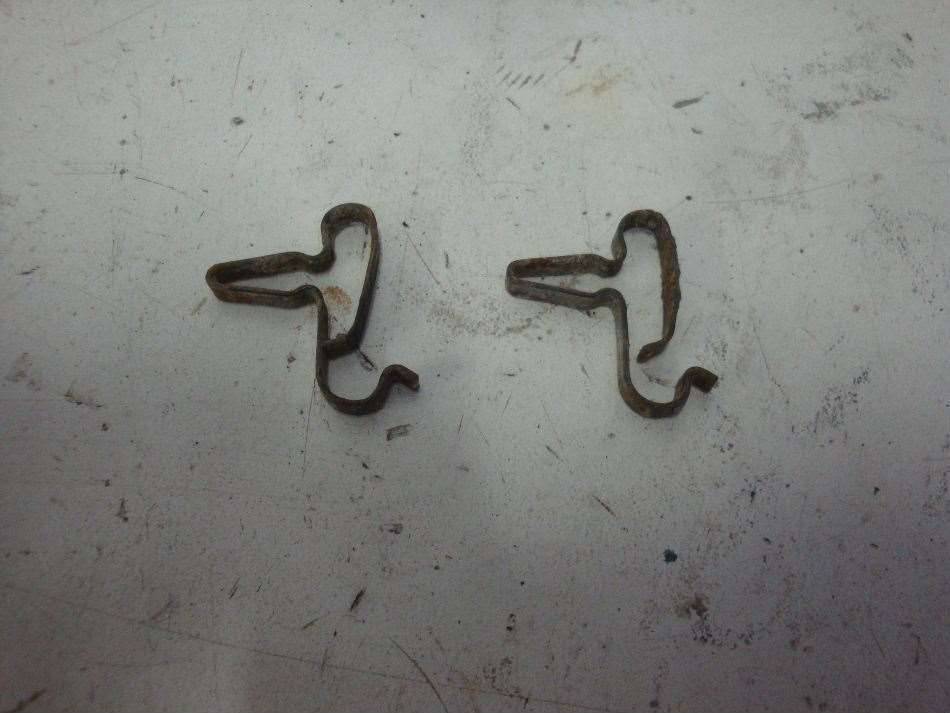 (66.21 KB) (66.21 KB)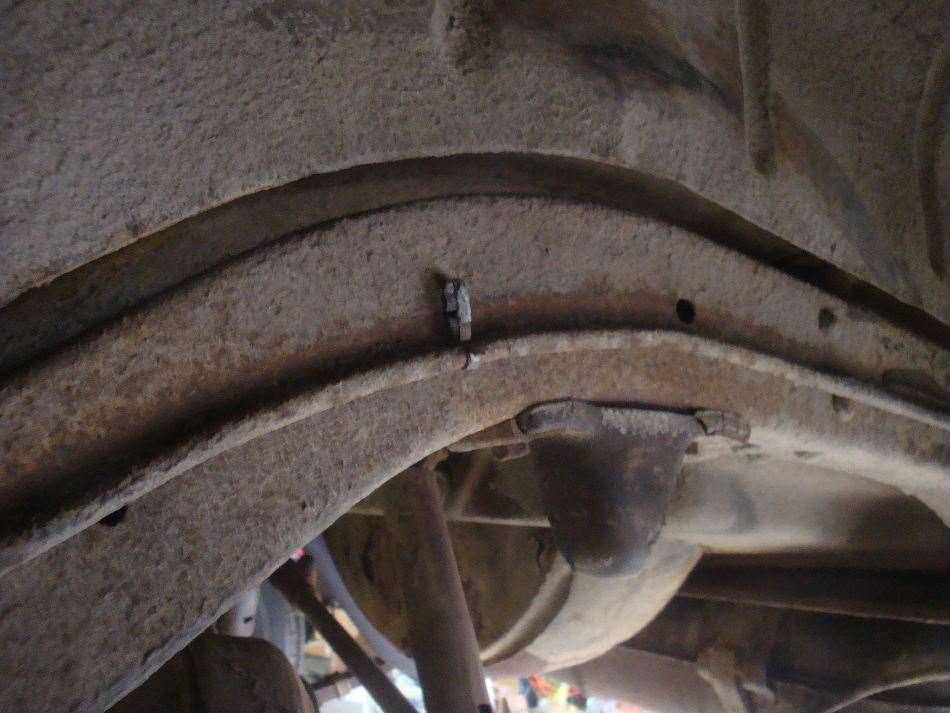 (78.46 KB) (78.46 KB)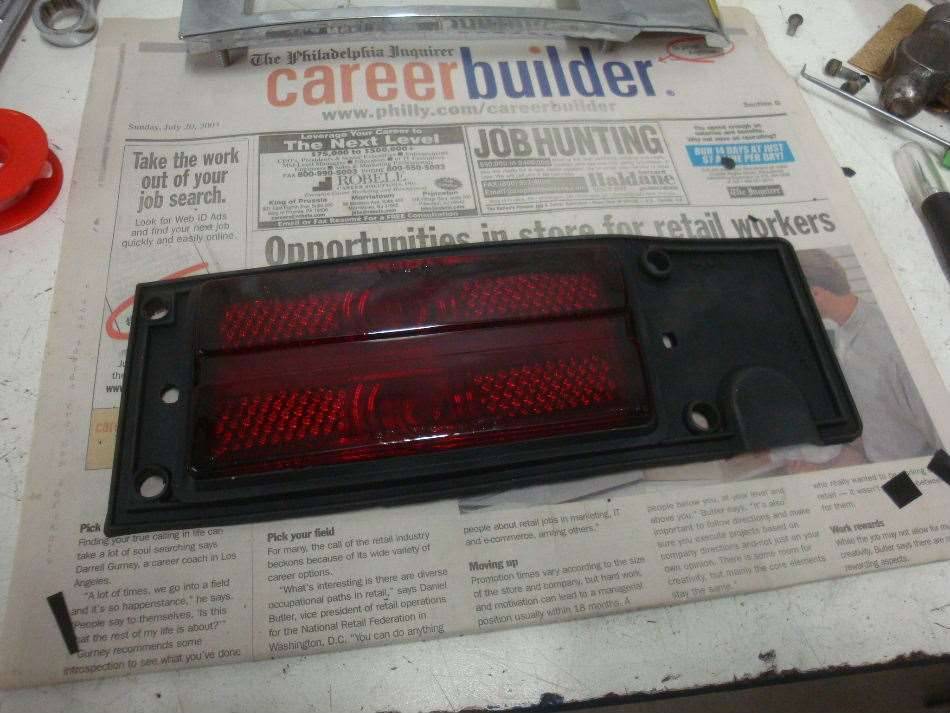 (95.83 KB) (95.83 KB)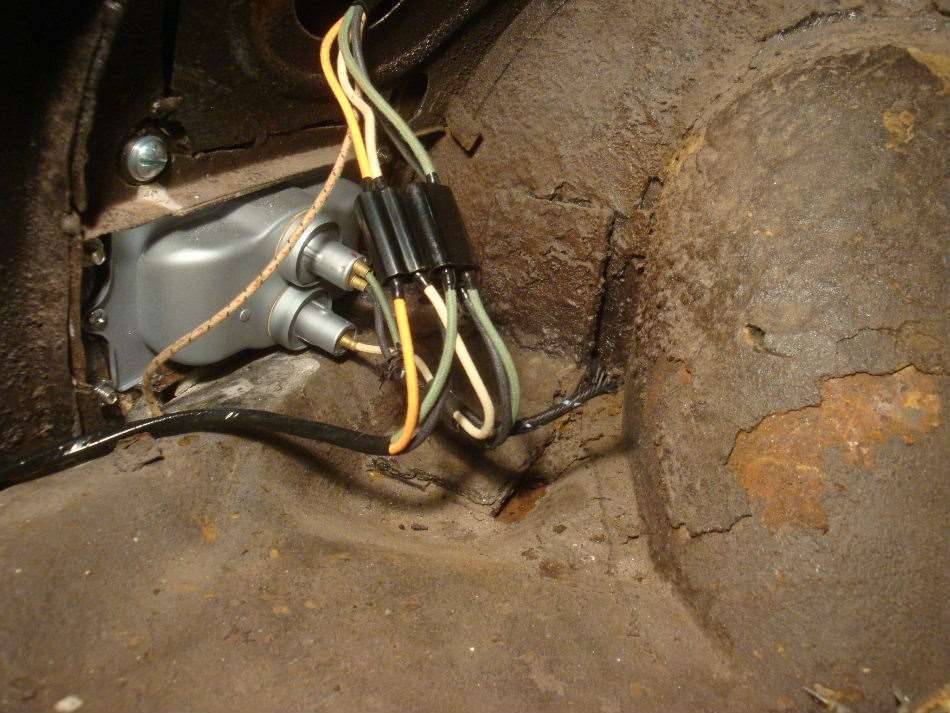 (72.93 KB) (72.93 KB)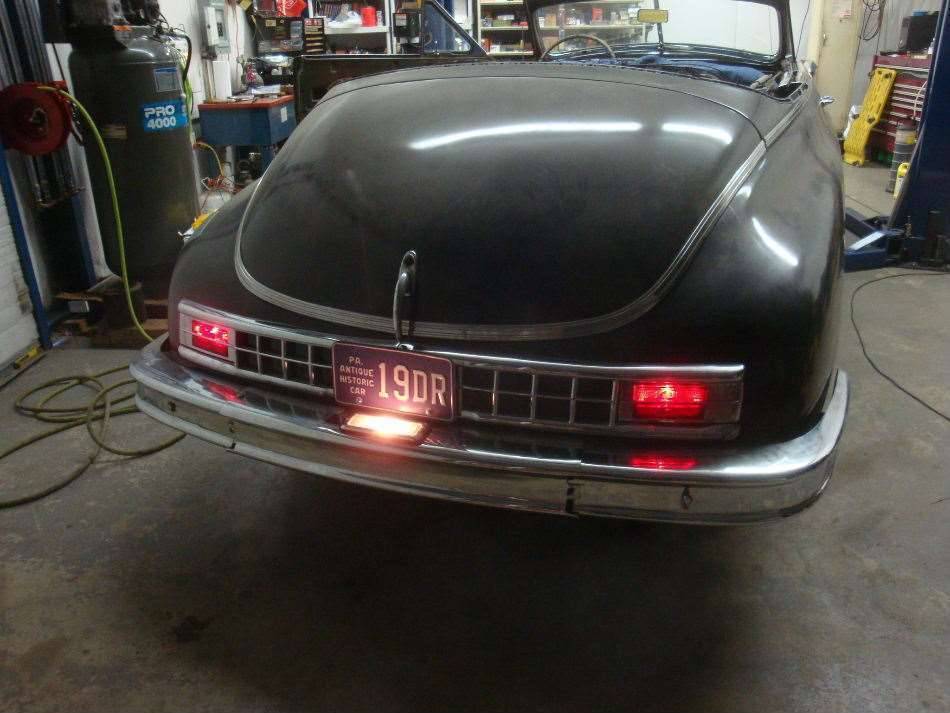 (83.47 KB) (83.47 KB)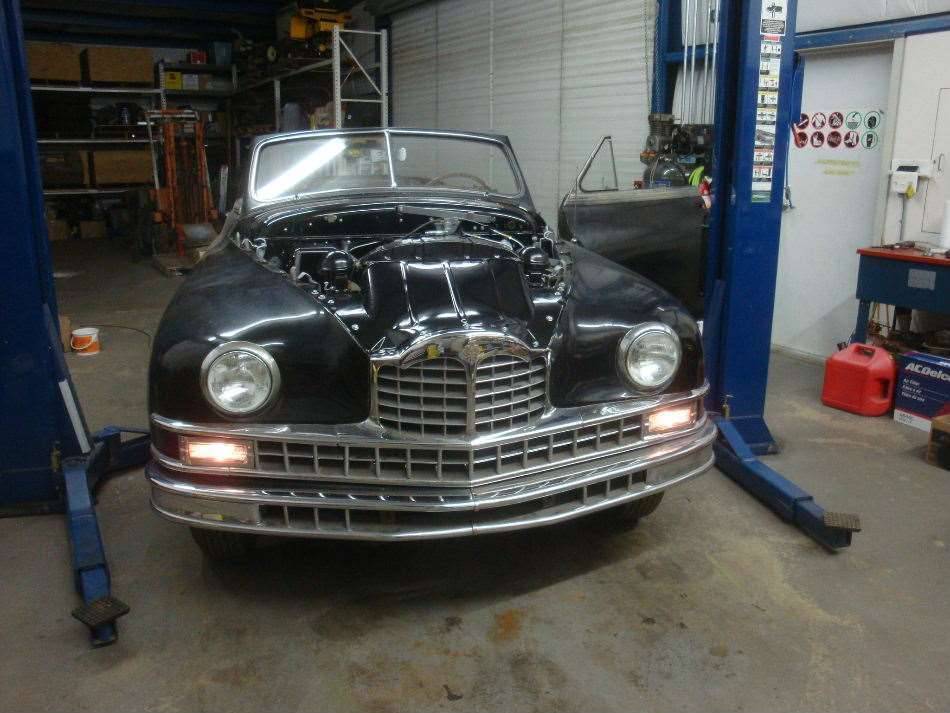 (84.50 KB) (84.50 KB)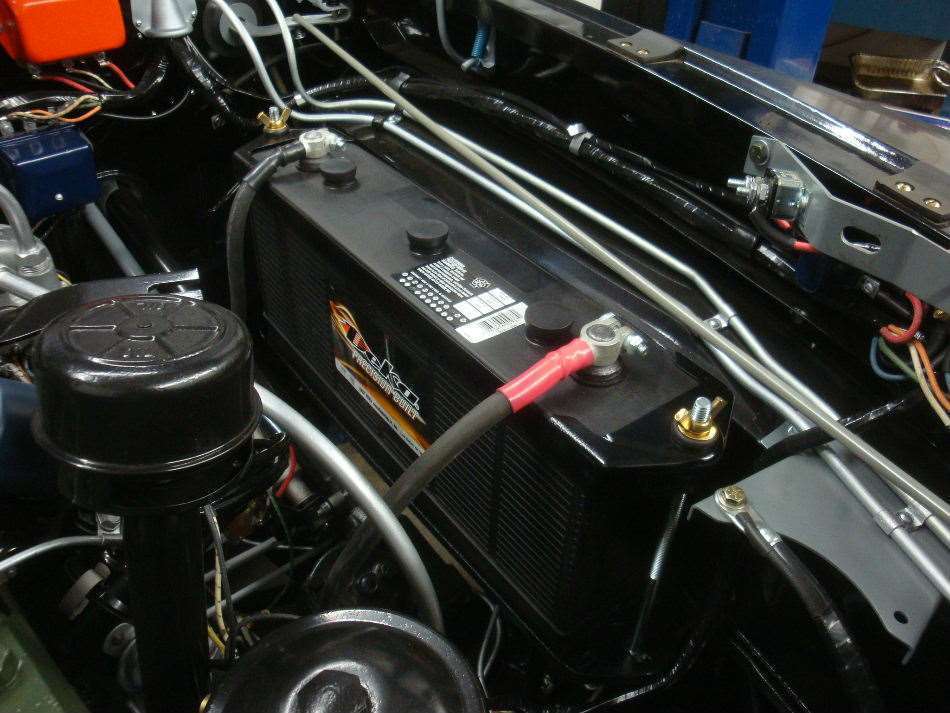 (81.32 KB) (81.32 KB)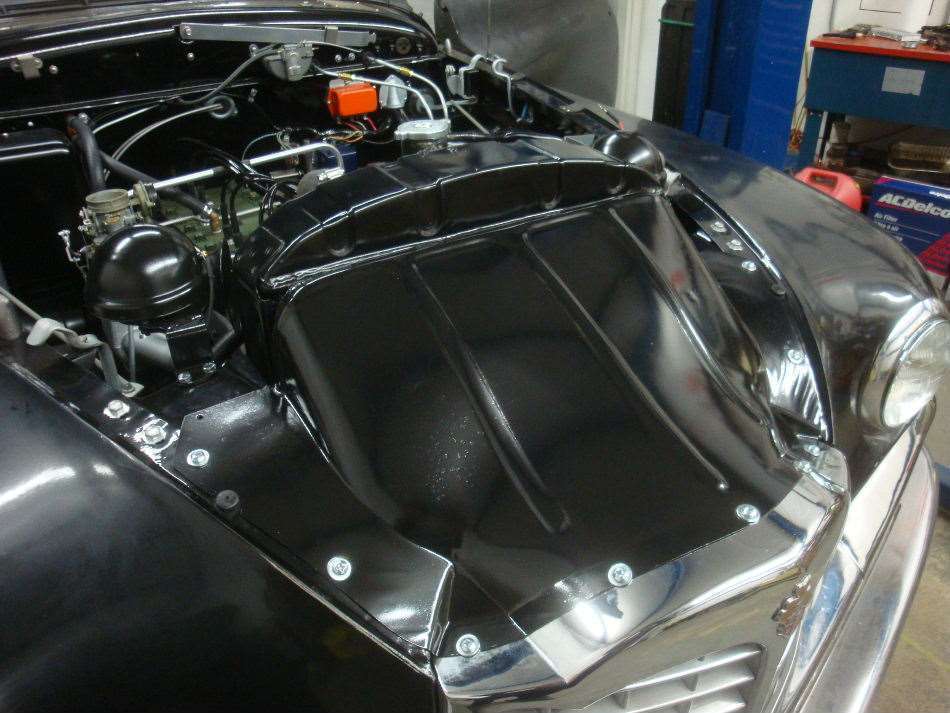 (69.17 KB) (69.17 KB)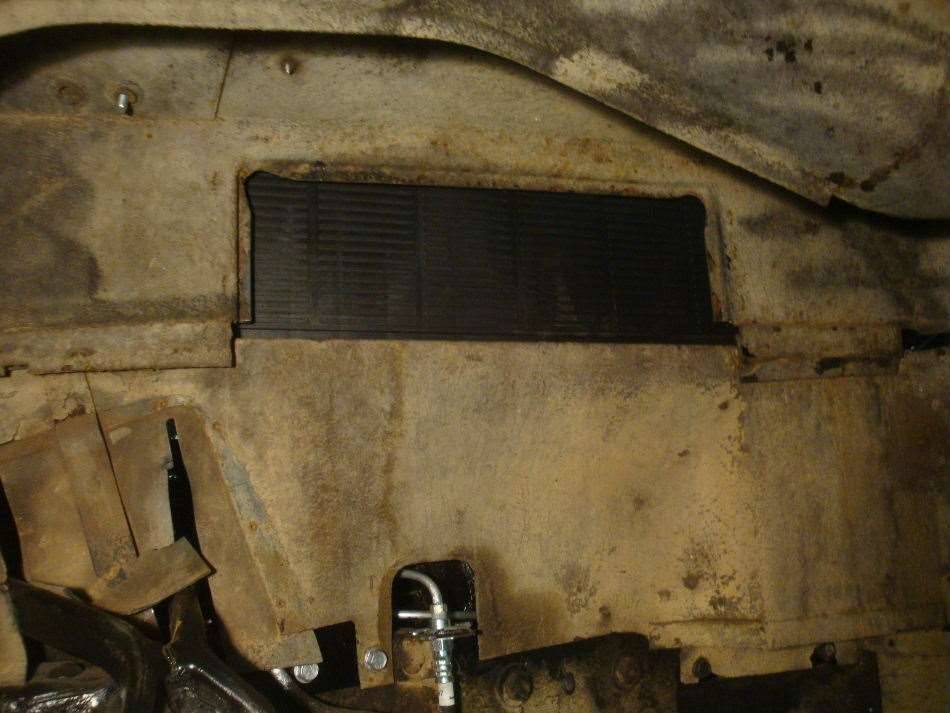 (64.70 KB) (64.70 KB)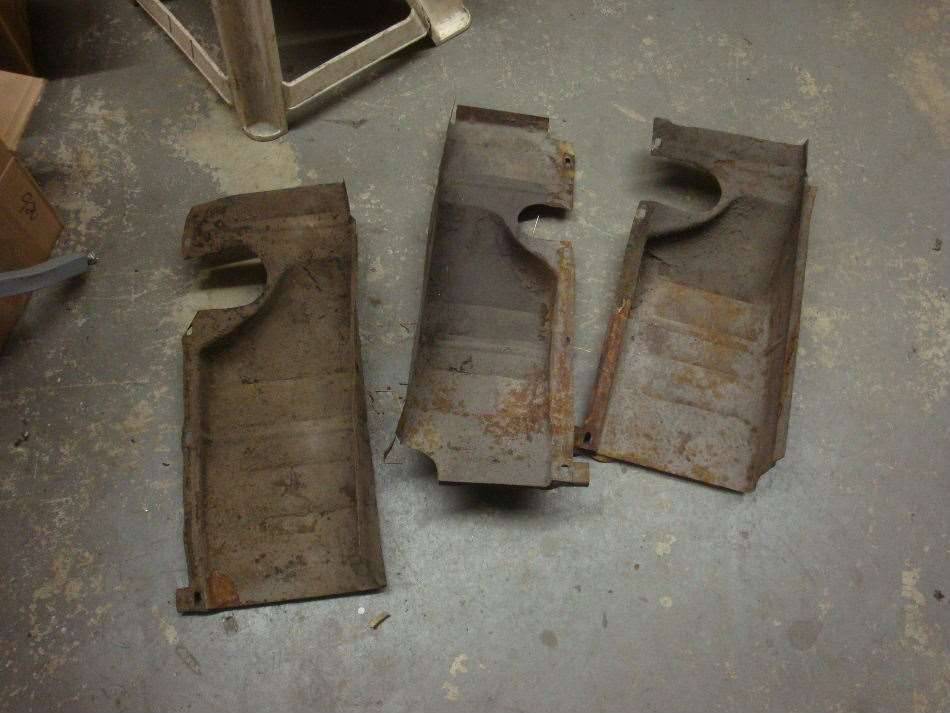 (73.51 KB) (73.51 KB) (70.21 KB) (70.21 KB)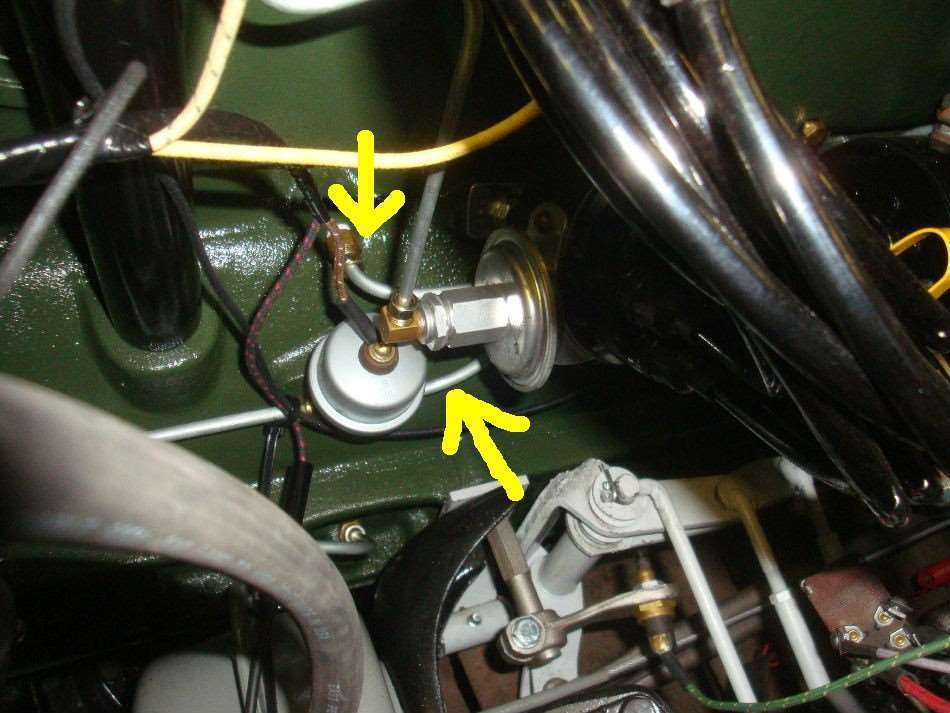 (51.81 KB) (51.81 KB)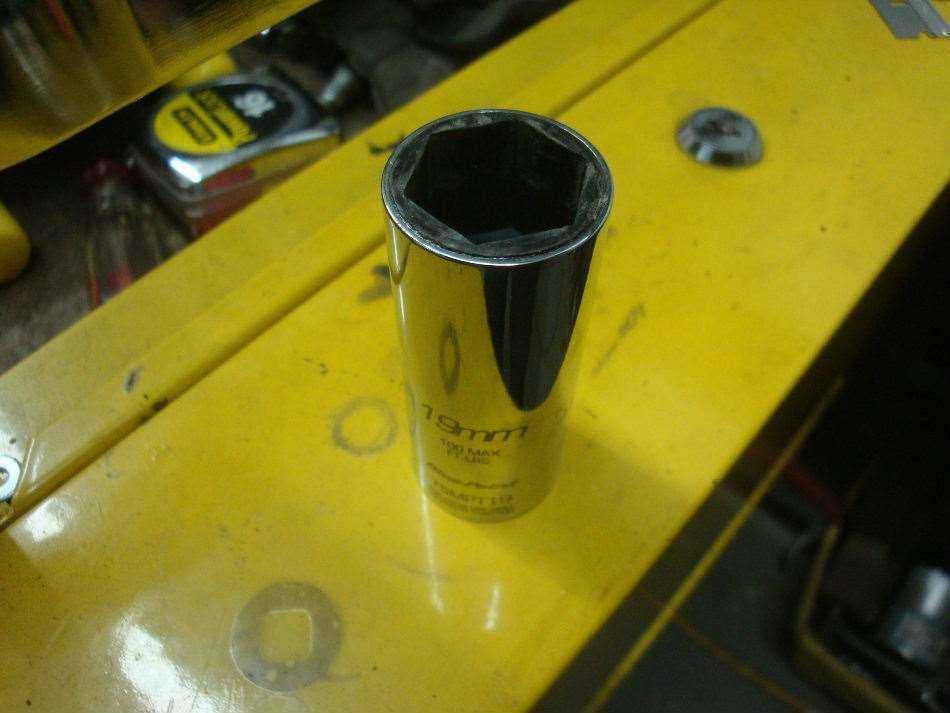 (63.69 KB) (63.69 KB)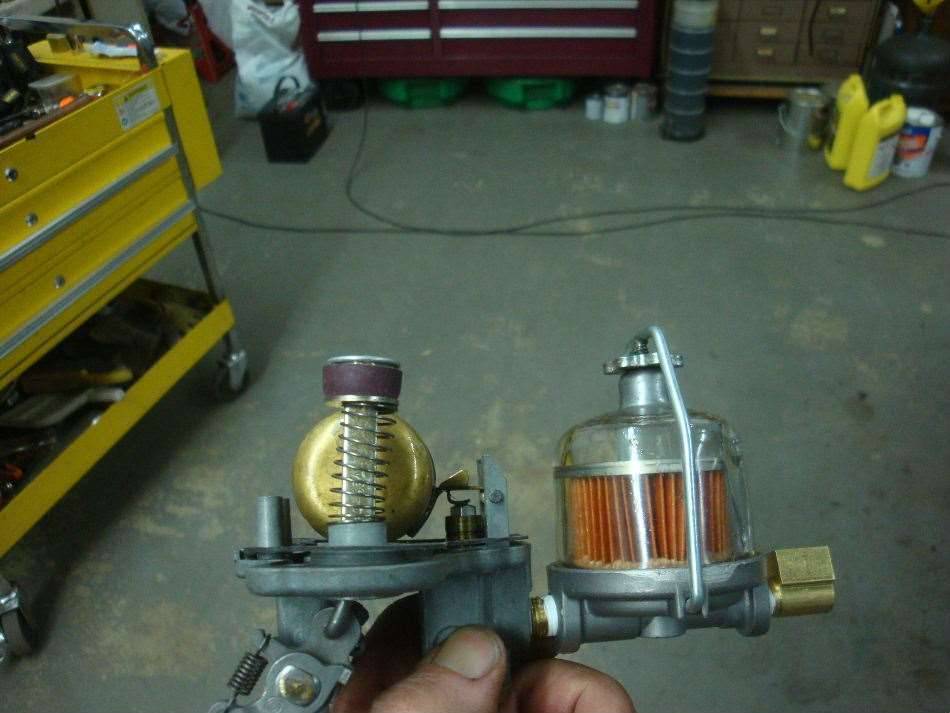 (63.16 KB) (63.16 KB)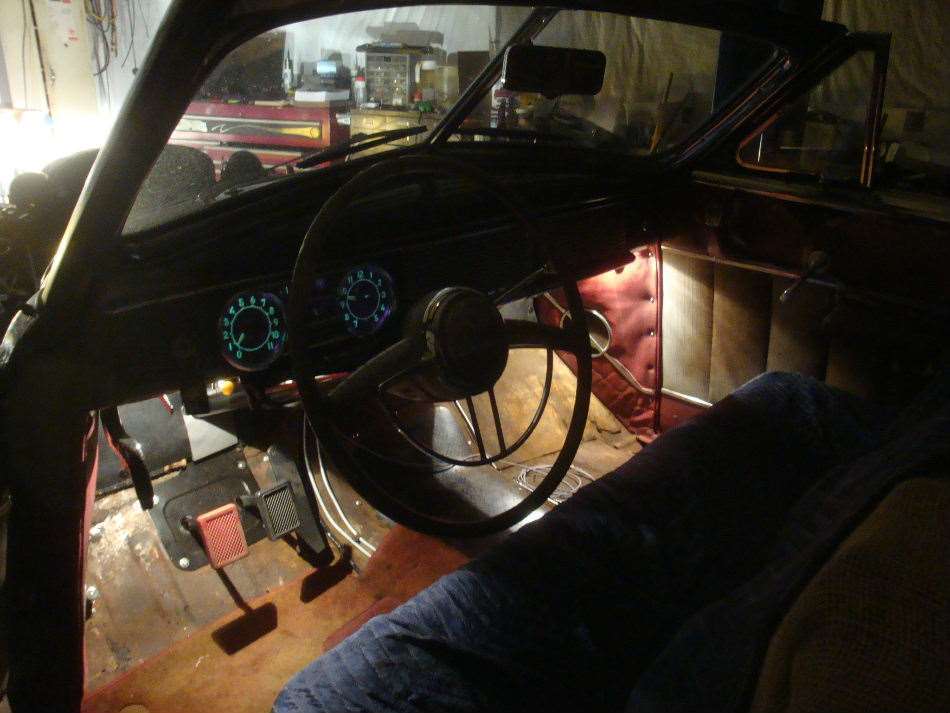 (47.92 KB) (47.92 KB)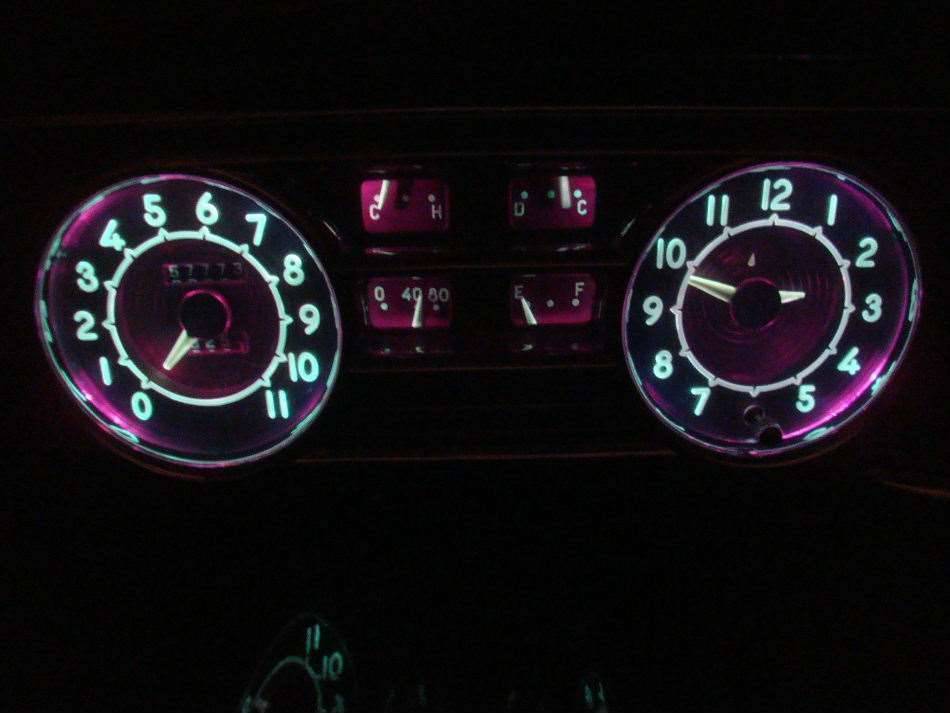 (16.37 KB) (16.37 KB)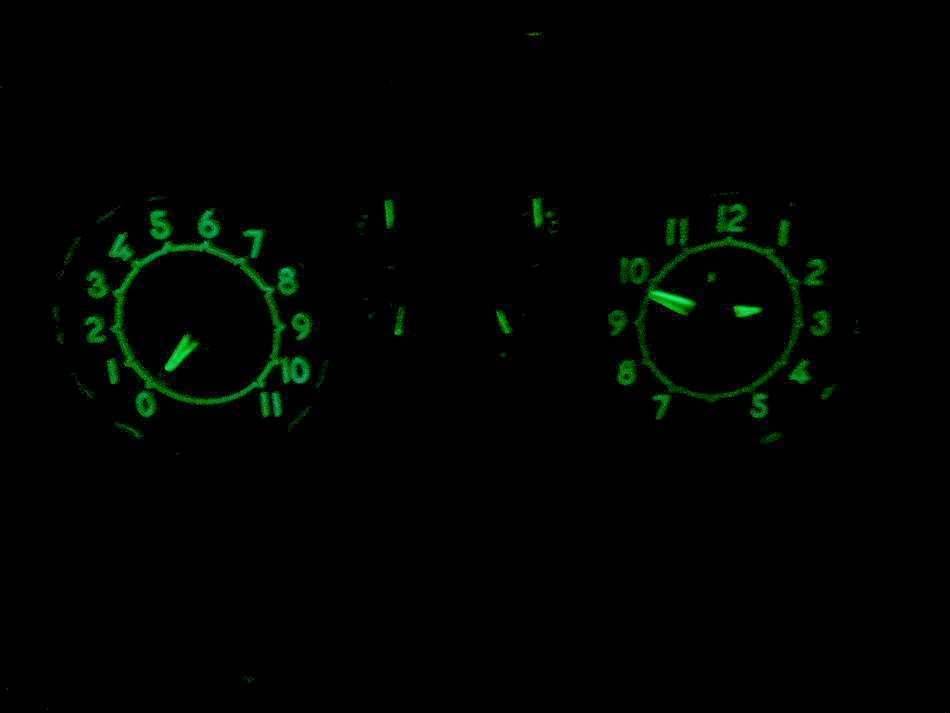 (28.53 KB) (28.53 KB)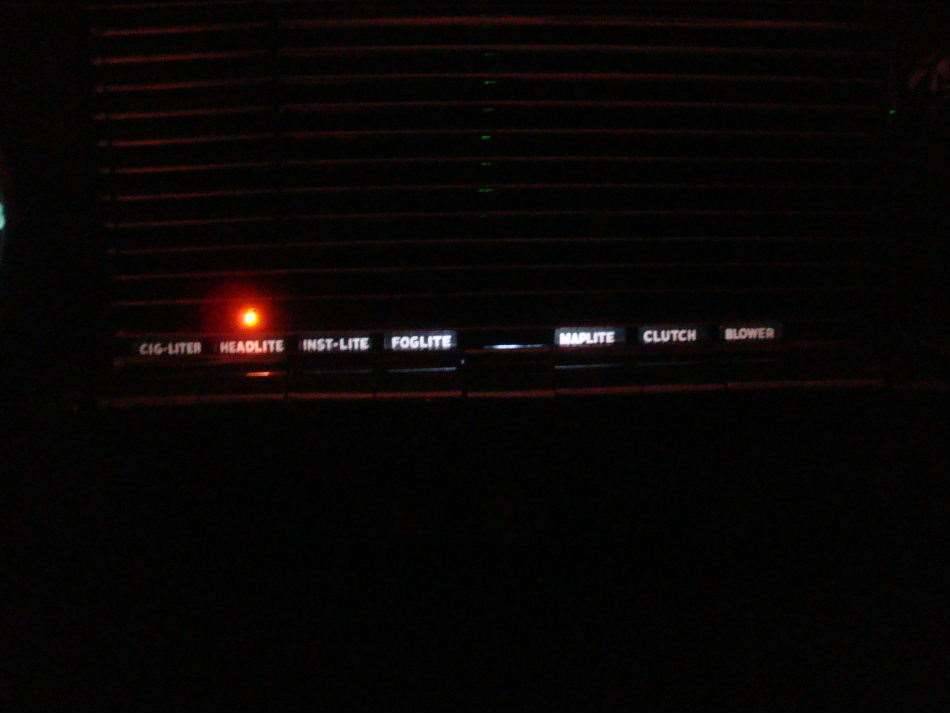 (40.67 KB) (40.67 KB)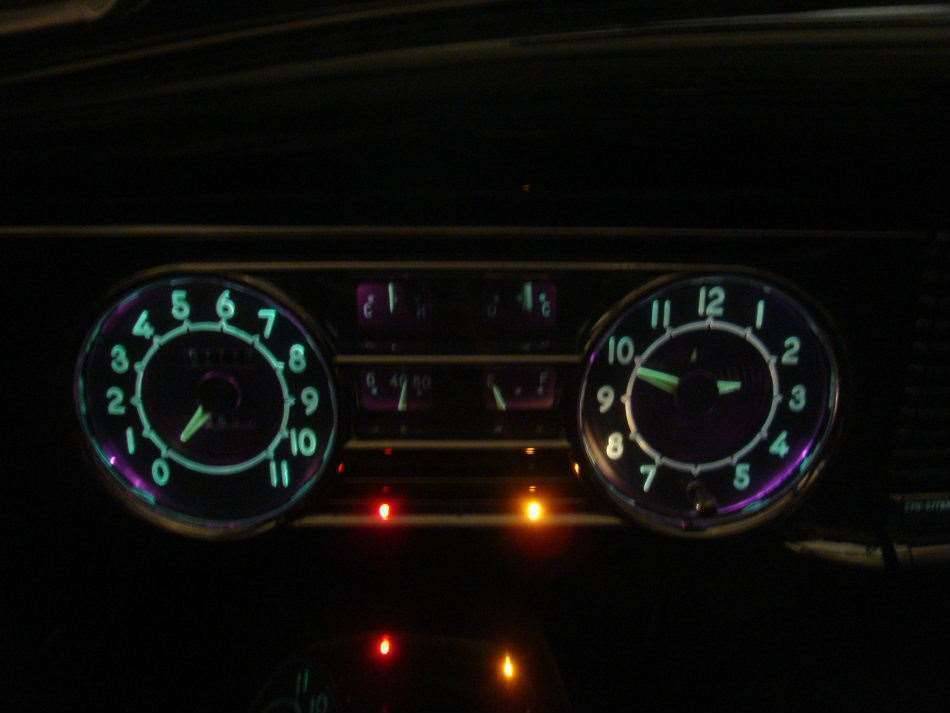 (68.26 KB) (68.26 KB)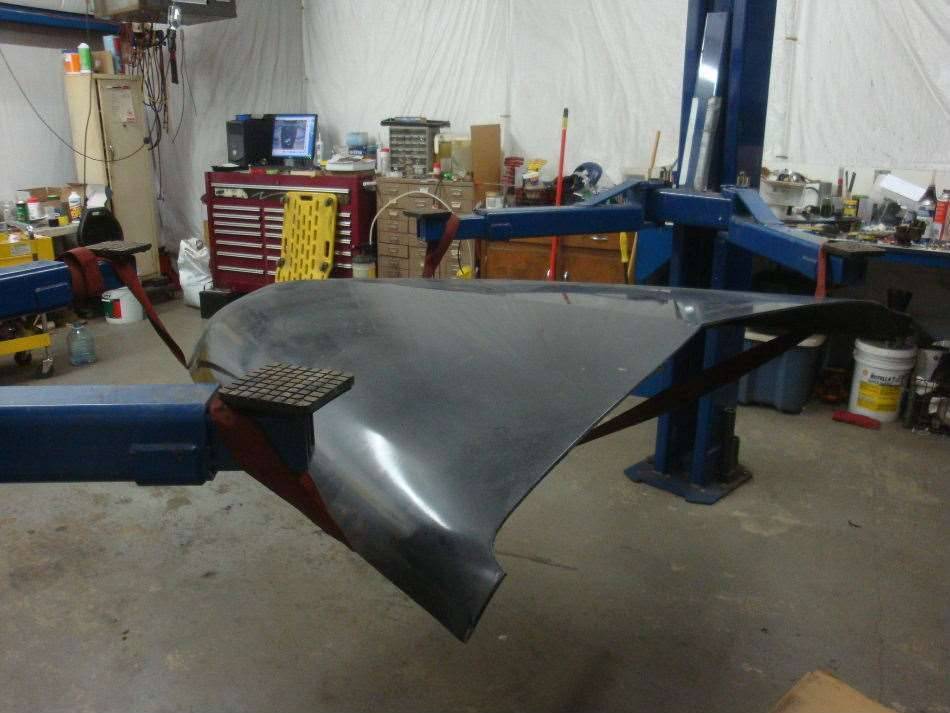 (76.16 KB) (76.16 KB)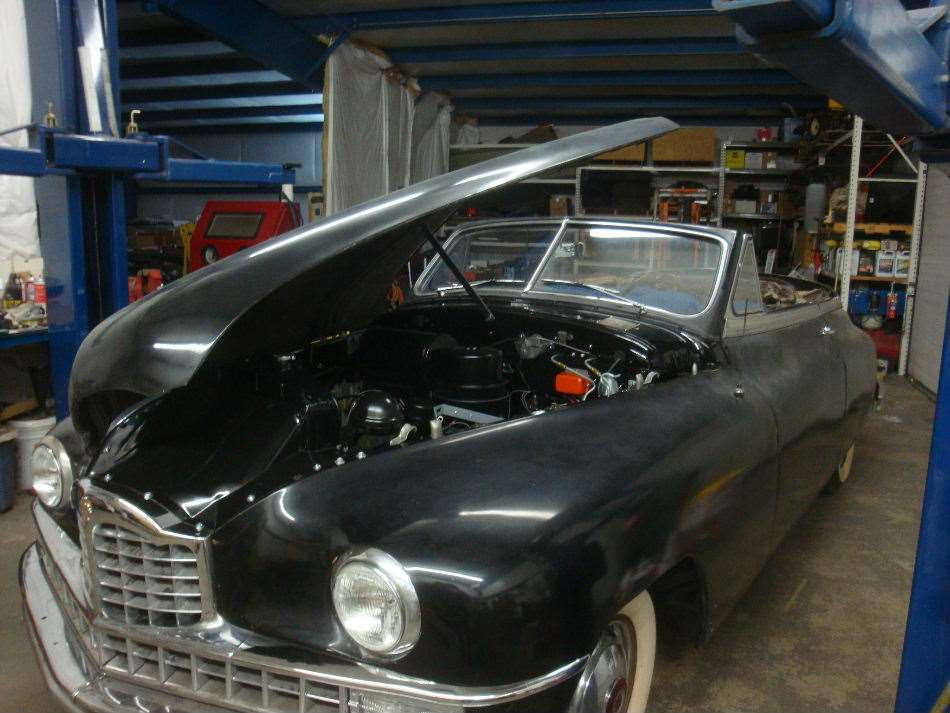 (81.41 KB) (81.41 KB)
Posted on: 2013/12/2 10:38
|
|||
|
||||
|
Re: 1947 Packard motorhome
|
||||
|---|---|---|---|---|
|
Home away from home
|
Quote:
It's similar to driving the original Lumina/Transport/etc GM minivans, Just much worse. It's really quite the poor design. One would have to think that the builder either had the Packard sitting around or it was free, so he decided to turn it into a motorhome on a whim. Jeff Attach file: (40.80 KB)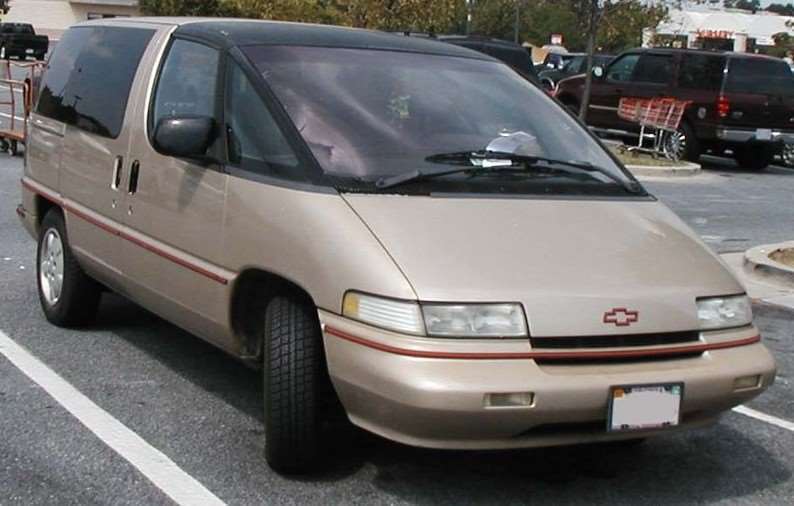
Posted on: 2013/11/30 11:59
|
|||
|
||||
|
Re: Jeff's 48 Custom 8 Victoria Project
|
||||
|---|---|---|---|---|
|
Home away from home
|
Thanks Roger. The parts you supplied were a big help in completing it. The car came with a real nice hood mascot, so one of these days, maybe fairly soon, it'll be back on the car. I'm not sure what the owner's exact plans are to tackle the rest of the work. I do know that he would like to drive it a bit before it's time to get involved with the body work. The car will shine up nice with a quick color sand and polish. It's currently covered with paint overspray from some other paint work that must have been done where the car was stored, and that makes the car look real dull.
Jeff
Posted on: 2013/11/30 11:41
|
|||
|
||||
|
Re: Jeff's 48 Custom 8 Victoria Project
|
||||
|---|---|---|---|---|
|
Home away from home
|
I keep claiming that the Packard is on it's way to the docks in Jersey, but it doesn't seem to want to leave. My job orientation continues to be pushed back each week, which frees up more time to finish up some of the nagging little details on the car. My next post should be the final one for work that I have done on the car. I may add two more posts after that: The trip to the docks and a before & after picture segment.
I got a chance on Wednesday to take the car for a quick spin up the road. I have to say that the car drives like a dream. The only improvement I could see would be a new set of radial tires. The engine is running great, the transmission shifts nice, overdrive comes in just as it should, and as far as I can tell in the bright light, it even looks like the little green overdrive light is working too. Of course, I had to take the camera along for the ride again. You'll need to turn the sound down once I get rolling, as all you can hear is wind noise rushing past the camera microphone. <iframe width="640" height="480" src="//www.youtube.com/embed/pG83XMOI27o" frameborder="0" allowfullscreen></iframe>
Posted on: 2013/11/30 1:56
|
|||
|
||||
|
Re: Jeff's 48 Custom 8 Victoria Project
|
||||
|---|---|---|---|---|
|
Home away from home
|
Unfortunately, my tight schedule didn't allow time for soaking the seal for any decent length of time, but what I did was, right after gluing the new cork to the seal retainer, I installed it on the hub of the balancer to stretch it out a bit. I left it on there as long as I could while I worked on the new timing cover gaskets. Right before I put the seal on the crank I tested how it went onto the balancer, and the cork would slide all the way on by it's own, so hopefully it did the same when I installed it for real. I just put the radiator back in a couple hours ago, so I haven't run the engine yet to see what happens.
Today is my last day to work on the Packard. Pretty much whatever is finished by 8pm tonight is how the car will be when it goes to Sweden. I know that there will be a few things that I wanted to get done that I won't have time for. I'm hoping to take the car for a quick (and cold) spin tomorrow afternoon, so I need to get the tail lights installed and the lights working. I do have a couple more questions for the experts. My books say oil capacity on the 356 is 7 quarts, but it appears that my engine wants 8. Is that because they aren't factoring in the oil filter, or is my stick wrong? It seems to me that there should be something else on the horn contact to keep it held down firm against the steering wheel nut. It looks like it could pop up and contact the horn ring on it's own without something there to keep it in place. Maybe something rubber, shaped similar to a vacuum cap, to go between the contact and the horn ring? Thanks, Jeff Attach file: (63.20 KB)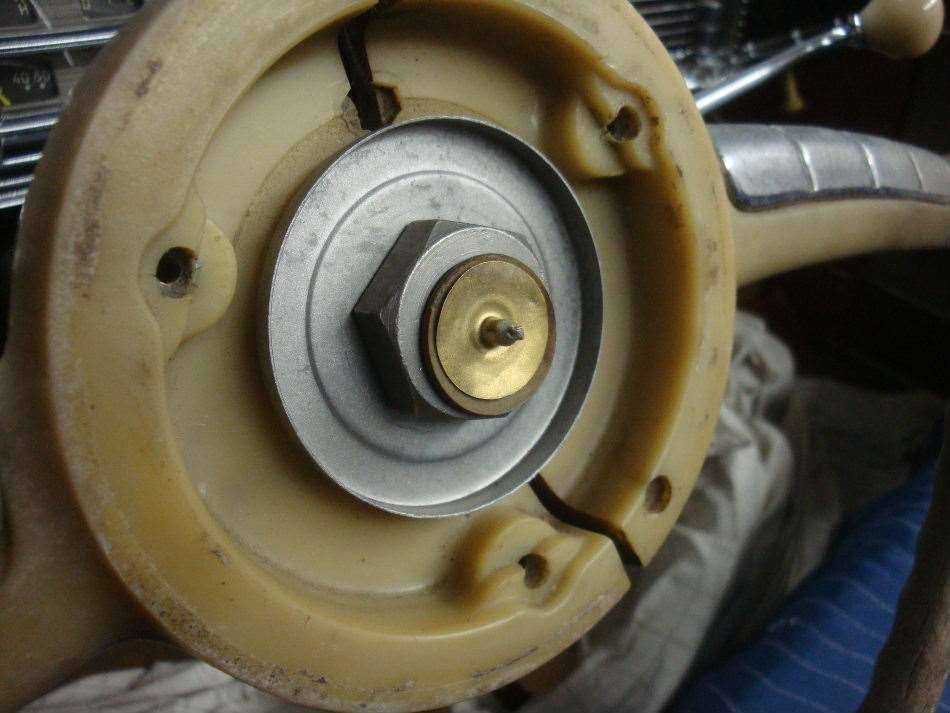 (61.14 KB) (61.14 KB)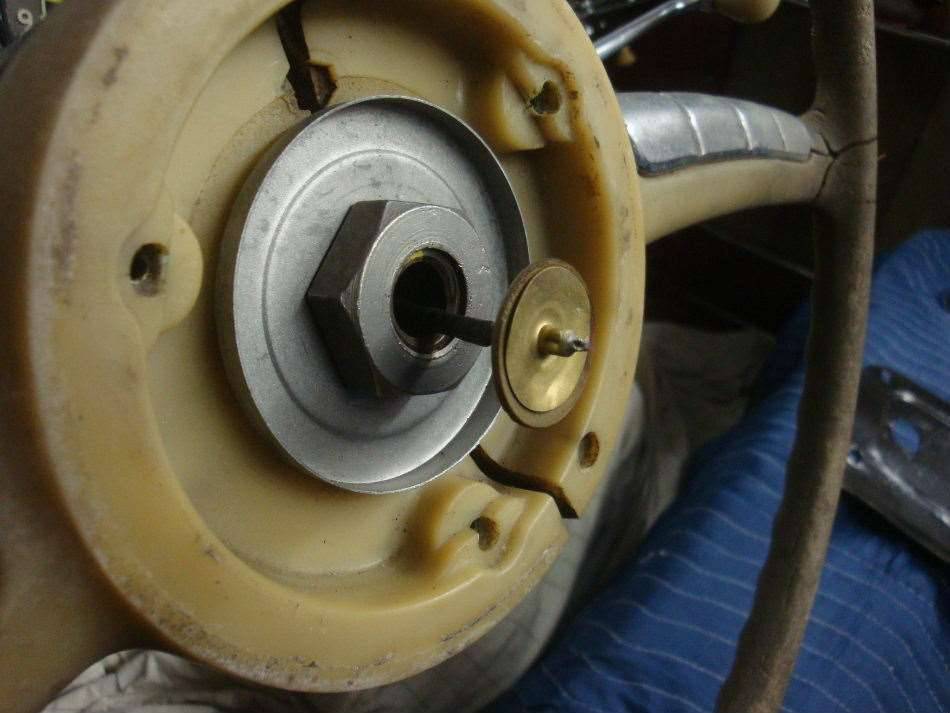
Posted on: 2013/11/24 16:11
|
|||
|
||||
|
Re: Jeff's 48 Custom 8 Victoria Project
|
||||
|---|---|---|---|---|
|
Home away from home
|
The cover appears to be fine, and before I took the engine apart, there weren't signs of the front cover leaking oil badly. When I cleaned and blasted the cover, I was real careful not to disturb the area where the seal rides. I'm hoping that Ross is correct and the seal was hung up on the hub of the balancer. I'm going to put it back together tonight, so it won't be long before I find out.
Jeff
Posted on: 2013/11/22 14:48
|
|||
|
||||
|
Re: Jeff's 48 Custom 8 Victoria Project
|
||||
|---|---|---|---|---|
|
Home away from home
|
Well, the front of the engine is back apart, and the cause of the trouble remains a mystery. Everything appears to be A-OK. All I can do is install a new seal and hope for the best. I did put a light coat of grease on the face of the previous seal, and I'm wondering if that caused the leak. The service manual implies that the seal is installed dry, though it doesn't specifically say not to put anything on the seal face.
There was a tiny leak in the radiator near the overflow tube, so I brought it back to the radiator shop. Turned out to be a major project to seal the tiny hole. My new seal and gaskets arrived from Max Merritt, so I'll try to get everything back together by Saturday. The final, written in stone deadline to have it completely finished will probably be next Monday. At this point, it looks like Tuesday will be the day that it goes to the shipping terminal in North Jersey. Attach file: (89.16 KB)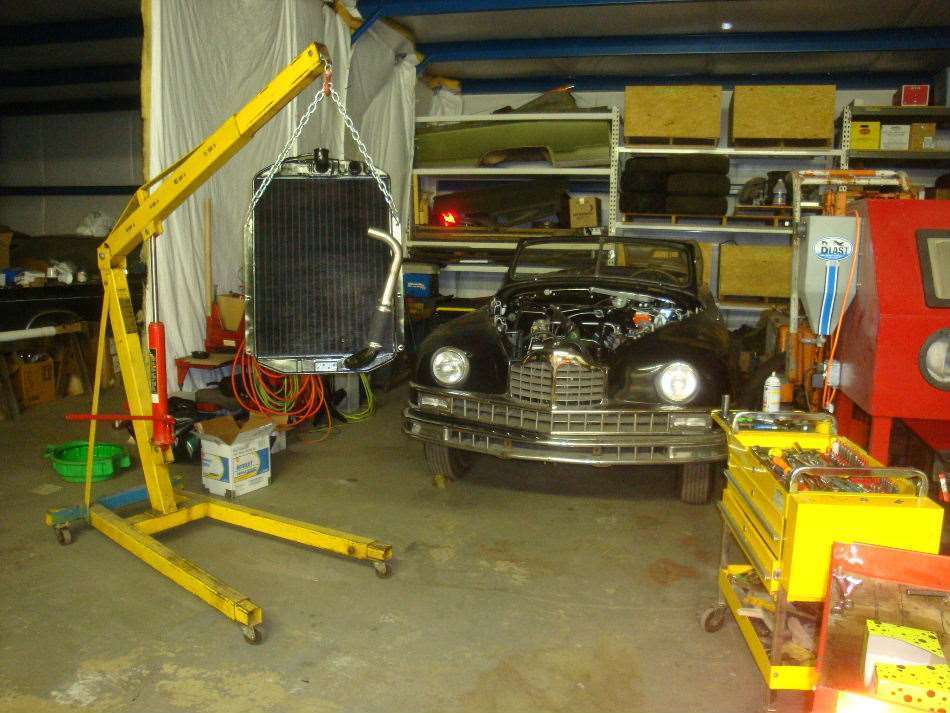 (134.31 KB) (134.31 KB) (153.20 KB) (153.20 KB)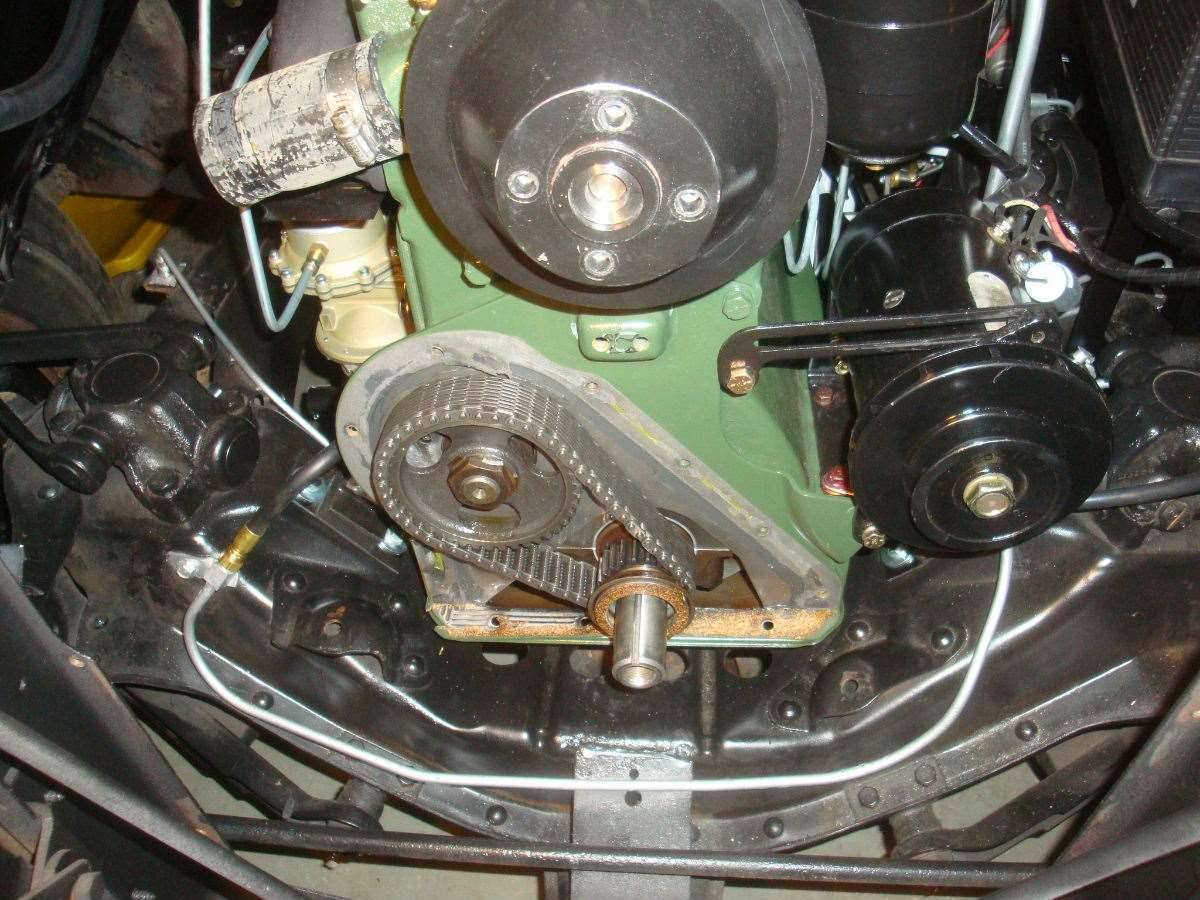 (51.71 KB) (51.71 KB)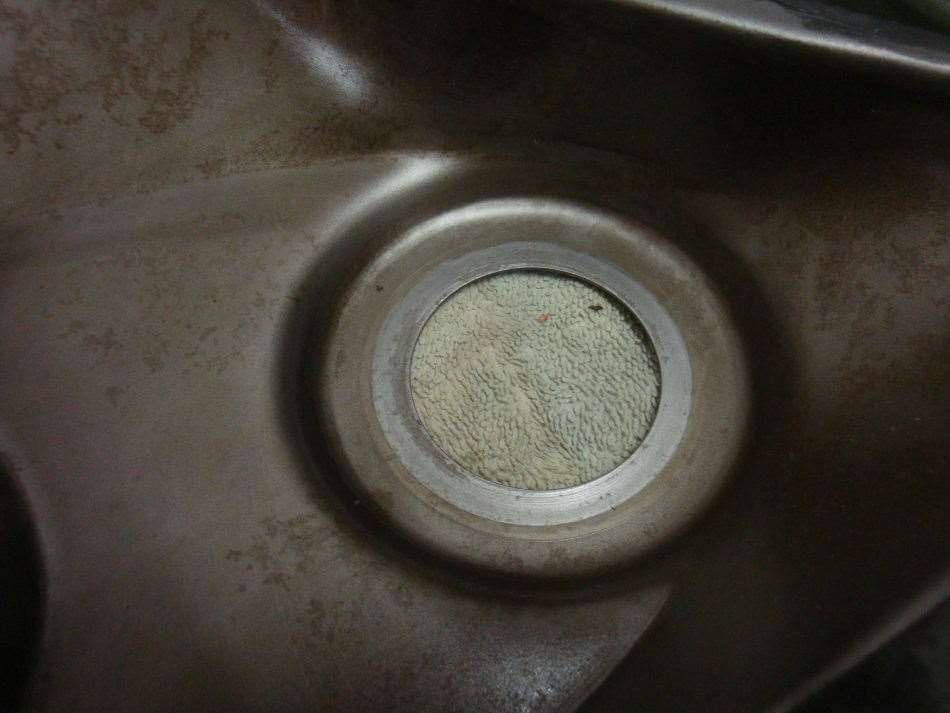 (75.32 KB) (75.32 KB)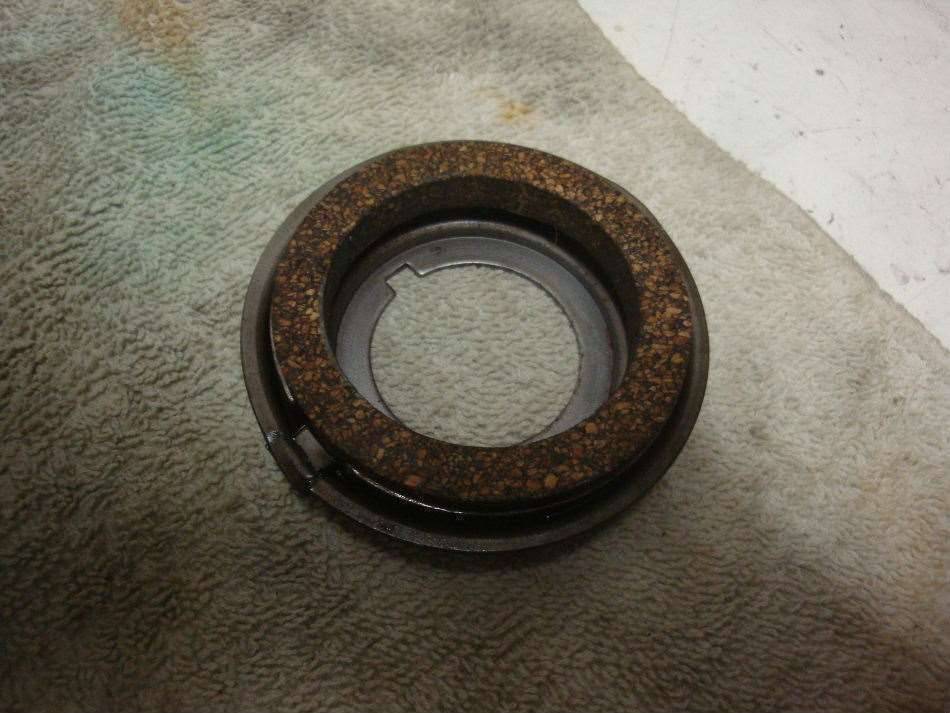
Posted on: 2013/11/21 0:05
|
|||
|
||||
|
Re: Howdy
|
||||
|---|---|---|---|---|
|
Home away from home
|
Hi Mark, There's no easy way to deal with that shift linkage. My upper shift arm was really seized onto the shift tube. I don't know if it could have been freed up with everything still mounted in the car. The steering column is quite different from a modern car. The steering shaft that goes all the way up to the steering wheel is part of the steering box, and therefore can't be disconnected from the box. This makes it a pain to get the rest of the column out of the car. The service manual says to unbolt the box from the frame and the column from the dash, then pull the entire assembly out of the car. To me, the hole in the firewall looks awfully small for the box to fit through. It seems like the best way to remove the column is to take off the steering wheel, cut the horn wire, remove the retaining ring and upper bearing, unplug the turn signal wires, loosen the clamp down near the box, unbolt the column from the dash, then slide the column out over the steering shaft. This method will work fine on a convertible, but I have a feeling that the column may hit the roof before it's clear of the shaft on a closed car.
If you have a torch, you may try heating the shift levers while someone in the car moves the linkage, but if you do get it freed up, it's going to be tough to properly lubricate all the parts with everything still assembled. Some additional benefits of taking everything apart would be that your upper column bearing is probably dry as a bone and due to be cleaned and repacked, plus the contacts on your turn signal switch most likely could use cleaning. Jeff
Posted on: 2013/11/20 2:27
|
|||
|
||||
|
Re: Jeff's 48 Custom 8 Victoria Project
|
||||
|---|---|---|---|---|
|
Home away from home
|
Hi Dell, I'm happy to report that shimming the relief valve did the trick. I added five thin little washers behind the spring, and it brought the pressure up to 47 psi at speed and it will drop down to about 30 after it idles for a while. The bad news is that the oil leak isn't getting any better with time, so it looks like I'm still going to have to pull the timing cover off.
The big news of the day is that the Packard made it's first trip under it's own power in about 25 years. I decided to make a video of the momentous event. I was a bit disappointed at how bad the video mode on my camera works in low light. It almost looks like it was totally dark out, when it was actually the latter part of dusk. I decided to post it anyway, since you can only make a maiden voyage once. If you have an adjustable monitor, tuning the brightness way up helps, otherwise it's best to fast forward to near the end. Some notes on the video: Yes, it's a pain in the butt to get out of my shop with a big car with manual steering. There's presently no latch on the driver's door, and that's why it tries to open every time I turn to the right. The floor section over the transmission is still off the car, and that's why the trans seems so loud, especially when I grind reverse a few times. When I turned around in the street, I realized that I had forgotten to release the parking brake. The car runs great, but still needs some fine tuning of the carburetor, as it's got a flat spot right off idle. The shifter linkage could use some minor adjusting too. Jeff <iframe width="640" height="480" src="//www.youtube.com/embed/k0TCI08Wcdw" frameborder="0" allowfullscreen></iframe>
Posted on: 2013/11/18 2:40
|
|||
|
||||
|
Re: Jeff's 48 Custom 8 Victoria Project
|
||||
|---|---|---|---|---|
|
Home away from home
|
Quote:
That's about where I am now. The spec on the 356 is 50 psi at speed, but Packard makes it very clear in the service manual that they expect the pressure to drop as the engine gets some miles on it. Since my bearings are all new and the pump appears to be in very good shape, I was hoping to be up at 50. As Dell mentioned, it may be as simple as shimming the pressure spring in the pump to get there. I think the other engines call for 40 psi at speed. Jeff
Posted on: 2013/11/17 11:19
|
|||
|
||||


