|
Re: The Duchess Project: 1940 Super 8 Convertible Sedan
|
||||
|---|---|---|---|---|
|
Home away from home

|
HEADLIGHT RIMS Continued- The tool from Steele Rubber to open the lip of the rims that holds the rubber gasket around the headlights worked well after I got the hang of it.
First I opened the lip enough to get the tool in it using a tack puller. Then I set the rim on edge and pressed the end of the tool into the lip. I finally figured out that a cranking motion worked well, in a cone shape with the apex at the end of the tool. I put on heavier gloves and my wrists could only take to much. But after about 45 minutes I had both rims opened all the way. Then I cleaned them up using a wire wheel, sandpaper, and a light file where there was rust on the outside. I'm convinced that if headlight rims on a model 30 or 40 years newer were in this condition, the metal wouldn't be there after the rust was removed. So now some rust mort, some glazing putty, and primer. This looked like an impossible job. Of course, I still need some kind of crimping tool to close up the li around new rubber, which I'm guessing I should put in after the priming and sanding si done, but before the final paint job. Attach file:  (38.55 KB) (38.55 KB)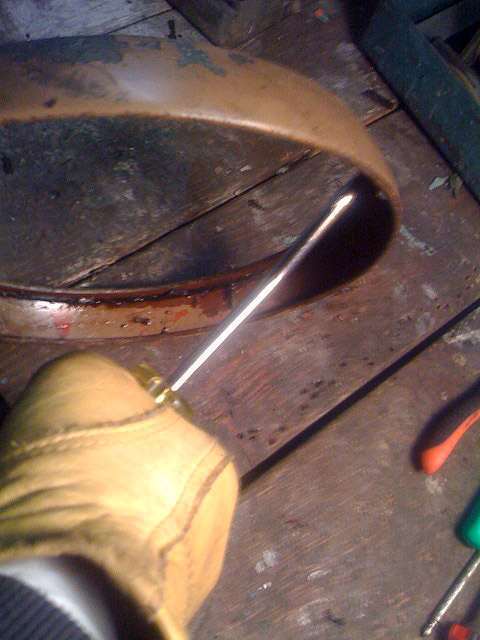 (34.10 KB) (34.10 KB)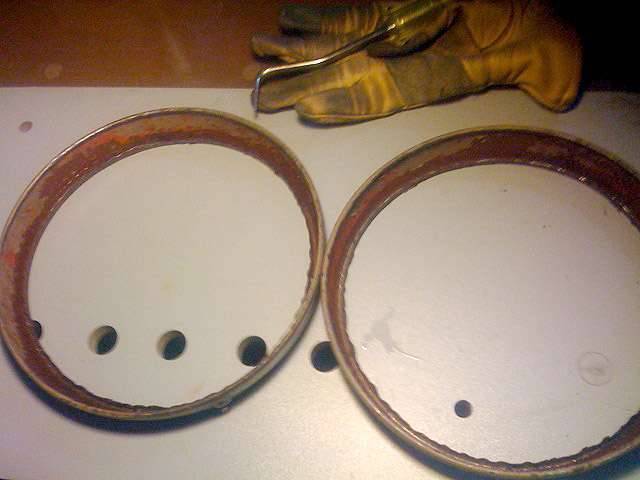 (46.86 KB) (46.86 KB) (24.39 KB) (24.39 KB)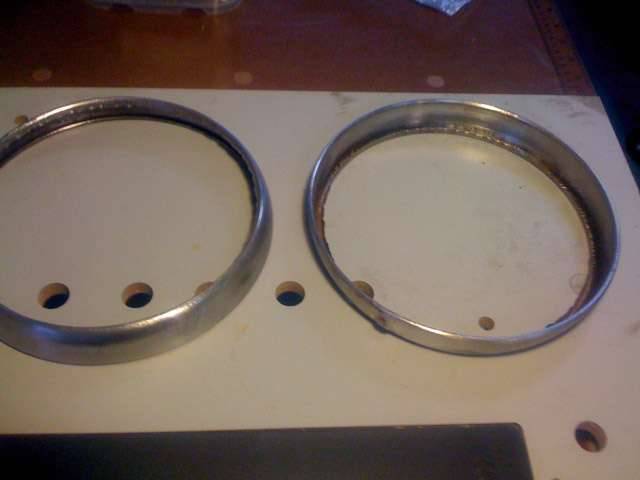
Posted on: 2010/11/26 23:33
|
|||
|
||||
|
Re: Some different takes on the Packard plant...
|
||||
|---|---|---|---|---|
|
Home away from home
|
I hope the local clubs figure out a way to snag the entrance as a facade for display in the Packard Museum, maybe an entrance or centerpiece to a multimedia space similar to the pieces of the Berlin Wall at the Newseum in Wash DC.
Posted on: 2010/11/24 14:12
|
|||
|
||||
|
Re: The Duchess Project: 1940 Super 8 Convertible Sedan
|
||||
|---|---|---|---|---|
|
Home away from home
|
HEADLIGHT RIMS - Soaking in Gas and then oil buckled up the rubber and it slid out in sections several inches long. More in the next post on this.
STEERING COLUMN and GEAR SHIFT - Picture pretty much speak for themselves. The gear shift knob came off easily without damage using this rubber gripping tool. Everything removed was cleaned up and made ready for priming. I also opened the steering box, cleaned all the grease off and made a new gasket for the lid, so it can be primed as well. Everything came apart without incident. Attach file: (38.51 KB)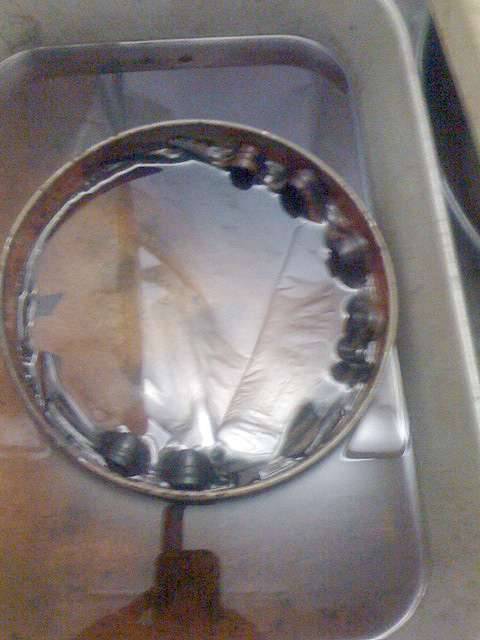 (32.64 KB) (32.64 KB)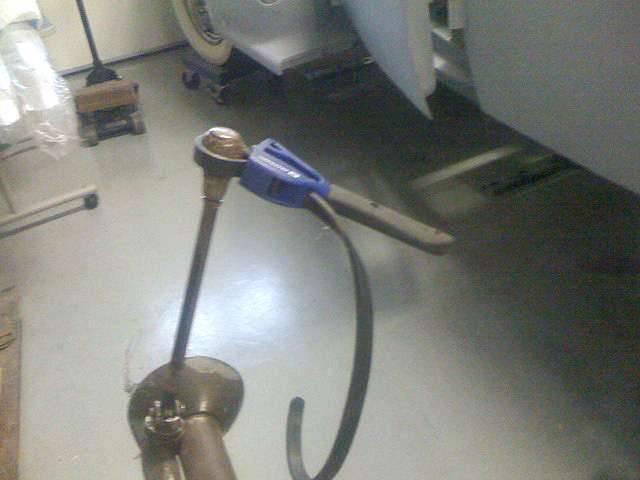 (32.78 KB) (32.78 KB)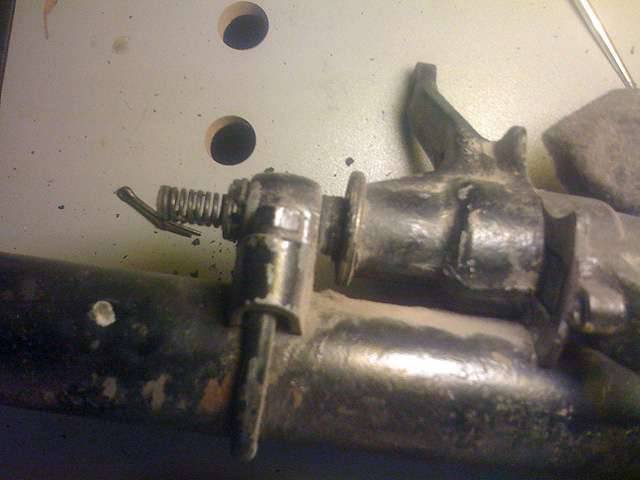 (39.87 KB) (39.87 KB)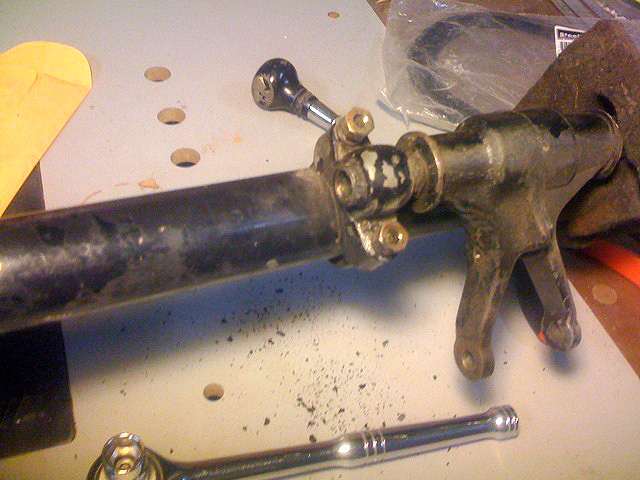 (42.11 KB) (42.11 KB) (37.34 KB) (37.34 KB)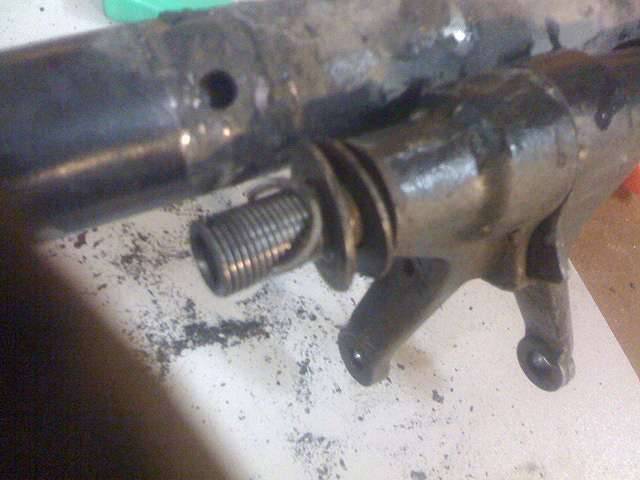 (31.51 KB) (31.51 KB)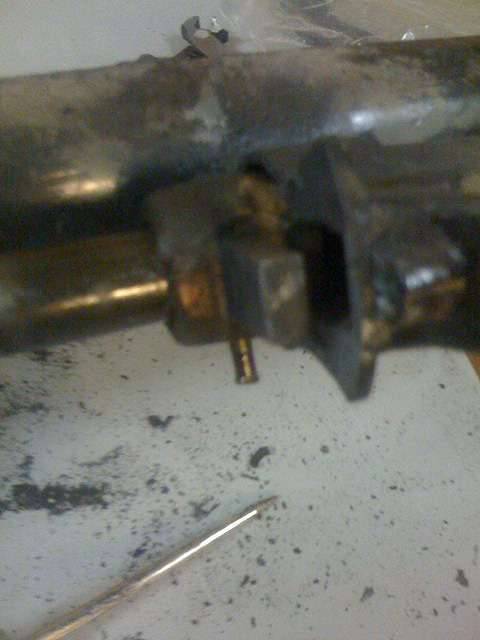 (32.62 KB) (32.62 KB)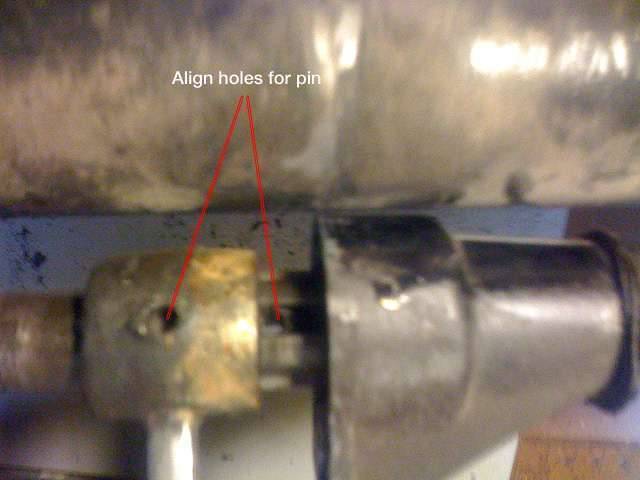 (73.42 KB) (73.42 KB)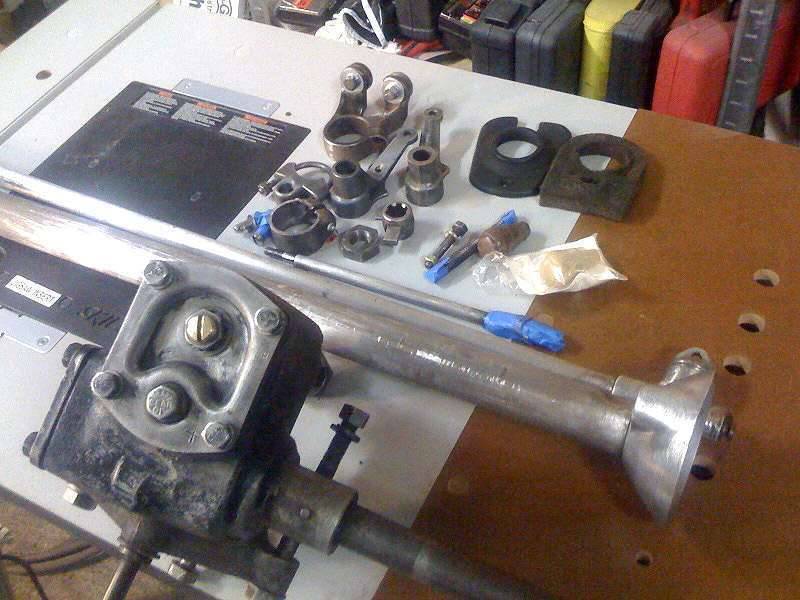
Posted on: 2010/11/24 12:32
|
|||
|
||||
|
Re: Smoke Problem
|
||||
|---|---|---|---|---|
|
Home away from home
|
This is an excellent solution. I'd never done anything like this before. The advice I got was
1. Spread out a cloth to keep track of all parts removed. 2. Place parts closest to the side they came off of. 3. Religiously follow the order of your kit's instructions. 4. Get a stool and a cup of coffee. I took notes as I progressed, just in case I screwed up. 100 something parts, all back together and operational. Yes, you can! Attach file: (127.68 KB)
Posted on: 2010/11/11 16:53
|
|||
|
||||
|
Re: The Duchess Project: 1940 Super 8 Convertible Sedan
|
||||
|---|---|---|---|---|
|
Home away from home
|
Thanks, West.
I know pretty much what is original and what is not on my car, but whether some of the non-original items are correct is sometimes a question. I started to enter some info about a chrome strip I purchased and its faithfulness as a reproduction, something I discovered a week ago, but my ride arrived, so I didn't finish. Will do today. My car is an early car C500324, sold on Aug 20 1939 by Earle C Anthony SFO to Oscar Kennedy Cushing. The trunk handle is original. I bought the trunk rack in 1971 or so. It arrived in a ball, literally, from of all places, Texas. I had it straightened and the pieces chromed. It had no moulding, but everything else. I bought the license light later. I do have 2 sets of bumper brackets and rubber grommets, one for with rack and one for without. Also the shield emblem. That's out for chrome. My engine is out of a 50 custom 8. In 1966 the block cracked and I replaced it with an engine from a 1940 120. In the 70s, my friend Vaughn Hickman, a teacher who taught his kids how to spot a Packard and report back, verified that a car found in a backyard field here was indeed a Packard and called me. Another Packard guy wanted the rest of the car. I had the 356 engine rebuilt. This is the engine I will use to do my driving. I bought another 1940 engine which could be sold with the car in the "some day" to someone who considers that important in valuing the car. I think the aircleaner came from that Custom 8, but not sure. It was not on my car. When I first got it it had a funky aircleaner on it with no air chamber. I painted it red. It's long gone. As mentioned, I don't have strips and they are expensive, esp that top one. Also the bumper itself. My bumper doesn't have the extra set of holes for the guards. So for now, I'll keep it. I'm sure the expense for these items will seem insignificant after the car is done draining my tank for paint and upholstery. Thanks, West, I appreciate your interest and value your advice after reading several of your posts. Joe
Posted on: 2010/11/10 11:19
|
|||
|
||||
|
Re: The Duchess Project: 1940 Super 8 Convertible Sedan
|
||||
|---|---|---|---|---|
|
Home away from home
|
Recently an astute observer or air cleaners pointed out a difference in those used with 356 Super 8 engines between 1940 and 1950 that I would characterize as esoteric, but I know that the wrong air cleaner would instantly draw attention to those in the know, as much as a misspelled word in a brochure or sign.
I'm not as knowledgeable, until I get close up and personal with, say, a bolt that doesn't quite fit. I don't deny that I could be the culprit here, replacing an original part back in the day just to keep the car running, but others (repair people and mechanics) have also replaced original parts with reasonable facsimiles which I've encountered when restoring a particular item. Also you can order reproduction parts, which I've done, that appear to be perfect replacements to the untrained, unfocused eye. You take the word of "experts," who are sometimes only expert sales people. A case in point in the 1940 center chrome strip which can be replaced by a reproduction stainless steel strip. Rather than rechrome my original, which had a few pits, I decided to replace it, the same as I'd done with the belt moulding. Rechroming the pitted belt strips would cost maybe $1200, versus a stainless steel set for about $600 that I would only have to polish. But I noticed some differences in prepping this center bonnet strip. 1. The lips weren't wide enough to retain the original 1/4" washers. The original strip has much wider lips, as you can see in the photo. Ok, get 5/16" washers. 2. The width of the strip itself is too narrow for 5/16" washers. This combo required getting the larger washers, but filing opposite sides of each to make them fit. Finding a solution and making it work, that's a joyful thing...and what the hobby is all about, right? Working around a problem? 3. Then I noticed that the end of the replacement strip doesn't have an elongated taper like the original, but a sort of bulbous end more typical of a 50s GMC pickup (no hate letters, please) than a classic Super 8. 4. When I slipped it over the tail of the Goddess of Speed (not to sound too snobbish, but it is The Flying Lady or Goddess of Speed, not The Donut Chaser...The Donut Chaser, that's like calling San Francisco Frisco. Which reminds me of when I was in college and could get a normally priced haircut at the real Fairmont Hotel in San Francisco. To save parking on Nob Hill, where, besides the cost, the garage jockeys always got it stuck in first gear (I know about the soft versus hard metal changeover from 39 to 40), I used to pull in the lot of the Pacific Union Club across the street, where even the parking lot attendant is 4th generation San Francisco, and leave the Duchess there. But one time when I returned, the elderly attendant approached me and informed me that the parking lot was private, exclusively for the use of (very wealthy) members. He said normally he has non-member cars towed. He said it didn't matter, big Lincoln or Cadillac. To him, they were just a bunch of Deez-Dem-and-Dozers parking where they shouldn't. But he said a fine automobile like mine had to belong to someone who respected others' property and had just made a mistake. And learned from their mistakes.)...Deez-Dem-and-Dozers aside, when I slipped the stainless replacement on, it didn't quite match up. The original strip has a crease down the center that the replacement doesn't, yet another subtle difference that helps to make a car look like it races the wind, instead of galumphs. So now I think I'll have my original strip chromed. Otherwise that rounded, thin-lipped replacement will catch my eye every time like an incorrect air cleaner. Regardless, I'll now be noting who replaced their center strip with something that falls short of the mark and who restored their original one. All this because I'm becoming like a born-again Christian or a reformed smoker. Intolerant. Attach file: (24.77 KB)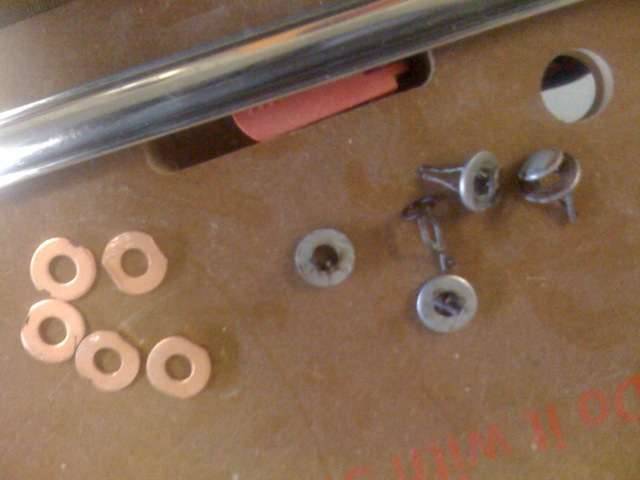 (26.09 KB) (26.09 KB)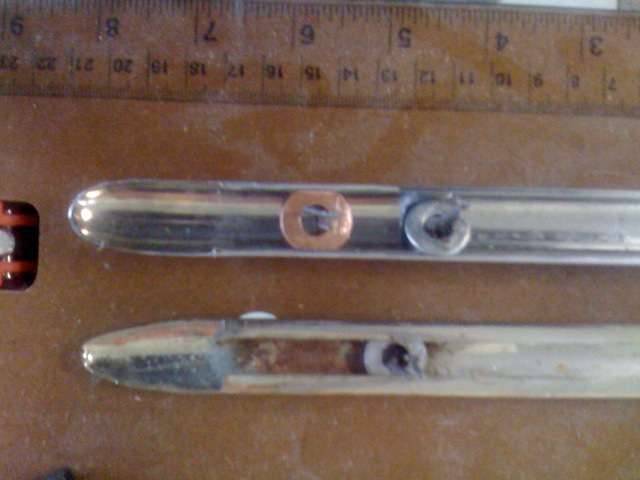 (21.18 KB) (21.18 KB)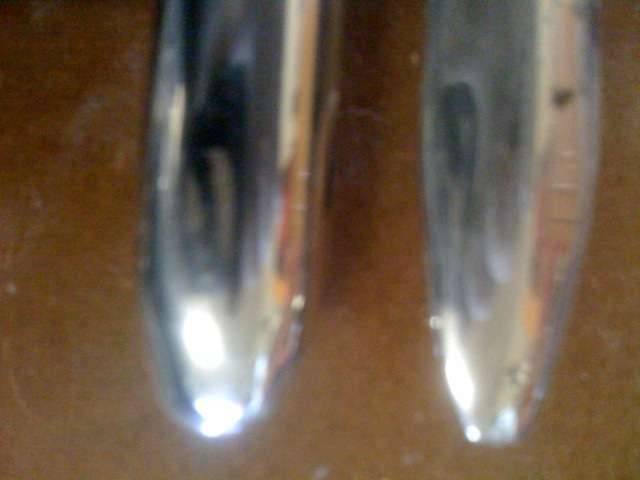
Posted on: 2010/11/9 20:20
|
|||
|
||||
|
Re: Replacing 1940 Headlight Rim Rubber Gasket
|
||||
|---|---|---|---|---|
|
Home away from home
|
Thanks much for the advice. I will soak until the UPS guy shows up with my backordered tool, before I set to pickin.
Posted on: 2010/11/9 17:00
|
|||
|
||||
|
Replacing 1940 Headlight Rim Rubber Gasket
|
||||
|---|---|---|---|---|
|
Home away from home
|
If I continue doing what I'm doing, I'll wreck my headlight rims.
I called Steele Rubber, where I bought the replacement gaskets, to find out if they could recommend a tool to open the edge of the lip that holds the rubber gasket in place around the inside of the headlight rim. They suggested the all-purpose tool shown below. I ordered one, but I wonder if anyone else has tackled this problem and what the solution is. What tools do you need? How you open it without wrecking it. There's just no end to the knowledge you need to restore a Packard. Well, there is an end, but I'd like to restore the Duchess before I see it. Joe Attach file: (43.48 KB)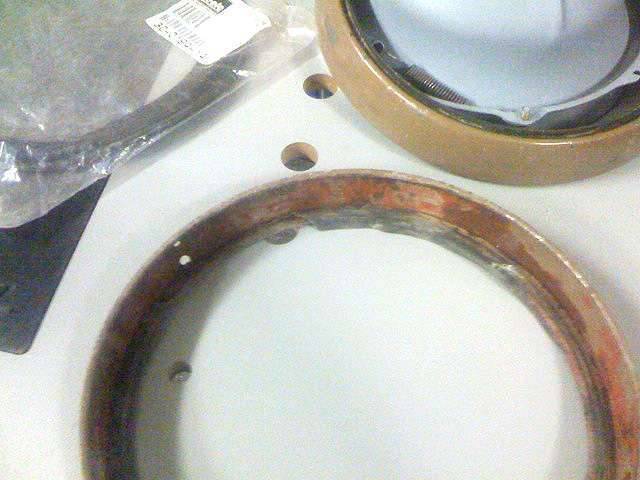 (31.97 KB) (31.97 KB)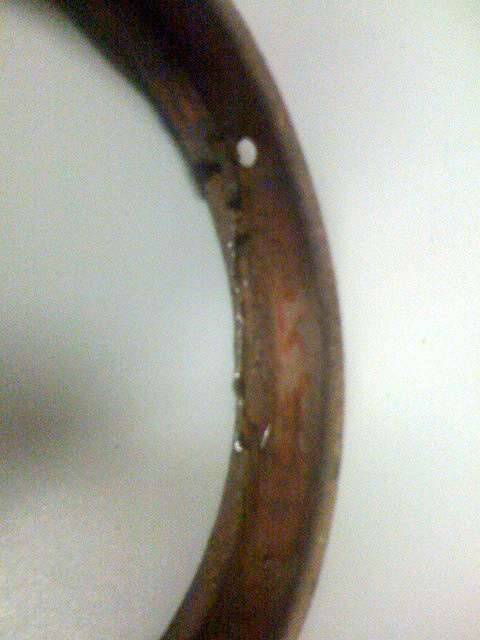 (18.91 KB) (18.91 KB)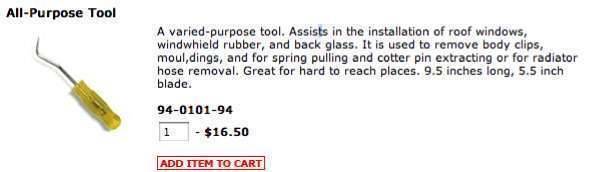
Posted on: 2010/11/8 20:06
|
|||
|
||||
|
Re: The Duchess Project: 1940 Super 8 Convertible Sedan
|
||||
|---|---|---|---|---|
|
Home away from home
|
I sent the Duchess to a DIY place near by, but wasn't able to devote my entire Saturdays to going there, which was about the only way to make it worthwhile. I went several times over a couple of years, but couldn't seem to accomplish much myself. I used the paint booth and a small sand-blasting box.
I couldn't decide whether to add the trunk rack or not. The 40s are really 30s cars. A trunk rack doesn't look out of place, but I wonder how many trunk racks were sold with 1940 models. A question for Jim Hollingsworth no doubt. It comes down to value. A trunk rack helps to sell. I'm going to keep it for now but not put it on the car right away. I primed it there. The parts have been chromed. In the end, I paid the owner to work on removing and replacing the rusted areas with new metal and parts, which involved welding. The trunk was rusted through on the sides towards the back where the brackets to the frame are located. The rear end of the body was pretty loose from the frame. When the frame moved up and down, it stretched the holes in the body where the bumper brackets come out, so that was something else to fix. The floor of the trunk had been replaced in 1971, but just the center section. Once we poked around in there, it was a mess. It's fixed now and solid as a rock with new brackets to the frame and body work done. That was last year. This summer I learned about the trunk pans from Classic 2 Current Fabrication. I sent the dimensions to see if the 120 pans fit the 160s. I've heard they do, but they couldn't confirm and I guess the dimensions I sent were inconclusive because they only offered to make one. The pans do not include the supports etc, so I think it would come down to cosmetics you wouldn't see and structurally it is sound. But I do wish I'd known about the pans and whether they fit the 160s. When that work was completed, I had her moved to a wood shop, where the wooden box for the convertible top was being made, but hadn't been fitted to the car. I talked to a restorer, but other projects delayed starting on my car. The wood shop was part of a tech shop where collaborative craftspeople in metal and wood materials share a building, teach classes, work on projects. It just wasn't financially able to cover costs, so I got a call that everything had to be moved out and to collect my car. So the Duchess came home and my dream of driving to my 50th high school reunion ended. I went to the reunion and others asked after the car and seemed pleased that I still owned it. So it became not as much of a disappointment. I was disgruntled for a month. The first restorer I talked to, didn't return my emails or calls. I started reading back issues of The Cormorant and PI magazines I had only flipped through. I actually read each one cover to cover from 2000 forward. I read about Tom Moretti who restores his own cars and wins at Pebble Beach. It was like reading The Lives of the Saints for me. I finally decided to blame no one but myself for the car not being finished. I wasn't much of a project manager. That's when I decided to work on the Duchess every evening I had free, right at home. I bought a gun for small parts and a compressor. I bought some primer and I was off to the races. I had taken one side of the top apart and sent the parts for chroming. They were finished, $500 worth, so I started cleaning the painted parts. In the 70s, when this interior top chrome was pitted and pocked, I rubbed it with steel wool and painted it black by hand. It looked a lot better. I was on a roll, so I painted the rest of the parts black as well. So now I had the pleasure of removing all that paint with paint strip and wire brushes. I couldn't find a formula for the brownish color used for so many parts on the inside of the car. The only part I had left with that color was the steering column. Since it had to be painted, too, I pulled it out of the car. I'm sure there were a few smirks when I hefted up on the counter at the industrial paint store. Like the times, just for laffs, I used to fly with a horse shoe in my carry-on. "Gladys, Come over here and take a look at this in the monitor. Could that be considered a weapon?" "On the hind hooves of a mule it might be." I'd say out loud, "That horse shoe has to fly with me for good luck on the entire flight." They used to let me take it, like a security blanket, but the TSA finally got their act together and now I don't even try. Anyway they matched the color to my satisfaction. I primed and filled and sanded and primed and sanded and painted. Then I drilled holes in the tongues that protrude forward from the wooden box, mounted the bracket, and started attaching parts skyward. Gee, I look at those restored parts and am very proud. I finally understood the other part of this hobby and how satisfying it can be. Attach file: (43.89 KB)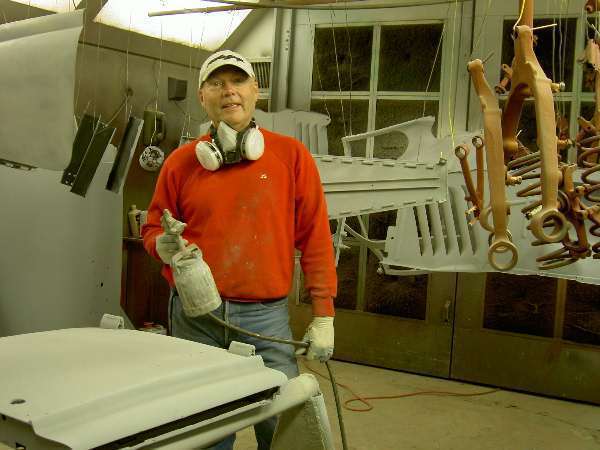  (258.83 KB) (258.83 KB)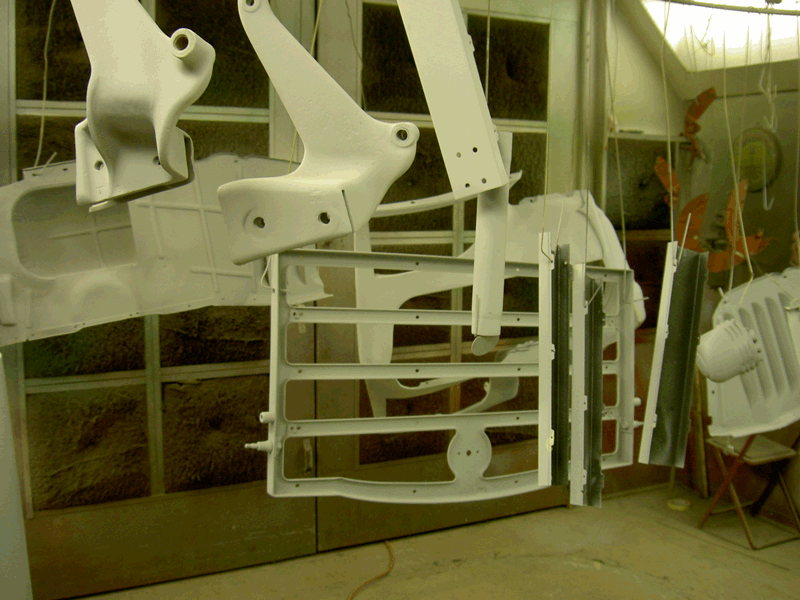 (25.13 KB) (25.13 KB) (351.06 KB) (351.06 KB)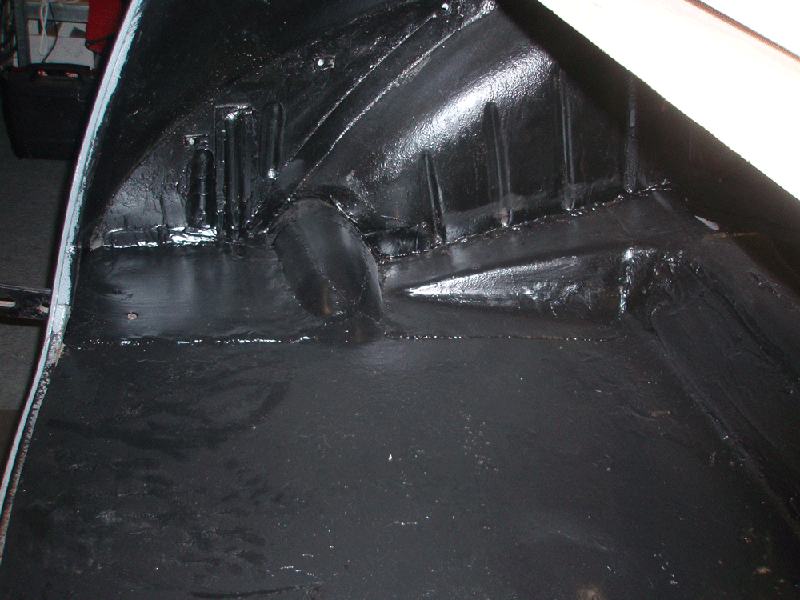 (53.40 KB) (53.40 KB)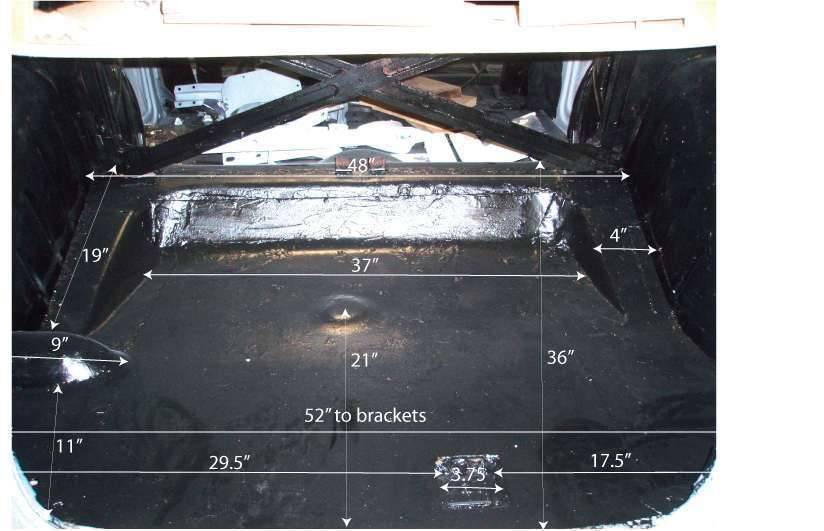 (60.55 KB) (60.55 KB)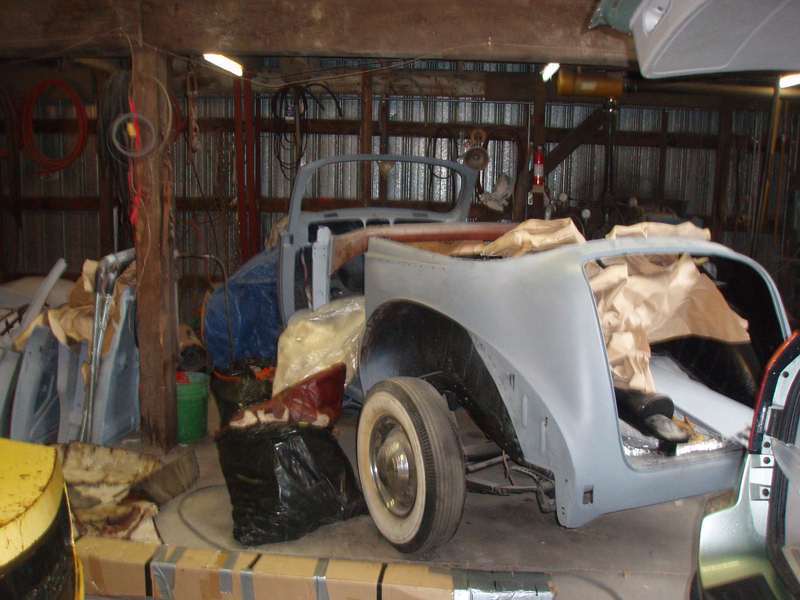 (62.93 KB) (62.93 KB)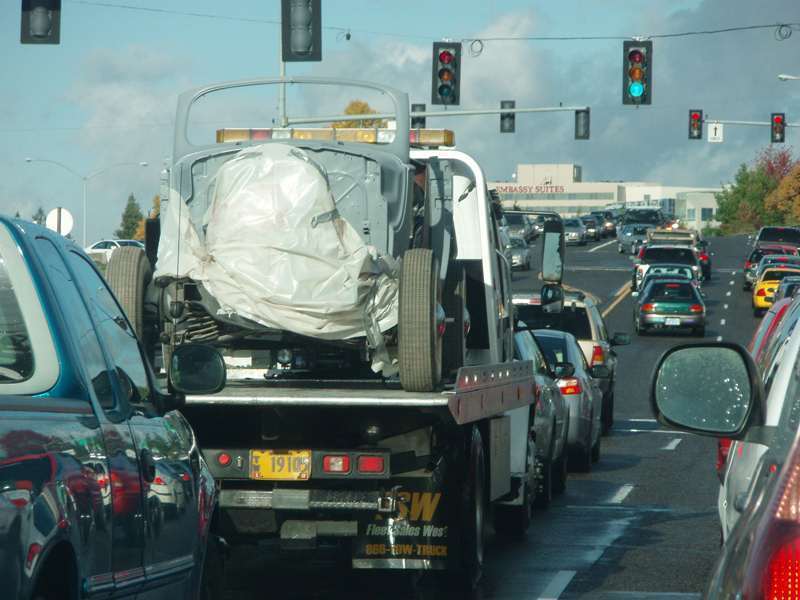 (206.93 KB) (206.93 KB)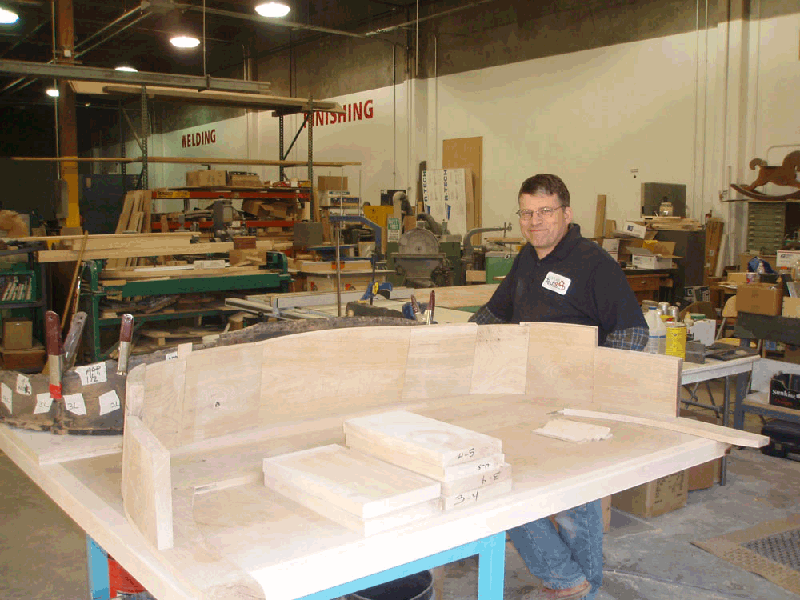 (58.77 KB) (58.77 KB)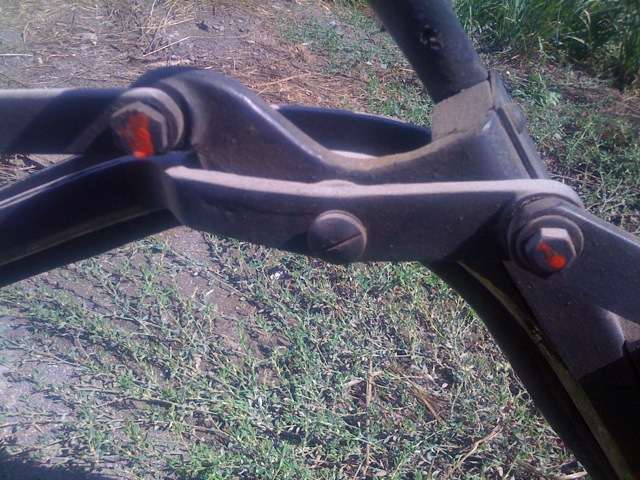 (24.06 KB) (24.06 KB)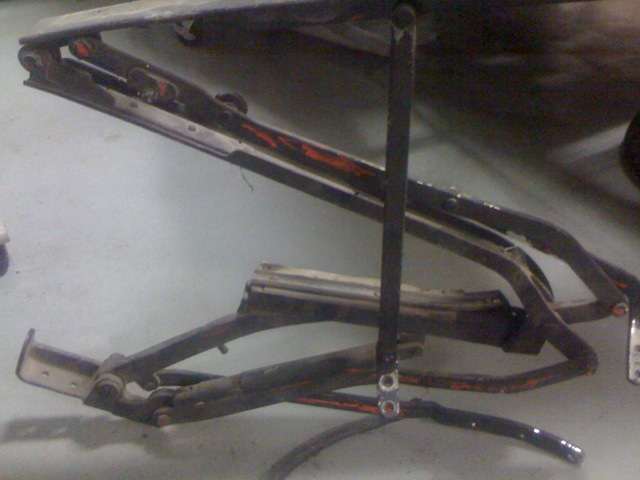 (34.15 KB) (34.15 KB) (24.24 KB) (24.24 KB) (35.12 KB) (35.12 KB) (54.35 KB) (54.35 KB)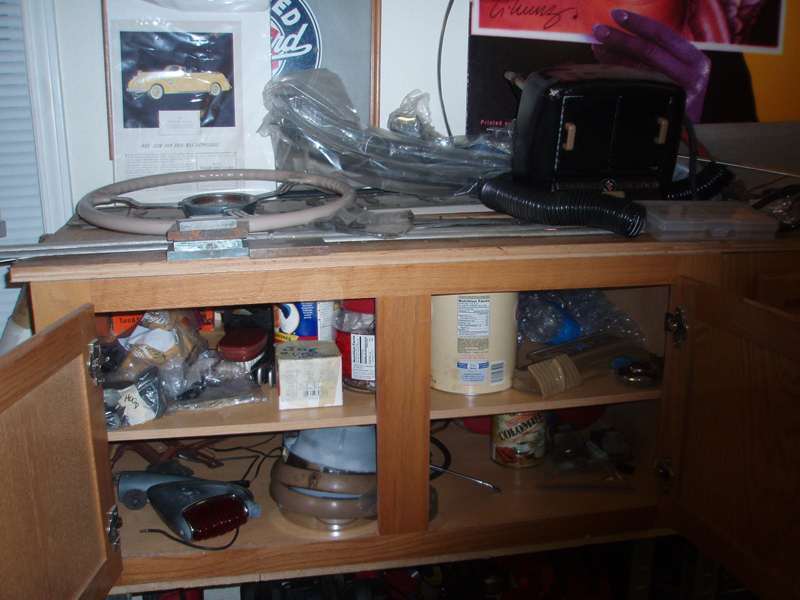 (35.84 KB) (35.84 KB)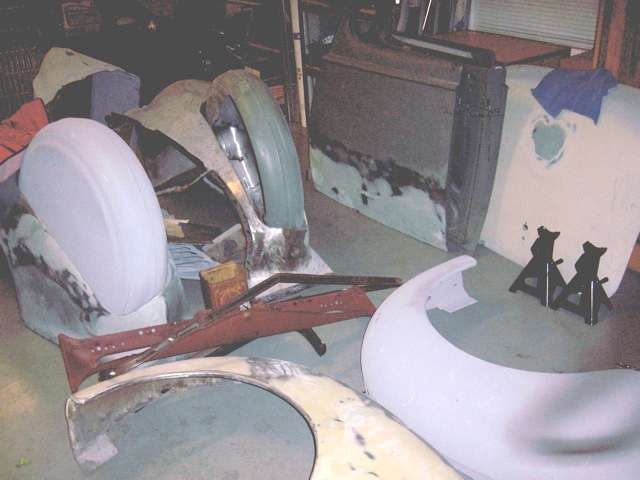
Posted on: 2010/11/4 16:58
|
|||
|
||||
|
Re: Escutcheons
|
||||
|---|---|---|---|---|
|
Home away from home
|
Tom
Several years ago, Jim Hollingsworth gave me this name: SM Troosh (805) 528-4594 1831 8th St,Los Osos, CA 93402-2709 It seems to me he does this. He is a one-off, a character, but very nice guy. I just couldn't afford to have him do my entire 40 dash in the marbleized brown plastic. I vaguely remember that he is a specialist and does Pebble Beach cars. If you call him, I'd be very interested in what transpires. Plastic was "in", but not great. Probably not UV resistant, etc. All that remained of mine, in a convertible, was the gear shift knob (oiled daily from my shifting), vent knob, and a couple of shaded control knobs. The dash plastic itself just corroded away and did the escutcheons. I switched over to a sort of caramel color. David E Miller's (Orange, CA) 1940 Darrin 2-dr conv, featured in Packards International magazine Winter 2005, has mottled plastic knobs, but not the same as Packard produced then. Possibly Darrin designed and made their own, as they did with several items on those customs. It is a beautiful burled walnut look. It made me recall as kids we used to float drops of different colors of enamel paint on water in a jar or can. You can create a pretty interesting design. Then, with the paint forming a wet skin on the top of the water, you dip something dead center straight down. The skin coats the item and voila! your item has a beautiful marbleized finish when you withdraw it. Maybe some enterprising person could figure out how to do whole dashboards that way. And with the clear coated plastic paints, maybe other parts could be made that way too, but the primer may melt the plastic. Worth an experiment maybe. Joe Attach file: (23.06 KB)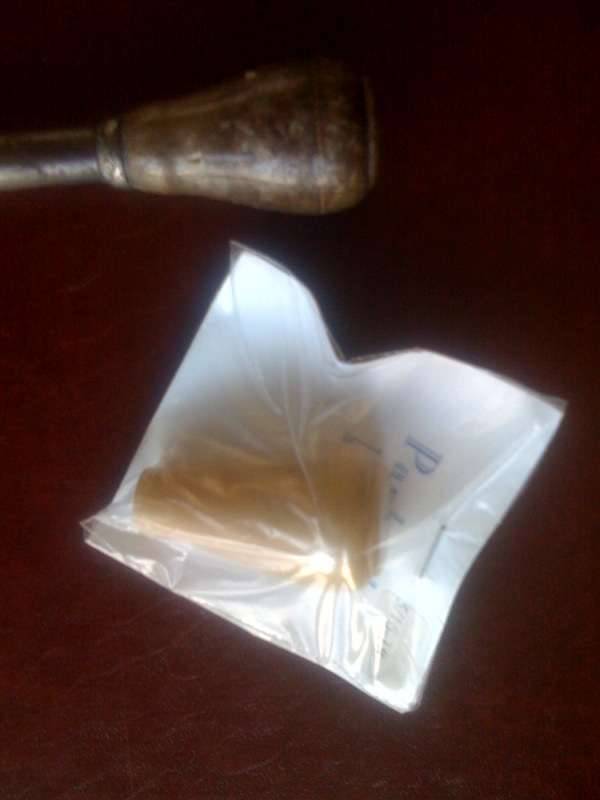
Posted on: 2010/10/31 11:38
|
|||
|
||||


