|
22nd/23rd Series License Light Lens
|
||||
|---|---|---|---|---|
|
Just can't stay away
|
Hey all! Writing to see if anyone has a NOS or at least good condition (white and not cracked) license light lens for a 22nd or 23rd series. As you can see, mine is a little worse for wear. Kanter apparently used to sell repops, but not anymore. Tuscon didn't have any when I last checked. MM might, but I figured I would check here first. Thanks in advance!
Attach file:  20240207_101905.jpg (1,199.67 KB) 20240207_101905.jpg (1,199.67 KB)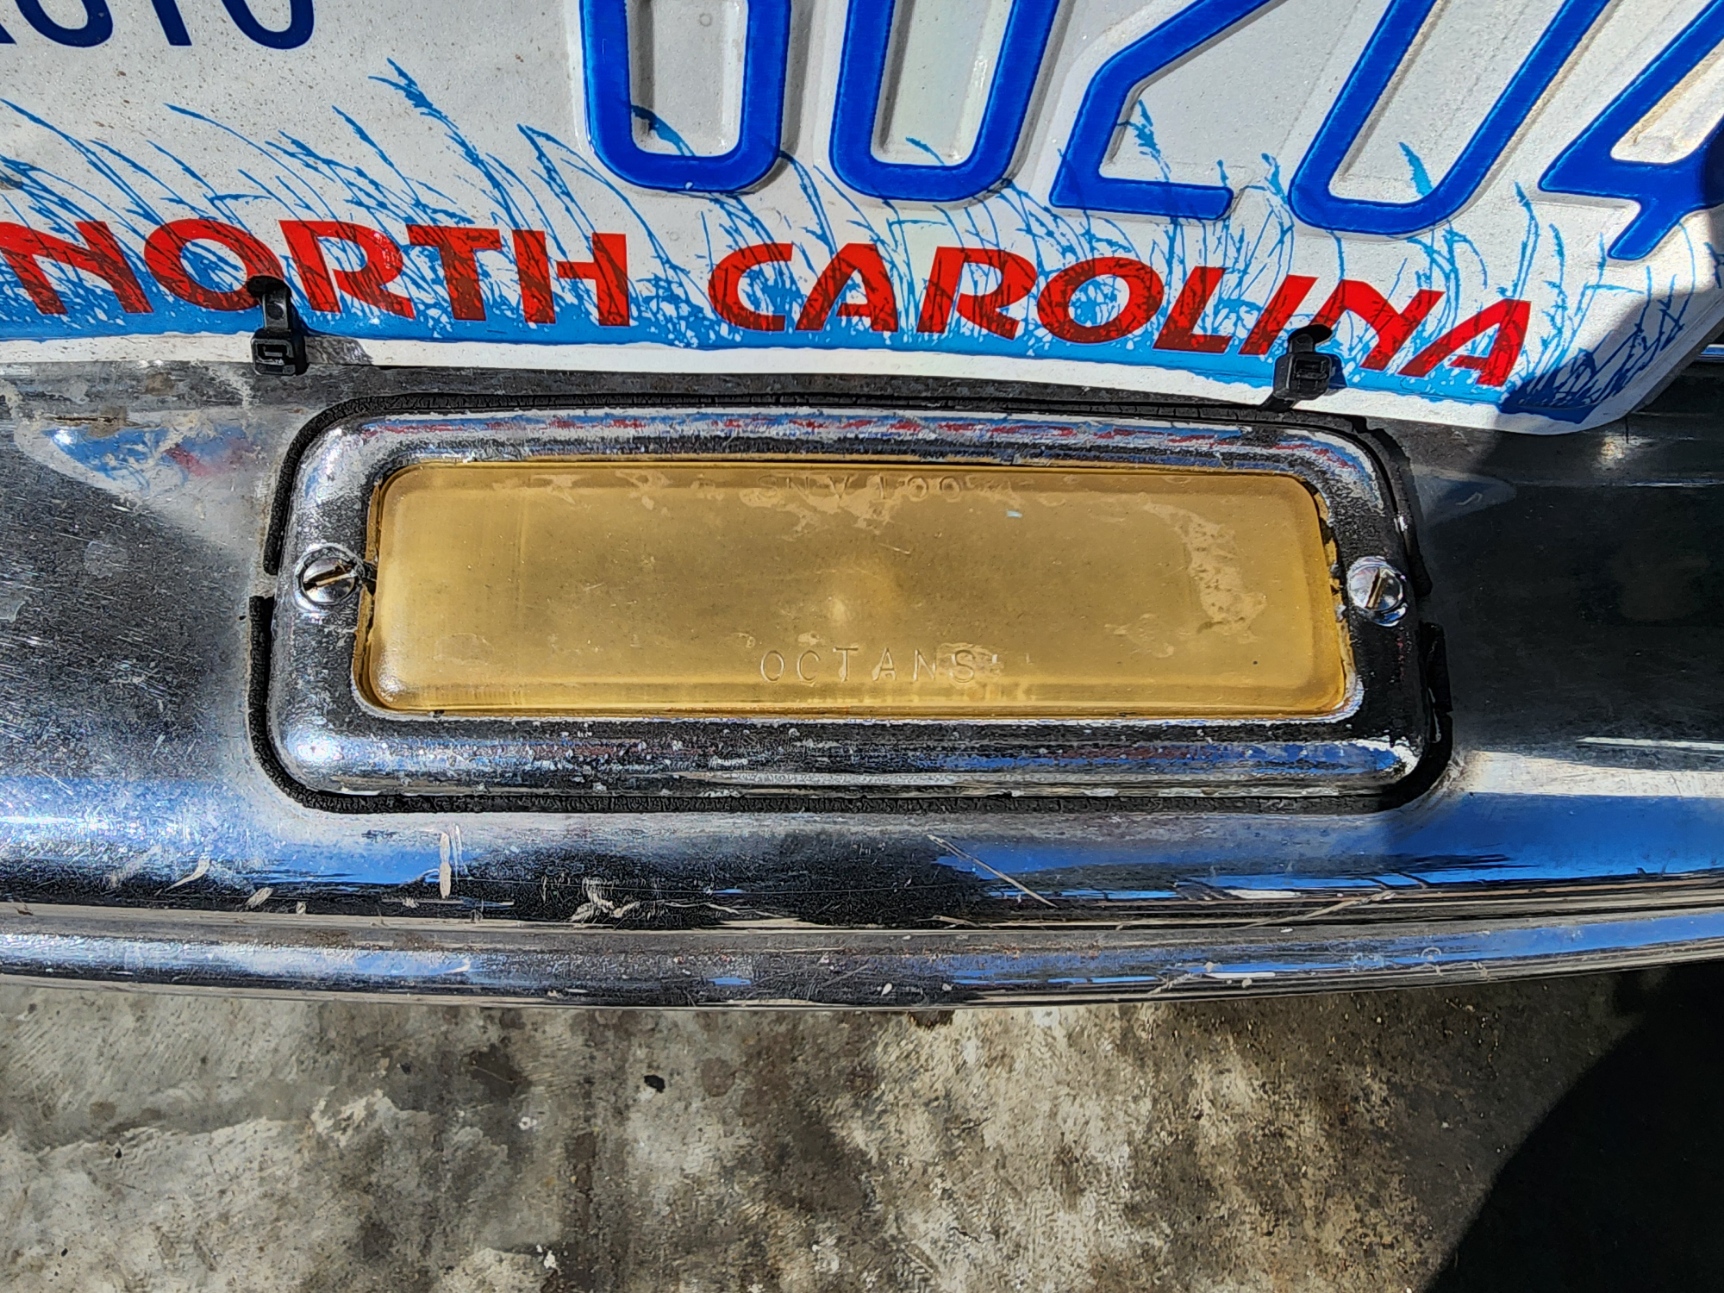
Posted on: 2/19 11:01
|
|||
|
||||
|
Re: Taillight Bulbs - 1158??
|
||||
|---|---|---|---|---|
|
Just can't stay away
|
LEDLight.com. I wasn't sure what to expect, but I LOVE the amber LEDs. They are SO bright, and the turn signal click isn't all that different than the original (definitely more consistent, similar timbre). They really work great. All the more perplexing as to why the 1158s didn't do anything.
Quick note on an edit to this: the website is LEDLight.com (no plural).
Posted on: 2/16 20:56
|
|||
|
||||
|
Taillight Bulbs - 1158??
|
||||
|---|---|---|---|---|
|
Just can't stay away
|
Hey all... silly question here. Been slowly re-working a lot of my wiring (many thanks to Howard for the wiring chart) on my '50, which remains 6v positive ground. One of the silly trivial things I thought I would do is update some of the exterior lights to LEDs. I bought amber-colored 1154 bulbs for the signal flasher/parking lights along with 6v flasher for LEDs. These are outstanding and work great.
The curiosity is the 1158s. This is of course what the manual defines as the taillight bulb. On top of not lighting at all, the bayonets on the LEDs were parallel, while the sockets in my 23rd require offset bayonets. I've also received incandescent 1158s that are also parallel. What am I missing here? Do 1158s come with different bayonet setups, should I be using a different bulb. The incandescents I have in there right now work well, but they are, of course, not labeled beyond their voltage, so I'm not certain of what they are (I THOUGHT I remembered putting 1158s in there... maybe not?) Definitely missing something. Thanks, all. Attach file: 20240216_184955.jpg (1,386.97 KB)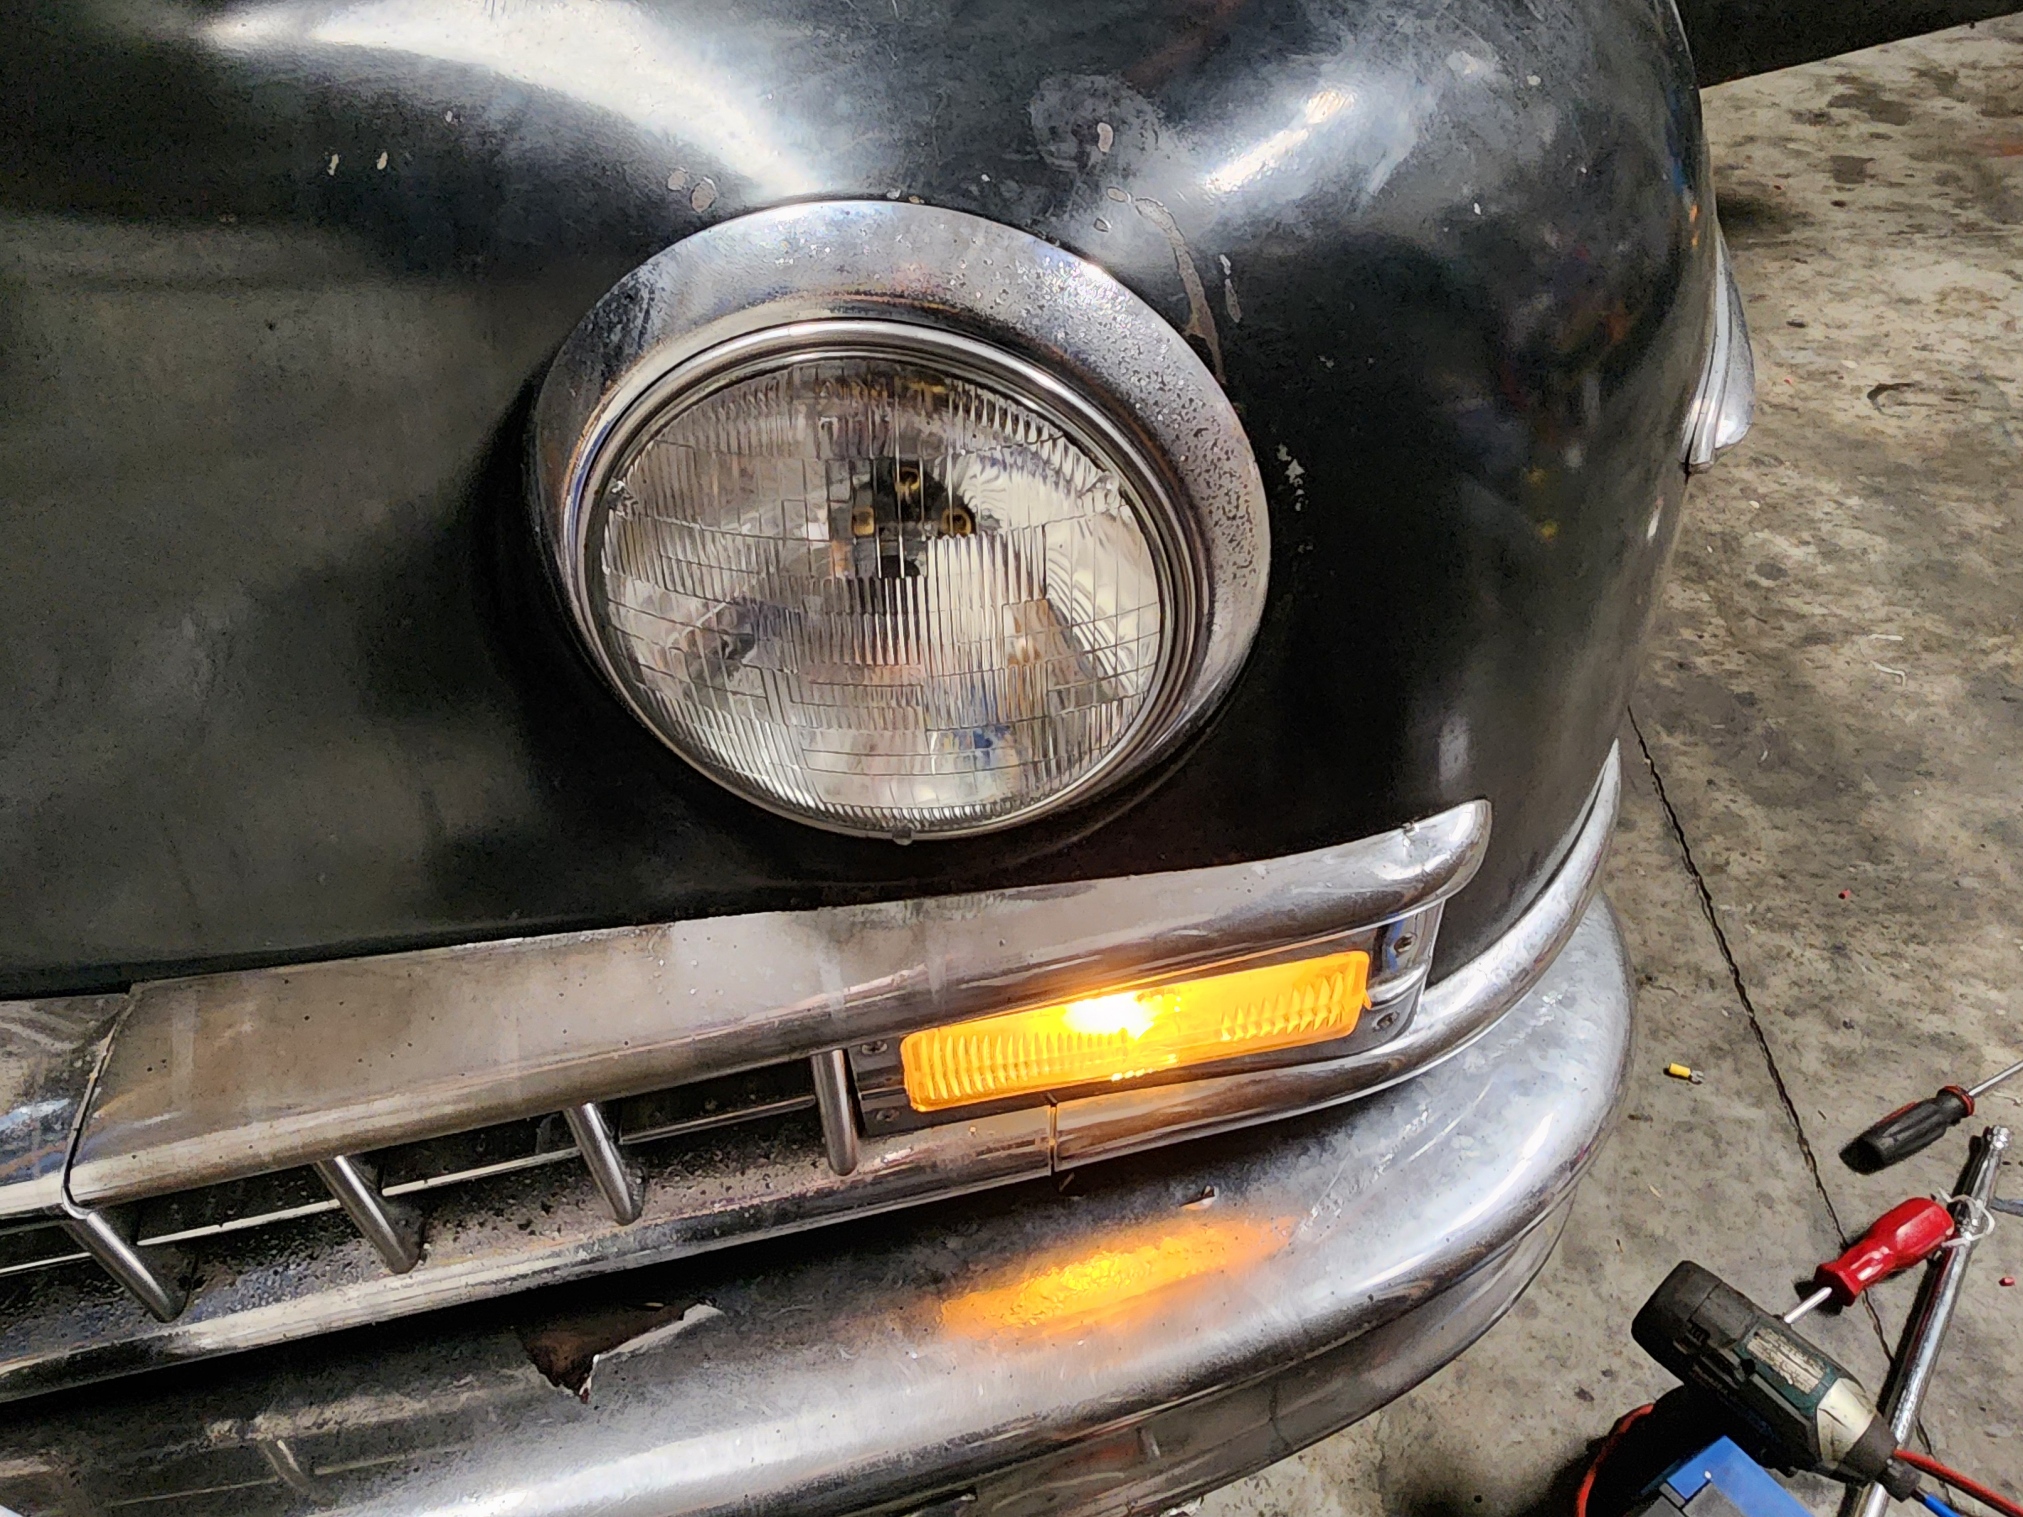 20240216_192909.jpg (1,202.89 KB) 20240216_192909.jpg (1,202.89 KB)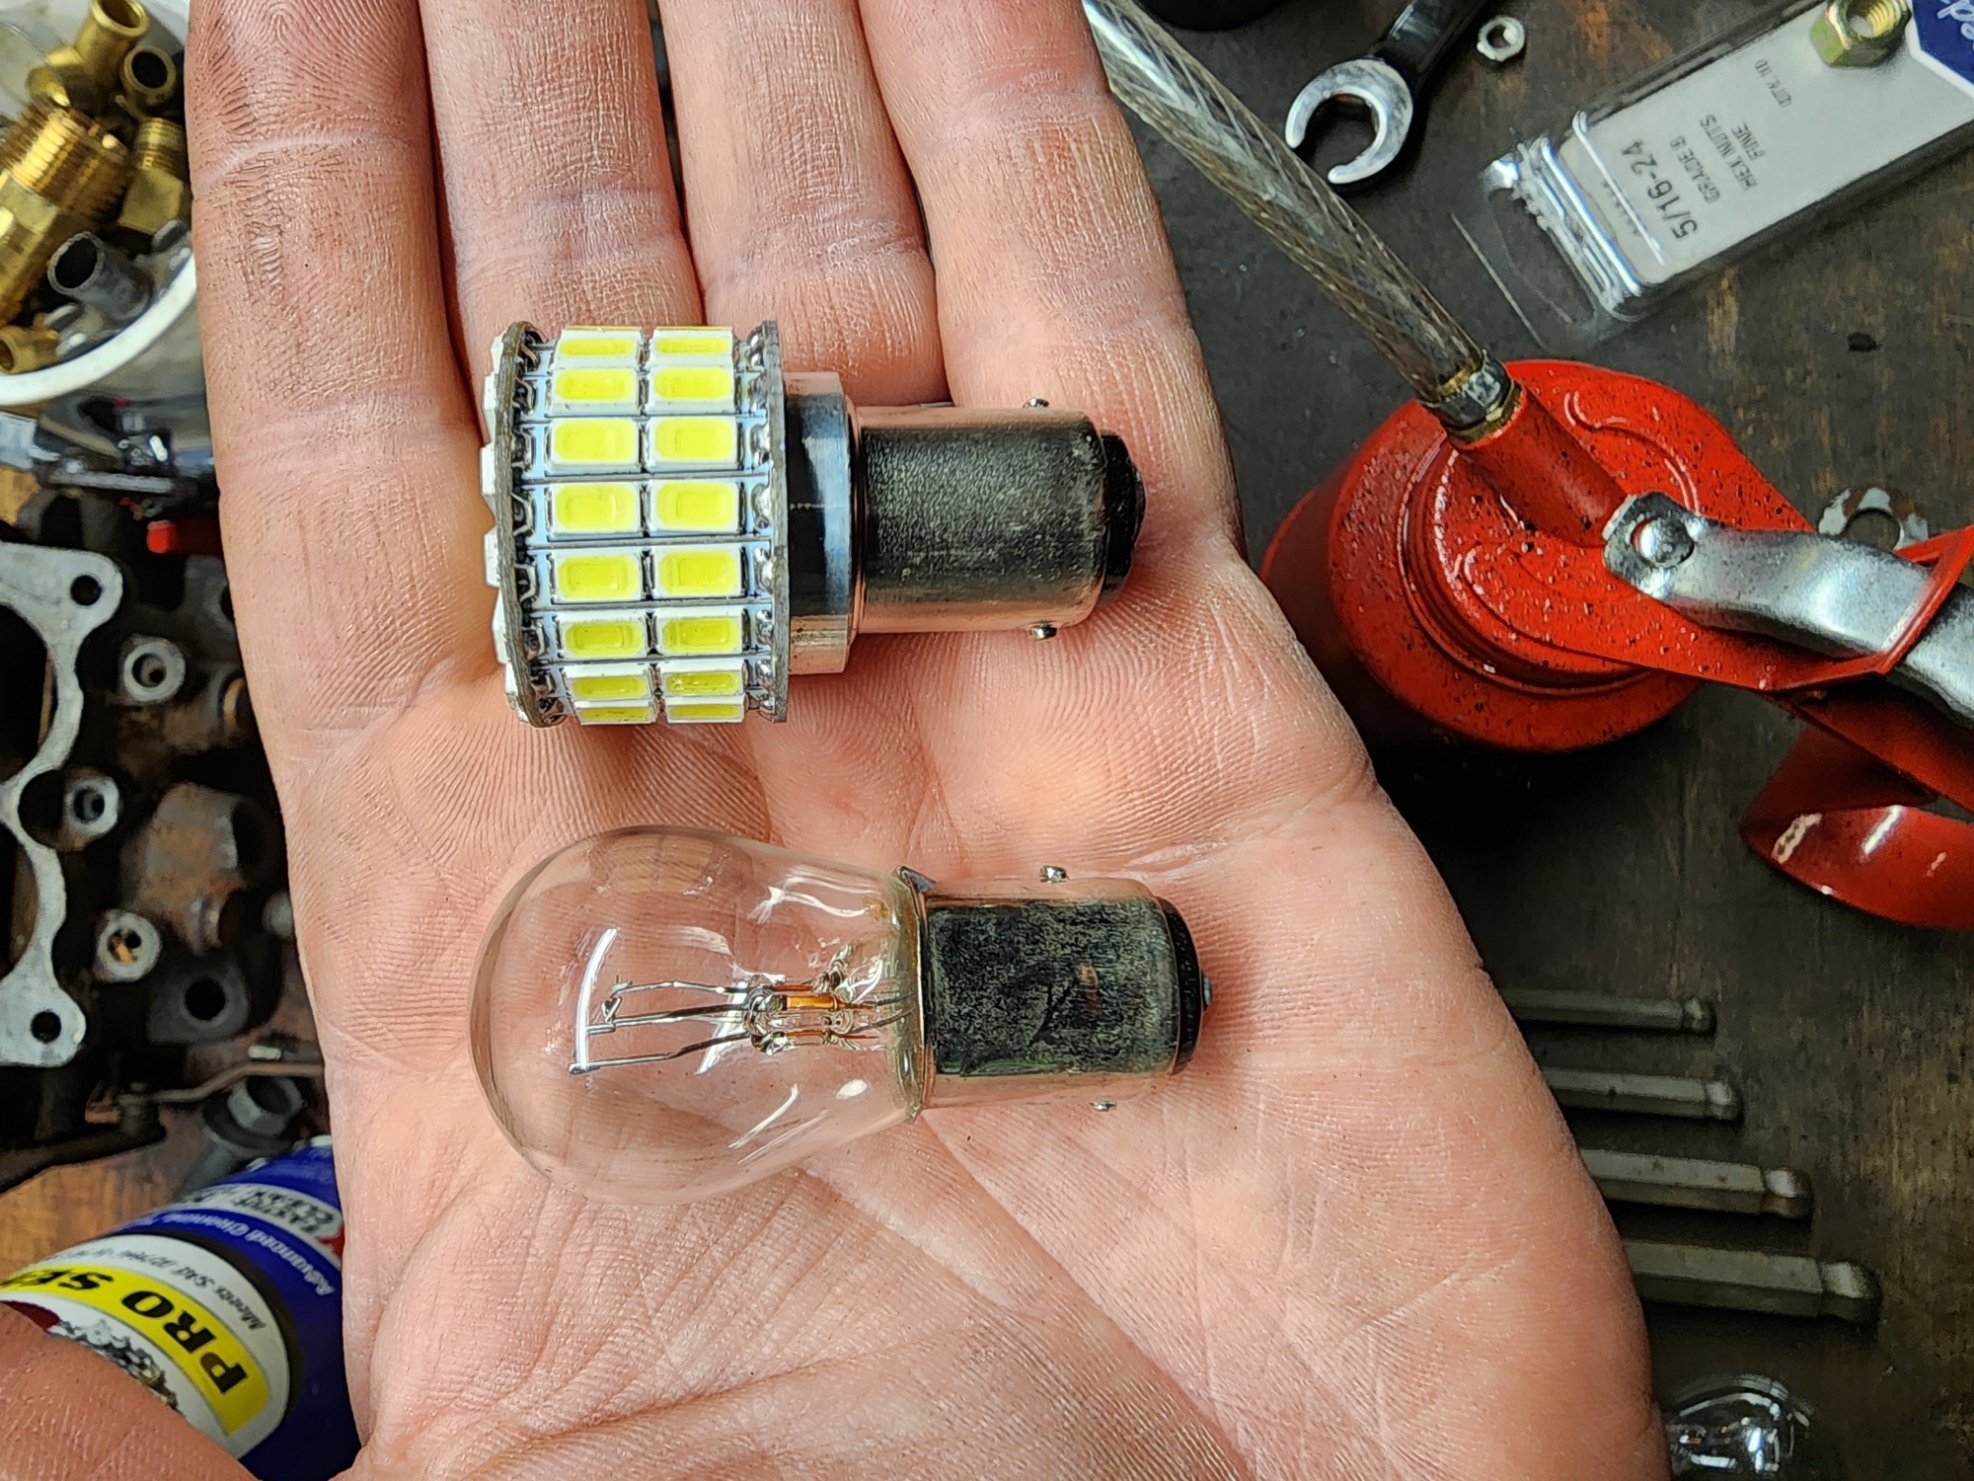
Posted on: 2/16 20:28
|
|||
|
||||
|
Re: Generator Terminals and Wire Gauges
|
||||
|---|---|---|---|---|
|
Just can't stay away
|
Howard - wow, this is amazing. I have been looking for this sort of chart for ages, just apparently in all the wrong places.
And no worries on the junction block - they're sold on PackardParts.org for $26. That seemed fair to me, so I grabbed one. Thank you again!
Posted on: 2/15 11:44
|
|||
|
||||
|
Generator Terminals and Wire Gauges
|
||||
|---|---|---|---|---|
|
Just can't stay away
|
Hey, all. Just looking for confirmation on a couple of things. Looking to rewire my generator/regulator connections. Autolitle setup on a 23rd series here.
On the gen, confirming that the bottom, i.e. larger terminal is the armature, and top, i.e. smaller terminal is the field. For the wires, wanted to confirm proper gauges: Armature - 10 gauge Field - 12 gauge Gen ground to headlight junction block, and block to regulator - 12 gauge Ammeter to stater terminal - 10 gauge? I'm also going to be replacing the junction block itself. Pretty crusty. Please set me straight if I'm off on any of this. Thank you! Attach file: 20240215_092946.jpg (2,707.37 KB)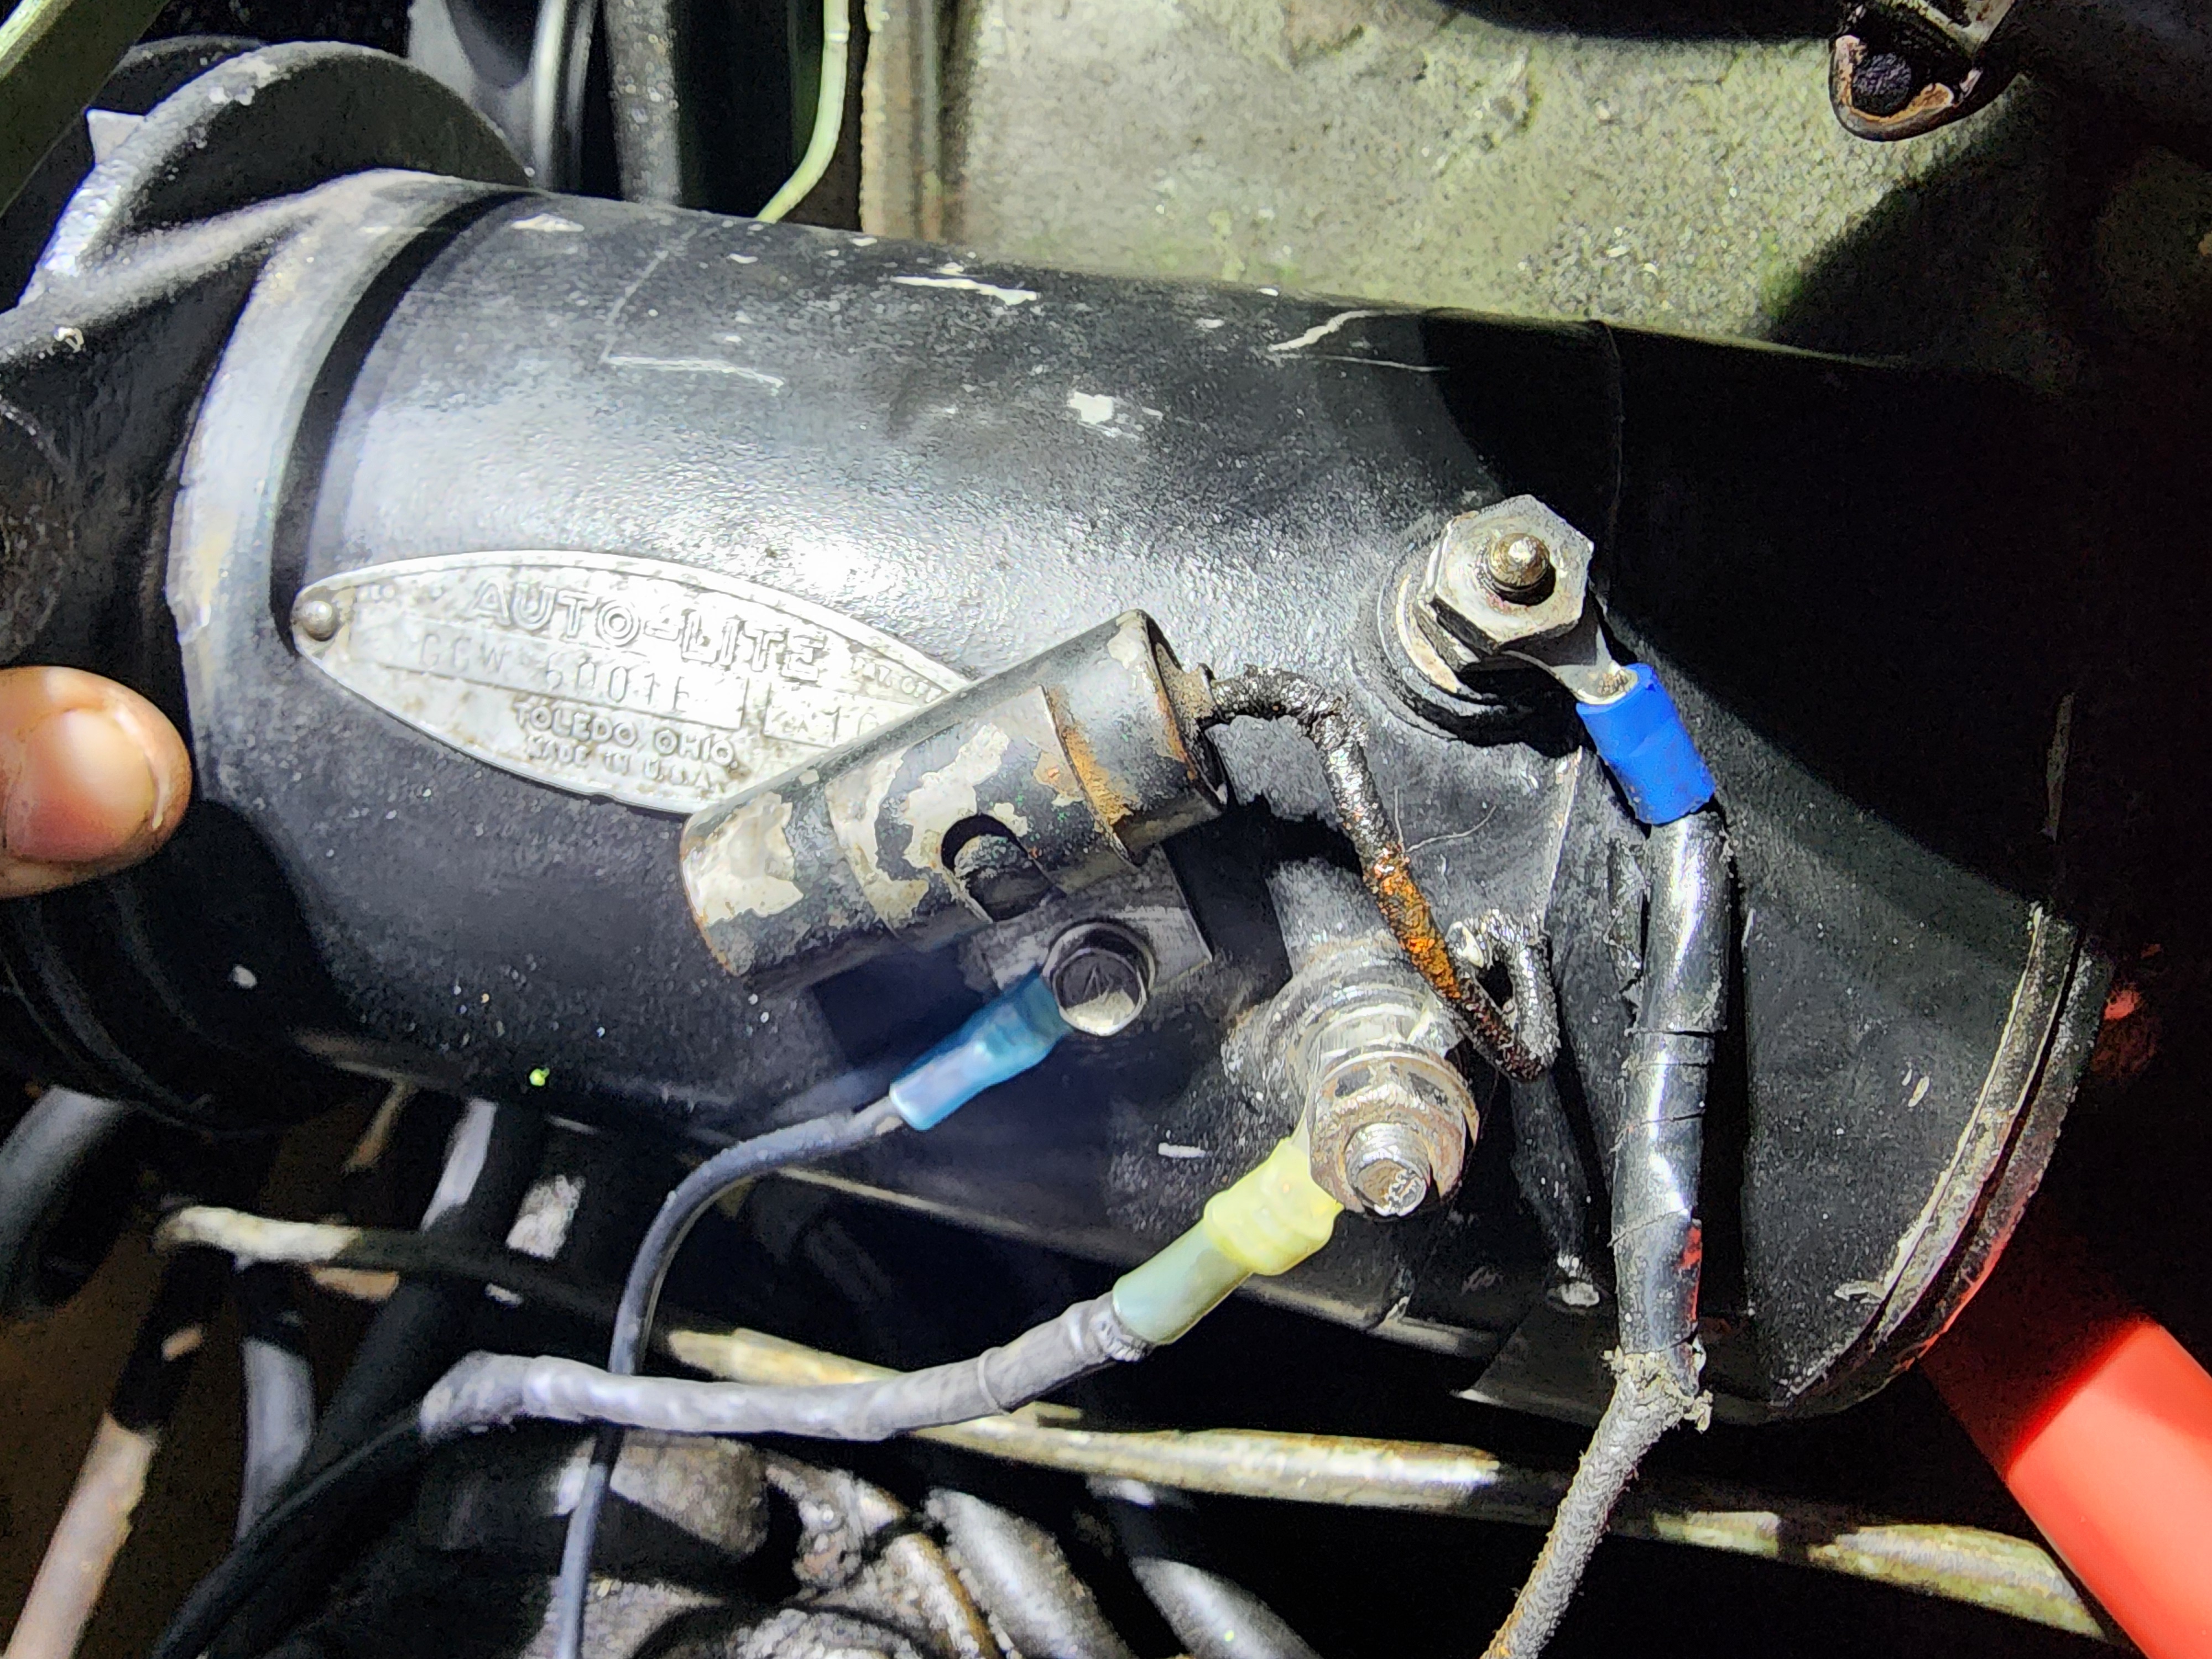
Posted on: 2/15 9:47
|
|||
|
||||
|
Re: '50 Ultramatic Trans Cooler Lines
|
||||
|---|---|---|---|---|
|
Just can't stay away
|
Hey all, quick update.
I tested Howard's hypothesis and confirmed his assumption. I followed what we were assuming was the feed line and disconnected what we assumed was the return at the cooler. I then turned the engine over (the head is off at the moment, so it spins relatively quickly) to see if any fluid would pump out - confirmed that it did. Relative to my picture: - the top connection (i.e. the inboard connection) is the supply - the bottom connection (i.e. outboard connection) is the return I did dive a little further into past posts discussing cooling, and running the cooler in sequence has been brought up as a positive addition for the transmission. One user did mention that they experienced a failure of their Ultramatic after having cut out the OE cooler altogether for an external air cooled unit. In that scenario, the user sat in a traffic jam for an extended period of time, the transmission overheated and required a complete rebuild.
Posted on: 1/24 14:26
|
|||
|
||||
|
Re: '50 Ultramatic Trans Cooler Lines
|
||||
|---|---|---|---|---|
|
Just can't stay away
|
Thanks, guys! So, my initial thinking was that I was going to take the OE cooler out of the circuit and just run the external in order to eliminate the risk of the trans and rad fluid mixing at any point in the future. The directions on the cooler I bought suggested running the internal and external cooler in circuit because it "provides maximum cooling efficiency." The directions suggest that running the external cooler alone should be done only when replacing the OE cooler is cost prohibitive.
I would say that I don't get the sense that my transmission is overheating, more just looking at options for "cheap insurance" for the transmission and cooling system. I hadn't considered the two together might be TOO MUCH cooling. Folks who have suggested the external cooler approach have just provided the perspective that it's a better option both for eliminating a potential issue with mixing fluids down the road and cooling the transmission. That said, I didn't really do a deep dive into whether the transmissions are prone to overheating (or just running hotter than they should). Not an engineer here - college band director lol, and just trying to figure out as I go.
Posted on: 1/24 11:42
|
|||
|
||||
|
'50 Ultramatic Trans Cooler Lines
|
||||
|---|---|---|---|---|
|
Just can't stay away
|
Hey gang - 1950 Packard model 2302 w/ Ultramatic here, still running the stock setup for transmission fluid cooling (internal, bottom of the rad). I stumbled on the external trans cooler kit introduced in the Service Counselor No. 26, vol. 6, though most I've talked to about it steered me way from pursuing this kit. Instead, I've been driven toward simply installing an aftermarket cooler in front of the rad. Seems like a cheap, easy, and positive thing to do for the transmission, so I figured why not.
In reading the installation instructions for the external cooler, it mentions running the external cooler in circuit with the OE cooler. I figured I would try to run it this way first - I'm not having any issues with my current cooler leaking into the rad, and cutting it out of the circuit would be easy to do if needed in the future. I would expect you'd want the fluid to go through the internal cooler, then the external cooler, then return to the trans. After perusing the forum, parts book, and Ultramatic service manual, I can't seem to find which line is the supply and which is the return. The picture is the view from above looking from driver's side fender. I recently departed from the OE lines recently due to some leaking, hence the rubber lines. Feel free to set me straight if my thinking is off on the approach here. Thanks, everyone! Attach file: 20240123_155046.jpg (1,481.50 KB)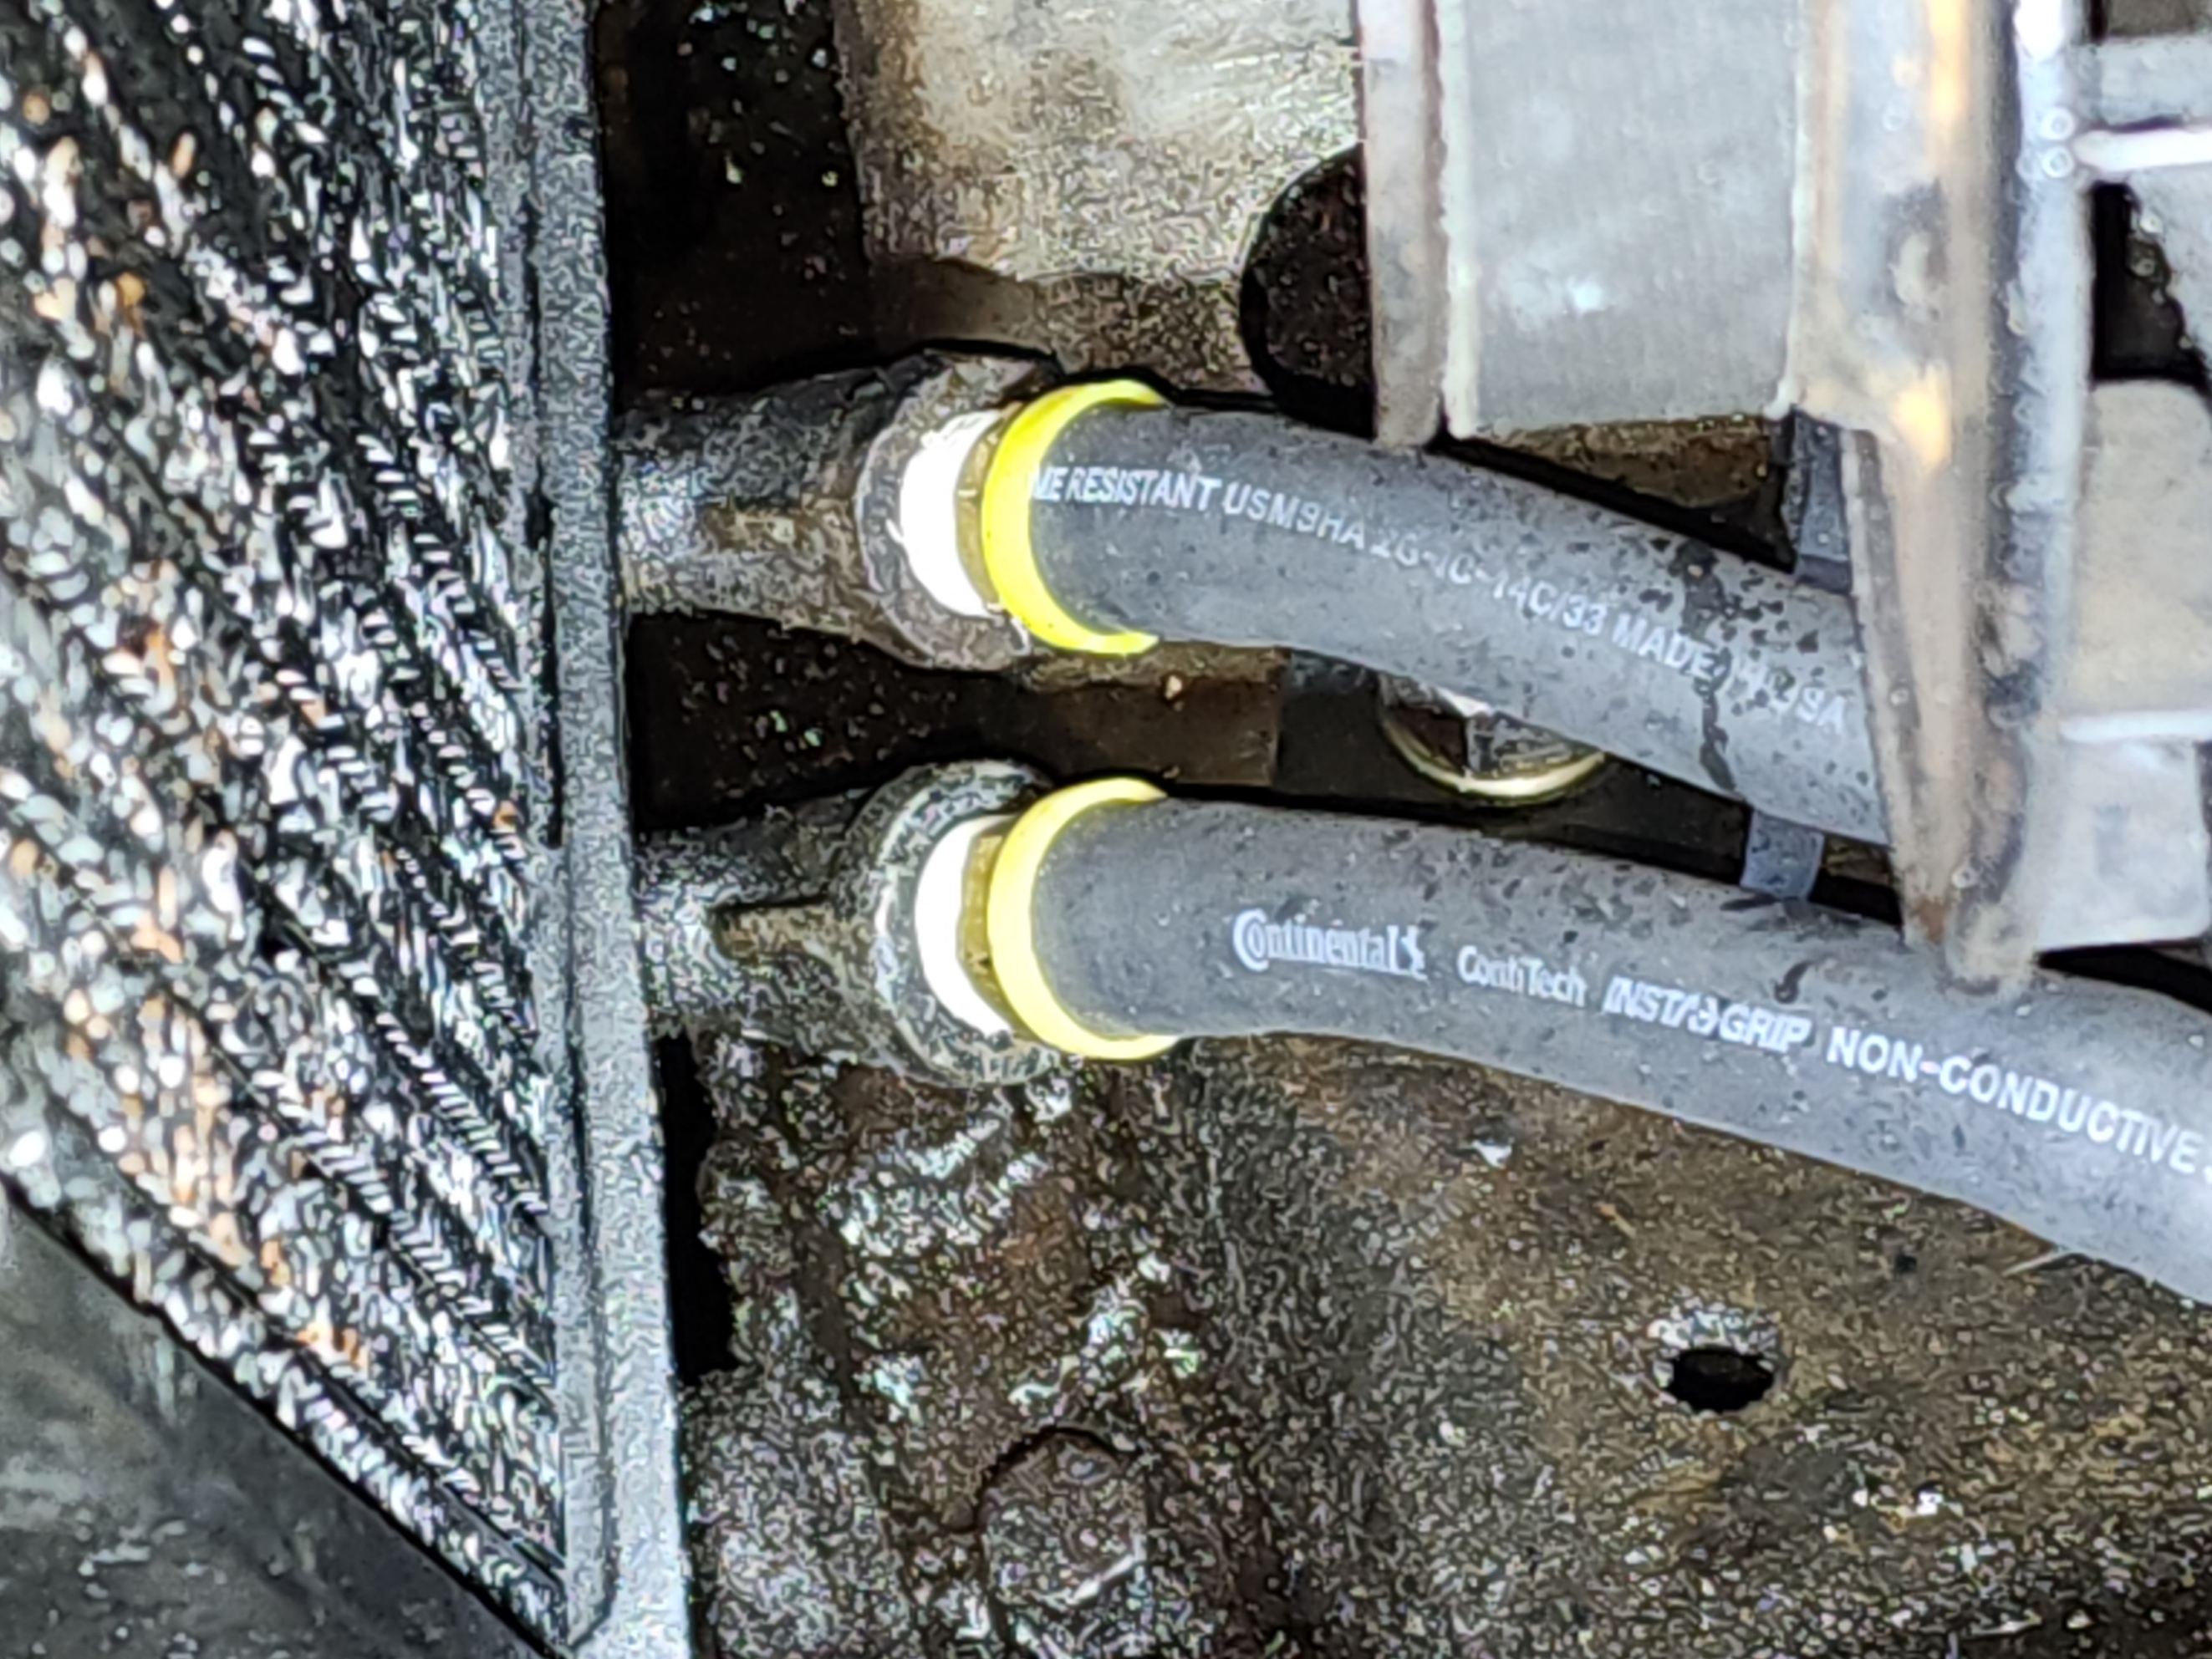
Posted on: 1/23 21:25
|
|||
|
||||
|
Re: Hydraulic Lifter Tick
|
||||
|---|---|---|---|---|
|
Just can't stay away
|
Haha, well, who knows what sort of nightmare I'll run into along the way. But I kept after the offending valve and finally got it. I'll wait for the beefier tool to get the rest, but here's how it all checks out.
- original valves still in the engine, they clean up pretty nicely. Not tons and tons of carbon. Very little play in the valve guide - I suspect the lifter plunger was indeed just dirty, and the check ball wasn't, well, checking. Looking forward to cleaning all these. - not a lot of pitting around the valves Productive night! Attach file: 20240114_002930.jpg (2,864.91 KB)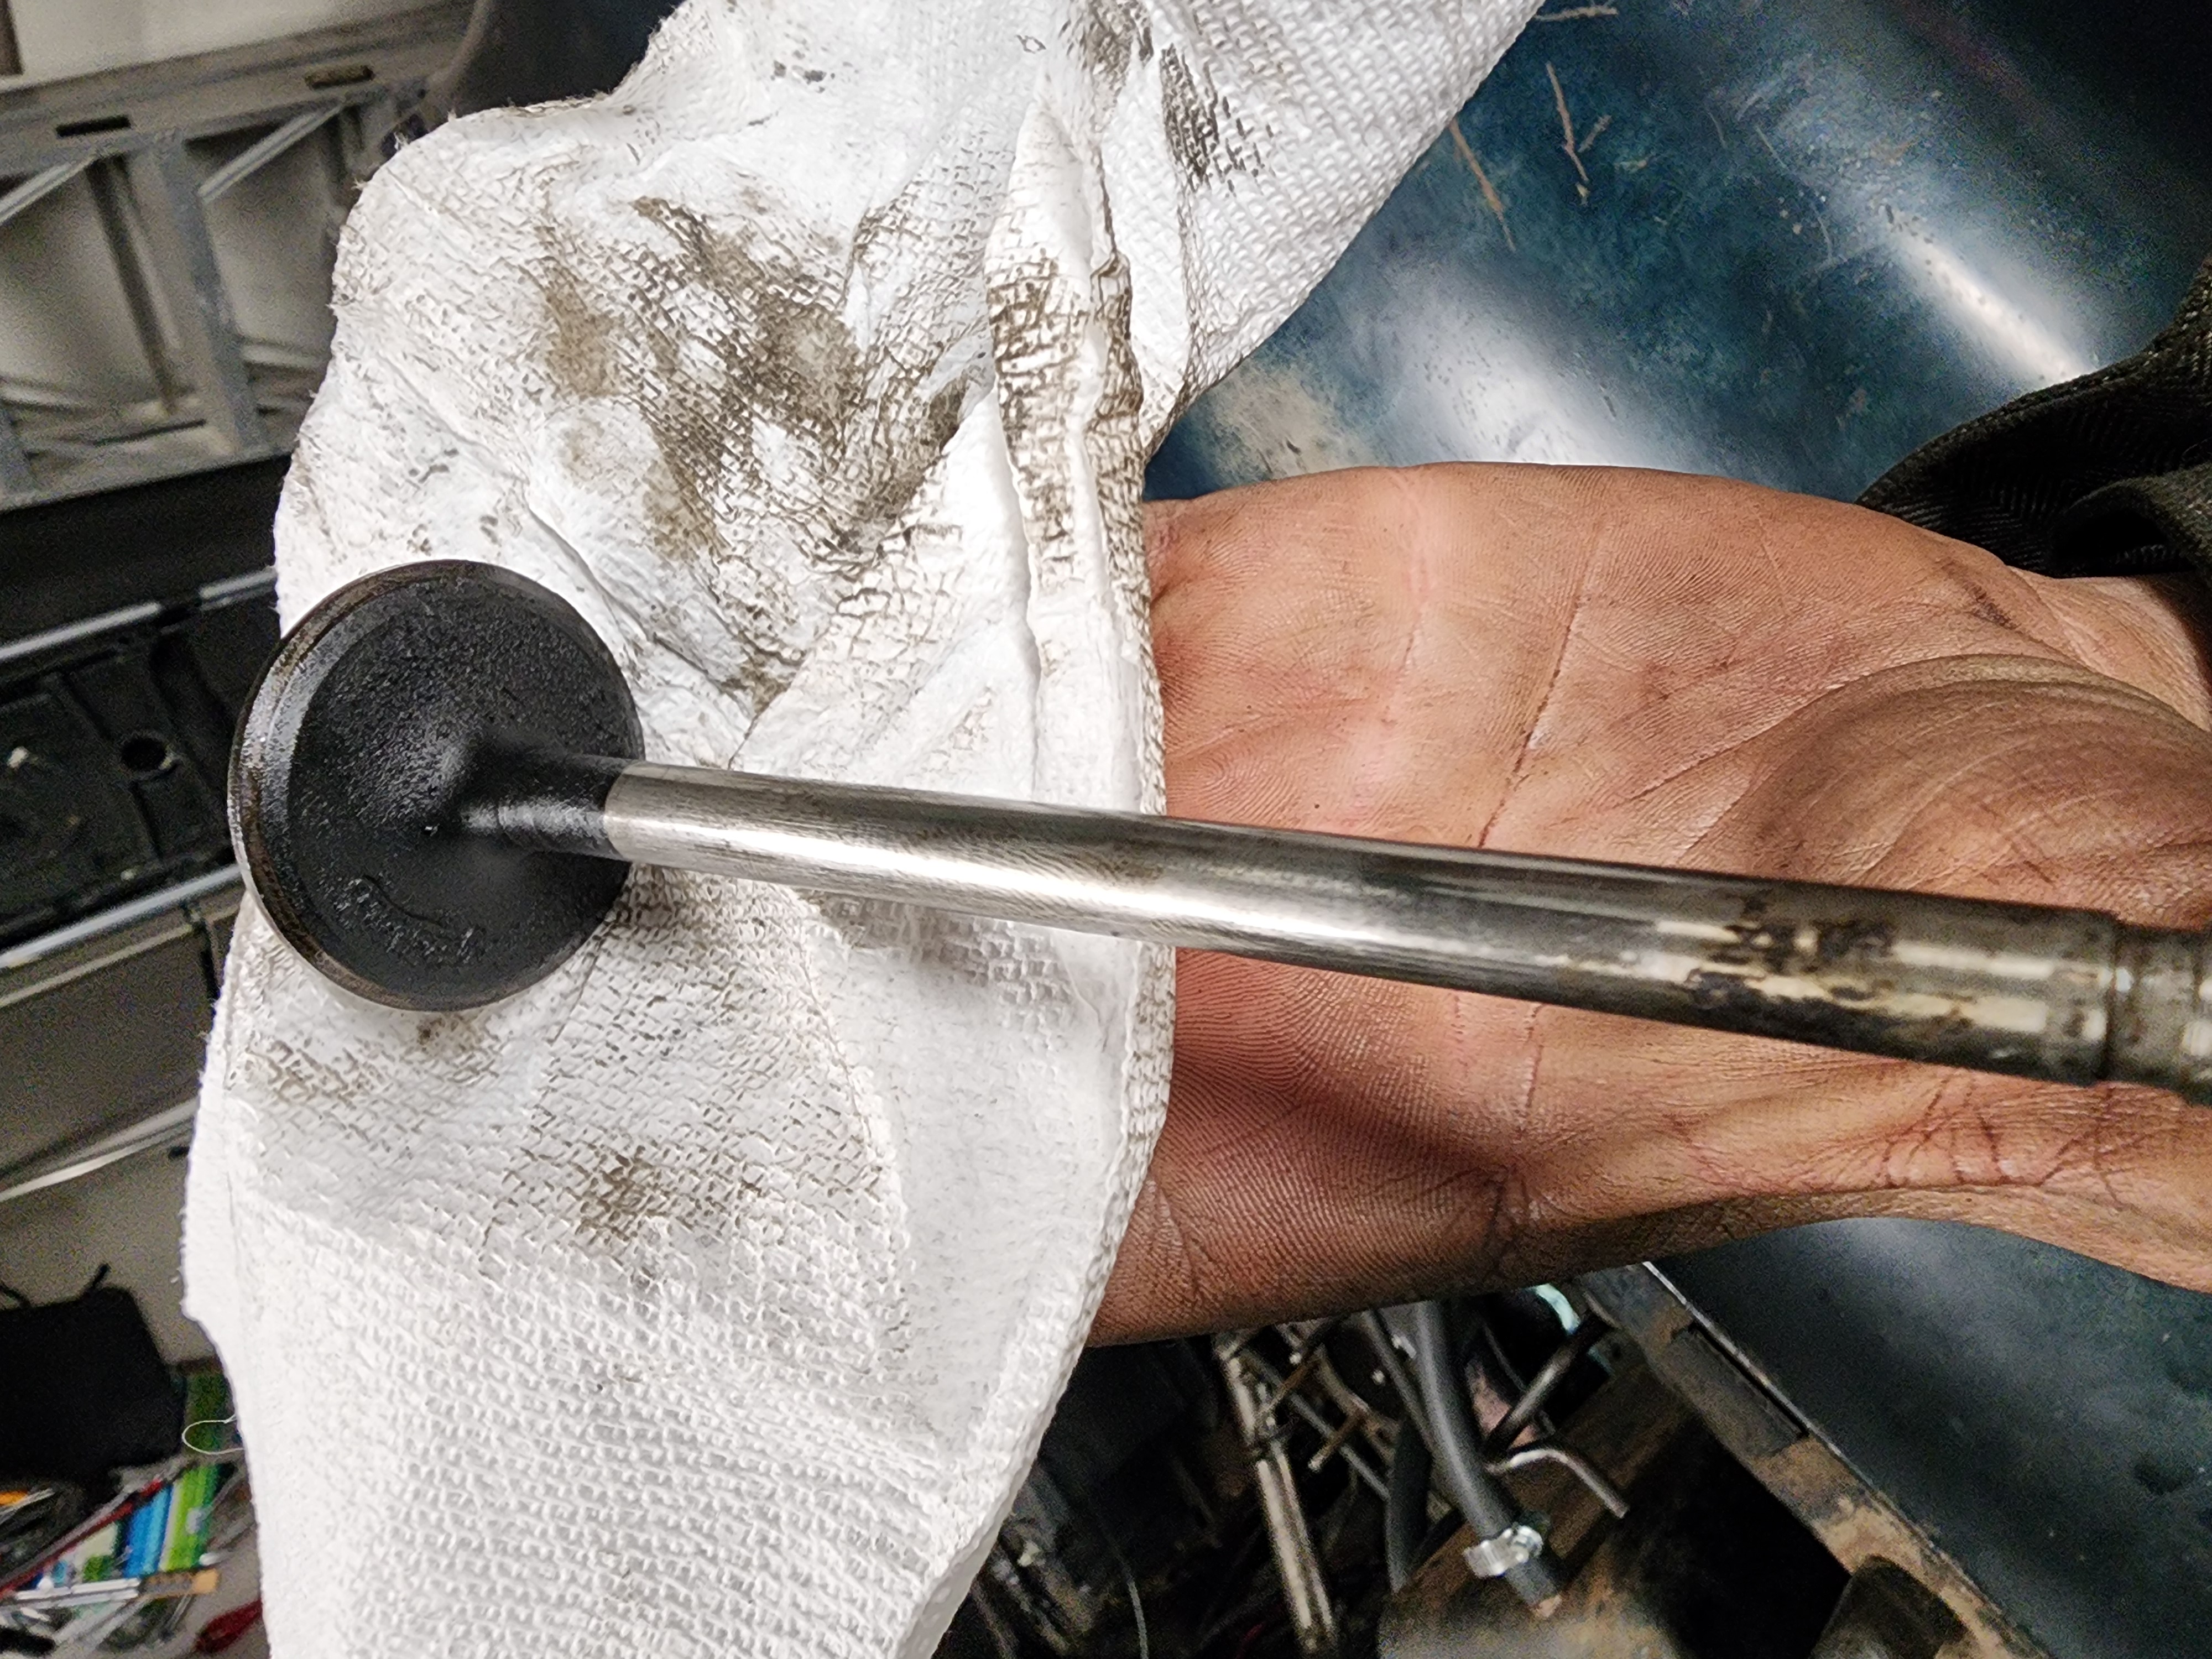 20240114_002640.jpg (1,814.43 KB) 20240114_002640.jpg (1,814.43 KB)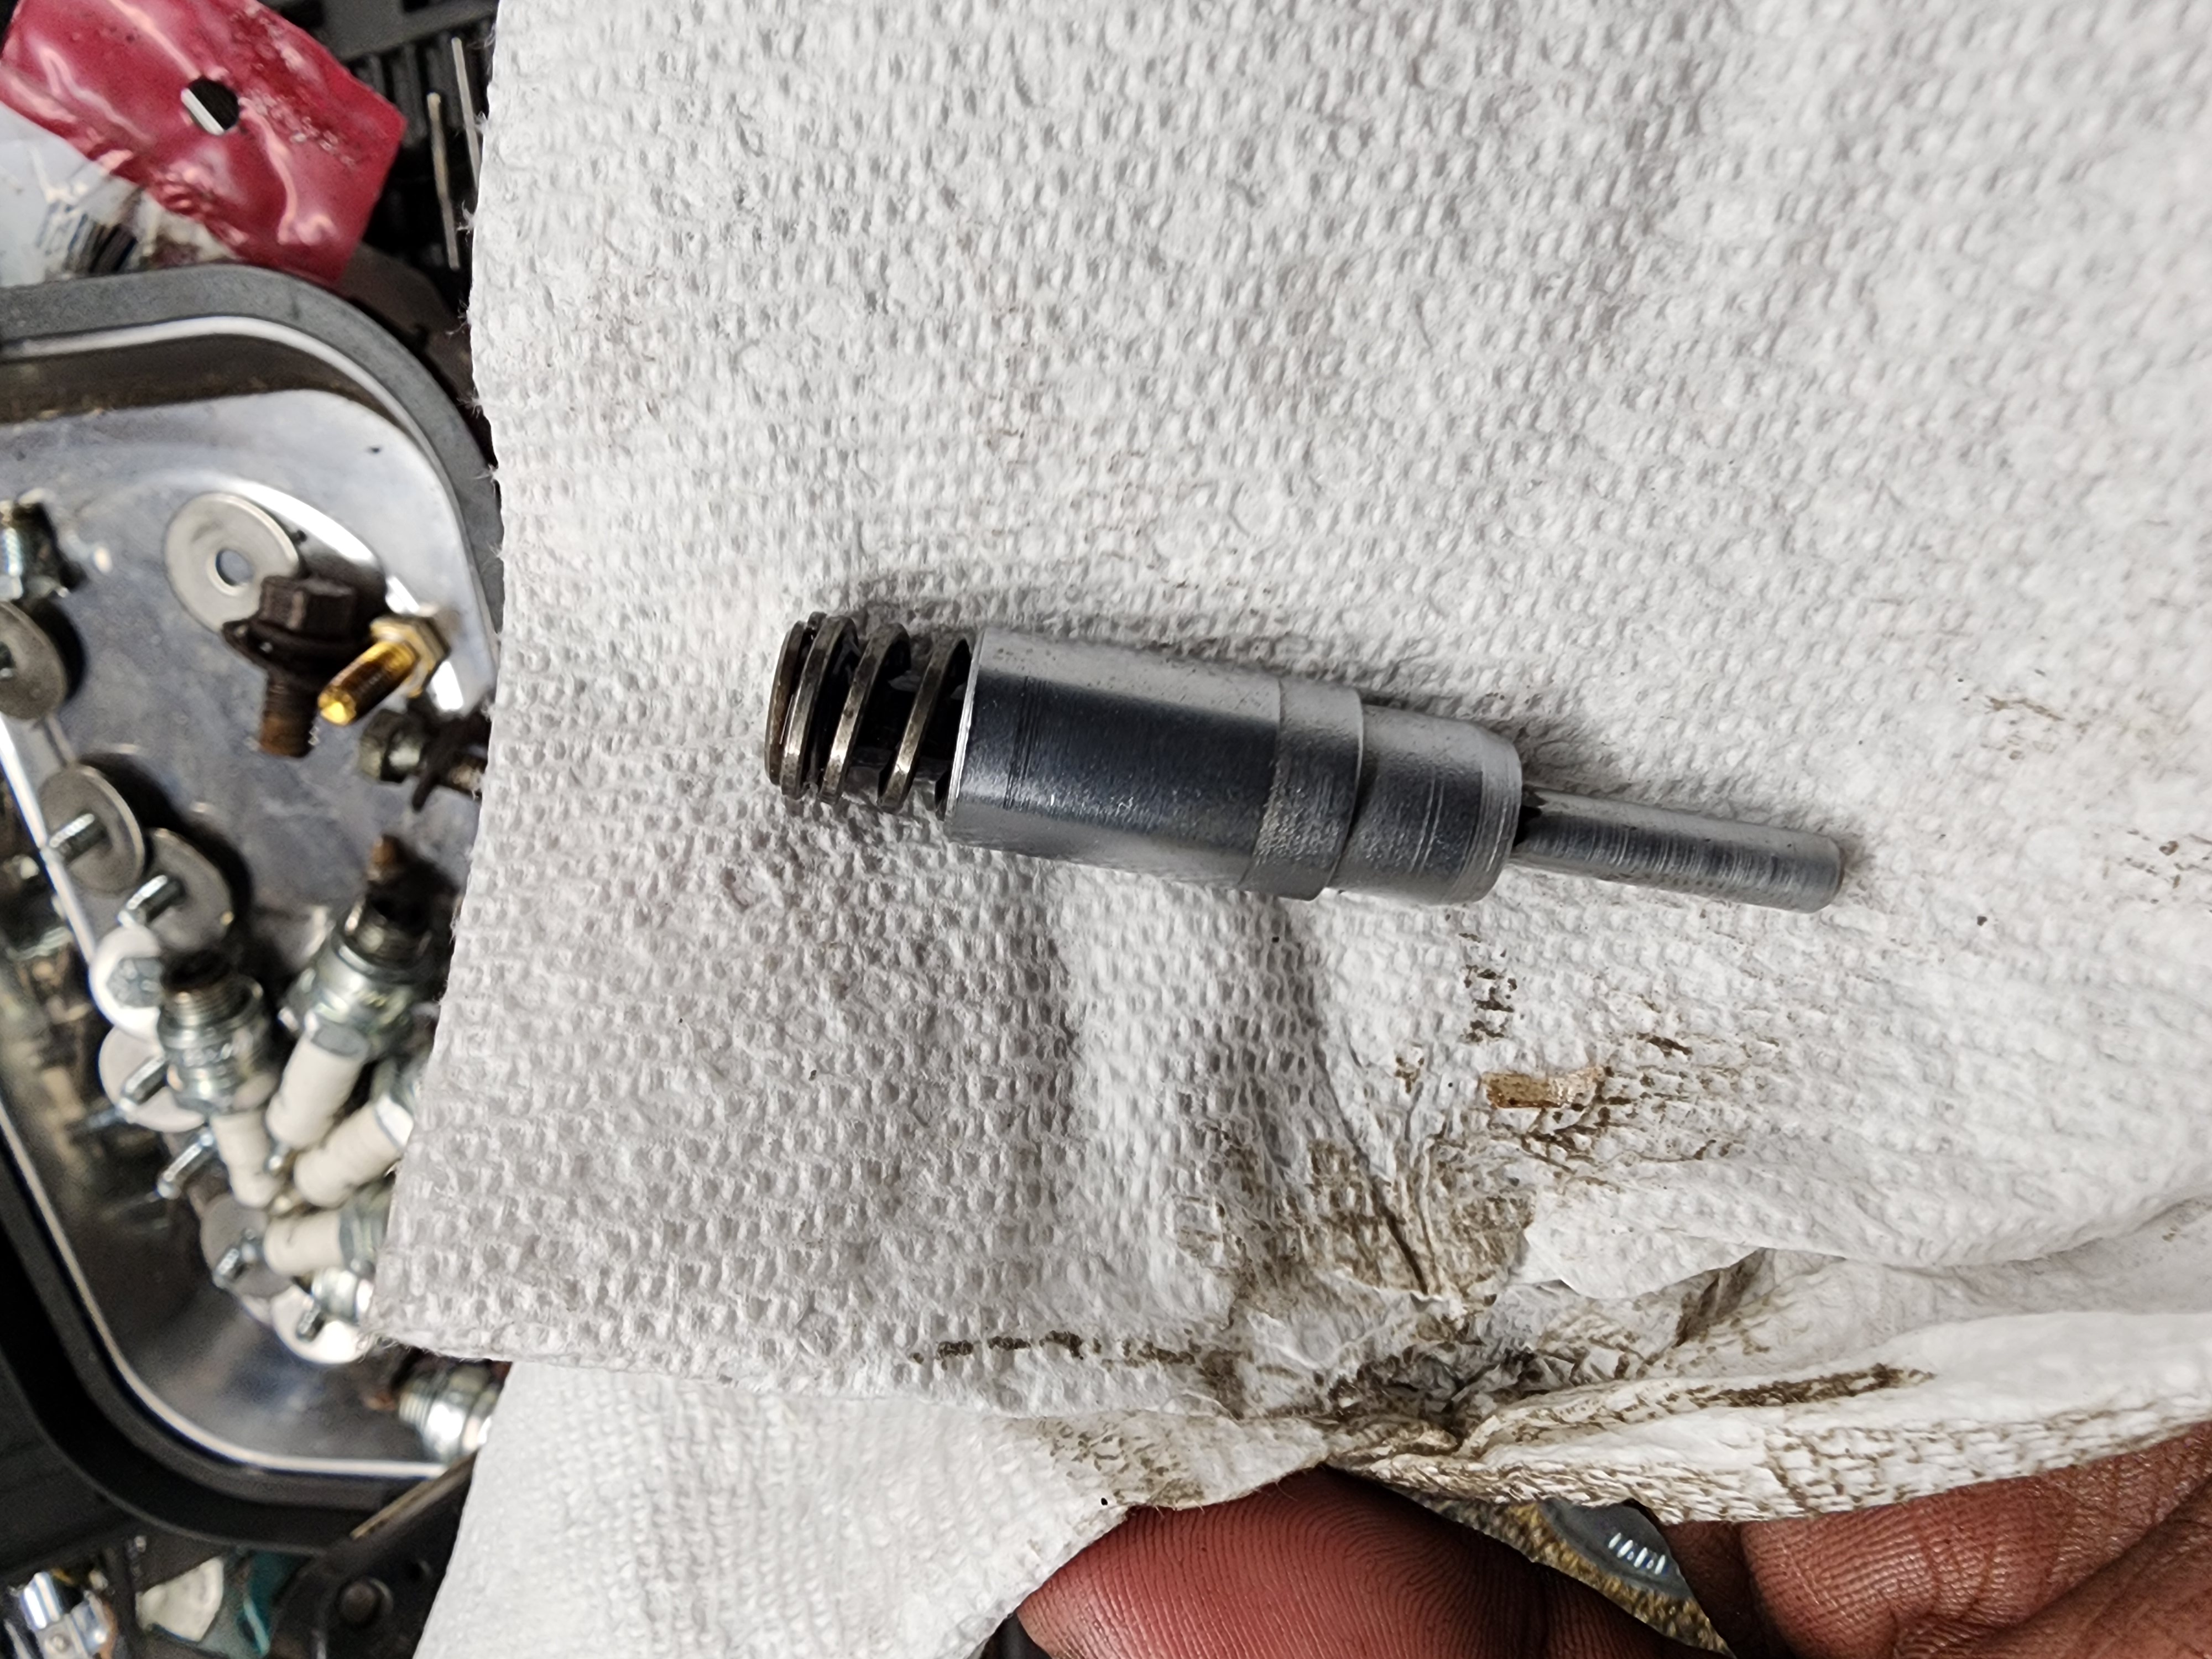 20240114_003727.jpg (2,051.03 KB) 20240114_003727.jpg (2,051.03 KB)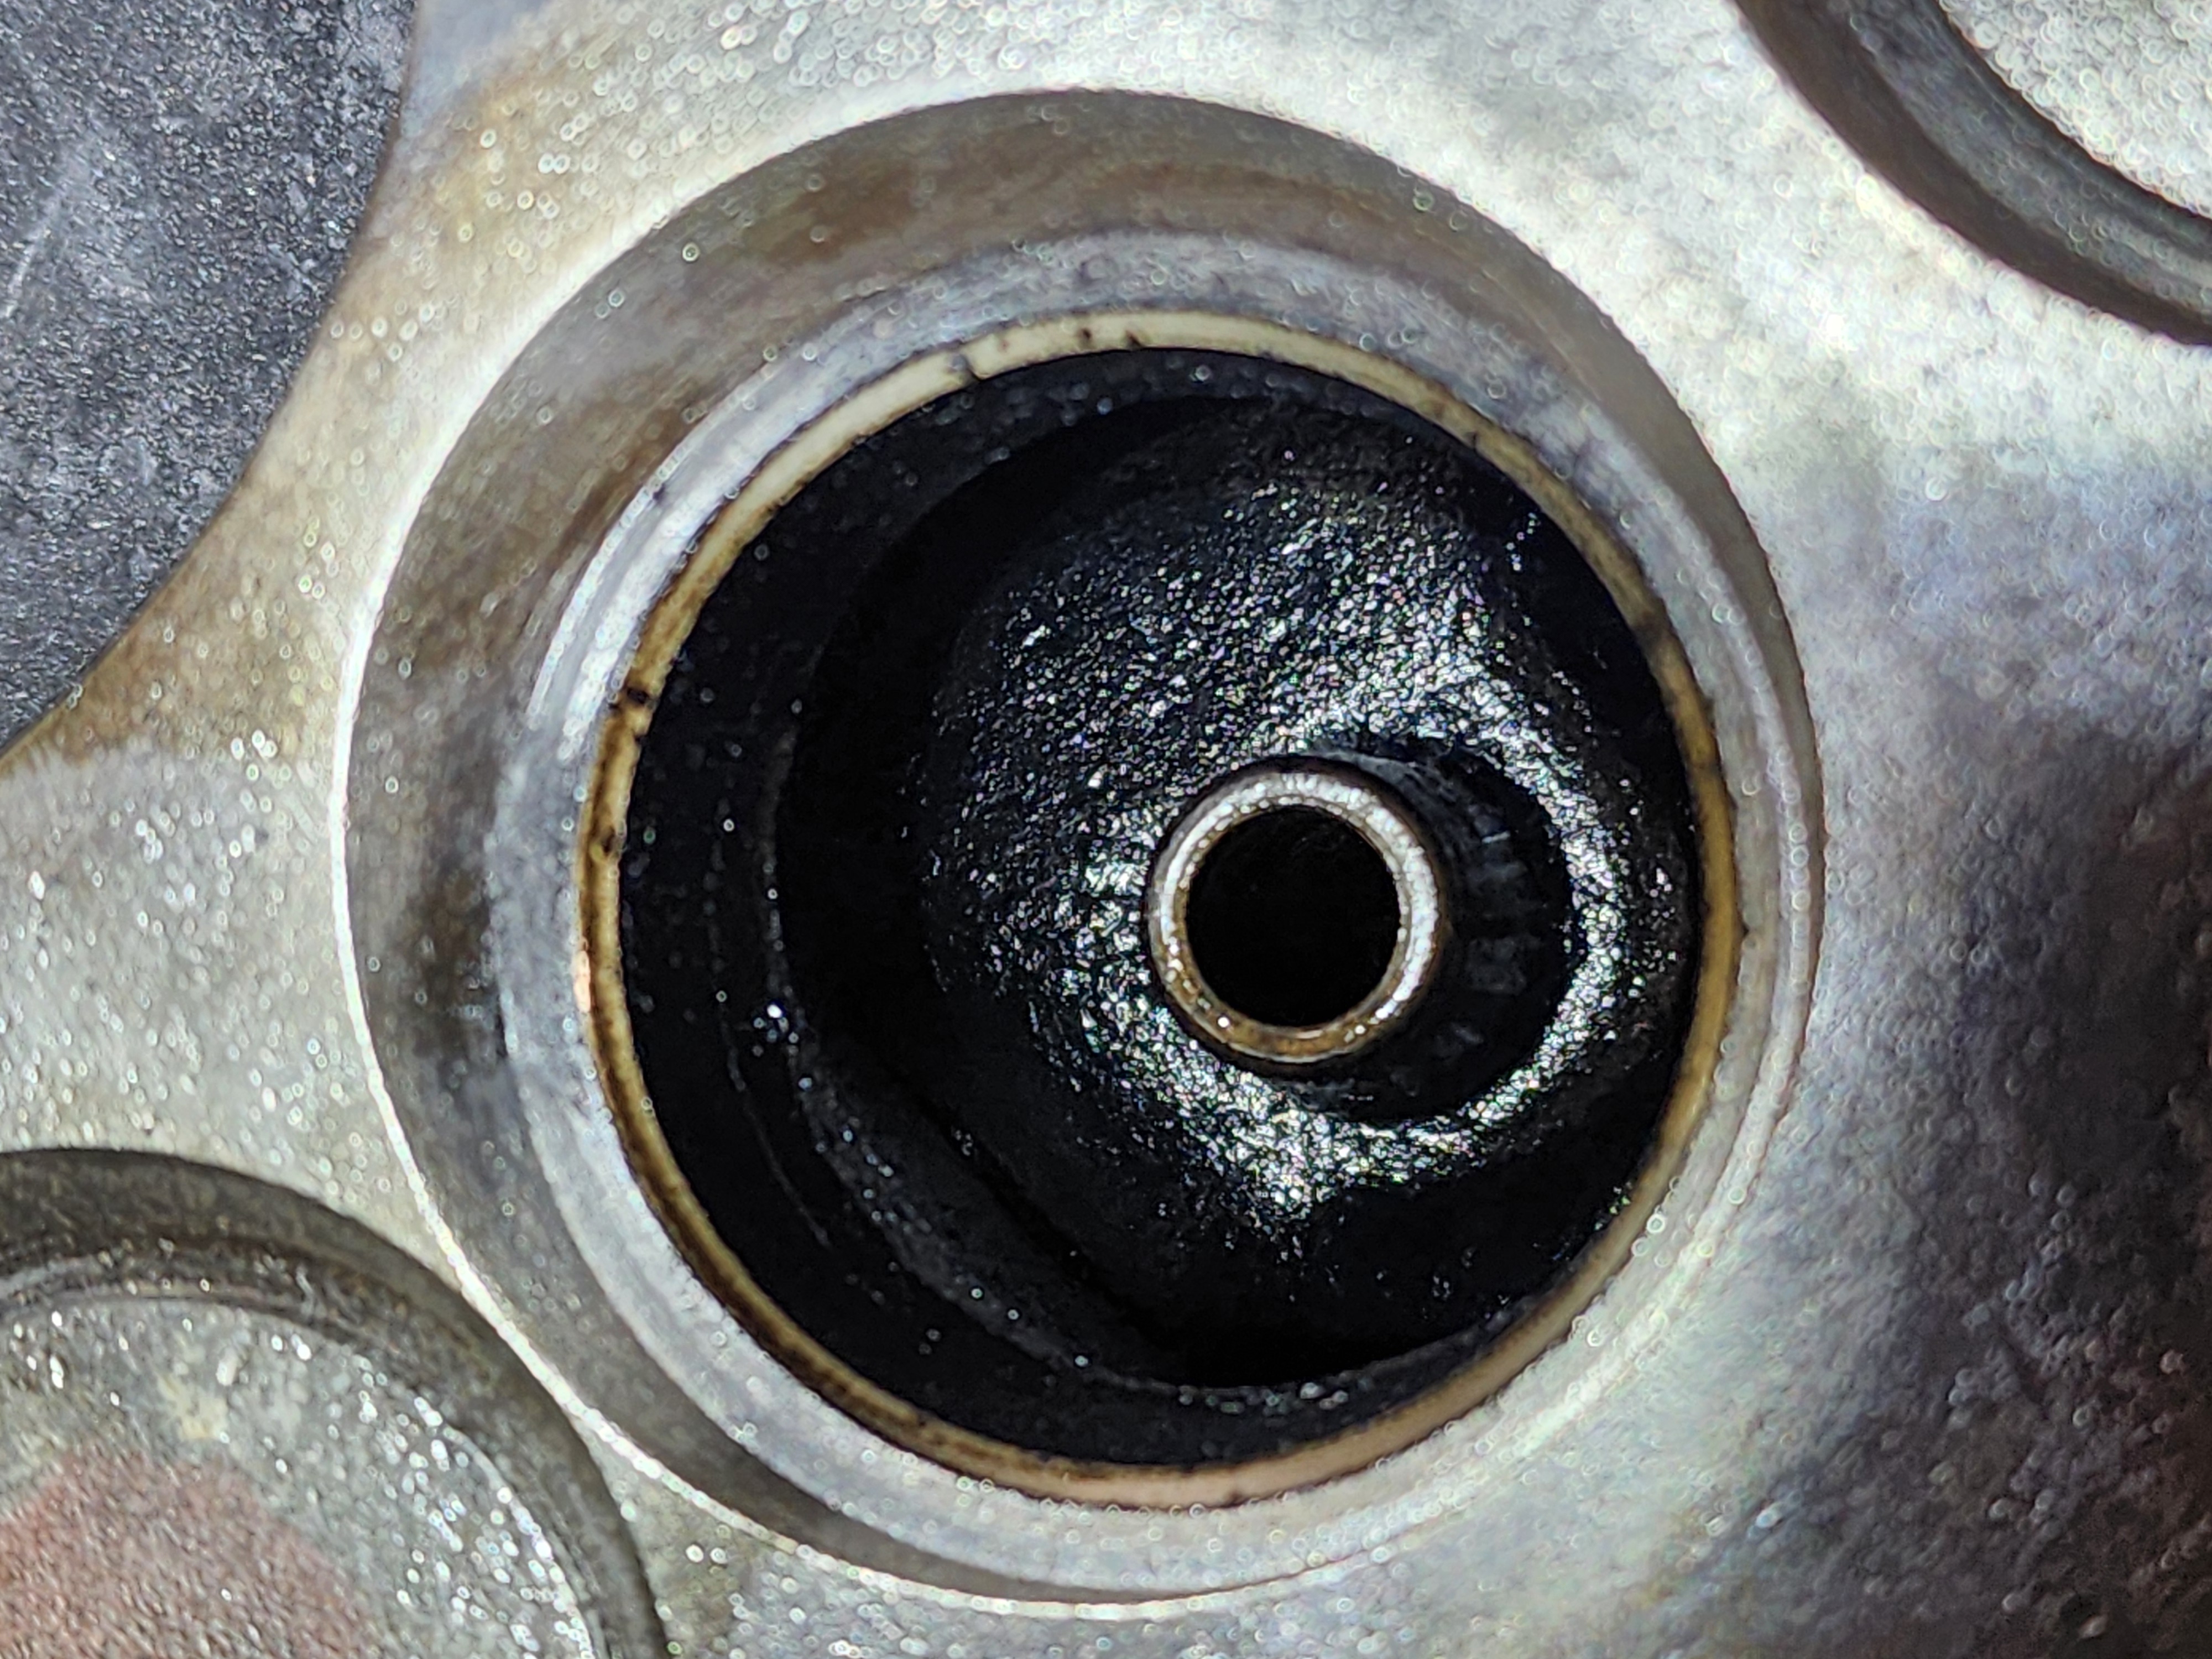 20240114_010320.jpg (2,987.08 KB) 20240114_010320.jpg (2,987.08 KB)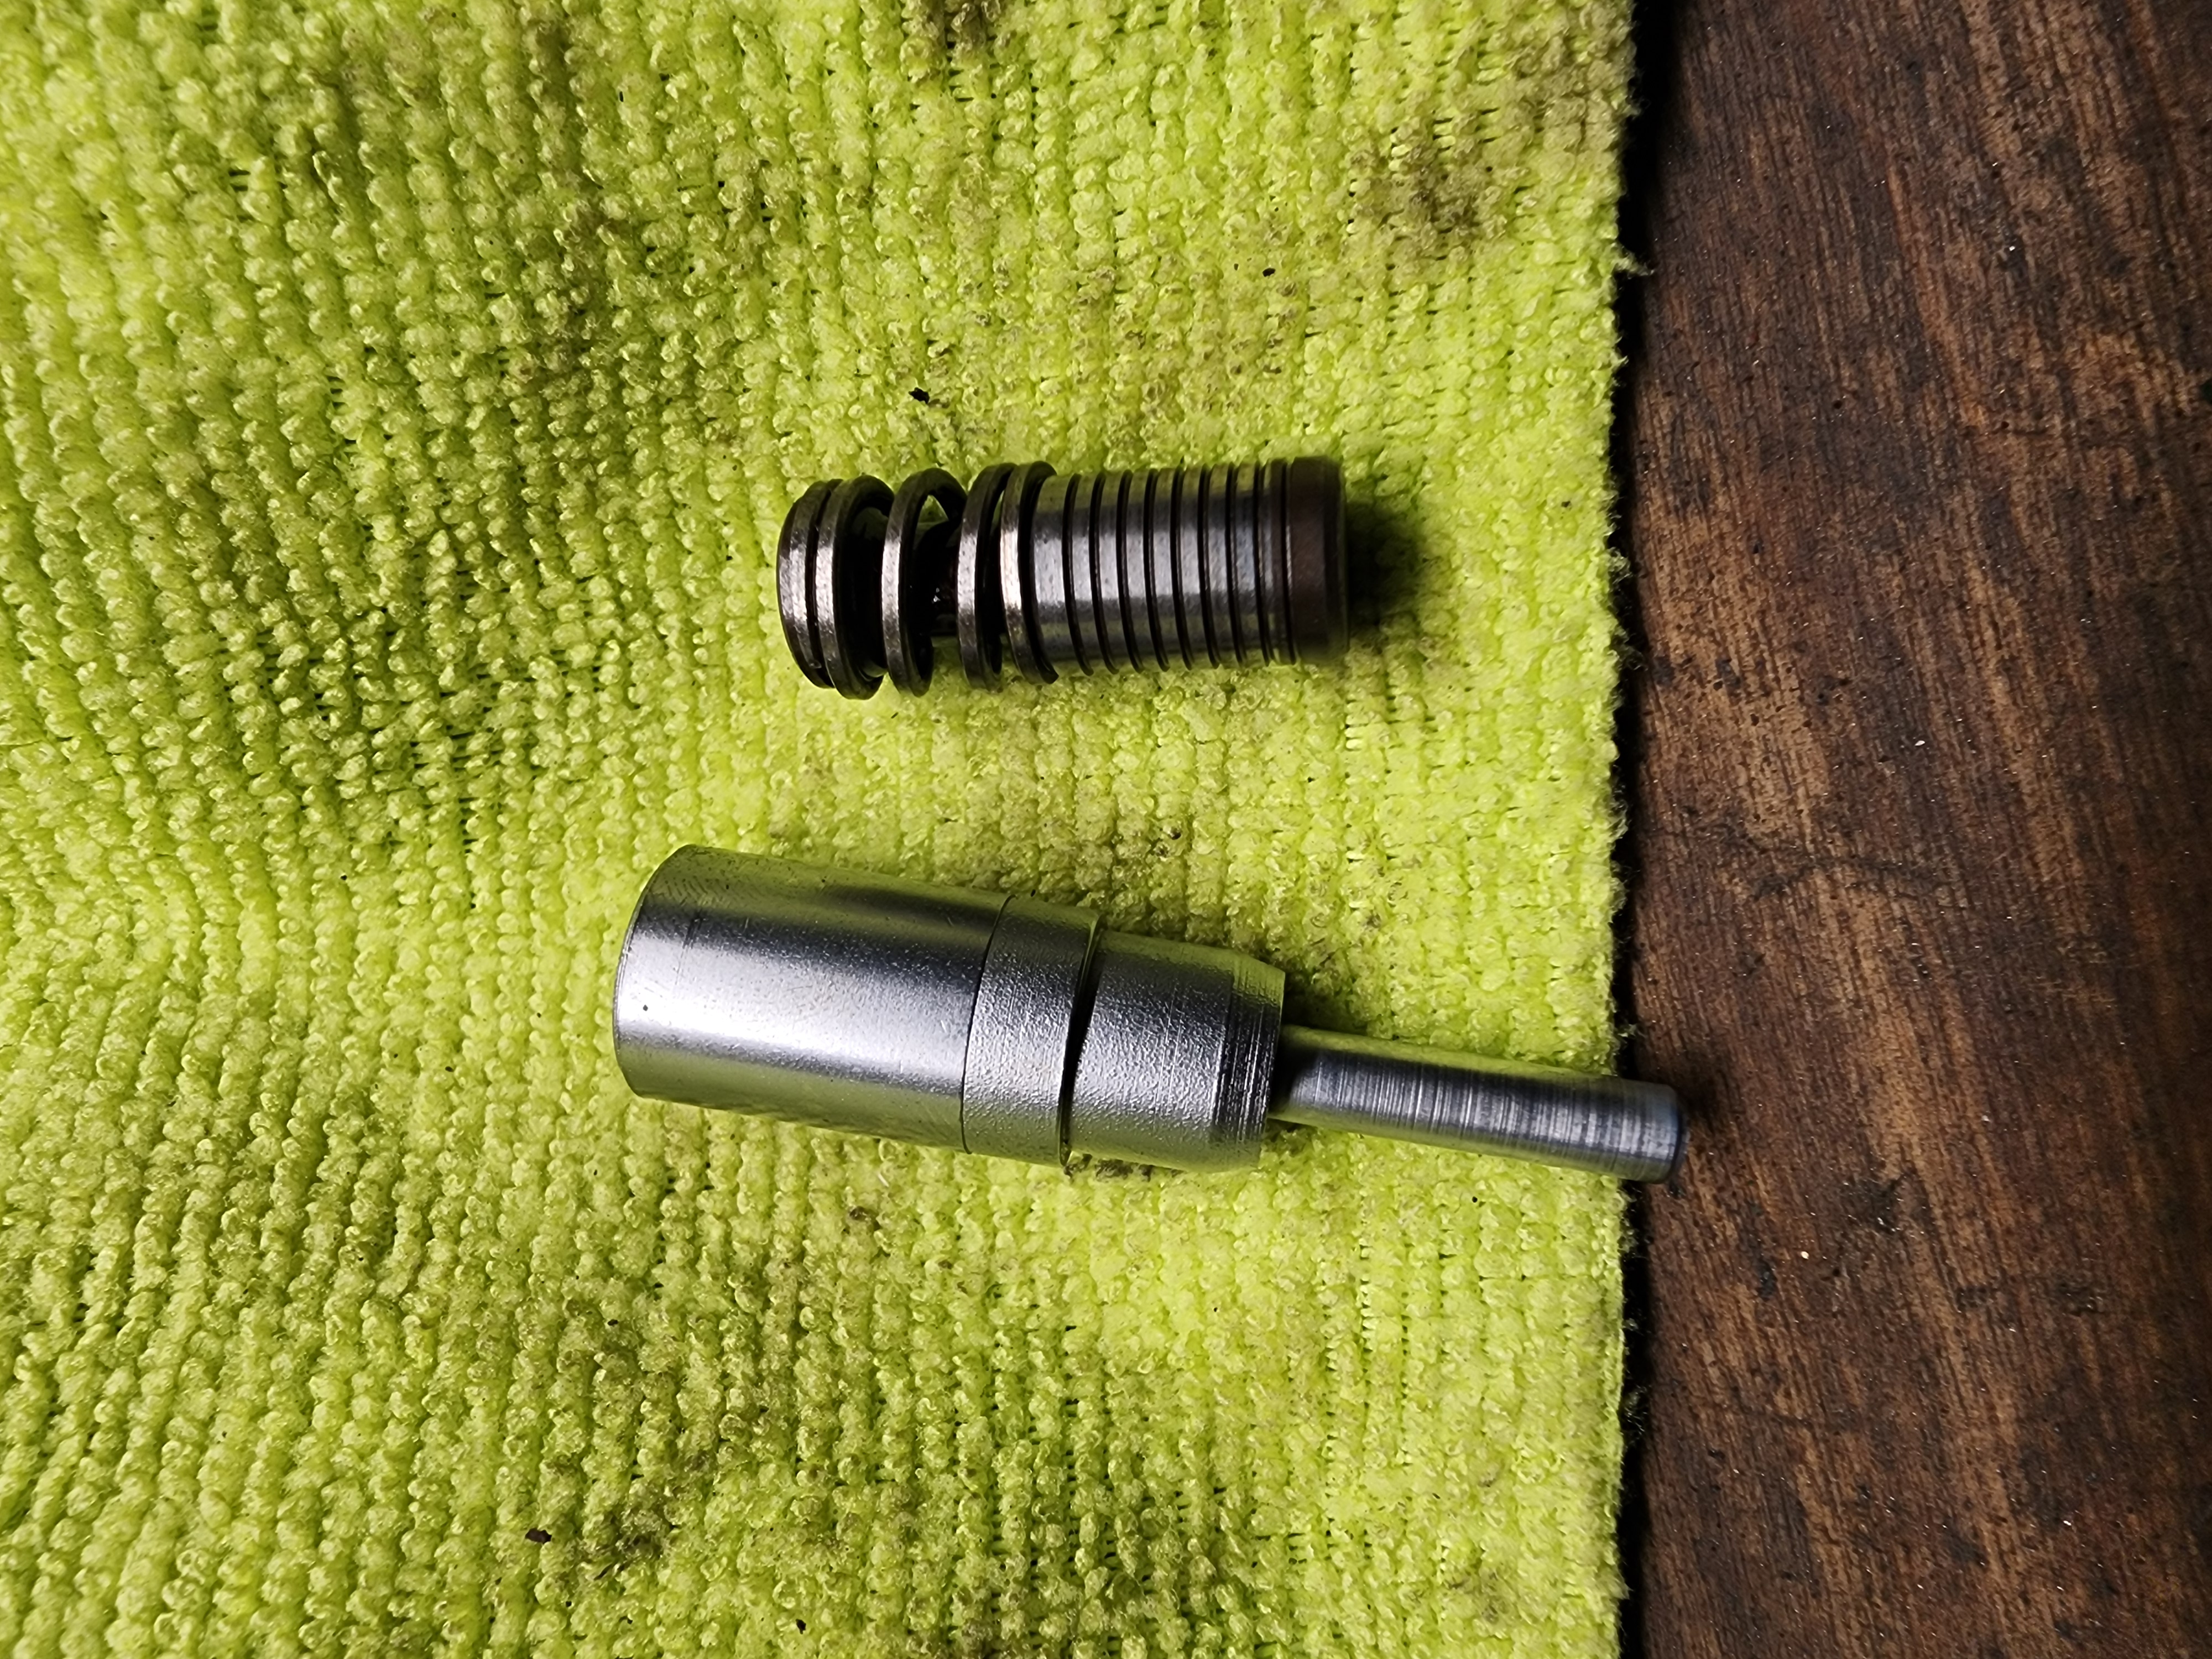 20240114_011332.jpg (3,557.16 KB) 20240114_011332.jpg (3,557.16 KB)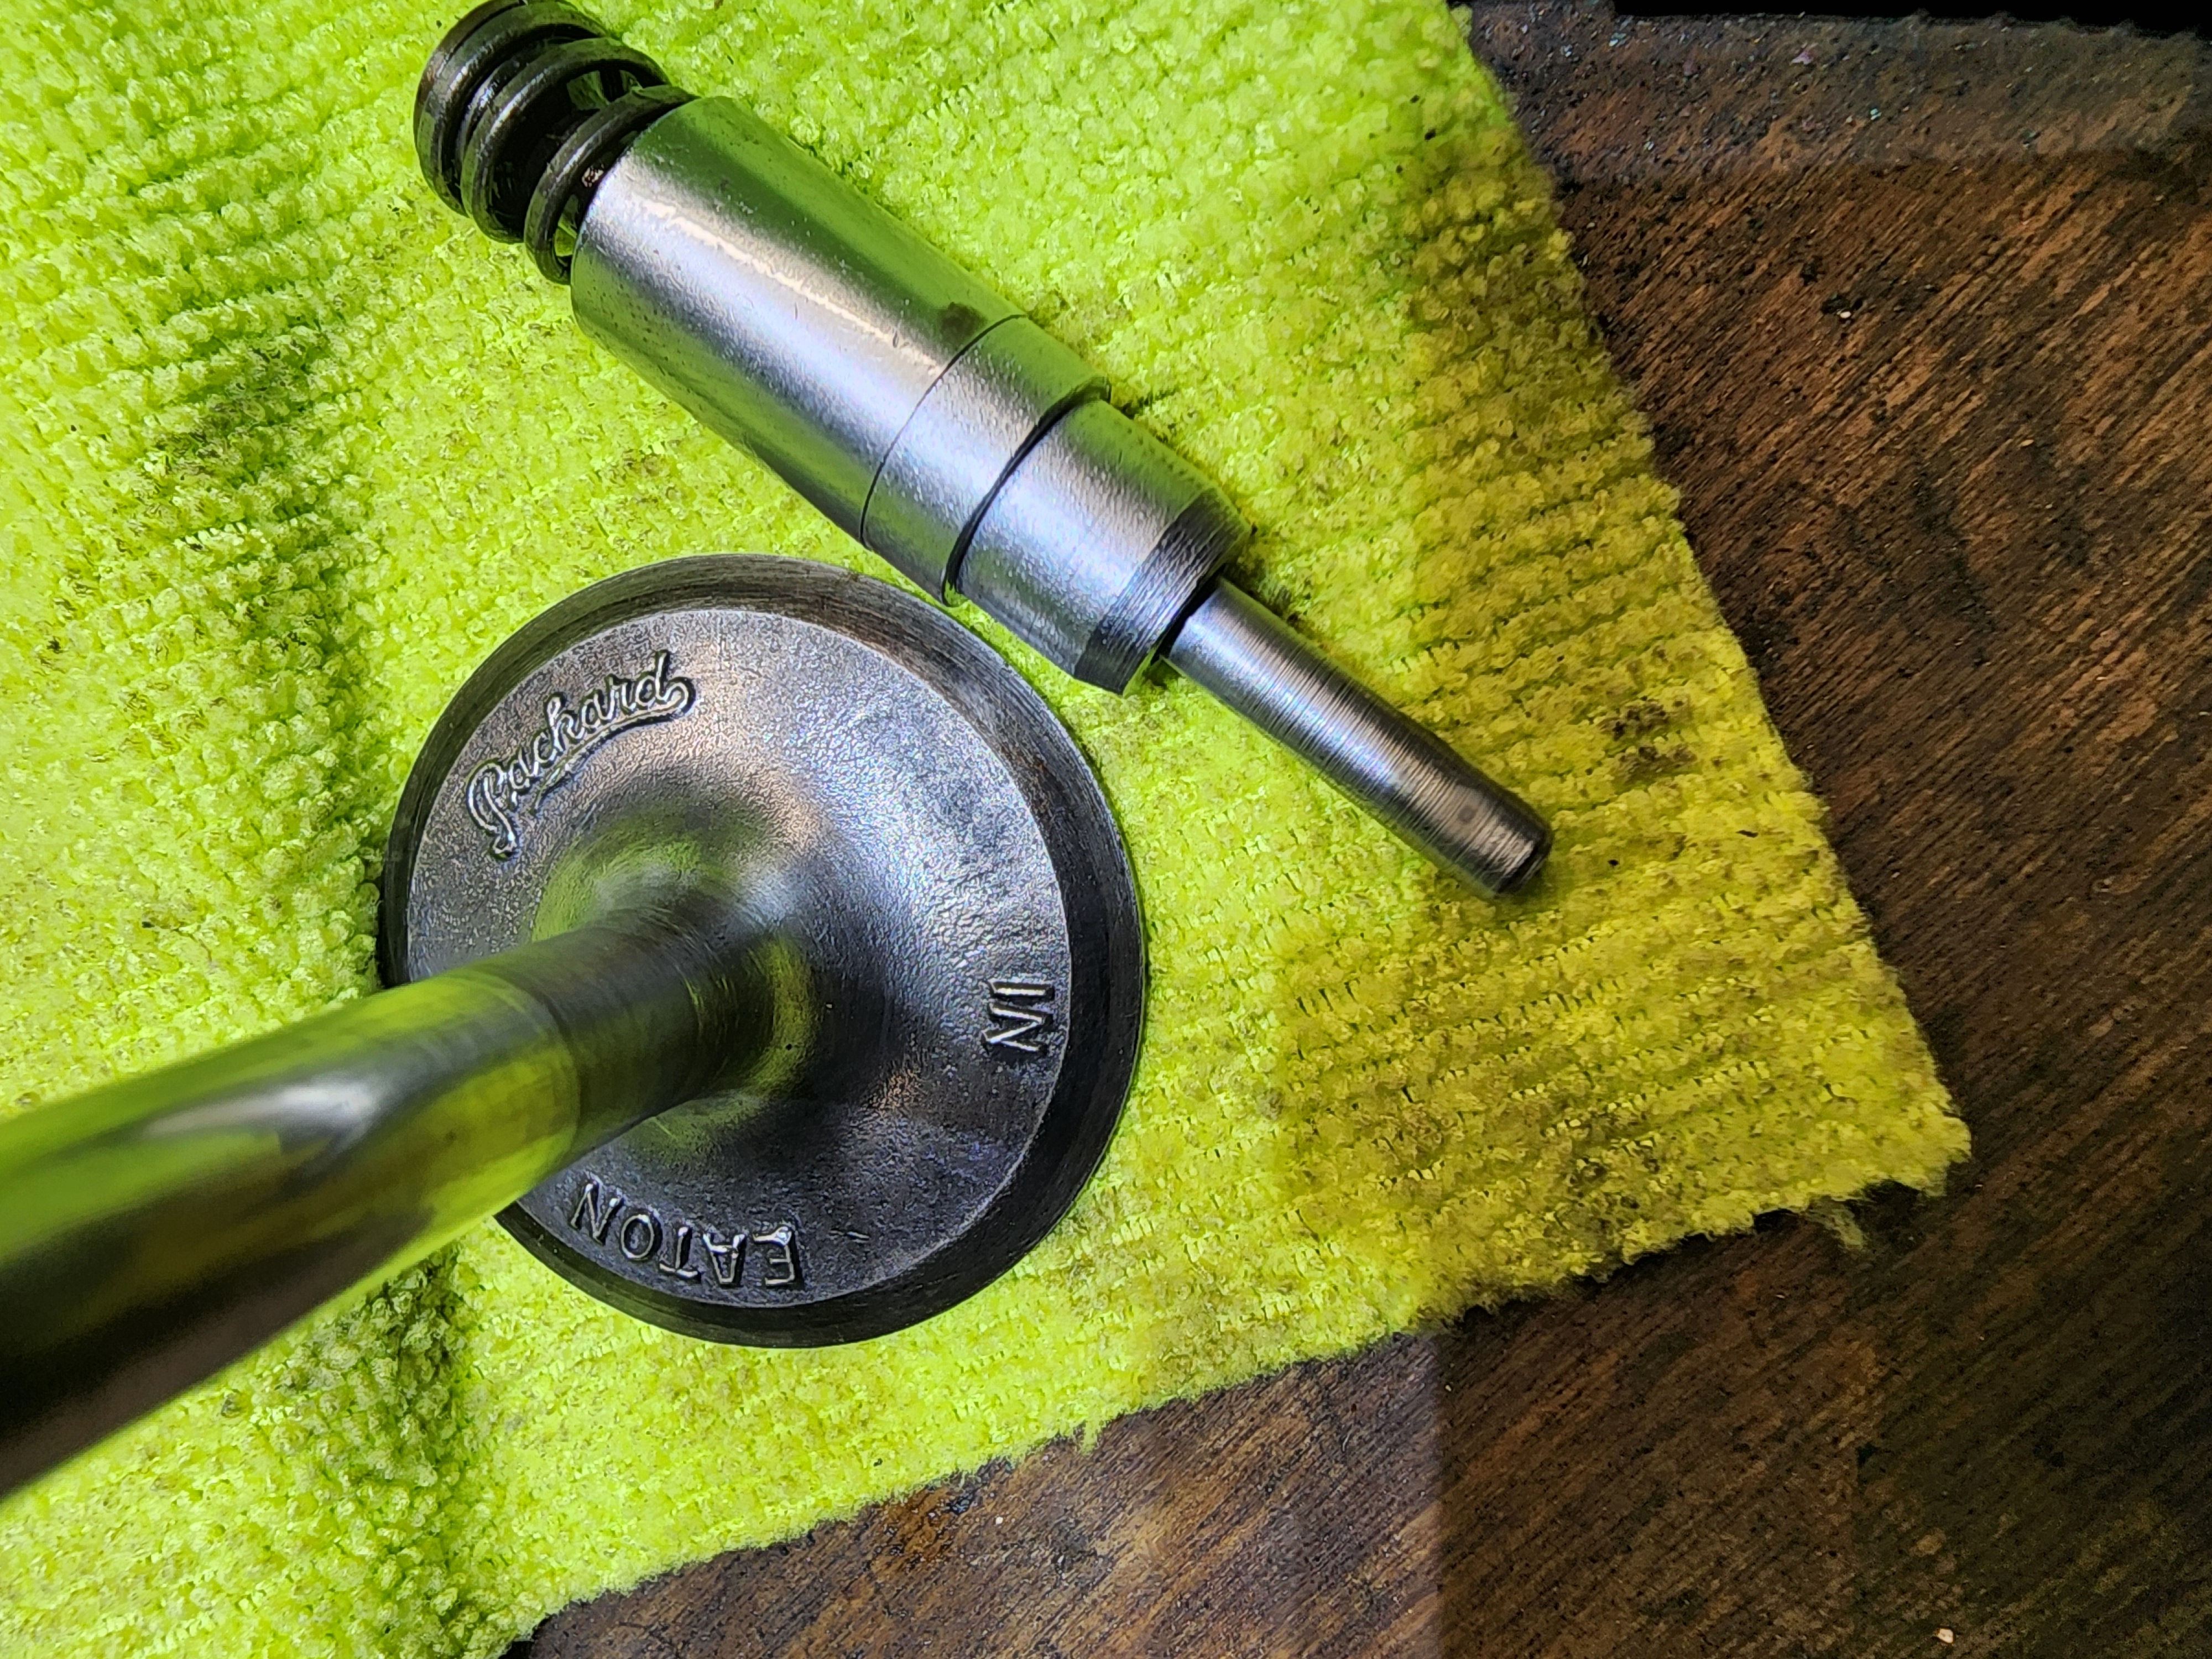
Posted on: 1/14 1:23
|
|||
|
||||
|
Re: Hydraulic Lifter Tick
|
||||
|---|---|---|---|---|
|
Just can't stay away
|
Hey gang,
Just checking in to share some progress! Project is going to take several days as tools/parts/discoveries happen, and I've made some progress. The head came off in about 30 seconds with an assist from my wife. I don't know anyone does it by themselves. Worked on the head first, getting it cleaned up top to bottom. The head shows evidence of having been milled before, so it won't be getting milled again. That said, the straight edge way able to lie flat without play, so no worries there. The only issue I'll have to tackle with the head will be some significant pitting at all of the ports where water would pass between the block and the head. Other that that, the head's good to go. The block is slowly coming clean, too, but as you all know, just a very slow and tedious process, and there's more cleaning to be done. Of the cylinder walls I've seen, they are bright and unblemished (you're indeed seeing reflections in the pictures). It did look like some coolant was leaching into cylinders 8, 5, and 4, where the compression was also slightly lower. I got to cleaning the piston head with Scotchbrite and some brake clean. Some other questions that have been asked: - There was only ever blue smoke at start up, then white, then no smoke (my wife commented on this the other day before I got into the disassembly when I was driving the car around the neighborhood and she was out walking). It's never really smoked, other than some MAJOR rich running issues I had when I first got the car... Thankfully, that was sorted out. - I never did a vacuum test on the valves, though I know that would've been a good practice. Plan at this point is to take each valve apart, clean/lap, check guides, verify valve stem length with the gauge, clean the lifters... basically recondition the valve train with what's in the engine and replace parts as needed. Haven't dug into the valves yet. The tool I bought (a spring compression tool advertised by Briggs and Stratton) is fighting me - I just don't think it's beefy enough for this particular assignment. I've since purchased a different spring compression tool from eBay (one I found recommended in another thread on this topic). That's where we stand! Won't make much more progress for the next day or so - taking the kids to MonsterJam in Greensboro! For now, it's a decent start I think. Thanks, all! Attach file: 20240112_155722.jpg (1,234.45 KB)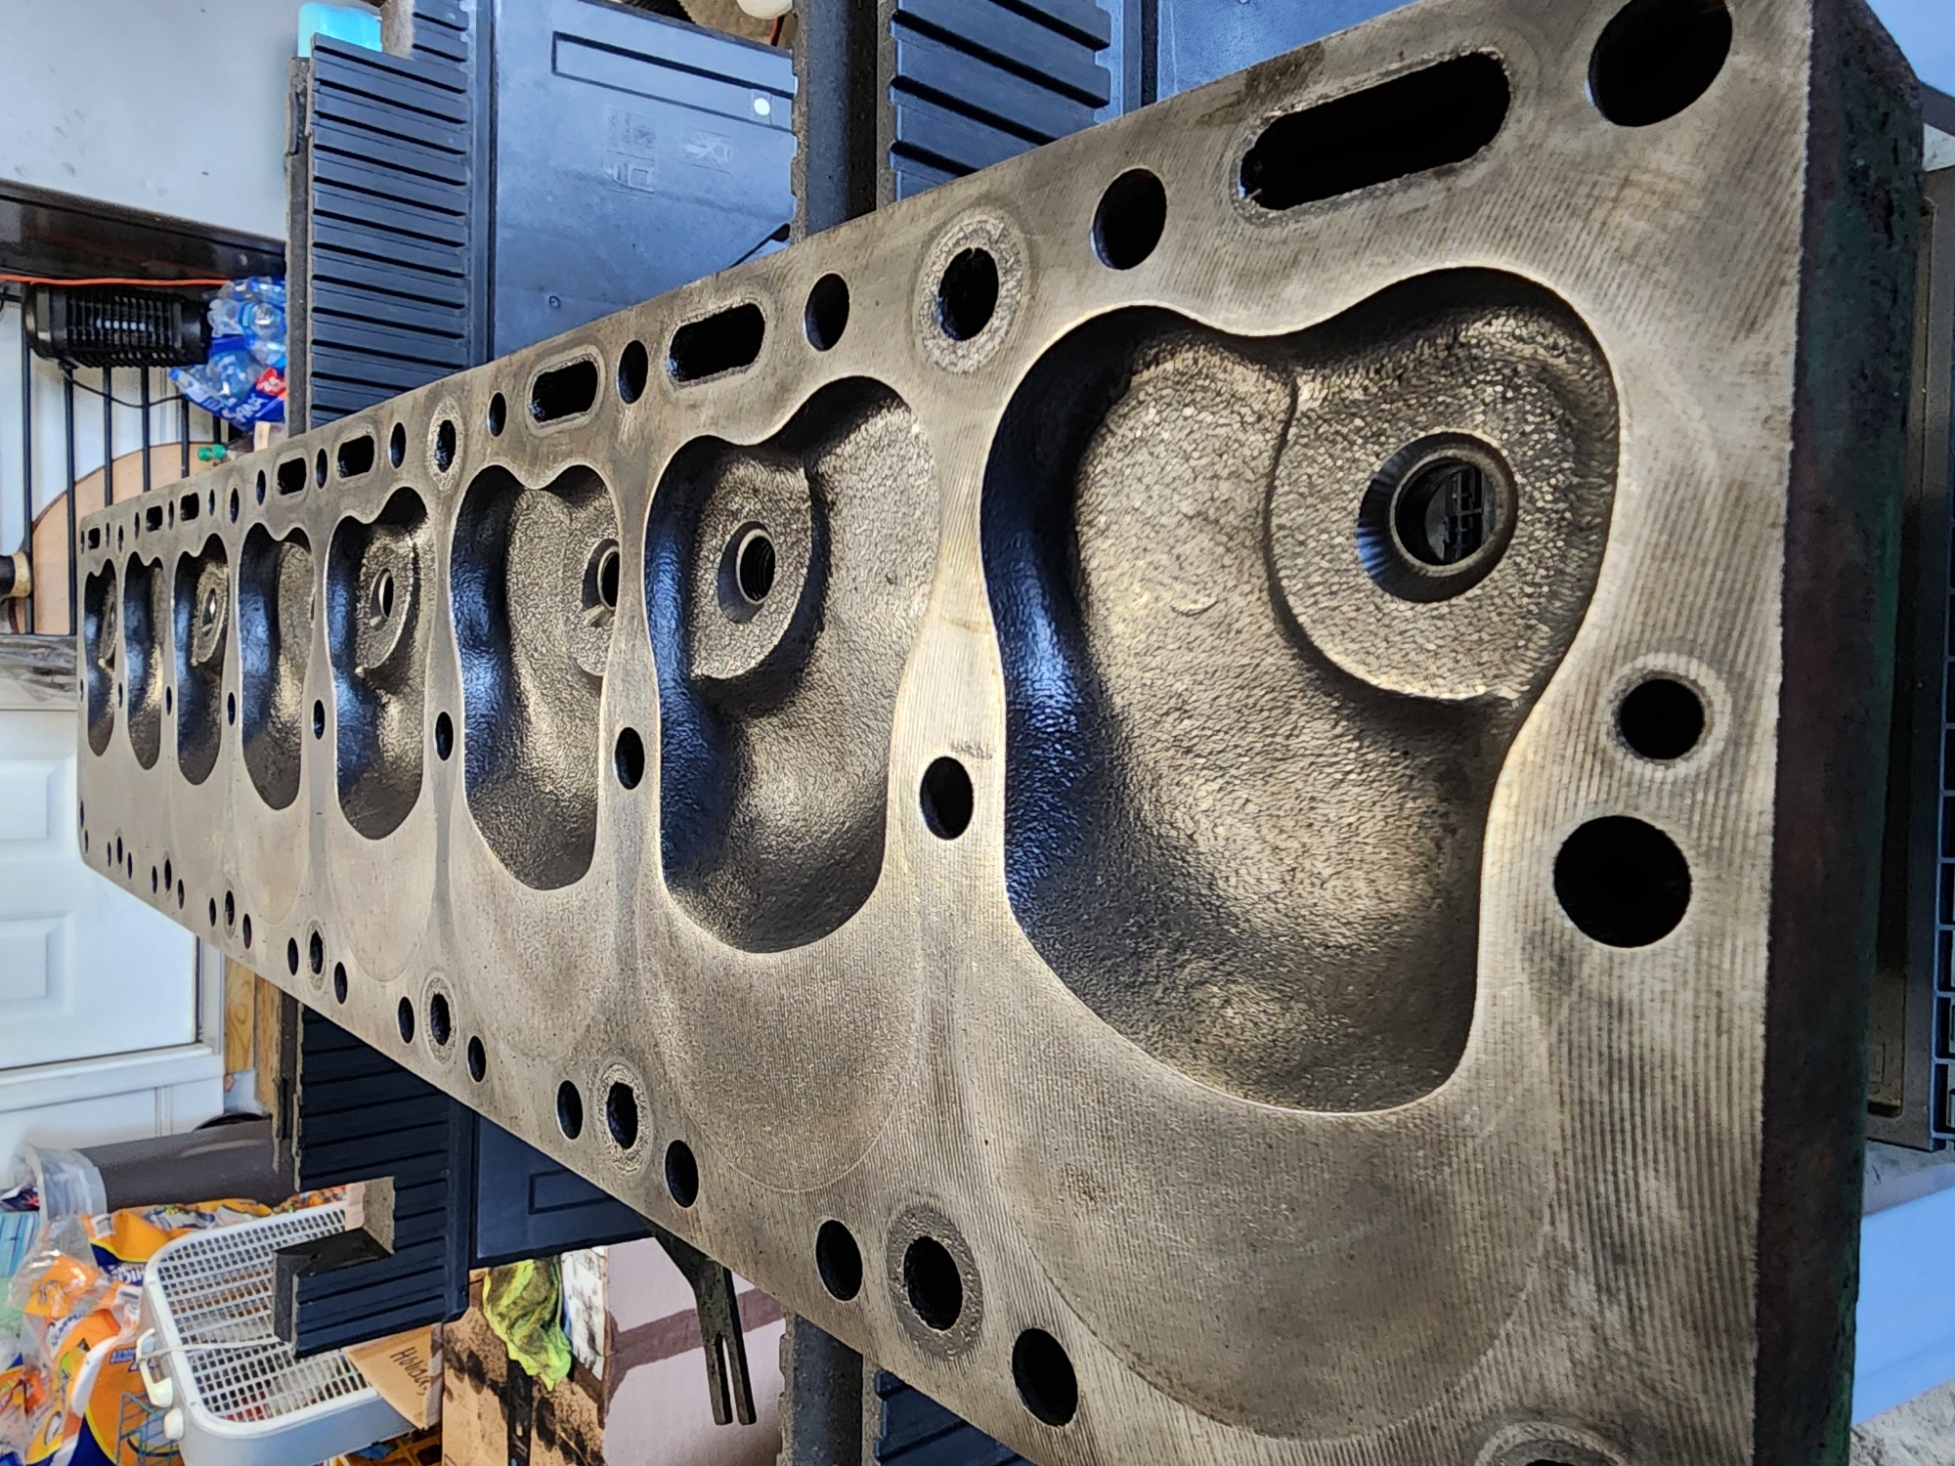 20240113_122519.jpg (773.35 KB) 20240113_122519.jpg (773.35 KB)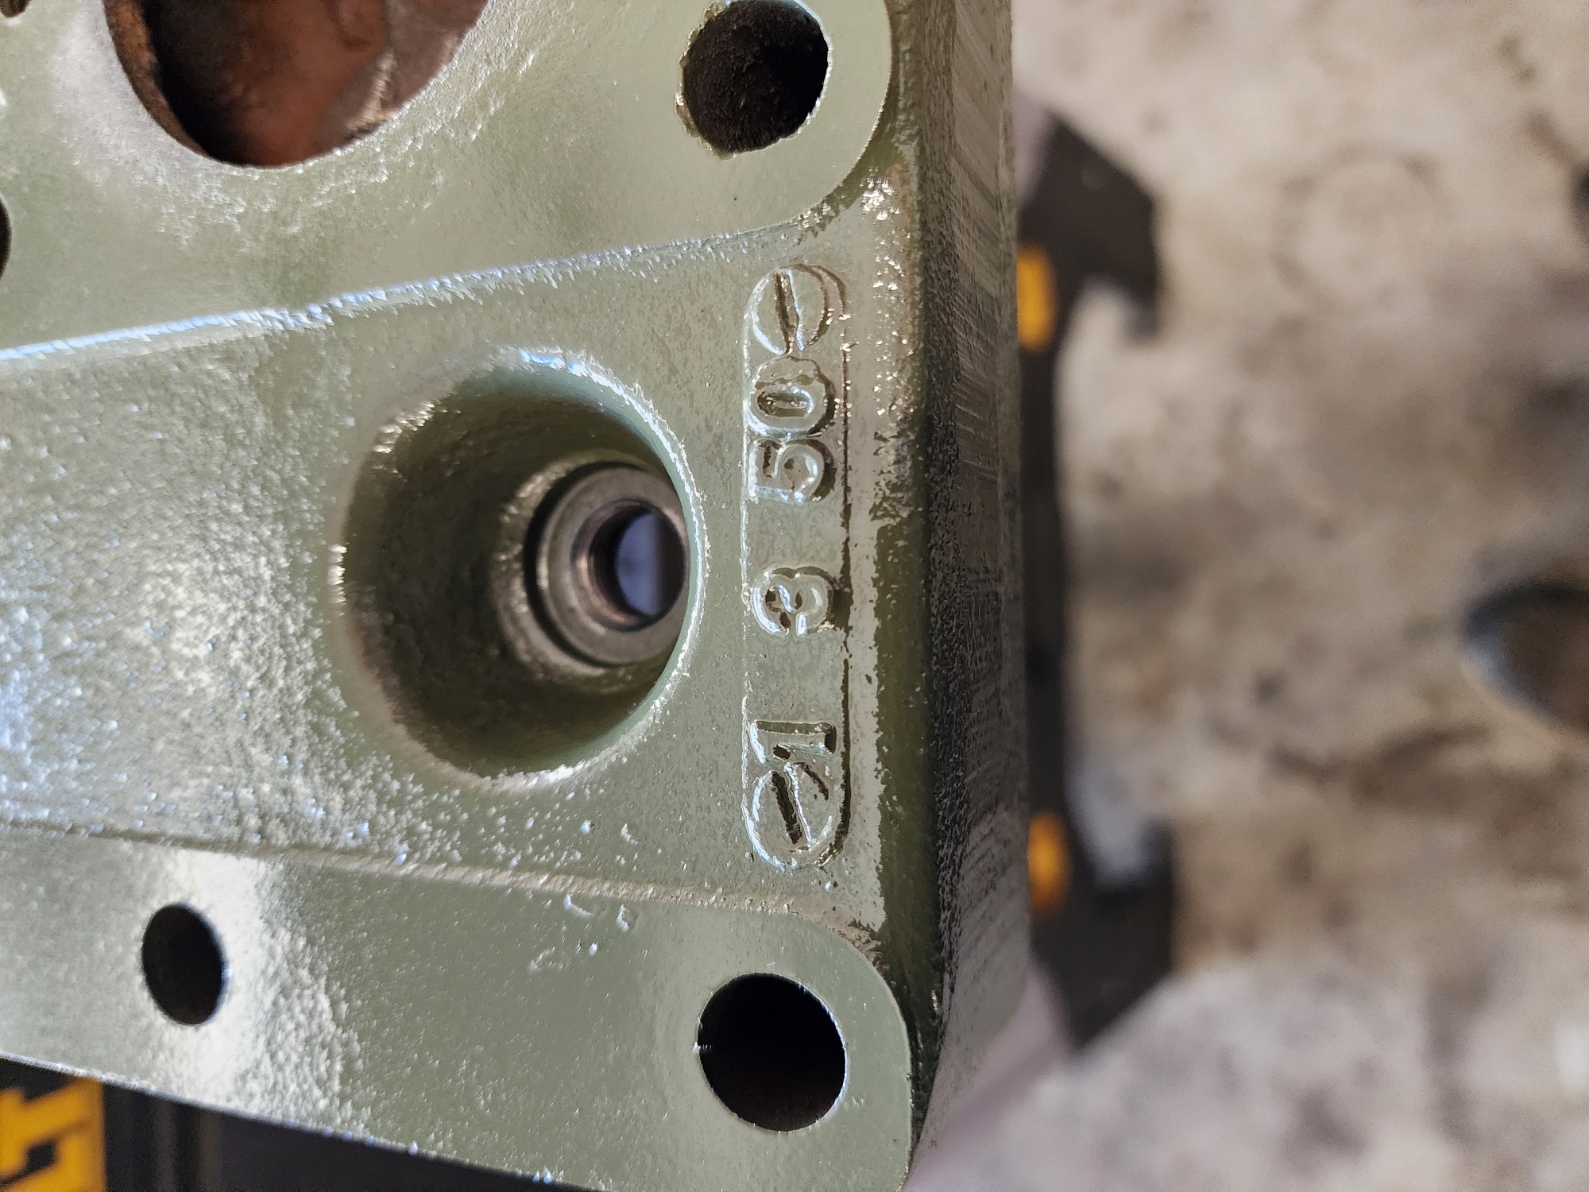 20240113_122538.jpg (1,210.46 KB) 20240113_122538.jpg (1,210.46 KB) 417206886_407619481671161_7761450141739123789_n.jpg (124.68 KB) 417206886_407619481671161_7761450141739123789_n.jpg (124.68 KB) 20240113_115841.jpg (970.36 KB) 20240113_115841.jpg (970.36 KB)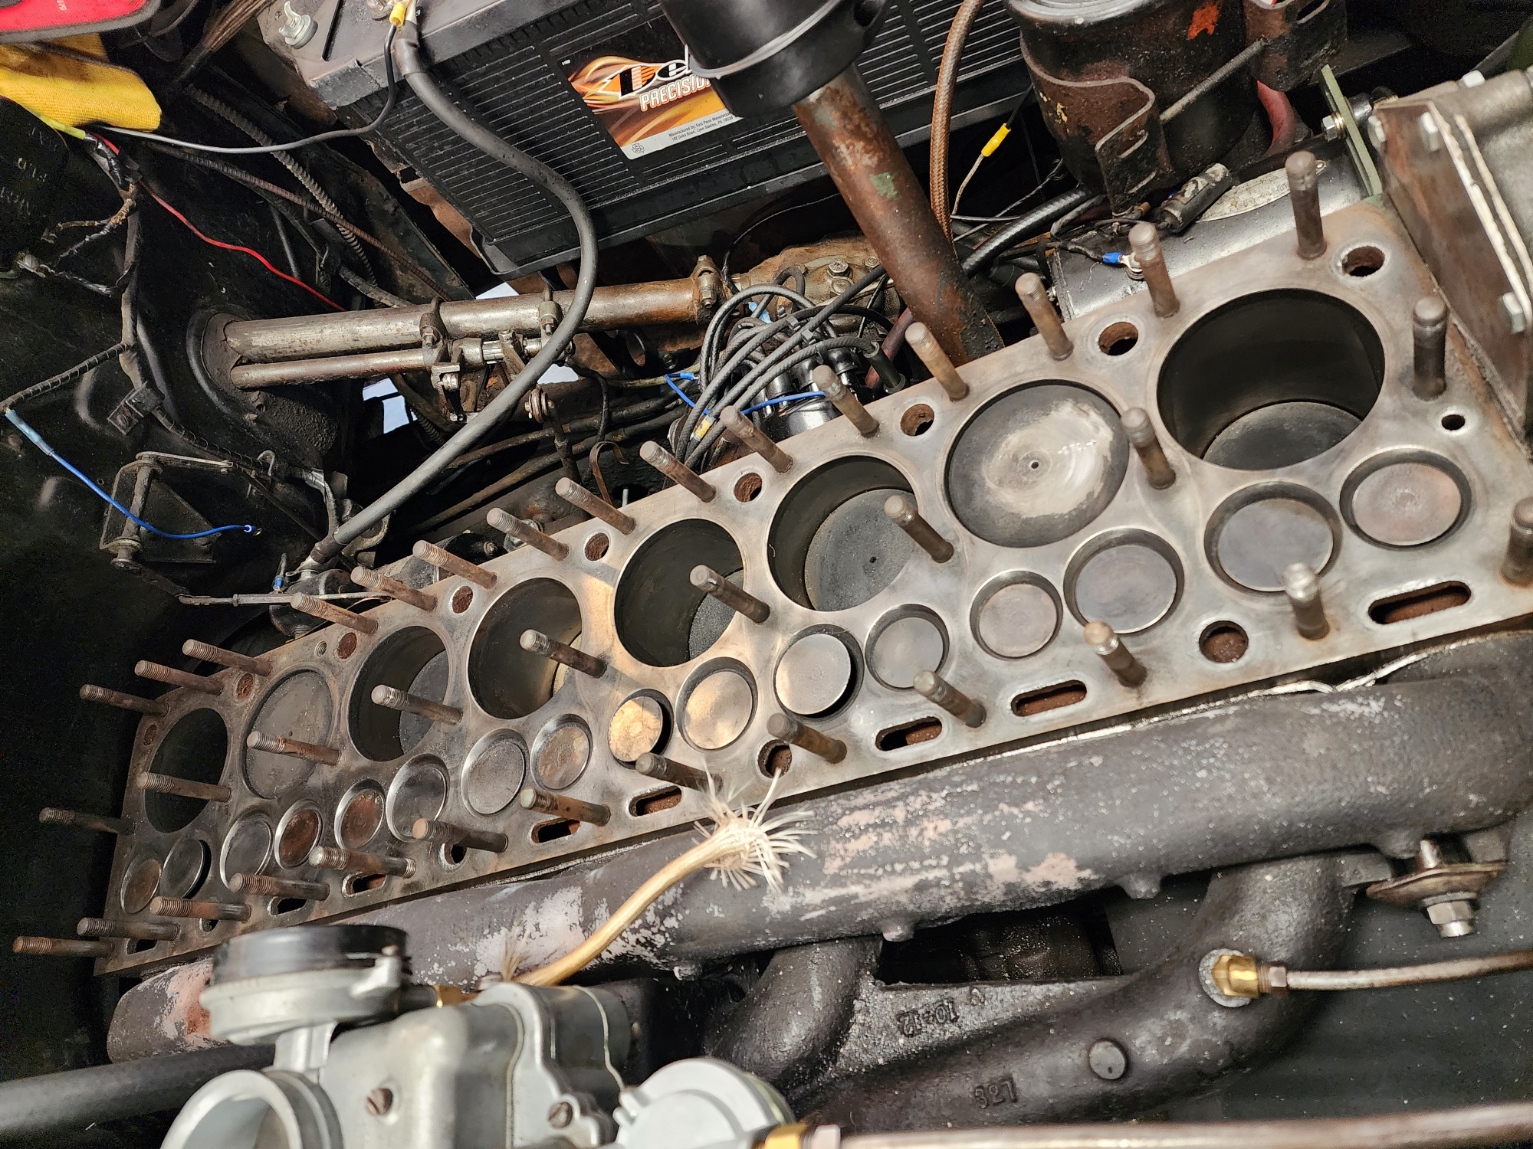
Posted on: 1/13 21:21
|
|||
|
||||


