|
Split Rim Handling Precautions
|
||||
|---|---|---|---|---|
|
Just can't stay away

|
Question for the forum: Do split rim wheels, once mounted and inflated, pose any significant handling risks? My '28 5-26 is the first car I've owned personally with split rims (disk type in my case), and I've heard a lot of horror stories.
The forum history has a lot of good information about the necessary precautions when mounting tires and inflating for the first time (e.g., use a cage, stem extension, etc.), but what about handling after that? Should I stand to the side when topping of the air? How paranoid should I be when removing a wheel? To date, I've used a stem extension or long lug wrench to keep my bits well clear of the lock ring, and then gingerly layed the wheel on its face. I suspect I'm being ridiculous, as presumably they must be predisposed to stay together once seated? If they were really as sensitive as my paranoia has made them out to be, the lock rings would fly off every time the car hit a bump, which clearly doesn't happen. I'm interested in your opinions. Thanks!
Posted on: 2014/9/16 7:45
|
|||
|
||||
|
Re: 28 5-26 Carb Rebuild Kit
|
||||
|---|---|---|---|---|
|
Just can't stay away
|
Thanks for the advise Tim. After grumbling a bit, I just bit the bullet and did as you suggested. I was able to polish the rough float valve on my lathe (although I didn't actually use it) and cut out the necessary missing gaskets easily enough.
These carbs are indeed simple, but there are a few undocumented gotchas that clearly escaped the previous rebuilder. Specifically, the choke butterfly linkage can be connected backwards so that the secondary airvalve lockout cam doesn't engage properly. Aside from the benefits of a thorough cleaning and new gaskets, I believe that was really all that was wrong with mine. In order to correct for that oversight, they had the airvalve spring tension setup wrong, and the idle set way too high to compensate. It ran okay, but overly rich and required partial choking at all times. Runs beautifully now though :) Having it to do over again though, unless your float valve or air valve springs aren't salvageable, I'd just make my own rebuild kit to begin with. I can understand that kits are often generalized, that there's variation between carbs one year to the next, and for all I know someone may have replaced certain components on my carb over the years. That said, the kit wasn't cheap and about the only parts I ended up using were the replacement air valve springs and the float cover gasket. I'd at least expected the intake gasket to be correct, since I'm certain that at least is a stock configuration and it's the hardest to reproduce (noting the required flame proof material).
Posted on: 2014/9/1 13:29
|
|||
|
||||
|
28 5-26 Carb Rebuild Kit
|
||||
|---|---|---|---|---|
|
Just can't stay away
|
Anyone have a good recommendation for a vendor that can supply a carb rebuild kit for my '28 5-26? I checked Daytona Parts, but they only go back to '32. I then ordered a kit from Kanter, who apparently sourced it from The Carburetor Shop.
After receiving their strong admonition that the kit could not be returned, I now believe I understand why. It is not a quality product (ill fitting and numerous wrong gaskets, coarsely ground needle valve, etc.). So... I either need to make do with the usable bits I received and create the rest, or find a better kit. Before spending more money and time though, I'm hoping someone else has already encountered and solved this problem :)
Posted on: 2014/8/31 19:21
|
|||
|
||||
|
Re: parts availability for pre-war models?
|
||||
|---|---|---|---|---|
|
Just can't stay away
|
Hi megamotorhead,
I've long felt the same way about Packards, and would have provided a similar list of favorites. After doing some of the same research, I decided that parts availability notwithstanding, I preferred the aesthetic and was going to look for a 6th-8th series car. I ended up with a 5th series after finding the right car for the right price (5-26 sedan), which was older than planned, but has been a joy to own thus far. What I've learned though, is that you'd better get used to Kanter and others telling you they don't have what you're looking for. There were more than 28,000 5th series cars made from 27-28, so I can only imagine that once the depression set in and those figures plummeted, you're going to have an even harder time finding parts for the 6th-8th. My car was a basket case when I bought it, and without access to a machine shop and NC milling machine, it still wouldn't be on the road. Consider that much of what you may need will either have to be reconditioned or fabricated outright. Here's my list of on-line parts resources: - www.classicaccessories.org/ - www.americanarrowcorp.com - julrichpackard.com/parts_inventory.htm - www.kanter.com/packard/pac-sen.html - ken-thornton.com/p_srparts_ti.html - www.customautoservice.com/ - www.packardsinternational.com/partsforsale.html - www.ebay.com (of course) - www.maxmerrittauto.com/ - www.classicandexotic.com - classiccarmotoroil.com/products.php - www.vintageandclassicreproductions.com/packard.htm All of this said, I'd buy it again and I'm still looking for the right 8-26 :)
Posted on: 2014/7/23 9:36
|
|||
|
||||
|
Re: passenger door outside lock
|
||||
|---|---|---|---|---|
|
Just can't stay away
|
Found a better pic of the lock and handle...
Attach file:  (53.84 KB) (53.84 KB)
Posted on: 2014/6/8 10:16
|
|||
|
||||
|
Re: passenger door outside lock
|
||||
|---|---|---|---|---|
|
Just can't stay away
|
Not sure on a '31, but here's a pic of the passenger side on my '28. It's right above the door handle.
Attach file: (84.82 KB)
Posted on: 2014/6/8 10:15
|
|||
|
||||
|
Re: Sharing my latest project
|
||||
|---|---|---|---|---|
|
Just can't stay away
|
The manifold looks great Chad.
Mark, I've used POR-15, in conjunction with their etching / galvanizing metal prep, on dozens of applications, including several on my Packard, over the past 2 decades and had very good luck with it. I'm located in Utah, where we use a lot of salt on our roads in the winter, so it's definitely been put to the test.
Posted on: 2014/6/8 10:04
|
|||
|
||||
|
Re: Solved: Vibration Damper Removal - 1928 5-26
|
||||
|---|---|---|---|---|
|
Just can't stay away
|
Easyed, I think you're right on the money with your assessment. The manual's implied meaning makes sense in that context now that I've been through the process.
What I wouldn't give to go back and get some of Packard's factory technician training so that all the similar, short, vague descriptions throughout the service manual didn't leave me scratching my head sometimes :)
Posted on: 2014/4/22 18:12
|
|||
|
||||
|
Re: Solved: Vibration Damper Removal - 1928 5-26
|
||||
|---|---|---|---|---|
|
Just can't stay away
|
Shoot, I completely missed that! I had my notification settings wrong and just didn't notice it. Thanks again for checking.
I drove the 5-26 this morning, and the engine feels nice and smooth. If I'm being honest, it's probably all in my head because I know the damper is working now, but it definitely isn't any worse at least ;)
Posted on: 2014/4/19 11:57
|
|||
|
||||
|
Re: Solved: Vibration Damper Removal - 1928 5-26
|
||||
|---|---|---|---|---|
|
Just can't stay away
|
One final post here to wrap up the thread: After contacting every possible parts source I could think of, I determined that the friction discs are unavailable and I'd need to make some for the damper if I wanted it to be functional. I ordered a sheet of Phenolic resin based on easyed's suggestion from Ridout plastics, knocked up some cad drawings of the discs, and borrowed some time on my good friend's CNC machine...
<a href="https://packardinfo.com/xoops/html/uploads/newbb/42808_535226c49905d.jpg"><img src="https://packardinfo.com/xoops/html/uploads/newbb/thumbs/42808_535226c49905d.jpg"></a> <a href="https://packardinfo.com/xoops/html/uploads/newbb/42808_535226f78a6f9.jpg"><img src="https://packardinfo.com/xoops/html/uploads/newbb/thumbs/42808_535226f78a6f9.jpg"></a> From there, it was a trivial affair to install the assembly as follows: hub -> friction disc -> inner flywheel & springs -> outer flywheel -> friction disc -> drive pulley. <a href="https://packardinfo.com/xoops/html/uploads/newbb/42808_5352272978e6f.jpg"><img src="https://packardinfo.com/xoops/html/uploads/newbb/thumbs/42808_5352272978e6f.jpg"></a> <a href="https://packardinfo.com/xoops/html/uploads/newbb/42808_53522735aefd3.jpg"><img src="https://packardinfo.com/xoops/html/uploads/newbb/thumbs/42808_53522735aefd3.jpg"></a> Once installed, however, a question arose that isn't well explained in the service manual (see step 4...). <a href="https://packardinfo.com/xoops/html/uploads/newbb/42808_535227673754a.jpg"><img src="https://packardinfo.com/xoops/html/uploads/newbb/thumbs/42808_535227673754a.jpg"></a> How exactly does one "Adjust damper standard"? From the vague description and included picture of special tool ST 143, I assumed by torquing the drive pulley retaining nut down until the damper released at the prescribed force (10 - 11 lbs). That meant I needed an ST 143... I took some rudimentary measurements of the picture and knocked up the following with a strap wrench, a 1x1, and a digital fish scale. :) <a href="https://packardinfo.com/xoops/html/uploads/newbb/42808_5352278fa2c56.jpg"><img src="https://packardinfo.com/xoops/html/uploads/newbb/thumbs/42808_5352278fa2c56.jpg"></a> It turns out, all of that diligence was ultimately unnecessary. Torqued down completely, my damper releases at ~10.2lbs... right in the prescribed range! <a href="https://packardinfo.com/xoops/html/uploads/newbb/42808_535227b226636.jpg"><img src="https://packardinfo.com/xoops/html/uploads/newbb/thumbs/42808_535227b226636.jpg"></a> <a href="https://packardinfo.com/xoops/html/uploads/newbb/42808_535227c885220.jpg"><img src="https://packardinfo.com/xoops/html/uploads/newbb/thumbs/42808_535227c885220.jpg"></a> That's it! I still have another sheet of phenolic if anyone ever needs a couple of these machined for their damper... Attach file: (89.22 KB)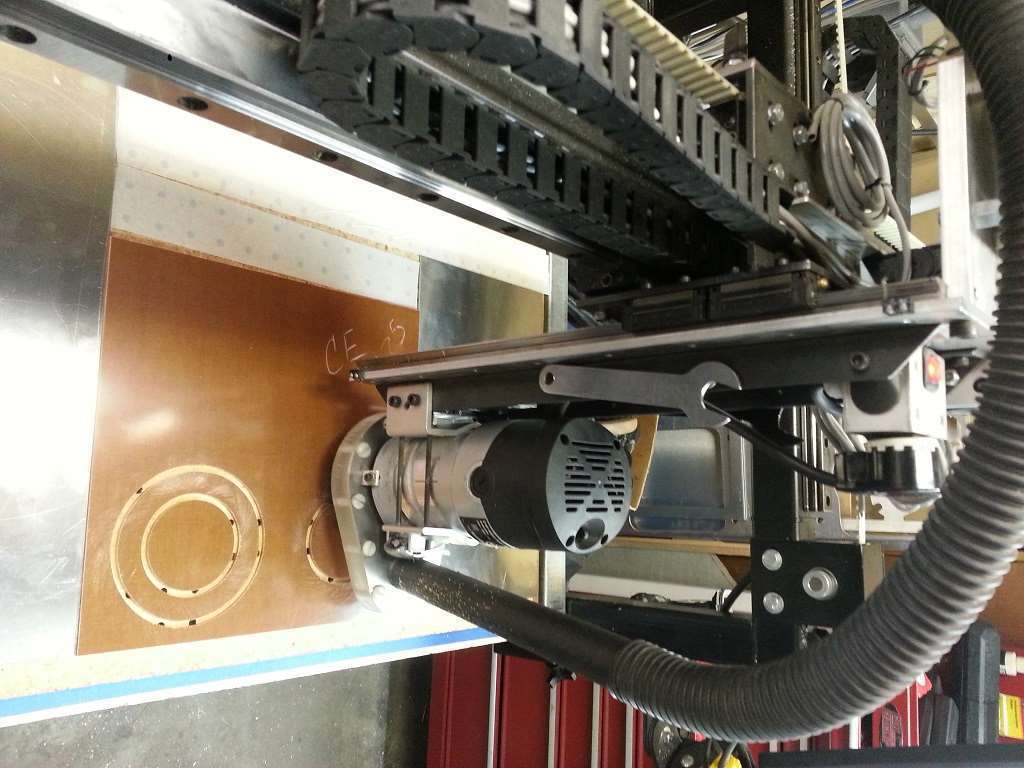 (52.21 KB) (52.21 KB)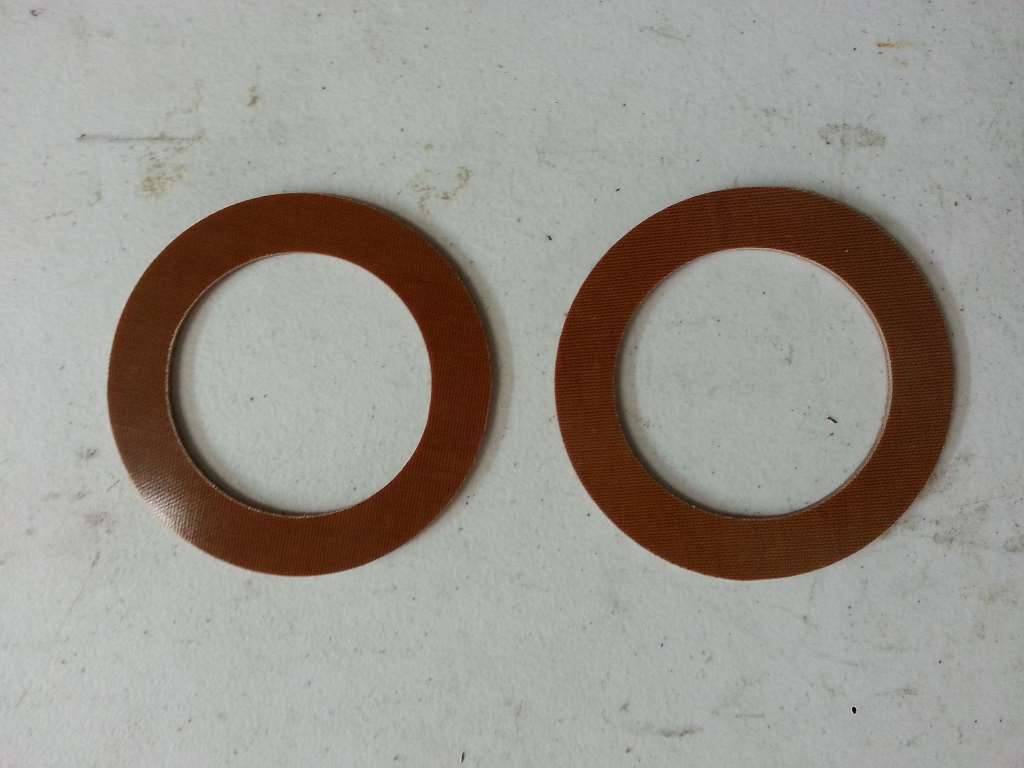 (69.44 KB) (69.44 KB)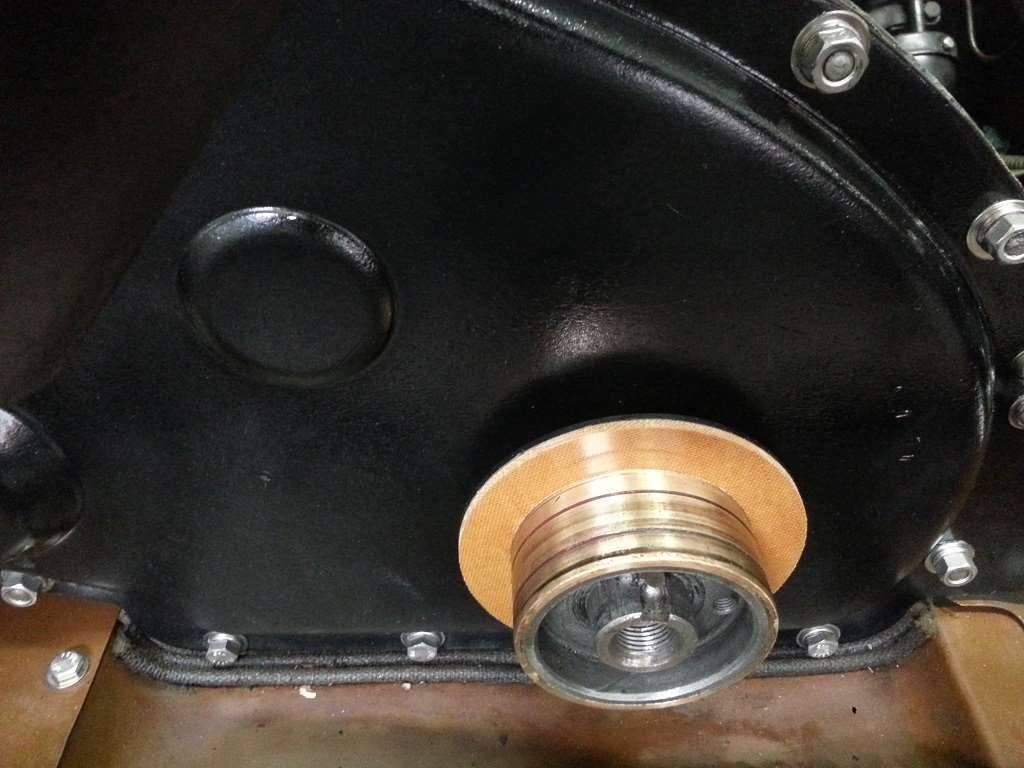 (85.96 KB) (85.96 KB)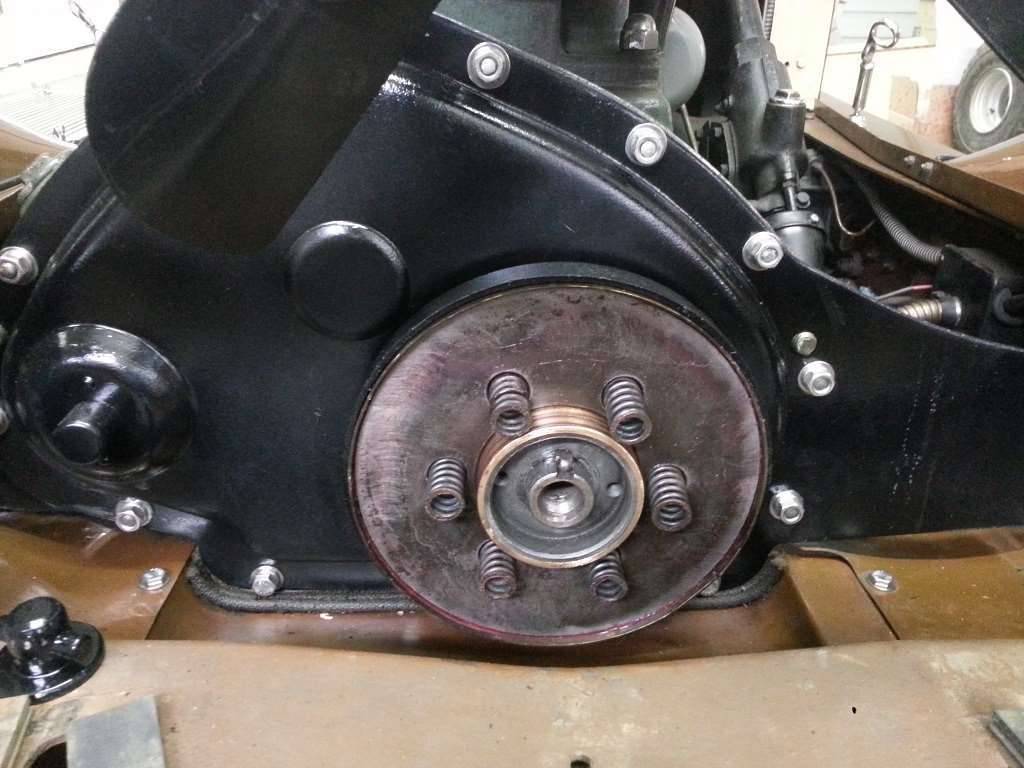 (78.33 KB) (78.33 KB)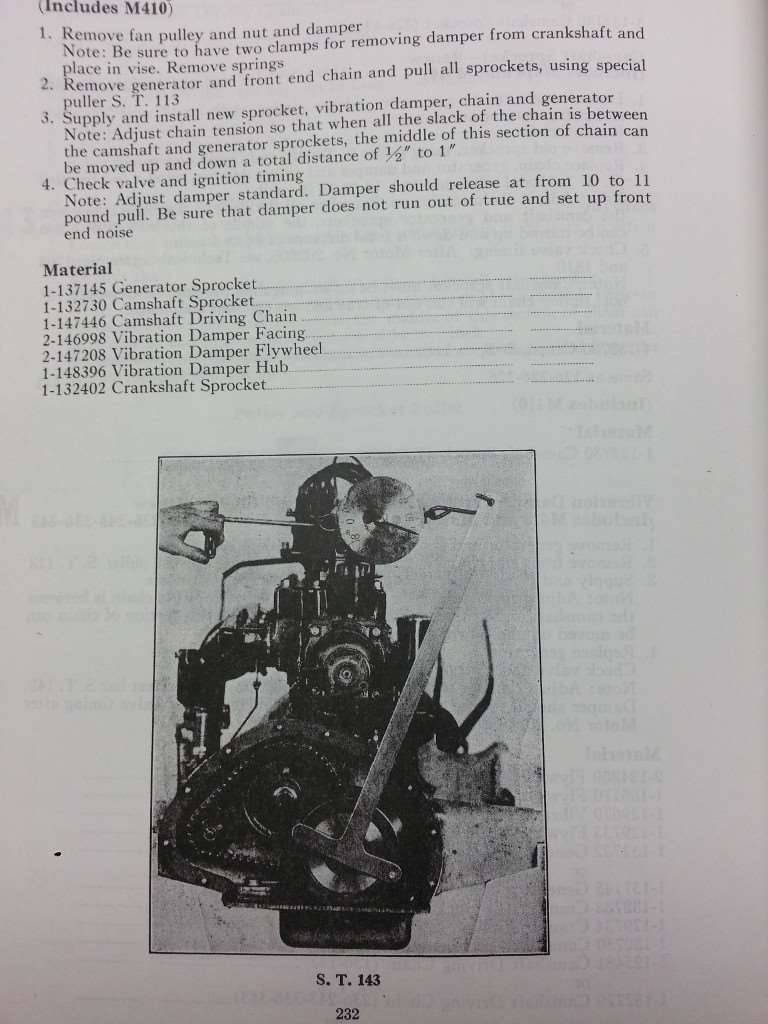 (85.75 KB) (85.75 KB)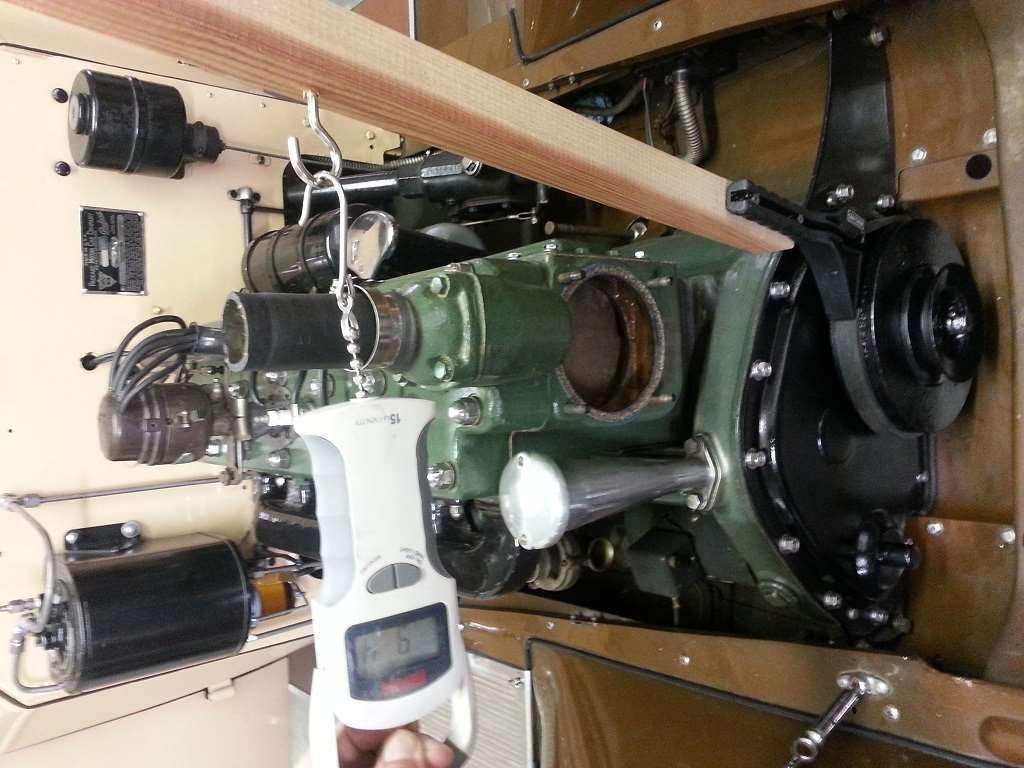 (44.85 KB) (44.85 KB)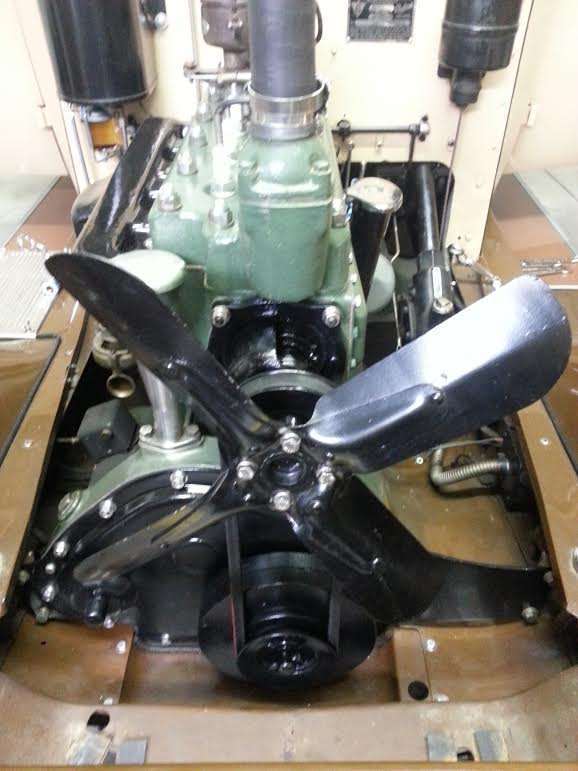 (34.38 KB) (34.38 KB)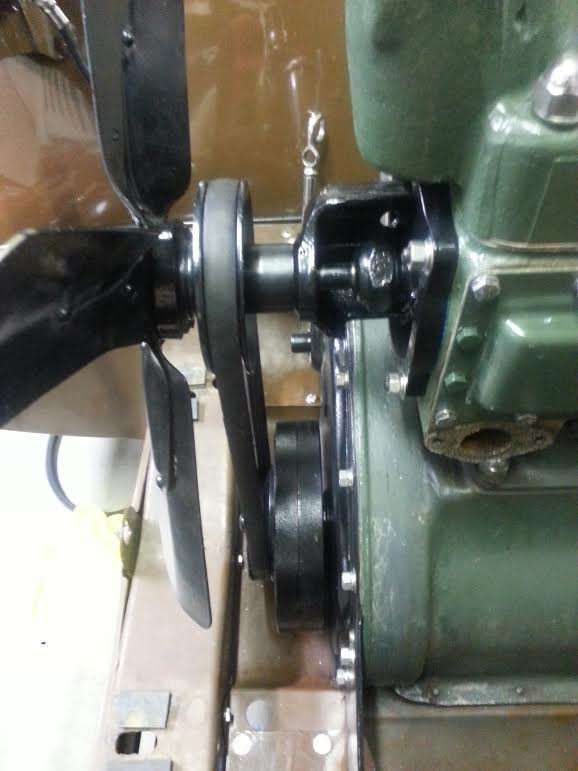
Posted on: 2014/4/19 2:38
|
|||
|
||||


