|
Re: Richter's '53 Caribbean
|
||||
|---|---|---|---|---|
|
Home away from home
|
My thought was to paint the car in Matador Maroon unless I find some evidence of an original color that I would take under advisement - would the dash be the exact same shade as the exterior? I only ask because I seem to see a lot of cars where the dash is a complementing color, but not usually the same. I suppose it's also possible that the dash is original paint and the exterior of the car was repainted in most cases.
So far the only identifiers I've found is the anti-theft number and the vin plate under the hood, which doesn't have a paint/trim stamp on it. As near as I can tell, none of the original interior survives that I can even use to make an educated guess.
Posted on: 2014/5/11 21:31
|
|||
|
||||
|
Re: Richter's '53 Caribbean
|
||||
|---|---|---|---|---|
|
Home away from home
|
Thanks to Bob K, one of the local Packard club personalities, and owner of a beautiful '53 Caribbean, I picked up a matching 327 L4xxxxx engine to go with my restoration. Spent most of the day wrestling it into and out of the pickup, and into the corner of the garage where it will live, and I'm definitely feeling it now.
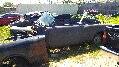
I was impressed with how much Bob was wrestling that big hunk of iron around though, he was doing better than I was, but then he only had to do it once.  I also picked up a set of his nice reproduction Caribbean plates, a fresh rebuilt 4 barrel carb and manifolds, a front split folding seat base, and some other random pieces that I'll definitely need. Goal for tomorrow is to get the Clipper spun around in the storage building so I can work on the front end of that easier. I don't think that's going to be much fun. I'm also thinking ahead to cutting out the floor pan - I'd love to take it as one big solid piece, but then I wouldn't be able to get it out. Attach file:  (64.69 KB) (64.69 KB)
Posted on: 2014/5/10 22:11
|
|||
|
||||
|
Re: Richter's '53 Caribbean
|
||||
|---|---|---|---|---|
|
Home away from home
|
After the local Packard Club meet on Saturday, and the British and European car show on Sunday, I didn't get a chance to do much on the Packard this weekend - I started taking apart the complete bumper that I picked up at the Pate swapmeet, since it'll end up going on my Caribbean bumper, and managed to give it a quick polish with steel wool:
Here's a nice little before and after: Attach file: (34.03 KB)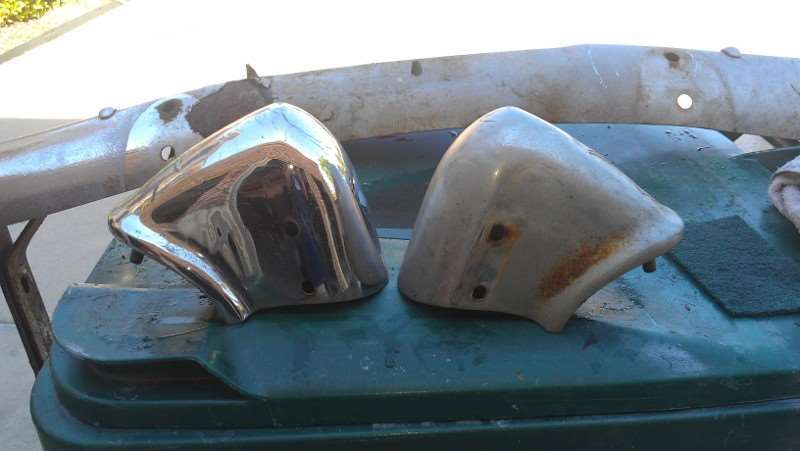
Posted on: 2014/5/5 15:10
|
|||
|
||||
|
Re: 1953 Caribbean Firewall/Inner Fender color
|
||||
|---|---|---|---|---|
|
Home away from home
|
I had the opportunity to see a (probably) original '54, even though it had signs of having maybe seen a topcoat touchup at least at some point in its past, with a little overspray on one of the windshield seals.
This one had black firewall for sure, and although the fenders were off (and nowhere easily found) I expect they probably matched as well. So, it may not still be 100% definitive, but it's definitely pointing toward black from the factory. I've got a gallon of black epoxy primer on order, and we'll see what the sheen looks like once it's sprayed on (still a ways away)
Posted on: 2014/5/5 12:36
|
|||
|
||||
|
Re: 1953 Caribbean Firewall/Inner Fender color
|
||||
|---|---|---|---|---|
|
Home away from home
|
I think this was the issue I had when I found the other thread where this was discussed.
 Please understand I'm not trying to start any disagreements, just trying to most accurately reproduce an amazing car. Please understand I'm not trying to start any disagreements, just trying to most accurately reproduce an amazing car. But it seems as if we have a disagreement between two great authorities - caribbeandude - The registrar of the Packard Caribbean database has the firewalls (and presumably inner fenders, for the same reason?) as being unretouched black primer (although probably with whatever overspray of top coats got through the hood gaps?) And Leeedy, with a lot of great pictorial evidence and firsthand experience with the cars has the bodies arriving in red oxide rather than black, and eventually getting painted the same body color as the top of the car. For what it's worth, I also downloaded and saved every image of Packard Caribbeans in the 1953 section of the photo archive, and find a few pictures with body colored firewalls and fenders, and a couple with black firewalls and fenders, and all of them appear to be restored. I also have to add that I can't tell from the picture whether the Caribbean shown is a '53 or not - it doesn't have the full sized wheel openings, but I don't know whether that was a piece customized by MB or not. Also, any trim that would point to it being a later one is missing, but it might also not have been shipped installed, since the cars weren't final painted until later. So I'm not sure how to proceed.
Posted on: 2014/5/2 14:48
|
|||
|
||||
|
Re: Low compression
|
||||
|---|---|---|---|---|
|
Home away from home
|
Quote:
Works for an OHV design, this is a L-head engine, is it not? Put the dough on the high (outer) edge of each valve and put the head down with a used gasket, and rotate the engine. I'm sure you're right. I haven't had a Packard engine apart yet to see how it works, or seen anything beyond pictures, and my own in a dark storage building. I saw pictures of the valvetrain from the side and assumed they were lifters actuating rockers like 'regular' engines. I've only rebuilt a 302 Ford engine, a '67 Triumph straight six, a 2.0L Dodge Neon DOHC, a 1.6L Mercury Capri DOHC, and a few 13B Rotaries (which don't have any valves at all), so all of my engine advice should definitely be taken generally, not empirically. :)
Posted on: 2014/5/2 14:38
|
|||
|
||||
|
Re: Low compression
|
||||
|---|---|---|---|---|
|
Home away from home
|
More importantly, you can just check it with a proven straightedge to see if it needs it. Some people mill the head everytime they rebuild an engine. I always get out the metal straightedge, a flashlight and a set of feeler gauges before just giving someone $300-400.
The fast explanation of valve clearance testing is, you get some playdough, and flatten it to about 1/4" or so on top of the piston, then bolt the head back on with a headgasket, and turn the engine over. Then take it all back apart, take out the playdough, and cut it in half across where the valve impression is - the depth of the playdough at the deepest part of the valve impression is your valve clearance.
Posted on: 2014/5/2 12:44
|
|||
|
||||
|
Re: Low compression
|
||||
|---|---|---|---|---|
|
Home away from home
|
It's not a problem at all! These old engines are fairly low compression and very forgiving compared to some of the newer ones, and should run fine with a little attention. So while it would be wonderful to spend a couple of grand and get that nice 47 angle valve job, line bore, head planed, crank reground etc, you should be able to get it running decent with what attentions you can administer at home.
You're doing it exactly right so far - ask all the questions you need to, and don't worry about what anyone thinks. Understand what you're doing and get comfortable with it before starting and you'll come out fine. Engines run fine with stuck rings all the time - if I'm remembering right, BigKev mentioned in his project blog that he was running for quite a while with stuck rings, and eventually the heat cycles and oil broke down the carbon enough to free them. If they're not scratching the cylinder walls, then you can just run them for a while and see if they free up. Alternatively, since you're already in the engine, you can pick up a piston ring set pretty inexpensively, and change them out while you're in there. You'll have to remove the pistons to do that, which means you'll have to get the oil pan off the bottom, unscrew the bolts on the connecting rods where they go around the crank, and pull the pistons out one at a time - installing rings isn't hard work, and the tools for it are pretty cheap. If you google or youtube search on replacing piston rings, you should find a ton of how to videos and step by steps, and pistons are pistons for the most part, so the same concepts should apply from a chevy or ford engine over to a Packard engine. Rather than sending out for a valve job, you can lap the valves yourself with a kit from OReilly or AutoZone - it comes with a stick with suction cups at each end and two tubes of paste, rough and fine. Basically you compress the spring (valve spring compressors can be bought or loaned from OReilly or Autozone) Compress the spring enough to pull the keepers off (using a 99cent magnet keeps you from dropping them into the engine). With the spring off, pull the valve down, put the rough paste on the back of the valve (where it touches the other metal) then twist it back and forth a few times to clean it, then wipe the rough compound off, do it again with the fine, you should be able to get good improvement just from that, and the $30 in kit is a lot nicer than hundreds of dollars for a 3 angle valve job. Again, valve lapping should be pretty well documented online, too. Really, the only remotely tricky part about doing engines is making sure all the moving parts (valves, pistons, etc) go back on in the same order they came off (each valve and each piston back into the same holes they came out of originally), and making sure the camshaft and crankshaft are lined up correctly. Just take your time, go slow, and if you're holding a sledgehammer or angle grinder or a welder, take a minute to ask yourself why and maybe head back to the computer for some more questions. Expensive machinery and sterile cleanroom environments are nice, but remember people have kept these things running for years with hand tools, in the open air, under trees dropping acorns and pollen and everything. Take care to keep things as clean as you can, and don't get frustrated, and you should be fine.
Posted on: 2014/4/30 12:00
|
|||
|
||||
|
Re: Harmonic balancer pulley not seating flush
|
||||
|---|---|---|---|---|
|
Home away from home
|
When I put together my straight 6 Triumph engine, I had a hard time because the keyway (slot in the pulley) was binding up. After cleaning the key and keyway it went together much better.
Posted on: 2014/4/29 15:47
|
|||
|
||||
|
Re: Ping In 359 Engine
|
||||
|---|---|---|---|---|
|
Home away from home
|
Around here they can also be borrowed with a deposit from the major parts stores, like OReilly or Autozone (OReilly owns Checker too).
Depending on access, you can also jump the solenoid with a screwdriver on some cars, by laying a screwdriver from the big hot lug on the starter over to the smaller one on the solenoid, which will crank then engine from under the hood. I feel better using a starter button though, or borrowing a neighbor.
Posted on: 2014/4/29 10:45
|
|||
|
||||


