|
Re: Rod for Adjusting Front Seat 1932 901
|
||||
|---|---|---|---|---|
|
Home away from home

|
Oops - I was eating dinner and the light bulb went off. It is the part on the seat frame that turns and not the rod. After some WD-40 and a little coaxing on the part on the seat frame all is well.
Posted on: 2016/3/12 20:42
|
|||
|
||||
|
Re: Our 1932 901
|
||||
|---|---|---|---|---|
|
Home away from home
|
David,
Thanks for the heads up I see that Classic & Exotic have a nut. The nut I have has 28 threads per inch (TPI) and the gauge is 27 TPI. I think the 27 TPI is a 1/16" NPT. For the $38.75 plus shipping that C&E is asking for their nut, I think I'll make one as I'm guessing it should take less than a 1/2 an hour. ?
Posted on: 2016/3/12 15:50
|
|||
|
||||
|
Rod for Adjusting Front Seat 1932 901
|
||||
|---|---|---|---|---|
|
Home away from home
|
I'm working on the front seats on my '32 901 and I have a question about he adjusting rod that is used on the driver's seat. It would appear that the smaller part that protrudes at the rear of the shaft (arrow) must be a removal pin that allows the main shaft to rod for adjusting.
I've tried removing it using liquid wrench and heat, but to no avail. I thought that before using brute force on it, that I would post this question. Also, in case I end up needing to drill it out does anyone know how far it goes into the main shaft? Attach file:  (83.37 KB) (83.37 KB)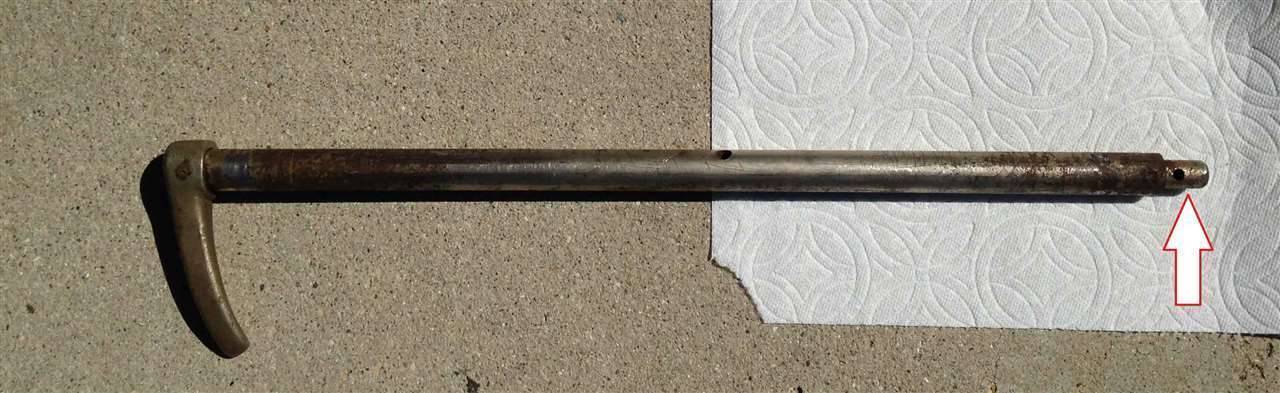
Posted on: 2016/3/12 14:33
|
|||
|
||||
|
Re: 1930's video Beverly Hills Packard.
|
||||
|---|---|---|---|---|
|
Home away from home
|
NEAtT- thanks for sharing. I like the scene at 1.30 minutes when the truck makes a left turn across on coming traffic and the car doesn't slow down, but swerves to avoid a crash.
It reminds me of driving in Italy several years except there where more cars in Rome.
Posted on: 2016/3/8 11:51
|
|||
|
||||
|
Re: Our 1932 901
|
||||
|---|---|---|---|---|
|
Home away from home
|
Dave,
I talked to Chris last week. He turned me on to several sources - they either did not had one or did not respond. I'll go with the repaired one and keep my eyes open for another one. While we are discussing my Packard challenges I got ready to connect the small line from the gas tank to the gas gauge and ran into a problem. The compression nut that came with the kit has 5/16" with 24 threads per inch while the gauge appears to be 27 threads per inch. Any ideas on what gives?
Posted on: 2016/3/3 18:58
|
|||
|
||||
|
Re: Our 1932 901
|
||||
|---|---|---|---|---|
|
Home away from home
|
The rear section of drive shaft that I got from Dave looked pretty sound, but I could not find anyone in the Los Angeles/Ventura area that could weld and balance it. This was because they did not have anything that would match up with the 6 bolt Packard flange without out making an adapter. I did find a shop that would do it for "$500 or so". Therefore, I decided to go with a completely new DS which is going to be made by Driveshaft Specialist in San Antonio for $625. It should be done in a week or so.
I finished most of the work on the dash. The instrument clustered was installed and some of the bright work that I had already had plated. The map light is now out for plating. I was unable to locate all of the correct push/pull switches for the dash and have ordered new ones. Although they are different, they'll be behind the dash and out of sight. I'll make knobs for them so they look correct. All of the floor boards have been installed and fitted. The bottom of the front seat was cleaned up and painted with a semi-flat black paint. I'll be sending the metal frame for the driver's seat, the back of the front seat and other pieces out for media blasting the remove the rust on them. I've ordered additional cloth wire so I can finish off the electrical under the dash, the rear seat cigar lighters, and the dome light. I've tried to find the left rear tail light stanchion as the top on mine that holds the license plate had broken off. Therefore, I made an attempt to repair mine by: 1. Forming a new top out of brass 2. 2. Attaching a threaded .25" rod to the base to strengthen the brass piece by drilling and tapping the base & brazing the rod to the brass top piece 3. Welding the threaded rod and brass to the base with Muggy Weld's Super Alloy 1. I'll be sending it out for plating. I don't think the fix will be as strong as the original so I'll keep my fingers crossed that it does not come apart at the plater's. Attach file: (107.53 KB)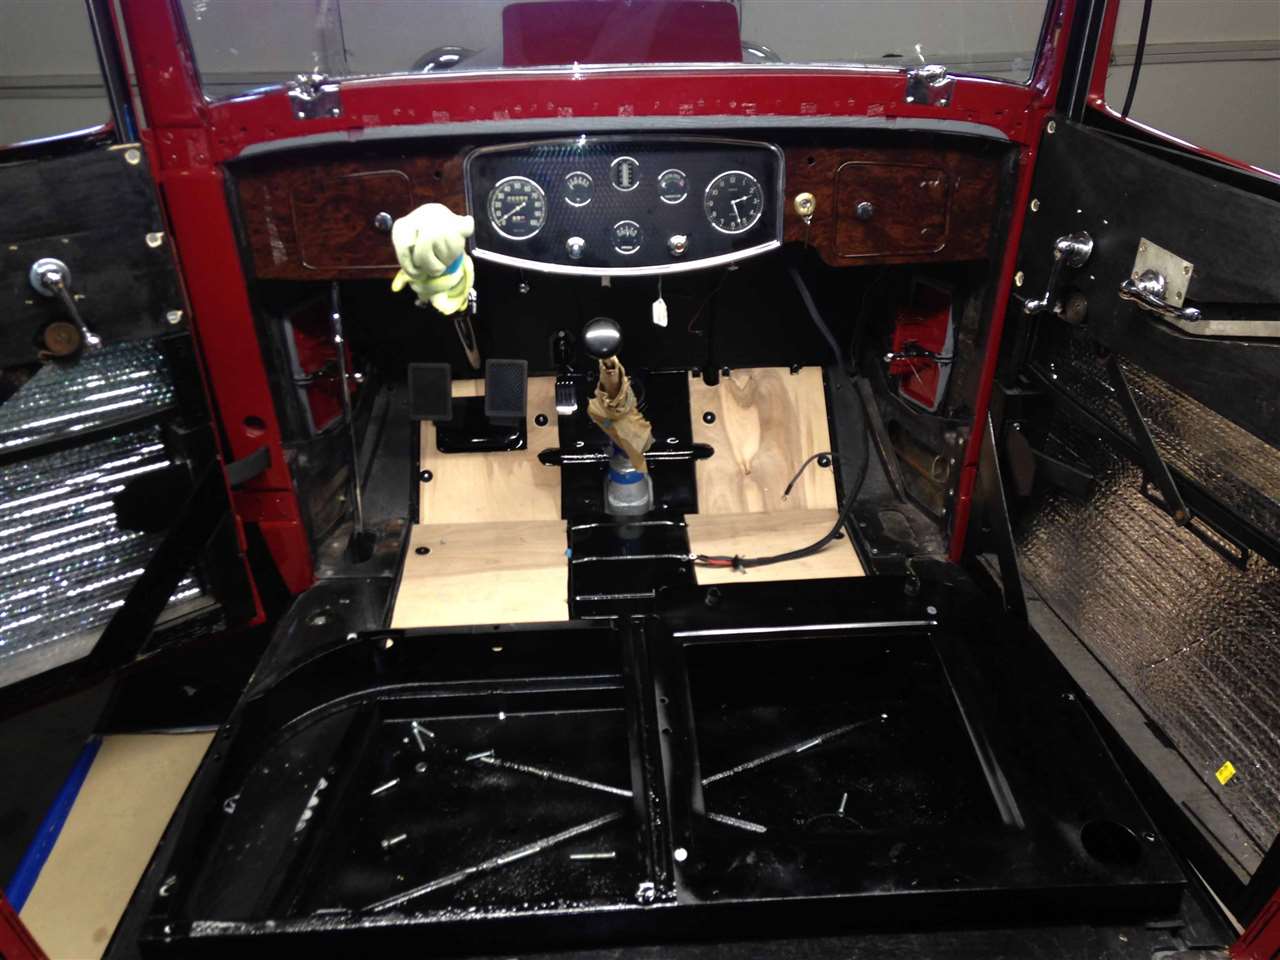 (76.27 KB) (76.27 KB)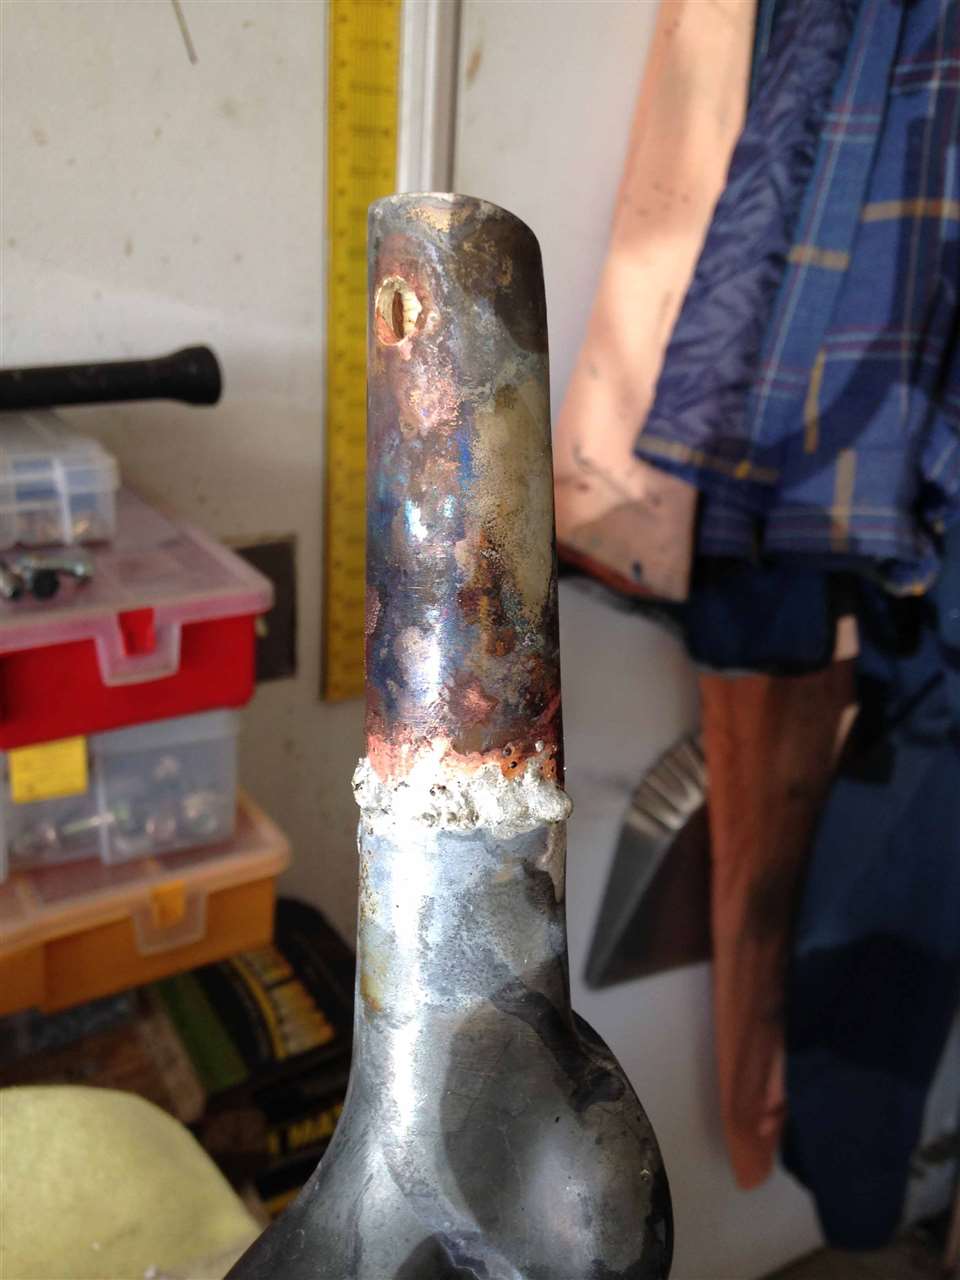 (79.95 KB) (79.95 KB)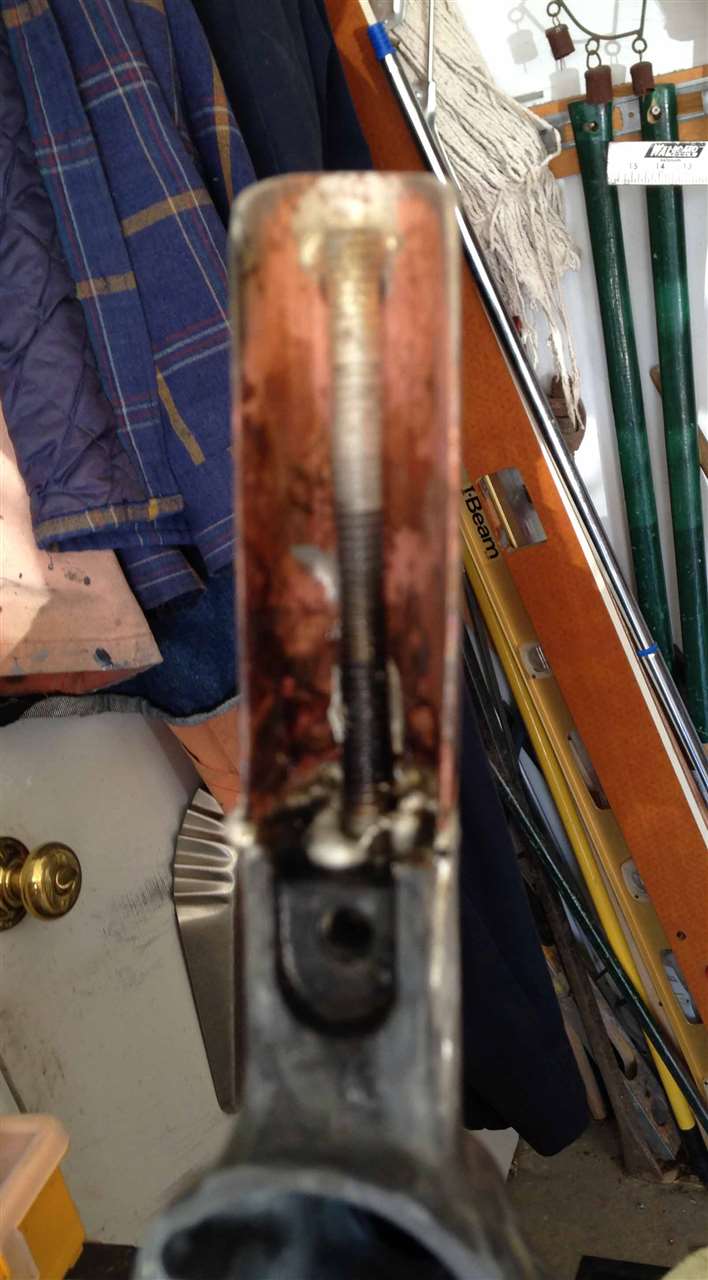 (139.29 KB) (139.29 KB)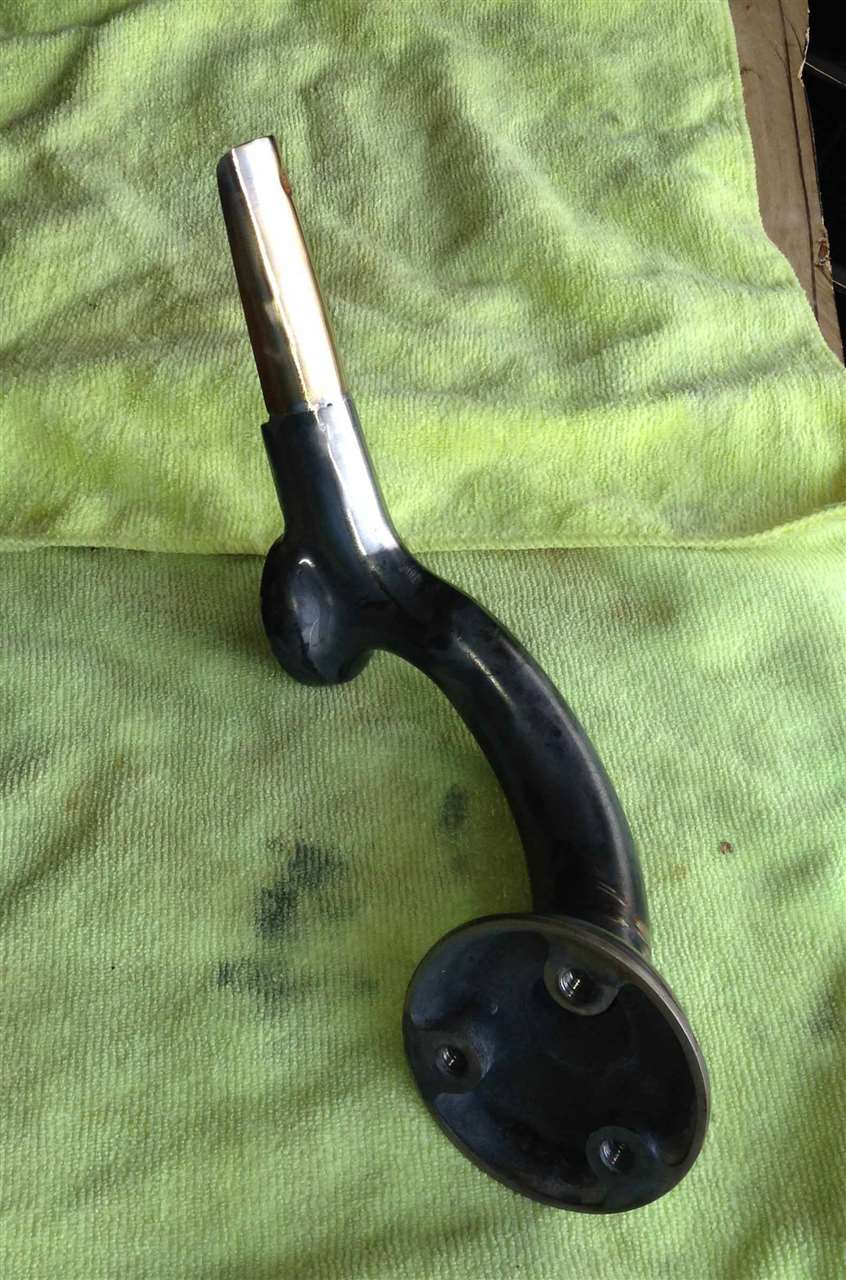
Posted on: 2016/3/3 11:21
|
|||
|
||||
|
Re: head gasket problems with 1935 eight
|
||||
|---|---|---|---|---|
|
Home away from home
|
I think I would remove the head and examine the area (head * block) for any cracks. I would clean and wipe down around the areas where the leak is then coat with a penetrating dye to look for cracks. If none are found, then I would reinstall the head with a new gasket. If you still have the old gasket, I would compare the new vs. the old.
Good luck and hopefully your problem is just a bad gasket. You might also want to check the head for flatness.
Posted on: 2016/2/29 17:33
|
|||
|
||||
|
Re: Dash & Instrument Panel on a '1932 901
|
||||
|---|---|---|---|---|
|
Home away from home
|
Thanks for all of your suggestions and inputs. As mentioned in some of my earlier requests for assistance, I took over this restoration from another person and that the car's intake had been converted to a downdraft carburetor. It has an automatic choke.
Going through all of my boxes of goodies I found two cables (22" and 34" long) and 1 switch to fill 4 holes. I saw the area for the map light, but did not find one. And that's what led me to pose my question. Based on your inputs and poring over PackardInfo & Google photos (Couldn't find an Owner's Manual) here is what I'm going to try to accomplish. Try to find 2 switches like I already have or 1 switch and a starter button. If I can't find any, I'll buy new ones that I can make a bezel and knob that look like the one posted above. I'll install the shorter cable for a throttle cable in the red hole (Note that the linkage on the firewall has a place for it to connect for the throttle) and ignore the connection on the steering column. I'll install 2 switches in the green holes and wire as per Dave (32model901). The blue hole will either be filled with a switch and will power lights that I'll install in the glove boxes or a starter switch that will be non-functional. The longer cable will go into my "Not To Be Used" box. If the previous had not already had the dash, and window frames wood grained or if I hadn't, I would fill the hole in. Dave did you re-magnetize the magnet or have it done by someone else? Any other thoughts are more than welcomed and are encouraged. Thanks Again
Posted on: 2016/2/27 11:30
|
|||
|
||||
|
Dash & Instrument Panel on a '1932 901
|
||||
|---|---|---|---|---|
|
Home away from home
|
I'm working on finishing the wiring on the dash and its installation. I'm assuming that the green circled holes are for the throttle and choke (see photo). Which hole (upper or lower) is correct for the throttle?
I only have 1 switch in my boxes of parts that seems like it would be for the dash (see photo), but it does not fit the red hole in the instrument panel. Is it a switch for this Packard and if so, what is it for? It is a pull switch and has three positions. What goes in the blue circled hole? In addition, is there a chrome or nickel plated bezel that goes over the yellow circled hole for the keyed ignition? It appears that the previous owner had both the clock and speedometer rebuilt. However, neither on seem to work. Does anyone out there have any recommendation? Attach file: (55.79 KB) (74.51 KB) (74.51 KB)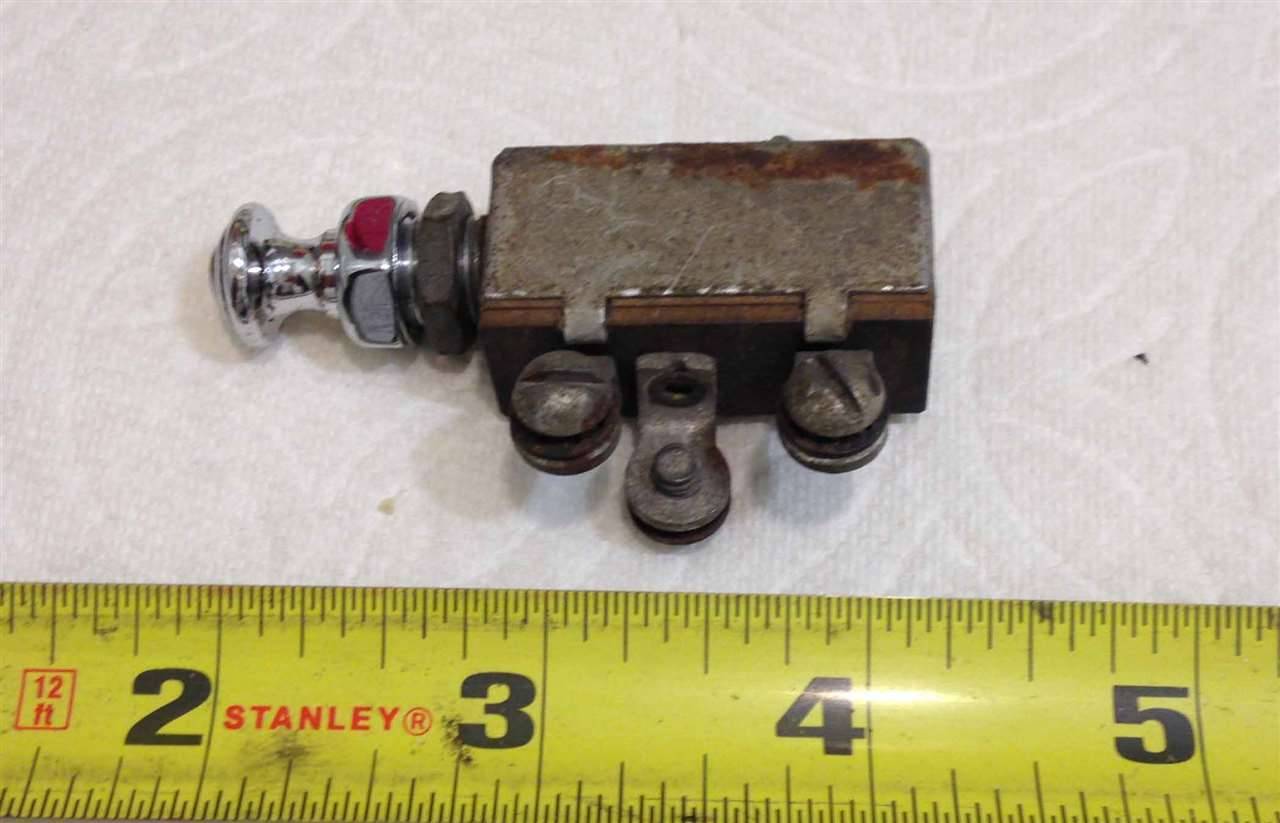
Posted on: 2016/2/24 11:41
|
|||
|
||||
|
Re: A Question About a Generator/Relay/Regulator for a '32 901
|
||||
|---|---|---|---|---|
|
Home away from home
|
Dave,
Thanks for getting back to me so quickly. I took off the rear cover of the generator and it looks like it has been completely rebuilt. The 1st photo was a portion of a larger electrical schematic that I found (don't remember where now), but here it is. Instructions on how to adjust would be appreciated. Thanks Again Attach file: (150.81 KB)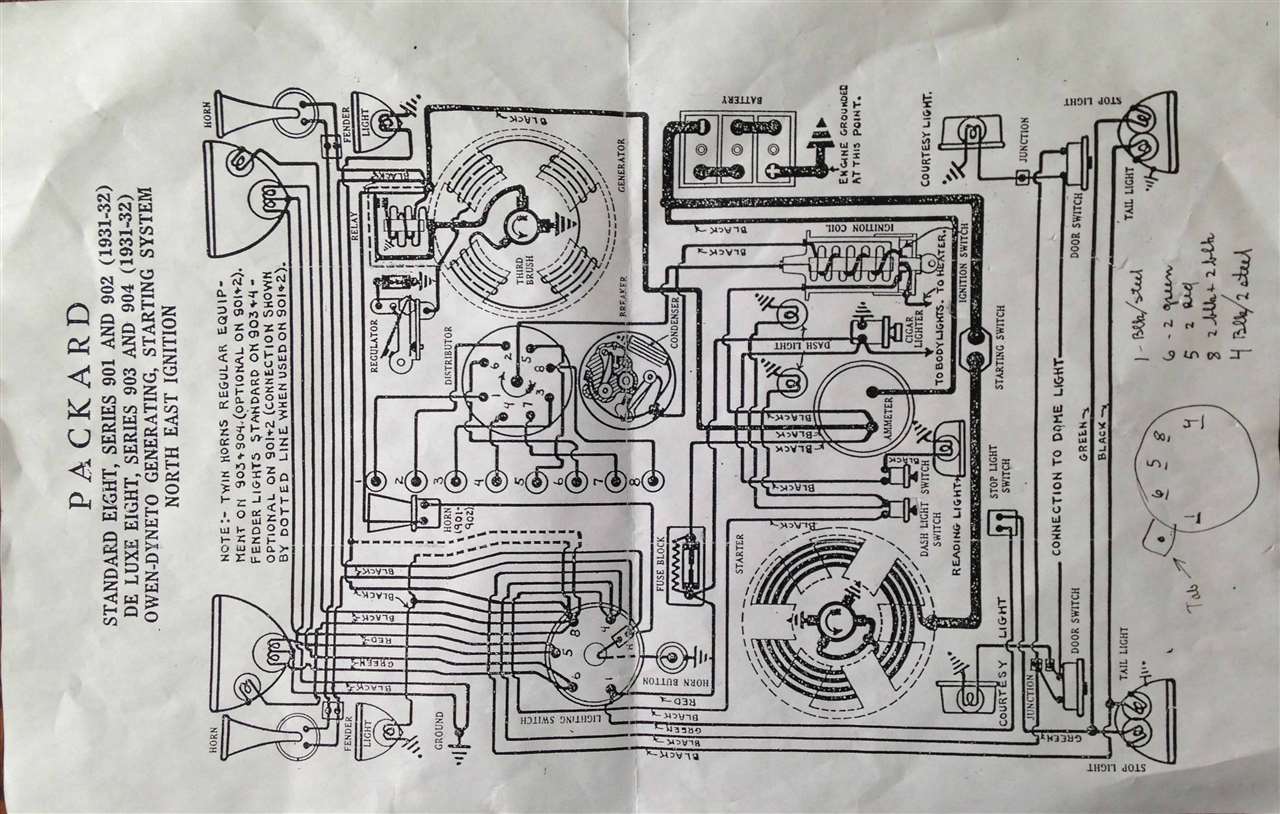
Posted on: 2016/2/15 11:31
|
|||
|
||||


