|
Re: Packard Oil Filter Conversion Kit - White Glove Collection
|
||||
|---|---|---|---|---|
|
Home away from home

|
I'd be interested to see it on a car to see how noticeable the modern filter is underneath it. Interesting idea.
-Kevin
Posted on: 2021/6/14 23:16
|
|||
|
||||
|
Re: 1938 Super 8 1605 - adventures with a newbie
|
||||
|---|---|---|---|---|
|
Home away from home
|
I'm sad to report that my dad, Floyd, passed away two days ago, unexpectedly. We were able to be there with him, and it was peaceful. We all love him and he will be missed. I'll always remember the times we got to drive the Super 8 together, and most recently the many hours we spent rebuilding the engine and learning together.
I will be taking over the rest of the engine rebuild and will get the car back on the road in his memory. I'll post updates here as I get them. He was excited to get the car back on the road this year and drive it with my mom and the grandkids. So I will make sure that happens. Once it's running again the grandkids will get rides whenever they are in town. Dad's purpose in getting the car was to provide something unique for the family to make memories with, and I will continue that purpose. -Kevin Picture 1: Dad on the left, his dad on the right. Grandpa is still alive. Picture 2: Grandpa Packard's first ride in a Packard Attach file:  Grandpa and Dad Packard.jpeg (132.96 KB) Grandpa and Dad Packard.jpeg (132.96 KB)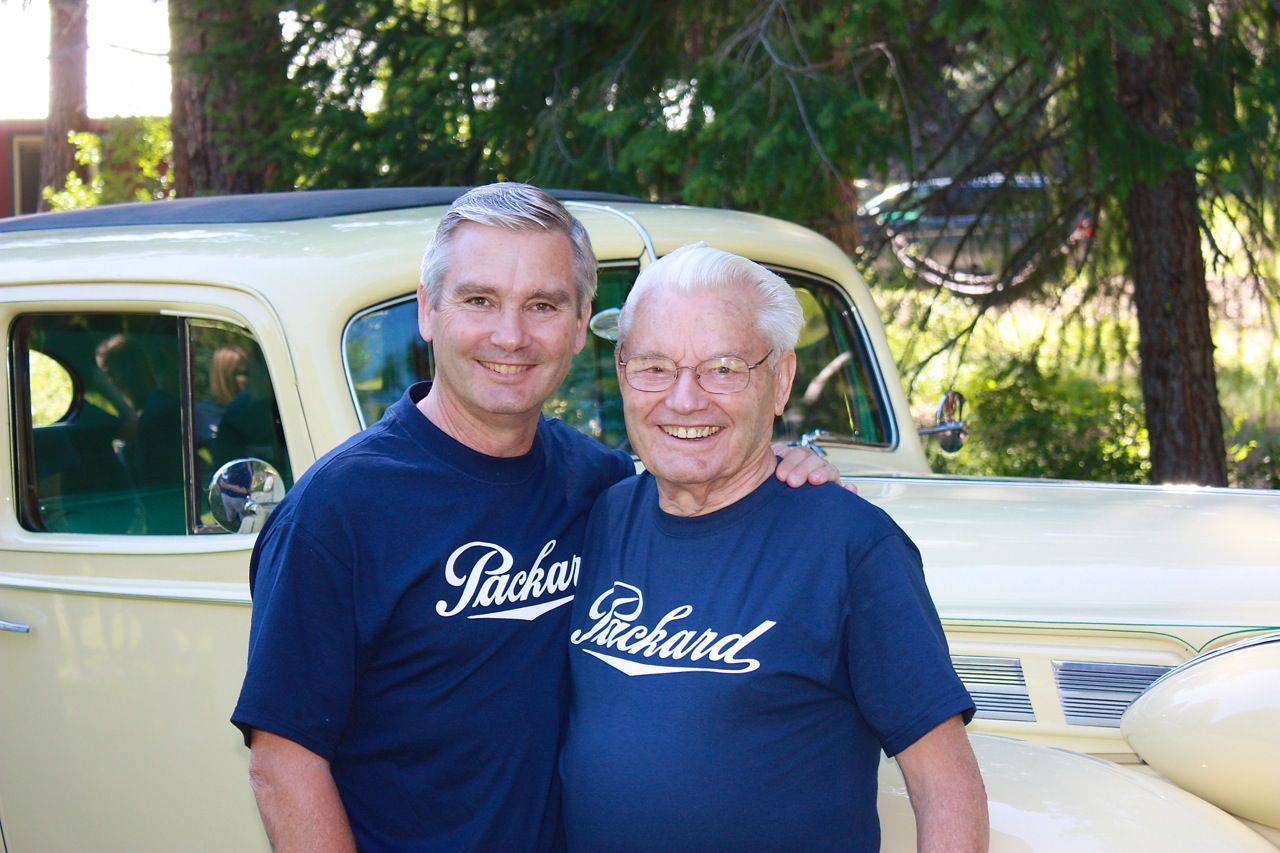 Grandpa and Dad Packard driving.jpeg (114.80 KB) Grandpa and Dad Packard driving.jpeg (114.80 KB)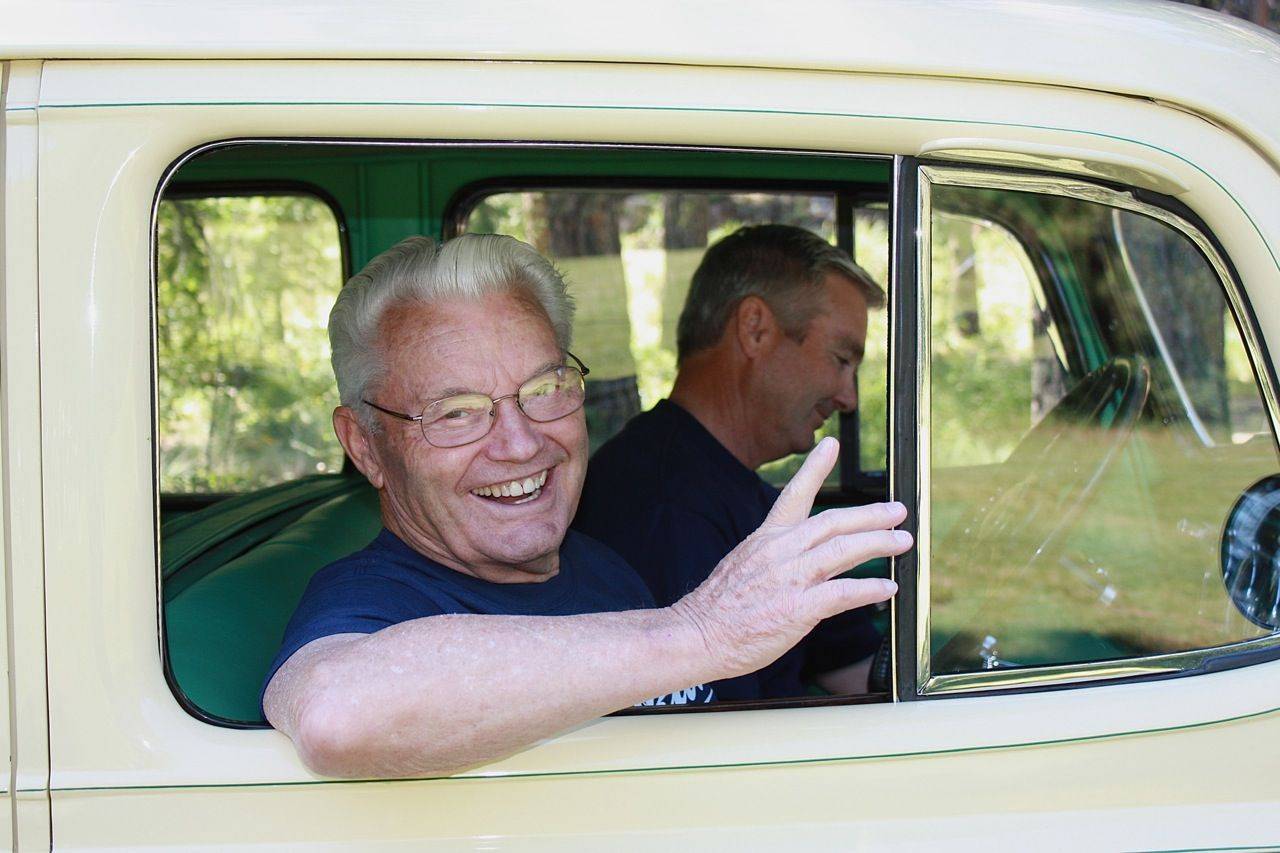
Posted on: 2021/6/12 22:47
|
|||
|
||||
|
Re: Which hubcaps for a 53 convertible coupe?
|
||||
|---|---|---|---|---|
|
Home away from home
|
No problem Chris. Yes, these are Junior hubcaps so the Seniors may be totally different. I have no idea.
Hope you get an answer! -Kevin
Posted on: 2021/6/9 16:43
|
|||
|
||||
|
Re: Which hubcaps for a 53 convertible coupe?
|
||||
|---|---|---|---|---|
|
Home away from home
|
Here's what mine are like. These are from a '54 Panama. I think they would be the same as '53. I also have no way to tell if these are original, but I would assume so since everything else on the car is.
-Kevin
Posted on: 2021/6/9 16:04
|
|||
|
||||

|
Re: KPack
|
||||
|---|---|---|---|---|
|
Home away from home
|
More small progress. I'm working my way through replacing all the beltline trim (window fuzzies) because the original stuff was trashed. Most of them had no mohair left, and all the rubber was hardened and falling apart. This allowed the windows to rattle like crazy.
I removed the old stuff, all held in with small screws. Some were very difficult to remove so I began spraying all of them with PB Blaster preemptively. After they they came out fine. I used this stuff from Restoration Specialties https://www.restorationspecialties.com/YM93-96-FLEXIBLE-PILE-LINING-RUBBER-COVERED-CHANNEL_p_36170.html. It's definitely not the same height as the original, though it says that is works for 51-57 Packard's on their website. But they seem to work. And it was cheaper than Steele. I clamped the new onto the old, then used the original drill holes as a pattern for the new. This allowed me to get them mounted up just about perfect. When I mounted them back on I made sure the screw heads were as deep as possible to avoid scraping the window. The glass no longer rattles and the car looks a bit more finished. I will eventually need to redo the window run channels, but that's a lower priority right now. I will also need to repaint all the interior trim....the original paint is pitted and flaking off everywhere as seen in the picture. I have the paint already but need to find the time to remove all the bad trim, sand it down, prime and paint. Again, not super high on the priority list. -Kevin Attach file:  Clamping the old and new beltine.jpg (110.19 KB) Clamping the old and new beltine.jpg (110.19 KB)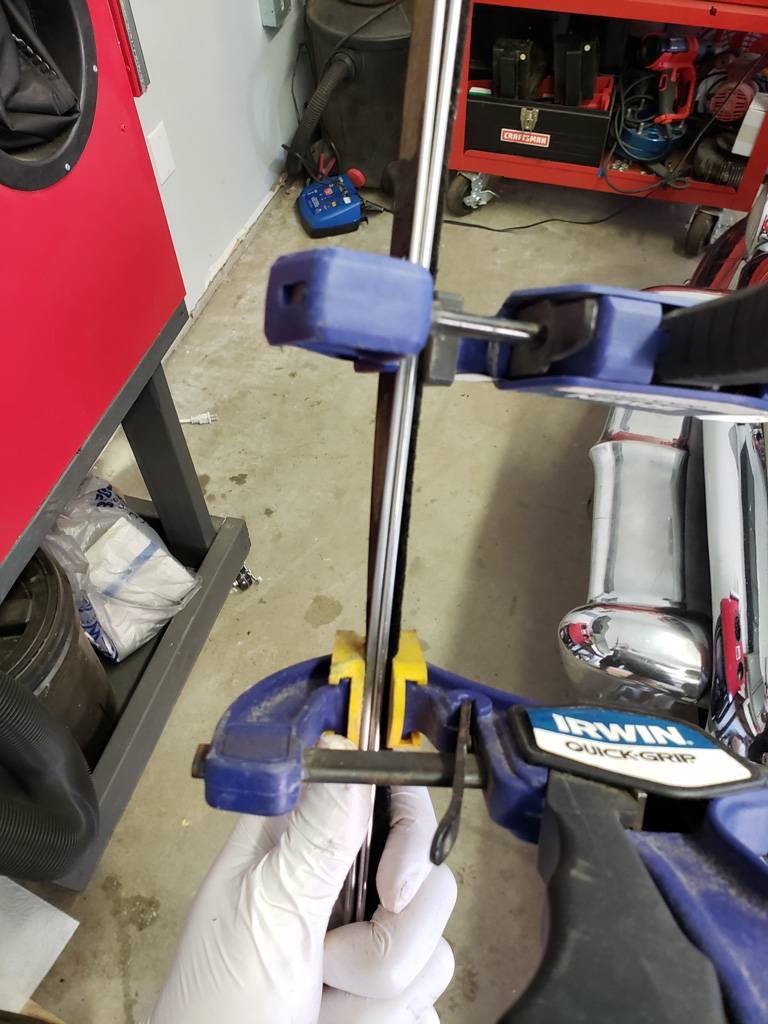 Using the original holes as guides for the new.jpg (92.85 KB) Using the original holes as guides for the new.jpg (92.85 KB)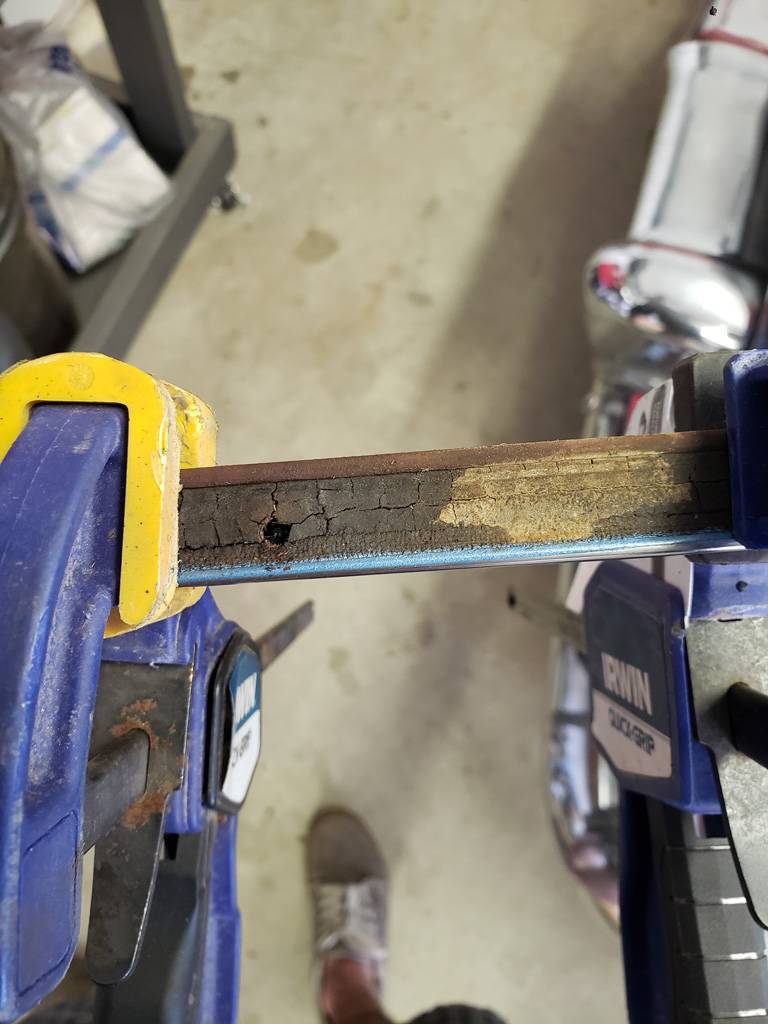 New beltine installed.jpg (94.01 KB) New beltine installed.jpg (94.01 KB) No more rattling windows.jpg (121.31 KB) No more rattling windows.jpg (121.31 KB)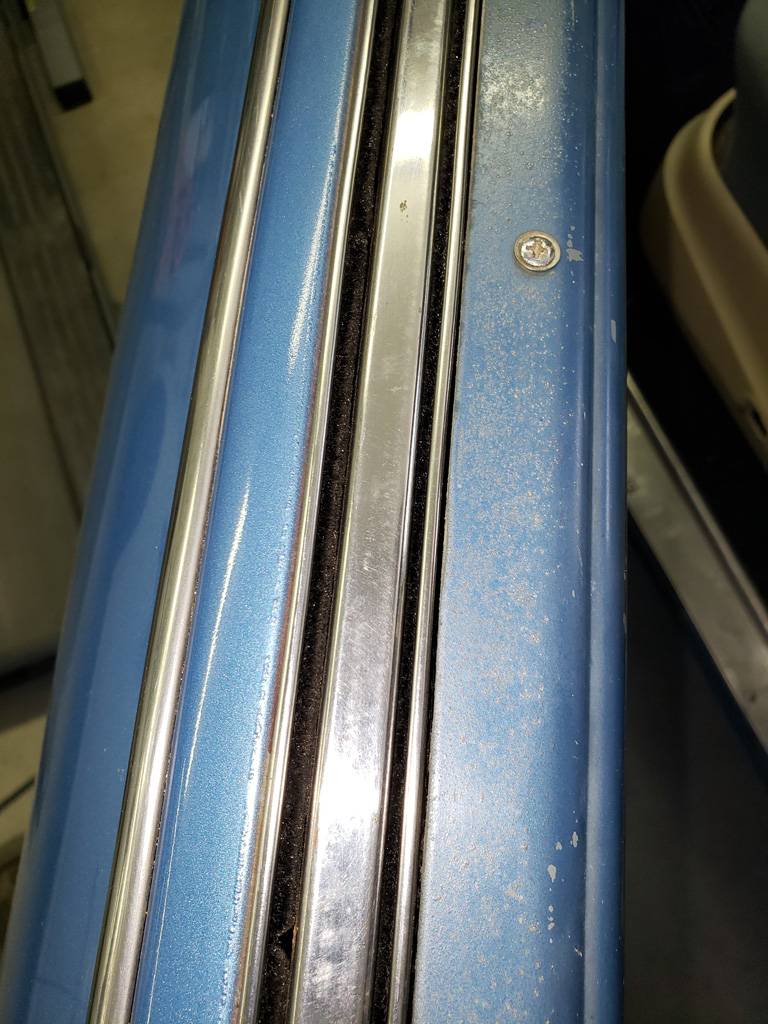
Posted on: 2021/6/9 10:39
|
|||
|
||||
|
Re: 1952 Packard mayfair throttle creeps up
|
||||
|---|---|---|---|---|
|
Home away from home
|
Mine did the same. I removed the throttle linkage (easy) all the way to the carb, cleaned it all up (sandblaster), repainted, and lubed up each movement point. I drilled out the rivets on the bracket and replaced them with bolts for now. Eventually I might go back and do it with the original type rivets, but so far it seems to be working well.
-Kevin
Posted on: 2021/6/8 13:45
|
|||
|
||||
|
Re: KPack's 1954 Panama
|
||||
|---|---|---|---|---|
|
Home away from home
|
Thanks Paul. It's nice to have the bumper back on after running without it for a while.
John, after painting the bottom half of the bumper silver, I cleaned off any overspray and minor pitting with 0000 steel wool. Then just applied wax over the whole thing. It's better than what it was, but very far from good. From 20 feet away it looks okay if you squint your eyes. But at least there's no more rust everywhere. -Kevin
Posted on: 2021/6/8 9:59
|
|||
|
||||
|
Re: KPack
|
||||
|---|---|---|---|---|
|
Home away from home
|
Don, sorry it's taken me a while to get back to you. I'm good on the brake drum for now. Mine seems to be working well enough.
Not a lot happening on my end. It's been very busy with life and family emergencies. So I'll update you with some work that I've done previously but haven't reported on. I removed the rear bumper to clean it up. The inside of the bumper was covered in rust, and the lower part of the outside was really bad also. The chrome had peeled off the bumper from the lower edge up to the center. One portion was much more than that. I also removed the bumper supports/mounts and cleaned them up. Removed all the rust, then primed and painted them. Cleaned up all the mounting bolts as well. I wire wheeled all the rust off the bumper itself. It was a messy job. I then cleaned up and painted the inside of the bumper with black paint. The outside of the bumper was more of an issue. Eventually the whole thing needs to be re-chromed, but that's crazy expensive right now and way down on the priority list. So instead I elected to just spray paint now chrome-less areas with silver spray paint, then clearcoat over the top. This will get me by for a bit. Bot great, but it looks way better than the rust that was on there before. Remounted everything and now the rear of the car is complete again. Not perfect, but an improvement. -Kevin Attach file: Bumper before.jpg (77.01 KB)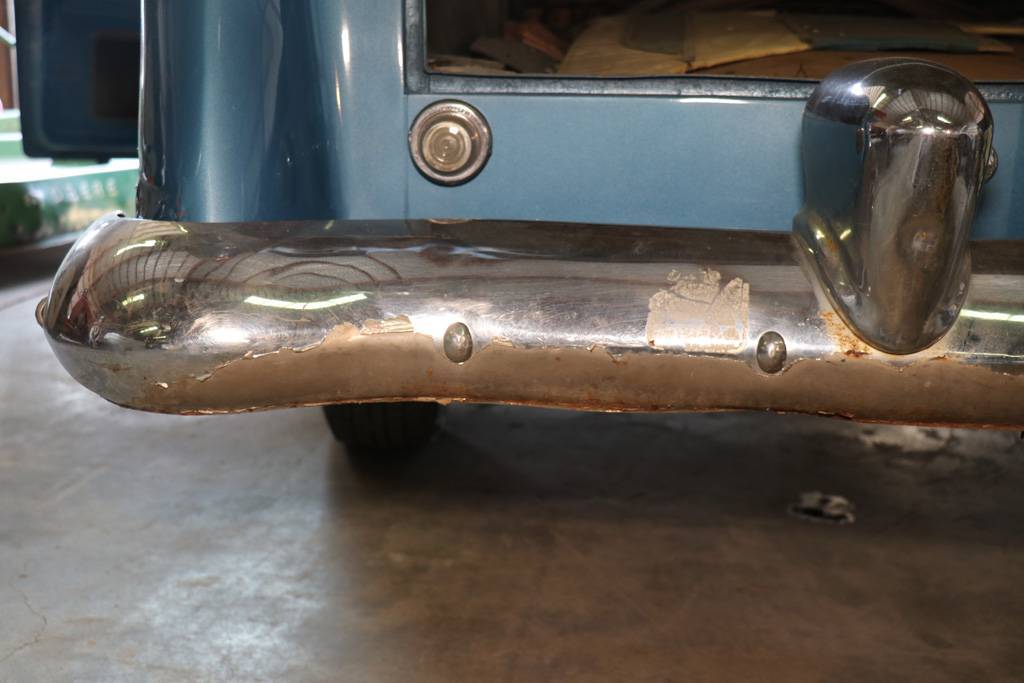 Bumper before 2.jpg (83.47 KB) Bumper before 2.jpg (83.47 KB)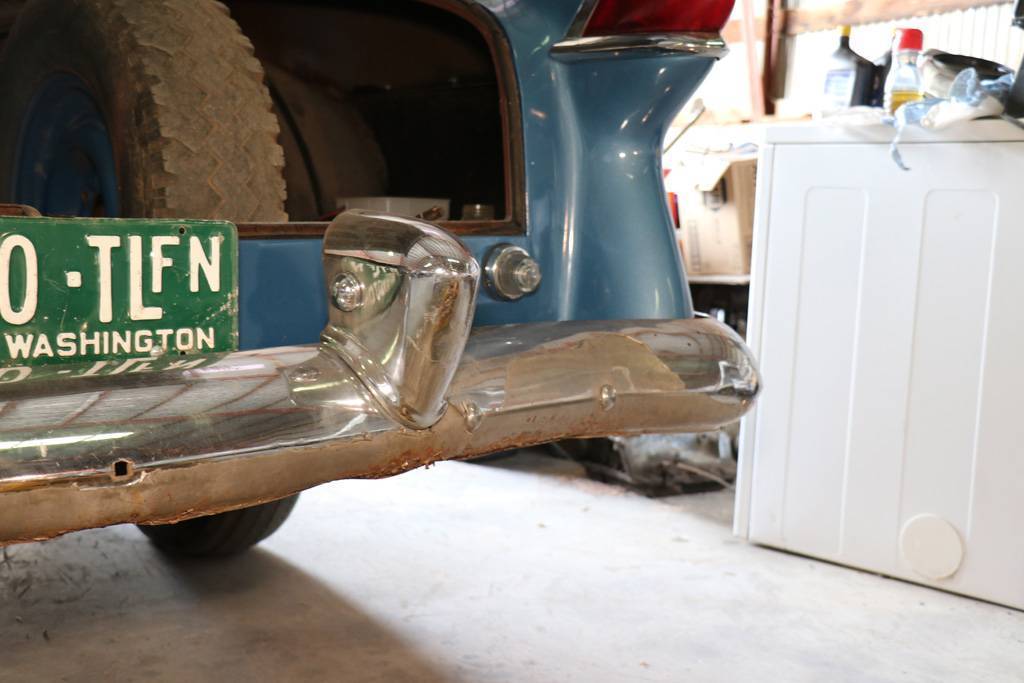 Bumper removed.jpg (124.25 KB) Bumper removed.jpg (124.25 KB)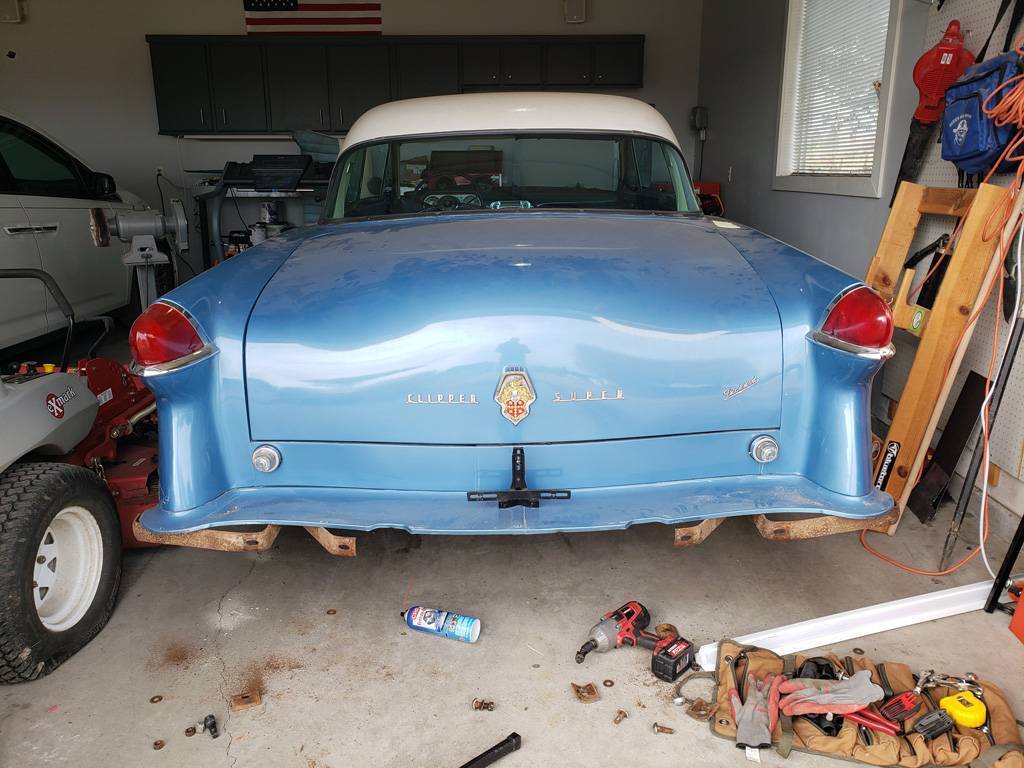 Rusted bumper.jpg (127.35 KB) Rusted bumper.jpg (127.35 KB)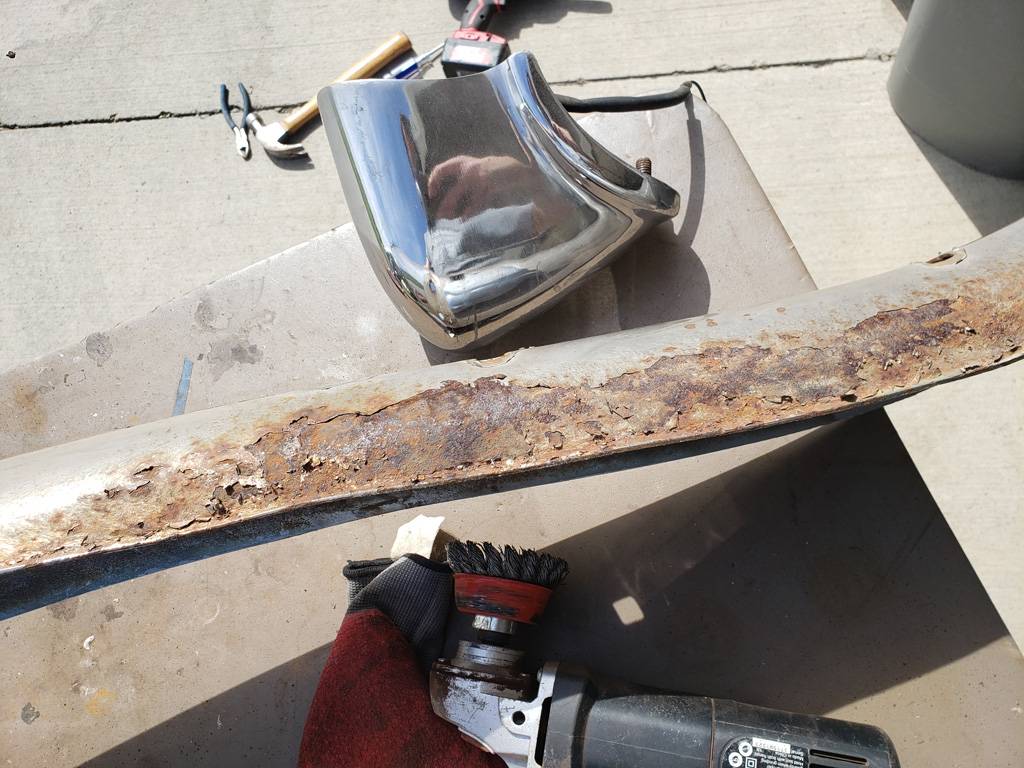 Rust on the lower edge of the bumper.jpg (110.17 KB) Rust on the lower edge of the bumper.jpg (110.17 KB)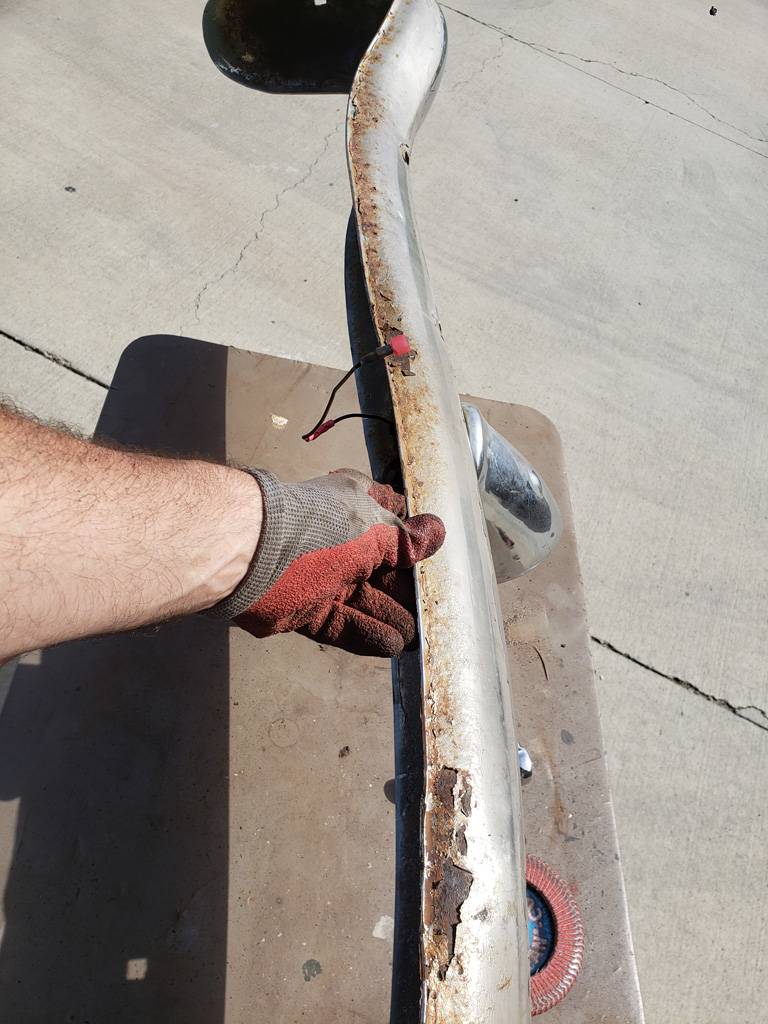 Ugly.jpg (91.02 KB) Ugly.jpg (91.02 KB) Rusted bumper supports.jpg (130.98 KB) Rusted bumper supports.jpg (130.98 KB)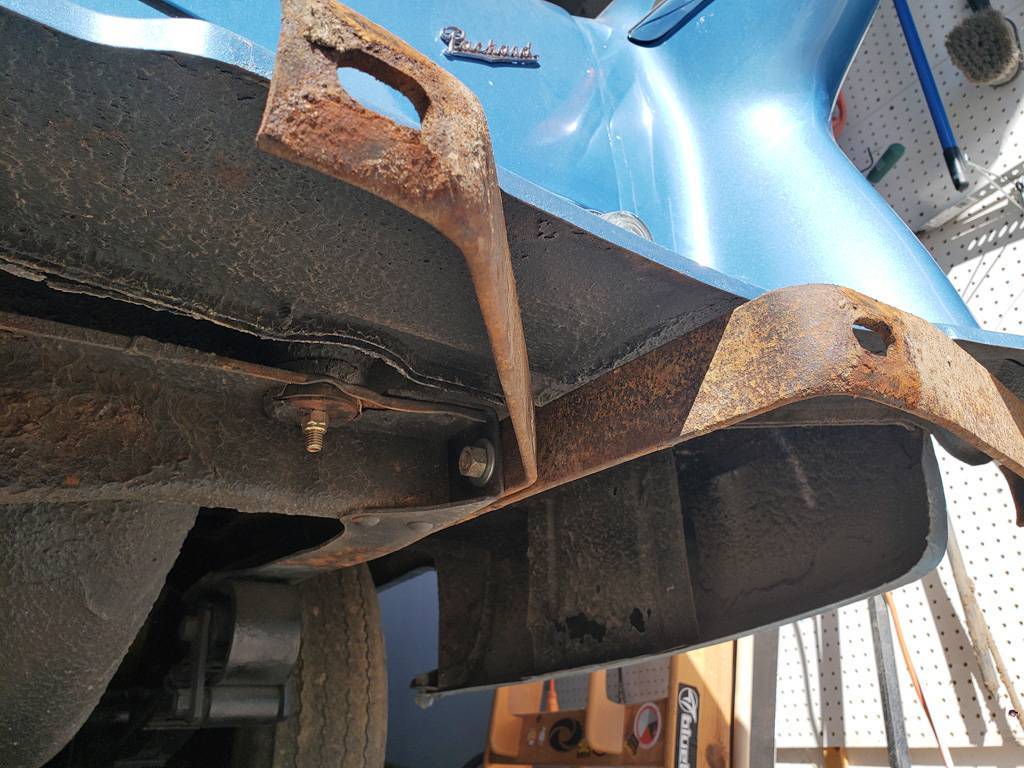 Ready for cleaning.jpg (210.31 KB) Ready for cleaning.jpg (210.31 KB) Rust removed inside the bumper.jpg (140.04 KB) Rust removed inside the bumper.jpg (140.04 KB)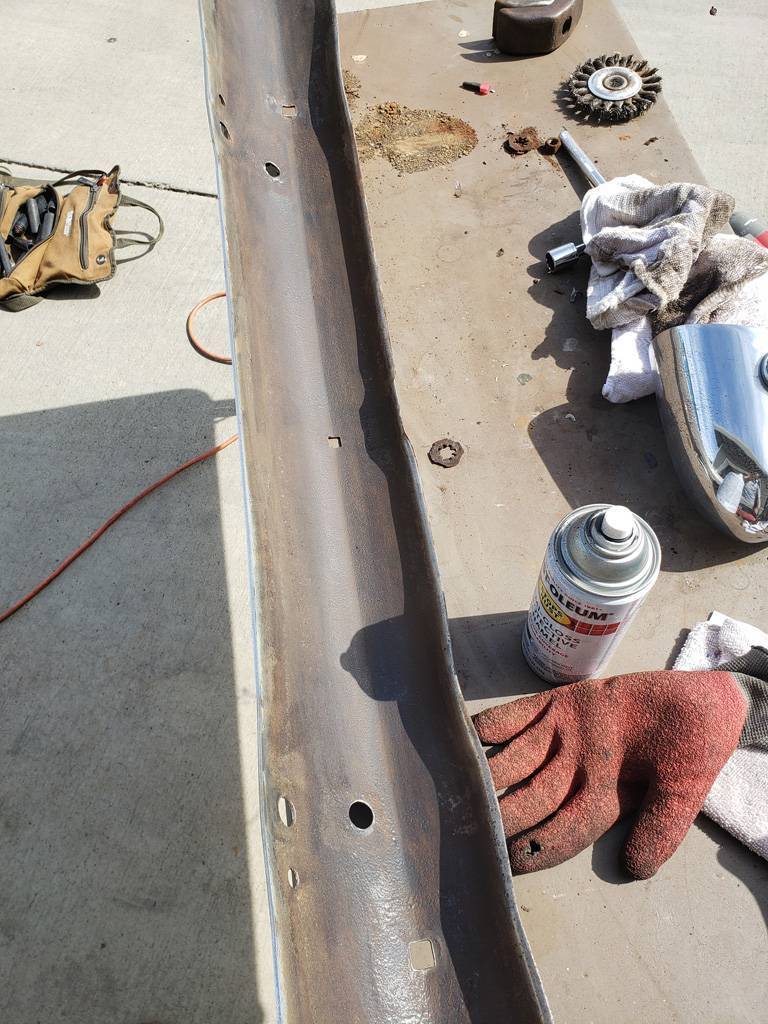 Inside of bumper painted black.jpg (103.66 KB) Inside of bumper painted black.jpg (103.66 KB)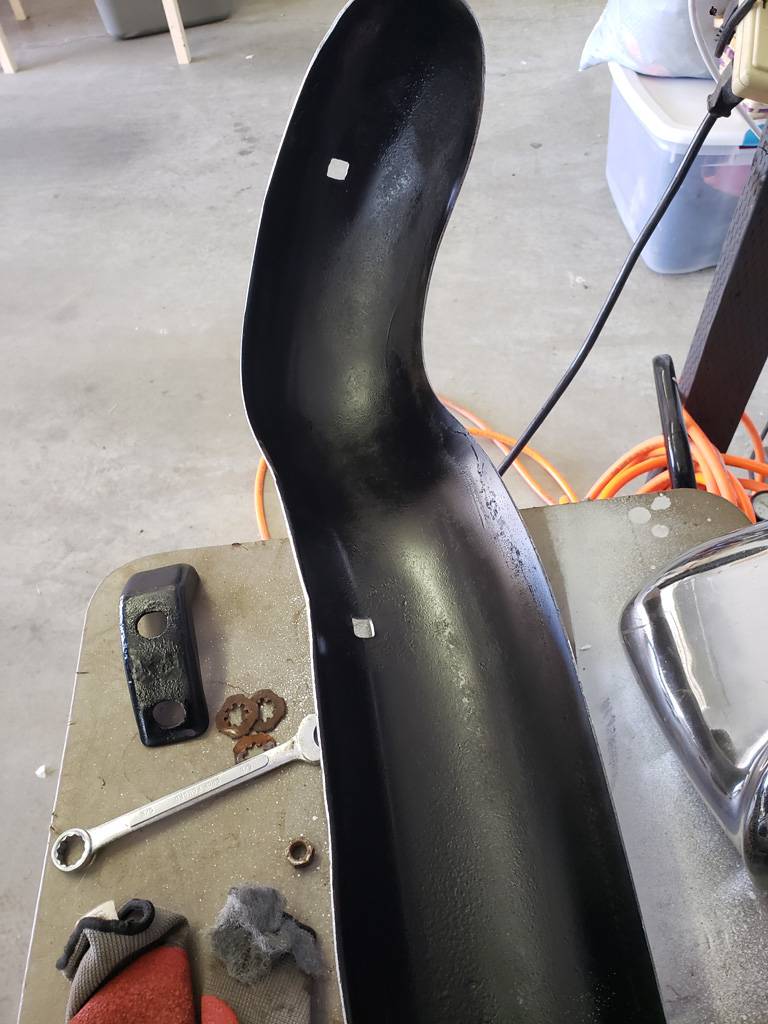 Rear bumper supports back on.jpg (60.10 KB) Rear bumper supports back on.jpg (60.10 KB)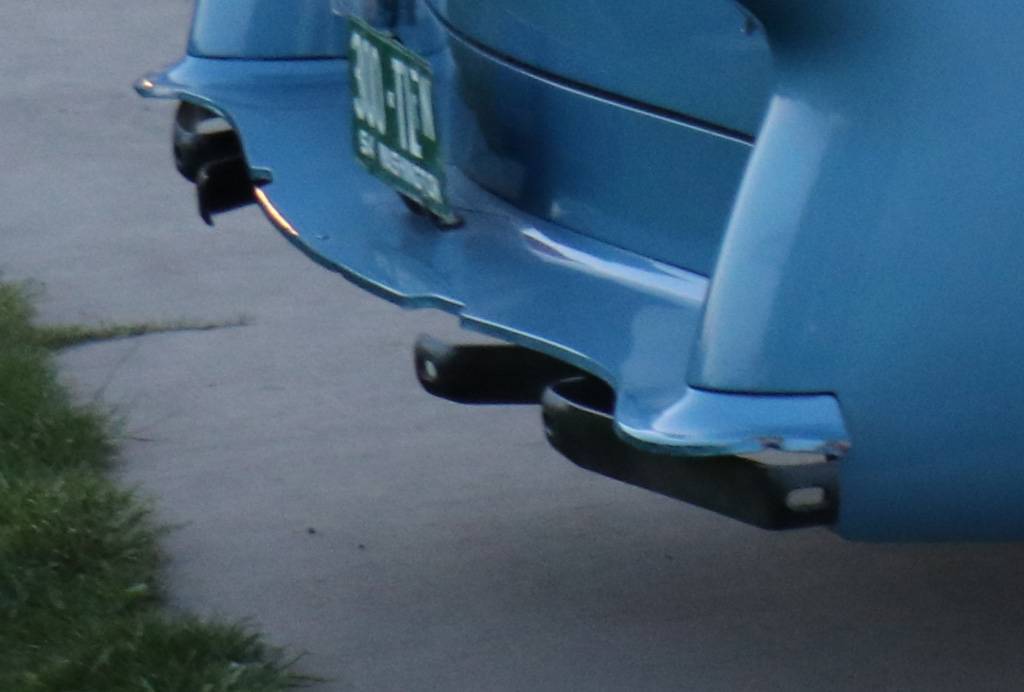 Rear bumper reinstalled.jpg (106.48 KB) Rear bumper reinstalled.jpg (106.48 KB)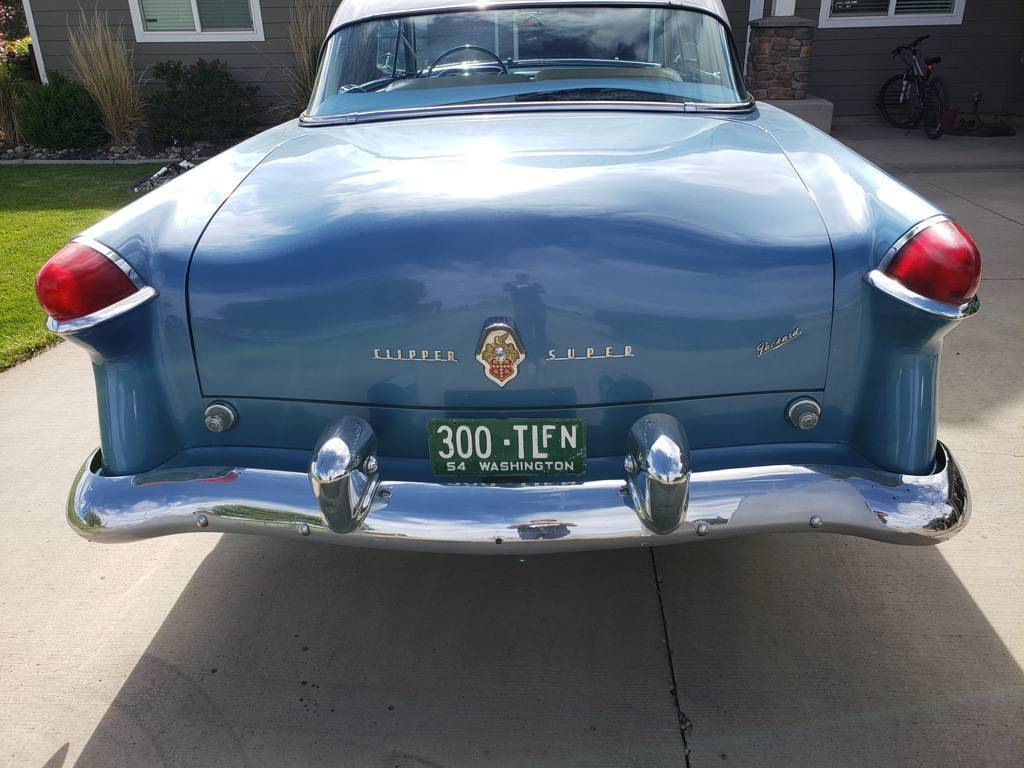
Posted on: 2021/6/7 14:02
|
|||
|
||||
|
Re: Various CL Pickings
|
||||
|---|---|---|---|---|
|
Home away from home
|
1953 Clipper Coupe, $5000. Apparently the engine has been rebuilt, though the front end of the car is not fully reassembled. In primer, body work looks alright. Not a bad price for project car that looks like it's in decent condition. If I had space and time, I might consider picking it up and finishing it.
https://moseslake.craigslist.org/clt/d/copan-1953-clipper-packard-door/7331580736.html -Kevin
Posted on: 2021/6/4 13:39
|
|||
|
||||
|
Re: Thanks to Ross!!
|
||||
|---|---|---|---|---|
|
Home away from home
|
Thanks Ross! Can't thank you enough for the help you've given me.
I'd love to see more videos on your Youtube channel. The distributor and brake adjustment videos were extremely helpful. I watched each one many times while I was doing the work and they made the work so much easier. I'd be down for literally anything on video....cooling system management, electrical, door/body adjustments, glass replacement, valve adjustment, etc. Even if it's a short video it would be very helpful. The more info that can be passed on to us new guys the better. -Kevin
Posted on: 2021/6/4 12:42
|
|||
|
||||


