|
Re: 20-21st trunk lid molding
|
||||
|---|---|---|---|---|
|
Forum Ambassador

|
Have partially answered my question. The 41 Clipper body notes said the retainer is riveted to the lid and molding "snaps" over the retainer. No information offered on how to remove it.
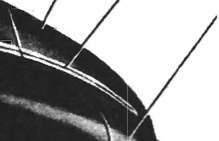
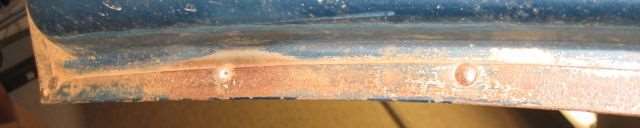
"Snaps" over may be misleading because the molding profile is identical in shape to those pieces that use wire clips -- a fairly deep groove on each side to hold the retainer. The retainer has square edges and is fully inserted almost full length of the molding. Nothing seems easy or loose enough to just "snap" into both sides of the molding with the retainer shaped the way it is. Maybe there was a special tool to distort the molding slightly. Did manage to remove one piece with minimal damage to the car or the molding but would not want to do it the same way on a car with decent paint. Will grind the rivets off on the other side. I'll reattach things with screws using the original rivet holes. It's dark now so pictures tomorrow.
Posted on: 2013/12/23 20:18
|
|||
|
Howard
|
||||
|
||||
|
Re: 20-21st trunk lid molding
|
||||
|---|---|---|---|---|
|
Forum Ambassador
|
To others wanting to remove their molding, right or wrong I have removed both moldings on my 47. I'm sure the factory wouldn't approve either method but since they didn't share their instructions, here goes with what I did.
Since I had removed the rivet on one piece yesterday, started that side by grinding the remaining rivets off. While it worked, unless you want to remove the retainer completely that is not the answer. If you do need to remove the retainer then it is the only option. Replacing the retainer is not a big deal using 8-32 x 1/8 steel binding posts. Those fit perfectly (with a tiny bit of cleanup with a #7 drillbit) back in the original rivet holes. Heads on the binding post screws are wide and flat so weatherstrip will lay over as per the original rivets and screws are not long enough to touch the molding. Just have a magnetic screwdriver to hold the screws while you start them and it's a good idea to glue or doublestick tape the mating side in the retainer. If you do neither, the vocabulary is liable to be exercised every time you drop one of the screws or receivers. After it was removed and was able to carefully examined the parts, I figured a way to remove the molding without removing the retainer. If you look at the retainer and molding photo, the molding has a wider lip on the bottom. What I did was use a block of wood on the bottom of molding to drive the molding up as high on the retainer as I could. Once up, used a pry tool (I used a tack remover) to slip under the top of molding and start prying away from retainer at one end. Use a cardboard or piece of plastic under the tool to protect the paint. Once the molding is started and is slightly away from the retainer at the end, slip a piece of thin shim stock (I used .005) in as far as possible to prevent the molding from slipping back down over the retainer. With a piece of wood and occasional use of the pry tool GENTLY tap the molding down and work the wood and shim stock down the length of the molding. I repeat GENTLY because you can distort the molding easily . It will take finesse and possibly vocabulary but once the molding starts releasing a bit it becomes easier. Attach file:  (11.30 KB) (11.30 KB)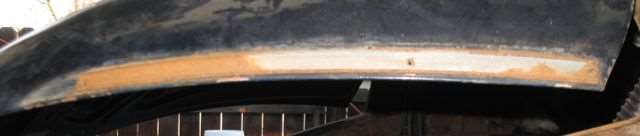 (10.04 KB) (10.04 KB) (11.50 KB) (11.50 KB) (15.08 KB) (15.08 KB)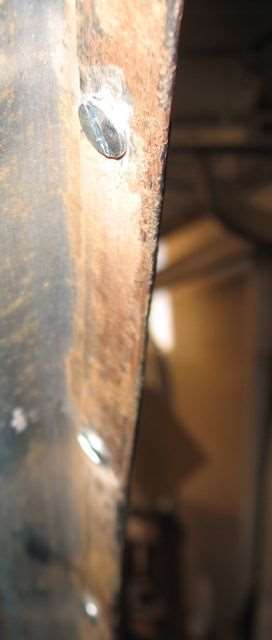 (10.73 KB) (10.73 KB)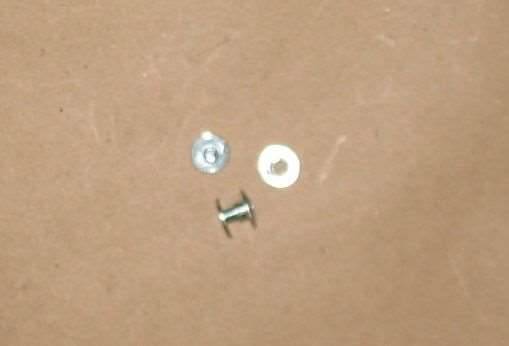 (14.08 KB) (14.08 KB) (13.13 KB) (13.13 KB)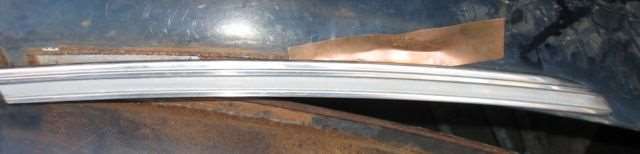 (10.28 KB) (10.28 KB)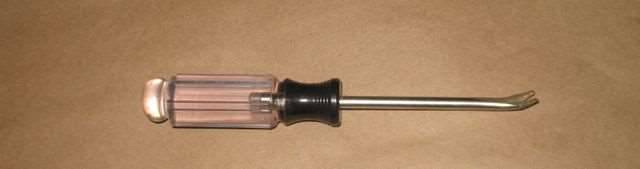
Posted on: 2013/12/24 13:01
|
|||
|
Howard
|
||||
|
||||


