|
Re: Attaching small trim pieces?
|
||||
|---|---|---|---|---|
|
Forum Ambassador
|
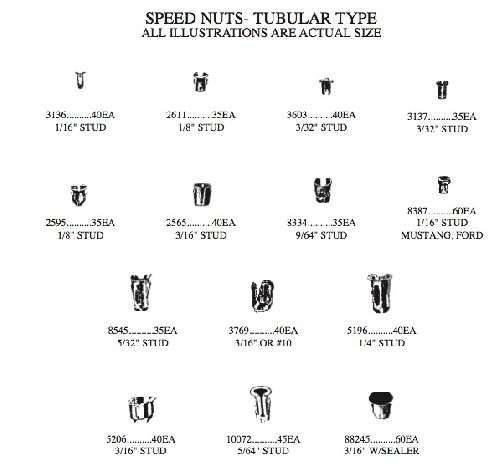
IIRC, I think those pieces have a stud welded onto the stainless at top and bottom. If someone pried it off or otherwise removed it improperly, those probably broke off and stayed in the retainer so piece was glued back on. If they are still there, they may be able to be pushed in further to clear the hole but if the retainer is gone or damaged, I believe what you will need are tubular speed nuts in the appropriate size and style. Restoration Specialtiesrestorationspecialties.com/ carry some. The speednuts are inserted in the body holes and trim is inserted in the speednut holes from the outside.
Posted on: 2011/8/5 22:13
|
|||
|
Howard
|
||||
|
||||
|
Re: Attaching small trim pieces?
|
||||
|---|---|---|---|---|
|
Home away from home

|
Are they inserted from the front? If not, how do you open the column up?
Does anyone know which specific studs are called for?
Posted on: 2011/8/6 14:31
|
|||
|
When two men ride the same horse, one has to be in the back...
|
||||
|
||||
|
Re: Attaching small trim pieces?
|
||||
|---|---|---|---|---|
|
Forum Ambassador
|
In line with about the middle of the chrome strips top and bottom are there some holes in the body now or any thing that looks like something or someone plugged them up? If you can find any holes, what size are they and do they have anything in them such as something that looks like a small tube with a flange on the outside to keep it from falling in? You can see them in the picture labeled outside.
The inner panel may not come off without a bit of effort and possible damage. I've seen two ways of attaching the center panels. One is like the door panel with the spring wire clips that go into holes in the inside sheet metal. Those can be removed with care using a wide stiff thin or flat tool getting under the panel edge and running up and down finding and prying the clips out. Problem is if the windlace is old and rotten or the panel material is brittle, either may start self destructing with the prying pressure. It's been awhile but I think clips down the center are what the 56 has. I believe the holes show in the picture labeled inside. If not, then--- The other way of attachment is the fabric is rolled around the panel first with tacks or staples already in place and glued--similar to regular upholstery using a tack strip. Then from the outside, fabric is hammered and panel is tacked or stapled into a strip of dense cardboard or wood like material embedded into a channel in the sheetmetal. Sometimes people are lucky but those panels usually bite the dust when removing or if not destroyed, won't hold well when trying to put back because the tacks use the same holes. You can't add new or more tacks easily because of the fabric being glued. If you have the upholstery panel with clips that removes with the wide tool, a regular push on type rectangular clip from Lowes or most parts stores may work from behind--if the center is open and I don't remember if it is in the area of trim. Looking at the inside picture, it is doubtful or at least very limited. I think it probably had the tubular speednuts because one of the advantages to using those is you do not need rear access -- but the alignment to the studs is critical. You need to wait and see your part to see what is actually there to get the size. The pieces I have are like your existing one--the studs are broken and gone. Attach file:  (7.58 KB) (7.58 KB)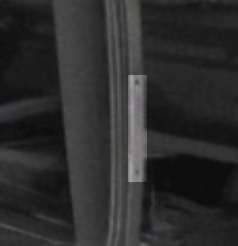  (15.15 KB) (15.15 KB)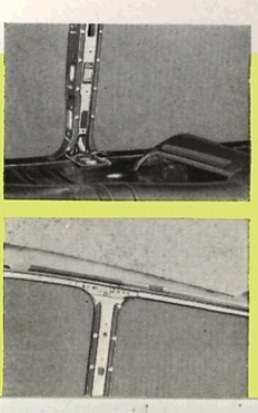
Posted on: 2011/8/6 15:21
|
|||
|
Howard
|
||||
|
||||
|
Re: Attaching small trim pieces?
|
||||
|---|---|---|---|---|
|
Home away from home
|
The parts book for 1955-56 shows #437158 for the clips that hold the trim moulding.
the 1951-54 list shows the same clips for 1953 and 1954 center pillar mouldings as well as for the 1952 type rear fender louvres. Perhaps packardguy53 could help as he had a recent thread about the rear fender louvres.
Posted on: 2011/8/6 15:42
|
|||
|
||||
|
Re: Attaching small trim pieces?
|
||||
|---|---|---|---|---|
|
Forum Ambassador
|
If they are the same clips as louvers, then they are the tubular speednuts as described in the louver install instructions.
Attach file:  (15.60 KB) (15.60 KB)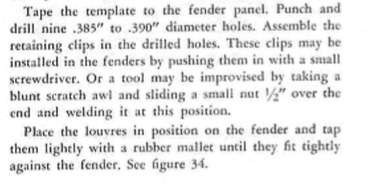
Posted on: 2011/8/6 15:58
|
|||
|
Howard
|
||||
|
||||
|
Re: Attaching small trim pieces?
|
||||
|---|---|---|---|---|
|
Home away from home

|
The parts are here---and I am still confused.
In working with wood, there are a number of different anchors that push in from the front; then driving the screw tightens the anchor. Is there a similar device for trim?
Posted on: 2011/8/10 14:59
|
|||
|
When two men ride the same horse, one has to be in the back...
|
||||
|
||||
|
Re: Attaching small trim pieces?
|
||||
|---|---|---|---|---|
|
Forum Ambassador
|
Are the old ones on your car totally gone? You might see if any of the vendors have any of the #437158 retainers called for. If not, then you will have to measure the diameter of the stud. The length is usually not as important but might as well have it if you wind up having to get a closed end speednut. Once you know what stud size to order, then just a matter of drilling the proper sized outside hole.
Speednuts come in different styles and sizes. The clip Packard calls for seems quite large in diameter if they are asking for a .385 to .390 hole but I don't know the stud size or what it looks like. Maybe packardguy53 could post a picture if he hasn't installed them already. Here are a couple of basic clip--again, many styles. In the first one, you push it into the drilled hole & barbs on the outside compress when inserting in the hole and spring back. Tangs on the inside grab the stud. In the second, the whole sleeve compresses slightly to slip in then expands back out and locks in the hole at the narrow opening just below the flange. Once the retainer is locked in, the trim piece is pushed in and the tangs on the inside grab onto the stud. Once the stud is in, the whole assembly is locked in and can't move.
Posted on: 2011/8/10 15:45
|
|||
|
Howard
|
||||
|
||||
|
Re: Attaching small trim pieces?
|
||||
|---|---|---|---|---|
|
Home away from home

|
So it can all work from the outside! thanks much; really appreciate the snaps.
Posted on: 2011/8/11 14:17
|
|||
|
When two men ride the same horse, one has to be in the back...
|
||||
|
||||

