|
Re: 1956 Packard Patrician Rebuild Project
|
||||
|---|---|---|---|---|
|
Home away from home
|
Why is it when a paint shop find out that you are shooting a classic, their price jumps from their reasonable advertised price to $15,000 just to shoot no body work included? Looks like I'm gonna be learning to paint.
Posted on: 2014/5/17 9:44
|
|||
|
[url=https://packardinfo.com/xoops/html/modules/
|
||||
|
||||
|
Re: 1956 Packard Patrician Rebuild Project
|
||||
|---|---|---|---|---|
|
Home away from home
|
According to Gus Wilson at the model garage, you should use a fine quality badger brush...
http://www.gus-stories.org/january_1926.htm
Posted on: 2014/5/17 12:56
|
|||
|
When two men ride the same horse, one has to be in the back...
|
||||
|
||||
|
Re: 1956 Packard Patrician Rebuild Project
|
||||
|---|---|---|---|---|
|
Home away from home
|
Note to self: When tired after all day in the shop, stop BEFORE catching the trunk on fire!!!!!!
PASS Pull- Aim- Squeeze- Sweep. Go buy a new extinguisher
Posted on: 2014/5/18 17:54
|
|||
|
[url=https://packardinfo.com/xoops/html/modules/
|
||||
|
||||
|
Re: 1956 Packard Patrician Rebuild Project
|
||||
|---|---|---|---|---|
|
Home away from home
|
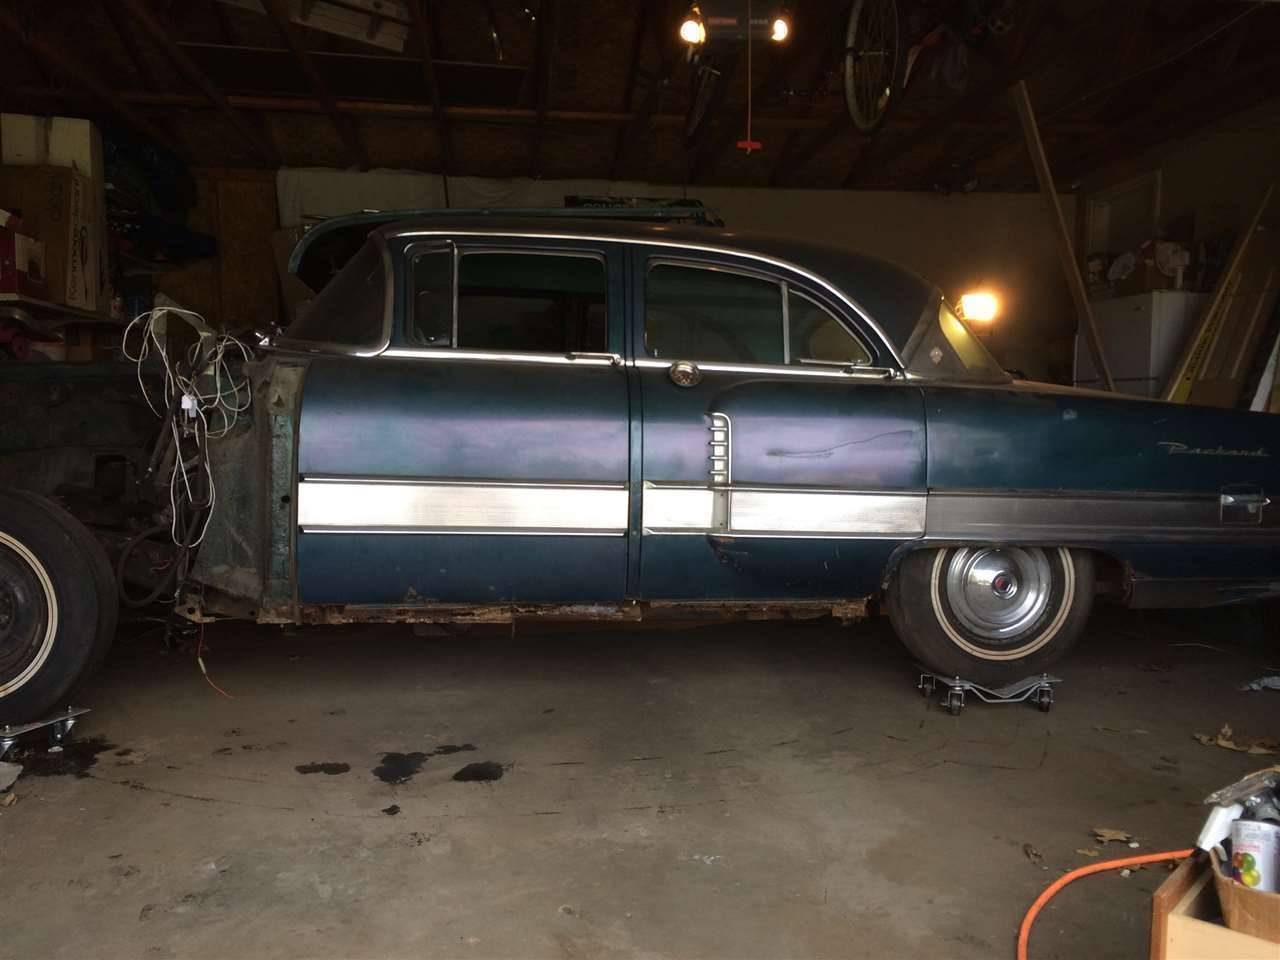
Frame off, what a pain in the arse. One floor jack, one person, took all day but, had a good day always fun. Here is some pics of what I have to work with. #2 left and right outriggers have some rust through issues that needs to be dealt with, lots of rotted rubber.
Attach file:  (33.55 KB) (33.55 KB)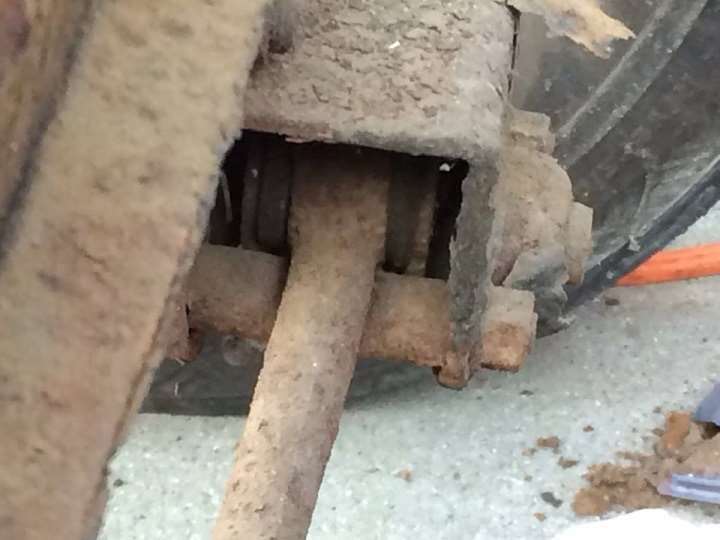 (59.61 KB) (59.61 KB)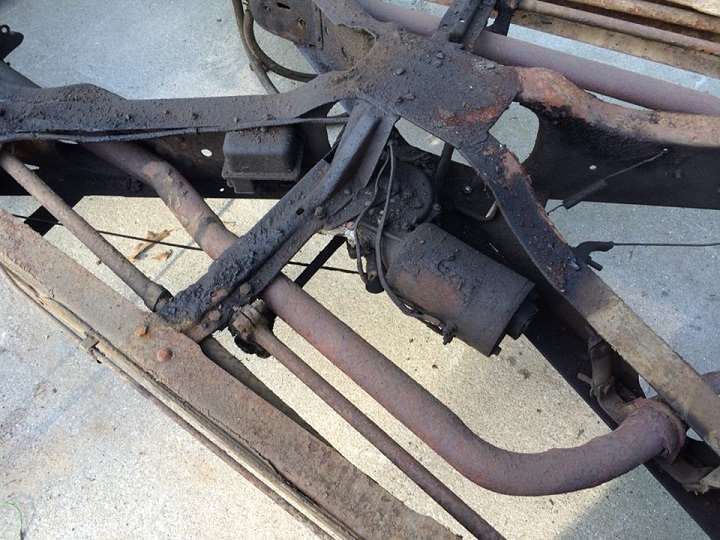 (55.55 KB) (55.55 KB) (61.71 KB) (61.71 KB)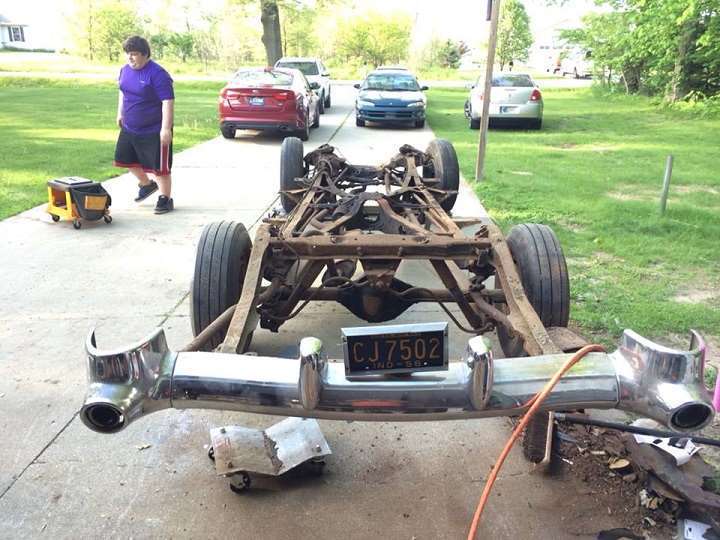 (60.09 KB) (60.09 KB)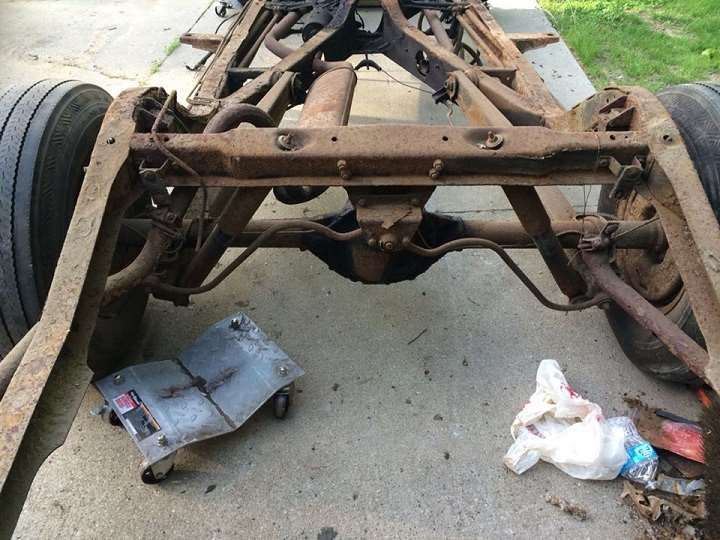 (63.62 KB) (63.62 KB)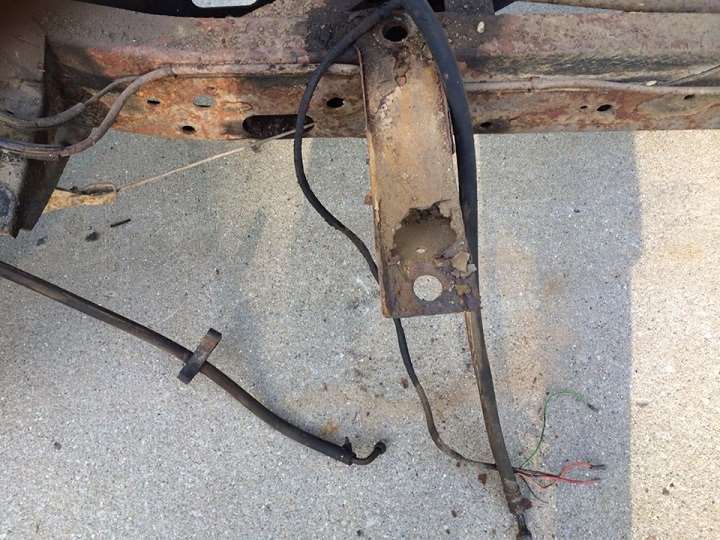 (61.40 KB) (61.40 KB)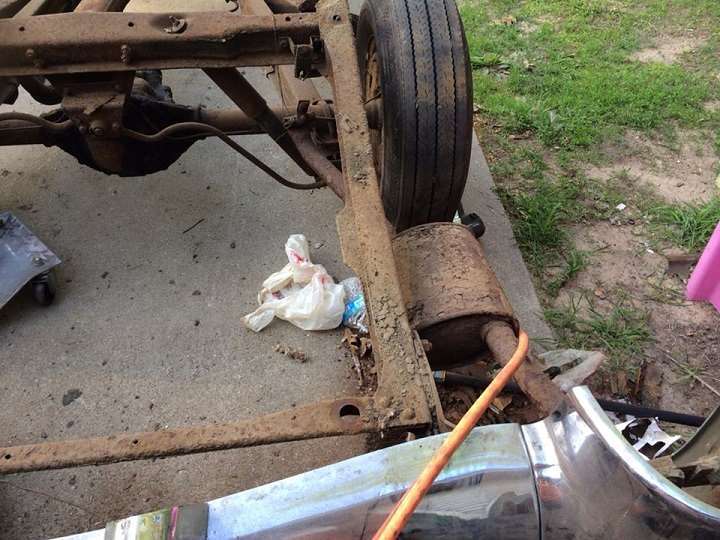 (54.27 KB) (54.27 KB)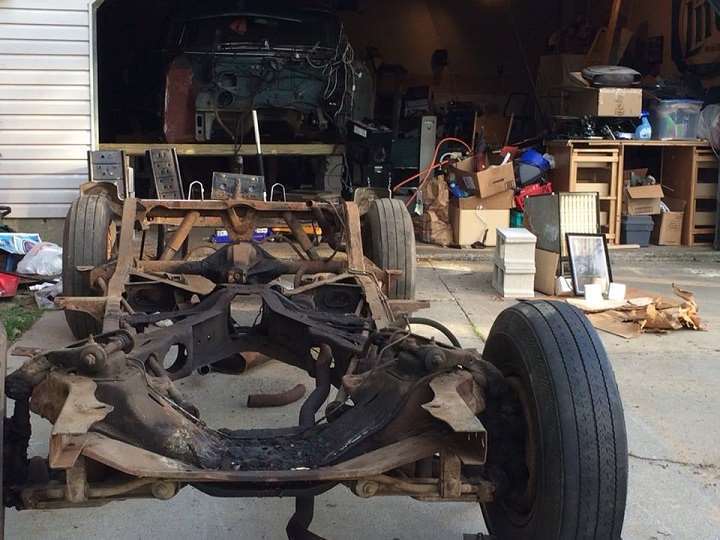
Posted on: 2014/5/24 19:42
|
|||
|
[url=https://packardinfo.com/xoops/html/modules/
|
||||
|
||||
|
Re: 1956 Packard Patrician Rebuild Project
|
||||
|---|---|---|---|---|
|
Home away from home
|
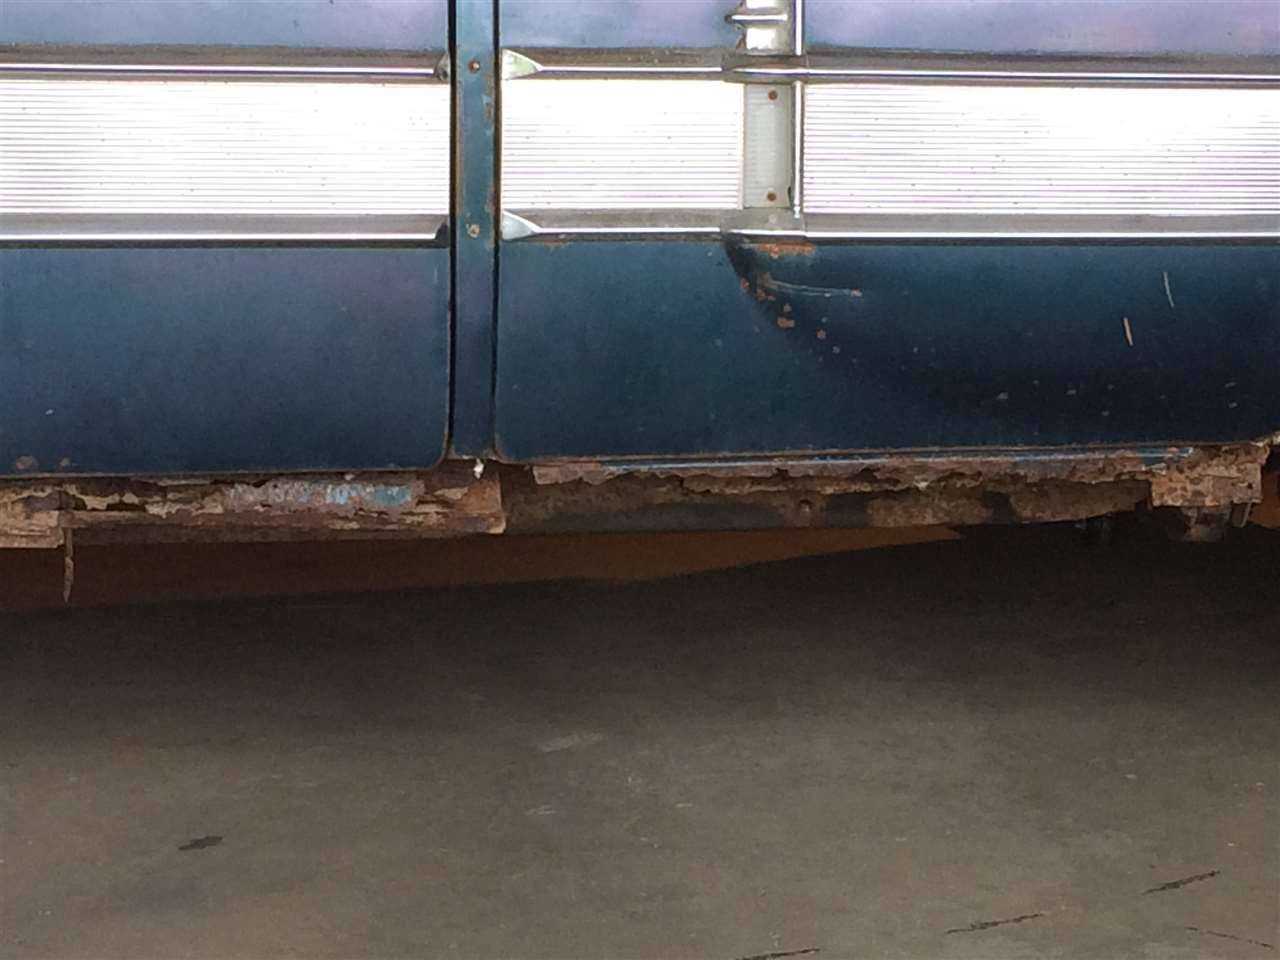
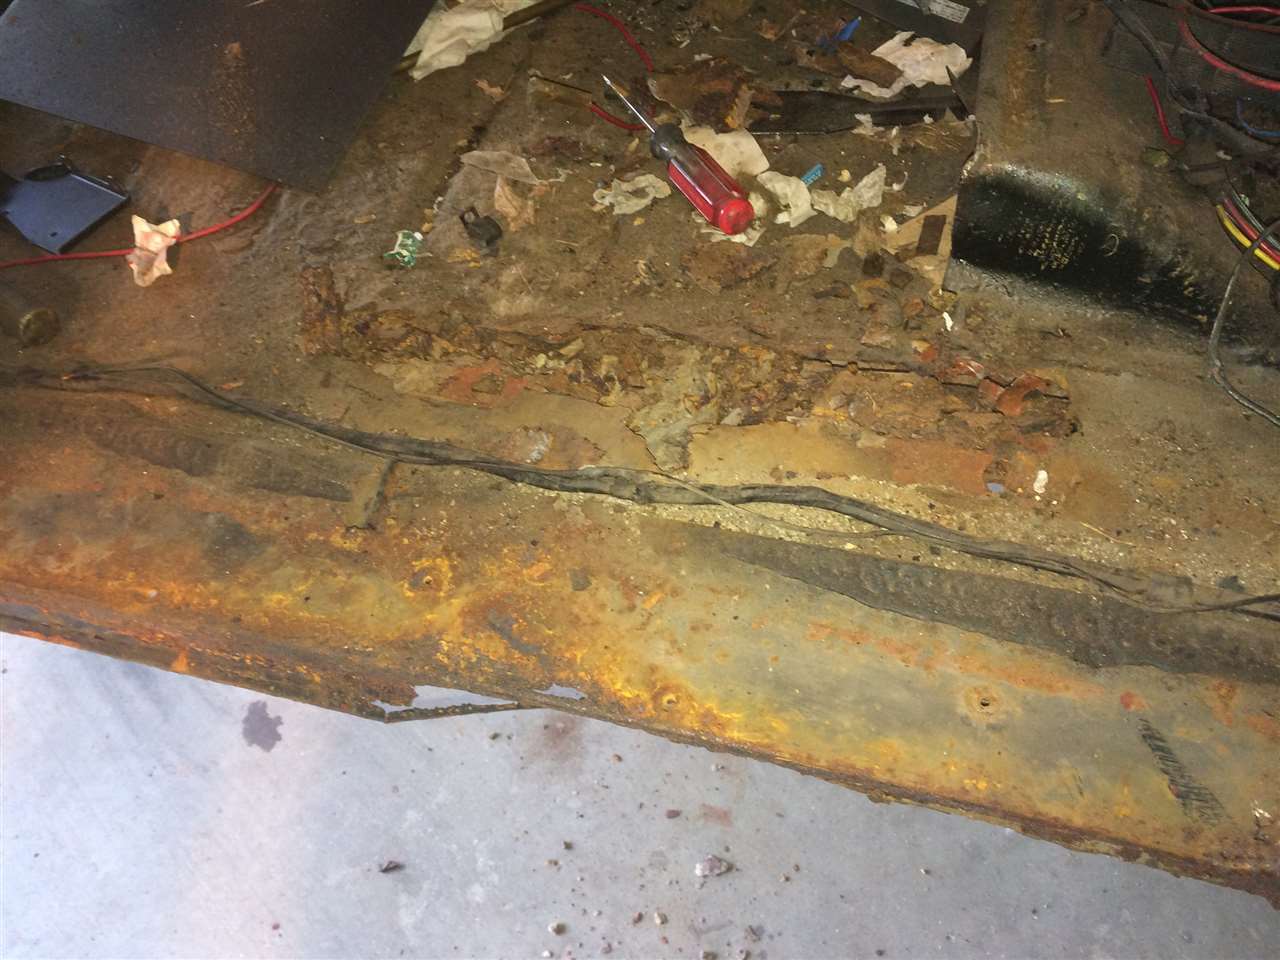
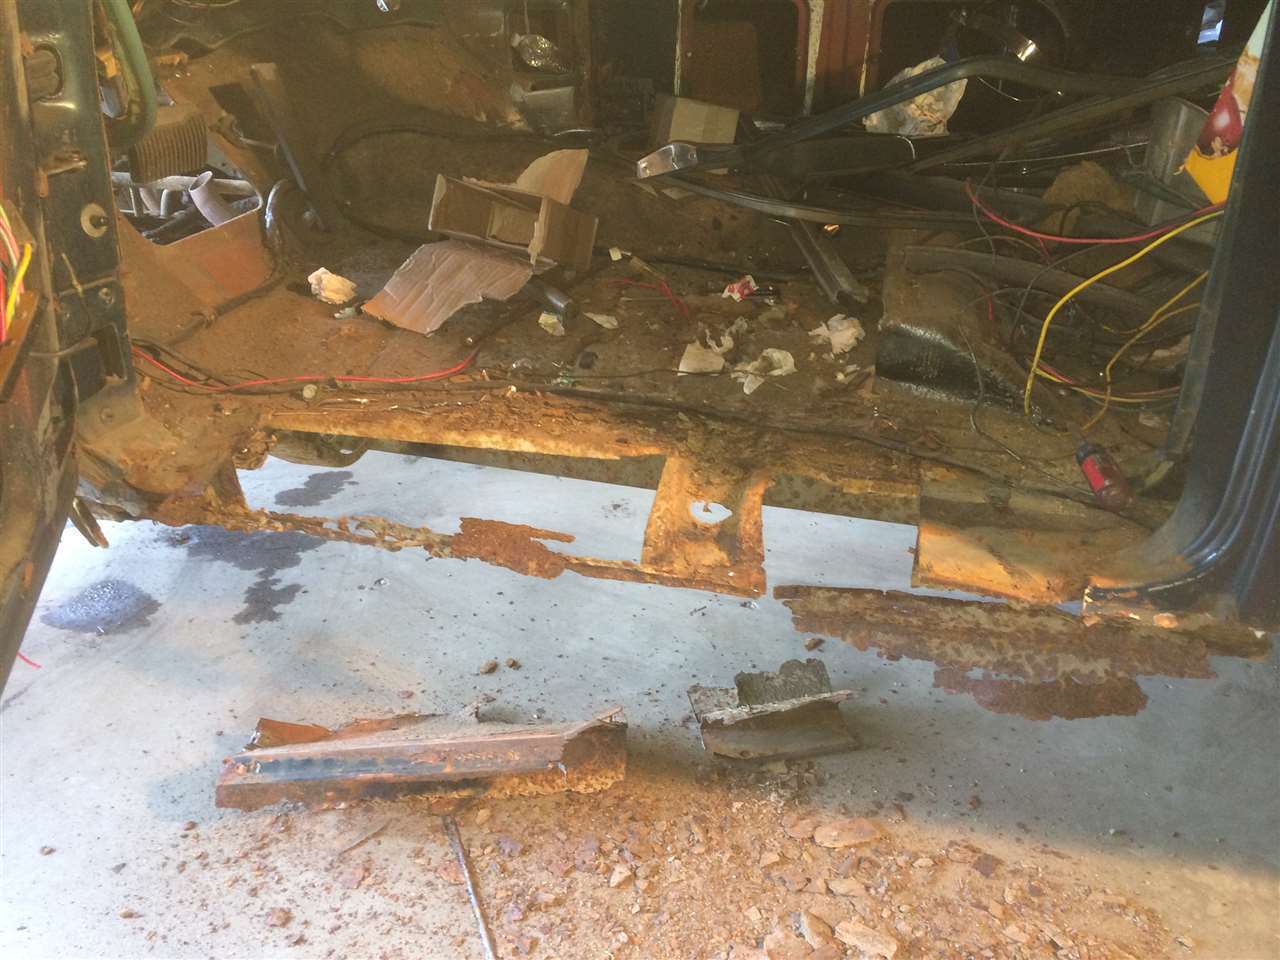
With the body off, just when you thought you had it all under control, more cancer is discovered. Rear body mounts non-existent, front trunk mounts, resemble the Grand Canyon. Tomorrow, I will build a new rear body mount from scratch...18Ga and a metal stretcher will do the trick with a 1" I.D. x 2" steel pipe for a spacer. Scraped the frame with a putty knife but the soda blaster would not touch the remainder, going to have to go to hard core sand blast. when I get the body finished and get to the frame full time, I have designed a body off Torsion Bar winder that looks like it will work well for taking the tension off when I replace all the rotted bushings in the torsion arms.
Attach file: (67.34 KB)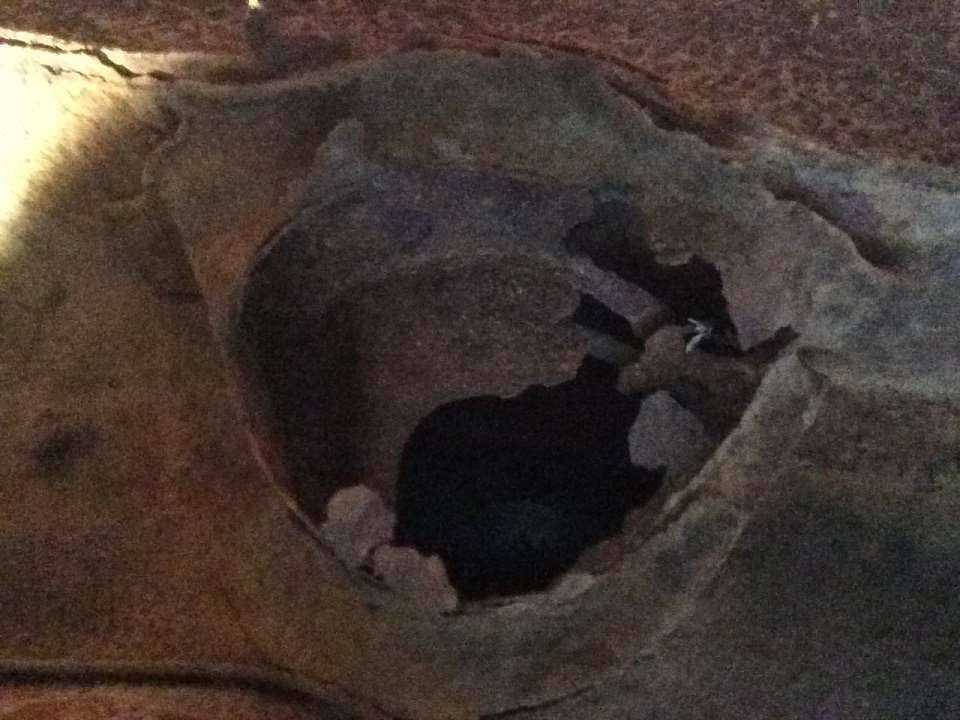 (147.01 KB) (147.01 KB)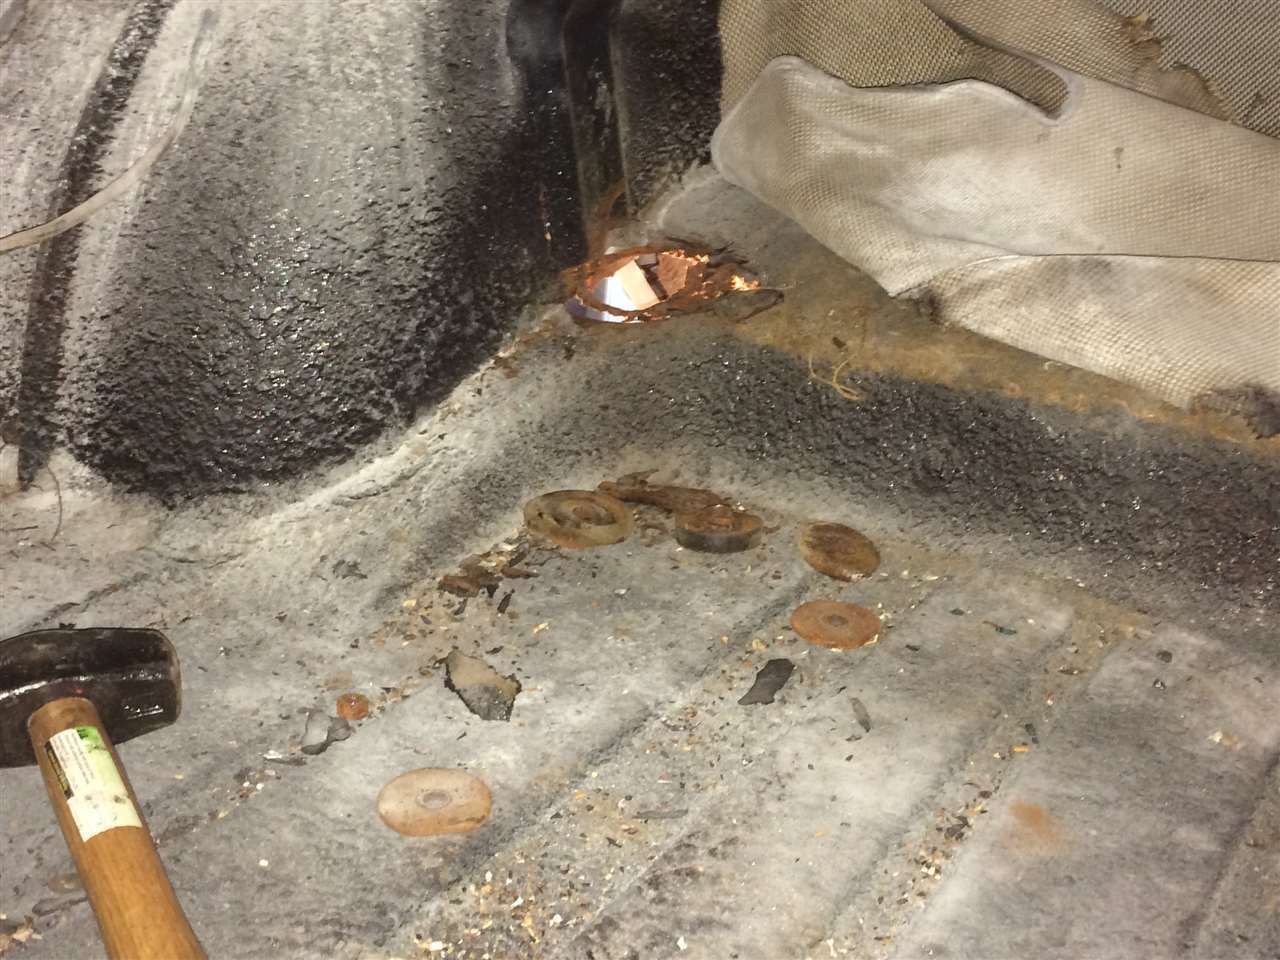 (160.39 KB) (160.39 KB)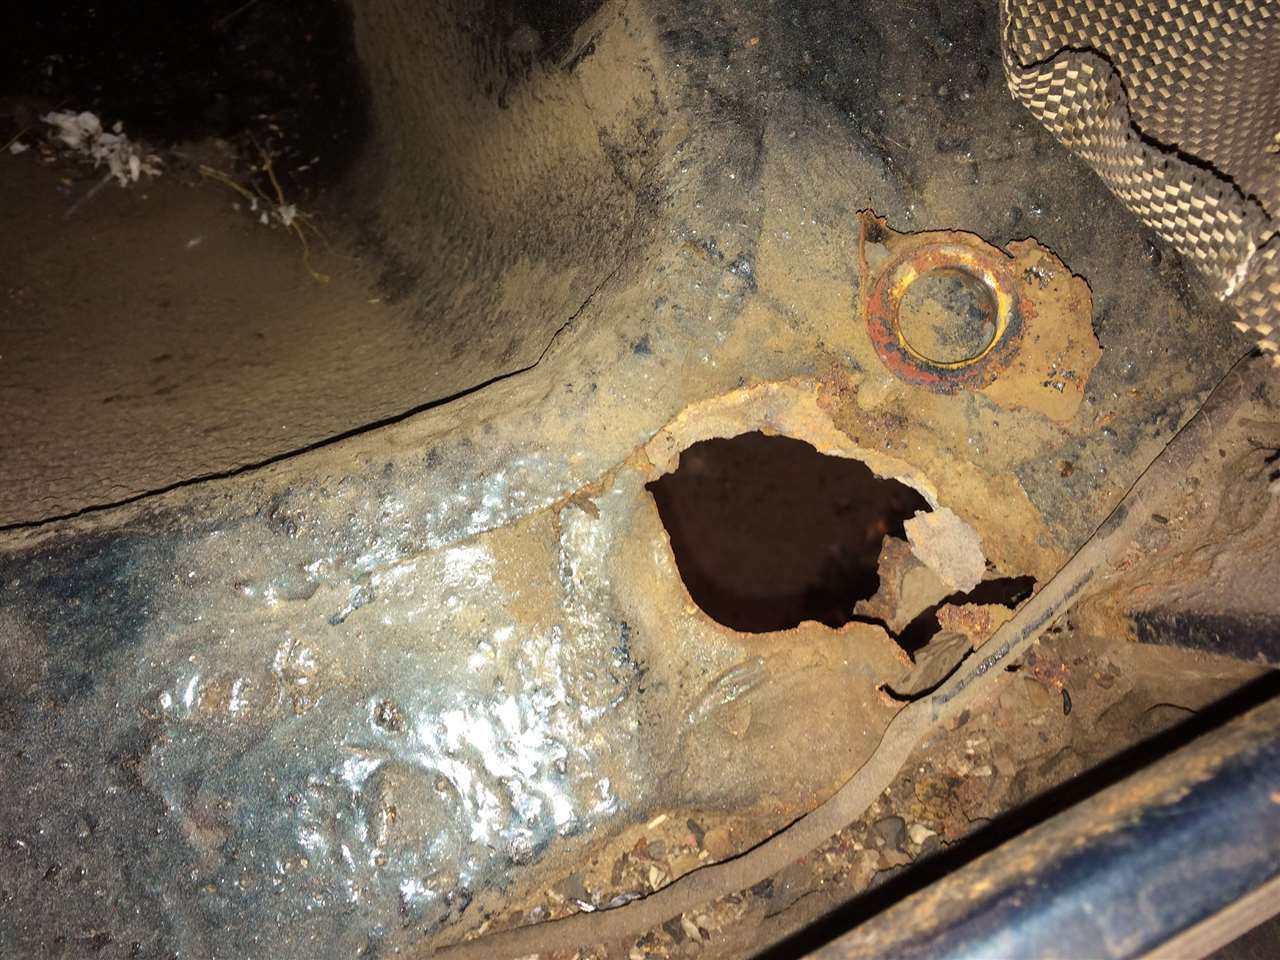 (75.21 KB) (75.21 KB) (71.96 KB) (71.96 KB)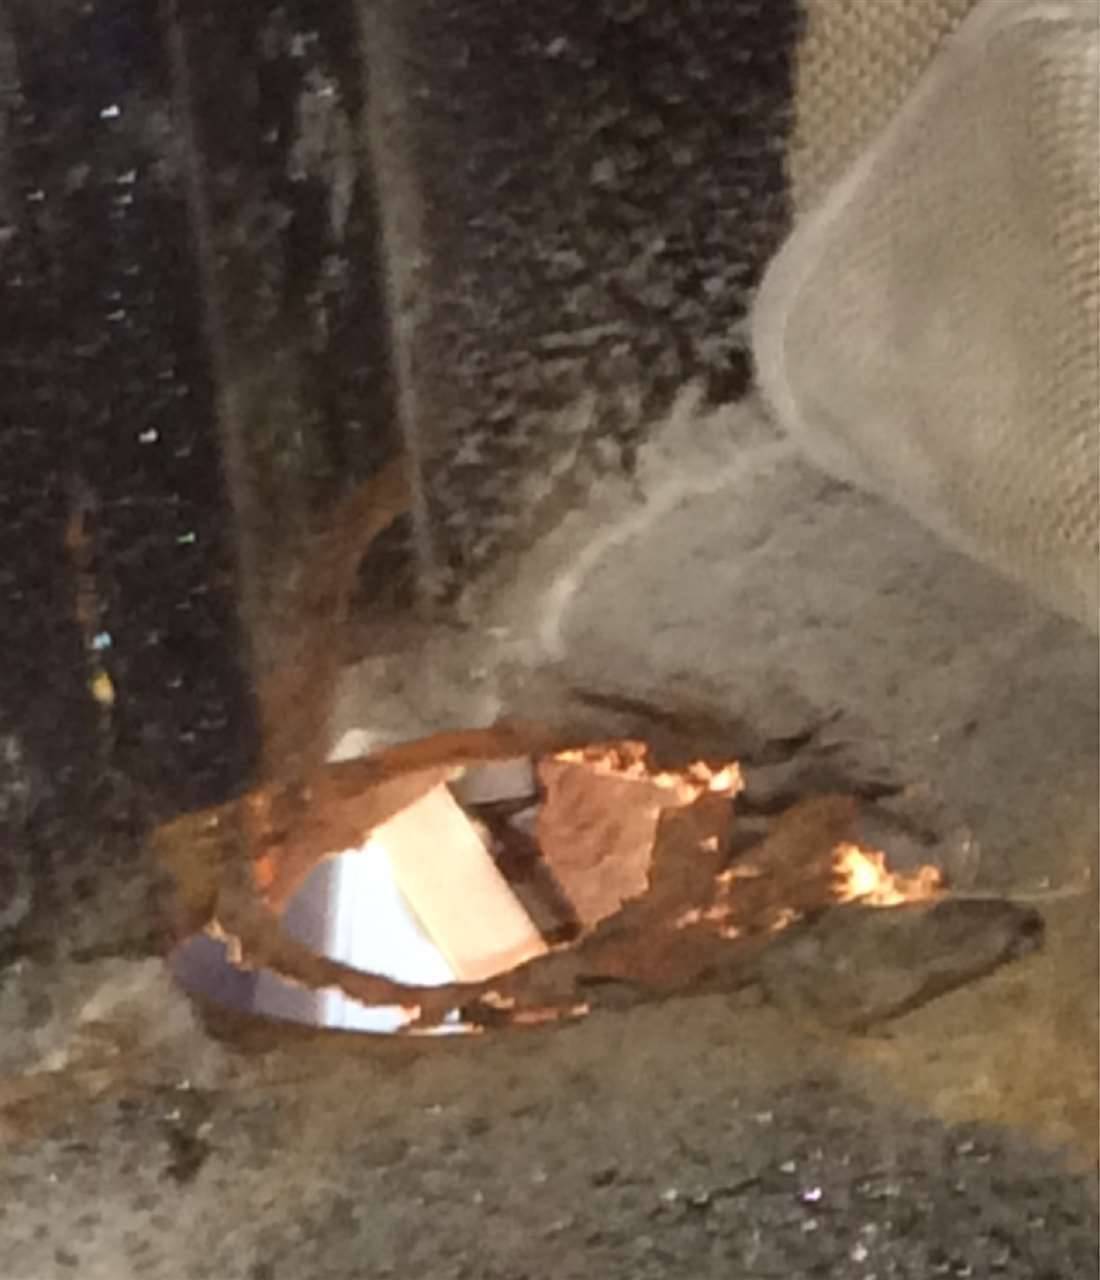 (109.25 KB) (109.25 KB)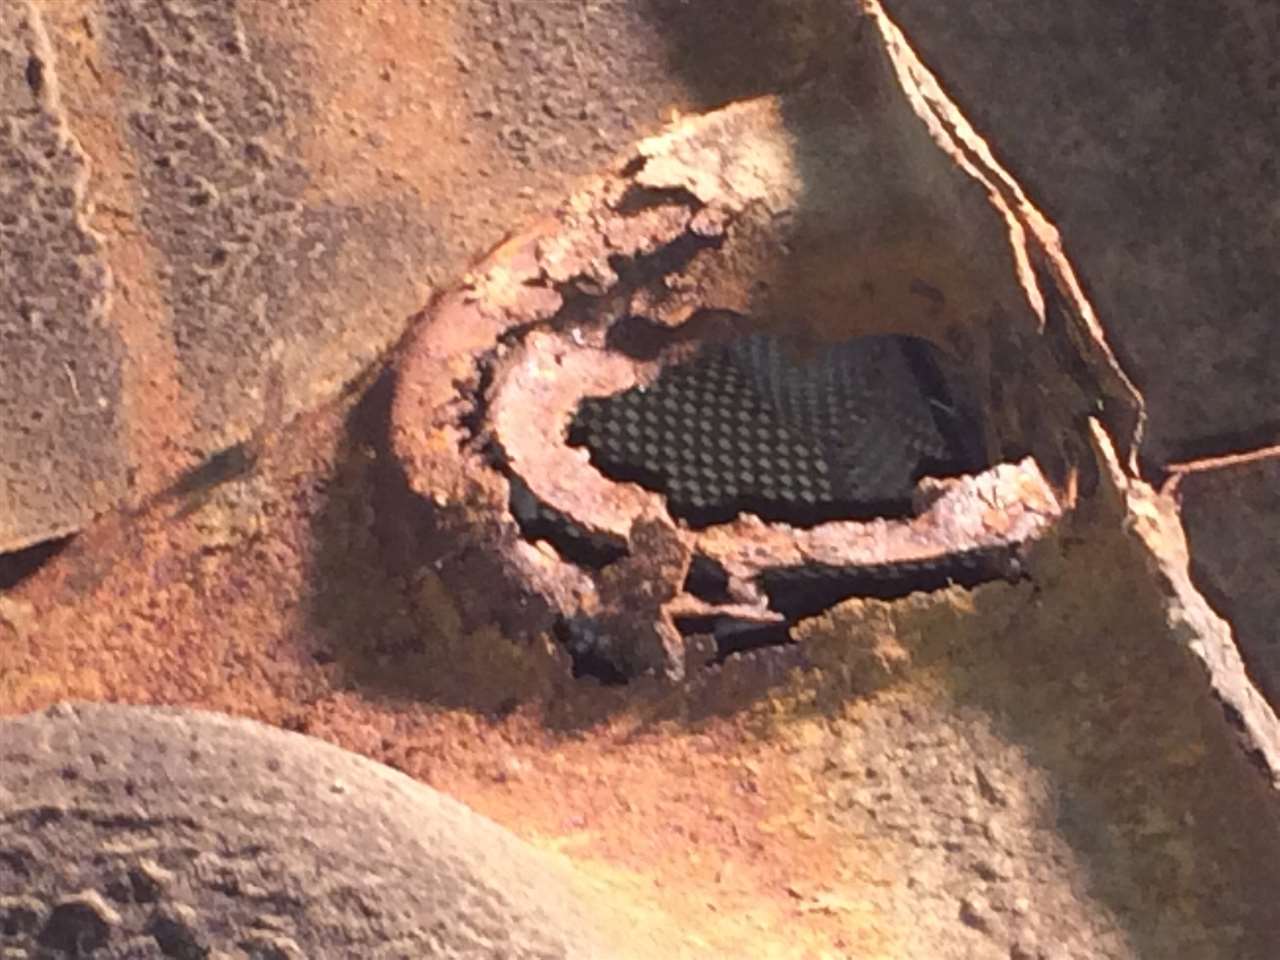 (75.21 KB) (75.21 KB)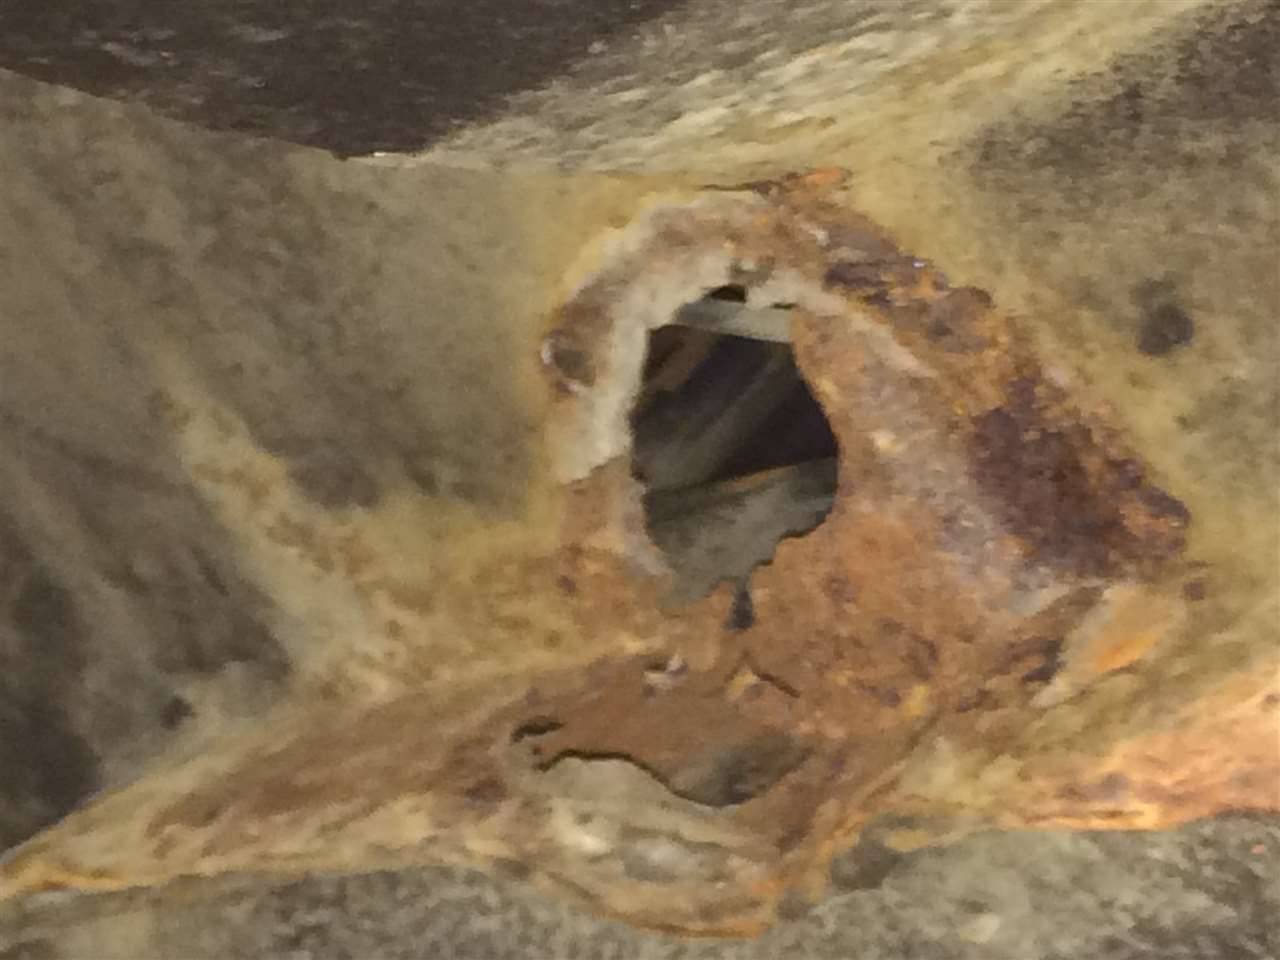 (152.43 KB) (152.43 KB)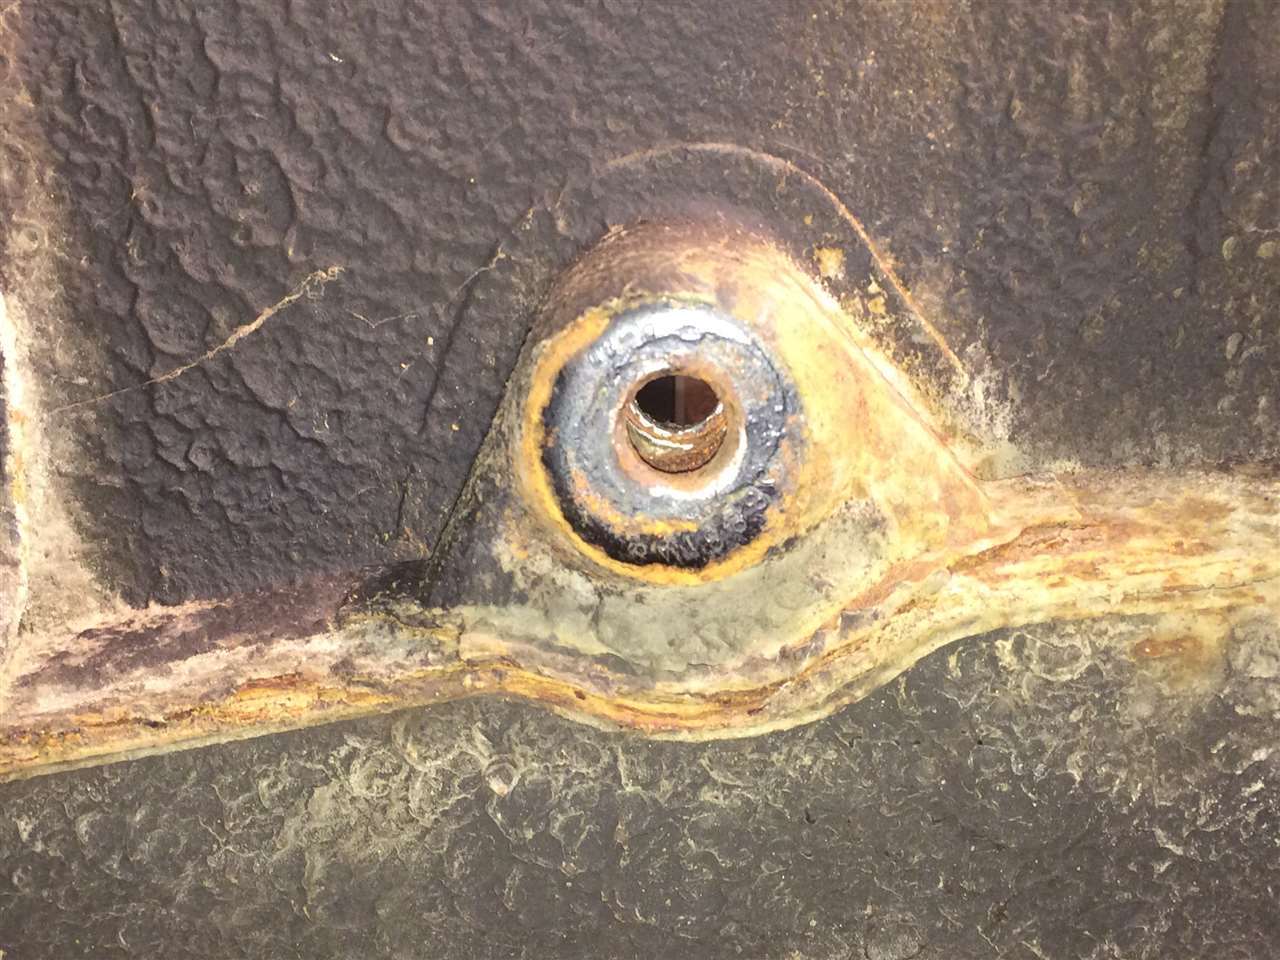
Posted on: 2014/5/26 18:46
|
|||
|
[url=https://packardinfo.com/xoops/html/modules/
|
||||
|
||||
|
Re: 1956 Packard Patrician Rebuild Project
|
||||
|---|---|---|---|---|
|
Home away from home
|
I'm one of those impatient one's, I have to get a sneak peek on what it will look like.
Again hit by the inflation of "Oh, its a Classic" $350 cheapest quote for sandblasting so,,,,, with Polycarbonate wheel in hand, I think this will be satisfactory. I am thinking of shooting undercoating over it, the frame was originally undercoated but was way worn out and flaked away. Attach file: (114.14 KB)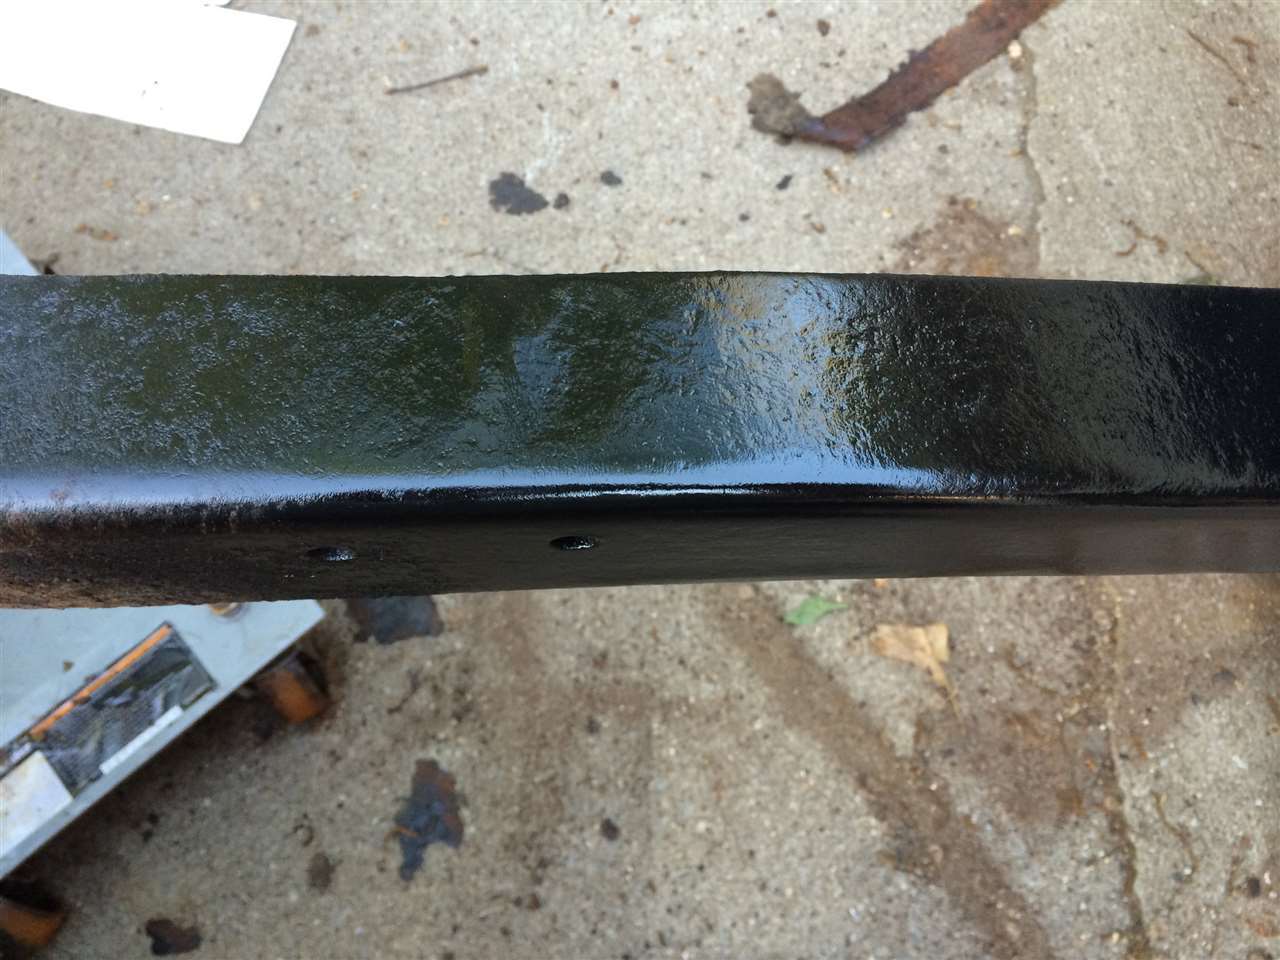 (133.23 KB) (133.23 KB)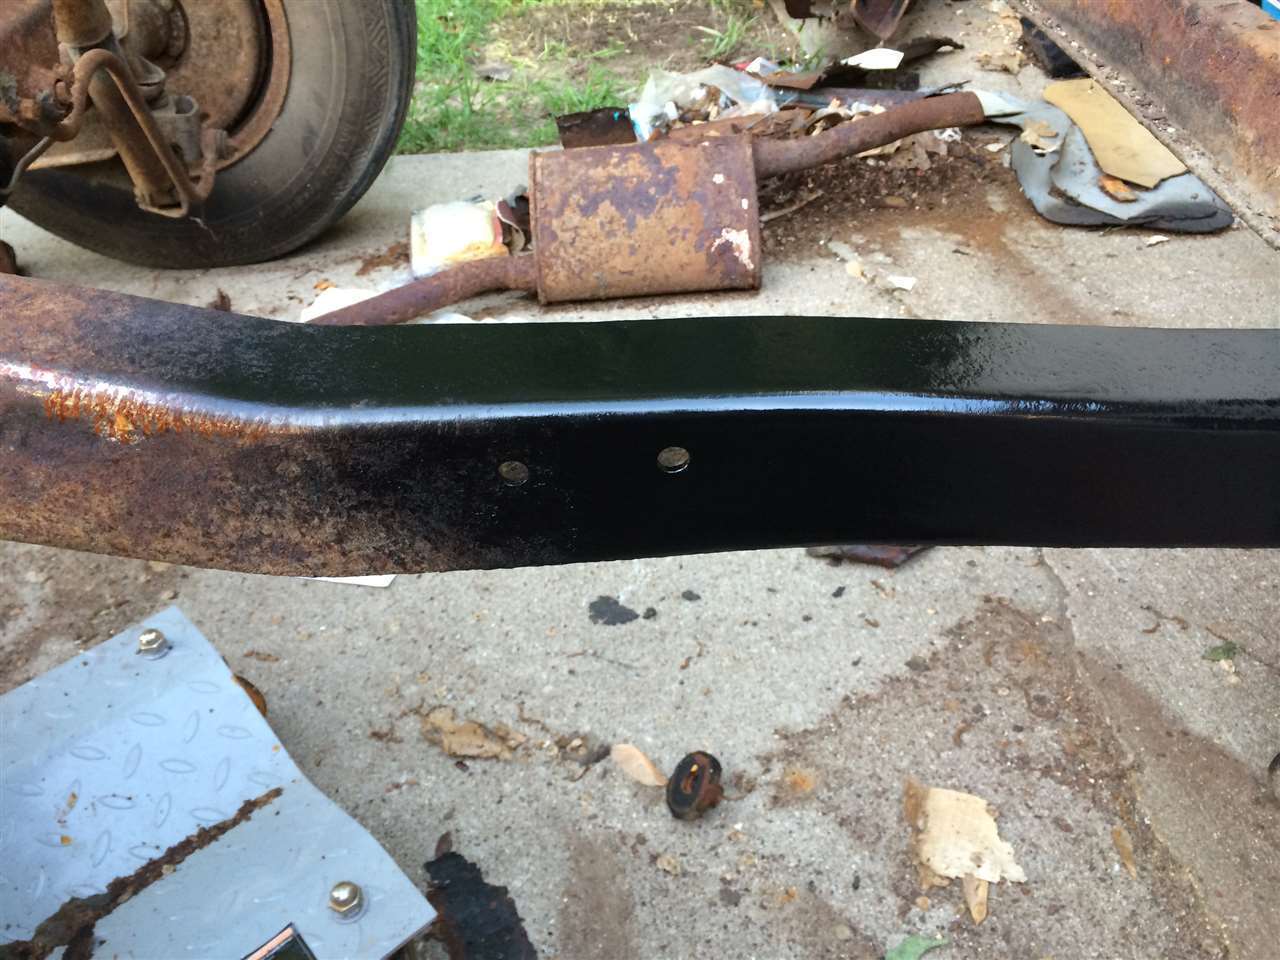 (143.17 KB) (143.17 KB)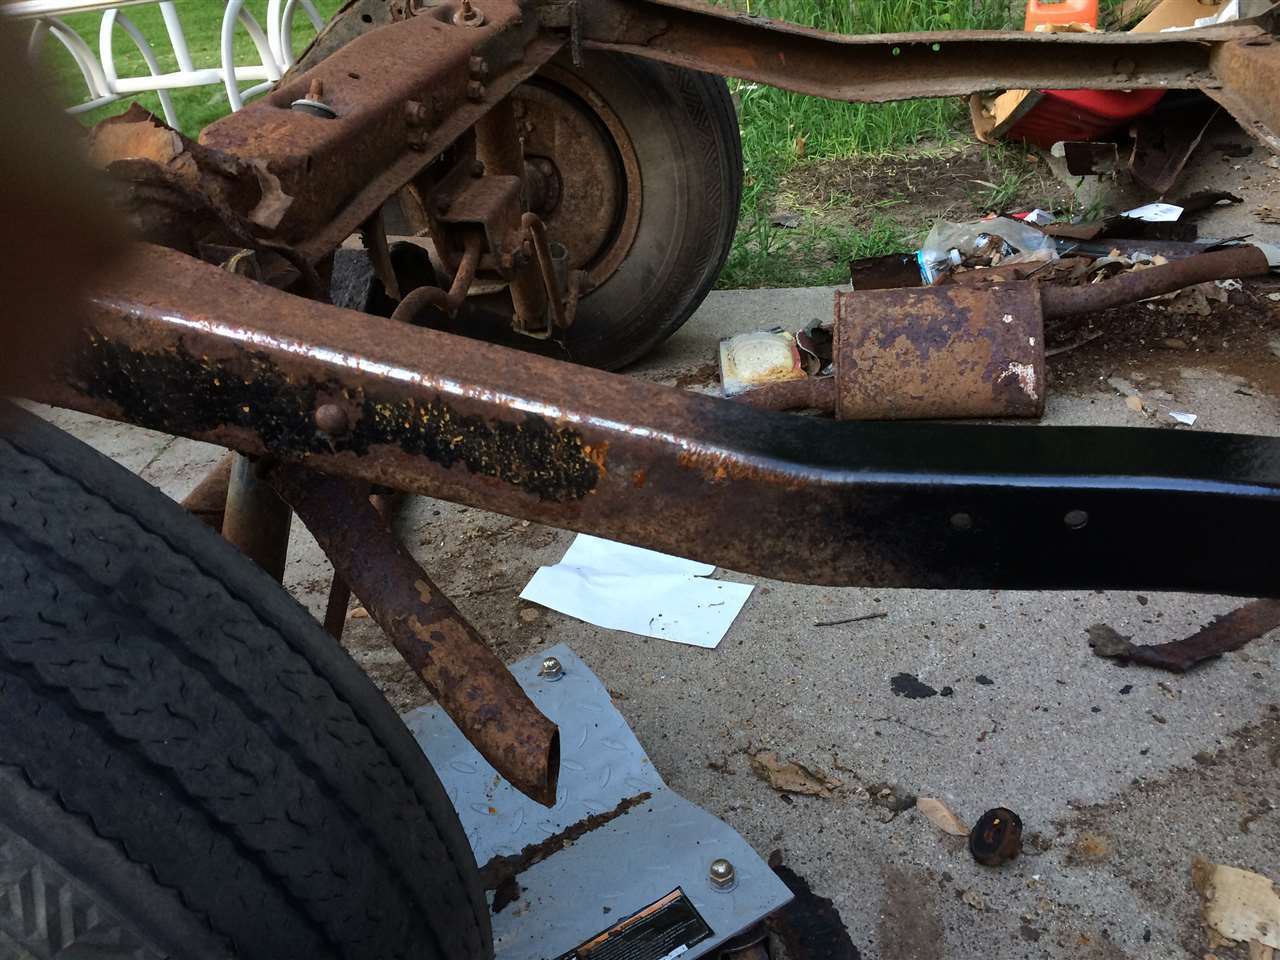
Posted on: 2014/5/29 19:53
|
|||
|
[url=https://packardinfo.com/xoops/html/modules/
|
||||
|
||||
|
Re: 1956 Packard Patrician Rebuild Project
|
||||
|---|---|---|---|---|
|
Forum Ambassador

|
Troy,
Given the rust damage that you've since discovered, I think you're gonna be glad (long after the repair work is all done) that you took the body off the frame. It's not uncommon to find those body mounts at the tail end of the trunk floor rusted out - 51-54 as well as 55-56. I'm suprised that C2C hasn't reproduced them as wall, as a companion to their trunk floor repair panel. Seems to me that those peices are the same stamping for left and right sides.
Posted on: 2014/5/30 9:22
|
|||
|
||||
|
Re: 1956 Packard Patrician Rebuild Project
|
||||
|---|---|---|---|---|
|
Home away from home

|
I wonder if the trunk section I bought for my 51 would work. One mount I fixed and the other was ok. I have outriggers I'm going to sell eventually too.
Posted on: 2014/5/30 9:41
|
|||
|
[url=h
|
||||
|
||||
|
Re: 1956 Packard Patrician Rebuild Project
|
||||
|---|---|---|---|---|
|
Forum Ambassador
|
Quote:
Again hit by the inflation of "Oh, its a Classic" $350 cheapest quote for sandblasting so,,,,, with Polycarbonate wheel in hand, I think this will be satisfactory. Polycarbide abrasive wheels are wonderful products - especially since HF stocks a 4-1/2" version for an angle grinder for just $5. 3M makes a compact Roloc version, for an angle-head die grinder, but it costs nearly twice the price. The downside is that these abrasive wheels make a lot of fine, airborne dust. So, be sure to protect yourself from that. Before going at it with any polycarbide wheel(s), and after scraping the easy, loose stuff off with a putty knife, I like to flail the rust with bevel and cup brushes mounted in my 4-1/2" electric angle grinder (while wearing good eye protection). However, beware of cheap brushes - lest ye want to suffer a few 'quills' stuck in thine cheeks. Quote: I am thinking of shooting undercoating over it, the frame was originally undercoated but was way worn out and flaked away. I doubt that undercoating was applied to the frame by the factory, but was more likely done 'locally'. Undercaating was a common dealer add-on in northern climes, where salt and other nasty stuff was/is used to combat snow and ice on roads. Though rather unnecessary on something as heavy as a frame, undercoating has its plusses. I find it to be a decent sound deadener in wheel tubs. However, long term benefits are questionable. As it ages, it tends to go off-color, which is only a cosmetic issue, but aso looses its grip, over time, it tends to hold moisture, which actually promotes rust. Since you're going to so much trouble, I think the frame would do better with an application of some sort of rust-encapsulating coating. I've been using POR-15, but have had some mixed results - beyond surface prep. Due to the way it dries/cures, POR-15 can be tricky to work with, and their Rust Preventative Coating must be topcoated if it will be subject to UV exposure. I prefer their glossy BlackCote over the ChassisCoat, but have encountered some issues with consistency of the product.
Posted on: 2014/5/30 9:52
|
|||
|
||||


