|
Re: Joe's '49 Club Sedan
|
||||
|---|---|---|---|---|
|
Home away from home

|
Took the Packard out early this week with 95 degree heat and the AC on full blast. Ran fine, didn't overheat but ran warmer than I would like, about 200 (new gauge has numbers). Decided to go with Plan B, adding the mechanical fan back on the water pump. The problem was that with the single belt arrangement with the compressor on the left, the fan in the original position hit the clutch of the compressor. I had planned to build a spacer, if necessary, to move the fan toward the radiator about 7/16". On most cars this would be pretty simple, drill 4 holes in a spacer and bolt it on. Not so with Packard, it has a lip on water pump bracket that centers the fan. This makes a spacer much more difficult to build.
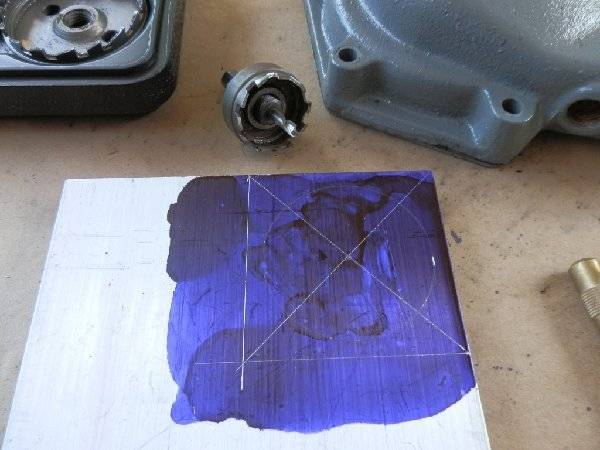
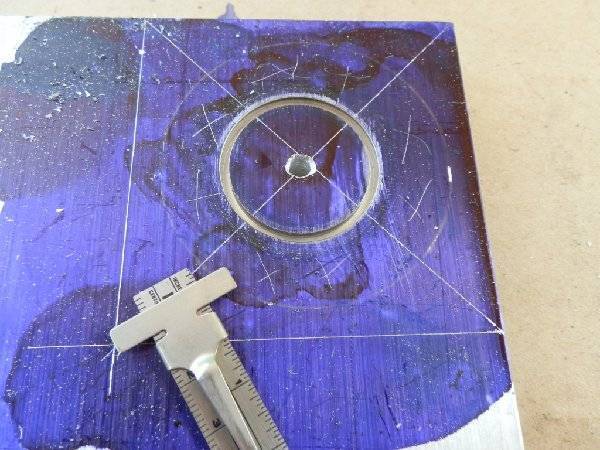
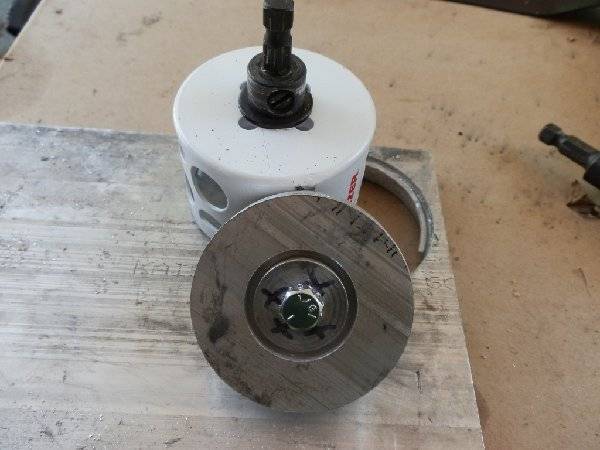
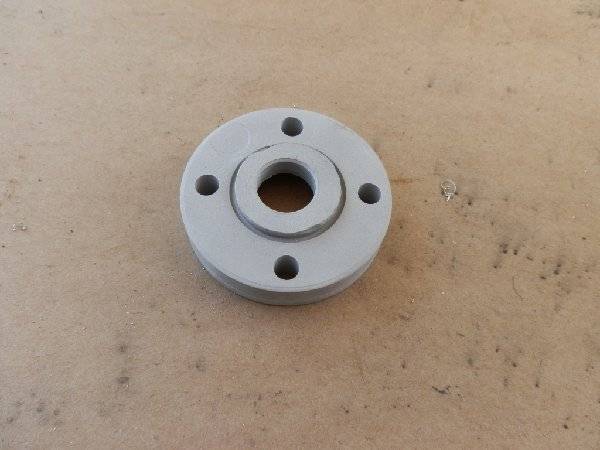
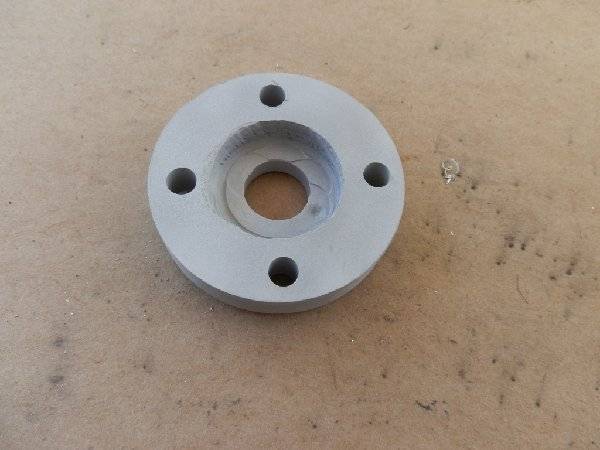
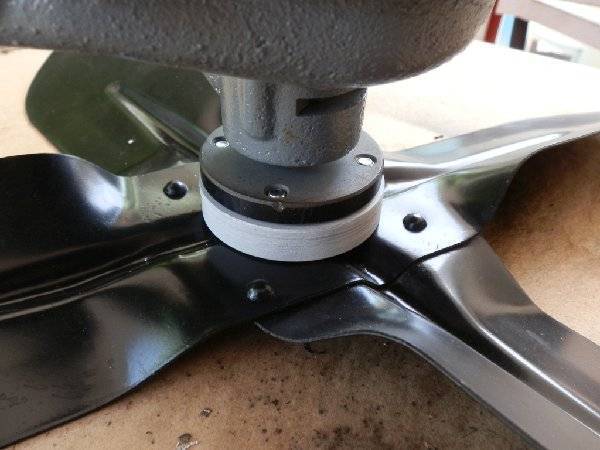
I started by buying a $6 piece of 5/8" thick aluminum billet. First used a hole saw with the correct inside diameter to cut the relief that will center the fan on the front of the adapter. Then used another hole saw to cut into the back of the spacer for the hole to center the back of the spacer on the water pump. Then used a 2 3/4" hole saw to get the round 2 1/2" round disk. Used a drill press for this.I have a small lathe but it is not powerful enough the carve out the excess material to finish the spacer. I used a 1/2" end mill in a drill press with a clamp to carve out the excess material. Not as pretty as using a lathe but equally effective. Drilled the 4 mounting holes and it is ready to mount. Would have been much easier with a lathe, but still possible with some available tools! Now the hardest part, getting the assembly mounted with little room!
Posted on: 2020/8/1 12:41
|
|||
|
||||
|
Re: Joe's '49 Club Sedan
|
||||
|---|---|---|---|---|
|
Forum Ambassador
|
Good job. All kind of commercial spacers are available that will fit the bolt holes but Packard did use that odd pulley hub with a dimension needing a large and non standard bore hole in the spacer.
I had to do something similar for my 356 engine with the compressor driven off the fan pulley so the fan would clear the side of the compressor belt. If I remember, that bore diameter is just a tad larger than those needed on the other engines. Fortunately my mini lathe was just barely able to handle the size.
Posted on: 2020/8/1 14:20
|
|||
|
Howard
|
||||
|
||||
|
Re: Joe's '49 Club Sedan
|
||||
|---|---|---|---|---|
|
Home away from home

|
I was out with one of my final test drives, everything was good until I pulled up to my shop gate, shut the car off to open the gate and when I went to re-start, nothing happened.
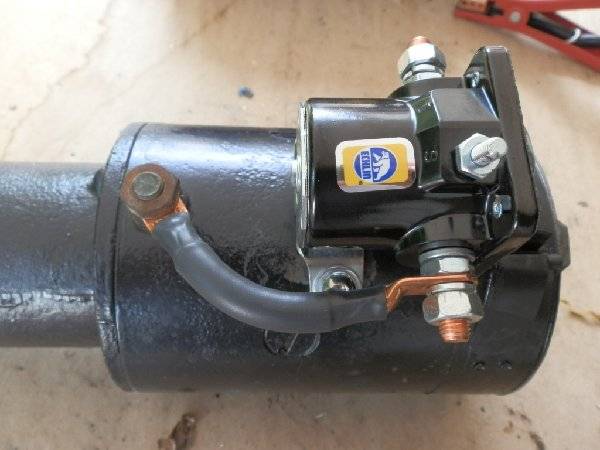
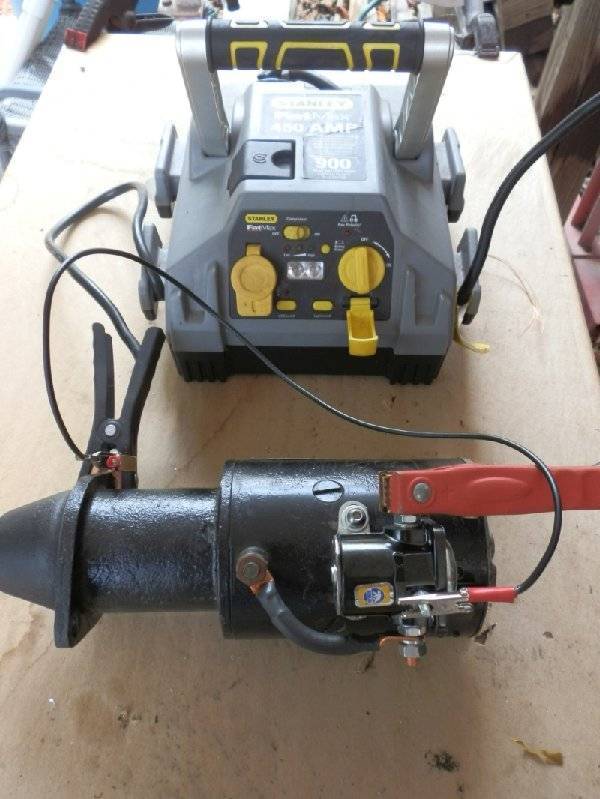
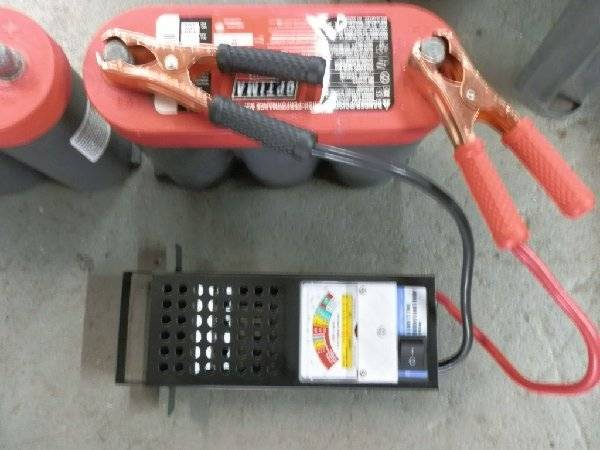
I dragged the car back into the shop and checked the battery, the voltage was good and I had no trouble starting the car earlier that morning several times so I immediately blamed the Chinese 12 volt solenoid that has previously given me trouble. Went to NAPA and bought a Ford 12 volt solenoid, pulled the starter and modified the solenoid to fit. Bench-tested the starter and re-installed. Ouch! Still no start! All indications are now that there was a sudden failure of one or both of the 6 volt Optima batteries. I'm kicking myself for not having by jumper box charged before deciding to remove the starter! I had no way of load testing the batteries and they are a real chore to remove to be tested. So I grabbed a 20% off coupon and headed to Harbor Freight to buy a 100 amp battery load tester. Total cost, $16 plus tax. Tested the batteries in the car at 12V and sure enough there was a problem. Removed the batteries and tested each at 6V and one was totally dead and the other was marginal. One was bought in 2015 and the other in 2016. Ordered a new pair of 5 volt Optimas for $375 and waiting for them to be delivered. Lesson learned, don't jump to conclusions, check all options first and suspect the less obvious!
Posted on: 2020/8/6 11:00
|
|||
|
||||
|
Re: Joe's '49 Club Sedan
|
||||
|---|---|---|---|---|
|
Forum Ambassador
|
I don't know if there is any good way to home test with the low end equipment mostly available but something I read when doing my AC experiments with my version of dual batteries to get a 6/12 voltage supply and researching how to series or parallel charge more than one battery is batteries vary in construction enough that while they both can put out the stated voltage and amps individually, one might have a significantly different internal resistance than another.
Nutshell was batteries that are in a series or parallel configuration need to be fairly well matched. If not, and they are charged together the charge circuit sees the overall need but cannot differentiate between the batteries. The battery with the lowest resistance will get more of the charge to the point it can be seriously overcharged before the level in the other is sensed and the one with higher resistance gets less charge and can be in a perpetual low state because the charge circuit never sees its real need because of the overcharged battery. I seem to recall another article that stated the AGM cells which I believe Optimas are made from are very sensitive in that respect and do best with a reliable and consistent charge rate.
Posted on: 2020/8/6 12:13
|
|||
|
Howard
|
||||
|
||||
|
Re: Joe's '49 Club Sedan
|
||||
|---|---|---|---|---|
|
Home away from home

|
Have used Optima batteries in race cars for some time, until I found that they tended to self-destruct with no warning. One minute good. Next minute boat anchor. Seems like an internal short (brought on by vibration?). And they're not cheap.
Bottom line. I don't use them any more. I use Deka AGM now, but of course they are 12 volt. Maybe you have no choice because of the dimensions and 6 volt option with Optima. Perhaps keeping them charged up individually on something like a CTEK 6 volt charger would prolong their life and warn you of impending problems. What HH describes as the potential problem with them wired as a dual setup is all too true, unfortunately. The small lithium starter batteries work really well, even on modern high compression engines. Sounds like you already have one. I suspect they are only available in 12 volt, but doubt that would harm your starter setup if used sparingly. One more thing to carry around in your trunk (in addition to a jack that is up to the job). I don't know about you, but I'm finding Packard-sized cars a bit hard to push these days! Brian
Posted on: 2020/8/7 0:04
|
|||
|
1941 120 Club Coupe (SOLD)
1956 Clipper Deluxe (RHD and auto) - for the wife, or so I told her! |
||||
|
||||
|
Re: Joe's '49 Club Sedan
|
||||
|---|---|---|---|---|
|
Home away from home

|
My 2 6V Optimas were not a matched pair but the new ones will be. Size was important to replace the original battery and to give the option of 6 or 12 volts. I have had good luck with the 12V Optimas in my '39 Ford and '64 Chevy pickup, both are much older than the 2 6Vs. I think the age and outside temperature with the engine heat and the placement of the batteries finally got to these batteries. I'm going to try a heat shield with the new ones.
With all the tools I have, I can't believe I didn't own a battery load tester. In addition to load testing the condition of the battery, it can be used to determine an estimate of cold cranking amps, read the voltage and determine alternator/generator output. Handy with a price of only $20 to $40.
Posted on: 2020/8/7 7:56
|
|||
|
||||
|
Re: Joe's '49 Club Sedan
|
||||
|---|---|---|---|---|
|
Home away from home

|
Yes, a lot of people say they have had good service from Optima 12V batteries.
For some reason, they don't seem to like race cars. Might be heat or vibration, as you suggest. But when they fail, it seems to happen without warning. I guess a load tester would be good for diagnostics generally, but would just deliver the bad news in that situation. An ordinary old voltmeter will do the same thing (ask me how I know). One of my most stressful drives was about 140 miles from a racetrack back to my workshop in a Porsche Carrera race car with the alternator not working and a Chinese wet cell battery fitted (only thing I could find on a Sunday). Made it back with 5.7V showing on the meter. The Optima battery had given up sometime earlier and the alternator had subsequently died. Later investigation showed the battery was shorted internally - most likely a loose plate. Sounds like you're well on top of this one, though. Brian
Posted on: 2020/8/7 21:40
|
|||
|
1941 120 Club Coupe (SOLD)
1956 Clipper Deluxe (RHD and auto) - for the wife, or so I told her! |
||||
|
||||
|
Re: Joe's '49 Club Sedan
|
||||
|---|---|---|---|---|
|
Home away from home

|
Got the battery and starter situation resolved. The Ford starter solenoid threw me a curve. Unlike the original solenoid, it is activated by a ground from the starter switch rather than positive voltage. Once I figured that out and made a minor wiring change, the car starts fine.
Corrected the horn issue that Howard pointed out. The problem started when someone in the past removed the steering wheel with a sledge hammer rather than a puller. The result was that the steering shaft was bent and the threads were messed up so the steering wheel would not go on as far as it should. Fixed the threads with a special 3/4" X 20 UNEF thread chaser but the steering wheel only went on slightly further due to the bent shaft. Used a shim on the contact disk to make up the distance and now the horn works perfectly. The fan spacer that I made previously was installed on the water pump pulley. With the fan moved forward there were very tight quarters to install the 4 bolts that attach the fan and spacer assembly. The bolts are fine thread and could only be turned about a 1/4 turn at a time with a box or open end wrench! Took quite a while to get them all secure. The fan now clears the AC clutch and is still almost an inch from the radiator. It will supplement the cooling from the electric fan that is is the front of the radiator and condenser. Took the car out for a ride this morning in 90 degree heat and the temperature stayed pegged at 180 degrees. A potential problem avoided. Just about time to bring this 7 year project to a close.
Posted on: 2020/8/18 12:14
|
|||
|
||||
|
Re: Joe's '49 Club Sedan
|
||||
|---|---|---|---|---|
|
Forum Ambassador
|
Do you have a number for the Ford solenoid that requires a ground to operate? If it checks out size wise it might be easier to find locally than a Cole-Hersee solenoid for someone needing a TL solenoid replacement.
Posted on: 2020/8/18 12:34
|
|||
|
Howard
|
||||
|
||||

 (90.39 KB)