|
Re: Resurrecting a 1951 Henney-Packard Parts Car
|
||||
|---|---|---|---|---|
|
Home away from home
|
Since I had to order the stabilizer bushings this morning, I’ll pick them up tomorrow while I am in town anyway picking up the repaired tire that had a slow leak.
Back to the driveline, I decided to remove the clutch and, even though I am not intending on replacing it, I wanted to be sure it wasn’t seized together. Other than cobwebs and the throw-out bearing being sideways, everything looks fairly clean in the bell housing. The throw-out return spring will have to be repaired or replaced but there is a spring hanging off the clutch arm return spring that I don't recall seeing on my other cars. Does the loose end go into the hole in the shift arm once it’s reconnected? The throw-out bearing itself was quite stiff but felt smooth. I poured oil over it and it is now much better but is it best to replace it? Before turning over the engine to get at the clutch pressure plate bolts, I cleaned out the holes and removed all the spark plugs, pouring oil into the cylinders. I placed the plugs back in with just barely a thread to keep dirt out but to allow the pressure to escape. While doing it, I noticed that several head nuts are missing but also, five or six of them are bolts, not studs and nuts! That will have to be addressed at some point too. The clutch pressure plate and pad were two bolts away from being removed when I suddenly remembered a Zoom meeting so quickly closed up the shop and rushed the block back to the house just in time! I was quite grubby but fortunately it was a one-way presentation. Attach file:  AF7BDBD7-25E4-4CB0-86EC-61DC4EF59069.jpeg (209.12 KB) AF7BDBD7-25E4-4CB0-86EC-61DC4EF59069.jpeg (209.12 KB)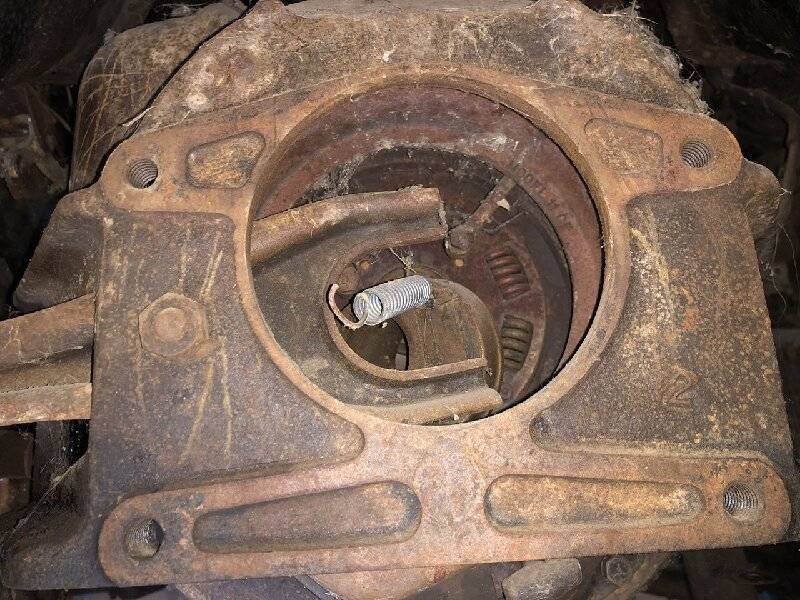  9E147495-380B-49DD-B092-843D0DD47707.jpeg (116.17 KB) 9E147495-380B-49DD-B092-843D0DD47707.jpeg (116.17 KB)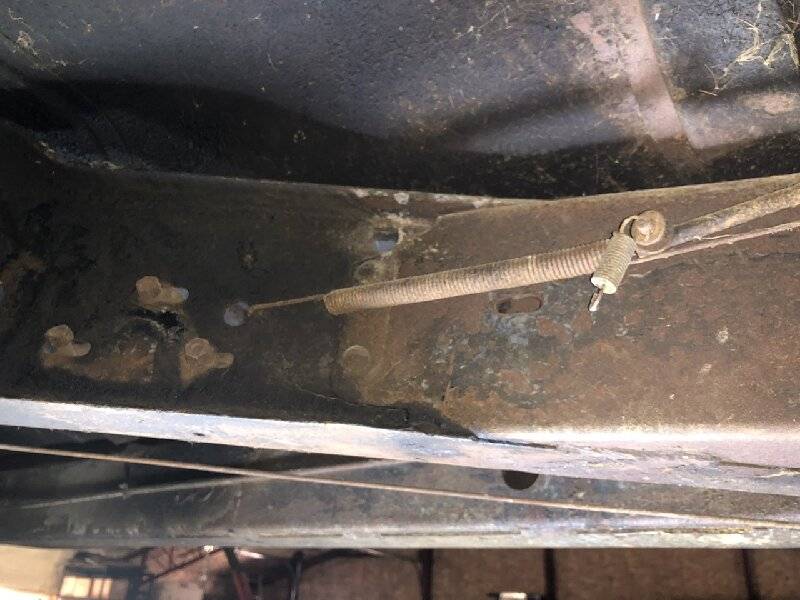
Posted on: 2022/7/18 21:35
|
|||
|
All generalities are false.
Once I thought I was wrong but I was mistaken. Don Pierson Packard / IMPERIAL page CA DMV Licensed Vehicle VIN Verification 1951 Henney-Packard 3-Door Long Wheelbase Air Force Ambulance The 1951 Henney-Packard is For Sale! 1954 Packard Patrician 1954 Packard Patrician Parts Car 1956 Clipper Custom Sedan |
||||
|
||||
|
Re: Resurrecting a 1951 Henney-Packard Parts Car
|
||||
|---|---|---|---|---|
|
Home away from home
|
After spending the morning going to town to fetch the tire and stabilizer bushings, I got to work on the car again. First was to finish removing the clutch which has seen better days. I had hoped to revive it with a little sand paper but it is too far gone for that so back to town tomorrow to see about getting it serviced.
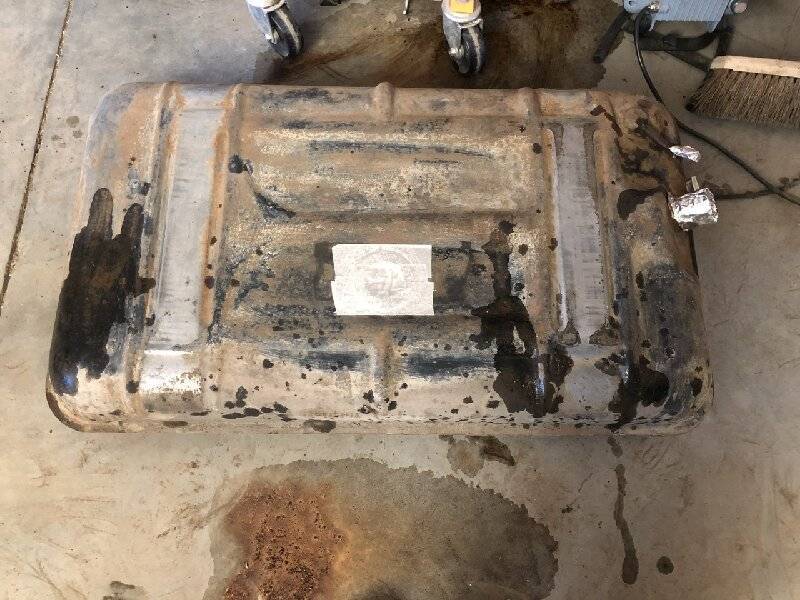
Then I worked on the rear stabilizer again and got it installed. The grommets were universal and fit just like originals but are split so a little easier to install. Getting the connector shafts reattached was a problem until I realized again that the car is up in the air on jacks with one side higher so I stopped to put the tire back on. Once it was on all fours, it all went right together. The gas tank is another matter as just sitting overnight with the cleaner in it, there are dots all over where there are pinholes and all the cleaner gone when there had been two quarts inside yesterday and the moist dots are on the top. Not sure where it went as there was no puddle on the floor! I took a remote camera and tried to look inside to be sure the fuel pickup was intact and it appears to be but I’m not sure. There is a photo below but not a very good one even after enhancing it a little. Attach file:  9BD1C798-6B49-48D3-803E-565B3C7BED09.jpeg (136.96 KB) 9BD1C798-6B49-48D3-803E-565B3C7BED09.jpeg (136.96 KB)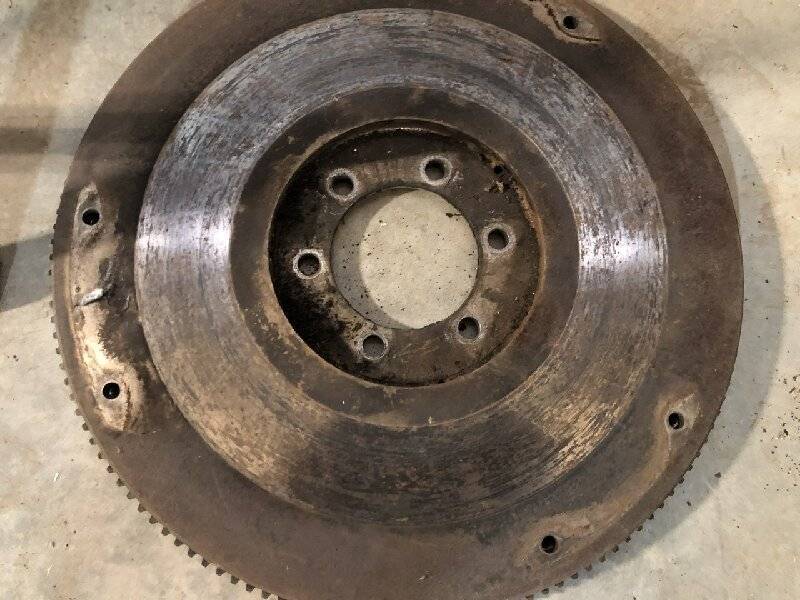  C0DBEA61-4B9D-4214-B152-16DD13593E6D.jpeg (190.20 KB) C0DBEA61-4B9D-4214-B152-16DD13593E6D.jpeg (190.20 KB)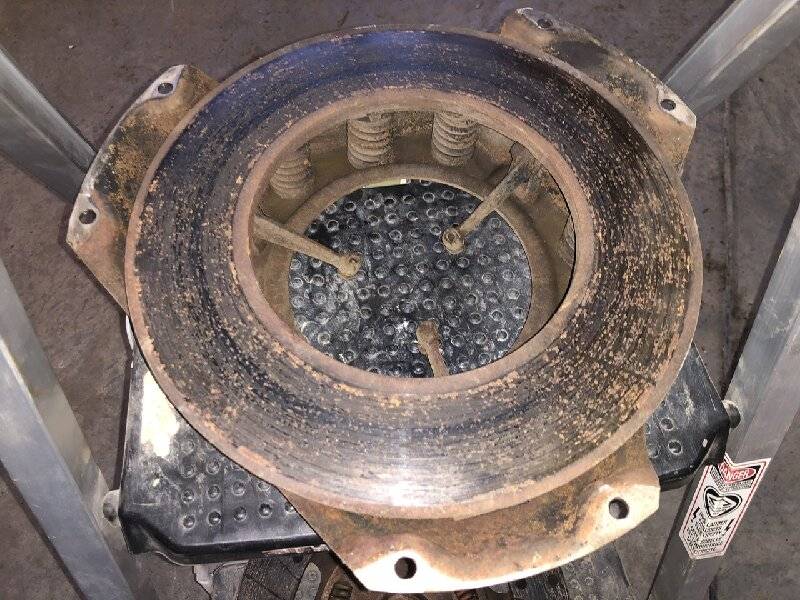  A7035B8A-F61B-458F-9BF4-8D936623A9A2.jpeg (226.96 KB) A7035B8A-F61B-458F-9BF4-8D936623A9A2.jpeg (226.96 KB)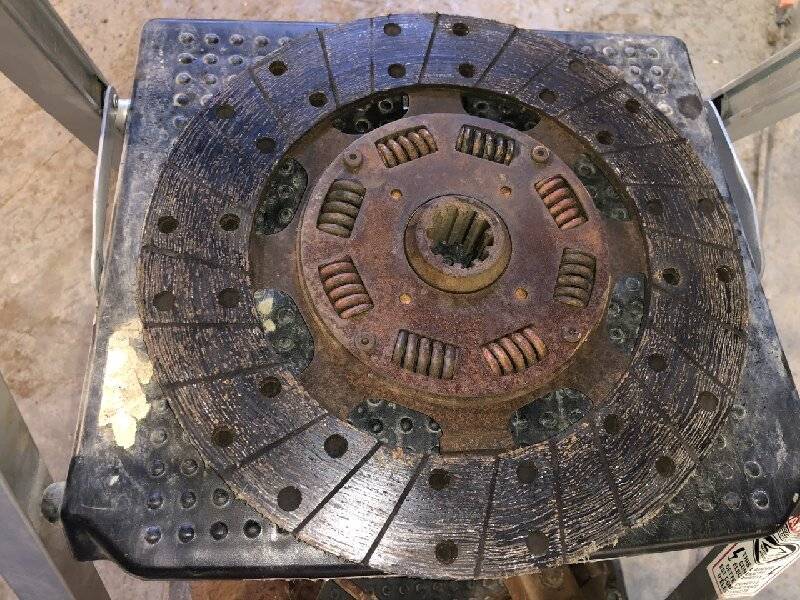  5E2AD550-6168-4619-A163-DFE75B1F37B3.jpeg (165.96 KB) 5E2AD550-6168-4619-A163-DFE75B1F37B3.jpeg (165.96 KB)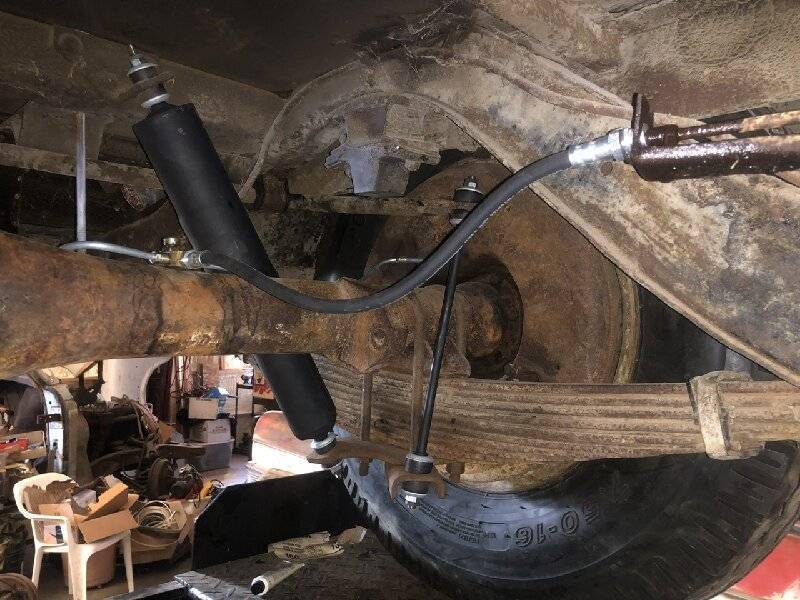  B361749D-0369-4B92-A316-7C43602D675A.jpeg (167.82 KB) B361749D-0369-4B92-A316-7C43602D675A.jpeg (167.82 KB)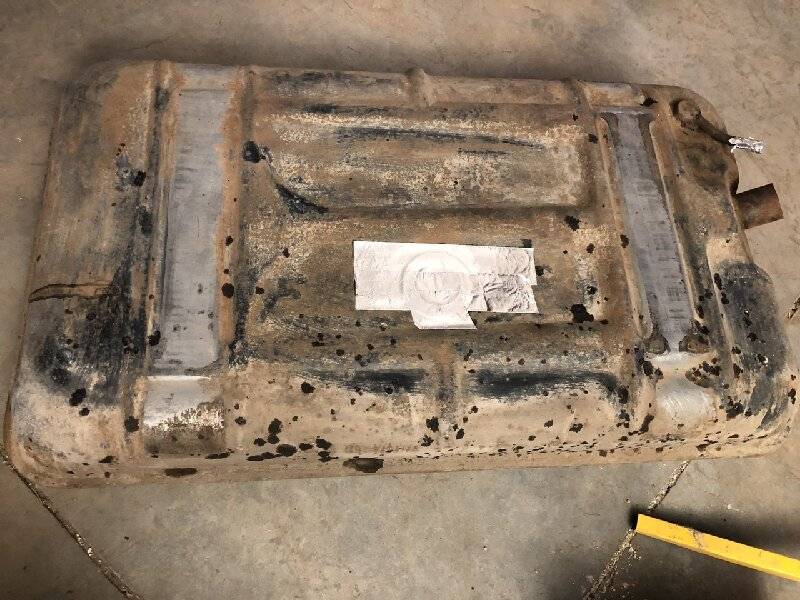  36F2C1F1-168E-4032-B368-9A30111E806B.jpeg (94.15 KB) 36F2C1F1-168E-4032-B368-9A30111E806B.jpeg (94.15 KB)
Posted on: 2022/7/19 19:39
|
|||
|
All generalities are false.
Once I thought I was wrong but I was mistaken. Don Pierson Packard / IMPERIAL page CA DMV Licensed Vehicle VIN Verification 1951 Henney-Packard 3-Door Long Wheelbase Air Force Ambulance The 1951 Henney-Packard is For Sale! 1954 Packard Patrician 1954 Packard Patrician Parts Car 1956 Clipper Custom Sedan |
||||
|
||||
|
Re: Resurrecting a 1951 Henney-Packard Parts Car
|
||||
|---|---|---|---|---|
|
Home away from home
|
On the fuel tank, I’m going ahead with trying to seal it but I suspect that in the end it will have to be replaced. The 1948-1950 reproductions that recently appeared on the market are identical other than needing to have their filler and vent pipes cut off. That’s the way Packard did it as the two connections do not have the hose flair that were on the passenger car tanks.
Posted on: 2022/7/19 19:50
|
|||
|
All generalities are false.
Once I thought I was wrong but I was mistaken. Don Pierson Packard / IMPERIAL page CA DMV Licensed Vehicle VIN Verification 1951 Henney-Packard 3-Door Long Wheelbase Air Force Ambulance The 1951 Henney-Packard is For Sale! 1954 Packard Patrician 1954 Packard Patrician Parts Car 1956 Clipper Custom Sedan |
||||
|
||||
|
Re: Resurrecting a 1951 Henney-Packard Parts Car
|
||||
|---|---|---|---|---|
|
Home away from home
|
It will likely need a second and even a third coat but this tank is huge and will need much of the can for the first. According to the instructions, there is a limited time in which do to the second coat so depending how much is left once it's been done and the excess drained back out, I'll do just that. This tank has been bone dry for decades (about 40 years) so that there were holes at all was a surprise, much less so many.
My other concern is getting the whistle plugged with sealer but that's a minor thing. I will blow a little air into it to be sure, though, and once done and dry I'll test if with water before installation. It will have had time to thoroughly dry out by the time any gasoline is added. Incidentally, looking at photos of the reproduction tanks, I don't think they have the whistle but I'm not sure.
Posted on: 2022/7/20 15:51
|
|||
|
All generalities are false.
Once I thought I was wrong but I was mistaken. Don Pierson Packard / IMPERIAL page CA DMV Licensed Vehicle VIN Verification 1951 Henney-Packard 3-Door Long Wheelbase Air Force Ambulance The 1951 Henney-Packard is For Sale! 1954 Packard Patrician 1954 Packard Patrician Parts Car 1956 Clipper Custom Sedan |
||||
|
||||
|
Re: Resurrecting a 1951 Henney-Packard Parts Car
|
||||
|---|---|---|---|---|
|
Home away from home
|
I went into town with the clutch but Napa does not offer the service in any of their local stores so I left them the flywheel to surface which is done in their Bend, OR store about 30 miles south. For the disk and pressure plate, I went to a different store that does have outside services to handle it, the closest being in Portland, OR. Going into town takes half the day so it was early afternoon by the time I got to work.
Once I returned and moving forward with the tank sealing, I did the etching and agitating steps today but even more holes including one on top of the whistle. It’s looking more and more like a replacement is in order and making me regret having sold a good ‘48-‘50 tank last year! In any event, drained, it is now sitting outside with all holes un-taped where it should dry quickly in the heat. I’ll probably leave it out there all afternoon tomorrow too to be sure it dries thoroughly. I'll have to be sure there are no lizards in it and I had to take one out by hand when closing up that had somehow gotten to the back and was on the window sill. It wasn’t amused having been scooped up like that!
Posted on: 2022/7/20 20:07
|
|||
|
All generalities are false.
Once I thought I was wrong but I was mistaken. Don Pierson Packard / IMPERIAL page CA DMV Licensed Vehicle VIN Verification 1951 Henney-Packard 3-Door Long Wheelbase Air Force Ambulance The 1951 Henney-Packard is For Sale! 1954 Packard Patrician 1954 Packard Patrician Parts Car 1956 Clipper Custom Sedan |
||||
|
||||
|
Re: Resurrecting a 1951 Henney-Packard Parts Car
|
||||
|---|---|---|---|---|
|
Home away from home
|
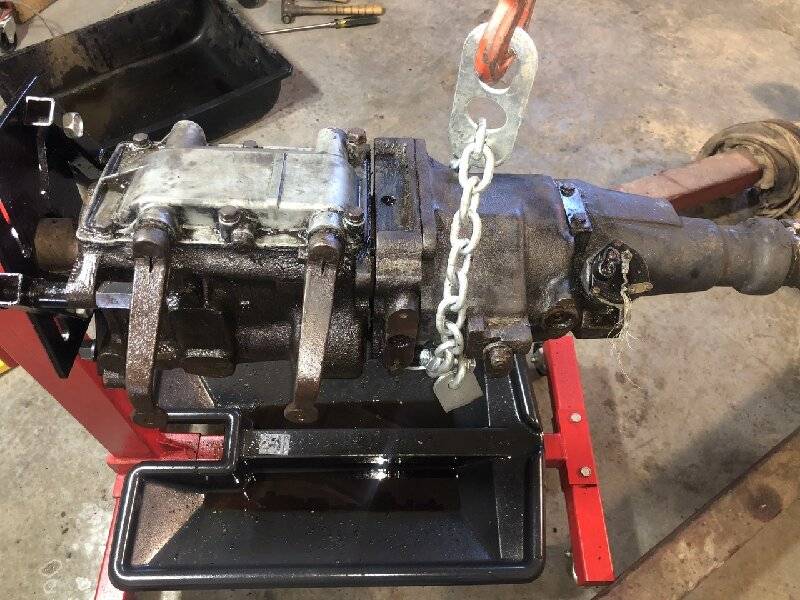
While the tank was sitting with the etching liquid in it, I started work on the transmission as I need to take off the R11 unit from a transmission with stripped gears and put it onto one that’s good. The Henneys had special transmissions with hardened gears and this isn’t one of them but it will do.
After taking out the bolts from the overdrive, I managed to get it to move about .200” but it does not seem to want to go farther and I don’t want to break anything by forcing it. Did I miss something? I will check the manual, of course, but with my very limited rural internet connection, I thought I would also ask. Edit: It appears that I still need to take off the access cover on top which is the small steel plate held on by two bolts above the solenoid, then remove a snap ring. If I understood correctly, that should let it come apart.
Posted on: 2022/7/20 20:17
|
|||
|
All generalities are false.
Once I thought I was wrong but I was mistaken. Don Pierson Packard / IMPERIAL page CA DMV Licensed Vehicle VIN Verification 1951 Henney-Packard 3-Door Long Wheelbase Air Force Ambulance The 1951 Henney-Packard is For Sale! 1954 Packard Patrician 1954 Packard Patrician Parts Car 1956 Clipper Custom Sedan |
||||
|
||||
|
Re: Resurrecting a 1951 Henney-Packard Parts Car
|
||||
|---|---|---|---|---|
|
Home away from home
|
Quote:
Easiest is to drop the transmission countershaft so that the overdrive unit with attached mainsheet can be removed. It may take some jockeying of the low & reverse sliding gear and tilting of the mainsheet to get it to pass through the opening in the rear of the transmission case.
Posted on: 2022/7/20 21:43
|
|||
|
||||
|
Re: Resurrecting a 1951 Henney-Packard Parts Car
|
||||
|---|---|---|---|---|
|
Home away from home
|
Thank you and I may have to give that a try although I'm trying not to disturb the transmission itself any more than necessary. I'm trying to swap an overdrive unit from another transmission onto this one.
On the other transmission with stripped gears, I actually have replacement gears but didn't really want to go that route.
Posted on: 2022/7/20 21:50
|
|||
|
All generalities are false.
Once I thought I was wrong but I was mistaken. Don Pierson Packard / IMPERIAL page CA DMV Licensed Vehicle VIN Verification 1951 Henney-Packard 3-Door Long Wheelbase Air Force Ambulance The 1951 Henney-Packard is For Sale! 1954 Packard Patrician 1954 Packard Patrician Parts Car 1956 Clipper Custom Sedan |
||||
|
||||
|
Re: Resurrecting a 1951 Henney-Packard Parts Car
|
||||
|---|---|---|---|---|
|
Home away from home
|
After reviewing the shop manual last night I thought it would be a quick job to remove the overdrive unit but it takes a type of ring pliers that I don’t have.
With so much else to do it wasn’t a loss so I got to work on the fuel pump. The first thing I saw was that one of the thin edges was chipped and, of course, the arm is badly worn so I got out another pump with the same number. I was surprised to see, however, that it takes a different kit in spite the same number on the housing and on the arm but fortunately I have both types of kits here already. Taking them apart, the one from the car, other than having the chipped edge, also was missing the retainers for the brass filter element inside and taking apart the other, I was surprised to find it full of oil! Obviously its seals had gone out while still in use. Somewhere I have a new inlet hose but I’ve yet to locate it after the disarray from the insulation. The fuel and brake lines are quite rusty so I’ll have to watch them both for leaks, especially the brakes once they’re done. Attach file:  62C95DD1-8650-4D21-882F-7118E78D0D61.jpeg (143.21 KB) 62C95DD1-8650-4D21-882F-7118E78D0D61.jpeg (143.21 KB)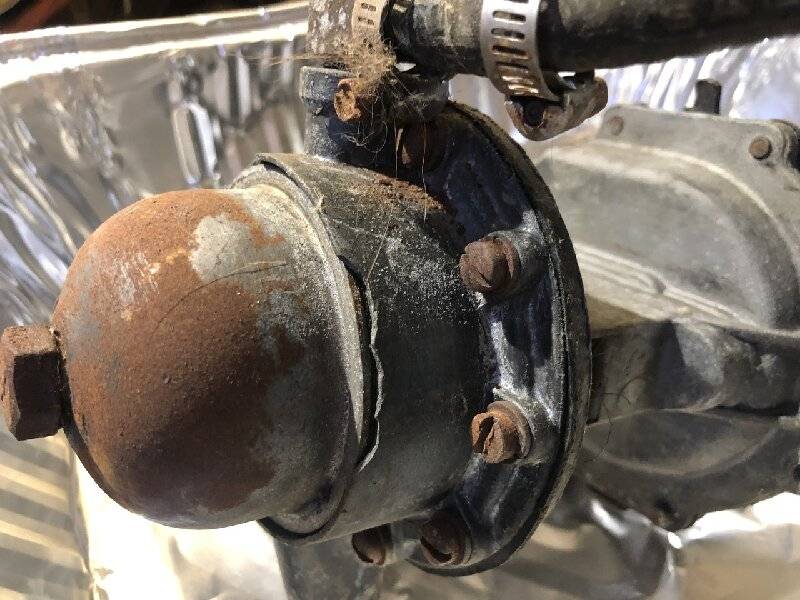  8AC9D9BB-0640-4DDD-B08B-4A5C0B645C82.jpeg (214.88 KB) 8AC9D9BB-0640-4DDD-B08B-4A5C0B645C82.jpeg (214.88 KB)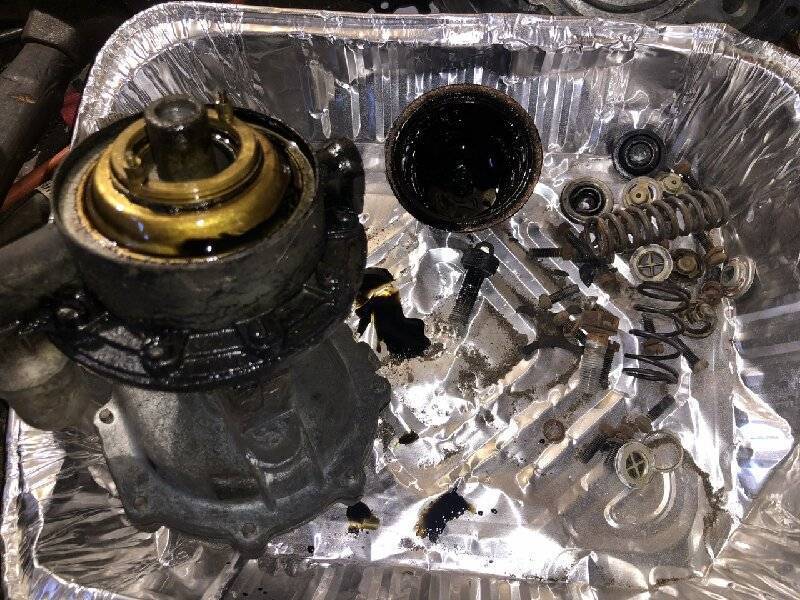
Posted on: 2022/7/21 22:42
|
|||
|
All generalities are false.
Once I thought I was wrong but I was mistaken. Don Pierson Packard / IMPERIAL page CA DMV Licensed Vehicle VIN Verification 1951 Henney-Packard 3-Door Long Wheelbase Air Force Ambulance The 1951 Henney-Packard is For Sale! 1954 Packard Patrician 1954 Packard Patrician Parts Car 1956 Clipper Custom Sedan |
||||
|
||||

