|
Re: Ken's 1937 115C Touring Sedan
|
||||
|---|---|---|---|---|
|
Home away from home
|
After my last post, I had some success. After screwing around with the choke, idle air screw, and drying the plugs, I got fed up and left it alone for a few hours. Went back out, pumped the gas twice, and it fired right up. It ran for about two minutes, but it wouldn't idle, and revving the gas had no affect.
I spent some time looking at the carb, and found one issue. I had forgotten to put the plug back over the low speed jet. After finding that issue, I decided to tear the carb back down and fully inspect it. I found the a Carter service manual, used the appropriate pages, and went at it. The only other issue that I found was that the choke linkage appears to be far from the recommended factory specification. Put everything back together, and manually operating the choke and throttle, still could not get it to fire. I would've thought a single barrel downdraft carb was pretty simple, but it appears to be winning. I'm going to put new plugs in tomorrow (the one item in the ignition that's not new) and then try it again. If that doesn't pan out, I may just send the carb to a pro so I know it is right. Incidentally, where does one connect the heat riser tube for the thermostatic choke? Should I just run a steel or copper line and butt it against the exhaust manifold?
Posted on: 2011/5/8 19:43
|
|||
|
1937 120 1092 - Original survivor for driving and continued preservation. Project blog / Registry
1937 115 1082 - Total basket case, partial restoration, sold Hershey 2015 Project blog / Registry |
||||
|
||||
|
Re: Ken's 1937 115C Touring Sedan
|
||||
|---|---|---|---|---|
|
Home away from home
|
I decided that new plugs were in order. They had looked fine when I was going through the ignition system, but after further inspection, I decided they were probably oil fouled. Put new plugs in today, and she fired right up! Lots of smoke, I'll probably put a little marvel mystery oil in the fuel after I get the carb tuned to try and clear out the carbon. Also, another oil change is probably due soon; the current oil is new but rather fouled with gas from all the time spent trying to start it without success.
Posted on: 2011/5/9 16:38
|
|||
|
1937 120 1092 - Original survivor for driving and continued preservation. Project blog / Registry
1937 115 1082 - Total basket case, partial restoration, sold Hershey 2015 Project blog / Registry |
||||
|
||||
|
Re: Ken's 1937 115C Touring Sedan
|
||||
|---|---|---|---|---|
|
Home away from home
|
I'm eating crow.
After fiddling with the carb for most of the weekend and then changing the spark plugs, I decided to try the old (incorrect) carb to determine if the driveability problems I saw yesterday were due to ignition or fuel delivery issues. I put the old carb back on, and plugged the vacuum advance hole because I didn't have the requisite adapter. It fired right up, and then I spent five minutes tuning the carb and adjusting the throttle. After that I drove it around the block for about 10 minutes. Did not have the road to hit third gear, but it took off, accelerated, and shifted smoothly. It even drove very smoothly considering the shocks are worn out. The great new- I do have a running driving Packard. If I hadn't already taken most of the body off, I might just drive it around this summer, but that bridge has been crossed. Now that I've typed that, there may be a five percent chance I do just that. Assuming I don't just put it back together and drive it (low probability), any tips from past experience on pulling the body off the chassis? My plan was to unbolt the body from the frame, jack up one side, slide a 2x4 along the frame, repeat on the other side. After that, lift up the front of the body, slide a 4x4 perpendicular to frame rails, repeat on the rear, and then use both ends of each 4x4 to lift the body vertically off the frame.
Posted on: 2011/5/10 20:13
|
|||
|
1937 120 1092 - Original survivor for driving and continued preservation. Project blog / Registry
1937 115 1082 - Total basket case, partial restoration, sold Hershey 2015 Project blog / Registry |
||||
|
||||
|
Re: Ken's 1937 115C Touring Sedan
|
||||
|---|---|---|---|---|
|
Home away from home
|
Also, in case I hadn't verbalized this, I wanted to drive the car before I tore it down any further. I was grinning ear to ear today driving around, even though I had no fenders, grill, windshield, or roof fabric. Good thing I live in a small town!
Posted on: 2011/5/10 20:19
|
|||
|
1937 120 1092 - Original survivor for driving and continued preservation. Project blog / Registry
1937 115 1082 - Total basket case, partial restoration, sold Hershey 2015 Project blog / Registry |
||||
|
||||
|
Re: Ken's 1937 115C Touring Sedan
|
||||
|---|---|---|---|---|
|
Home away from home
|
Ken
I haven't had much time to follow your resto thread, but I quickly went through it this morning. I didn't see anywhere in the previous posts that anyone recommended to you to check and/or replace your center steering link. Do this while you have your front end off. Also, you might want to check with BigKev. He has copies of Mark Lambert's video that would be of great, great help to you in all you are doing.
Posted on: 2011/5/14 9:49
|
|||
|
West Peterson
1930 Packard Speedster Eight boattail (SOLD) 1940 Packard 1808 w/Factory Air (SOLD) 1947 Chrysler Town and Country sedan 1970 Camaro RS 1936 Cord phaeton packardinfo.com/xoops/html/modules/newbb/viewtopic.php?topic_id=4307&forum=10 aaca.org/ |
||||
|
||||
|
Re: Ken's 1937 115C Touring Sedan
|
||||
|---|---|---|---|---|
|
Home away from home
|
West- thanks for the tip. I was actually aware of the center link issue from your blog- I'm planning on fully disassembling the frame for blasting and paint and will look at it then.
I'll ask BigKev about that video. Spent 10 minutes on the phone with Mark and learned several things that I didn't know before. That's the problem with a project like this. I know I don't know a lot, but I also don't know what I don't know. E.g. the body mounts are all different heights. I'll post pictures this weekend if I get the body off as planned.
Posted on: 2011/5/14 11:44
|
|||
|
1937 120 1092 - Original survivor for driving and continued preservation. Project blog / Registry
1937 115 1082 - Total basket case, partial restoration, sold Hershey 2015 Project blog / Registry |
||||
|
||||
|
Re: Ken's 1937 115C Touring Sedan
|
||||
|---|---|---|---|---|
|
Home away from home
|
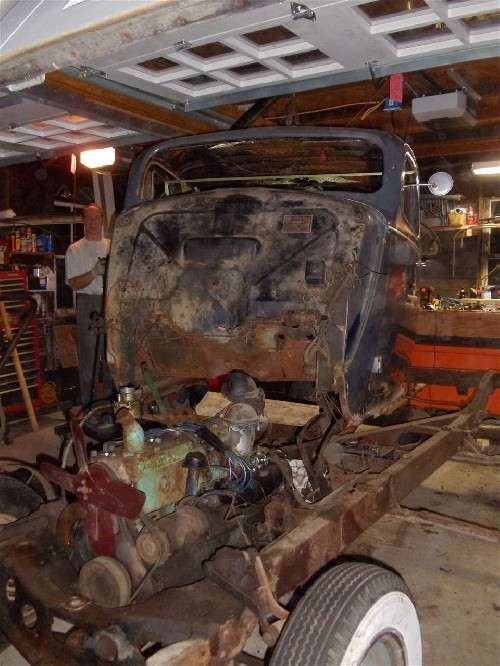
Updates- I got a lot of the interference removed from the body, but still a lot of work to go! A few questions:
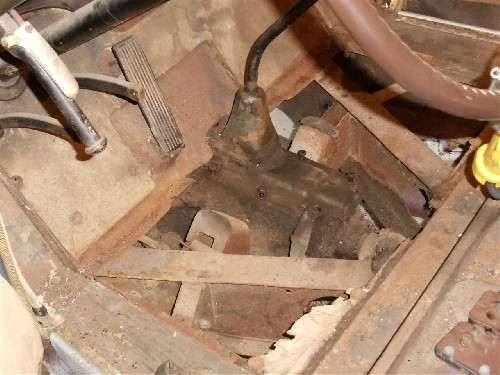
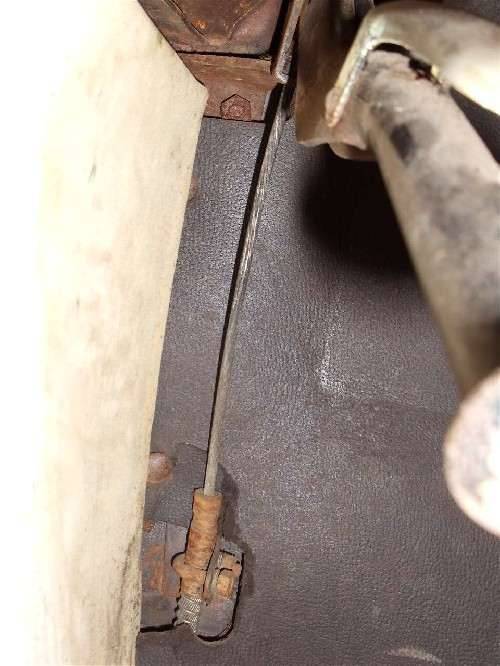
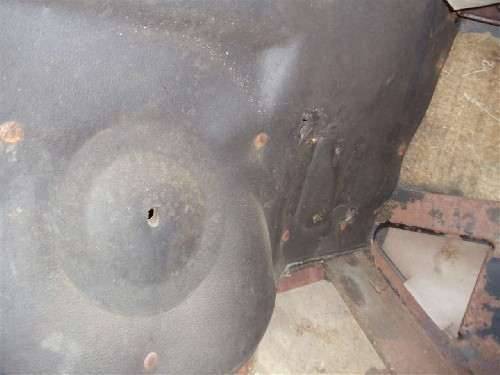
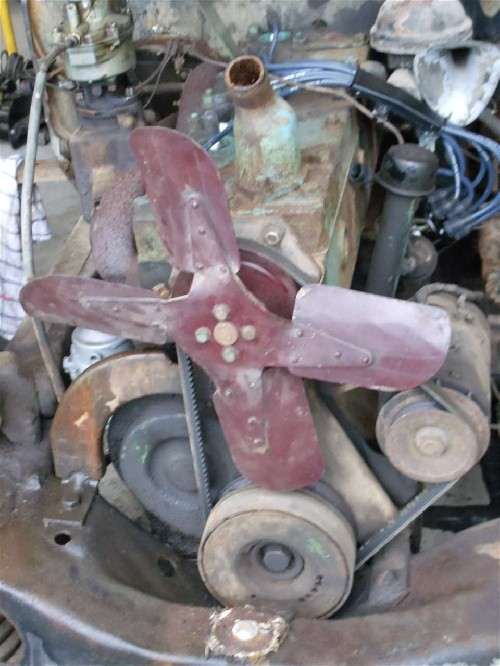
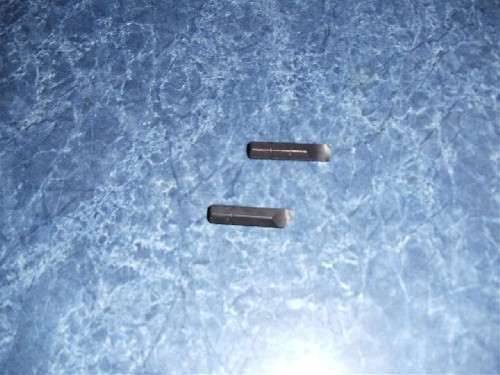
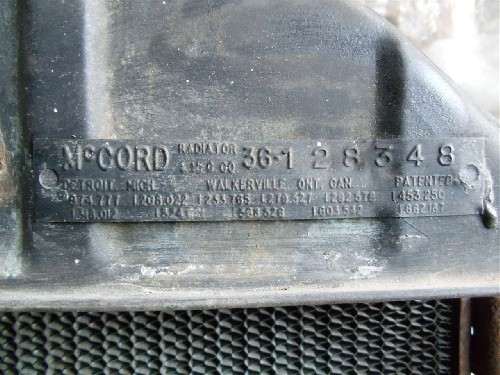
In the game of, "What's original on my car?" I have a few pictures. Are the fan and parking brake cable original? Also, what are the two indentations on the firewall insulation from- heater and radio? Finally, two removal questions. Does the coil come apart? I didn't realize it had a shielded cable running to the ignition switch. It looks like the coil can could unscrew right there, but I don't want to damage a working coil. I can always unbolt it from the engine for now. 2nd question- any tips for removing the doors. I have penetrating oil on them, but as you can see from the two broken impact screwdriver bits, they're pretty well stuck. I'll be re-attacking tomorrow.
Posted on: 2011/5/14 17:48
|
|||
|
1937 120 1092 - Original survivor for driving and continued preservation. Project blog / Registry
1937 115 1082 - Total basket case, partial restoration, sold Hershey 2015 Project blog / Registry |
||||
|
||||
|
Re: Ken's 1937 115C Touring Sedan
|
||||
|---|---|---|---|---|
|
Home away from home
|
Sometimes getting a little angry can be pretty productive...
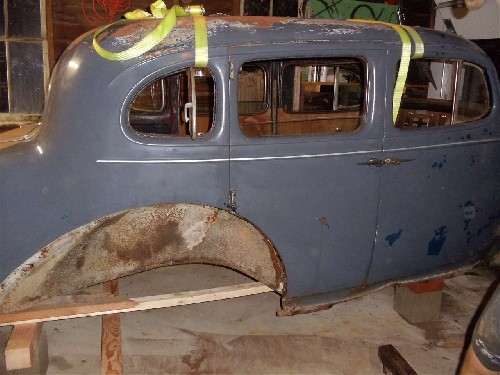
I went and picked up a borrowed torch yesterday, thinking it would be the final chapter in my ongoing saga to remove my doors in preps for picking the body off the frame. After heating them and using every other trick I could think of, still no luck. I was pretty frustrated, and since I already had most of the interference removed, I decided to just pull the body off as is. I finished unbolting the body mounts (holy crap there are a lot of bolts in that thing!) and then put straps through the front and back side windows. My plan was to lift it very slightly off the frame and then see if anything was deflecting too much. It took a little bit of tension and persuasion to free the body from the mounts, but then it lifted straight and true, so off it came! I would've had to put the doors back on in three months when I have to move anyway, so it's actually a net gain. Today I had some time off from work, so I took the rolling chassis to the car wash in a futile attempt to remove 74 years of grime. I guess that will be left to the sandblaster! Also found a local welder to TIG weld a crack in my exhaust manifold and found a local metal shop to bend a patch panel for my rotted out front engine crossmember. I won't be able to work on the car much until the middle of next week, but with luck I can have it at the sandblasters next weekend and then start the painting and assembly process. More to follow.
Posted on: 2011/5/19 20:21
|
|||
|
1937 120 1092 - Original survivor for driving and continued preservation. Project blog / Registry
1937 115 1082 - Total basket case, partial restoration, sold Hershey 2015 Project blog / Registry |
||||
|
||||
|
Re: Ken's 1937 115C Touring Sedan
|
||||
|---|---|---|---|---|
|
Quite a regular

|
Hey, your moving along on this project! Is your inner body bolts phillips? When I first noticed Henry's were, I got the PB Blaster on them for a week or so, every one came out without to much trouble.
How many hours do you think you have into the disassembly process so far?
Posted on: 2011/5/20 6:07
|
|||
|
||||

 (112.09 KB)