|
Re: 51Packard's....51 Packard
|
||||
|---|---|---|---|---|
|
Home away from home

|
9-12-11
I got a few things done over the weekend. I reinstalled my carb and air cleaner, mostly to get them out of the garage. I media blasted the throttle linkage and the lug bolts from the front passenger side wheel. If you remember, the throttle linkage was wired to a clothes pin glued to the firewall. I examined the linkage and the only thing I could see that might make them go to those steps was the rivets holding the firewall mount were really loose. A couple of hammer blows on the anvil part of my vise seems to have cured it. I hope that is all it is. If so, they did a lot more work gluing and wiring than hitting the rivets. I removed one cotter pin from each mount connection and re-bent the spring washer to take some slop out of the linkage. Then I painted it. I reinstalled the linkage on the motor. Seems OK, but I did not adjust it or reinstall the spring yet. Wanted to get the wheel back on, but ran out of time. Still need to order the fuel pump rebuild kit. Hopefully will get that done tomorrow. Attach file:  (150.15 KB) (150.15 KB)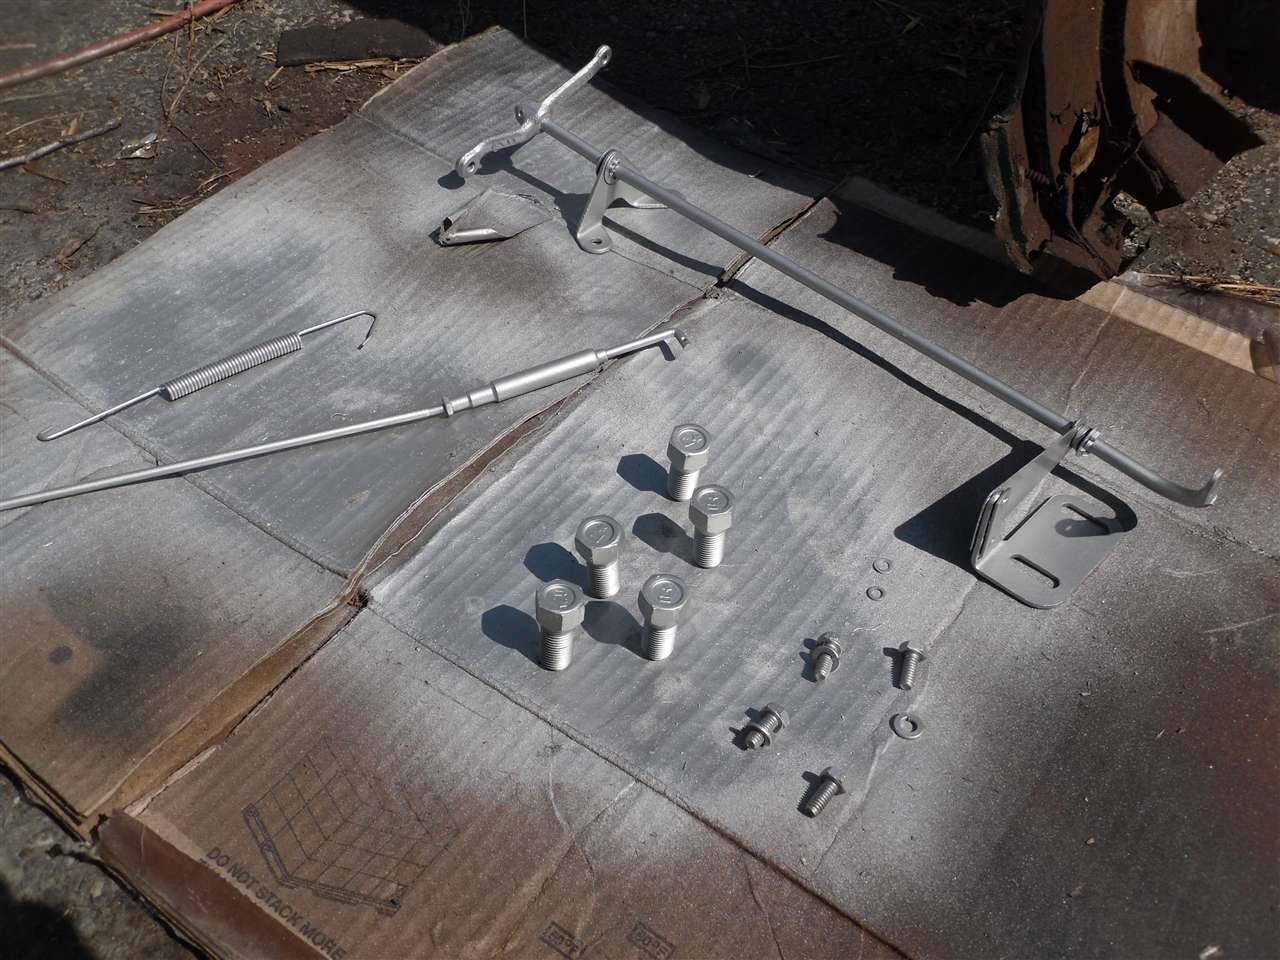 (156.62 KB) (156.62 KB)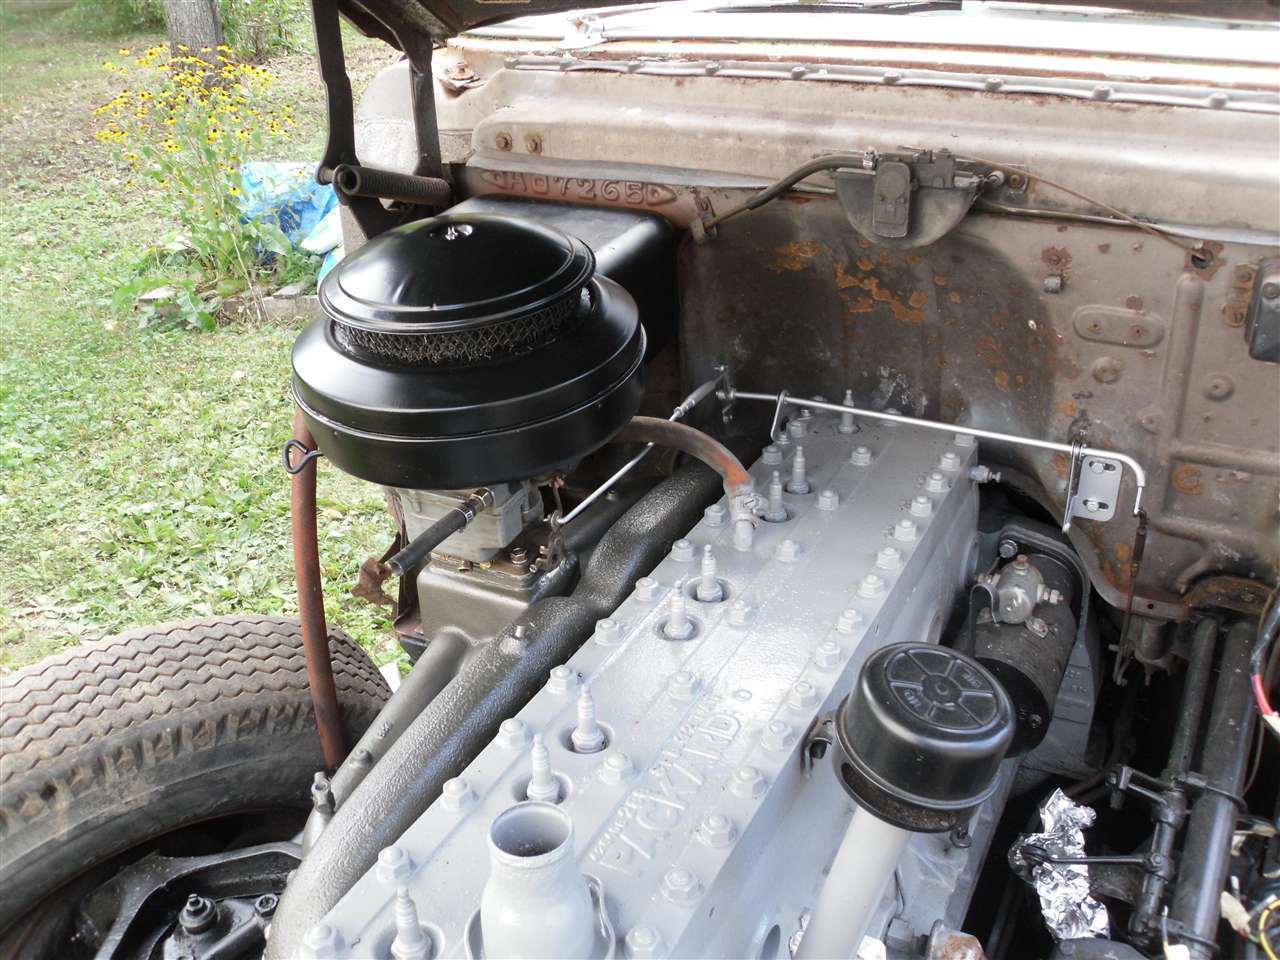
Posted on: 2011/9/12 17:42
|
|||
|
[url=h
|
||||
|
||||
|
Re: 51Packard's....51 Packard
|
||||
|---|---|---|---|---|
|
Home away from home
|
9-20-11
Got my fuel pump rebuild kit today from Then and Now automotive, but I didn't check it out yet. I media blasted and painted one of my horns semi-gloss black. When I install it, I will have to scrape some of the paint on the mount and radiator frame so it gets a good ground. I took apart some of the outer parts of the distributor and media blasted them. Then I cleaned up the outside of the distributor the best I could without disturbing the inside. I'm not comfortable messing with distributors so I am trying to keep it as intact as I can. Painted the body of the distributor semi-gloss black and the cap clamps, vacuum advance, and the bottom clamp silver.
Posted on: 2011/9/20 19:06
|
|||
|
[url=h
|
||||
|
||||
|
Re: 51Packard's....51 Packard
|
||||
|---|---|---|---|---|
|
Home away from home
|
9-21-11
Finished painting the horn semi-gloss black. Put my distributor back together and set it in the engine for safe keeping. I'm going to need a new distributor to engine seal because mine fell apart. I have to say, it looks way better than it did! Hopefully it will still work. My dist. cap needs a good cleaning and it really shows now. I media blasted and painted my generator bracket and coil bracket semi-gloss black. I took the fuel pump in the house to start rebuilding it. Had everything set up. Took a wrench to the bolt on the bottom dome and turned it twice. Next thing I hear is "What's that smell? Get that thing out of here!" So that was the end of my rebuild project for the day. Took it outside and removed the bolts from both domes. Took the vacuum dome off and it looked pretty clean inside. Removed all the screws on the fuel side and broke the seal from the diaphragm. Some gas came out. I pumped the diaphragm and heard a burping noise. The diaphragm looks OK and my car ran off of it, but I will change it anyway. No telling how old it is. Letting the parts air out so hopefully I can bring it inside again. I guess that gives me time to re-read BigKev's fuel pump rebuild guide on the website. Question on the cup on the side of the distributor. It was full of old grease that I tried to clean out the best I could. Do I fill it with regular grease or is there something special about it? How do I properly fill it? Just pack it in the cup and put the top back on or put some in the top too? Attach file: (89.21 KB)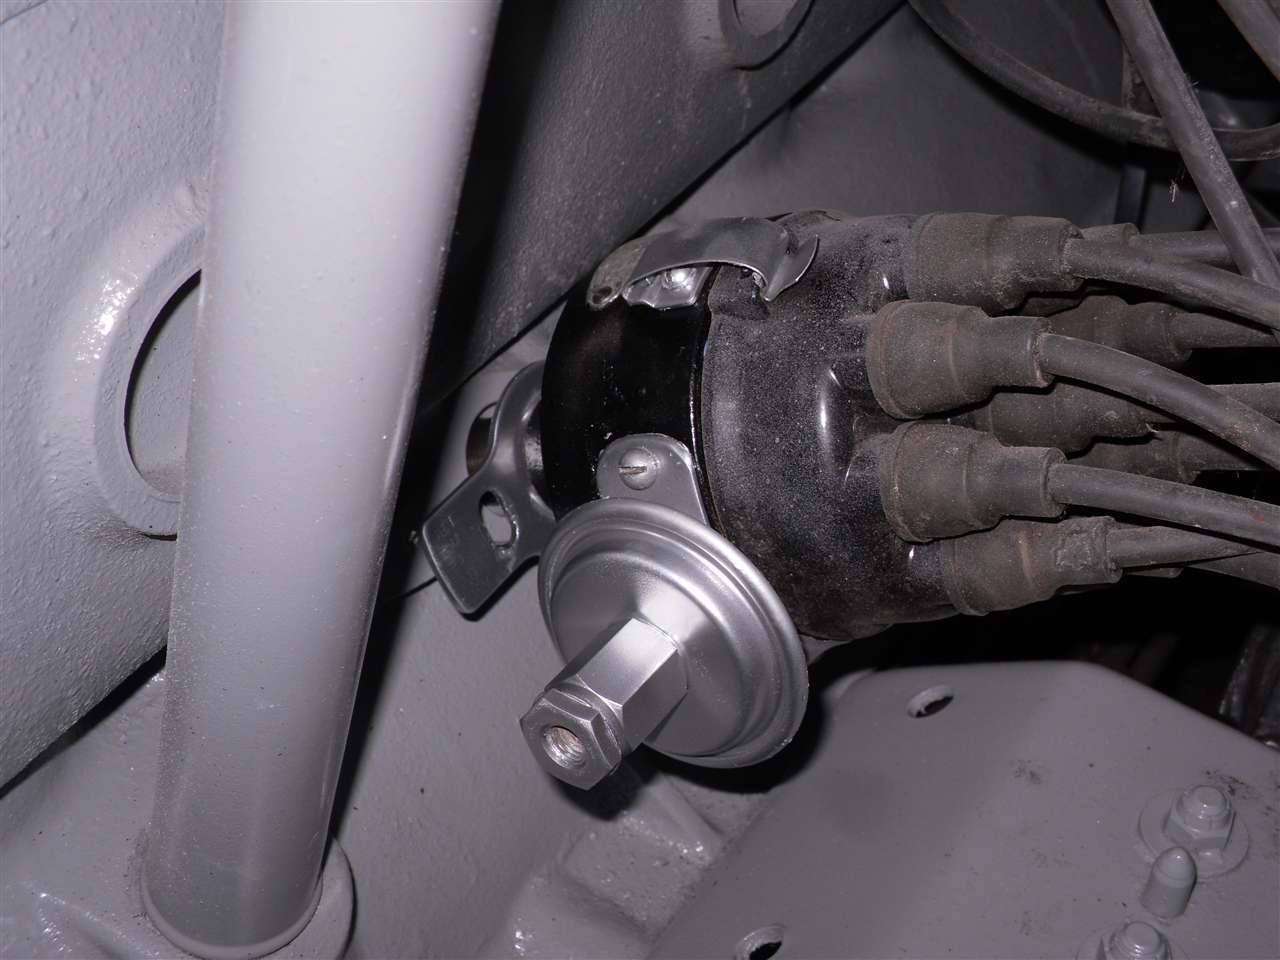 (105.07 KB) (105.07 KB)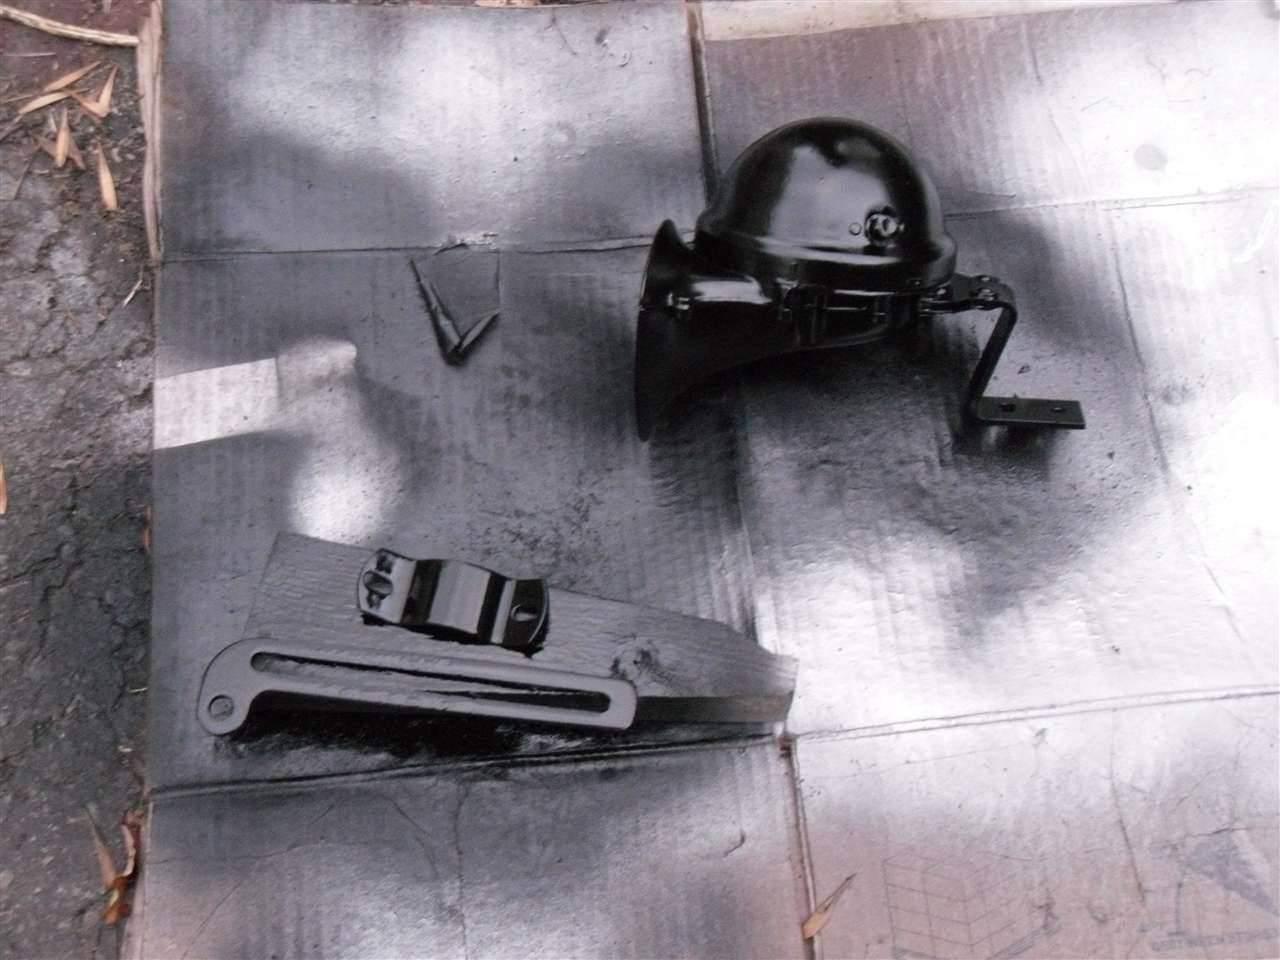 (105.25 KB) (105.25 KB)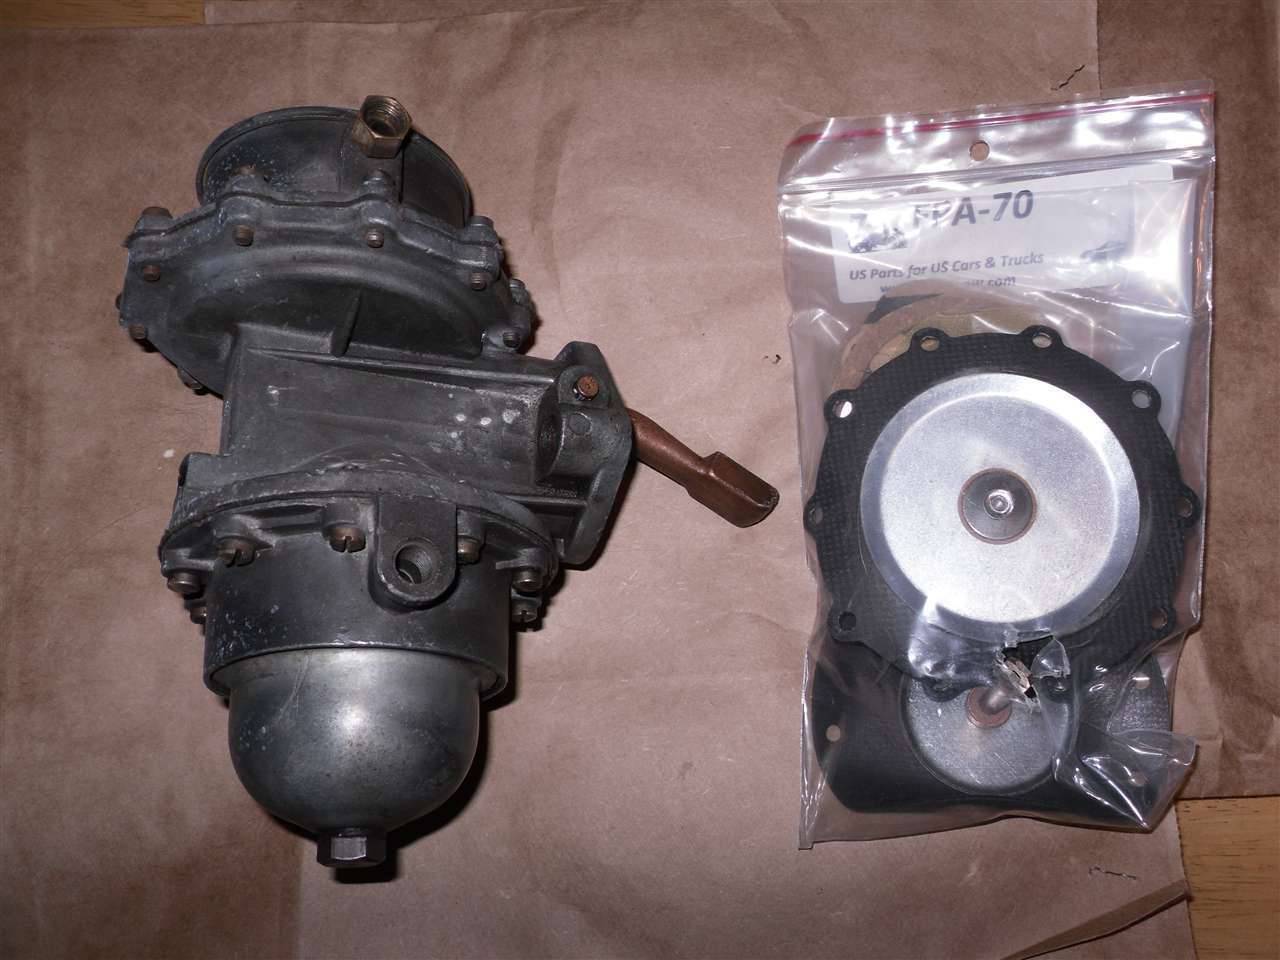 (76.62 KB) (76.62 KB)
Posted on: 2011/9/21 20:02
|
|||
|
[url=h
|
||||
|
||||
|
Re: 51Packard's....51 Packard
|
||||
|---|---|---|---|---|
|
Home away from home
|
9-22-11
H E L P ! ! I'm starting to disassemble the fuel pump. I got the halves separated that hold the diaphragm. I cannot figure out how to remove the pin on the pumps arm. I can probably skip that step and wiggle the diaphragms on the internal parts, but it would be easier with the arm removed. Any ideas? BigKev's guide says to pry it out if you do not have a replacement. My kit does not have a replacement one. Also, the new pin is different. It looks like C clips go on the ends, but my kit did not come with one. Lastly, there was some stuff shoved in the vent shaft that looks like steel wool. Maybe its filter material? Just want to make sure it is supposed to be there. Attach file: (68.71 KB)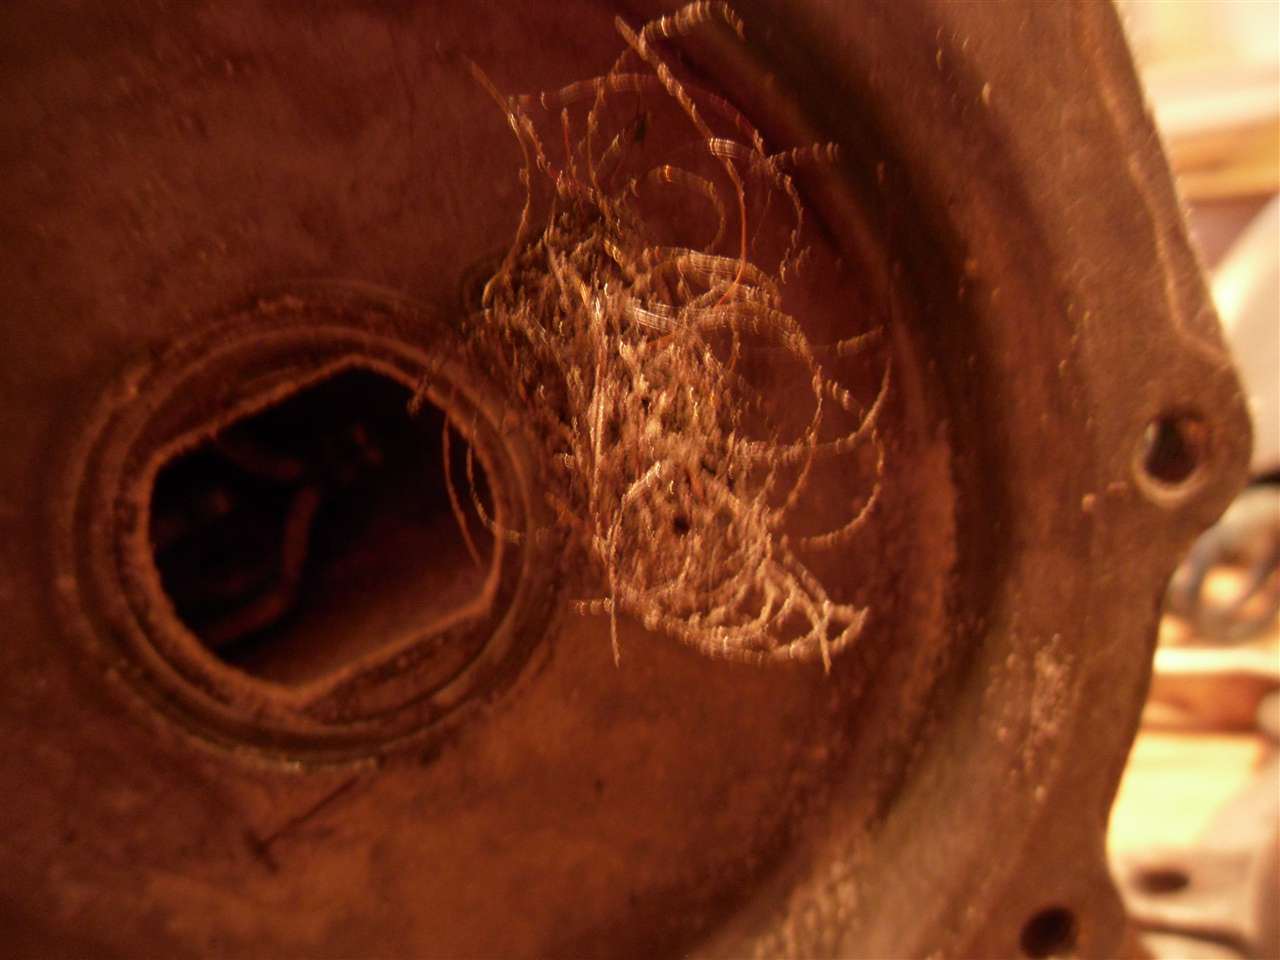 (71.16 KB) (71.16 KB)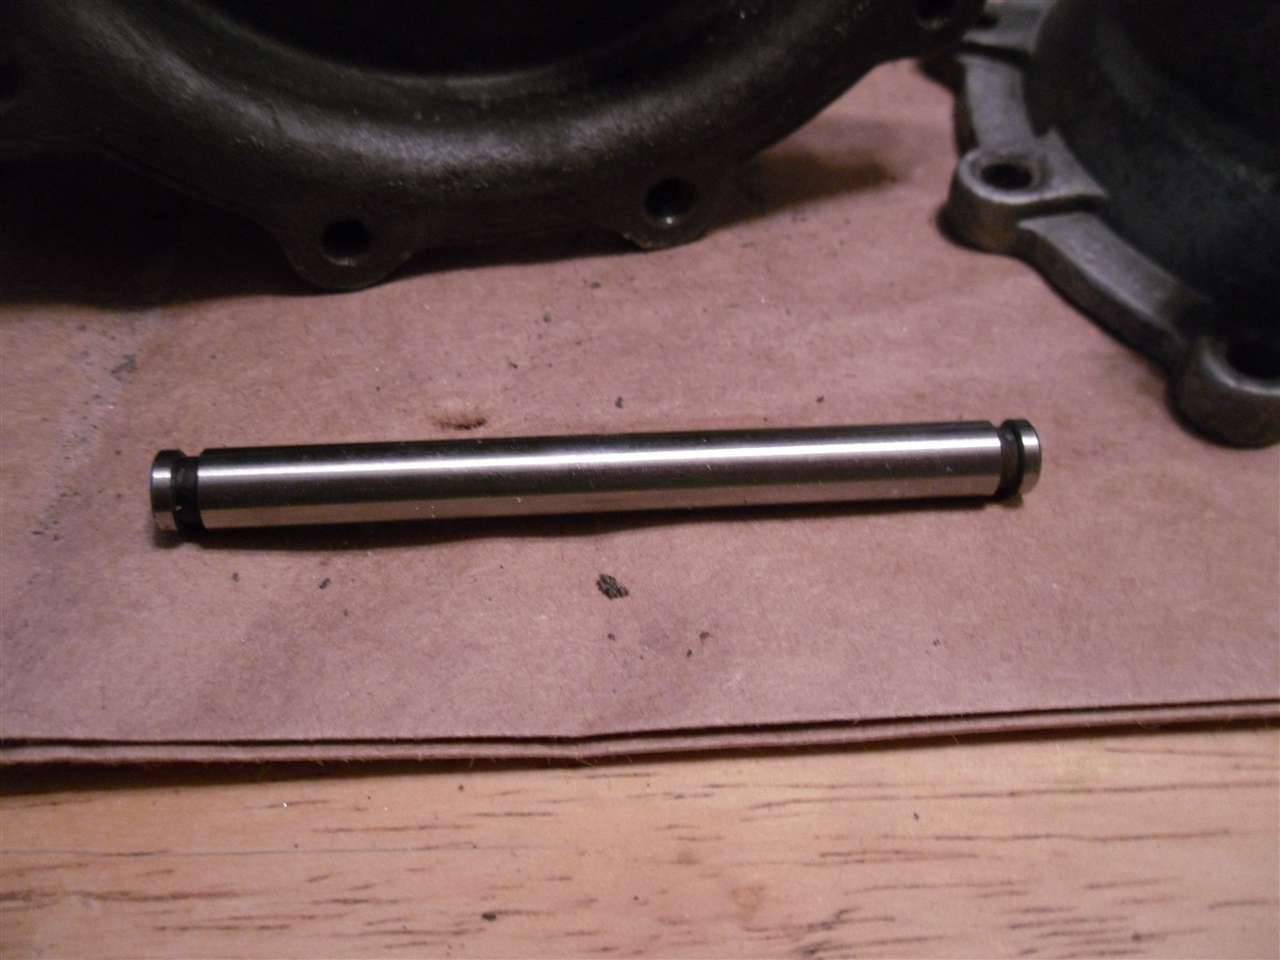 (50.79 KB) (50.79 KB) (46.00 KB) (46.00 KB)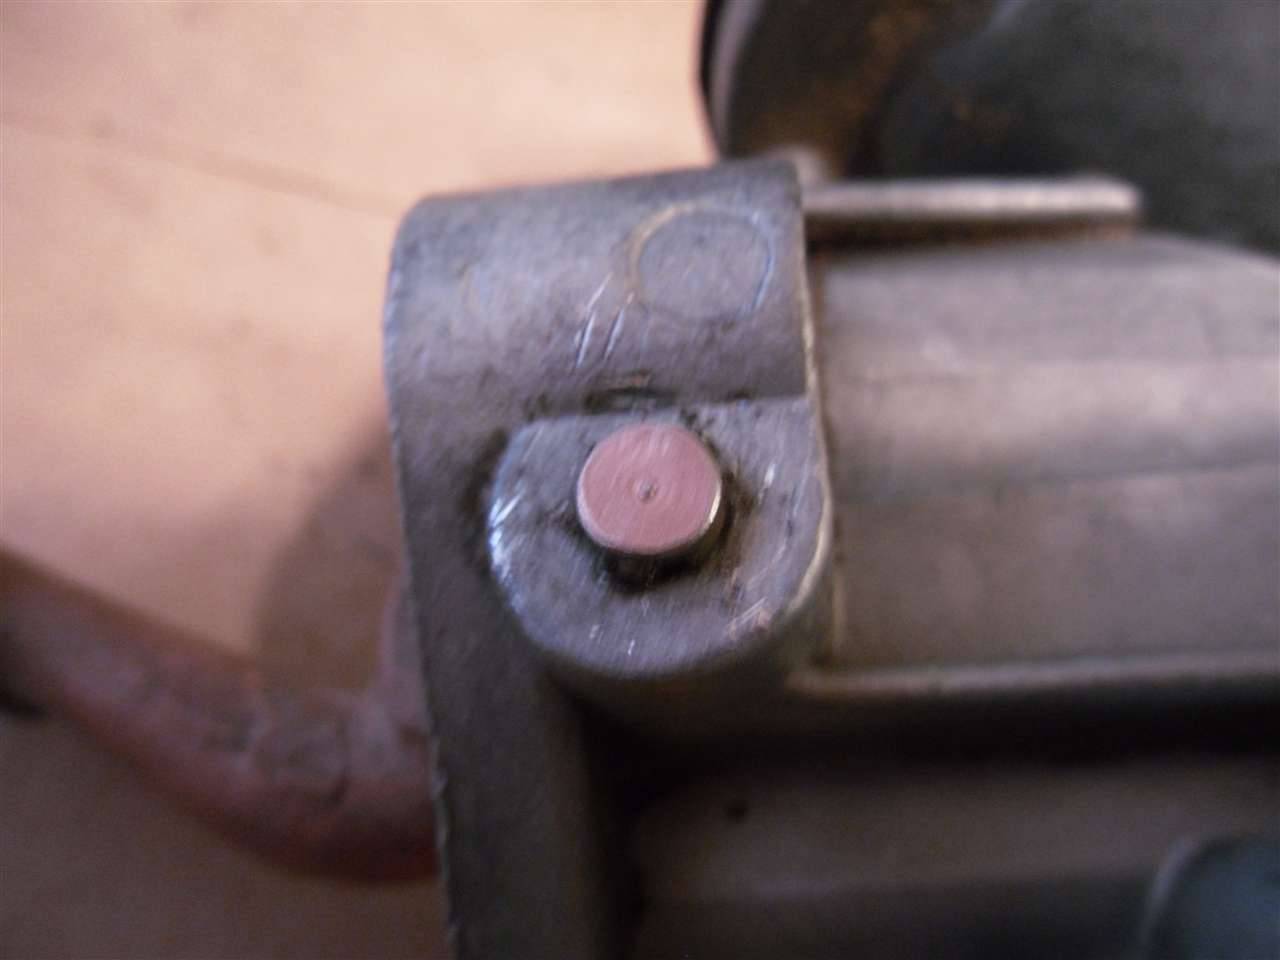 (68.41 KB) (68.41 KB)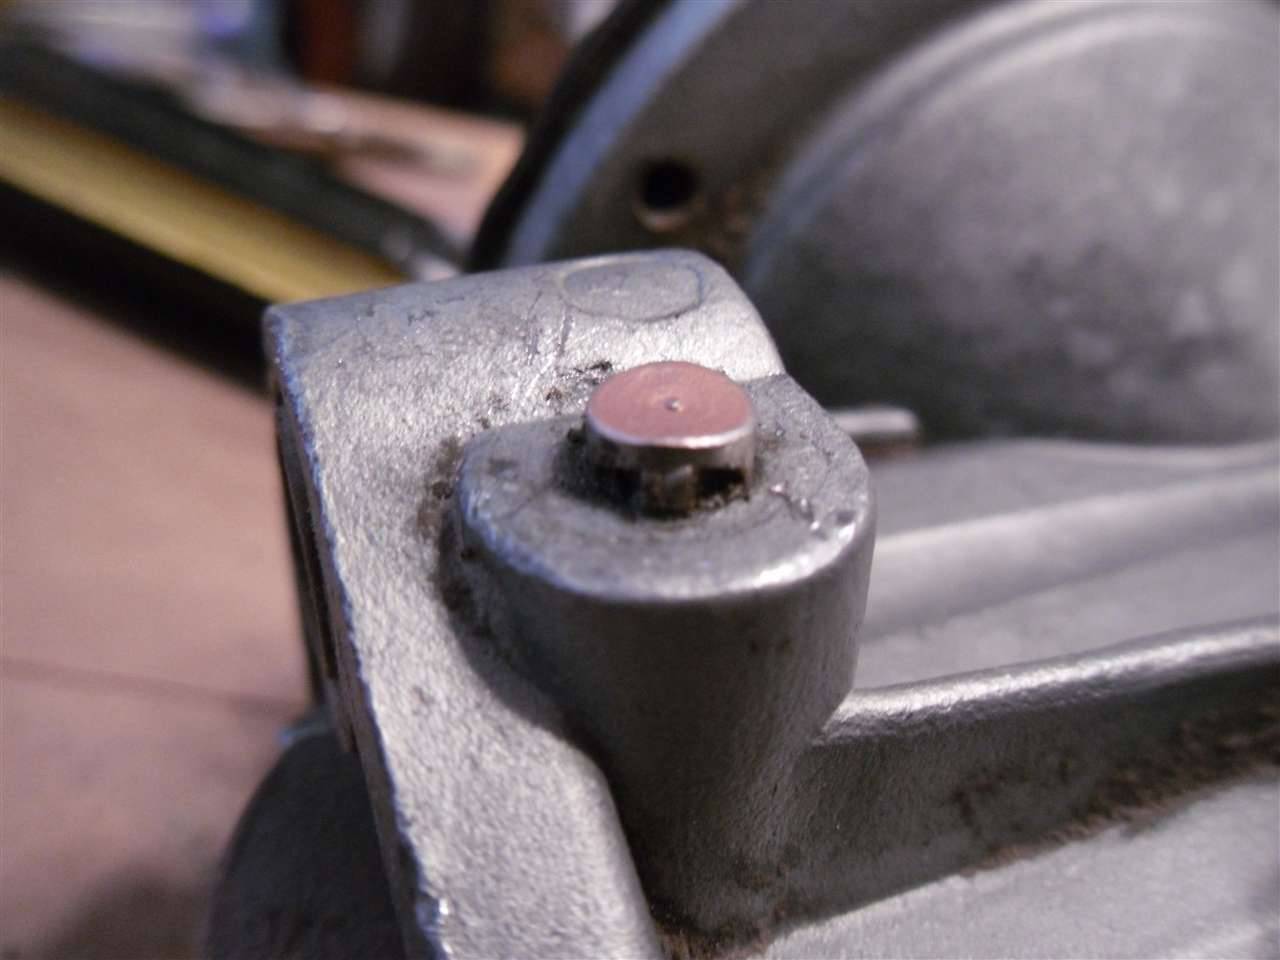
Posted on: 2011/9/22 18:17
|
|||
|
[url=h
|
||||
|
||||
|
Re: 51Packard's....51 Packard
|
||||
|---|---|---|---|---|
|
Home away from home
|
...also the valves that came with my kit are different. In the pic the top ones came out of my pump and the ones from the kit are on the bottom. Did I get the wrong kit or are these new and improved?
Attach file: (69.10 KB)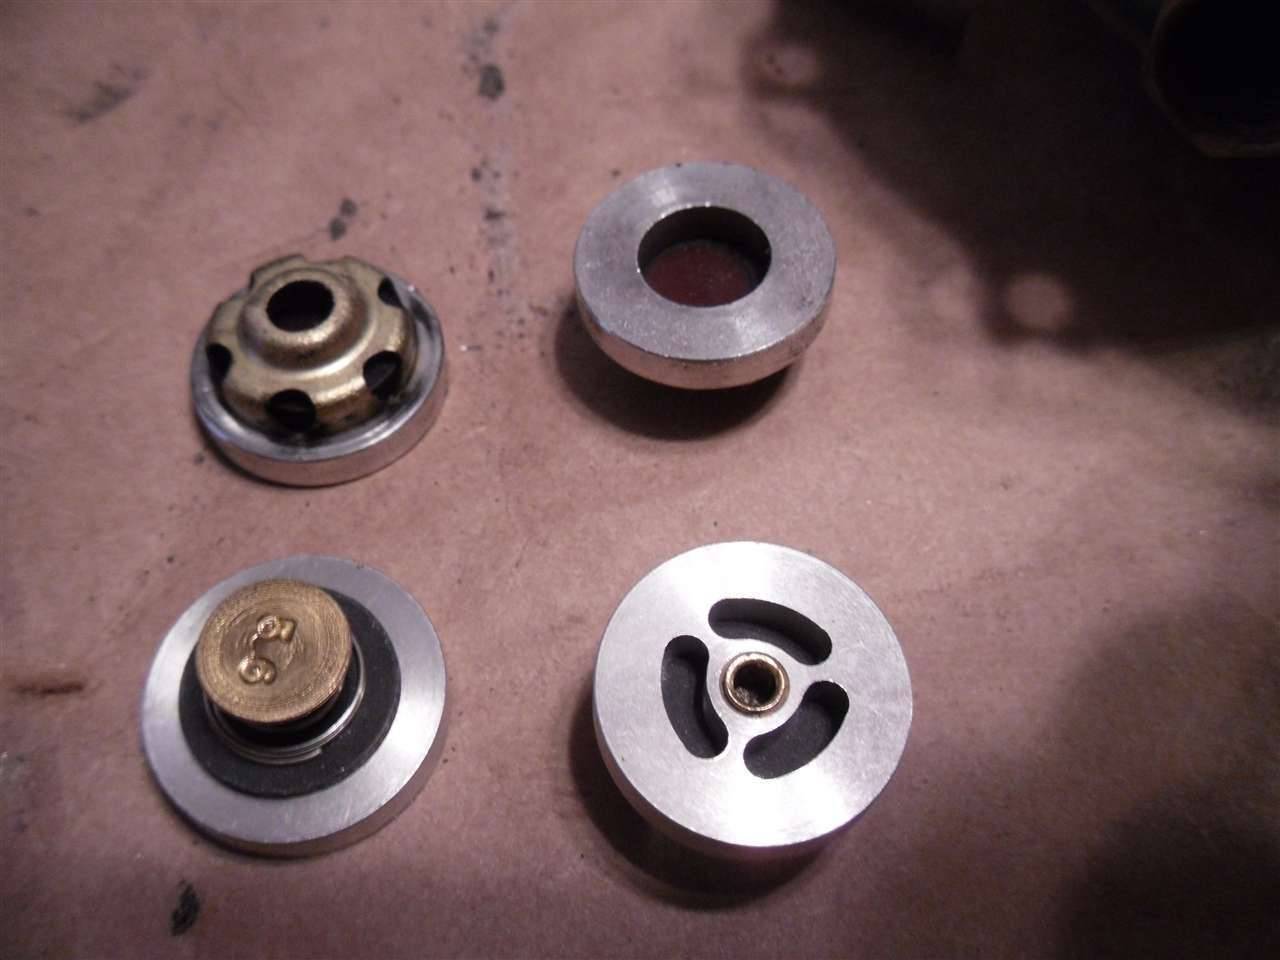
Posted on: 2011/9/22 18:30
|
|||
|
[url=h
|
||||
|
||||
|
Re: 51Packard's....51 Packard
|
||||
|---|---|---|---|---|
|
Webmaster

|
So it looks like the new pin uses two clips for retaining it instead of the old plug like before. If you can't get a grip on it to remove it, then carefully drill it out with a drill bit slightly small than the shaft diameter.
Or if the other side is open, and clip that retains the shaft in the middle is already removed, then perhaps you can use a drift to push the shaft and plug out from the opposite side.
Posted on: 2011/9/22 18:30
|
|||
|
-BigKev
1954 Packard Clipper Deluxe Touring Sedan -> Registry | Project Blog 1937 Packard 115-C Convertible Coupe -> Registry | Project Blog |
||||
|
||||
|
Re: 51Packard's....51 Packard
|
||||
|---|---|---|---|---|
|
Webmaster
|
The design of the valves is for sure different, but will the new ones seat in where the old ones were? If not I would stop and call the supplier right away as they could have pulled the wrong kit off the shelf.
I would not fear a different design, but different fitament, yes!
Posted on: 2011/9/22 18:33
|
|||
|
-BigKev
1954 Packard Clipper Deluxe Touring Sedan -> Registry | Project Blog 1937 Packard 115-C Convertible Coupe -> Registry | Project Blog |
||||
|
||||
|
Re: 51Packard's....51 Packard
|
||||
|---|---|---|---|---|
|
Webmaster
|
Looking at your shaft pin again, it looks like there is a key swedged in there or something. Or perhaps that is just a trick of the camera.
Posted on: 2011/9/22 18:36
|
|||
|
-BigKev
1954 Packard Clipper Deluxe Touring Sedan -> Registry | Project Blog 1937 Packard 115-C Convertible Coupe -> Registry | Project Blog |
||||
|
||||
|
Re: 51Packard's....51 Packard
|
||||
|---|---|---|---|---|
|
Home away from home
|
Thanks BigKev. The other side of the pin is hollow with the edge mushroomed out (pic 3 above, but blurry). Is the cap just supposed to pop off? I'm not really seeing how it works to keep the pin in place.
The valves do fit in the cavity the old ones were in. I guess it will be OK then.
Posted on: 2011/9/22 18:37
|
|||
|
[url=h
|
||||
|
||||


