
|
Re: Randy Berger's 1956 Caribbean
|
||||
|---|---|---|---|---|
|
Forum Ambassador
|
Remove the divisor bar and lay it aside. The convertible has one other piece of chrome at the top held on by two screws. This piece fills in the gap that the flipper on the hardtop requires to nest in when you close the door. Remove the screws and label them.
Now, if you have saved enough money, you are ready to take your two frames with their two extra pieces to the plater and return to the work area to fashion a new divisor bar. Drill out the one rivet at the top retaining the bright stainless to the divisor bar. Curiously I cannot locate the part number of this piece. Perhaps it is considered part of the assembly 30.3965. In any case it is held on to the divisor bar by one rivet at the top. The vent window rear weatherstrip 30.4335 is rivetted to this piece by four rivets. Drill out those rivets and lay the stainless piece aside (perhaps for buffing). While the castings are away at the platers draining money from your sock, you can fashion your new divisor bars. Using the old divisor bar as a pattern, drill the necessary holes for clearance and new rivets (or screws). Some holes are just for clearance of rivet heads, etc. Note that some holes are off center. Attach file:  (84.00 KB) (84.00 KB)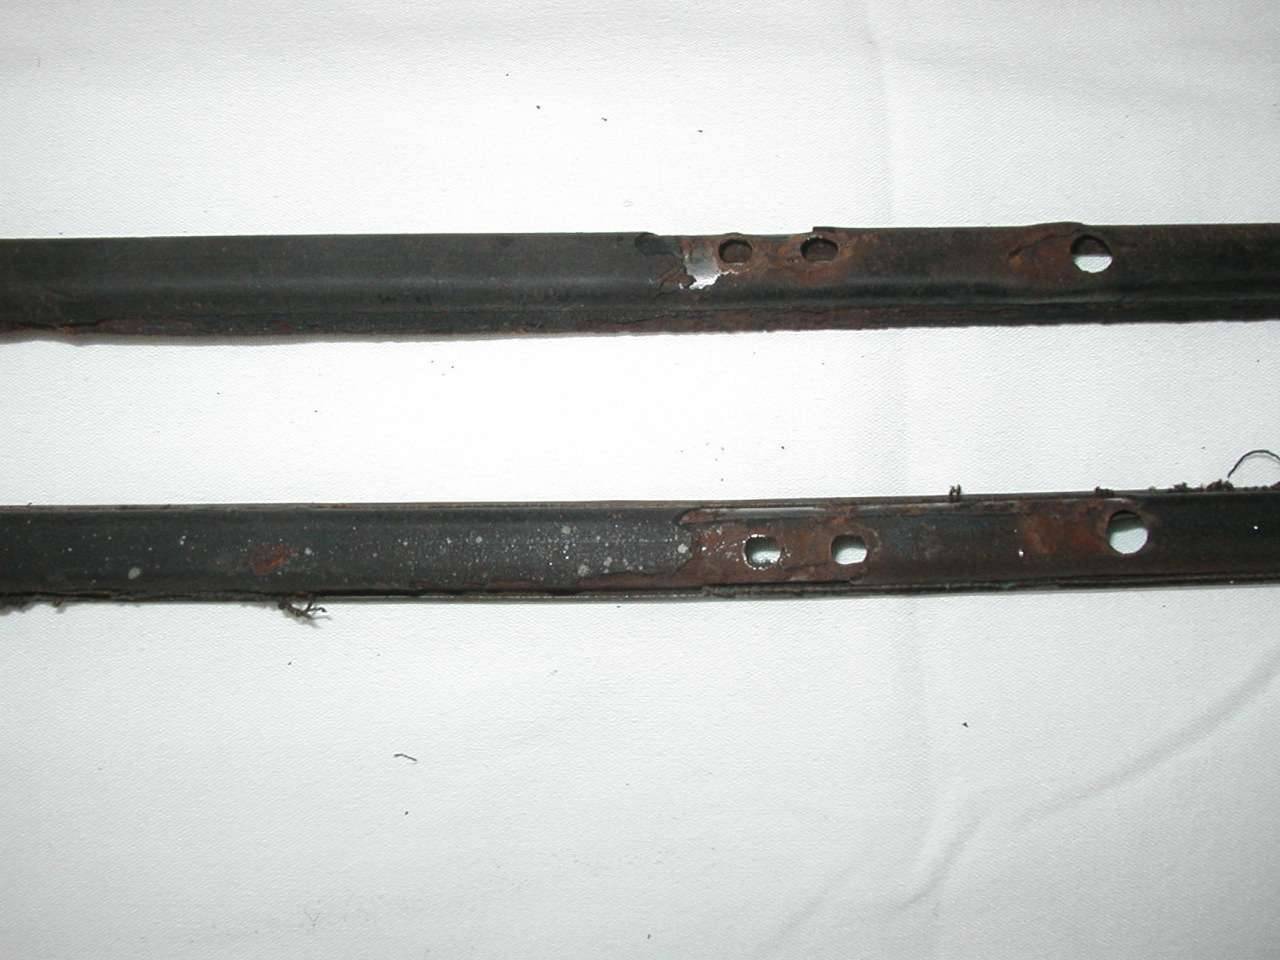
Posted on: 2008/11/4 1:24
|
|||
|
||||
|
Re: Randy Berger's 1956 Caribbean
|
||||
|---|---|---|---|---|
|
Forum Ambassador
|
The top end of the divisor bar must be fashioned to fit into the frame casting. The picture here is far better than my text could describe. Note the red line pointing to the one rivet that holds the no-name piece of stainless to the divisor bar.
Attach file: (78.53 KB)
Posted on: 2008/11/4 1:26
|
|||
|
||||
|
Re: Randy Berger's 1956 Caribbean
|
||||
|---|---|---|---|---|
|
Forum Ambassador
|
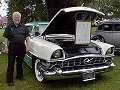
This is a picture of the original divisor bar. There are three holes to be drilled and two sections cut away. I found it easier to drill the holes before I cut away the sides. Where there had been two rivets holding the divisor bar to the frame, I chose to tap (10-32) those holes for some special undercut screws. I also used these screws at the bottom of the divisor bar where there had been two rivets
Attach file: (105.38 KB)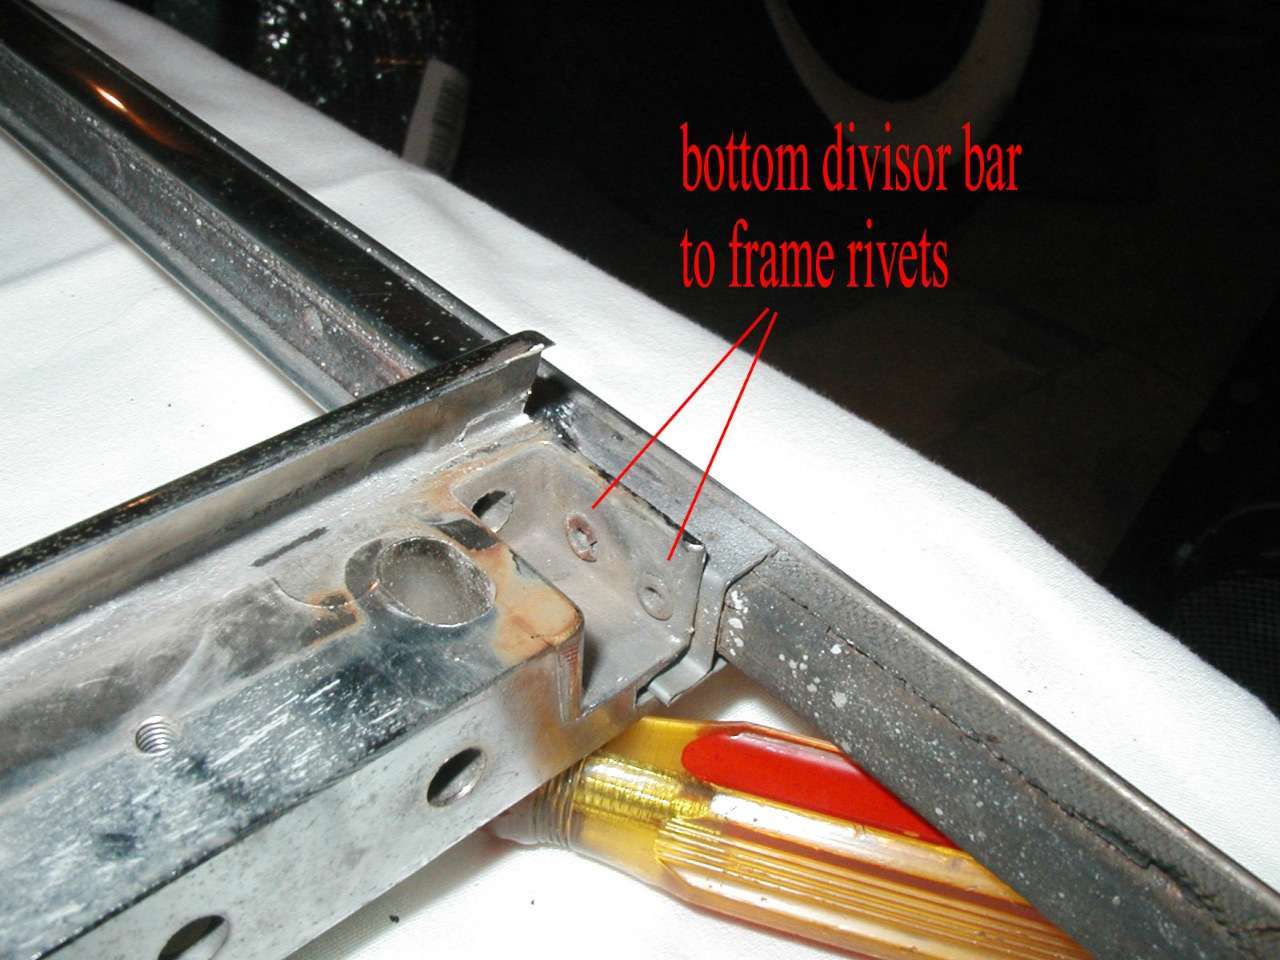
Posted on: 2008/11/4 1:32
|
|||
|
||||
|
Re: Randy Berger's 1956 Caribbean
|
||||
|---|---|---|---|---|
|
Forum Ambassador
|
These three holes must be carefully measured and drilled. They hold the divisor bar in an exact location. So, as the saying goes, measure twice-drill once. The bar must then be bent at the exact location to place it at the proper position relative to the frame.
Attach file: (76.41 KB)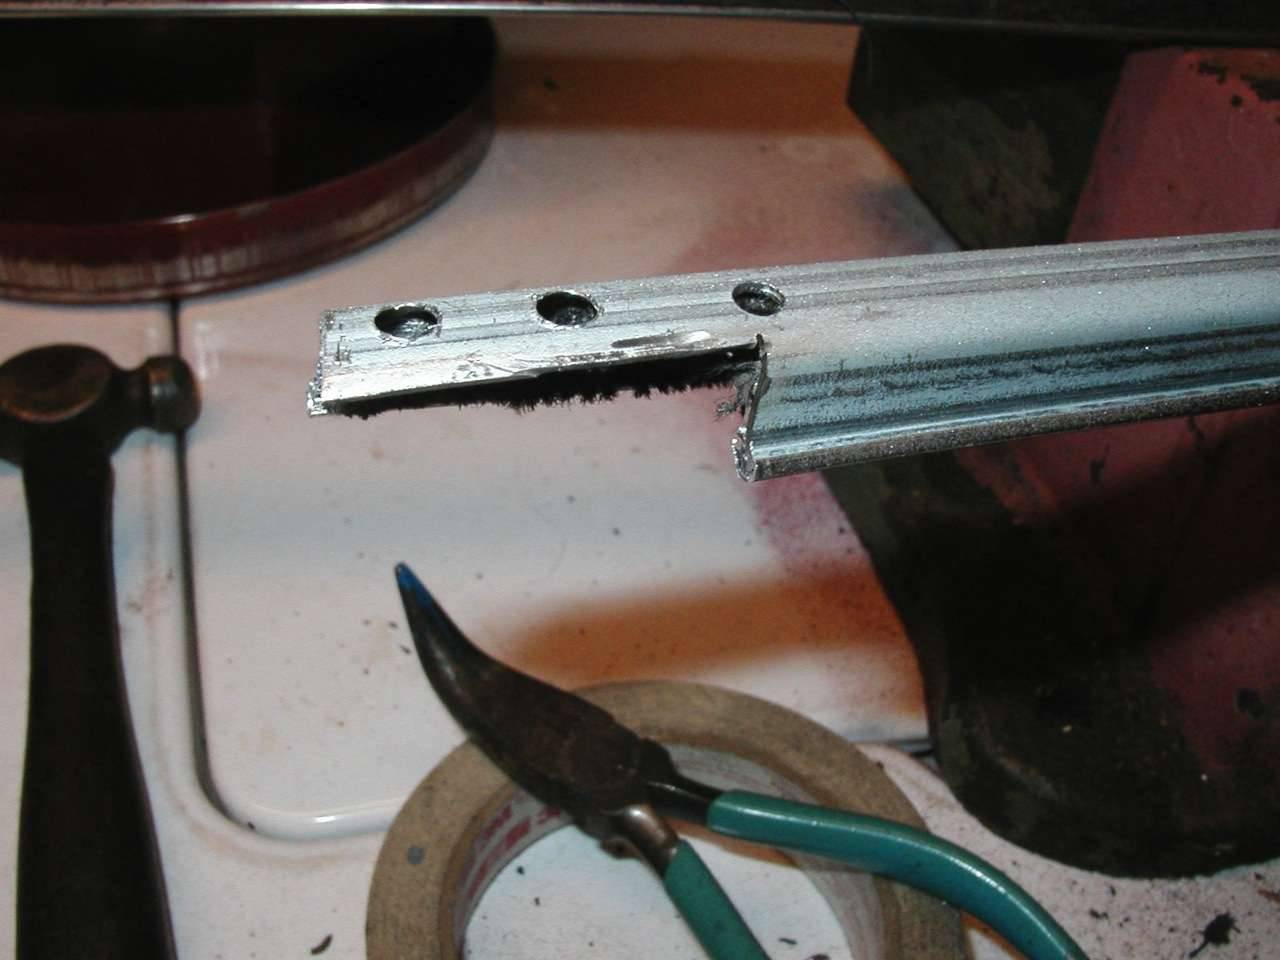 (54.40 KB) (54.40 KB)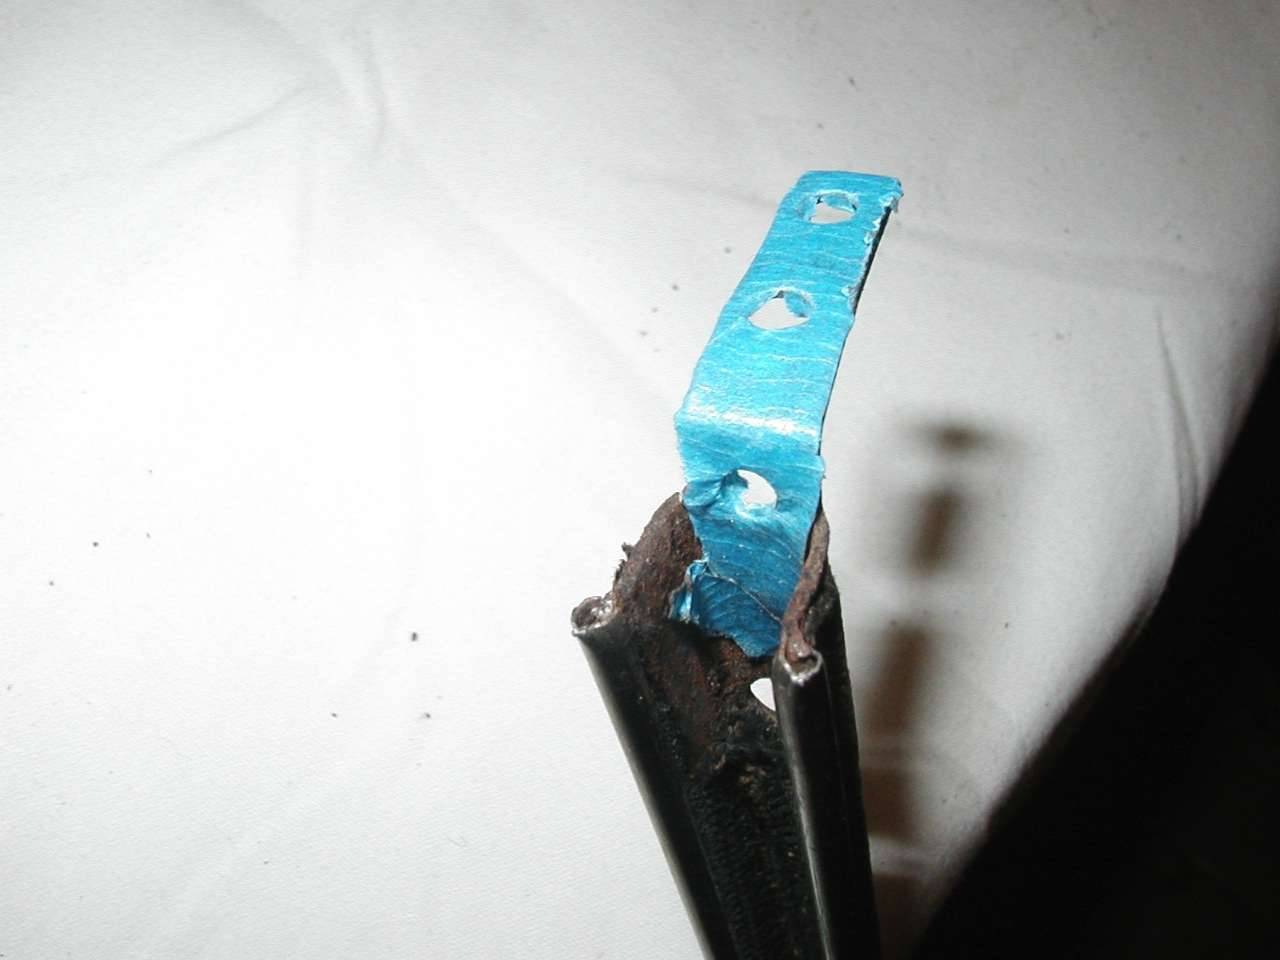
Posted on: 2008/11/4 1:33
|
|||
|
||||
|
Re: Randy Berger's 1956 Caribbean
|
||||
|---|---|---|---|---|
|
Forum Ambassador
|
This is the 10-32 screw I used. It is a 3/8" long Phillips screw. McMaster-Carr 91099A355 .
I had to buy a hundred of them along with internal lock washers and nuts, so if anyone is contemplating this rebuild and would like eight of these screws, just drop me a PM on the website and I will gladly send them for the cost of the postage. Attach file: (1.35 KB)
Posted on: 2008/11/4 1:36
|
|||
|
||||
|
Re: Randy Berger's 1956 Caribbean
|
||||
|---|---|---|---|---|
|
Forum Ambassador
|
I cut down some pop rivets to fasten the vertical weatherstrip to the no-name stainless piece. I left one original rivet in the picture to get some perspective.
Attach file: (150.88 KB)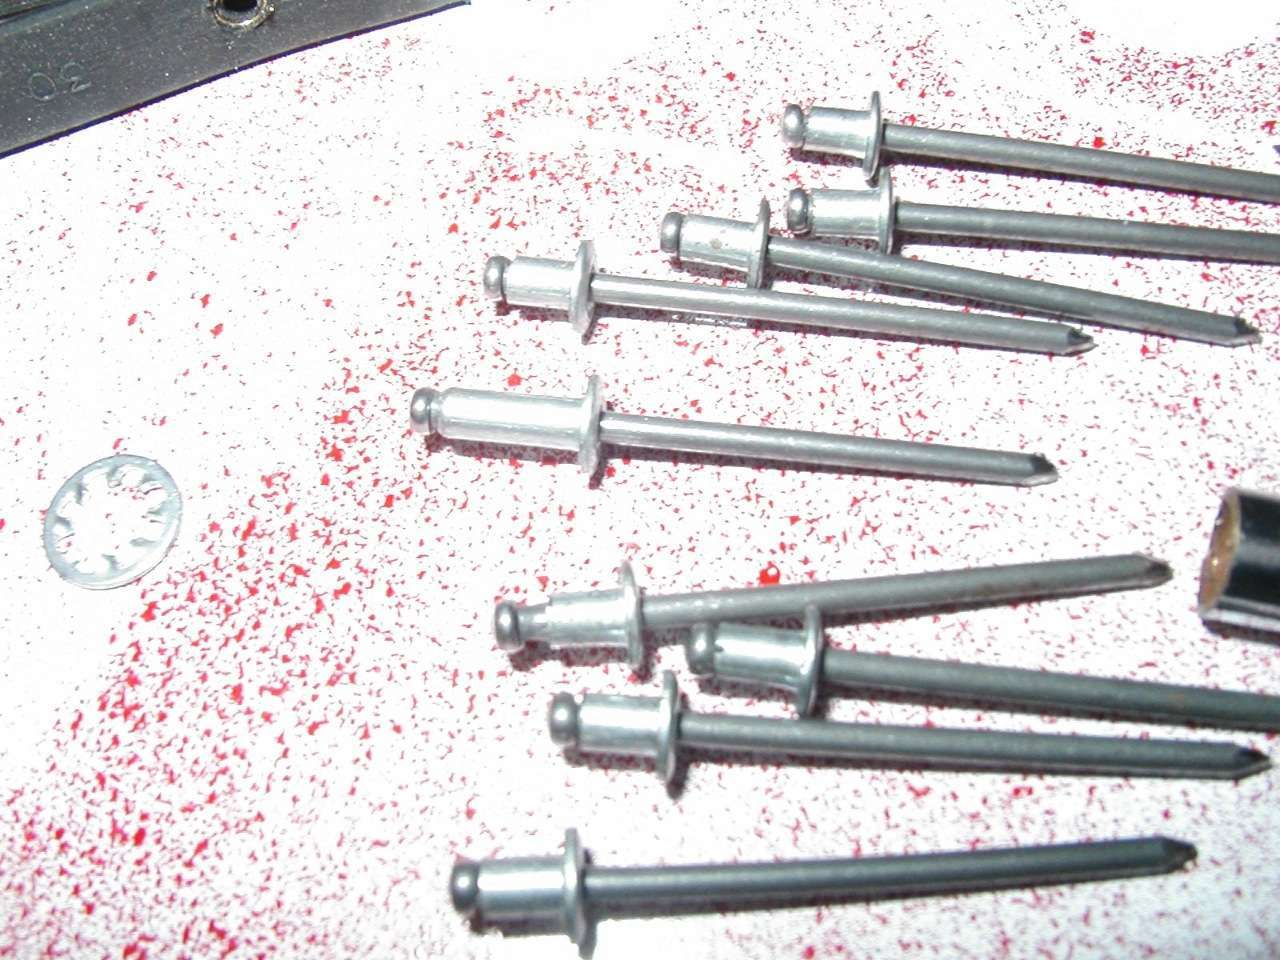
Posted on: 2008/11/4 1:38
|
|||
|
||||
|
Re: Randy Berger's 1956 Caribbean
|
||||
|---|---|---|---|---|
|
Forum Ambassador
|
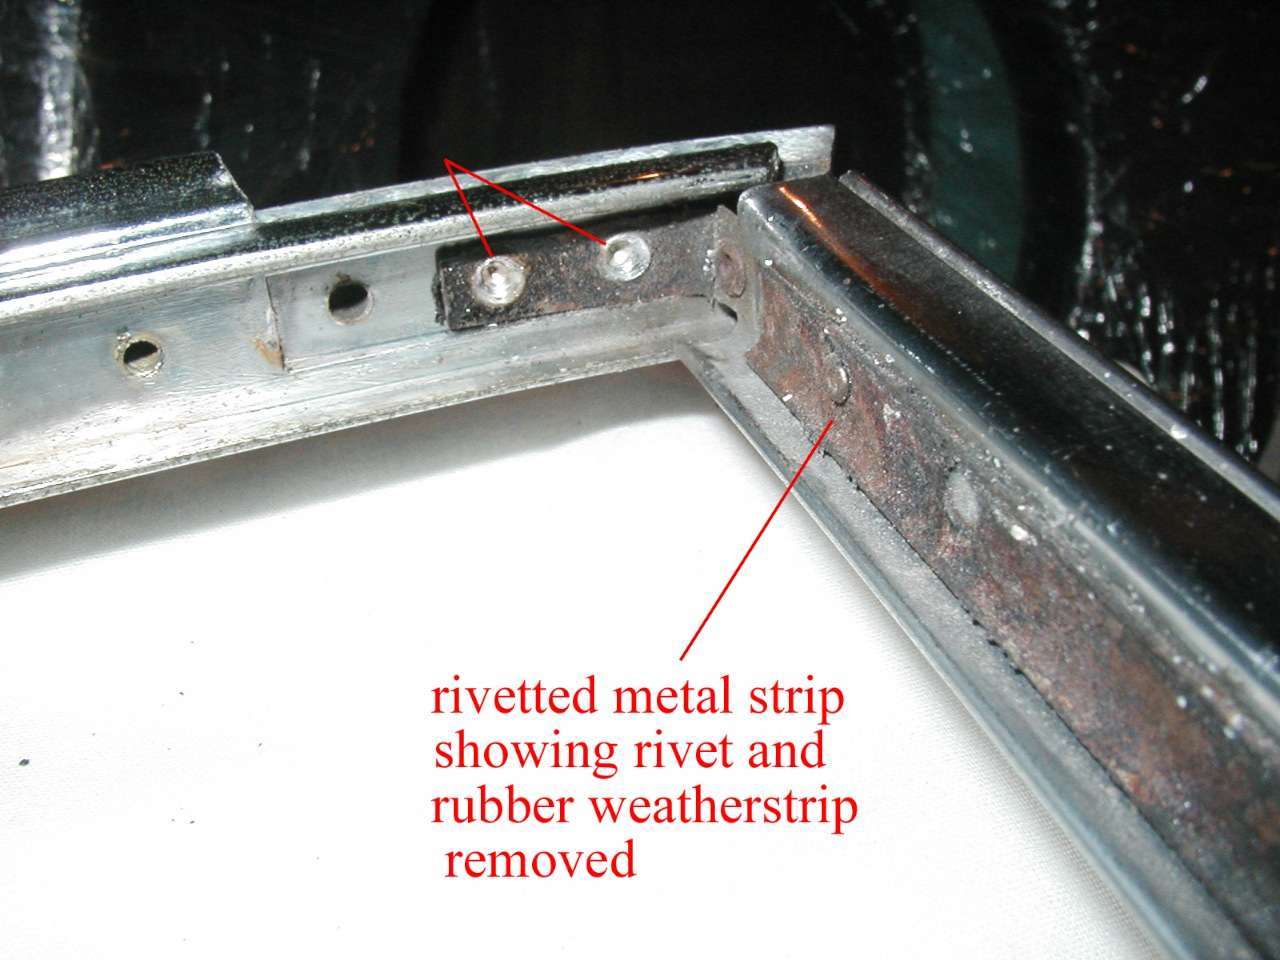
Originally that weatherstrip piece was glued to a metal strip which was rivetted to the no-name piece. I guess it was difficult to glue because Steele now makes that weatherstrip with an imbedded piece of metal, but the metal is visible in three locations as shown in the picture. I sprayed it with flat black paint. The holes are predrilled for 1/8 rivets, but the normal rivets are too long so I had to cut them down. They hold the vertical weatherstrip just fine and I was able to close the vent wing with a tight seal and no interference from the rivets
Attach file: (100.53 KB)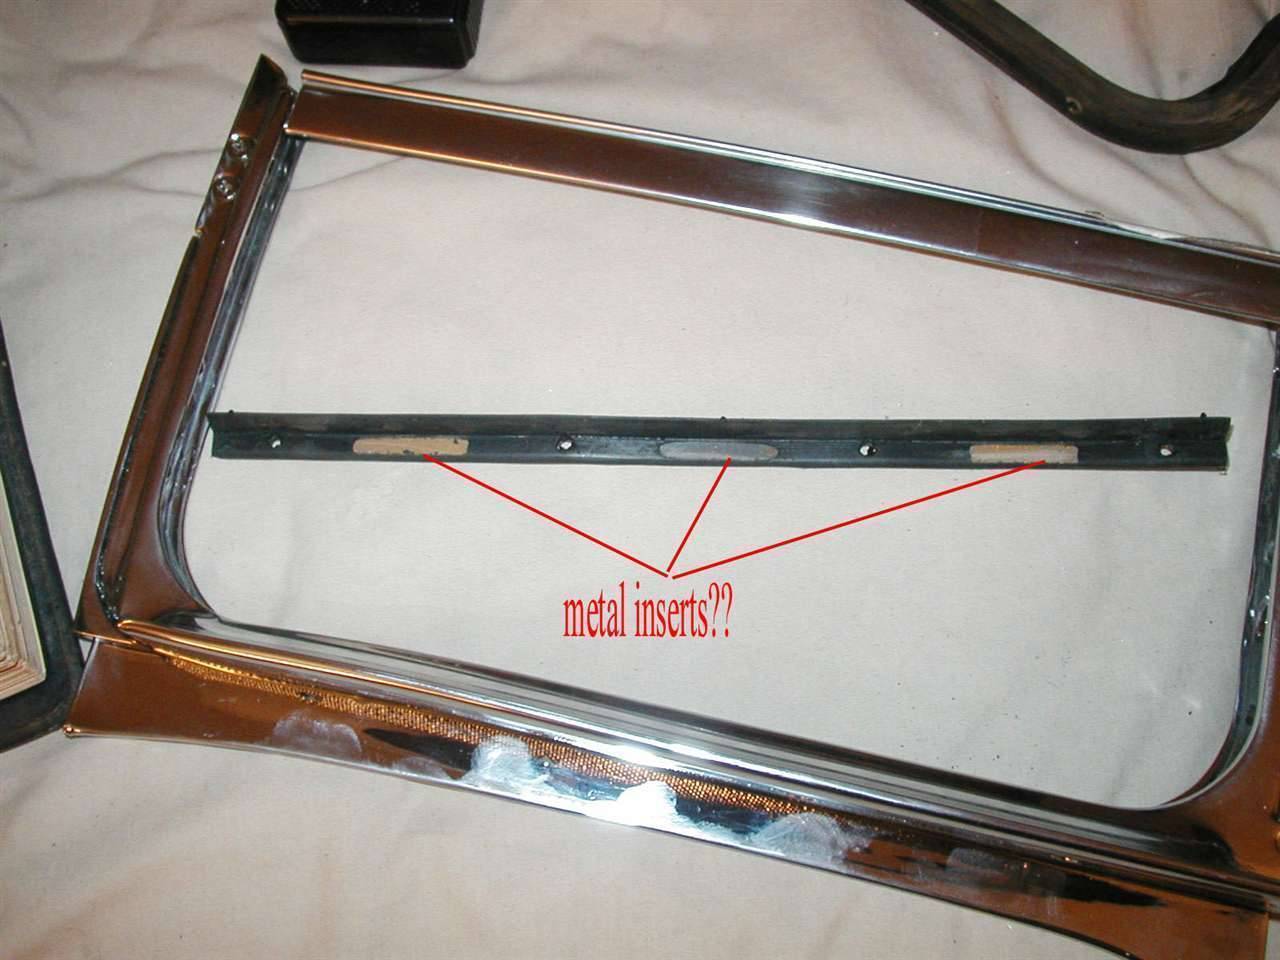
Posted on: 2008/11/4 1:40
|
|||
|
||||
|
Re: Randy Berger's 1956 Caribbean
|
||||
|---|---|---|---|---|
|
Forum Ambassador
|
I installed the new rubber using the original screws which I had previously saved in the old rubber. The screws that Steele supplied are panheads which were not proper at all as can be seen from the comparison.
Attach file: (40.45 KB)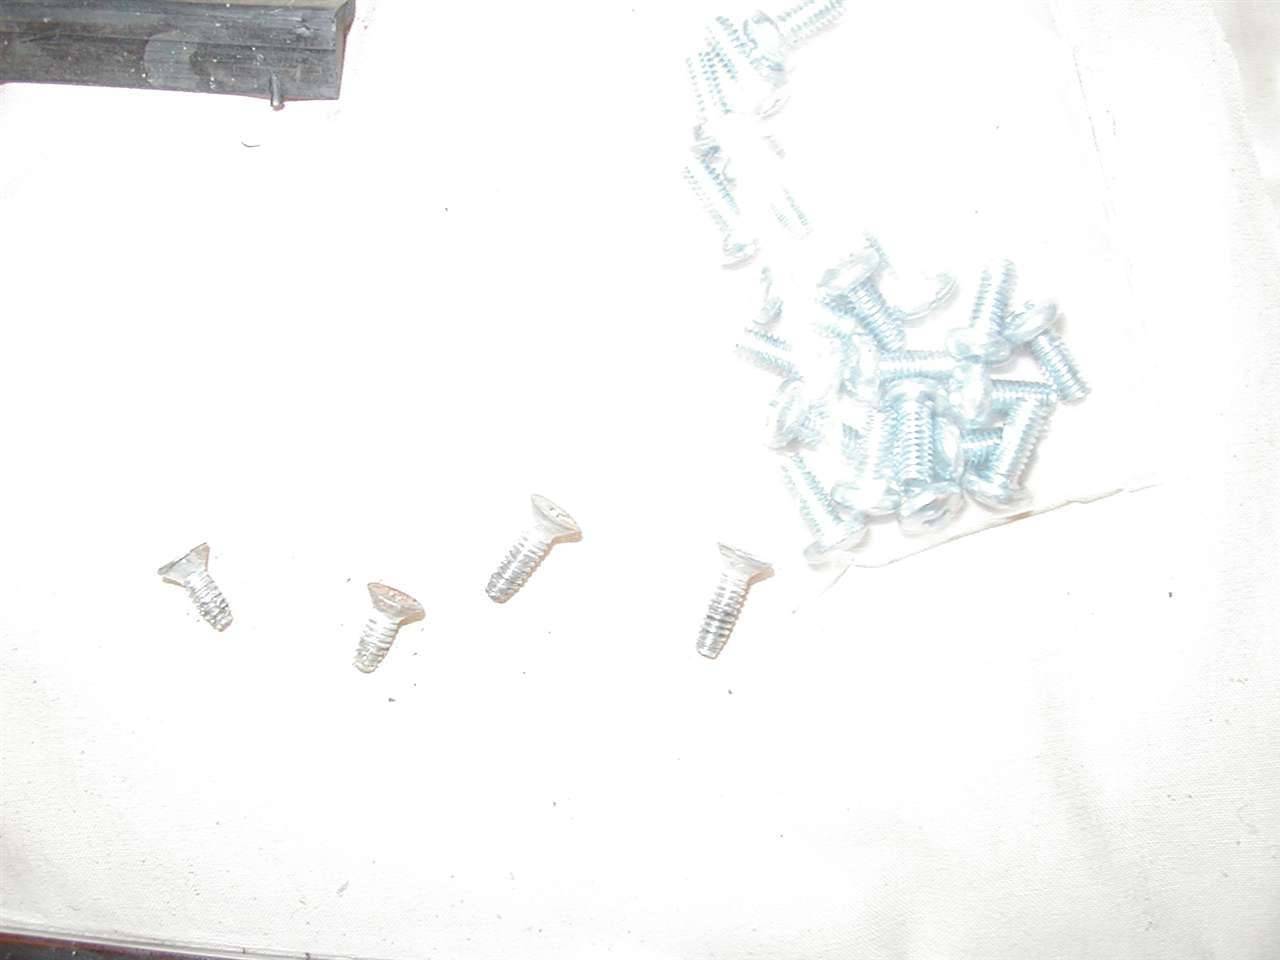
Posted on: 2008/11/4 1:43
|
|||
|
||||
|
Re: Randy Berger's 1956 Caribbean
|
||||
|---|---|---|---|---|
|
Forum Ambassador
|
The old screws fit into the frame casting and are countersunk as designed. I'm glad I saved them as I did.
Attach file: (94.42 KB)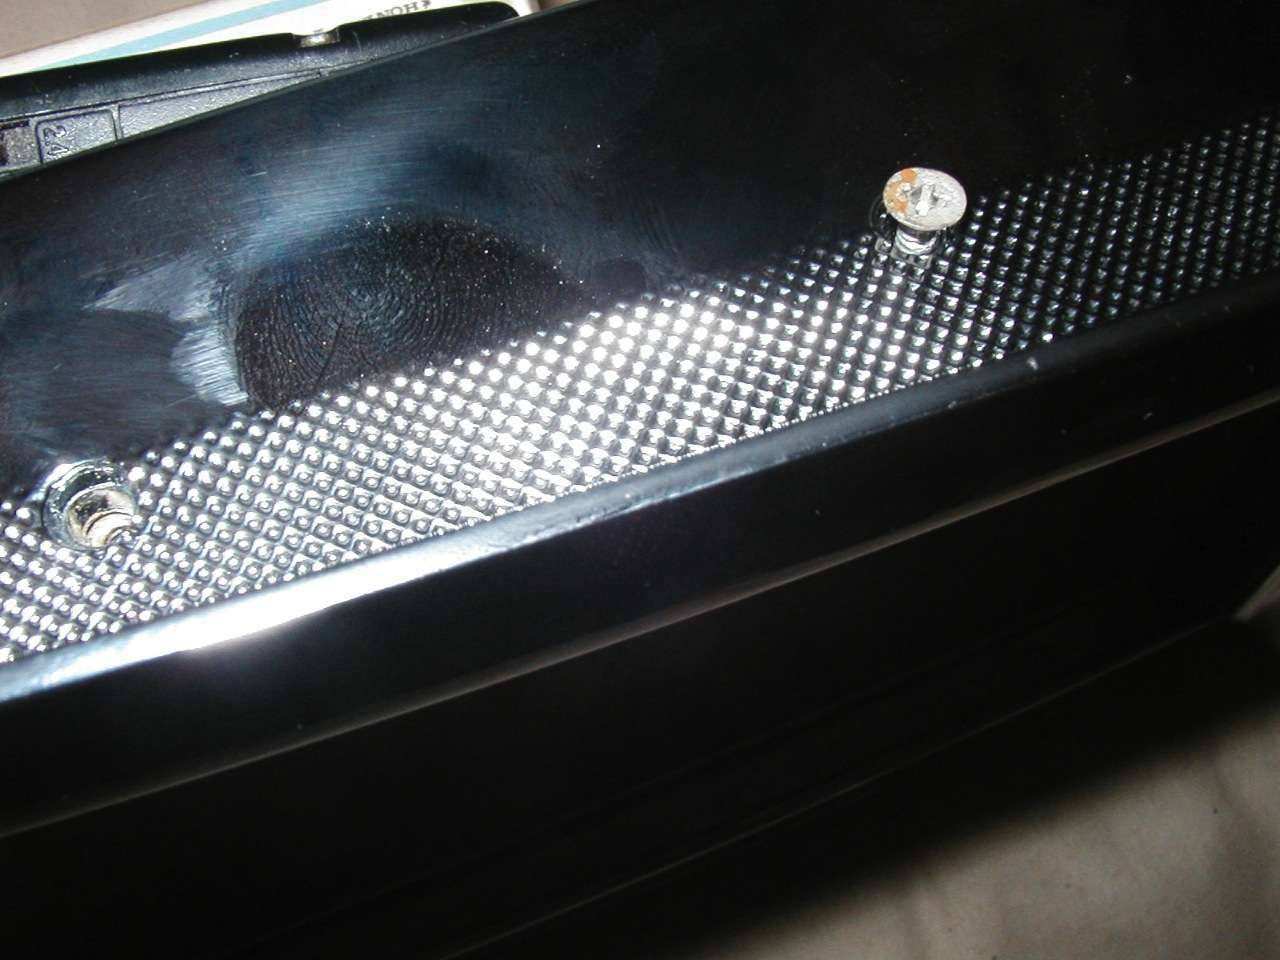
Posted on: 2008/11/4 1:44
|
|||
|
||||


